Design
The DEEP Dive: How We Chose Our Lowe’s Kitchen Cabinetry + What It Cost
When we stress and obsess about the design details, we take note because that’s often what we think makes the best stuff to share here. Just saying “we chose these shaker full overlay cabinets” doesn’t really show you all the decisions along the way that we had to make (let alone the hardware choices, which felt endless in a good way). So today is a deep dive into this: my sister’s kitchen cabinet design for those who might be stealing these ideas (And please do! Nothing makes me happier than our ideas making your design choices less stressful and your homes more beautiful).
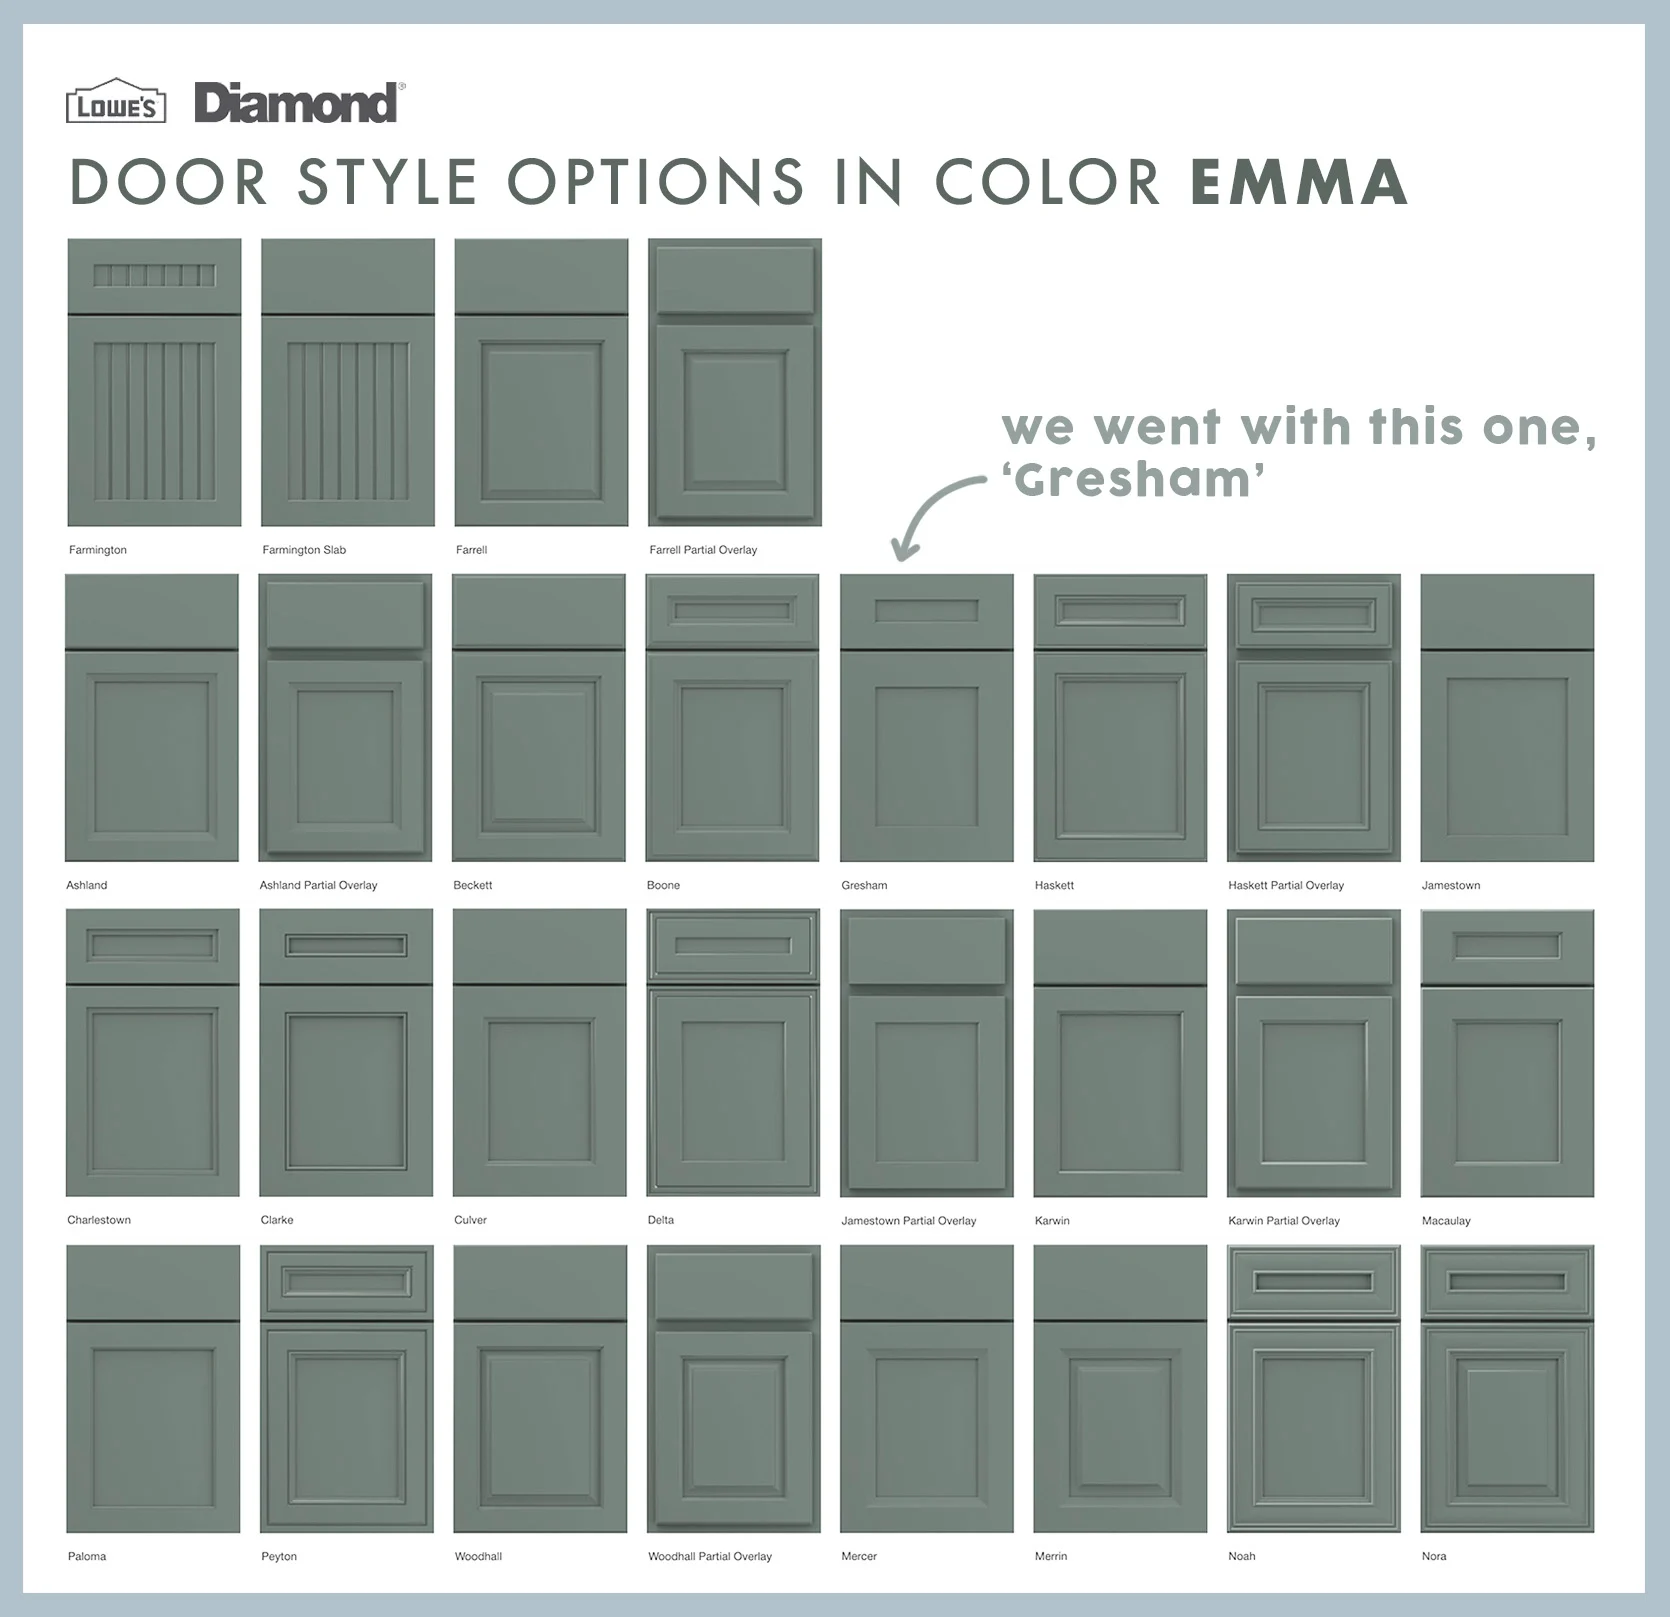
Lowe’s kitchen cabinetry had a few different lines that all had different profiles and colorways (varying in quality and level of customization). Knowing that they all functioned well, our priority as design enthusiasts was to make sure that the door style and color were what we wanted, and we chose that first.
Things We Knew
- We wanted dark green appliances (so whatever color we chose had to really look good with that specific color); we didn’t want a white kitchen this time.
- I don’t love wood-toned flat overlay cabinets as much as painted (in some settings it works, BTW, but didn’t feel right here)
- We didn’t want anything too dark (the kitchen is small with only one window, and I frankly rarely love dark kitchens).
- Nothing too contemporary or hyper-modern, so cabinet doors would be shaker (but what size of panel/rail/stile was up for debate).
- Just in case they wanted to sell soon, we didn’t want to take any huge color risks (I love a burgundy kitchen, but not here)
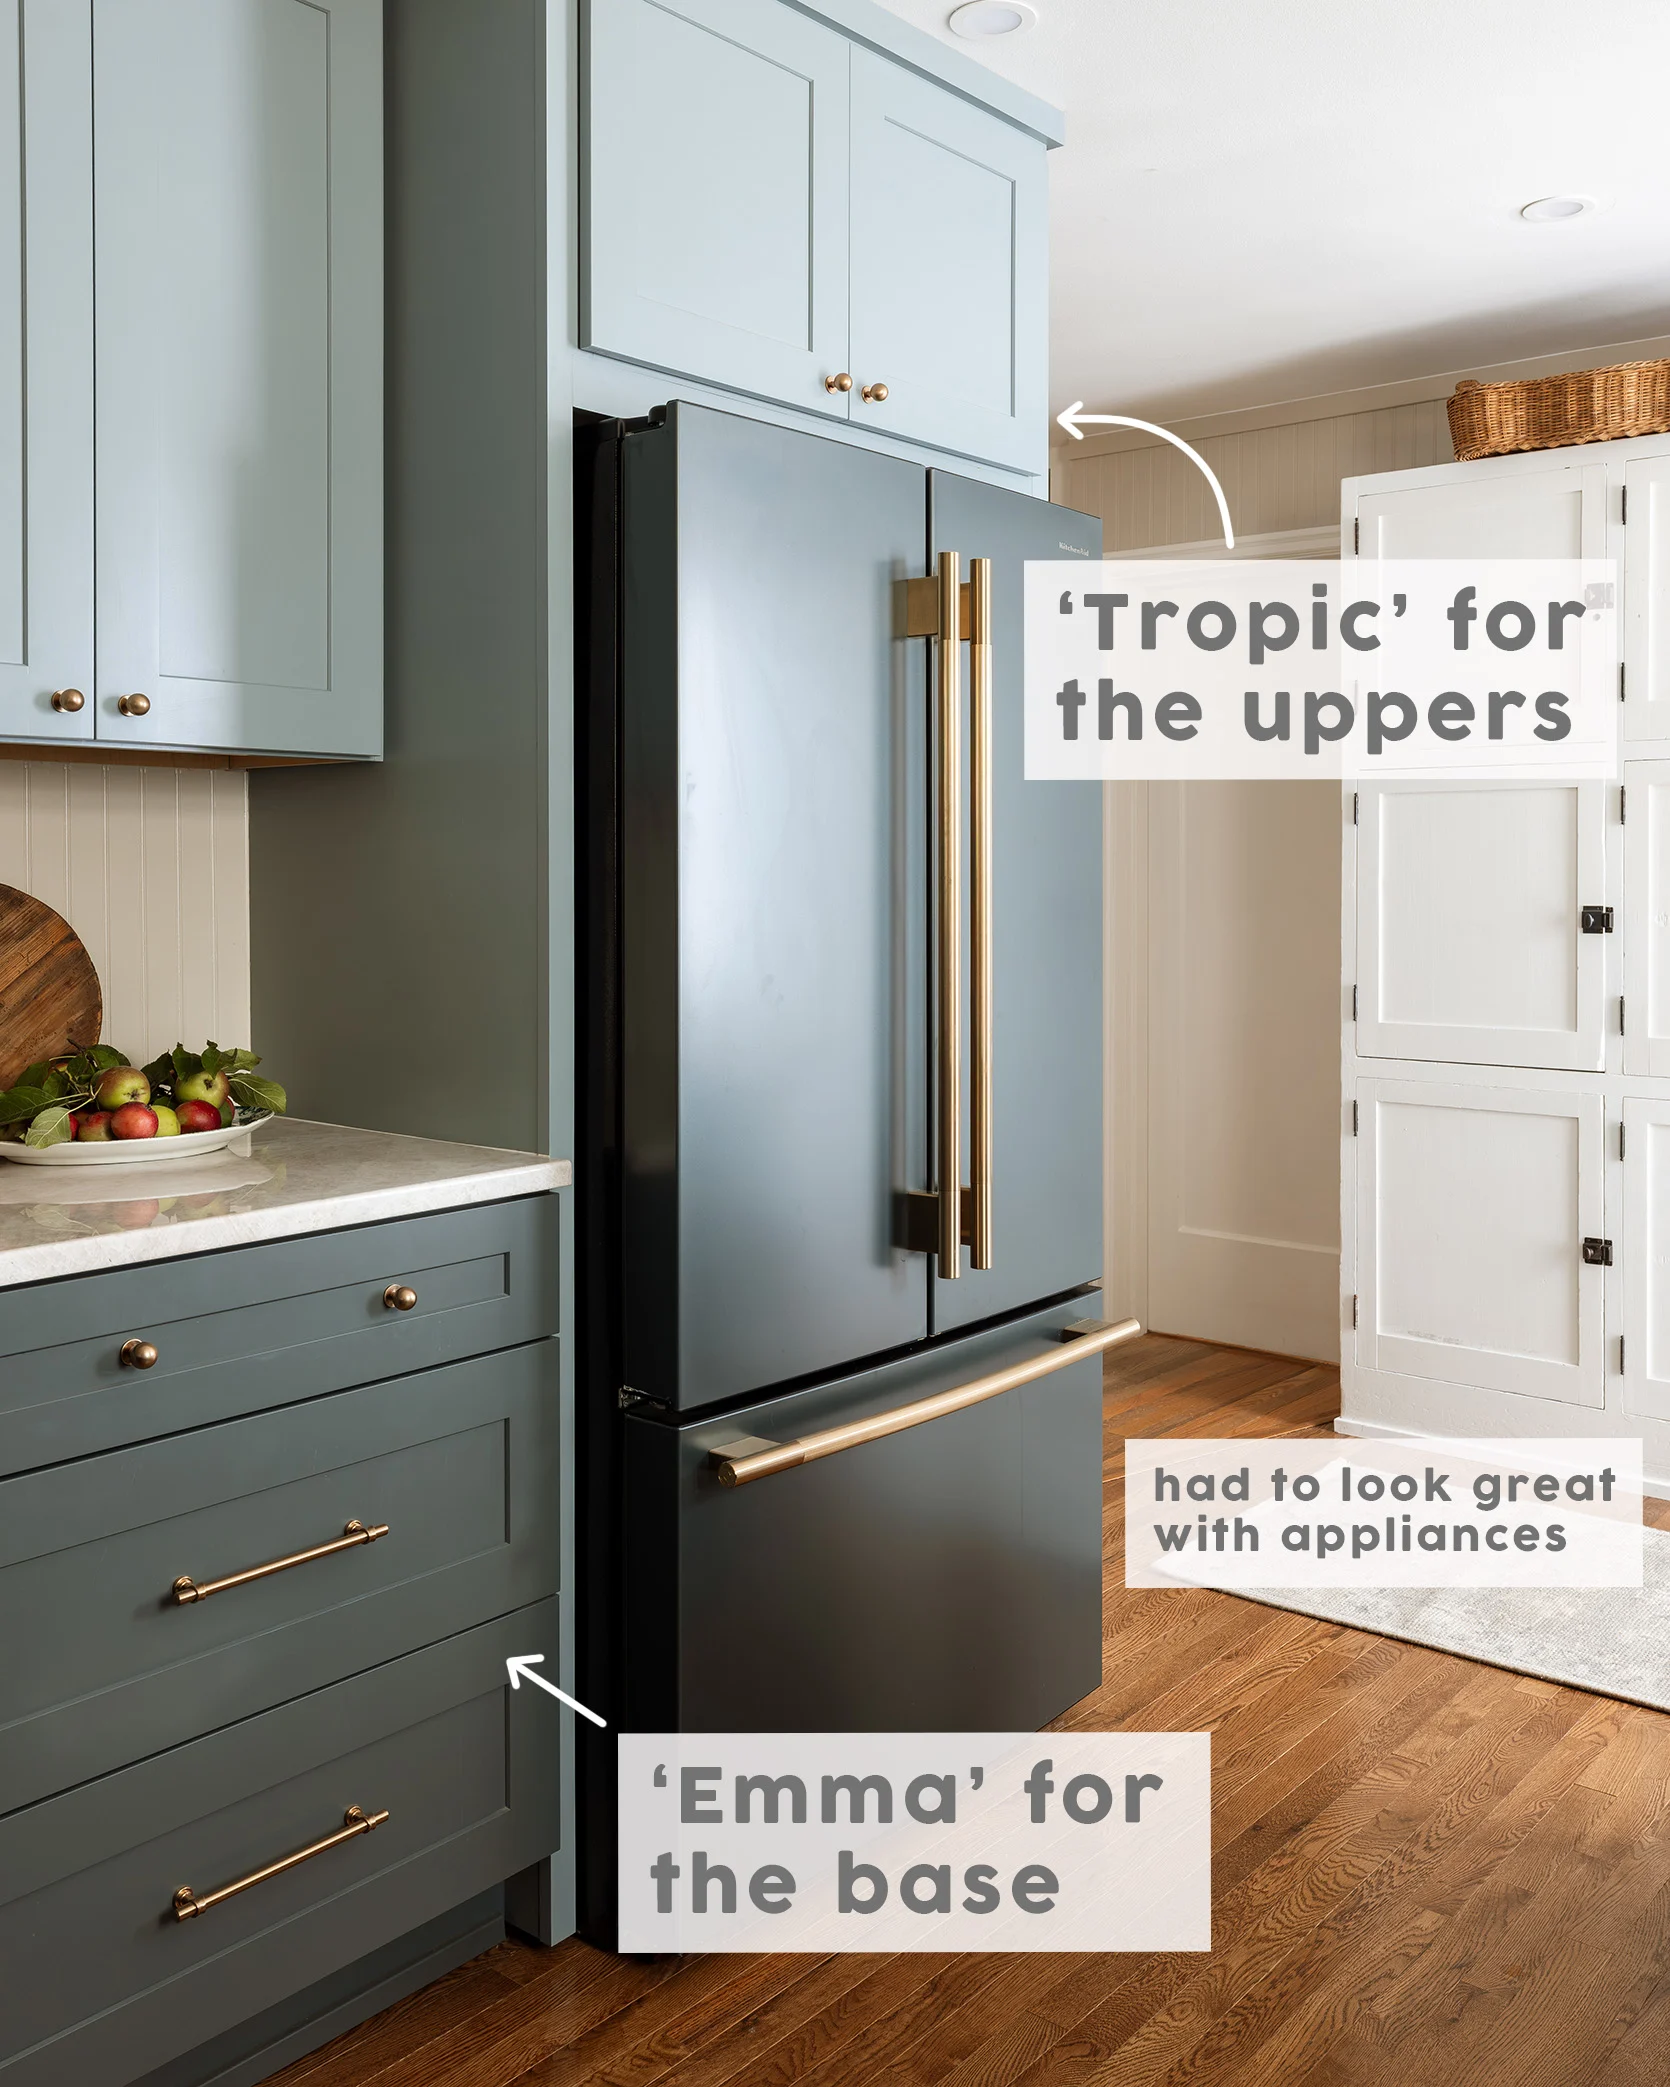
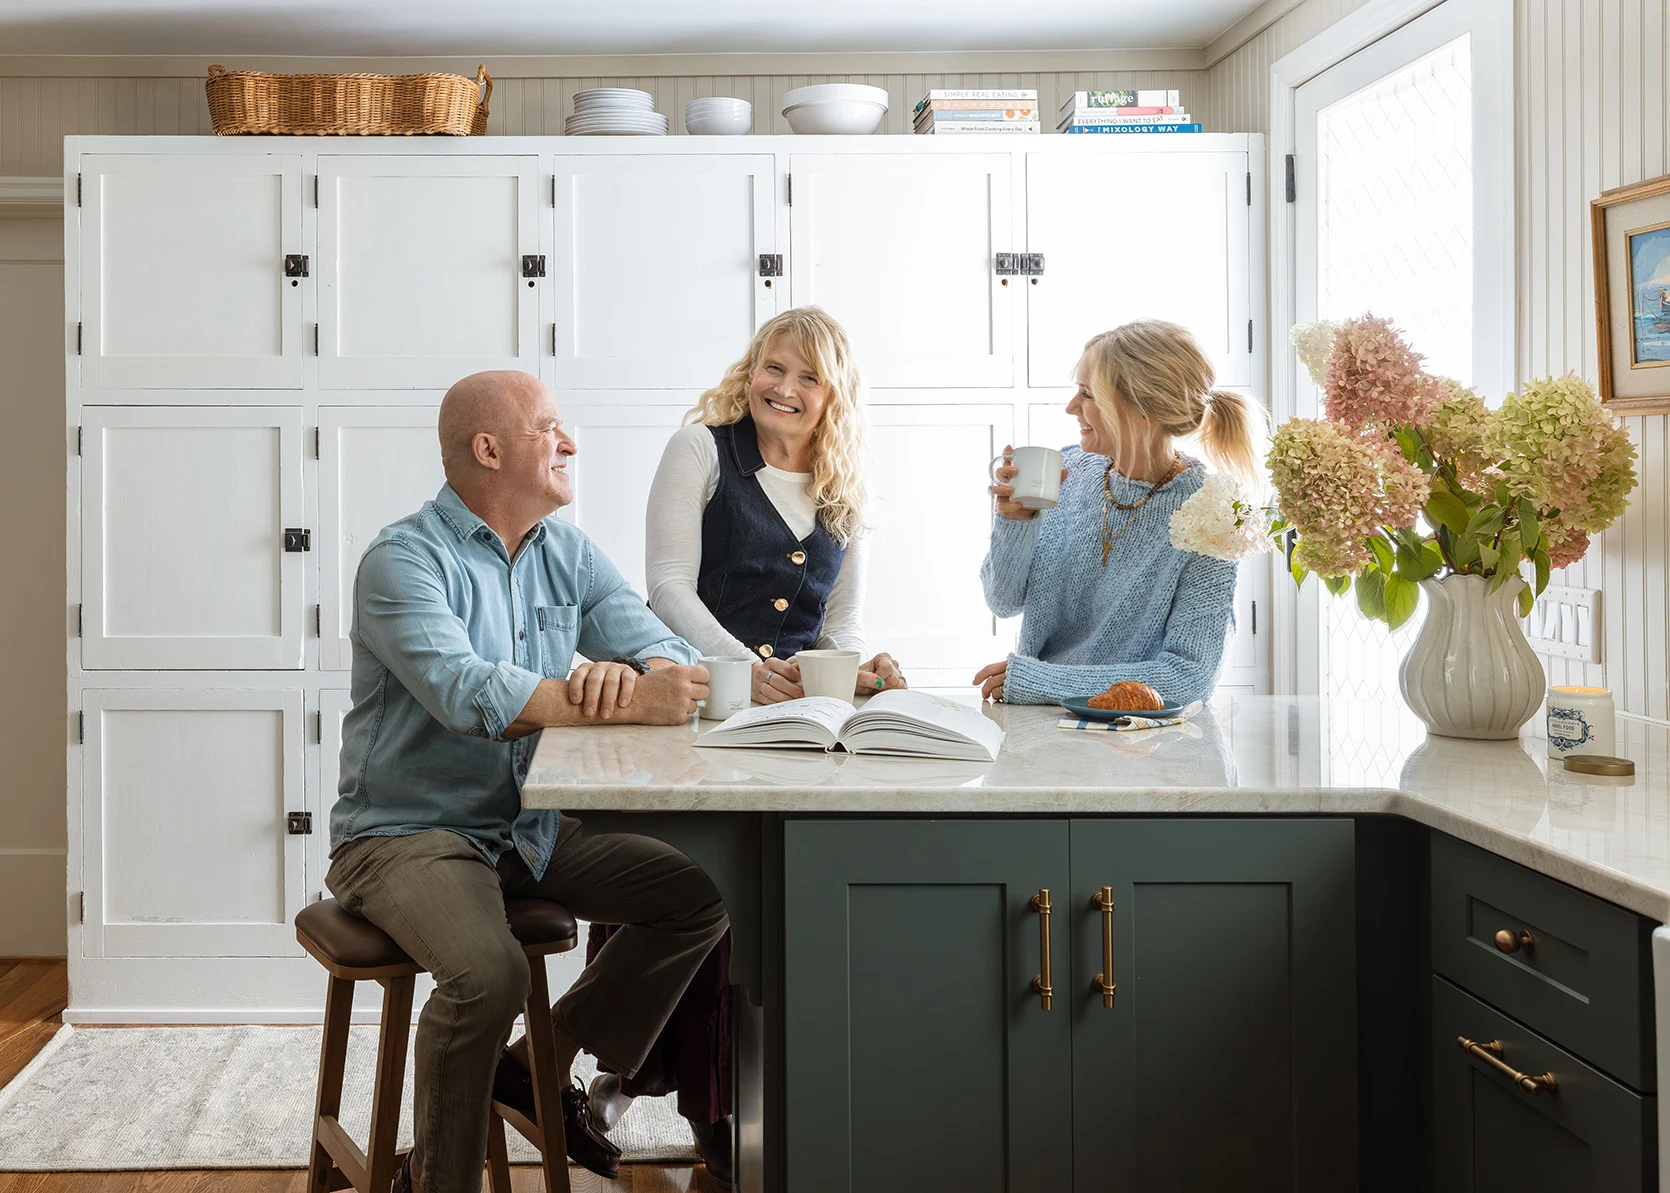
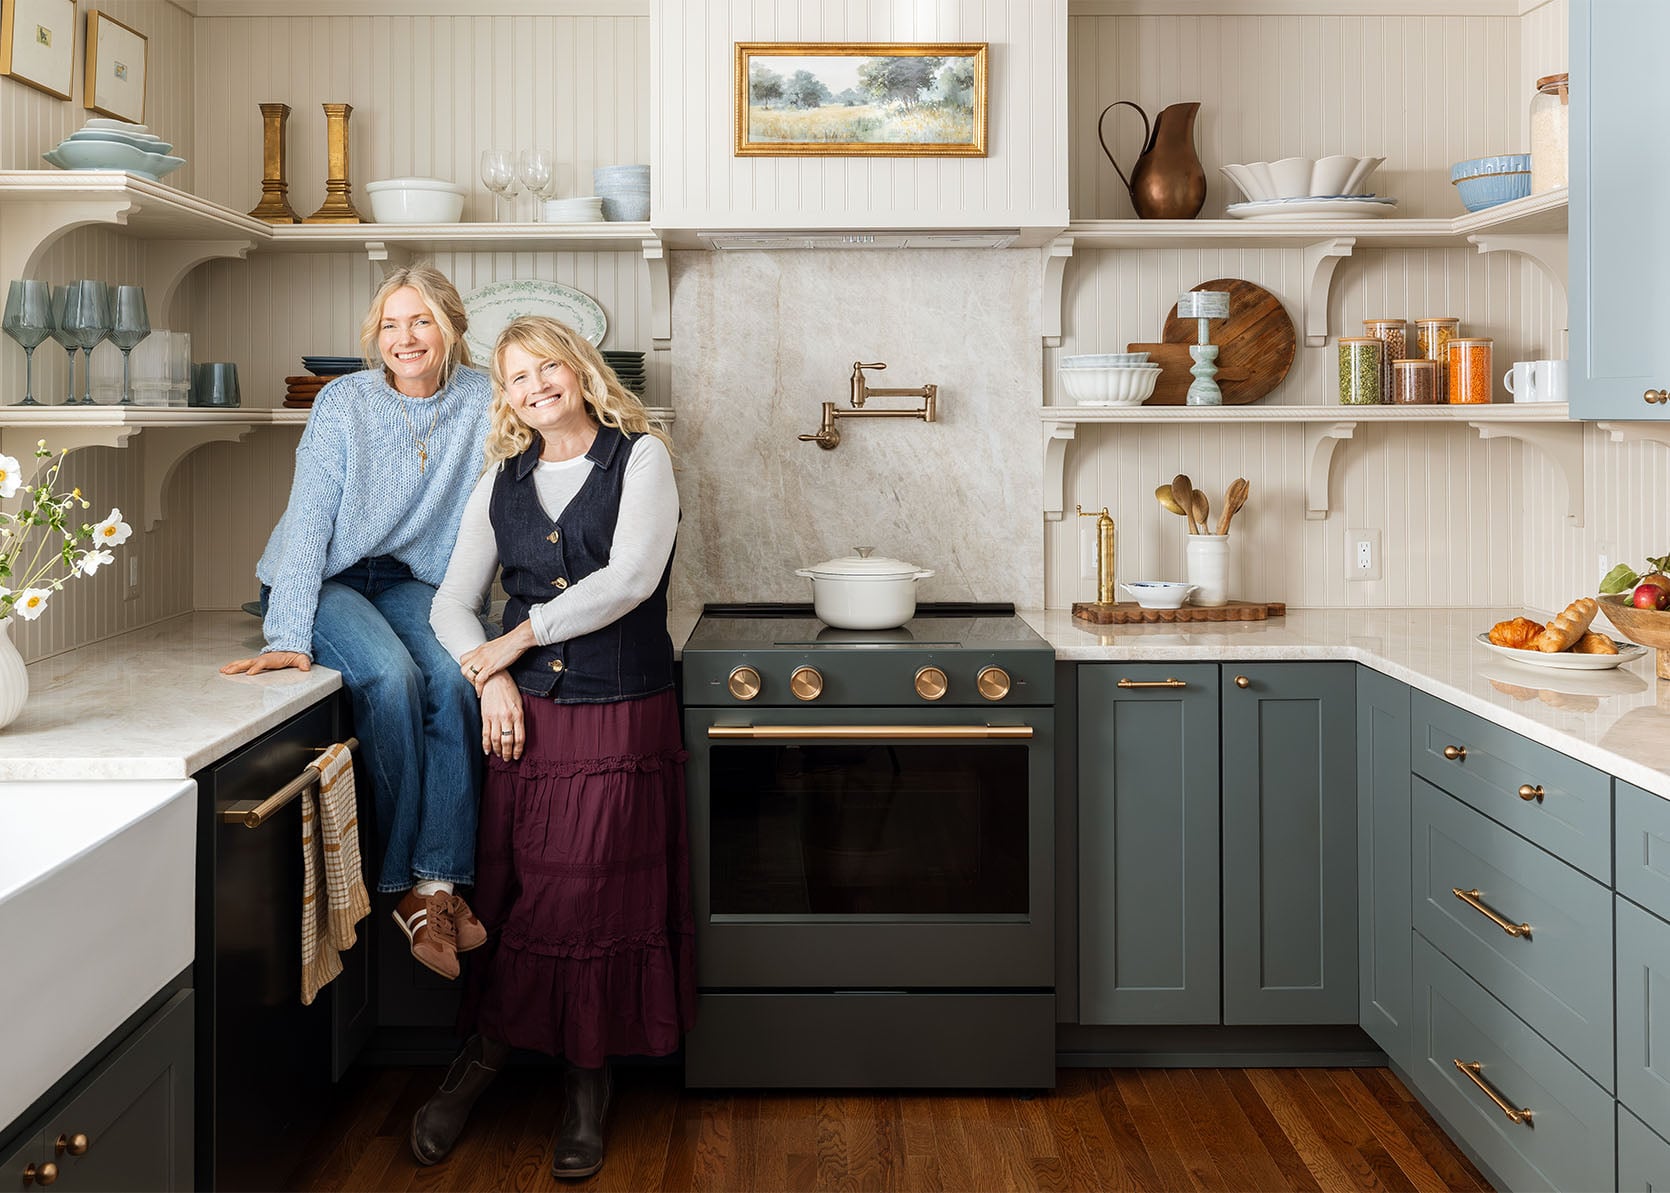
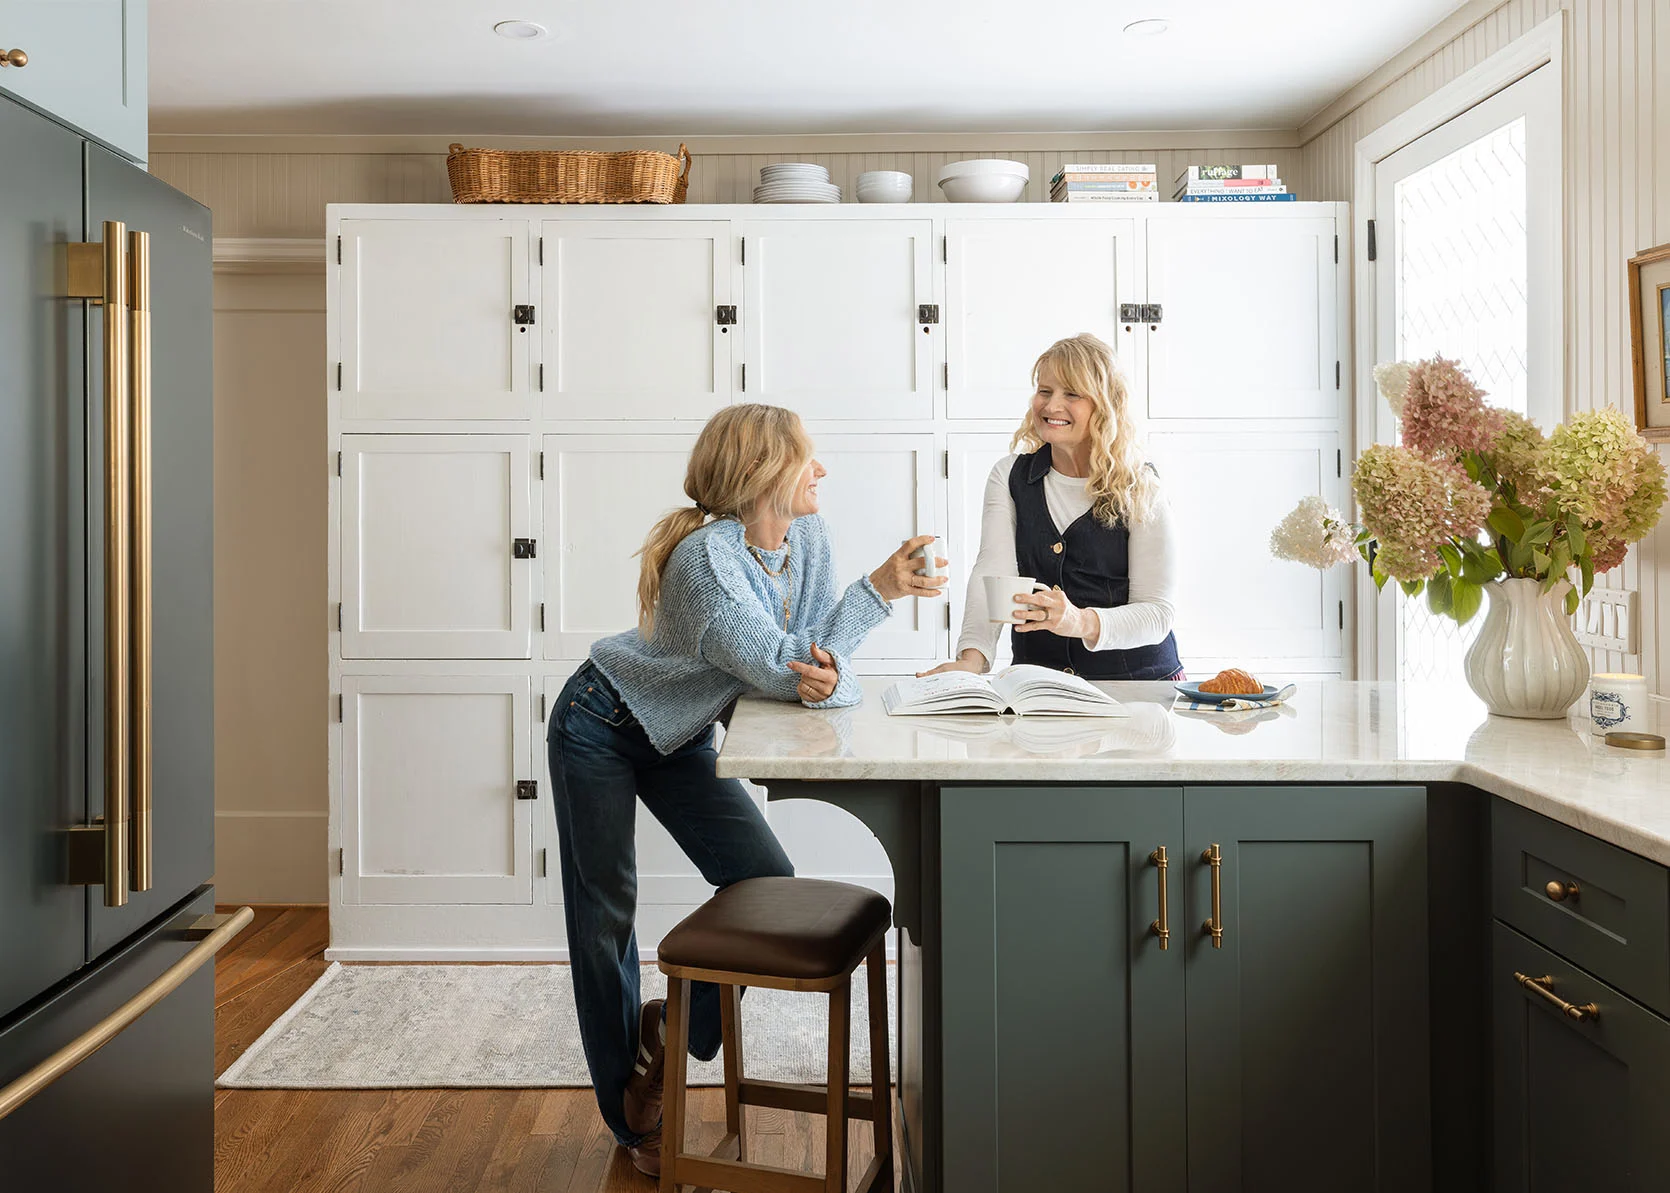
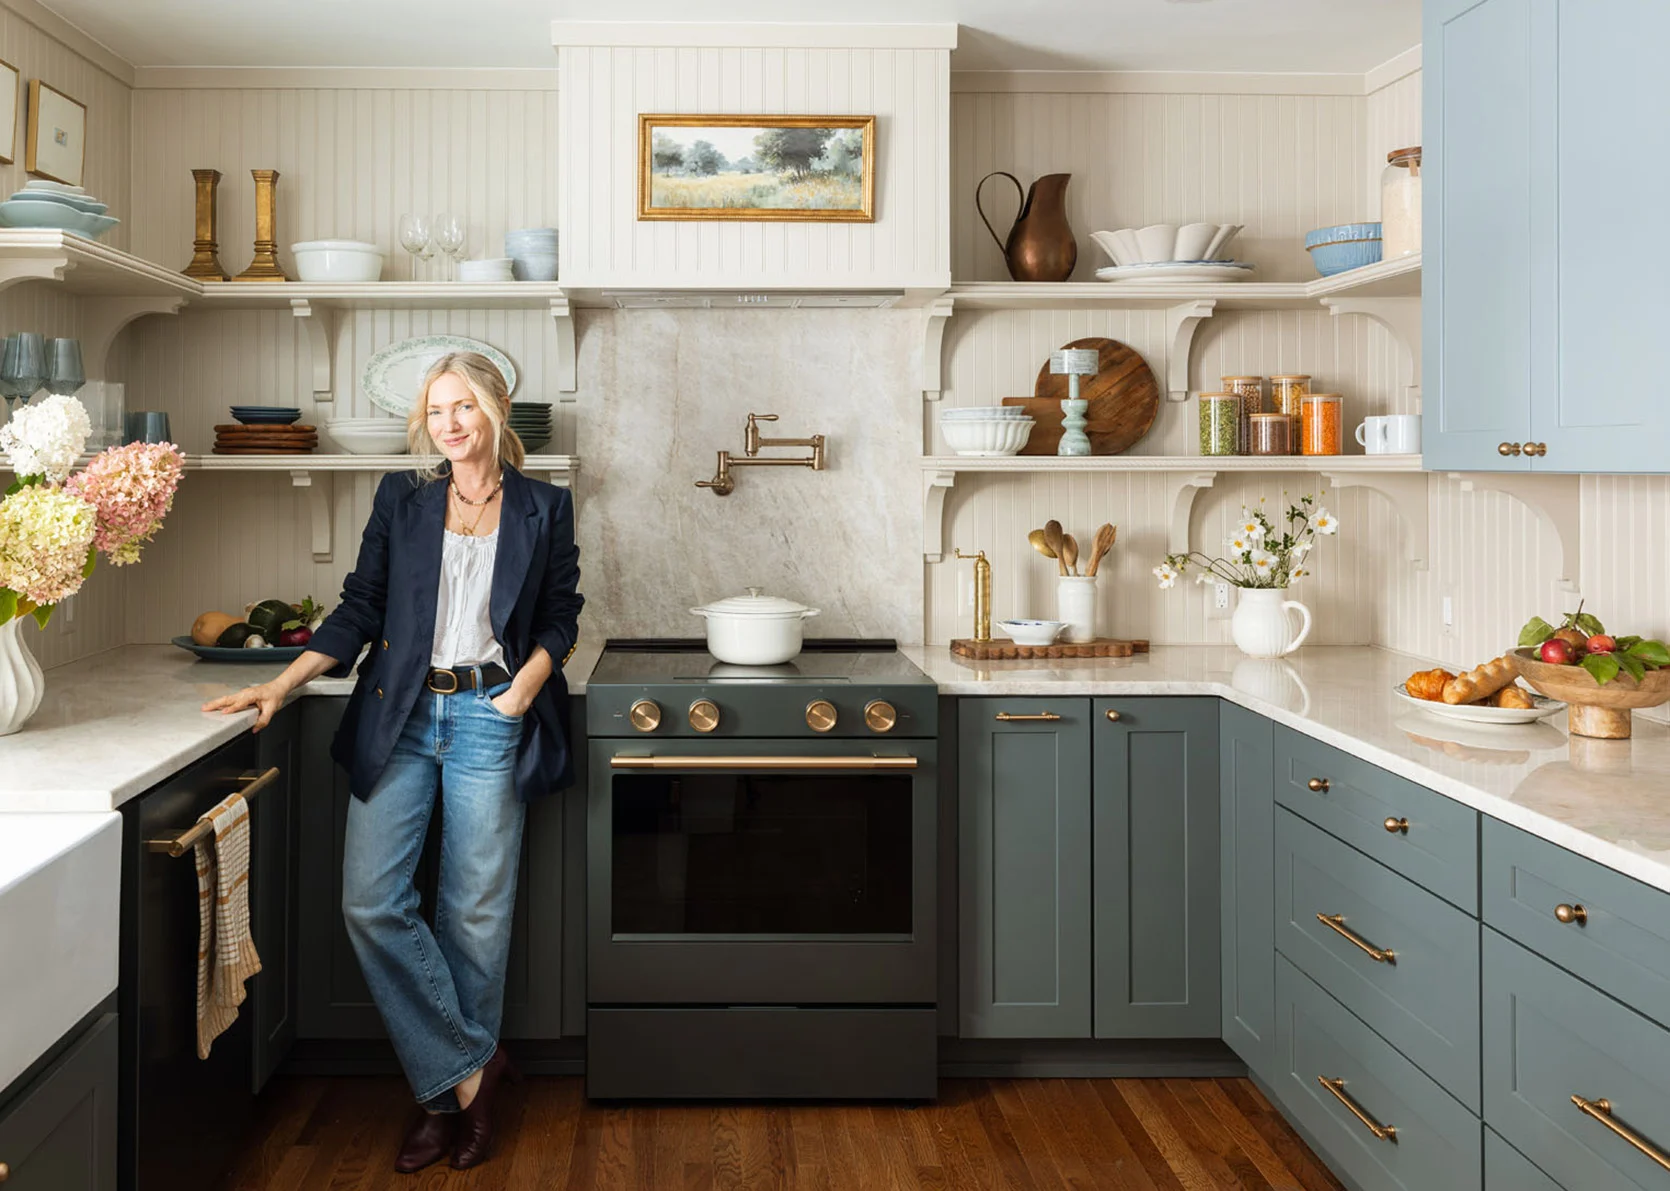
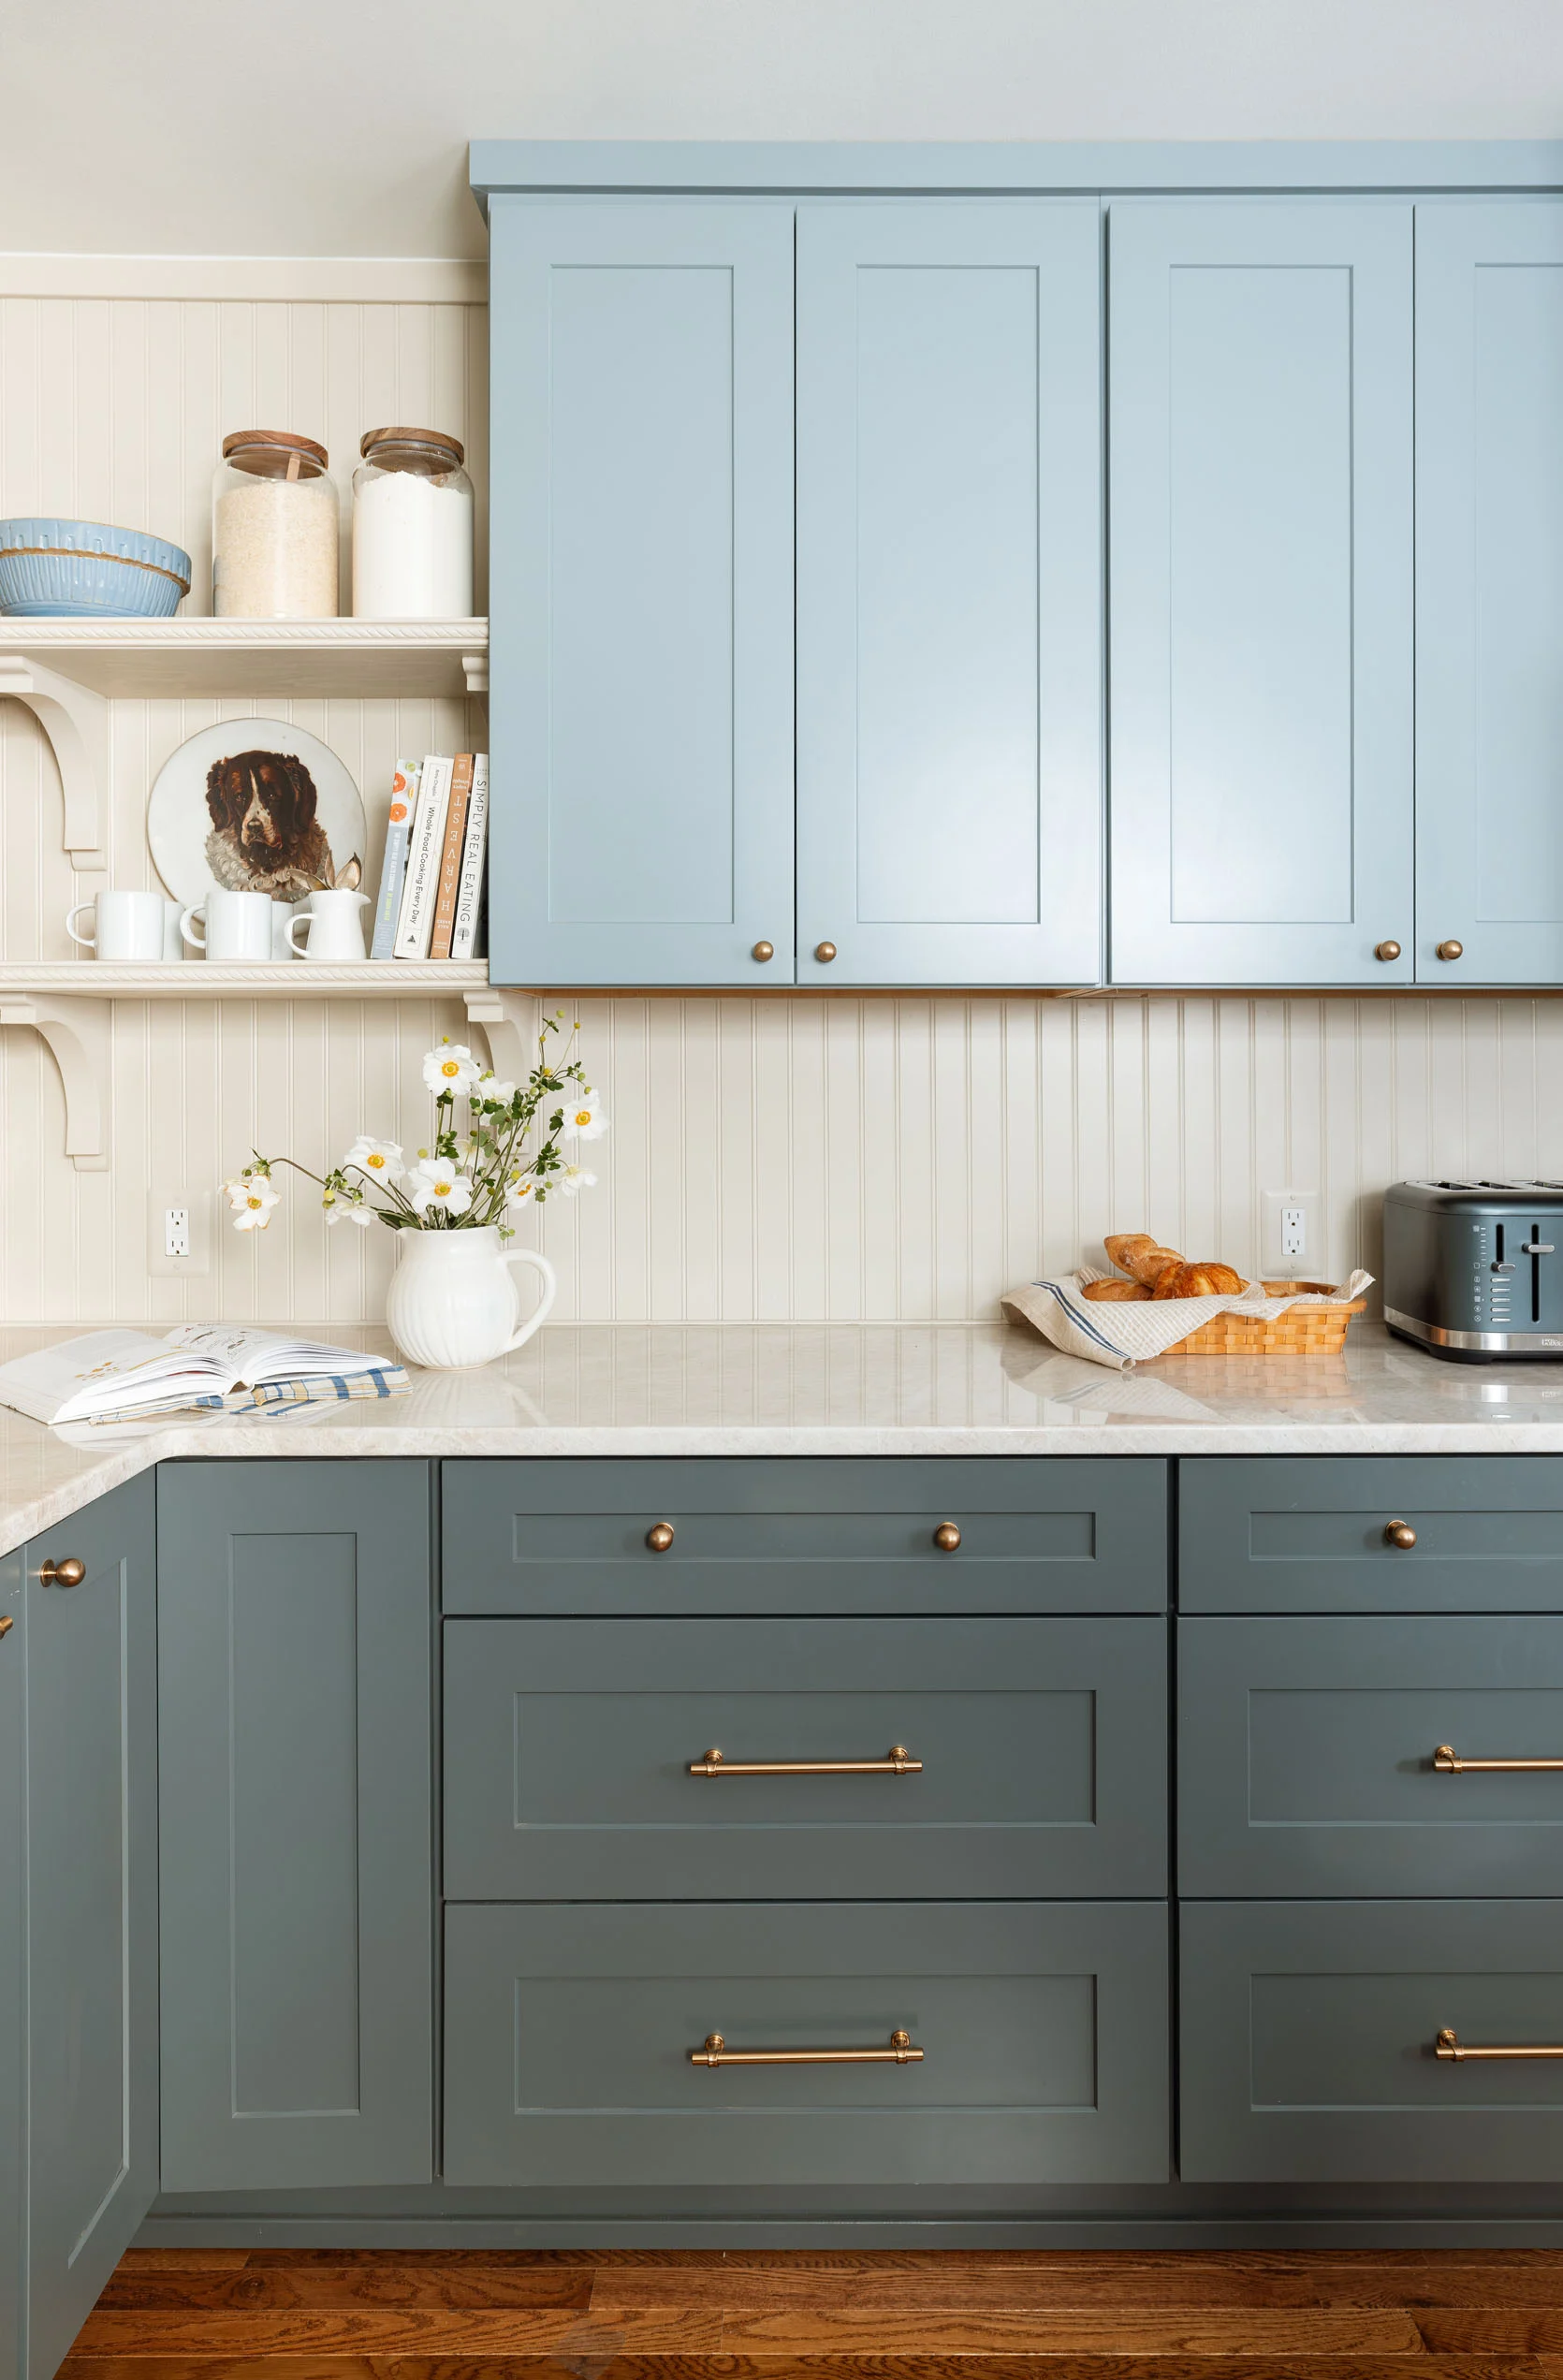
So this really narrowed it down to warmer neutrals and blues and greens. But we needed to be hyper-picky about the greens and blues, which is why we mixed two different lines (Diamond Express and Diamond Intermediate) that had the same shaker profile. We chose the color Emma (bottom) and Tropic (light blue, on top). Each of these colors and corresponding lines offers a bunch of door styles to choose from. Of the shaker styles offered, we felt good about ‘Gresham’ for its simple, clean lines, but appreciated that it offered shaker drawer fronts, which worked well for our more drawer-forward design.
Basic Cabinetry Tips
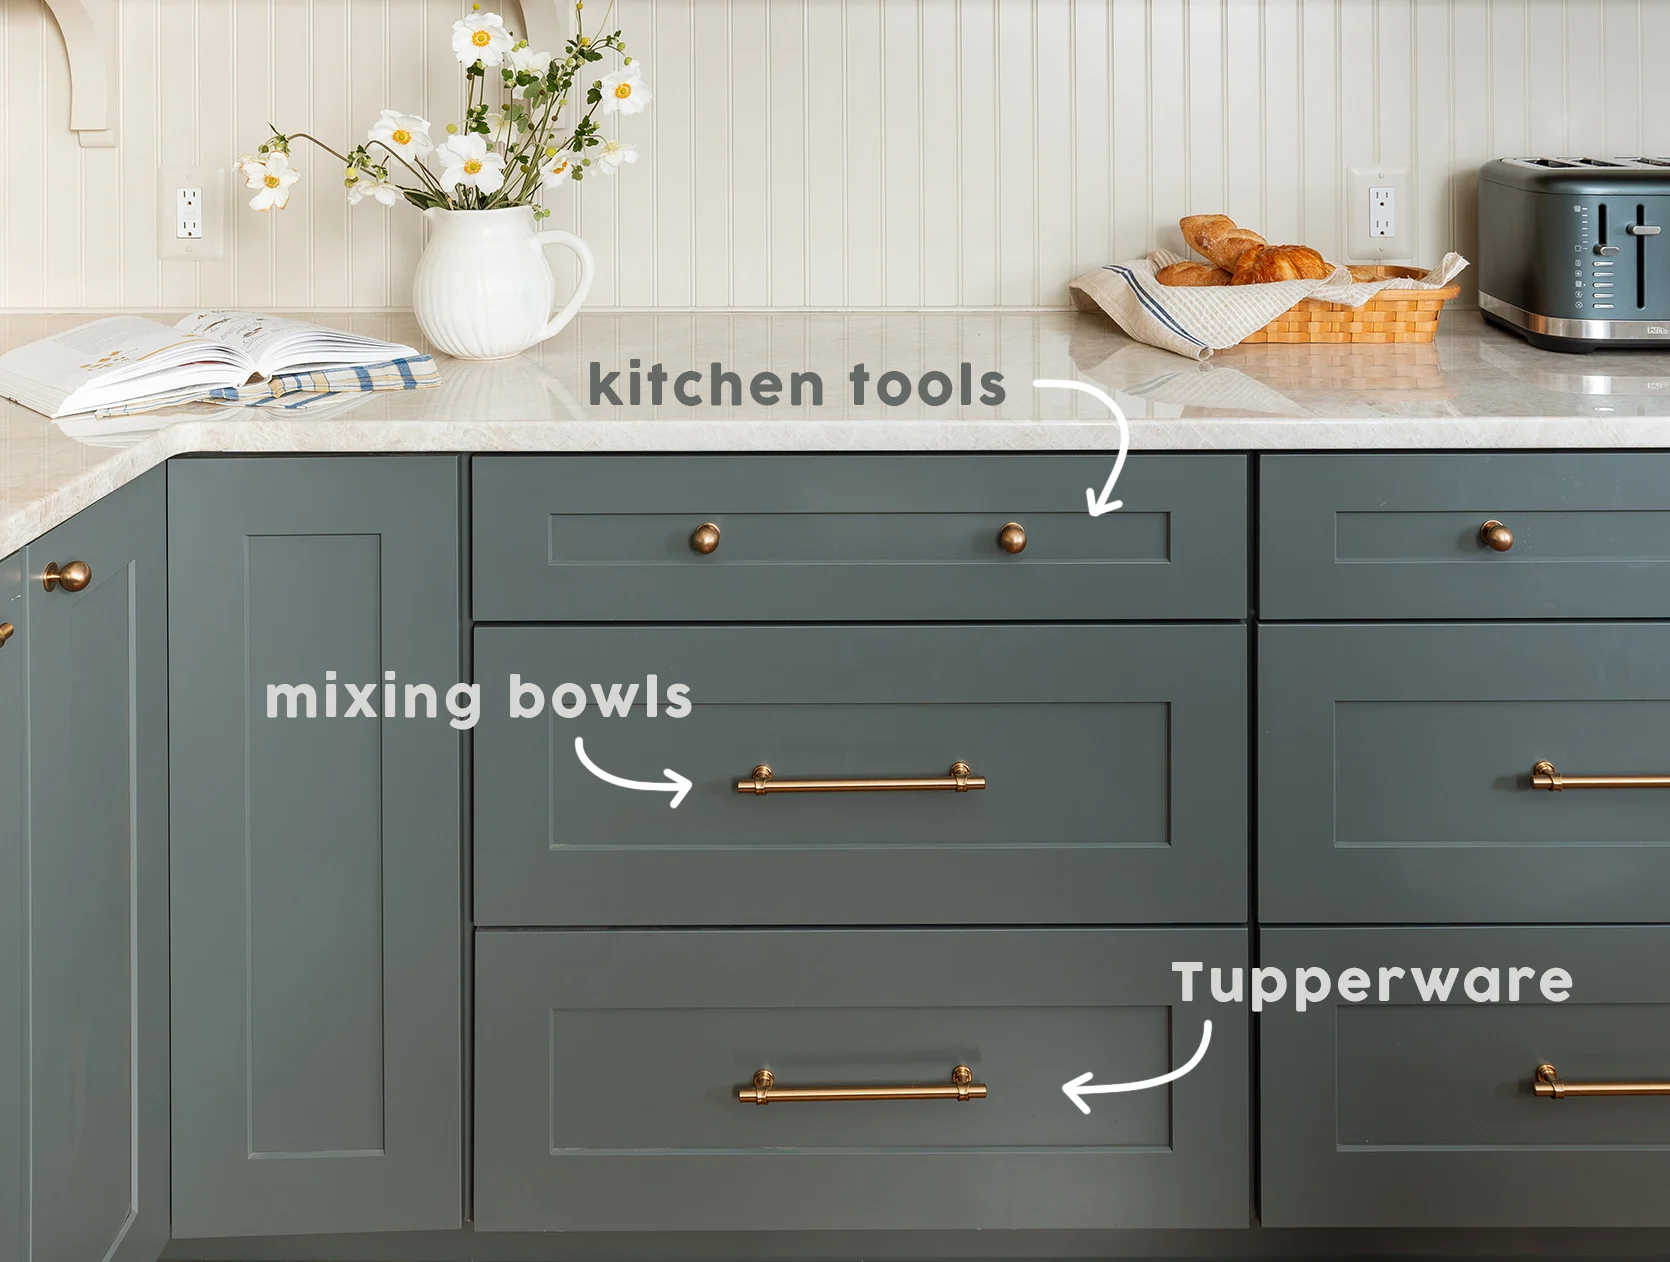
Opt for deeper drawers instead of lower cabinets. You can mix in some cabinets, but most everything that would fit in a cabinet can fit in a drawer except taller appliances. So we left one big cabinet that houses their microwave and could also keep a mixer. You might want a cabinet for bigger pots (and usually you need some doors because you don’t have the width to do drawers everywhere in the corners). But all Tupperware, mixing bowls, and kitchen tools fit better and get less lost in drawers than cabinets.
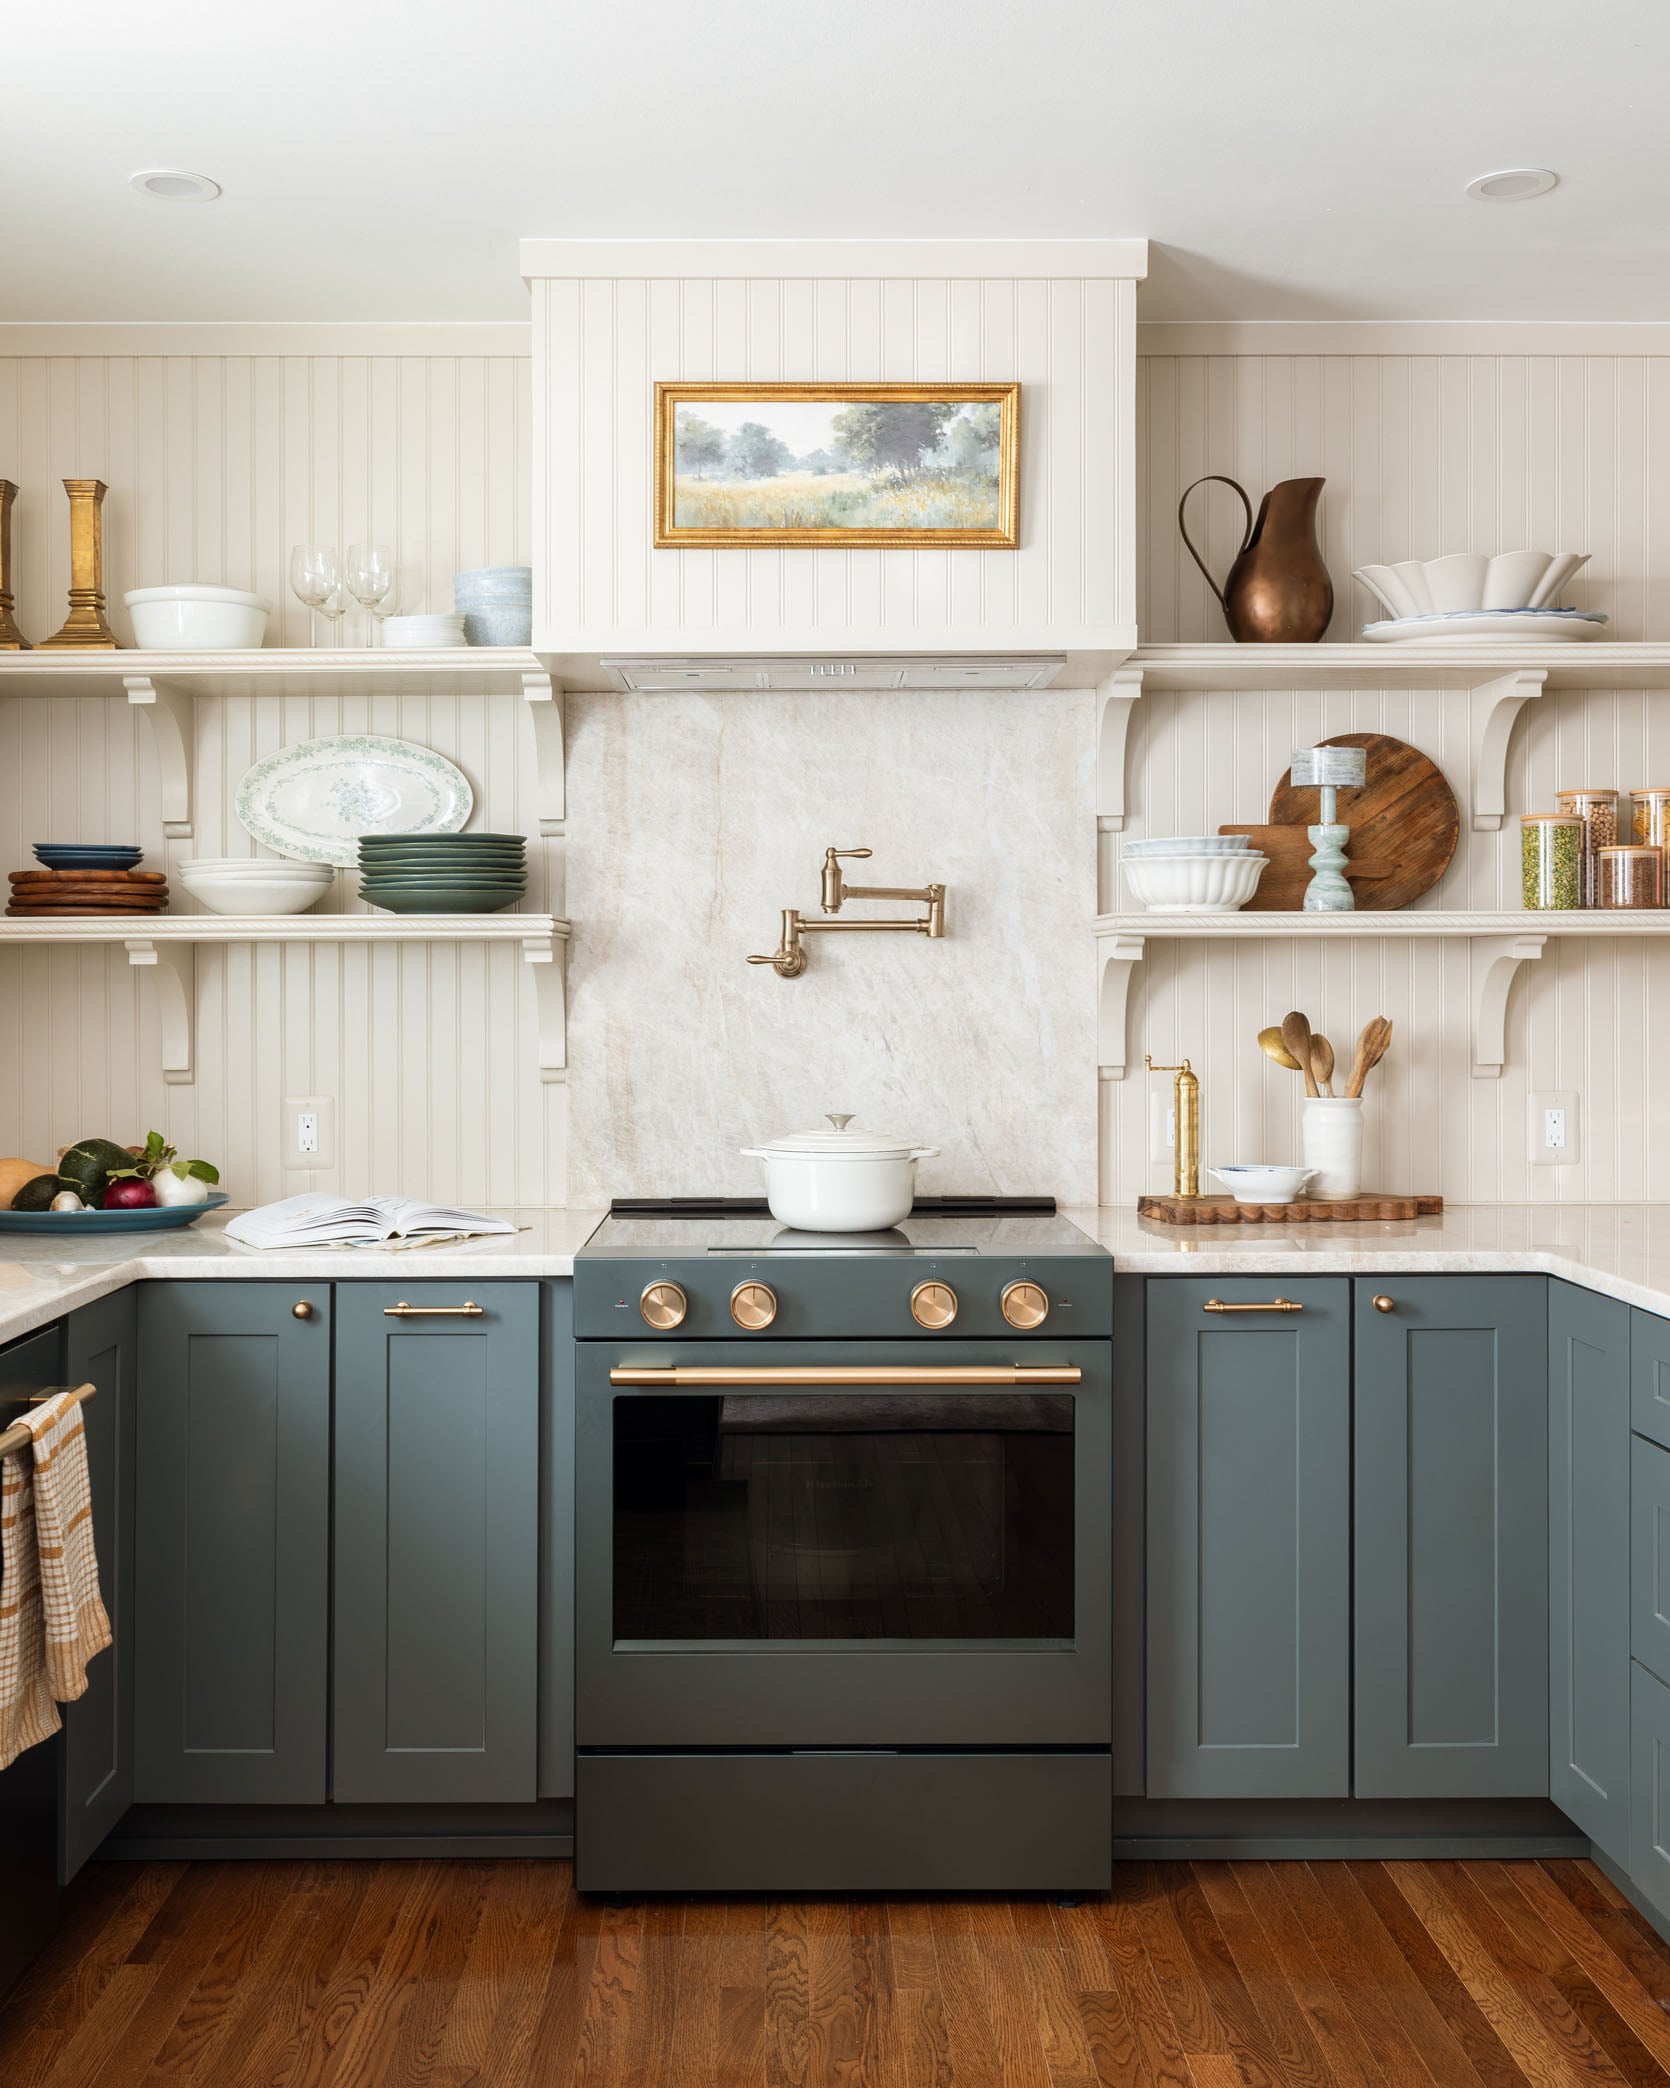
Lean into symmetry. While not every kitchen is as clean-cut as this one with the range being in the middle of the back wall, I generally try to find symmetry if it can happen. This might mean wasting a tiny big of space with a faux panel just to even things out, but I’d opt for that rather than having one bigger drawer or cabinet on one side. I would have never flanked one side of the range with the spice pull-out and the other with a cabinet, but that is also a style preference (but a strong one). In order to make your cabinets look high-end, you want things to look streamlined, not collected.
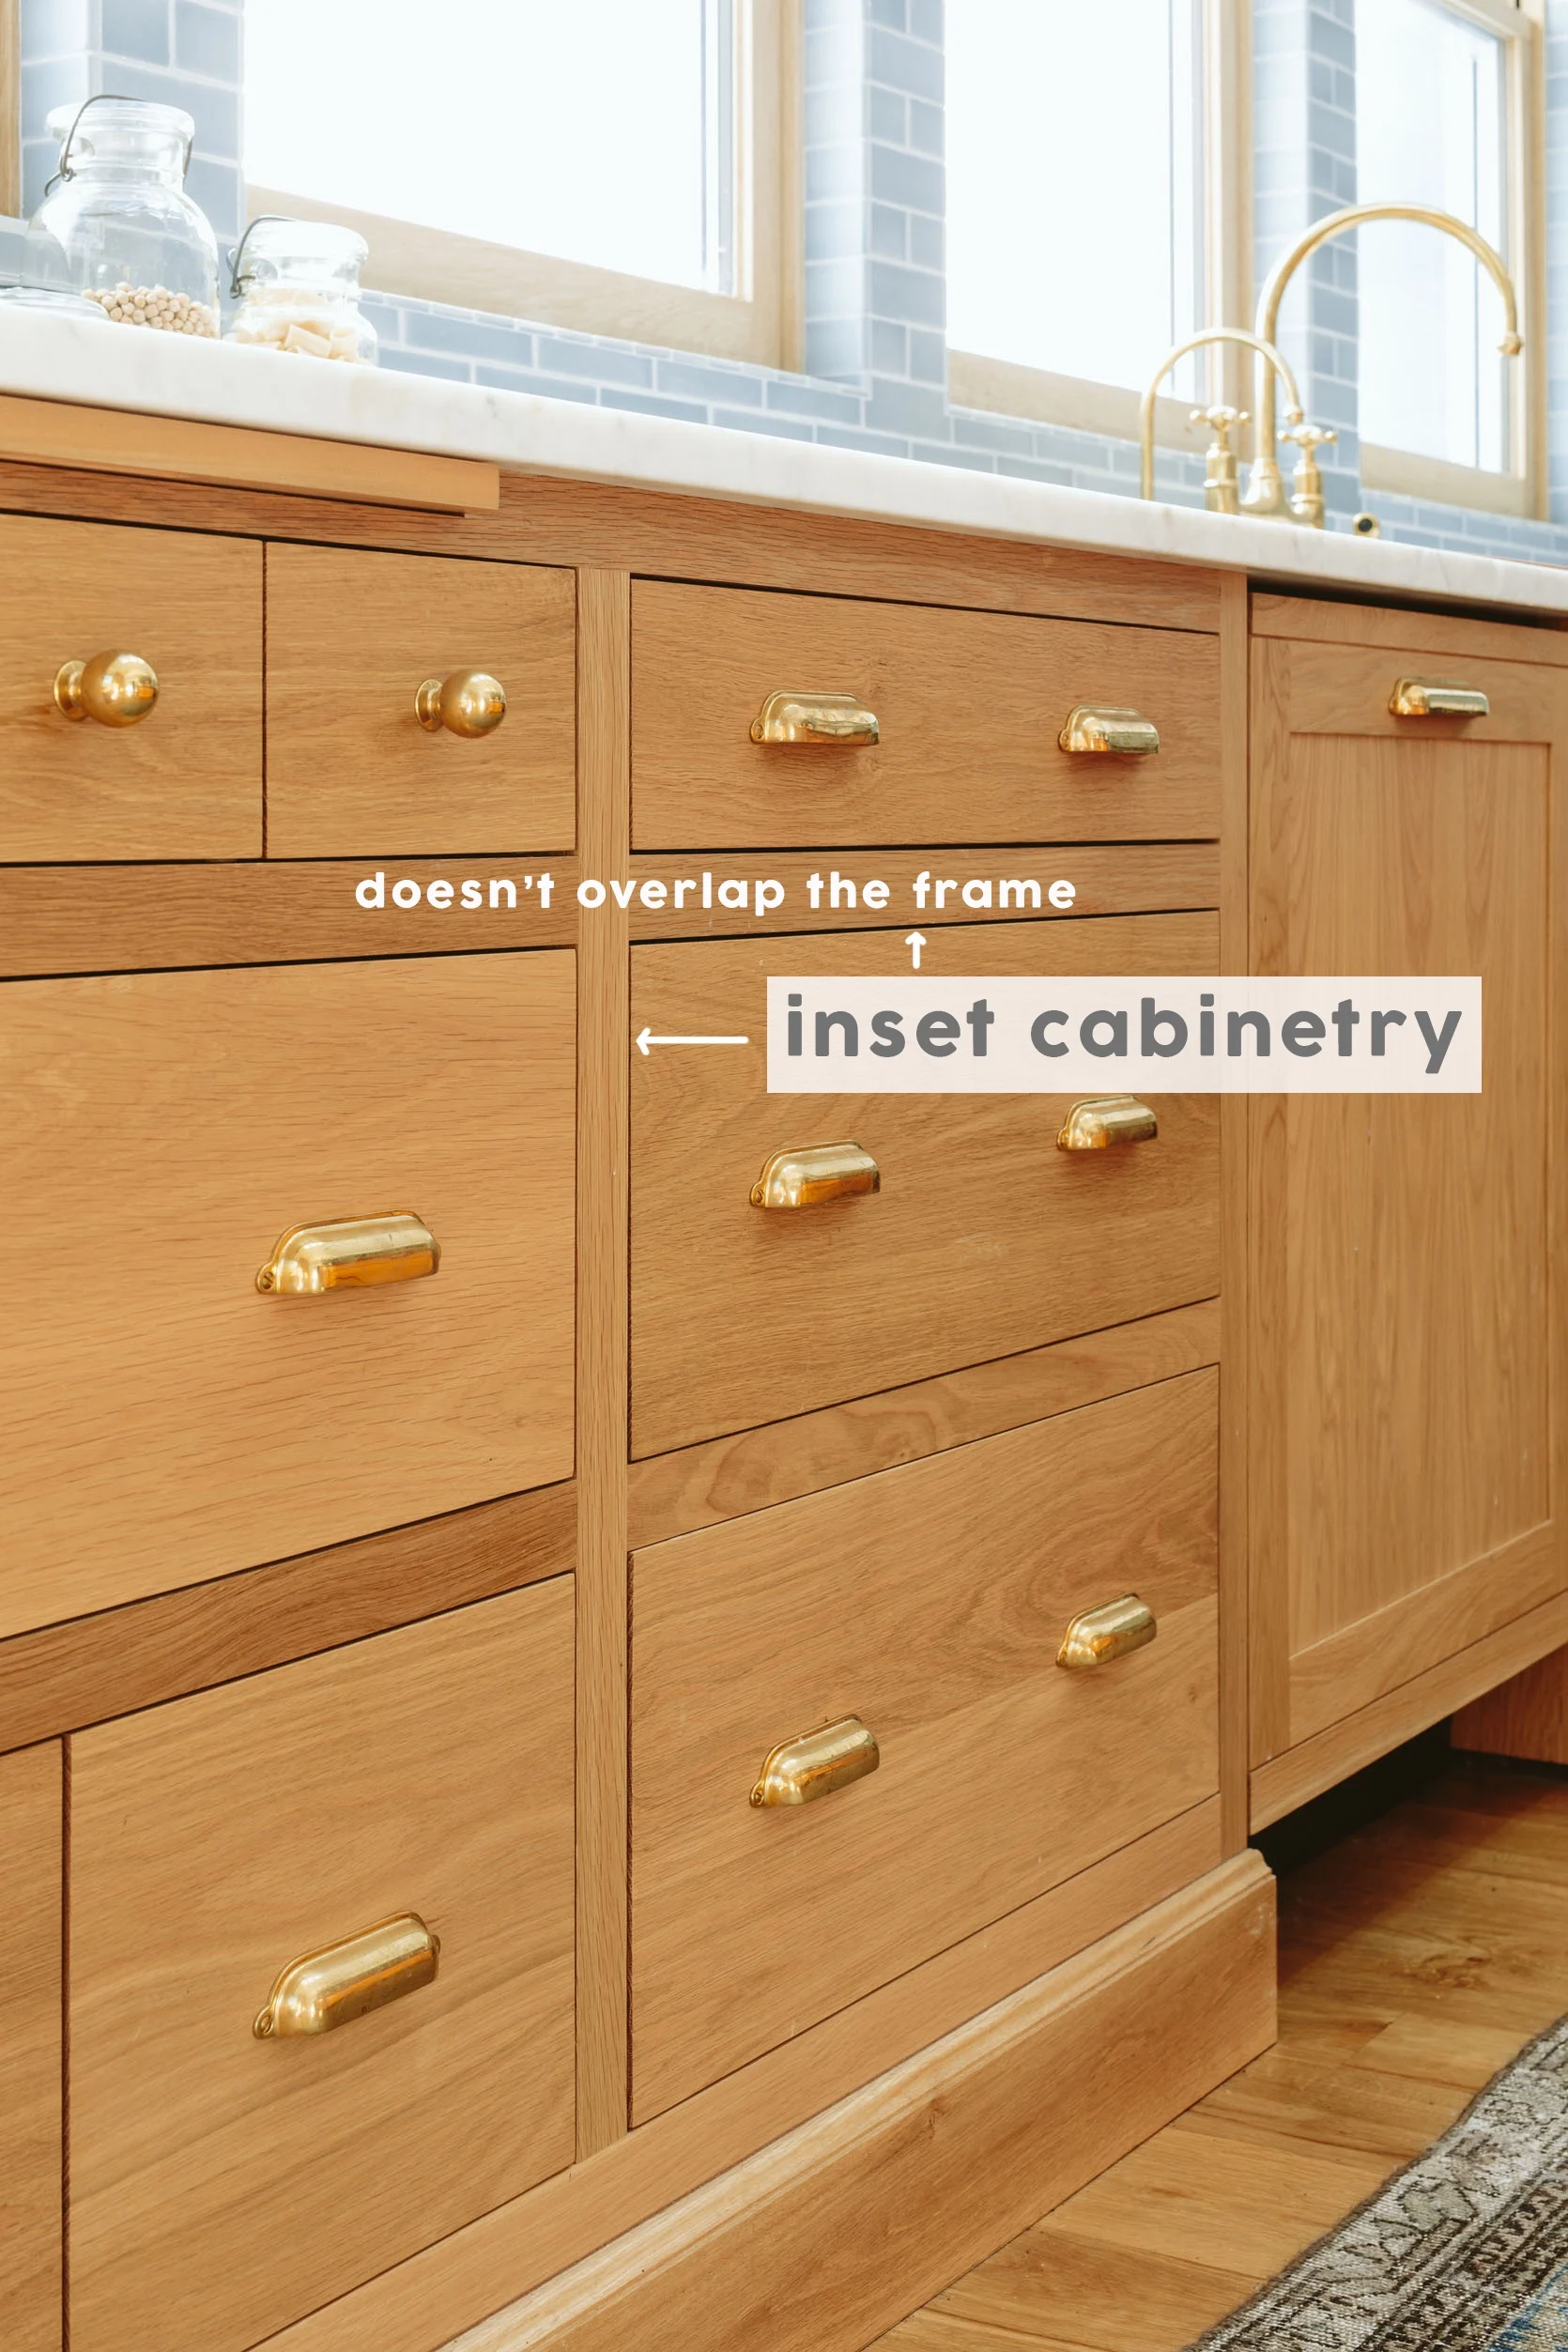
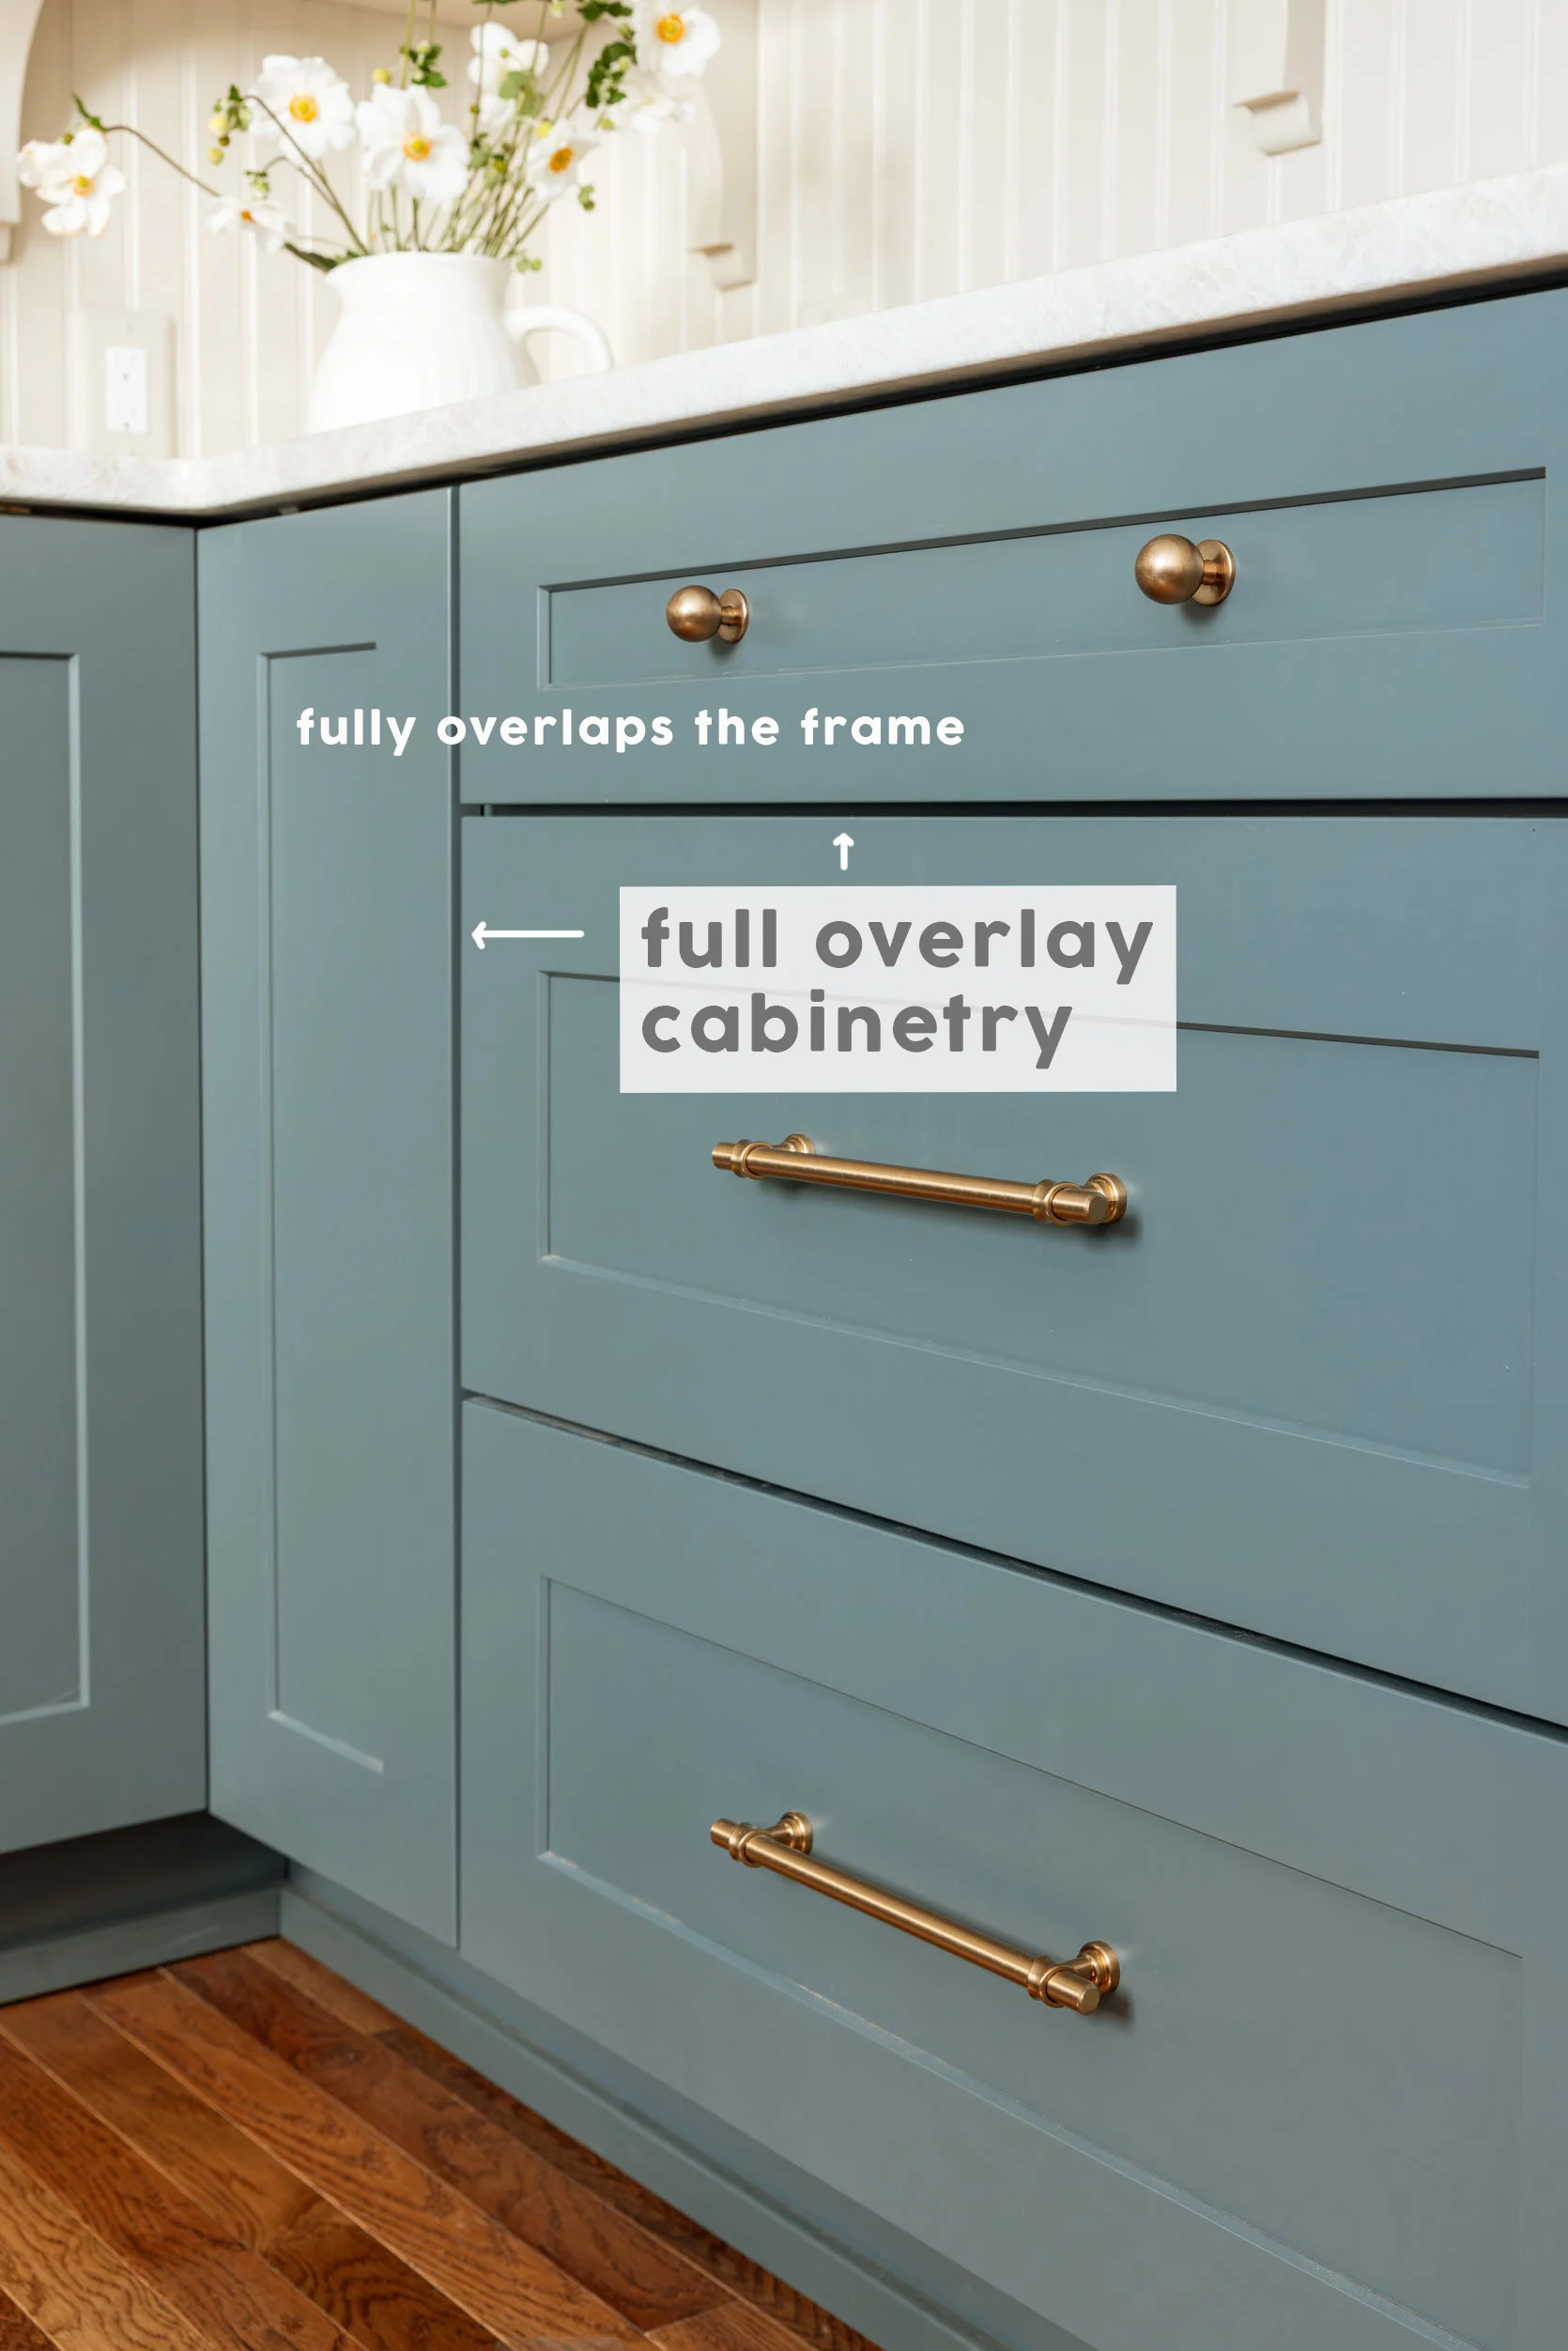
Skip partial overlay cabinet fronts. Most designers love to choose “inset” cabinetry, which means that the face of the cabinet run is flat, with the cabinets and drawers “inset” inside the frame. It’s the cleanest, most streamlined look. But it’s a lot more expensive, and I don’t think it’s always necessary. Full overlay, like what we did here, is easier and thus more affordable to execute because it can be slightly less precise and still look perfect. There are more margins for error, and you can use different equipment to build. But what you don’t want, what can look dated, is what we did in the ’90s: a partial overlay, which creates bigger gaps and adds more lines, thus being the least streamlined. If you have a partial overlay (especially if you have a more decorative front panel), you can replace it with more streamlined styles. If for some reason you have to choose partial overlay, paint it a modern, fresh color and it will reduce the datedness by a lot!
Our Layout
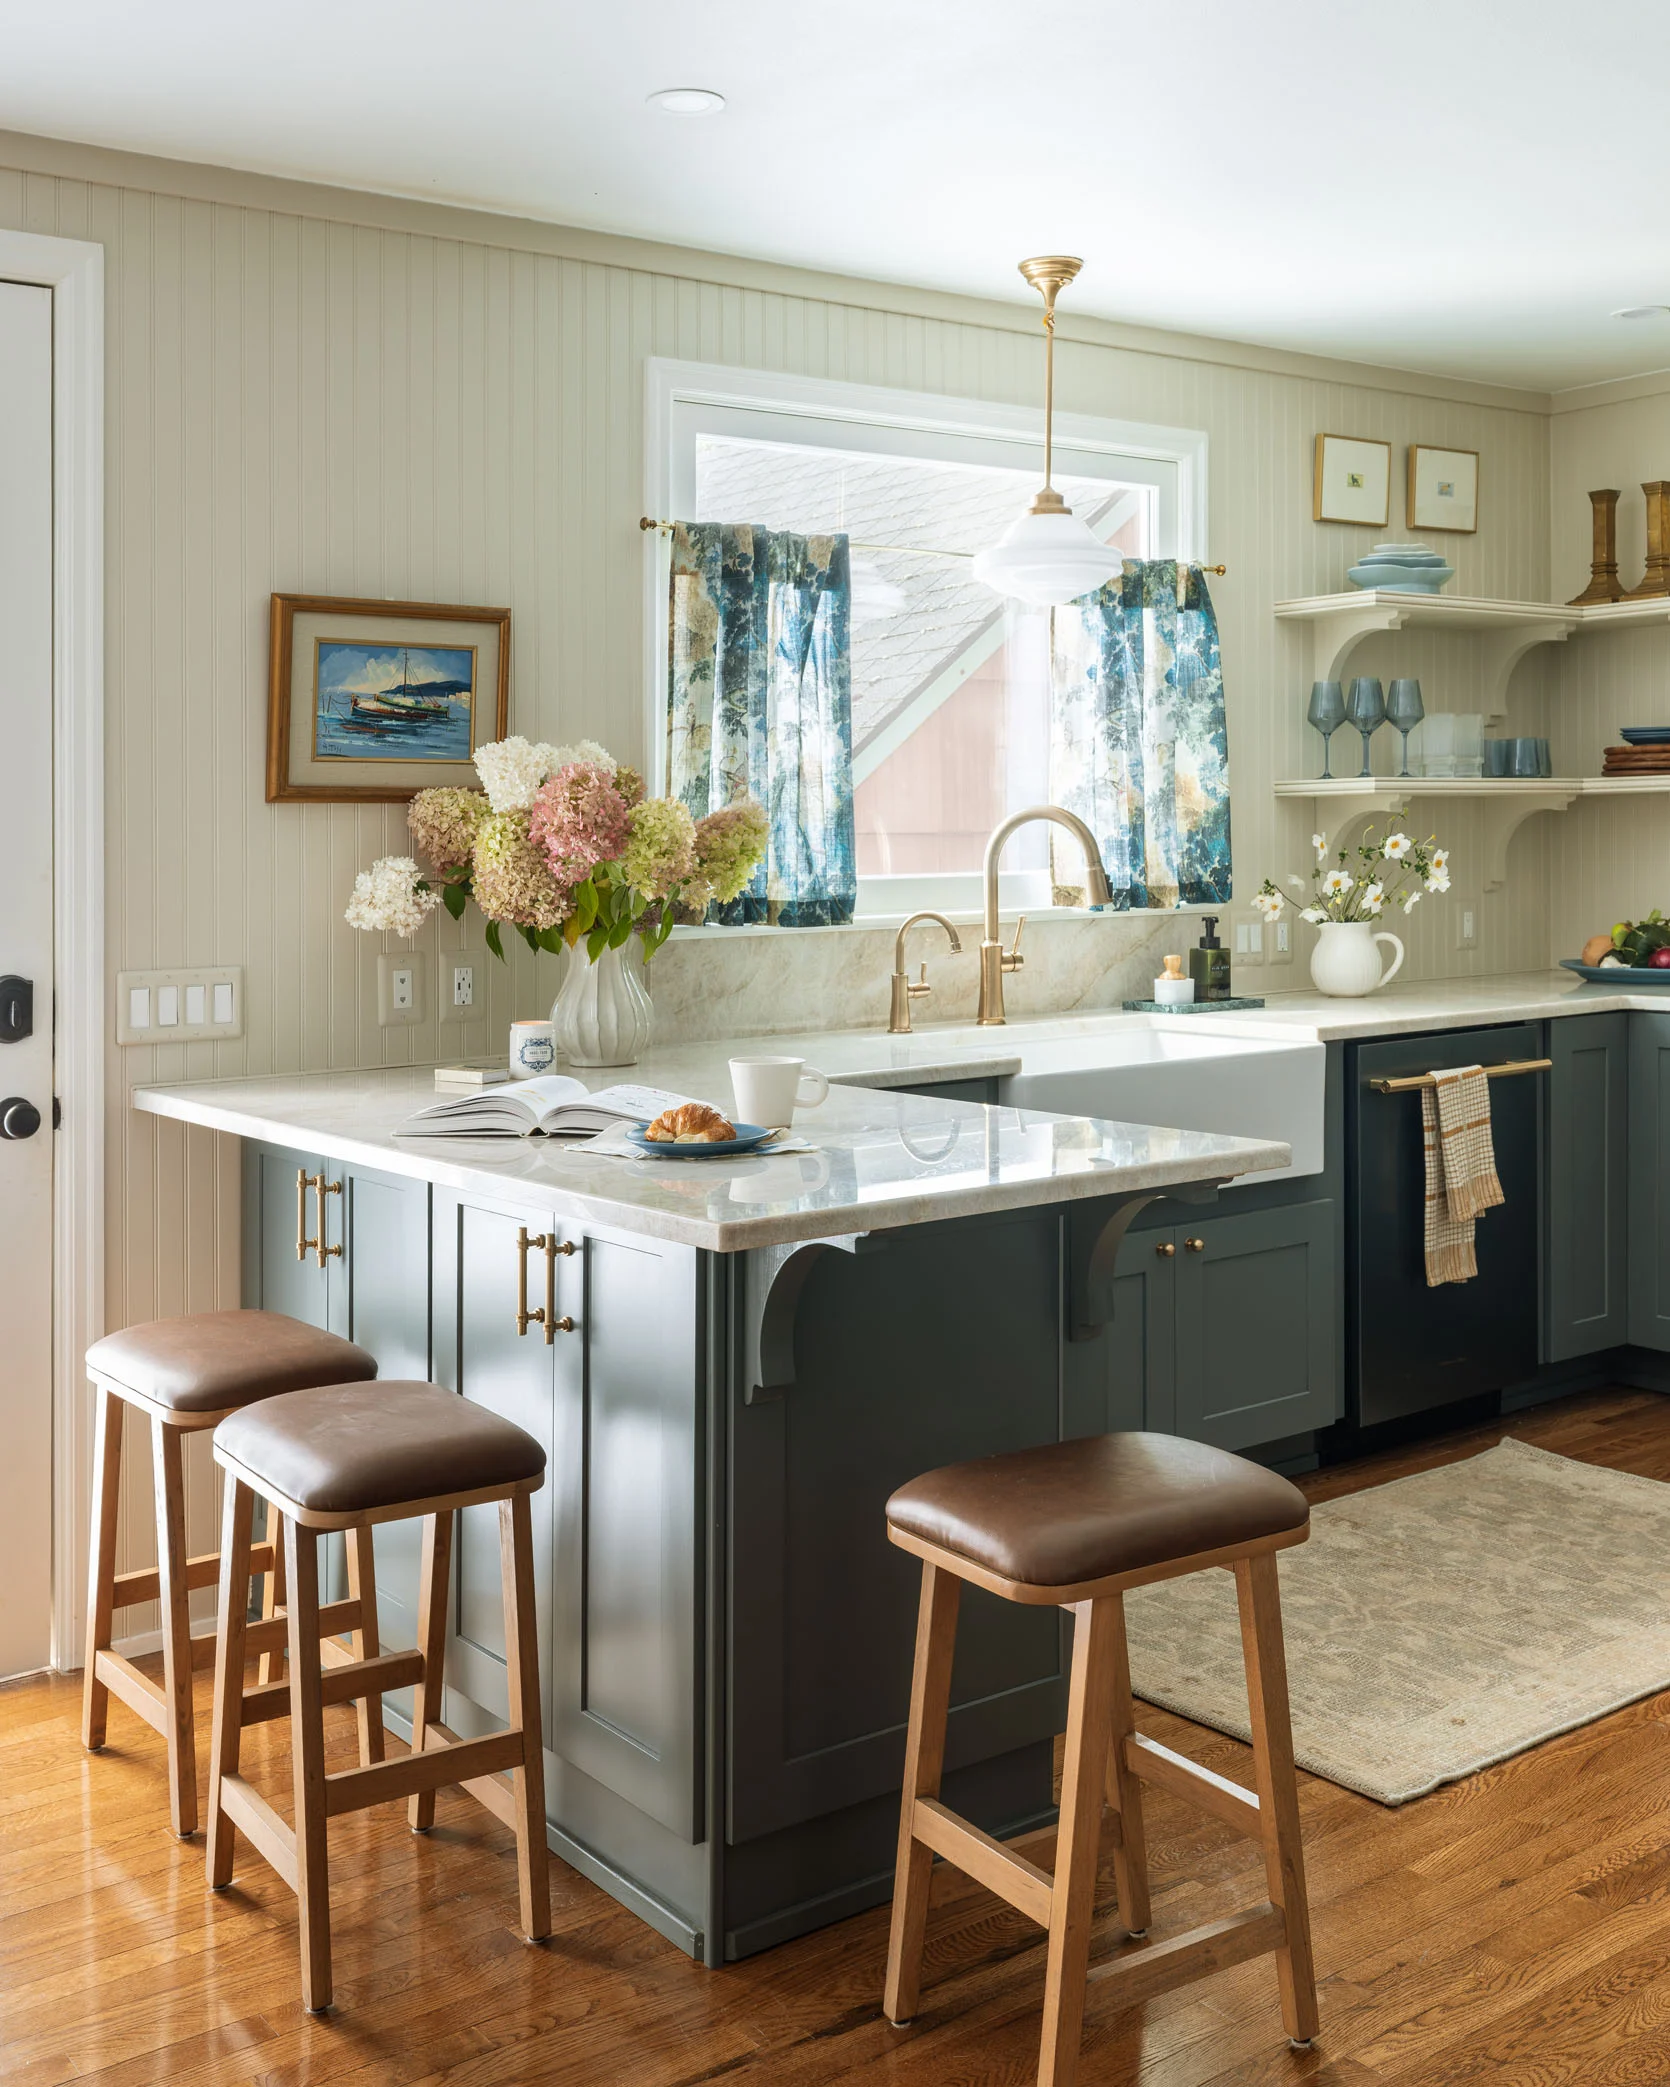
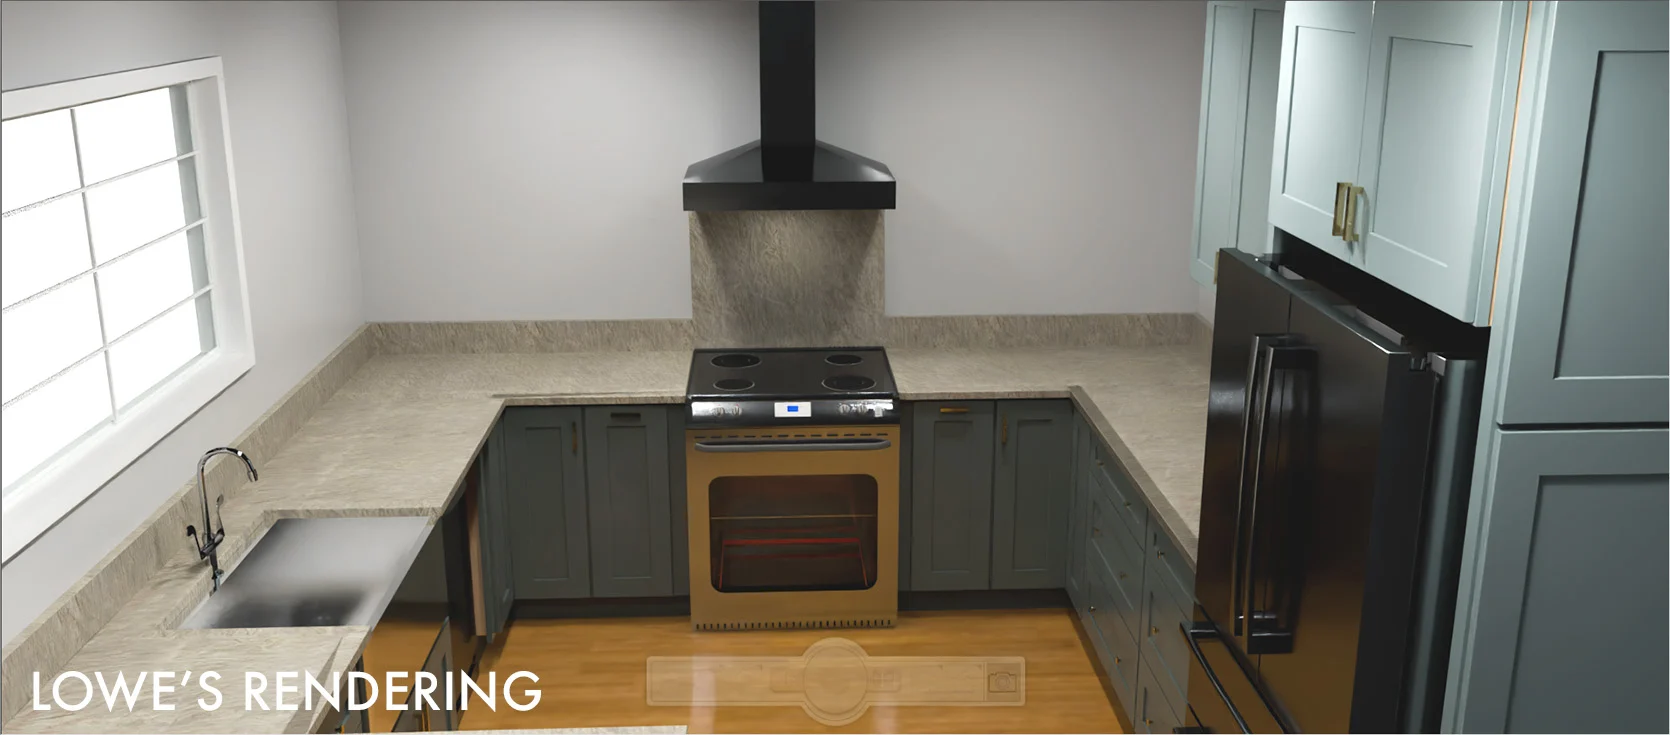
With the colors decided, we needed to figure out exactly how the cabinets would be laid out.
We sat with Chris (our Lowe’s kitchen cabinetry specialist) and went cabinet by cabinet, drawer by drawer, to decide what would go in them and, therefore, what the inside should be (size and function). Some decisions were easy (garbage by sink, spice pull-out by range) while others required a bit more thought. I think the cabinet layout is specific to your family, storage needs, and how you cook, but if you’re embarking on the process, here are some things that I always do:
Now for function – the insides of the drawers and cabinets are so fun to lay out because you get to fantasize about how you are going to live there (which is so fun), and you really want to meet your needs. This is where you label each drawer with everything from “Saran wrap” to “SodaStream”. What you want to avoid is not having an easy in/out storage location for the Vitamix you use every day. Not everything will have a perfect location (which is why so many new-build kitchens will have a walk-in pantry to throw the air fryers and serving platters into).
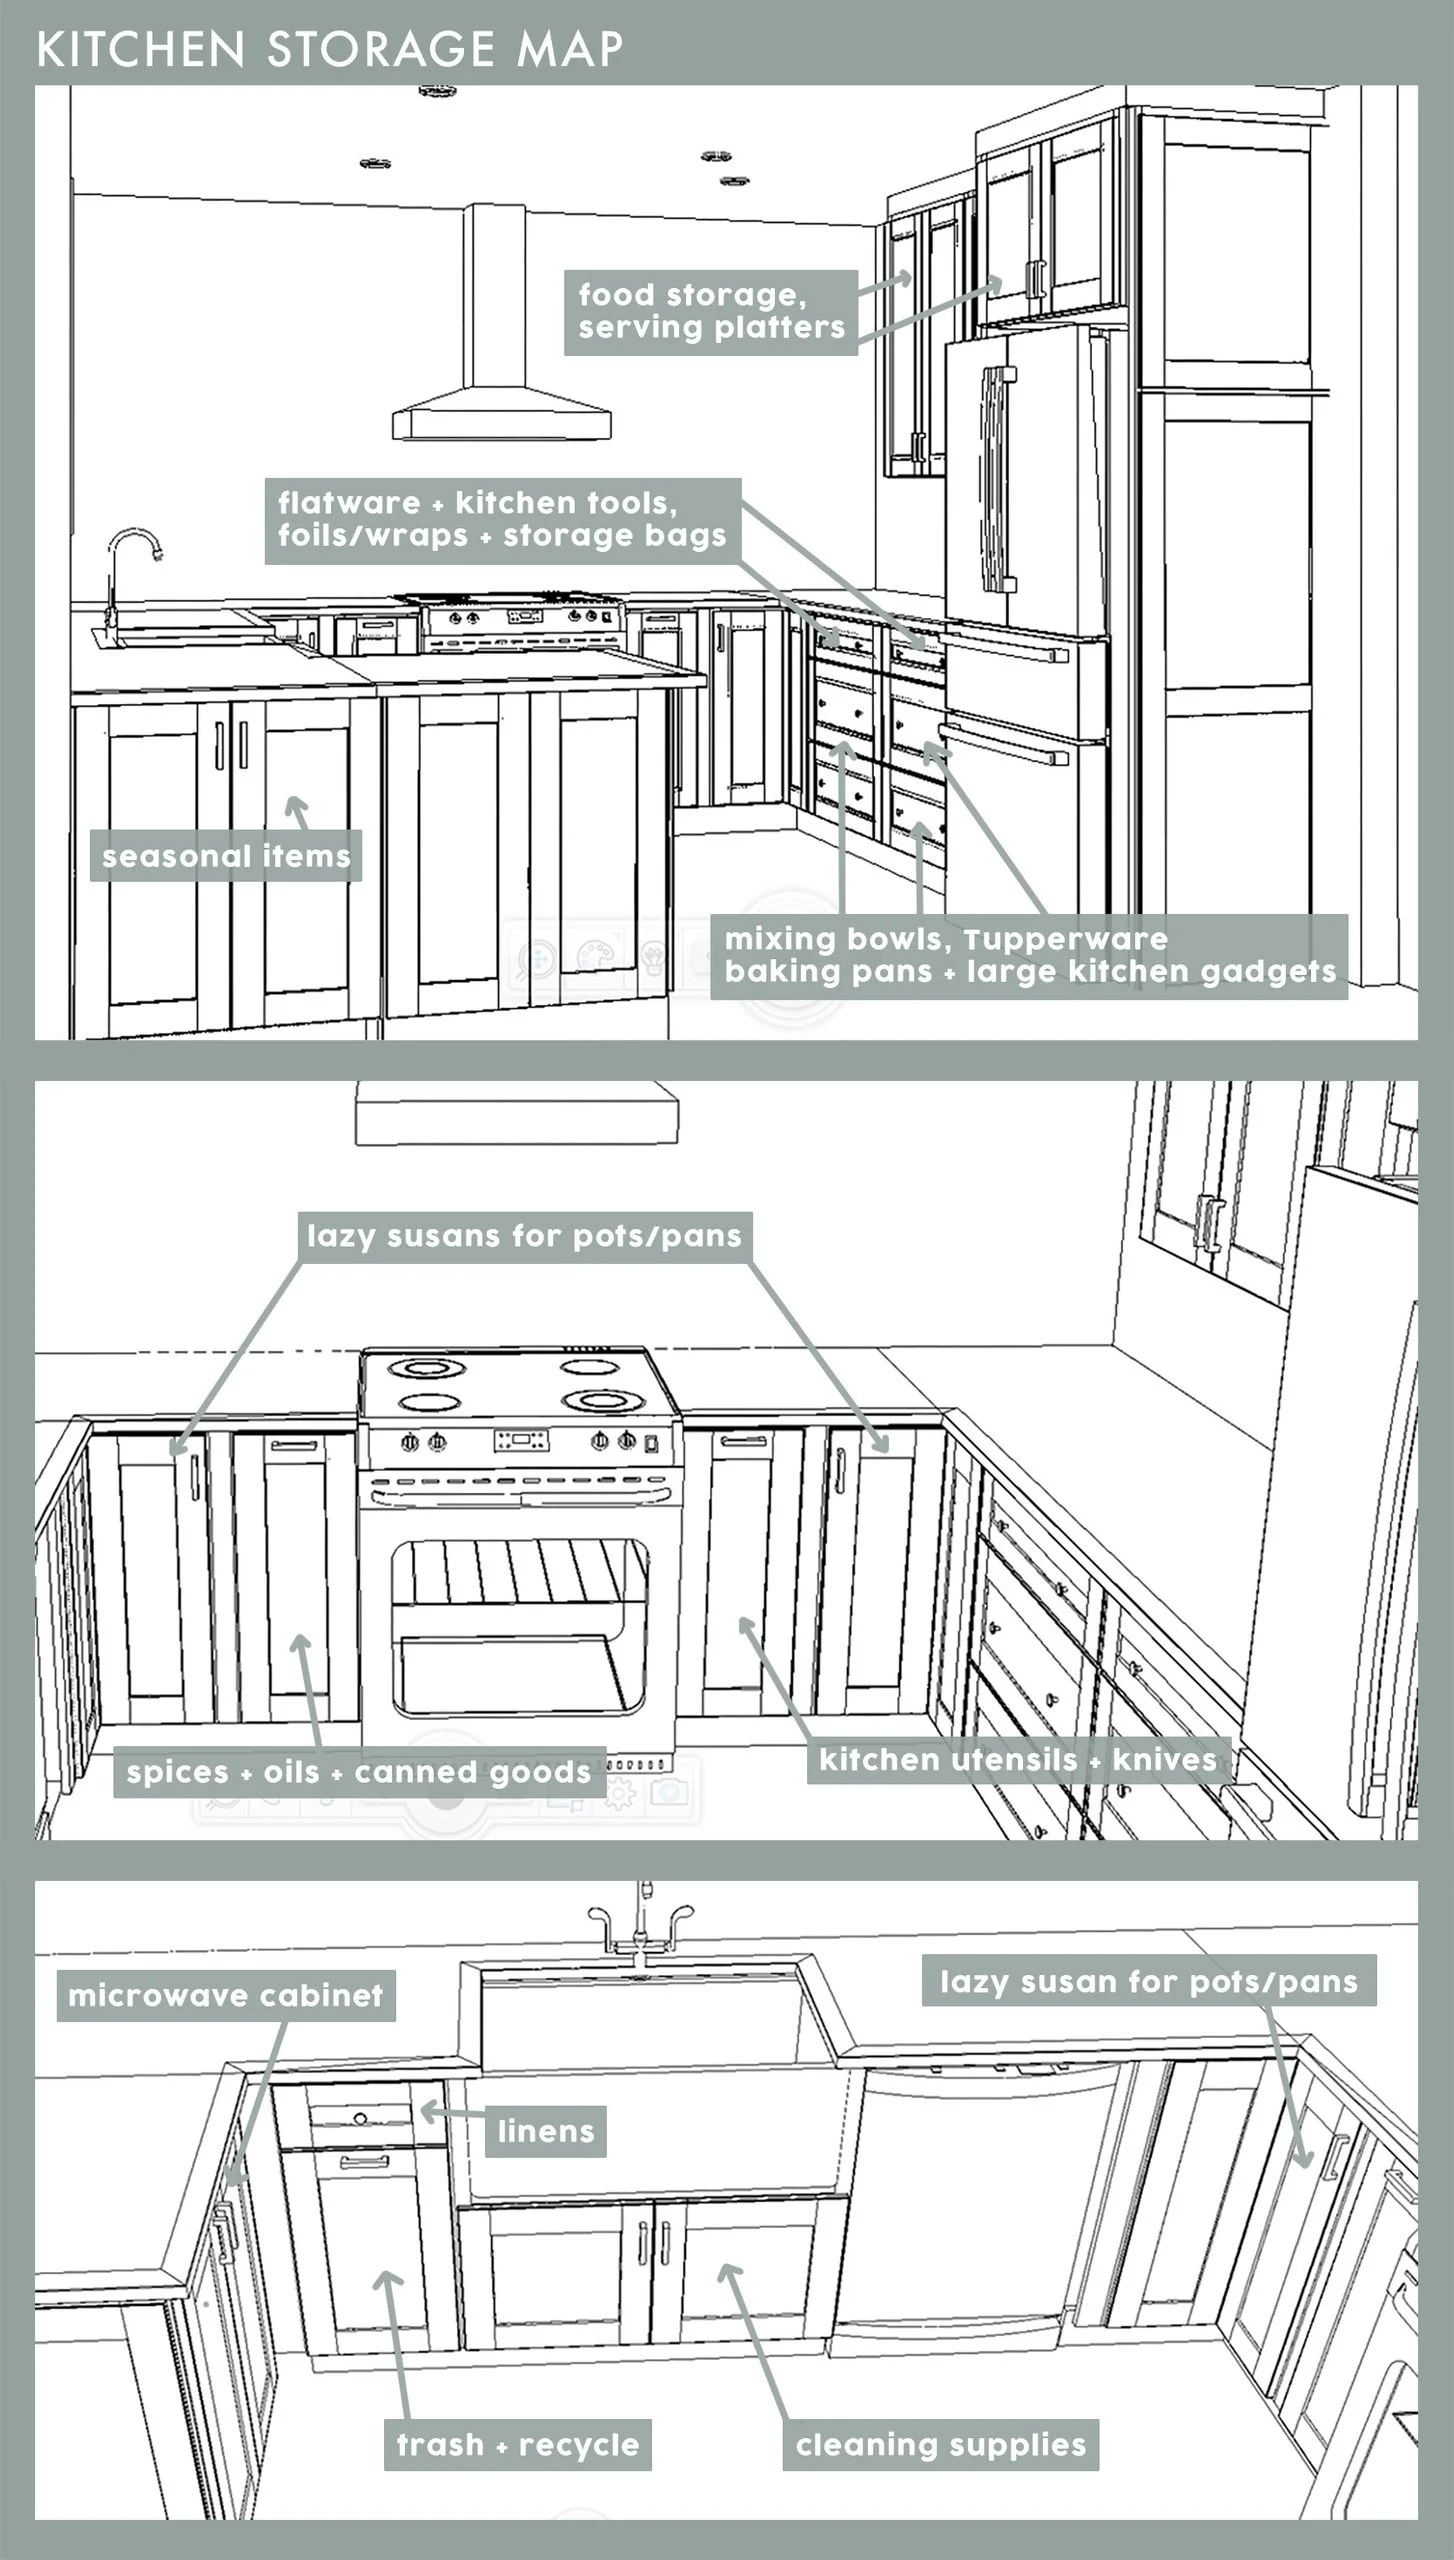
We only shot a few of the drawers because it didn’t feel necessary to buy Tupperware just to shoot it in a drawer, so I wanted to call out our favorite features as a “don’t skip these” cabinet elements.
Spice And Oil Pull-Out
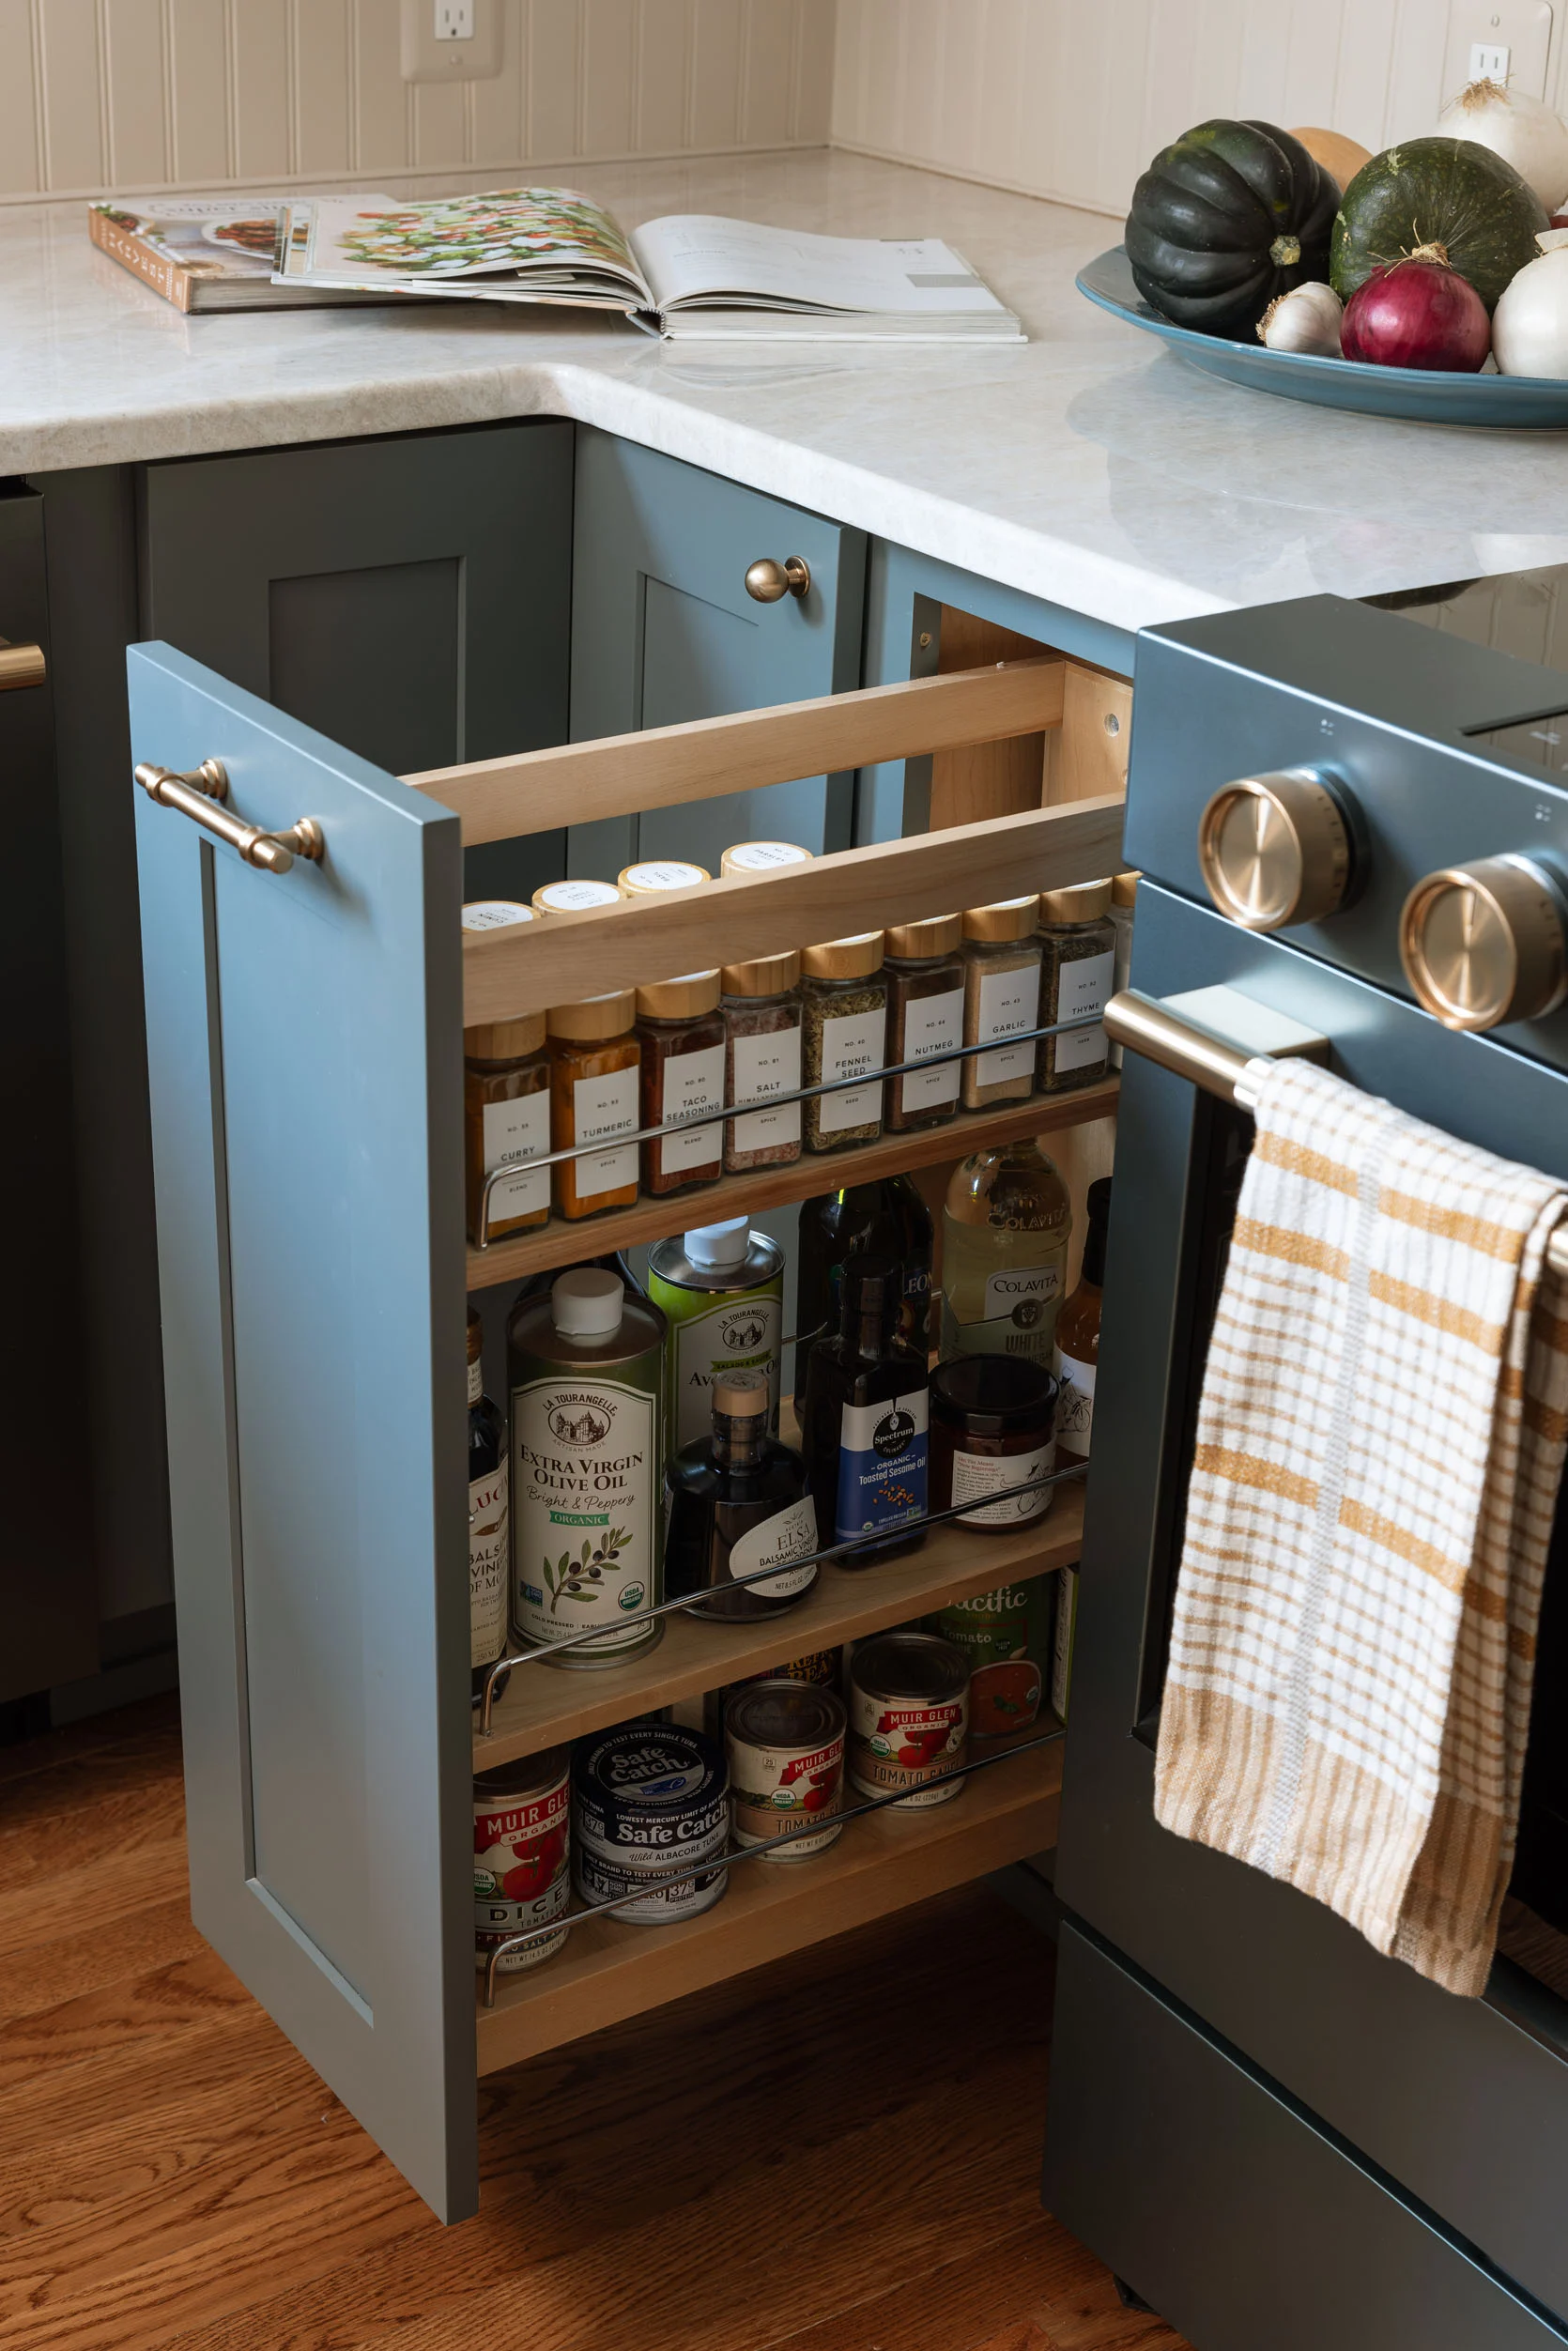
Spices can be in a drawer and lie flat, labels up (like I have, which is admittedly really easy to find each spice). But here we opted for a pull-out spice drawer next to the range (with pretty labels on the spice lids instead). All of your cooking oils and vinegars need to be upright, obviously, and putting them behind cabinets is annoying, as they can get buried quickly. So we took out one of the shelves of the spice pull-out to allow for spices up top, oils in the middle, and canned goods on the bottom.
Utensil (and Knife) Pull-Out
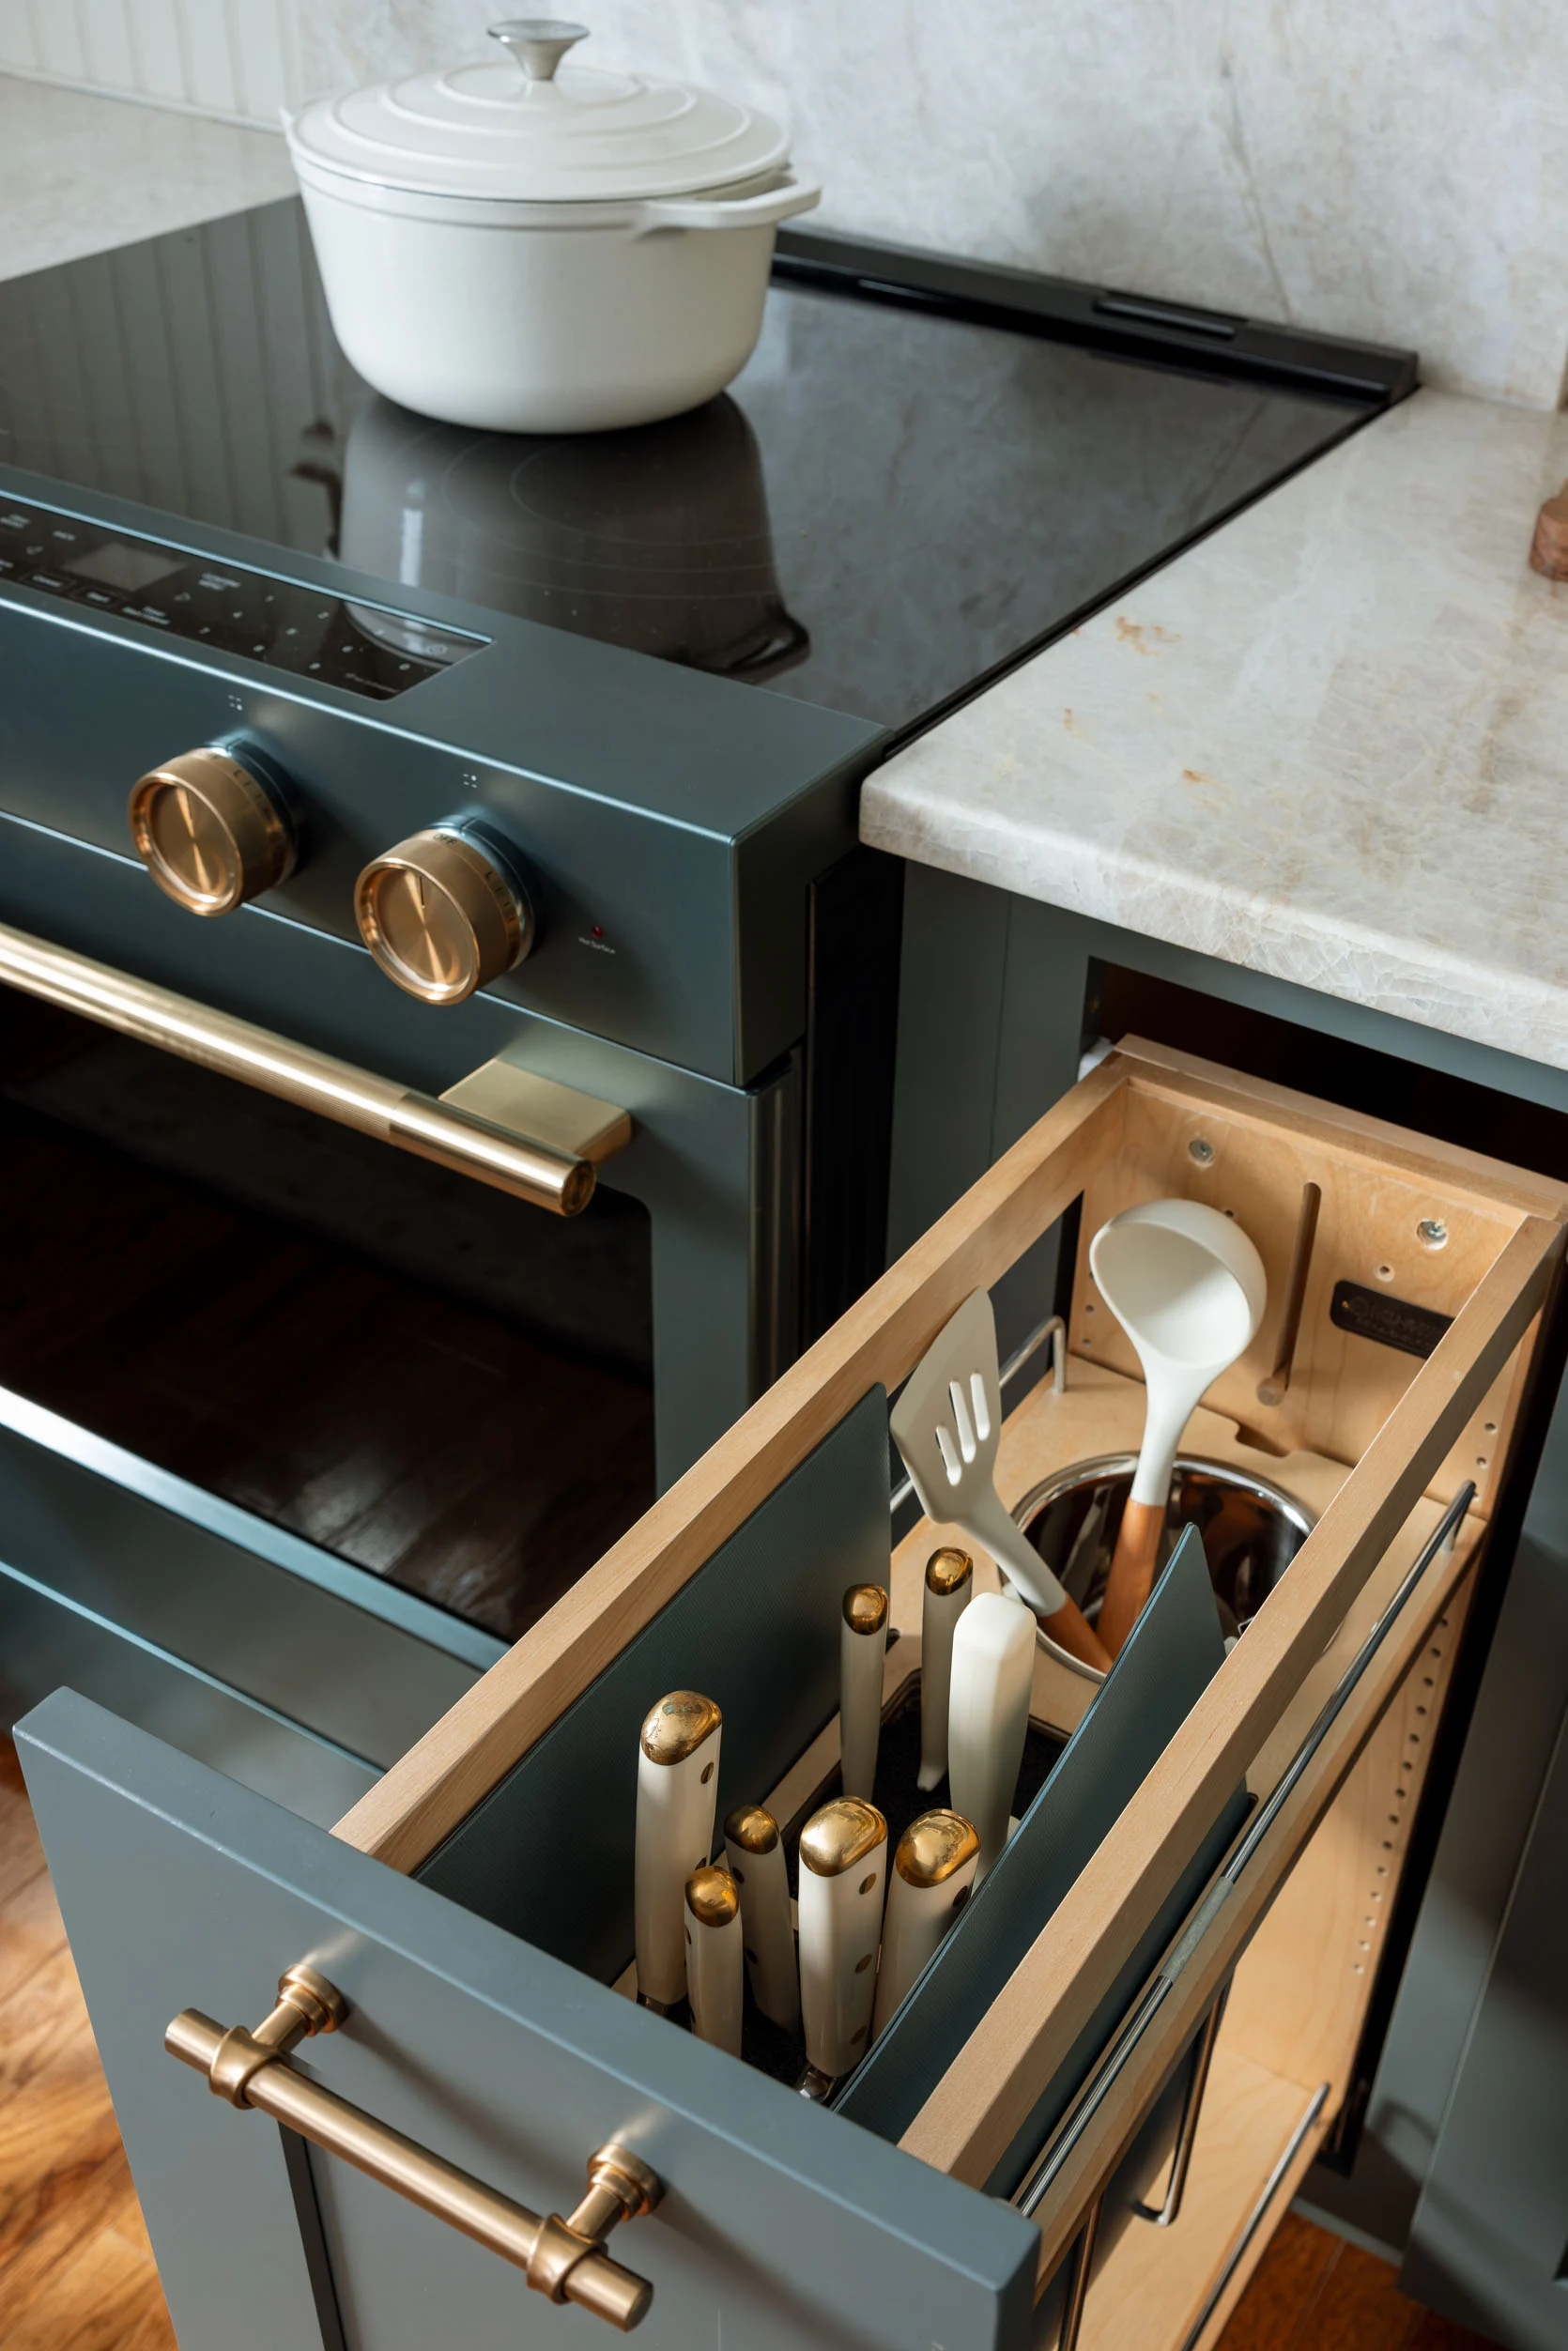
We flanked that pull-out with a matching front, with different functions. For this, we did knife storage and utensil storage. The utensil bin is key (I have two and they are so convenient). You might want knives to be on a knife block or mounted on the wall and do more utensil storage, which was an option, but we were excited to explore this feature. This is a flex rod knife block which makes it super easy to slide and store your knives of all sizes and keep them protected.
Lazy Susan Corners
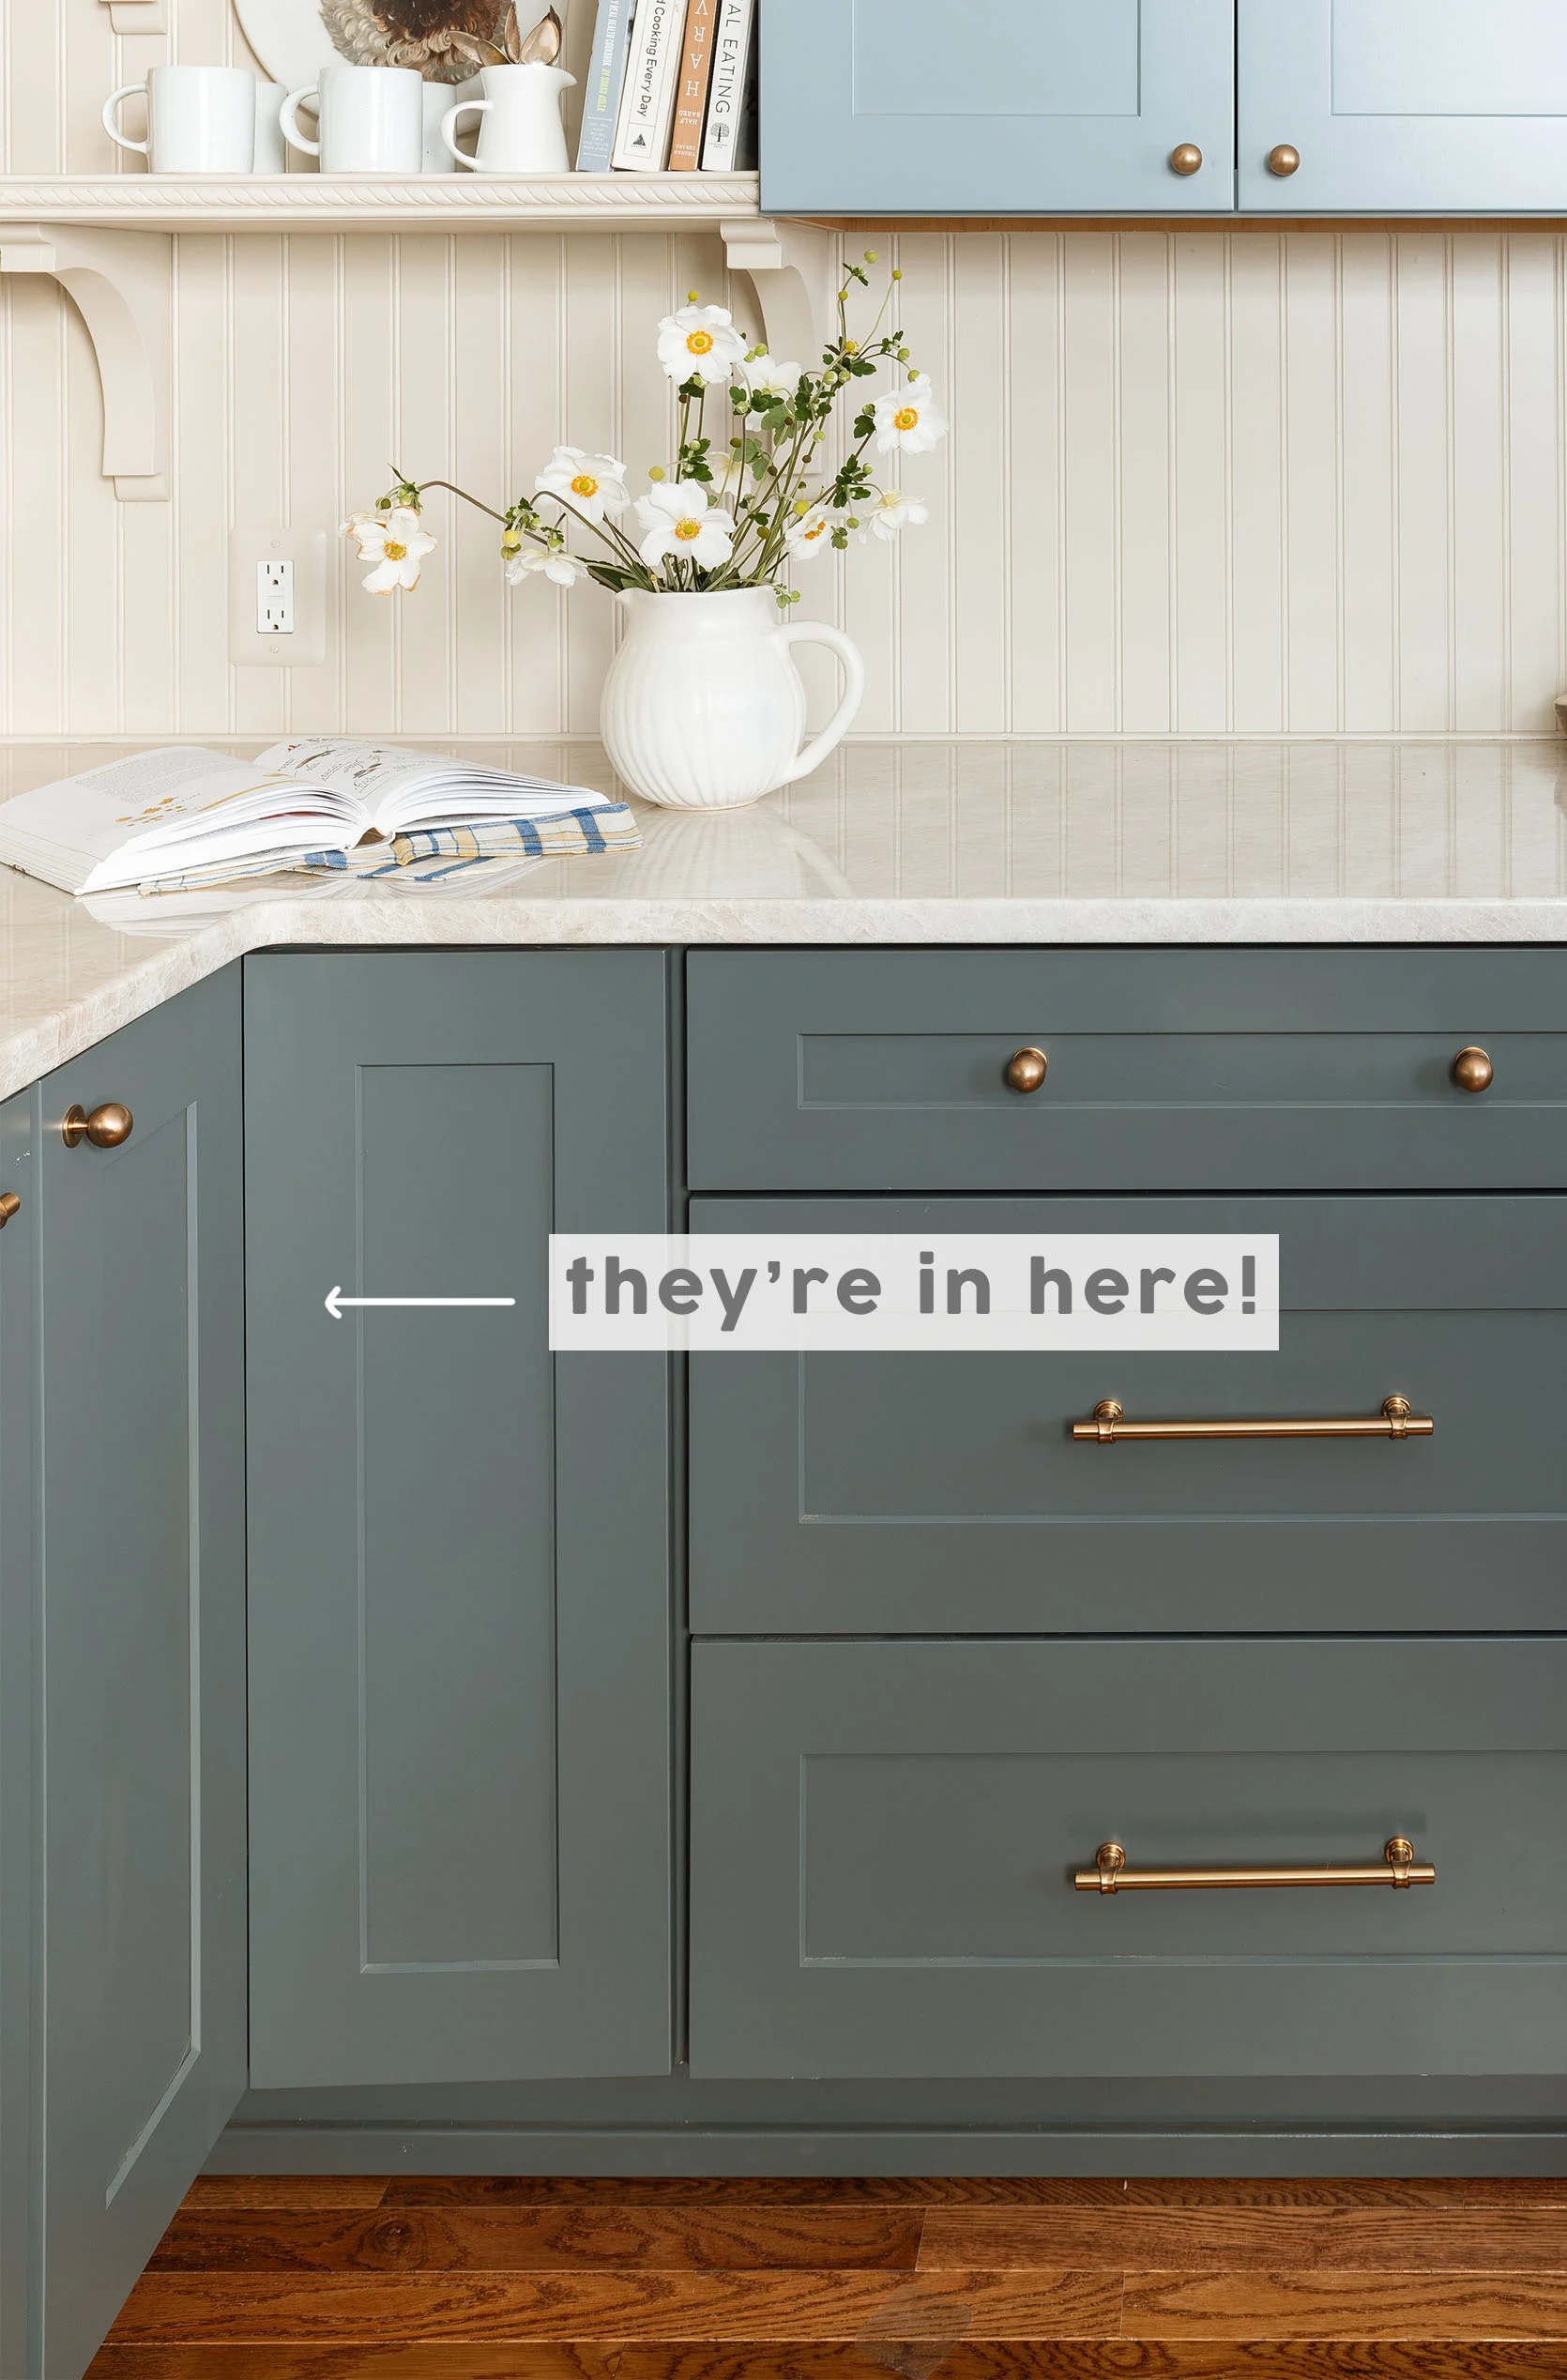
To avoid a blind corner (which I have at home and no idea why, but it also doesn’t really bother me since I only use the same three pots or pans weekly), you can get these corner lazy susans installed instead. It’s not crucial but sure is handy for finding buried pots. We did it on both sides.
Trash And Recycling Pull-Out
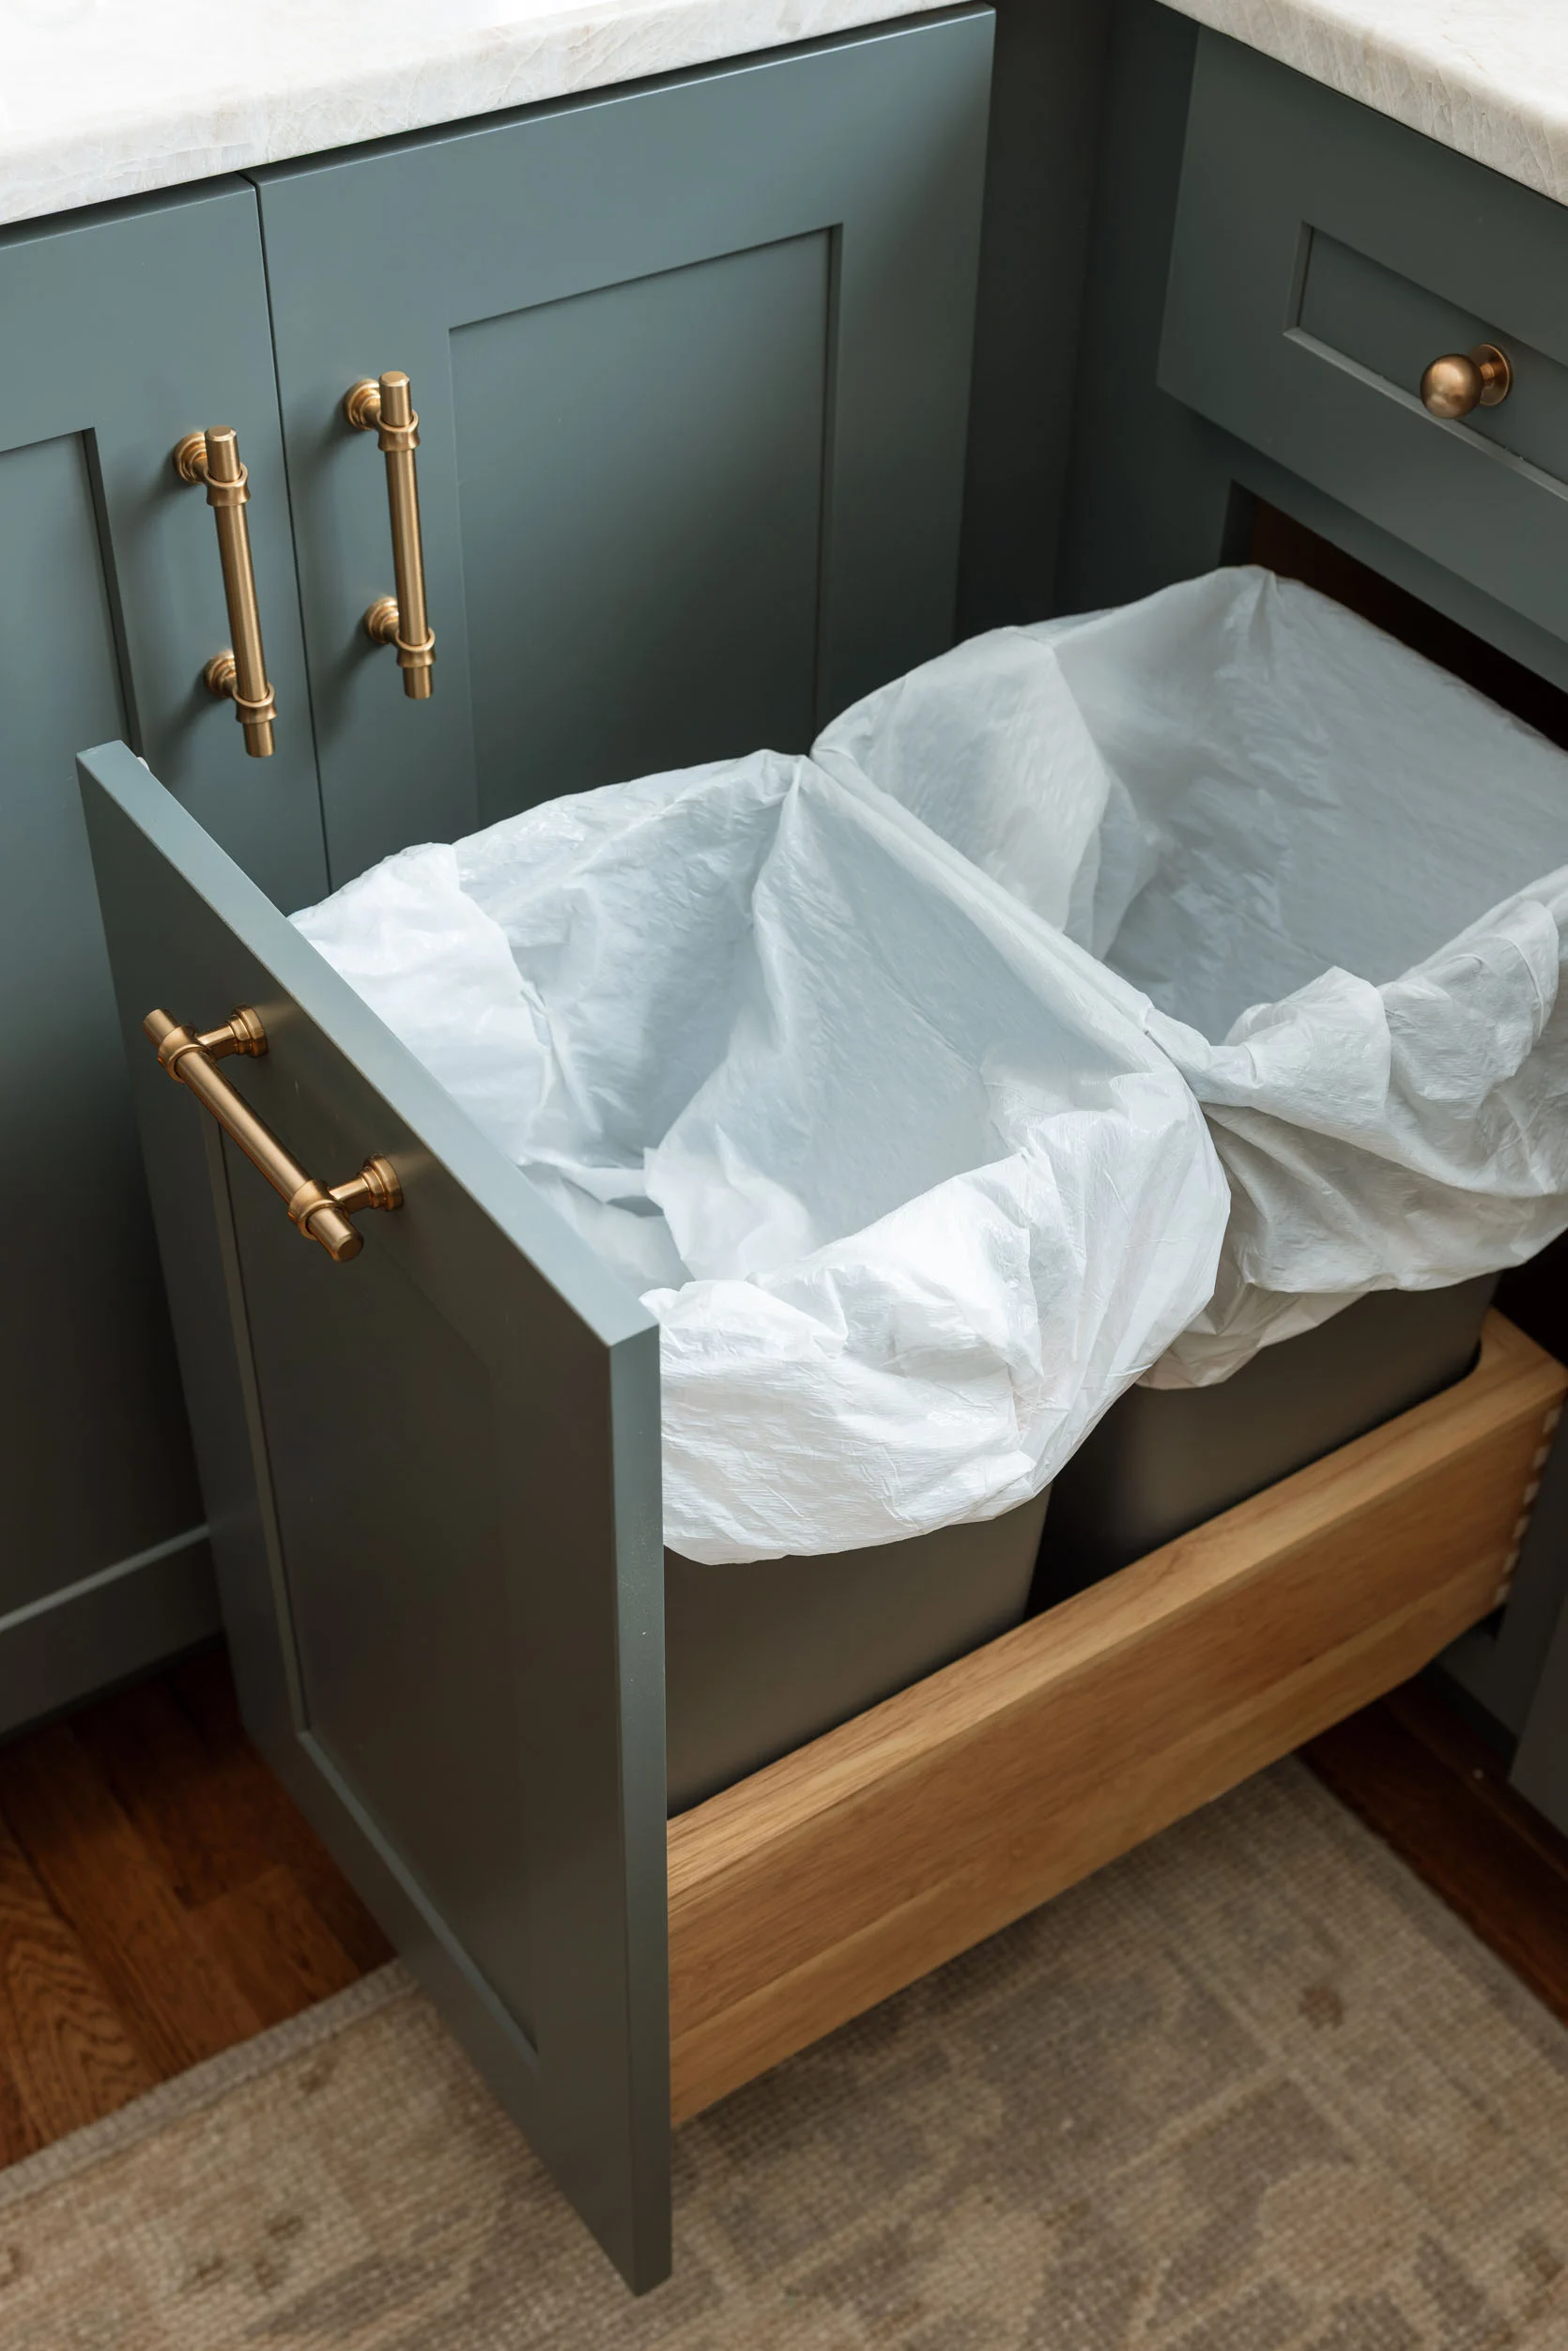
Probably the most important of all of these so you don’t have to deal with a floating trash can in your kitchen. We didn’t have that much space on the left side of the sink (and the dishwasher was on the right), so we squeezed in two smaller trash cans.
Microwave In A Cabinet
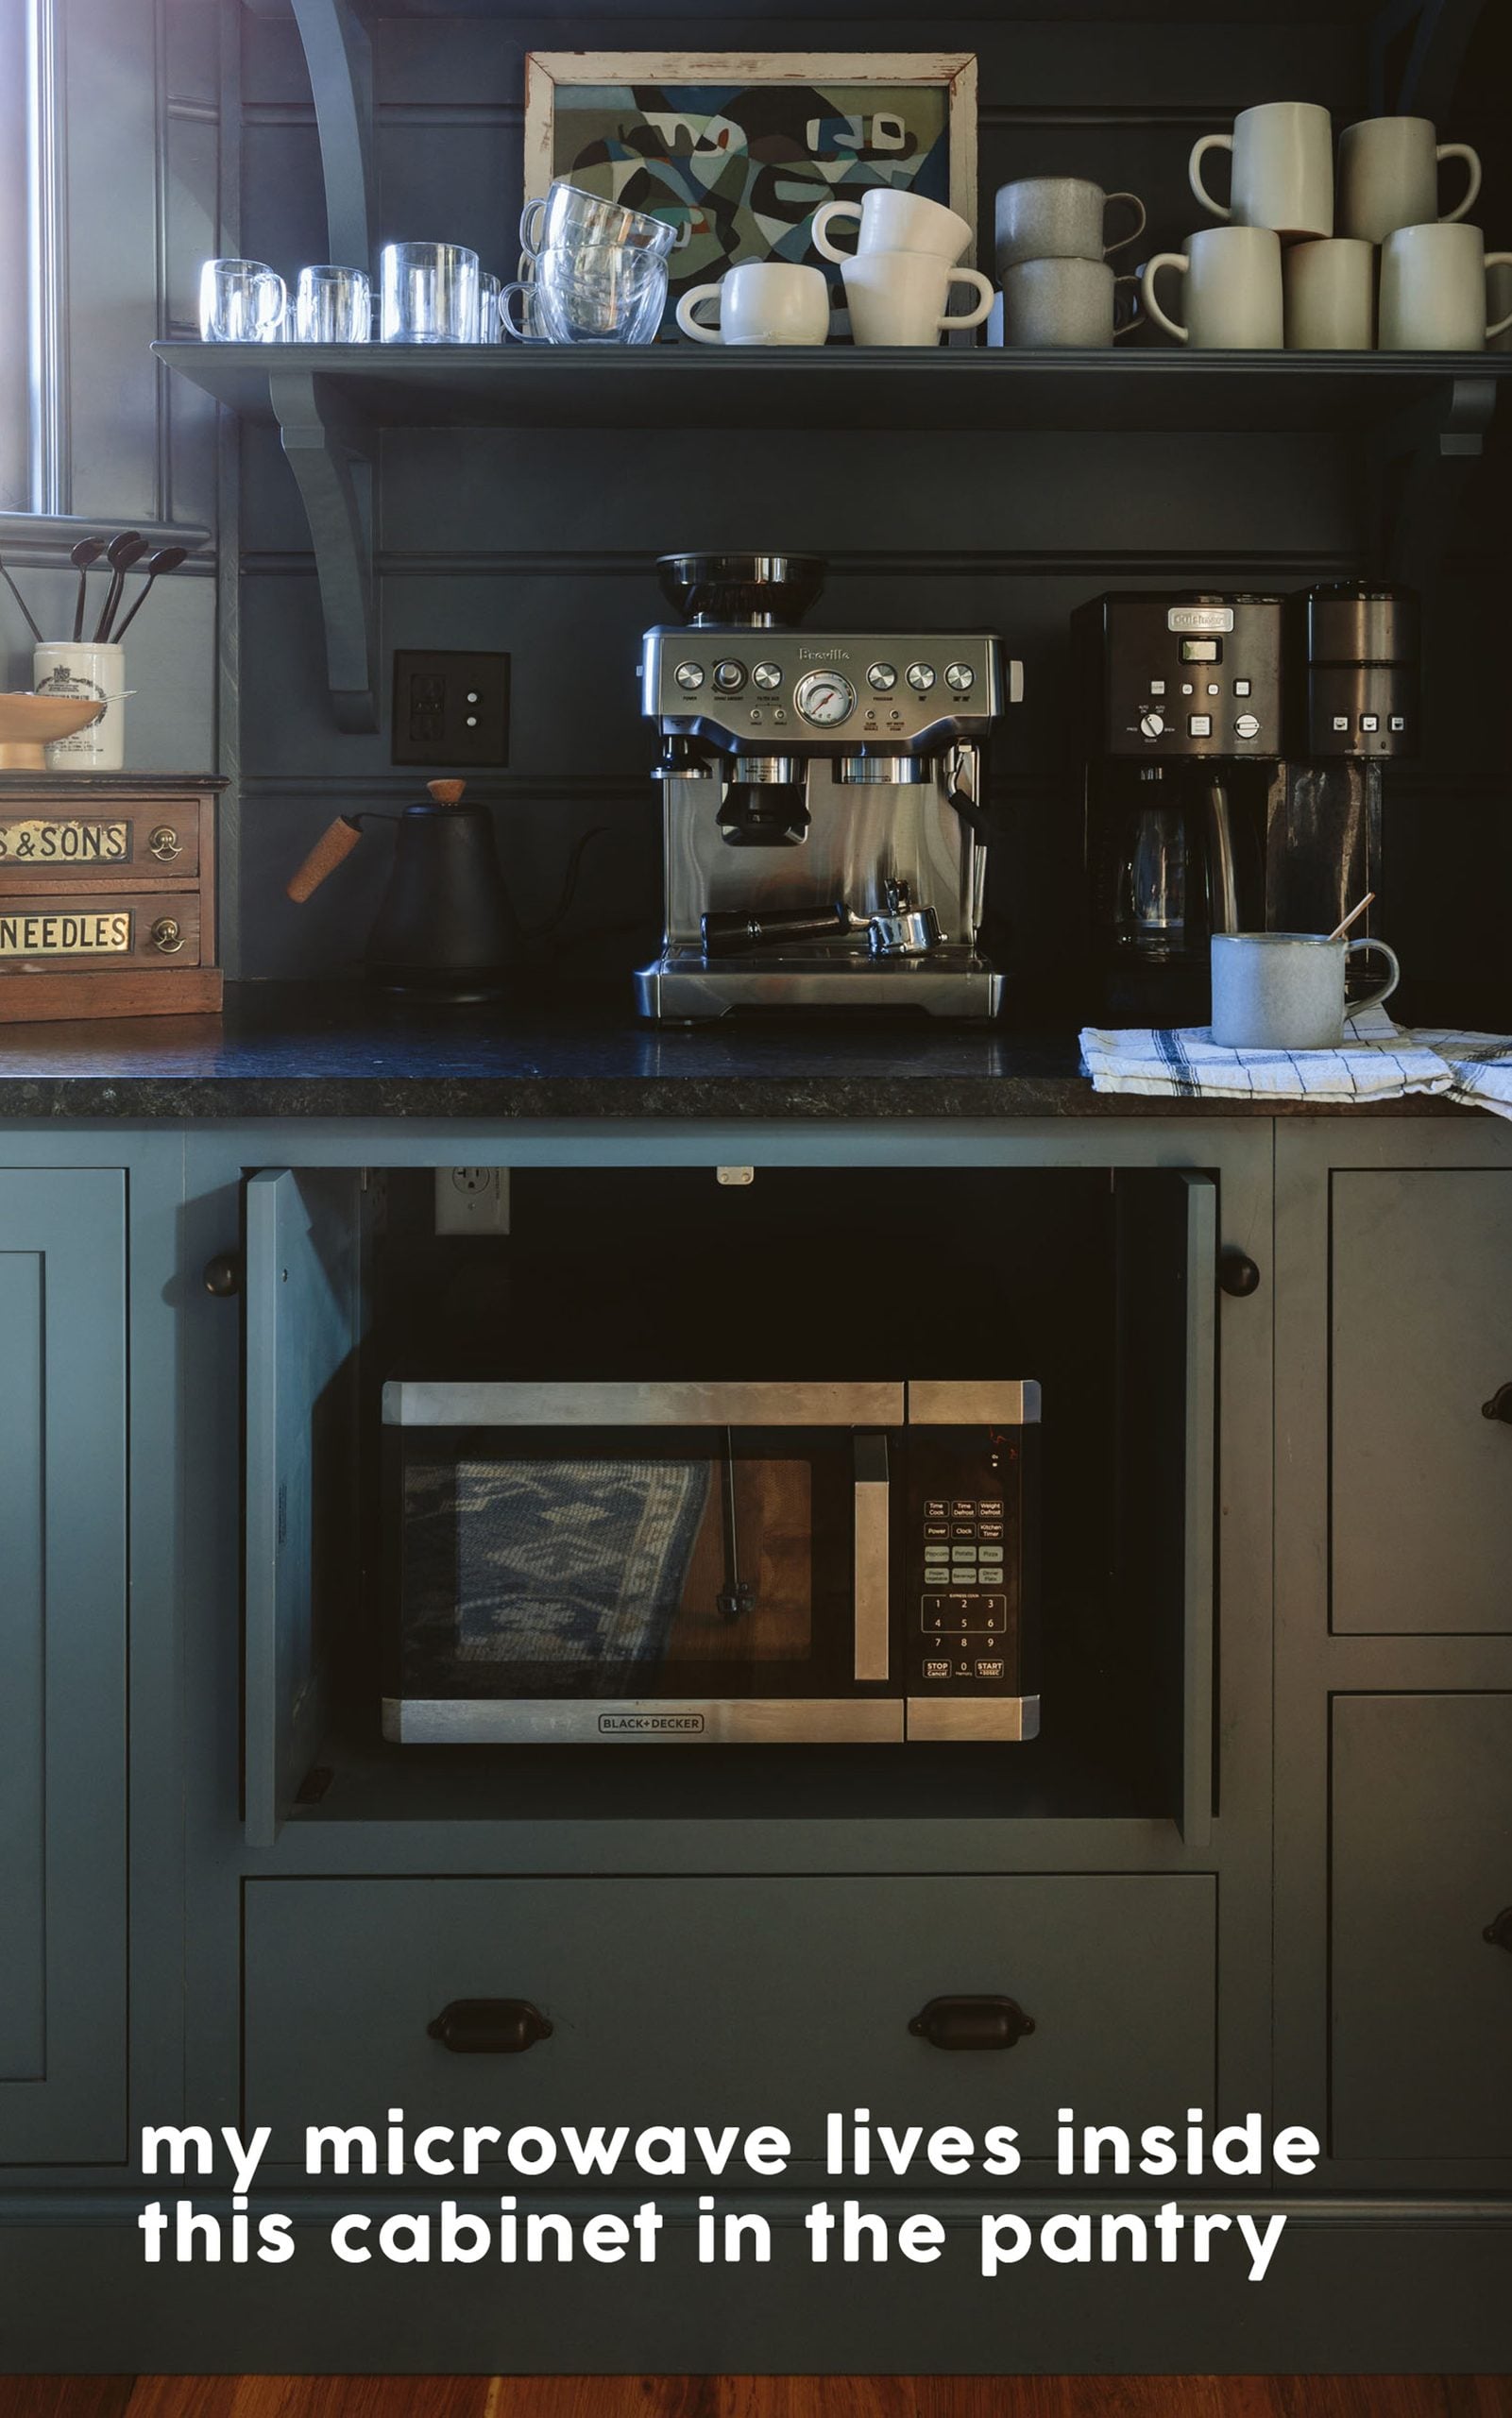
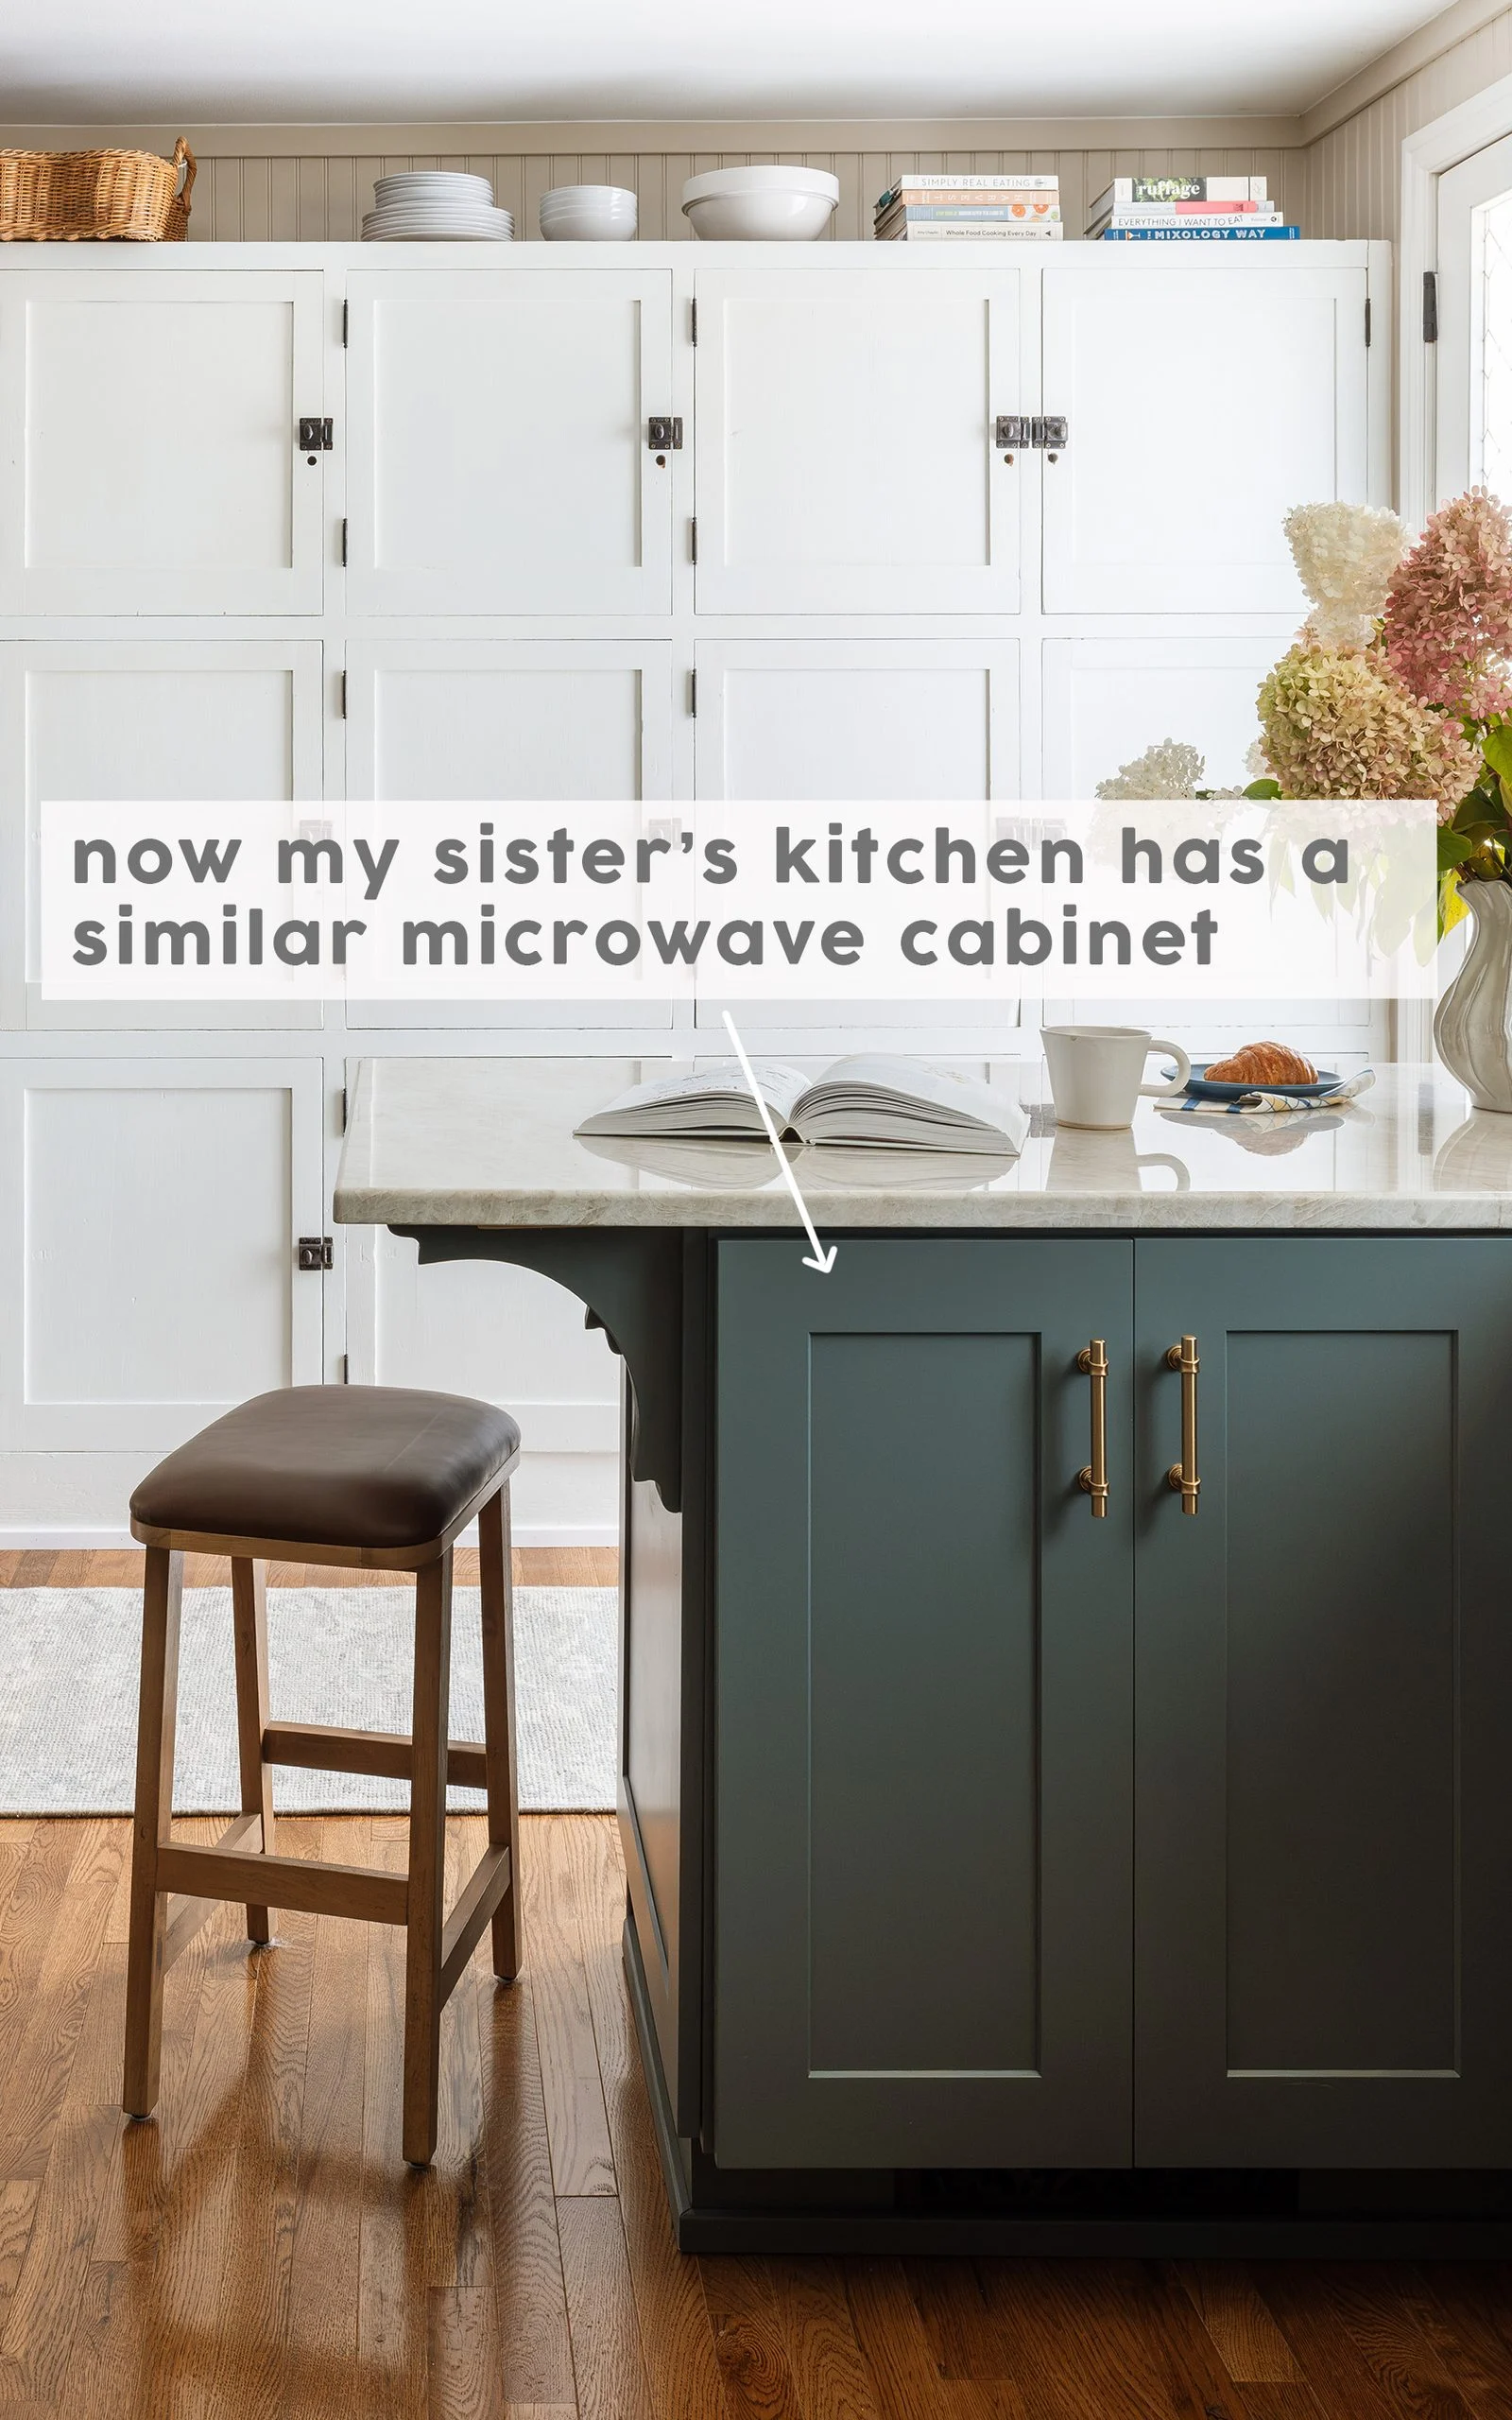
I’m so sorry I don’t have a picture of it (we hadn’t bought the microwave yet), but this cabinet is big enough to house a microwave and has a plug (through the floor, pre-planned obviously). Listen, I don’t hate a built-in microwave, and sometimes it’s the best option if you use it all the time, but I’d rather look at cabinets than at appliances, so like in our pantry, I prefer to hide them behind a cabinet. Yes, this requires two moves (opening the cabinet, then opening the microwave), but it’s worth it to me not to give up visual real estate. In my sister’s case, that peninsula wasn’t wide enough for the built-in microwave anyway (in the matching KitchenAid suite), so barring keeping a microwave on the countertop, this is the best and a great solution.
Choosing The Right Hardware + Placement
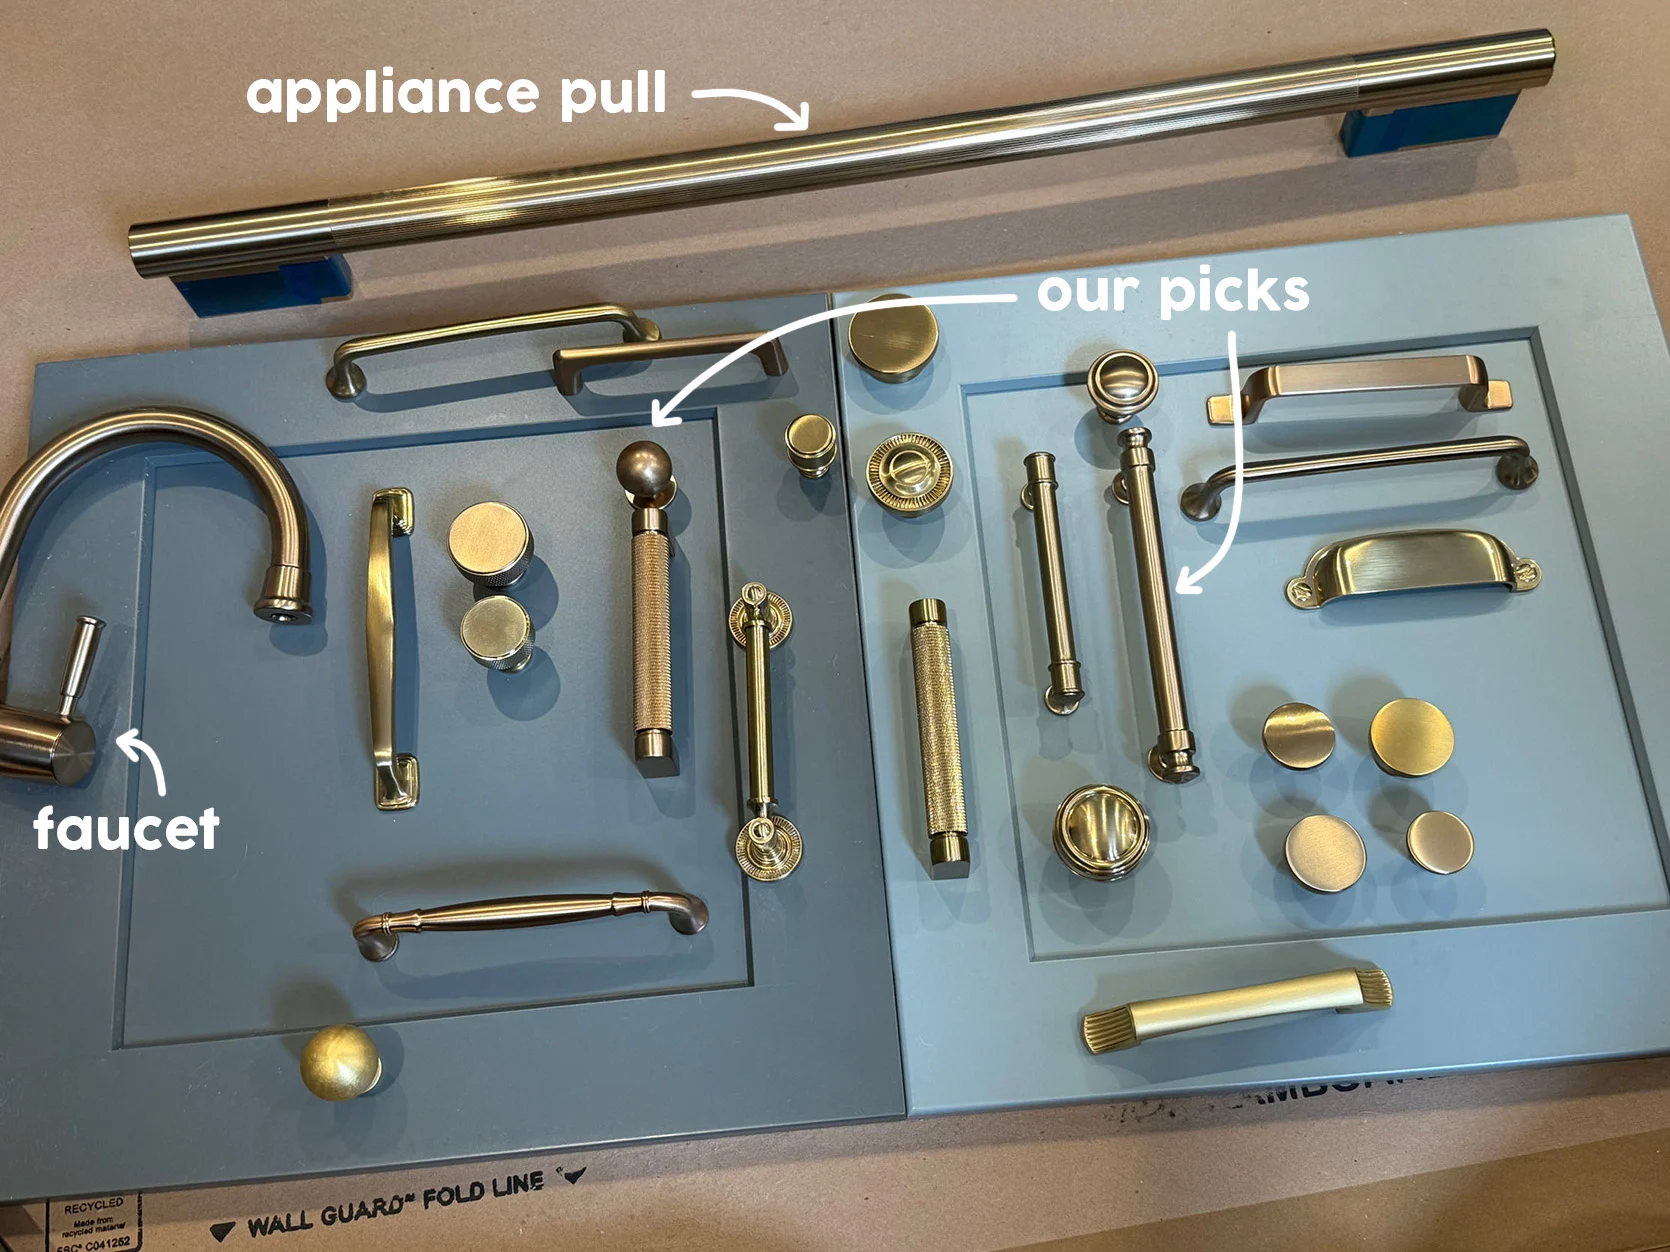
We went a bit overboard when it came to choosing the hardware for this kitchen. Between the brass appliance pulls, pendant light, and plumbing fixtures, we wanted to make sure all the finishes worked well together. Because “champagne bronze” doesn’t always translate the same across brands, this meant ordering a bunch to test out. I think Gretch ordered something like 30 different options between knobs and pulls in varying shades of brass to see what would look best in both finish and style. I wouldn’t say you need to order as many to feel good about your choice, but it doesn’t hurt to have options, and we were pleasantly surprised by Lowe’s wide range and wanted to try a variety. And the rejects were very easy to return once we made our final selection.
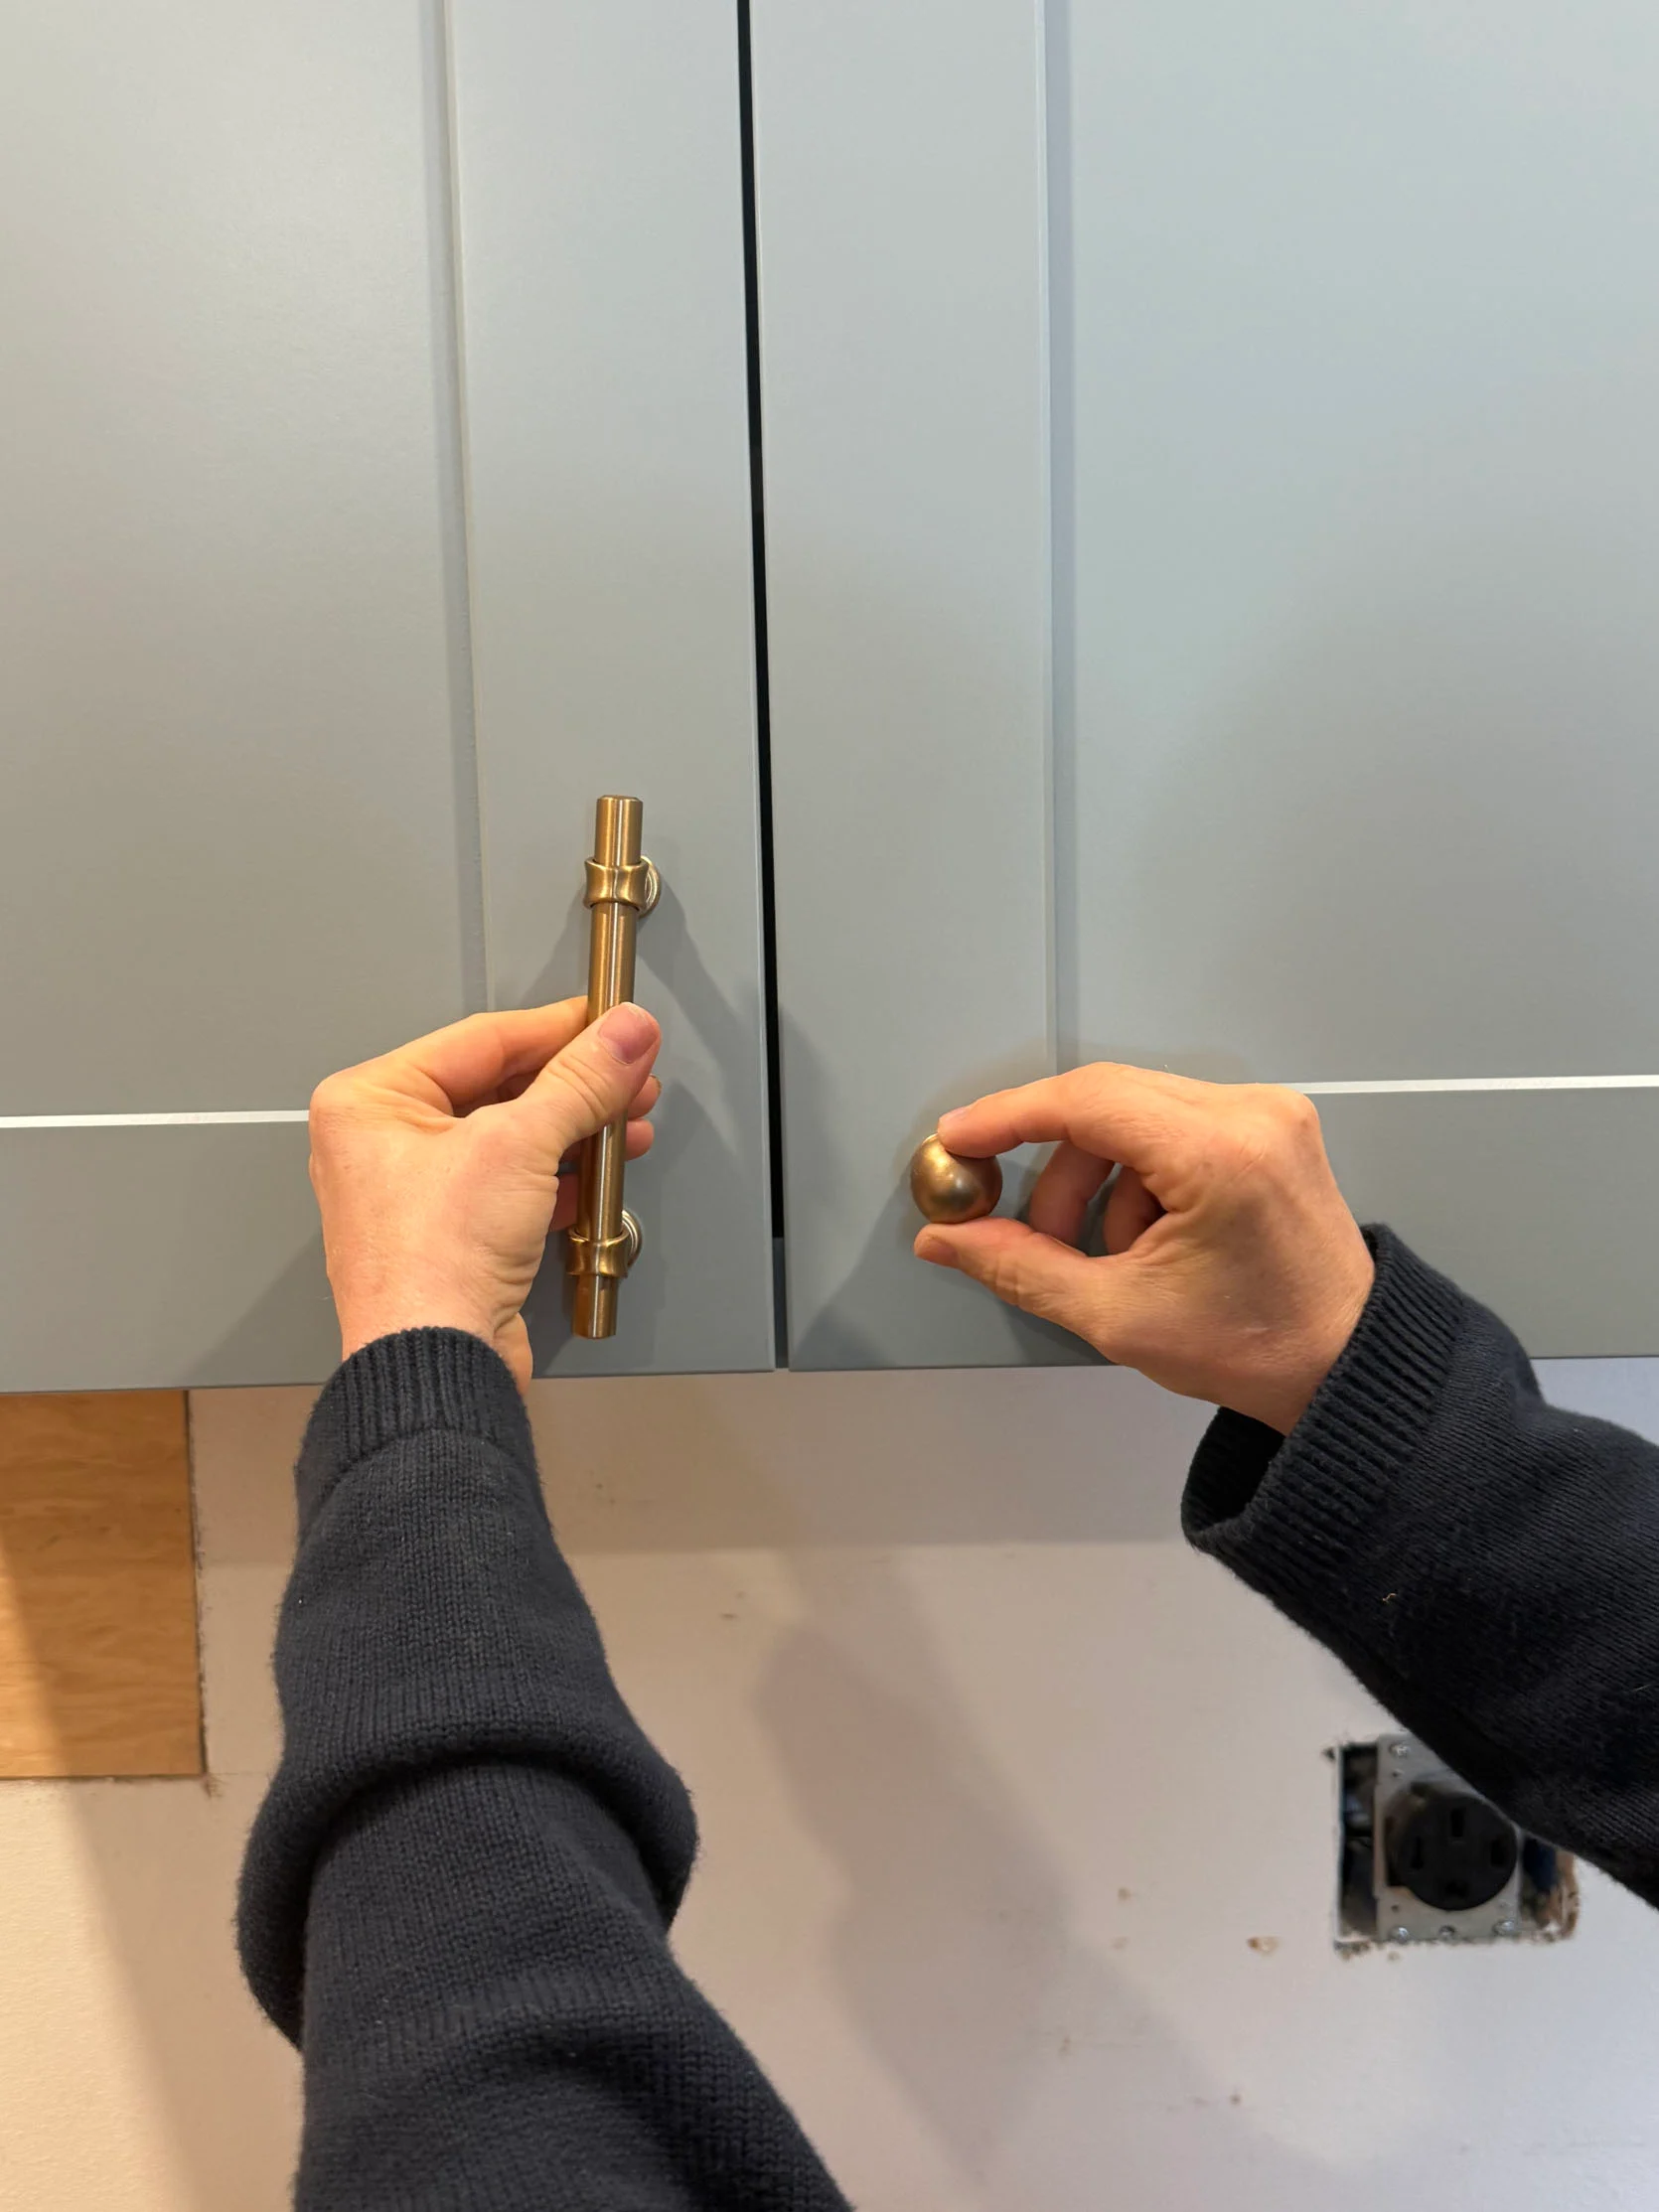
Short Drawer Pulls | Long Drawer Pulls | Knobs
To help a kitchen feel more high-end, I recommend using a mix of knobs and pulls throughout. We played around for a while to decide which knob or pull looked and functioned best, based on the type of cabinet (a heavy pull-out spice drawer works well with a sturdy handle, but an upper cabinet pulls easily with a single small knob). On the larger drawers, we opted for a mix of double knobs and larger drawer pulls. Mixing sizes, styles, shapes, and placement across all cabinetry helps the kitchen feel more designed rather than choosing the same handle for everything. But you do you! Some may like a more streamlined selection, but I gravitate toward a collection. If you’re feeling stuck and need some inspiration, we wrote this post all about hardware placement just for you.
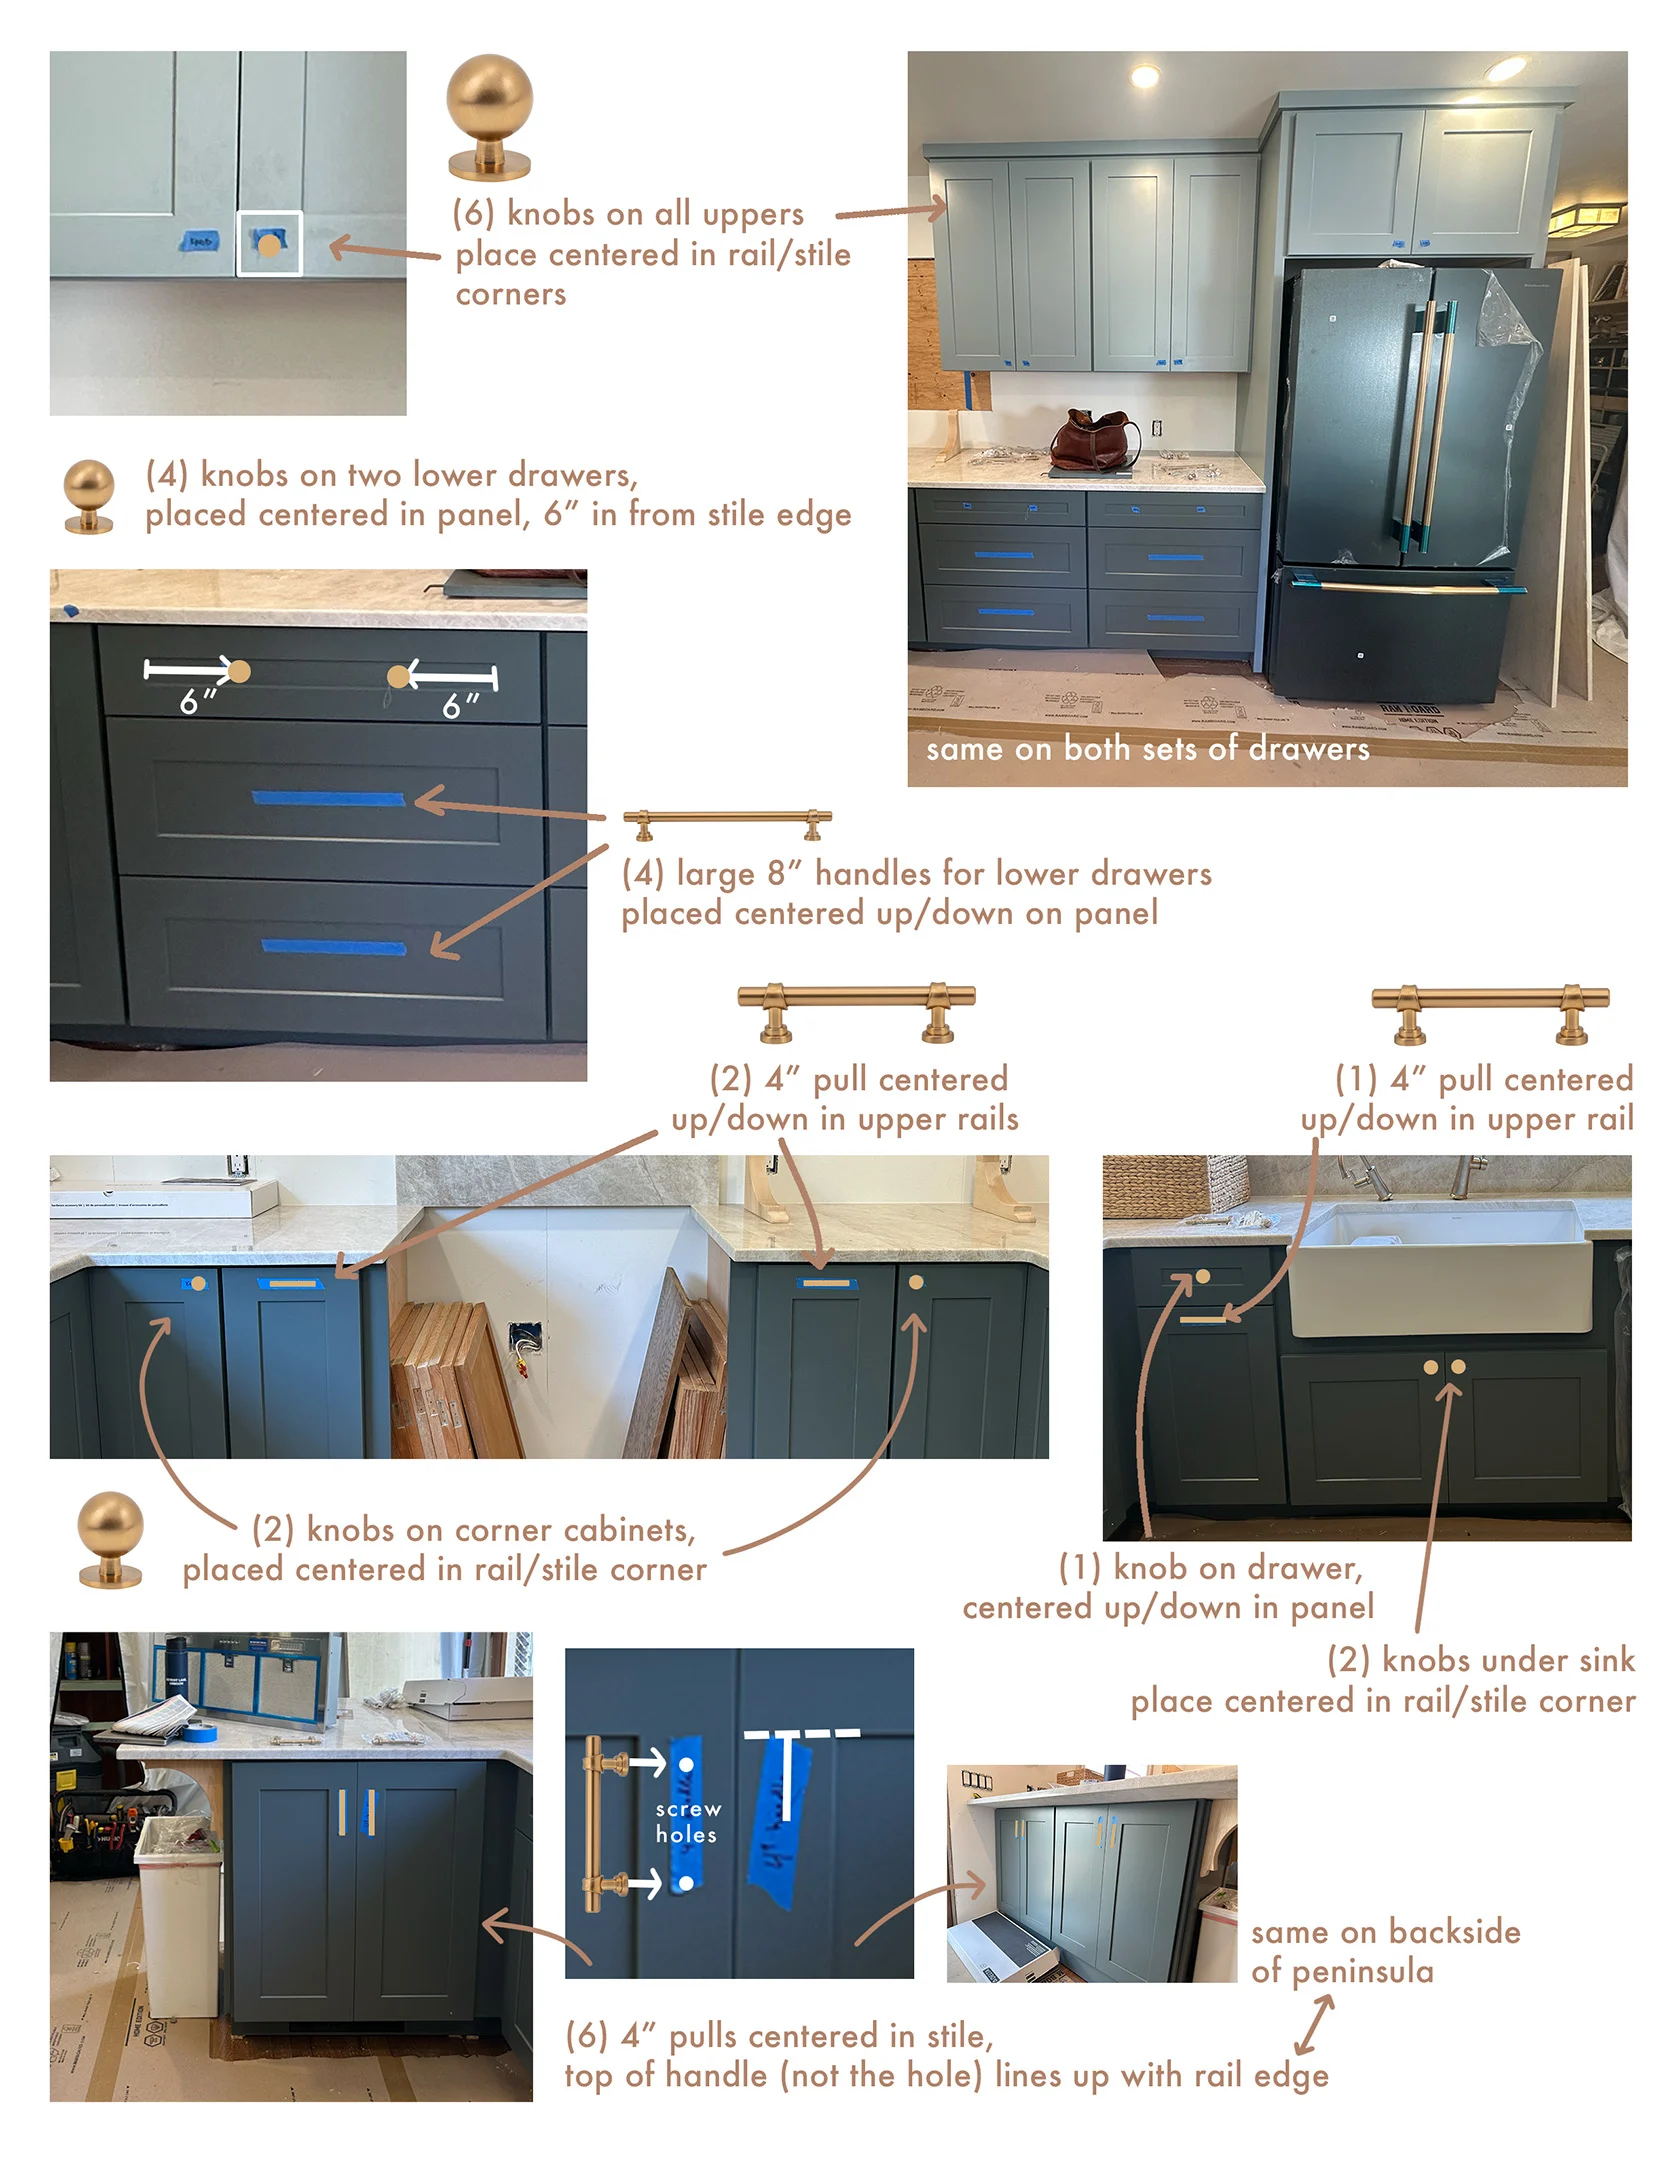
For this kitchen, we went with a more traditional placement, centering the knobs in the corners of the face frame. But knobs and pulls on drawers were treated differently than knobs and pulls on cabinets, and pull placement on cabinets varied based on orientation. I recommend creating a sort of map for yourself or your installer to keep all your placement choices straight. Get specific with your measurements and placements, noting when it’s a knob, 4″ or 8″ pull. You’ll thank me later.
So How Much Did We Spend?
Here’s the official cost breakdown for just the cabinets. Next week we will dive into the overall budget for the kitchen. On hardware alone, we spent $326.46. That covers 15 knobs, 8 short pulls, and 4 long pulls. Cabinetry is where we spend the bulk of our budget.
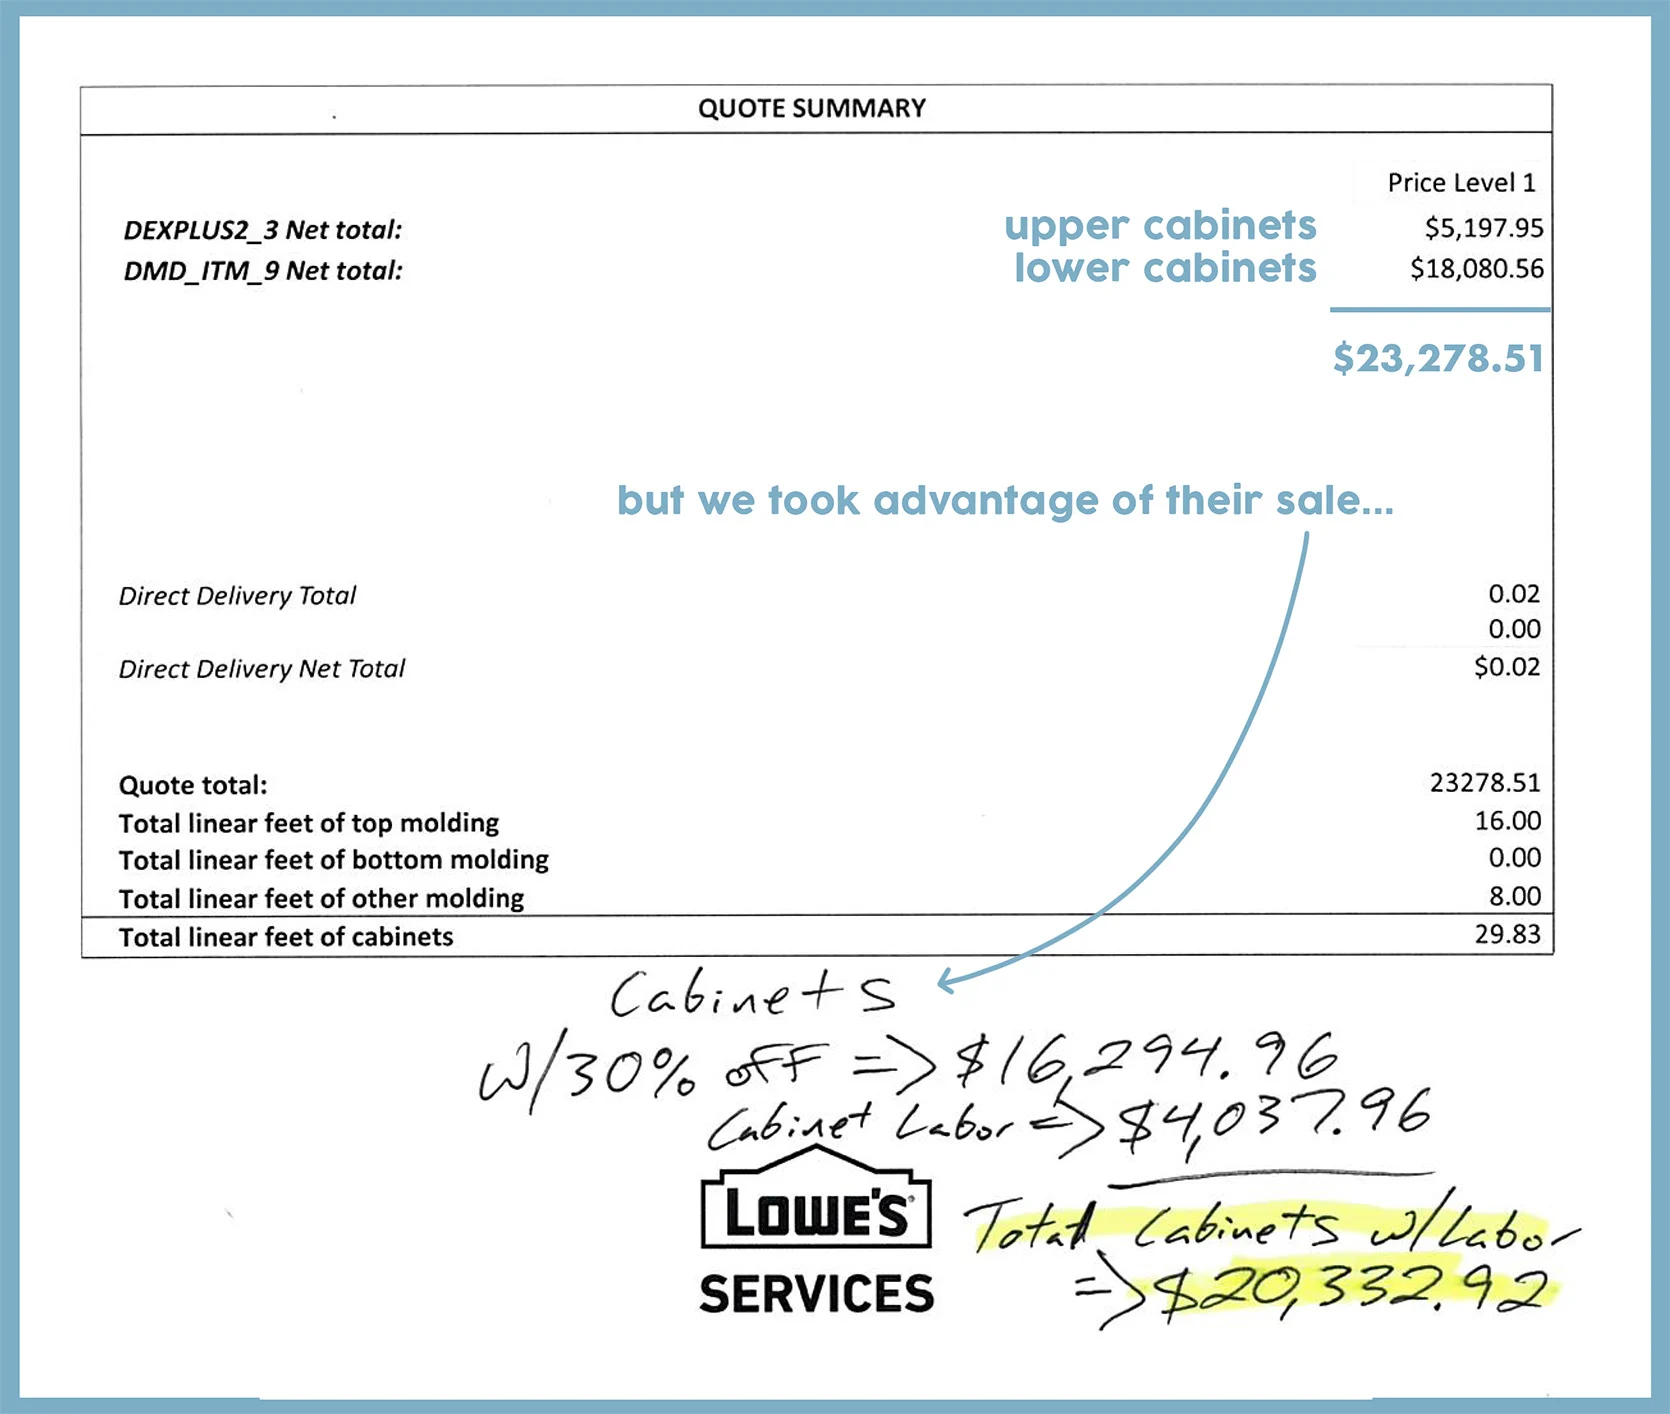
The upper cabinets totaled $5,197.95. These were from a more mid-range line, Diamond Express, and we required fewer uppers since it was always our plan to have open shelving and a large vintage cabinet they’d use for their pantry. The lower cabinets came in at $18,080.56, and because we wanted a specific color only available in Diamond Intermediate, these were a step up in price. But thankfully Lowe’s was running a 30% off sale, so our cabinet total dropped from $23,278.51 to $16,294.96. Labor was an additional $4,037.96, but it was worth every penny for the ease of having the Lowe’s kitchen cabinetry team handle the install. All in, we spent a total of $20,332.92 ($20,659.38 if we’re including hardware).
Next week, we’ll dive into the overall kitchen budget, detailing costs of stone, hardwood floors, appliances, etc., and I’ll be sharing my thoughts on the best times to splurge vs. save. Let us know what else you’d like us to touch on with this kitchen. If you have any questions, put them in the comments and we’ll do our best to answer them! xx
*Photos by Kaitlin Green
Subscribe
0 Comments
Oldest