
The Lake House, Post #3
Stuff is going down at The lake house. Figuratively and literally (click on link to check out the first two lake house posts). I hate showing ‘before’ and ‘progress’ pics without ‘afters.’ It’s like wine tasting where you taste it and then spit it into a bucket – sure, still kinda fun, but ultimately very unsatisfying (not to mention uncivilized and disgusting). No climax. No cathartic release. No fun at all. But I’ll do it anyway. I’m a masochist (and a sadist, sorry) like that. (ooh, ‘Design Masochism’ could be a great new name for the show….no?)
ANYWAY,
Here is your taste (or tease….or torture):
Before:
Nobody is living here right now, that’s why its messy – my computer, my potato chips and bottle of water are making them look like shut-ins, but it was our mess. And this is all the staged furniture – not the homeowners. It was all just staged to sell the house, then left there to be the new homeowners burden (it is now all donated).
The major problems:
Laminate flooring. It’s a bummer. It doesn’t look bad in these picturs, but it looked really cheap in person. I get it, it’s inexpensive. I used it in my office redo last week, but it’s a rental and I wanted a $150 update. I would always save up for real or engineered wood in my purchased home before using this quality of laminate – which is very, very low quality. It looked like vinyl stickers (I know there are some better quality better looking laminates out there, so if you have laminate don’t hate yourself, most of it is not this bad).

The brick and beams: Those beams are wood underneath but they are painted brown, not stained. I hate it when people paint wood brown. It would be like painting me white, its just not necessary; i already got that covered. It (I) just needs some pretty stain (or makeup) to enhance it. But stripping and staining is way more labor intensive than just painting over, so that is getting painted all white.
Everything needed to be freshened up to create the airy, casual feeling that we wanted, and nothing does that faster than white paint.

The cabinetry, the hardware (look how big that handle on the drawer) the color of the wood on the door….. THE TILE ON THE WALL! There are a LOT of finishes happening here. Here’s a secret – try to limit the amount of finishes in your house to just a few – aka, you don’t need a different floor for your kitchen if it shares the same space as the living room – just keep the wood going. But using so many different tiles looks sooo messy. Its just like a color palette – the more colors you add the more hectic it will look.
Calm down, house.
Oh and also this house is apparently in Greece, as is indicated by the greek column. Very grand and not random at all.
Never do that. Even with a gun to your head. It’s not worth it.
But the open layout is great. And the architectural details are good – brick, beams, huge ass windows…its potential is HUGE. But it just needed some ‘secrets’. (aka, white paint, new flooring, new cabinetry and new furntiure, accessories, color and love).
So here is where we were a month ago (6 weeks or so into the renovation).
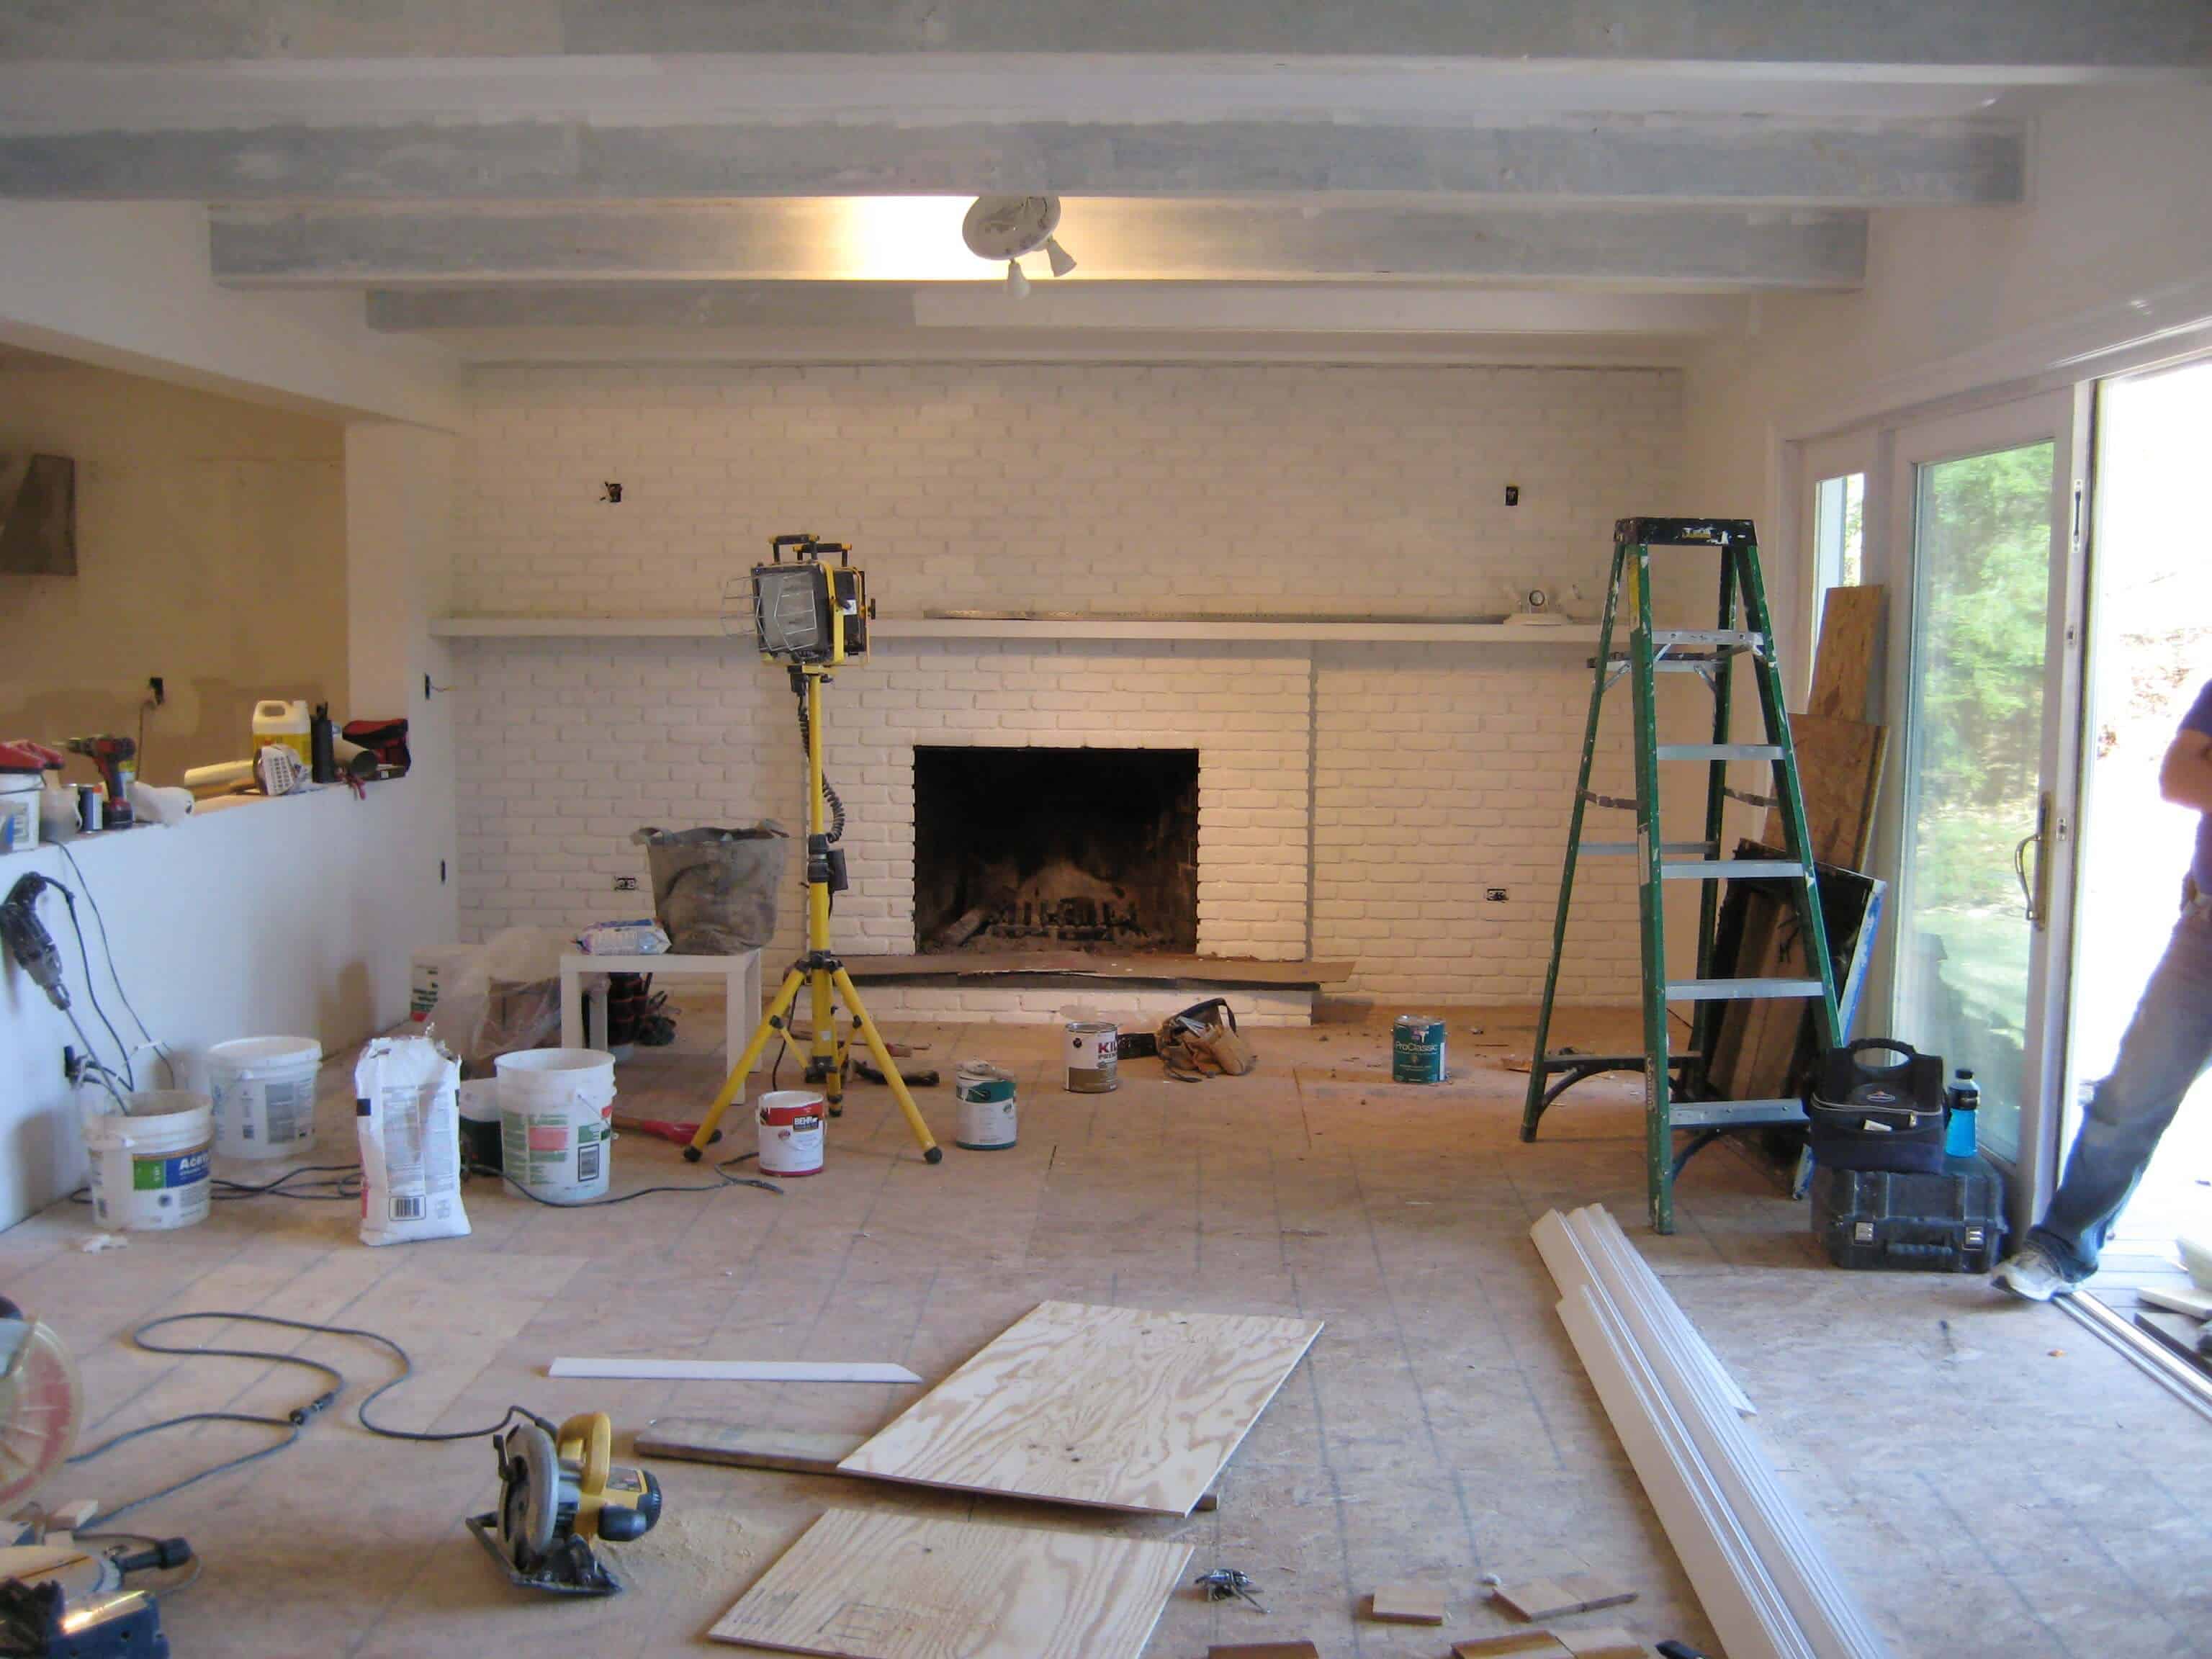
Stuff everywhere, but already so much better. White, bright, airy and so much less busy. Remember that the less contrast in a house, the less busyness, and the less hectic energy flowing there. We are bringing in contrast in the furniture and accessories, but we wanted the foundation to feel calm and peaceful and easy – this is their weekend escape from their hectic New York life. So I had to equalize and calm down all the finishes to calm down the energy. We want it to feel energetic, but not hectic – a hard but good balance to strike.
Here’s what I did:
Painted the brick and beams white – looks like here there was only one coat in thes pics, but there are two coats now. I used Benjamin Moore’s ‘Super Bright White’, because it doesn’t get much whiter than that. I used semi gloss on the beams and brick, and flat finish on the walls. At this point I hadn’t painted the hearth because the stone was nice and I wanted to see how it looked, but after everything else was painted white it looked super random and weird so it is now painted.
The flooring is prepped here (above, the laminate is taken out) and we put in radiant heating which looks like this underneath:

Previously there were these extremely unattractive wall heaters everywhere that looked like this:

Thats the master bedroom before we removed the heaters. But they were everywhere downstairs as well. It sadly gave the homeowner nightmares, and we can’t have that.
Radiant heating basically just means that the floor is heated – that all the heat comes up from the floor. It’s efficient, smart, luxurious, etc, and yes not cheap (about $12, 000 for labor and materials). But there is no better time to do it than when you are replacing flooring – you have to rip up your floor to do it. This wasn’t in the original plan and it caused us to have to up the budget, but for resale it was crucial that they did this, and like I said, it was now or never.
Meanwhile in the kitchen, we lowered that ledge behind the sink. It was strangely high and cutting off the room. There wasn’t enough space for a big counter with a lip for a bar area anyway – we wanted the sofa to face the lake, so it needs to go there and it’s going to take up most of the space, just giving like a foot of space behind it.
Wow, buuuuuuuusy. I have no idea what they were thinking with this flip: fake granite, stone tile, weird different tile flooring, laminate, brick, maple cabinets….there is no consistency, no coherence, no design plan here at all.
We faced out our grecian column to be a simple white beam (they’ve since cancelled their toga themes house warming party) – the contractor just tore down the facade of the beam and built a wood box around the load bearing beam underneath.
The kitchen which was huge and extremely cheaply done is now demo’d and we find out that it was previously two rooms and there are washer and dryer hookups in the back and clearly it needed to be two room. So we had to reconfigure our cabinet plans (Yes, they were already ordered and being built…. this is what you call a massive ‘hiccup’ that kept me from sleeping, but ended up working out).

That hole in the ceiling is the plumbing being prepped for a clawfoot tub in the middle of the master bedroom directly upstairs….YES! It’s an awesome big old tub from Victoria and Albert.
Hello, big ass beautiful raw wood mirror. Aren’t you just opening up the space even more and reflecting light everywhere whilst making a huge statement? Why, yes you are.
So here are some sneak peeks into whats happening elsewhere in the house:

White cesarastone, light blue penny tile backsplash (from nemo tile), brushed brass hardware (from Restoration hardware on their 50% off sale, not sure if there are any left), white shaker cabinets (from Jilco Cabinetry – extremely good service, helpful guys)…. open, airy, bright, modern with a classic vintage vibe. Our goals were timeless, but stylish and I didn’t want them to have to touch it if they wanted to sell it in 7 years.

Ooooooh, we have some green going on in the kids bathroom, yes we do.
I’m going back May 1st for the first install – meaning the house should be totally done – construction-wise, and we can start decorating – which frankly is the most fun part. But even seeing it transformed this much gets me super excited.
Frequently asked questions:
What is the budget? Sorry, it’s not my money so i’m not talking about it. But it’s a very reasonable budget for a lot of vintage pieces, splurges here and there and supplemented with big box stores and thrift stores. It’s a casual lake house for a casual family so nothing is too expensive or high end.
How long has it taken? We started demo in early February and should be done May 1st. 3 Months. Which is not bad considering it was almost a gut renovation. We have almost every major piece of furniture ordered and ready to be delivered, but it could take another few weeks after that to really make it feel finished in the space.
How do I design a house in New York from Los Angeles? Its not ideal, honestly, but I have a great project manager there, Lana (check her blog) who handles the day to day and checks up on the house, coordinates with the contractor (who is great) and then I go out there around 7-8 days a month – sometimes two short trips sometimes one longer trip. Yes, travel is part of our contract.
I can’t tell you how excited I am to get over there and start decorating. As many of you probably know from renovating your own house, that renovating is stressful and serious and expensive. Every house is different, every house has its own quirks, needs, etc and there are so many things that can go wrong – and not in a ‘this lampshade is too big’ kind of way. More in a ‘your foundation is weak’ or, ‘you have mold’, or ‘the water heater won’t heat enough water to fill that huge bathtub that you want to put in’ kind of way. I’ll be so glad when it’s just a beautiful blank canvas for me to do my magic on.
Now its your turn to share your biggest renovation ‘hiccups’. Comment away, it will make us all feel better because it happens to the best of us.
To see the Lake House project from the beginning take a look here: Lake House Post #1 | Lake House Post #2 | Lake House Post #4 | Lake House Post #5 | Lake House Post #6 | Lake House Featurein Country Living | The Lake House Makeover – Kitchen Edition