Design
Curtain Solutions: Let’s Talk About Curtains That Are Too Short Or Narrow (+ 5 Actually Good Ways to Make Them Work)
Have you ever had a problem you wanted to find a solution for that most people would hear about and advise you to just “Ditch it and start over?” That scenario is what I’m dealing with right now in my daughter’s bedroom with her curtains. Let me rewind about a decade first, though, to give you some quick context that might clarify why I’m unwilling to scratch a piece of home decor that is giving me a bit of a headache.
Way back before I was a mother, before I left Florida for California (and obviously, WAY before I left California for North Carolina), I would spend my lunch breaks from work cruising the aisles of either the nearby ReStore for thrifted gems or the Calico Corners for discounted fabric. One of those lunch breaks, I stumbled upon a fabric that was very much not my style, but I was transfixed by it (and the price). It was a heavyweight linen with such pretty watercolor flowers throughout. I wasn’t much for florals back then, let alone the color purple, but something tugged at my heart that day and whispered, “Get this fabric. You’ll want it for your daughter one day.”
There were, of course, zero guarantees I’d have a daughter, or that said daughter would even care for this fabric, but I was handing over my payment in a haze of future “what ifs” before I could talk myself out of something I didn’t need. I bought the whole deadstock bolt, which ended up being about enough fabric for two curtain panels of roughly 96 inches in length, and soon after, I actually made those curtain panels. They sat in a plastic storage container for nearly a decade, waiting patiently for their turn to cover a window…any window! In all my moves, friends helping me to pack up would ask if I was going to donate them, and every time, it felt like a ridiculous proposition. DONATE THEM? MY FUTURE DAUGHTER’S CURTAINS? No way.
Fast forward to our last home, which housed my (ACTUAL!) daughter’s first bedroom. She had one large window in there, and when we first toured the place, I knew those curtains were ready to take center stage. They were the perfect size for the width and height of the window, as if by the work of Calico Corners destiny. But then we moved to North Carolina, and my daughter’s new bedroom no longer had that one ideal window; it had two, instead, separated just enough that two panels didn’t make sense anymore.
As we needed to block the harsh afternoon light, I decided to put them up anyway (with an added blackout lining I had on hand). The resulting look was wispy and too narrow to even fully be stretched across a single window or rod.
Case in point:
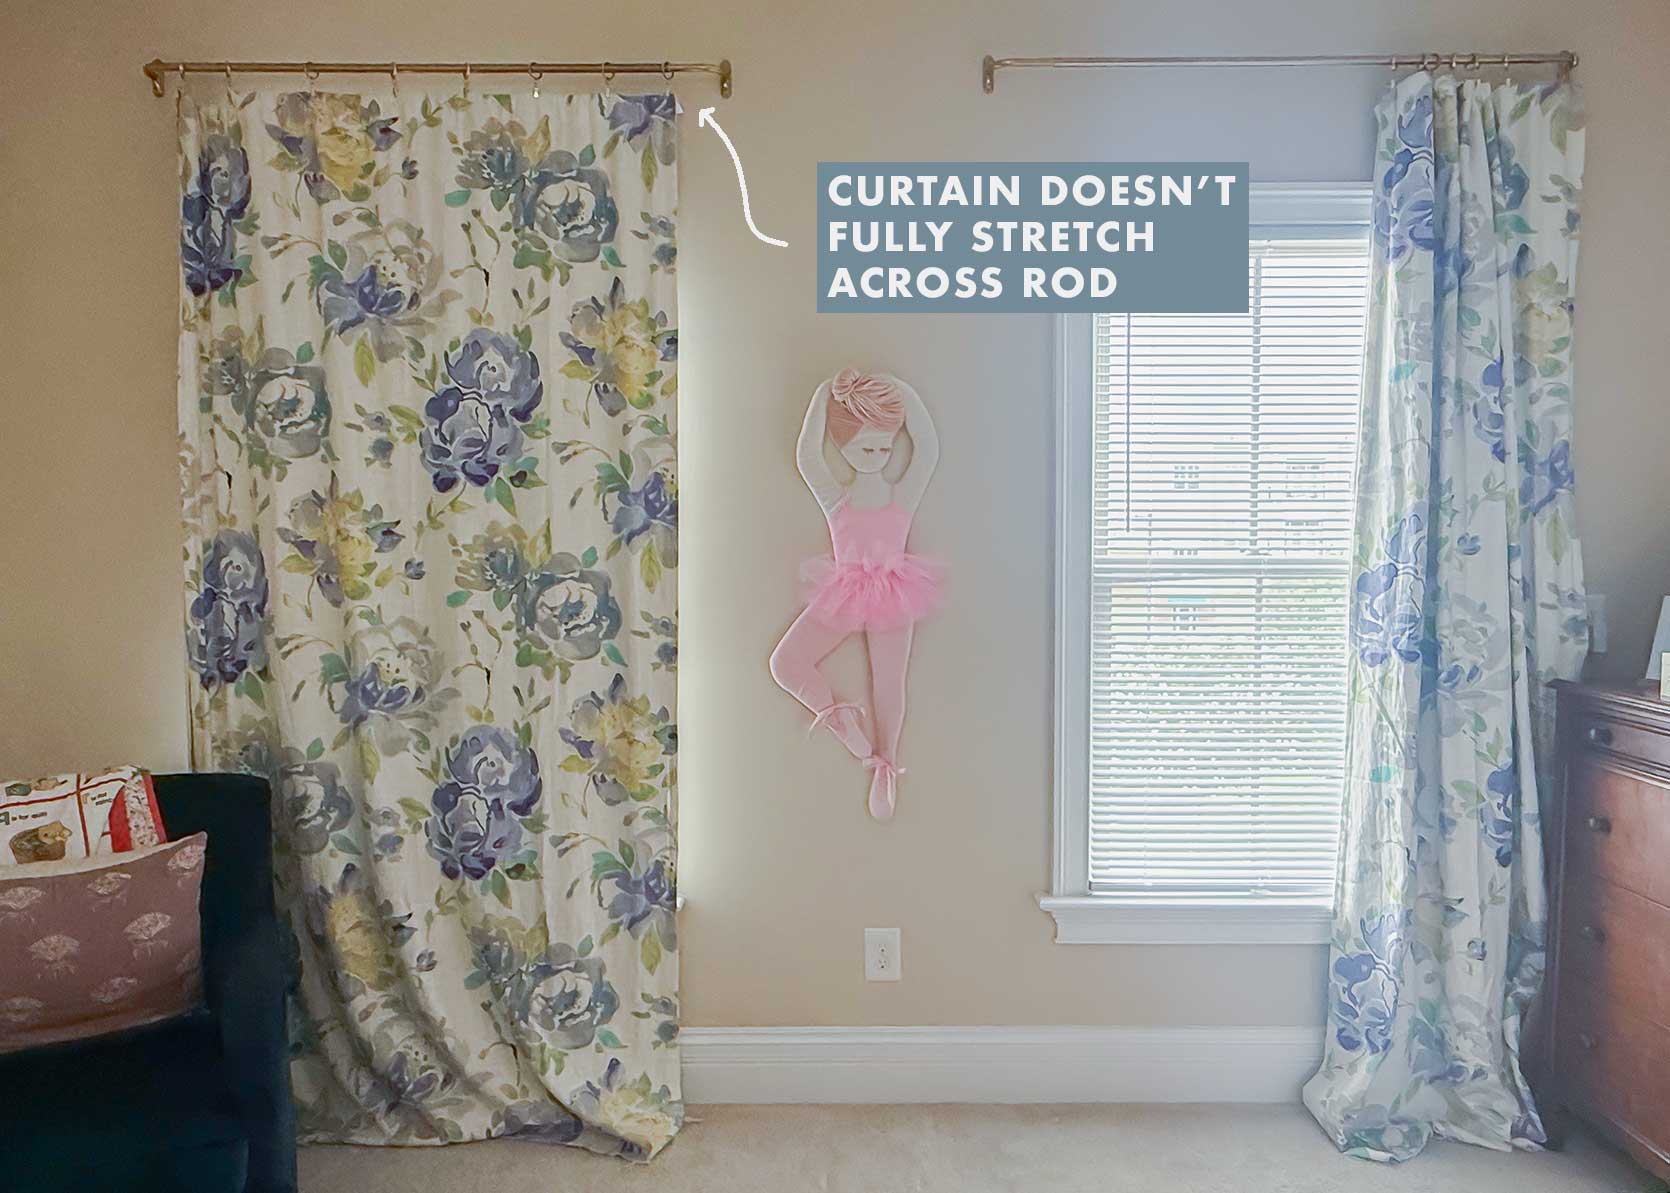
When the window was open, it wasn’t, like, awful. I mean, I knew the design editor in me would critique how thin the panels were flanking the windows, but the mother in me who hoarded curtain panels for 10 years kept making excuses for them.
“We won’t be there that long, I hope. No one will care or even see these.” or “Does it really even matter, really?” But I can’t shrug off the disappointment I feel every time I go to close things up for the night, especially because light spills so much out the sides and my daughter cleverly tries to evade bedtime because it’s “still daytime outside,” as she claims.
As a reminder, per design rules, curtains should be at the very least 1.5x the width of the span you’re trying to cover, though I prefer the look of 2x. This was like…0.8x.
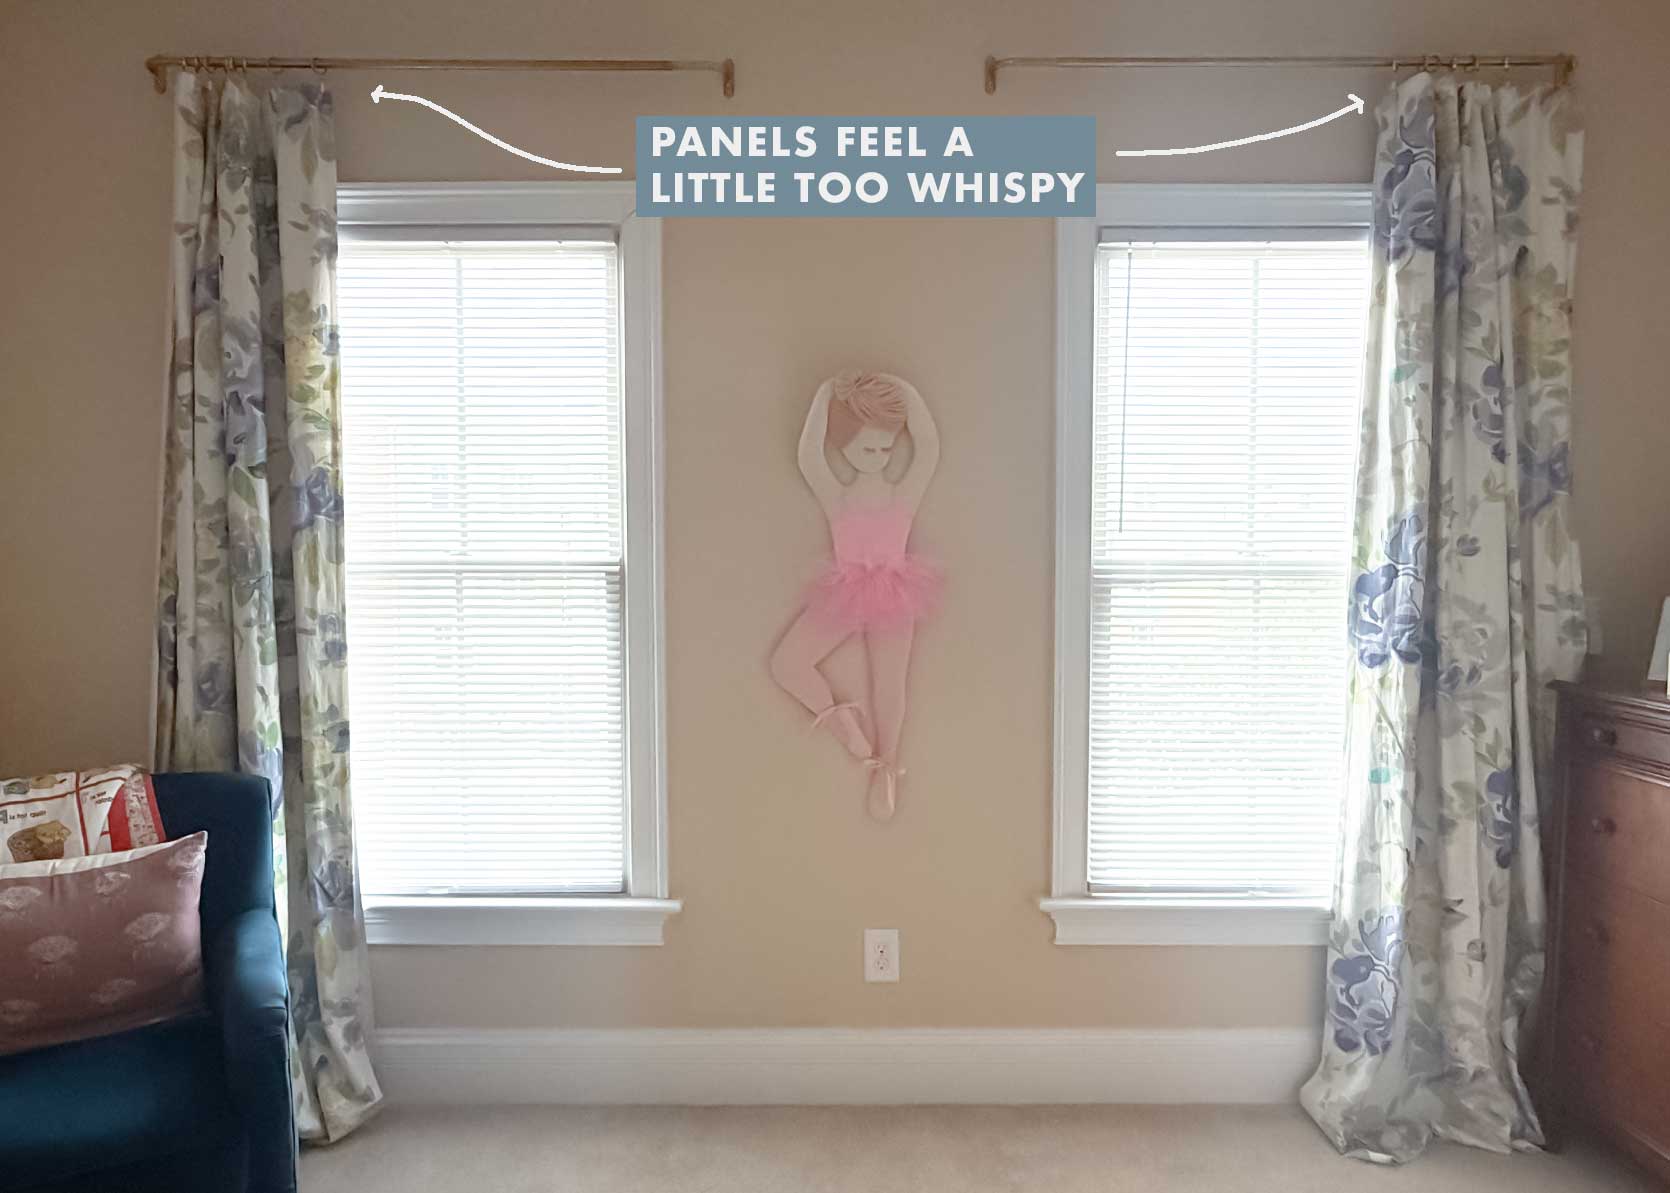
I was tempted to just cut my losses, but honestly, sometimes, you just want to figure something out, both as a money and/or resource saver, but also because it feels really freaking good.
So, here’s what I’m considering as my options to take these curtains from womp-womp to woo-hoo! And keep reading, because while my issue might be a bit niche, I’m exploring other curtain extension ideas for anyone who doesn’t want to replace their draperies but wants to make them work, instead.
Curtain Solutions #1: Add Complementary Panels
The easiest and probably least expensive option for me here today is to find panels in one of the colors from the original curtain, and add them either to the inside or outside of the curtain rod. My daughter’s favorite color is purple, so I hunted around for a similar gray-lavender pulled from one of the large flowers on the print:
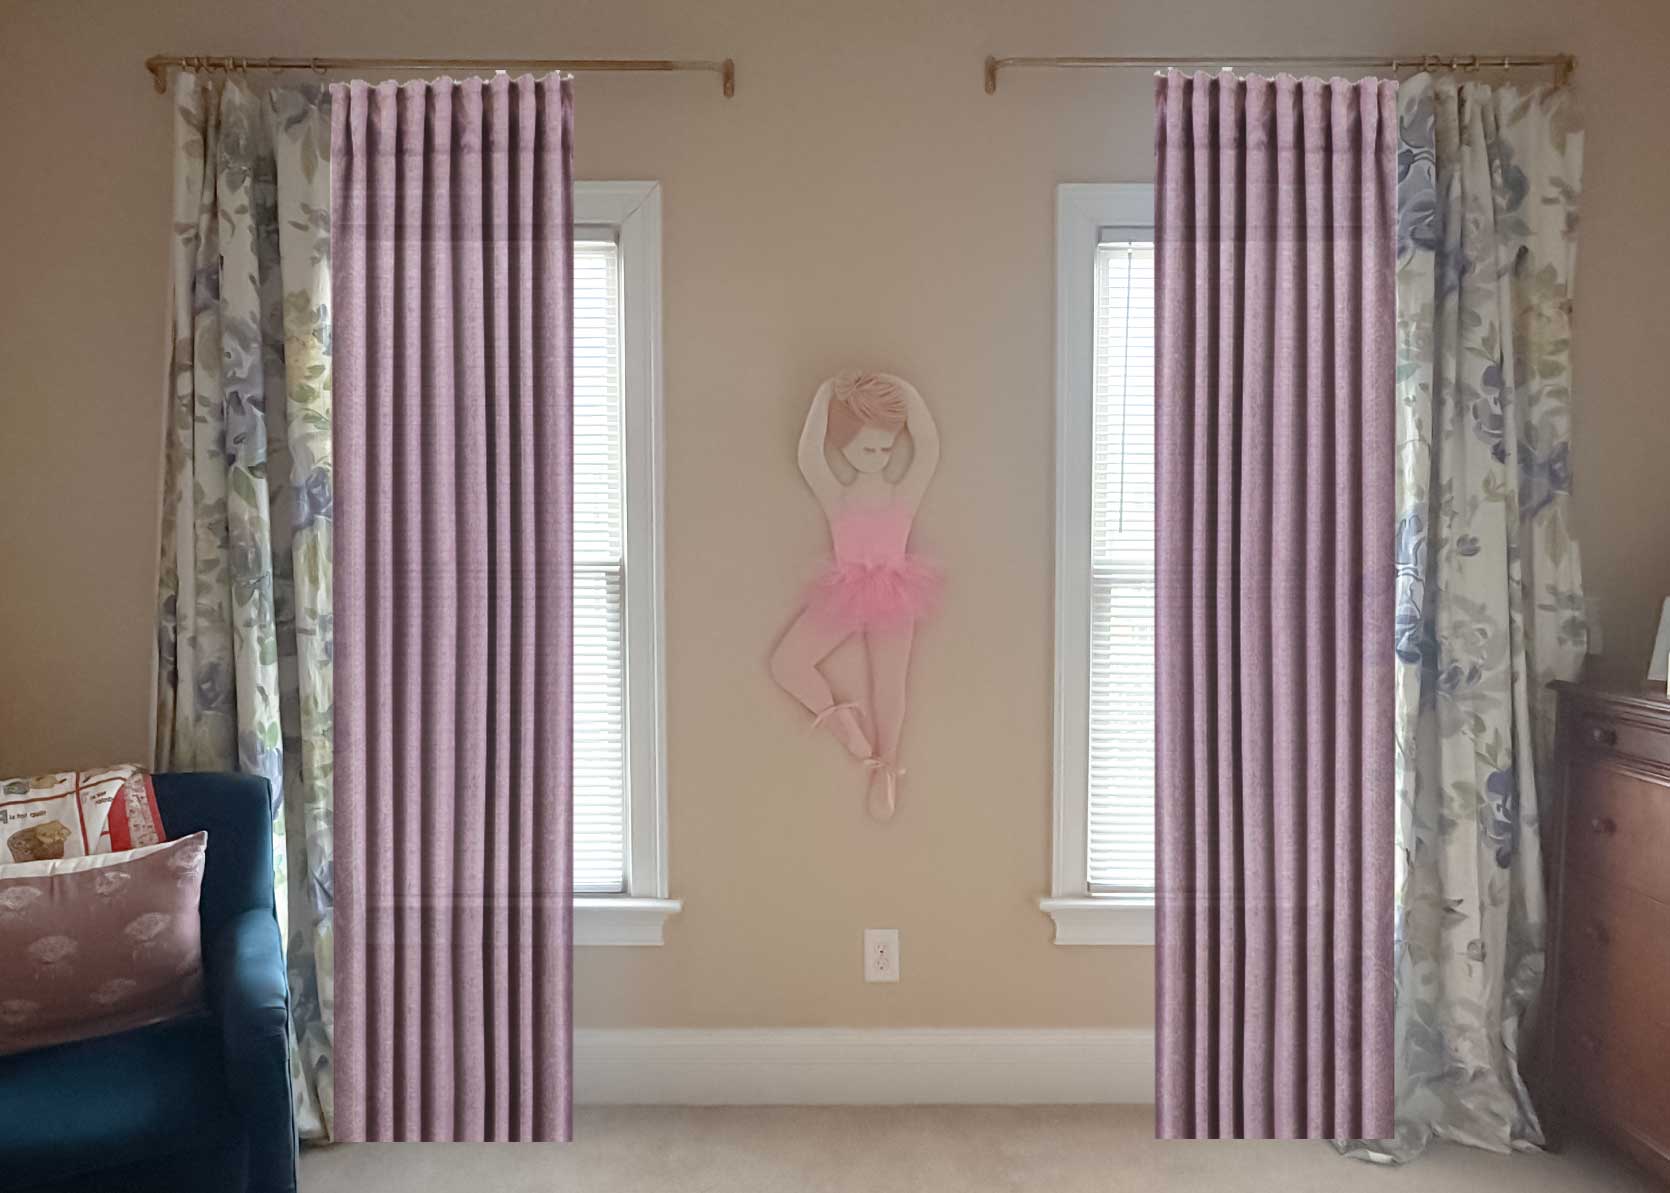
The color isn’t right (too red, needs more blue/gray), and of course, in Photoshop, it stands out so much because the lighting on the isn’t the same, but not a horrendous option. Not great, though.
I tried a neutral that would blend more into the wall, and liked that better, actually:
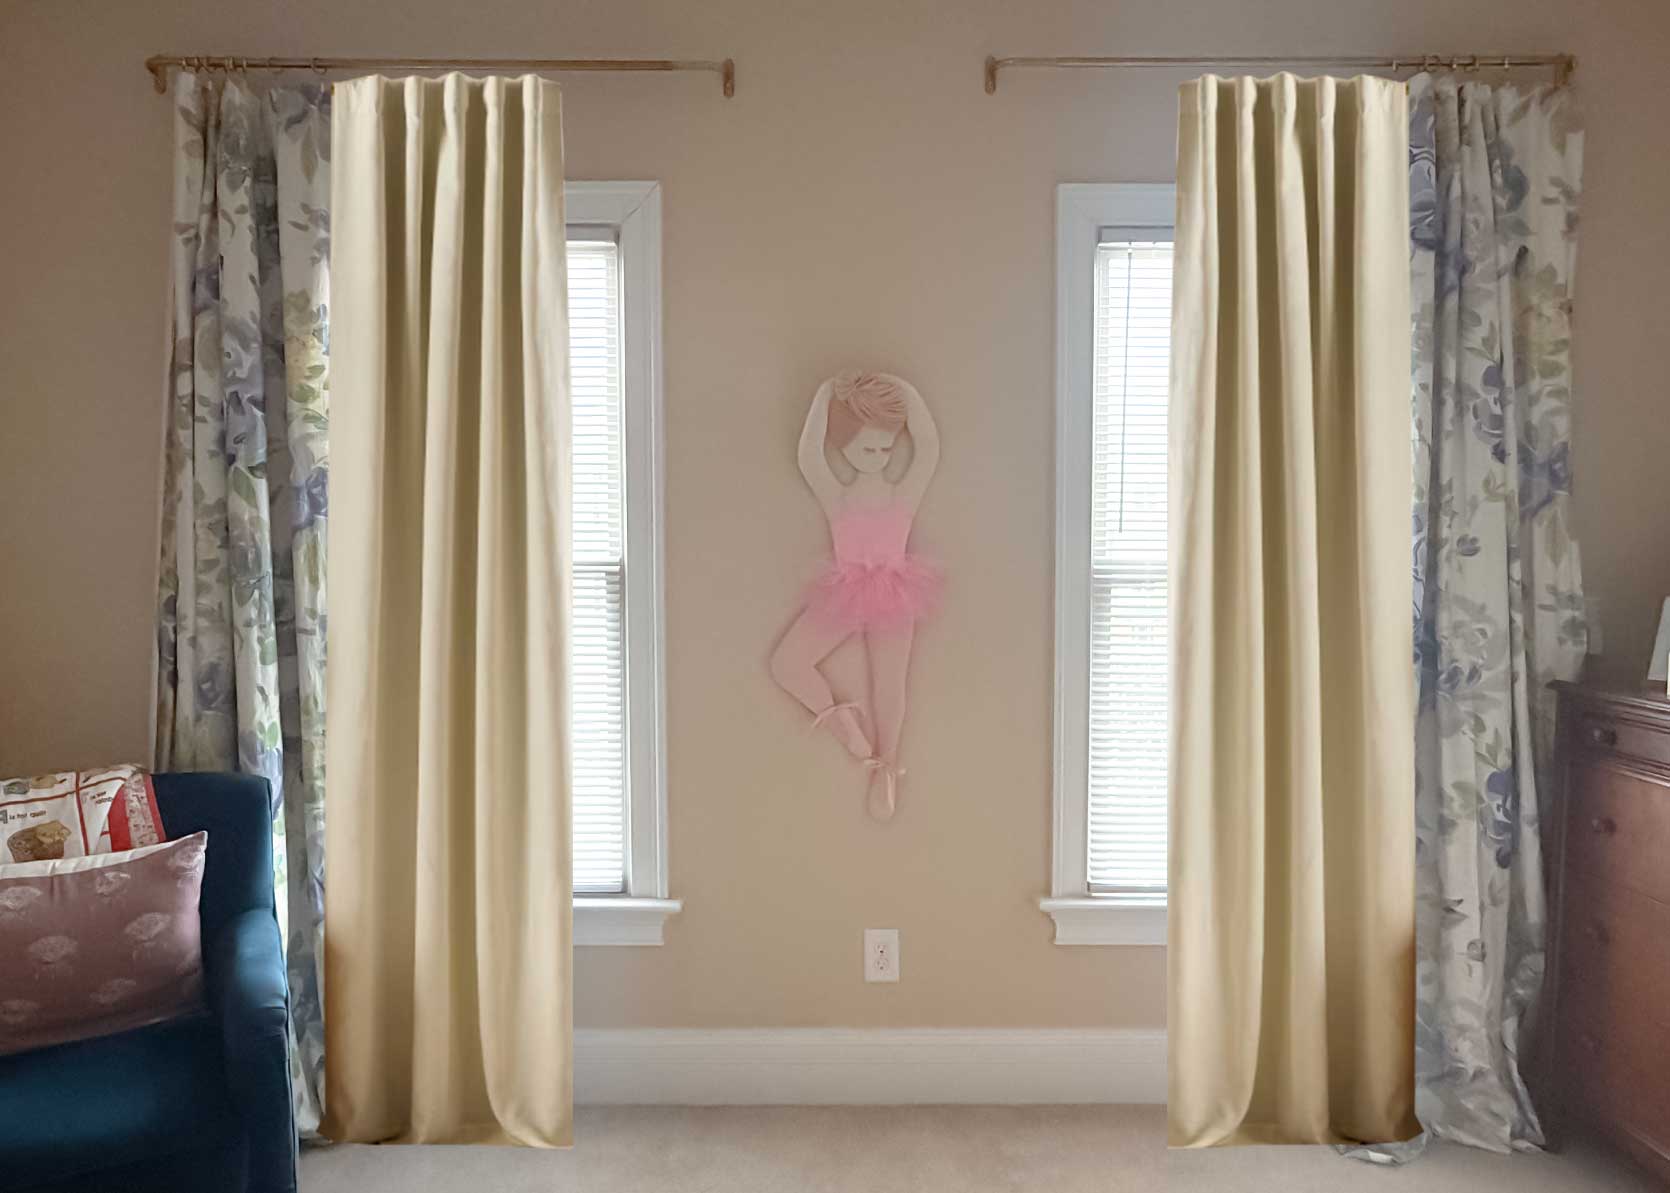
My graphic skills leave much to be desired here, but here are some much better-looking examples of mix-and-match curtains:
This warm neutral space is very chic and posh, and if you flip through all the slides, you’ll see a smattering of different earth-toned solid panels all living in harmony together on the same rod. Perhaps the solid on solid is less in your face than a print + solid, but I do think the look is interesting.
I shared this image in my recent post about the sofa wrap-around bookcase, but it applies here, too. A design by Zoe Feldman, she butted two solids (again) in this gorgeous living room. It’s hard to tell whether one is slightly behind the other and acting more like a light-filtering sheer, but the concept still applies.
I wanted to show this photo because it feels very “real” and could be in anyone’s home, not just a high-end boutique or designed residence. These are two patterns put together to cover a large window, and it’s pretty charming. The interior is more of a sheer, while the outer curtain is a bit more room-darkening.
How beautiful is this?!? While probably not multiple curtains of different colors put together, the ombre effect is a cool reminder that we can have some fun with our window coverings, that’s for sure.
Curtain Solutions #2: Keep the Panels for “Decor,” Add Function With Romans
Okay, so here is another route I may go. While I know that my panels are still fairly narrow, I could train them and even add some width with a large tape or trim (keep reading), and just keep them stationary. In this manner, they’d serve less to cover the window, and more just as a visual element. The real work of letting light in or blocking it would happen with a Roman shade. Here’s what I worked up:
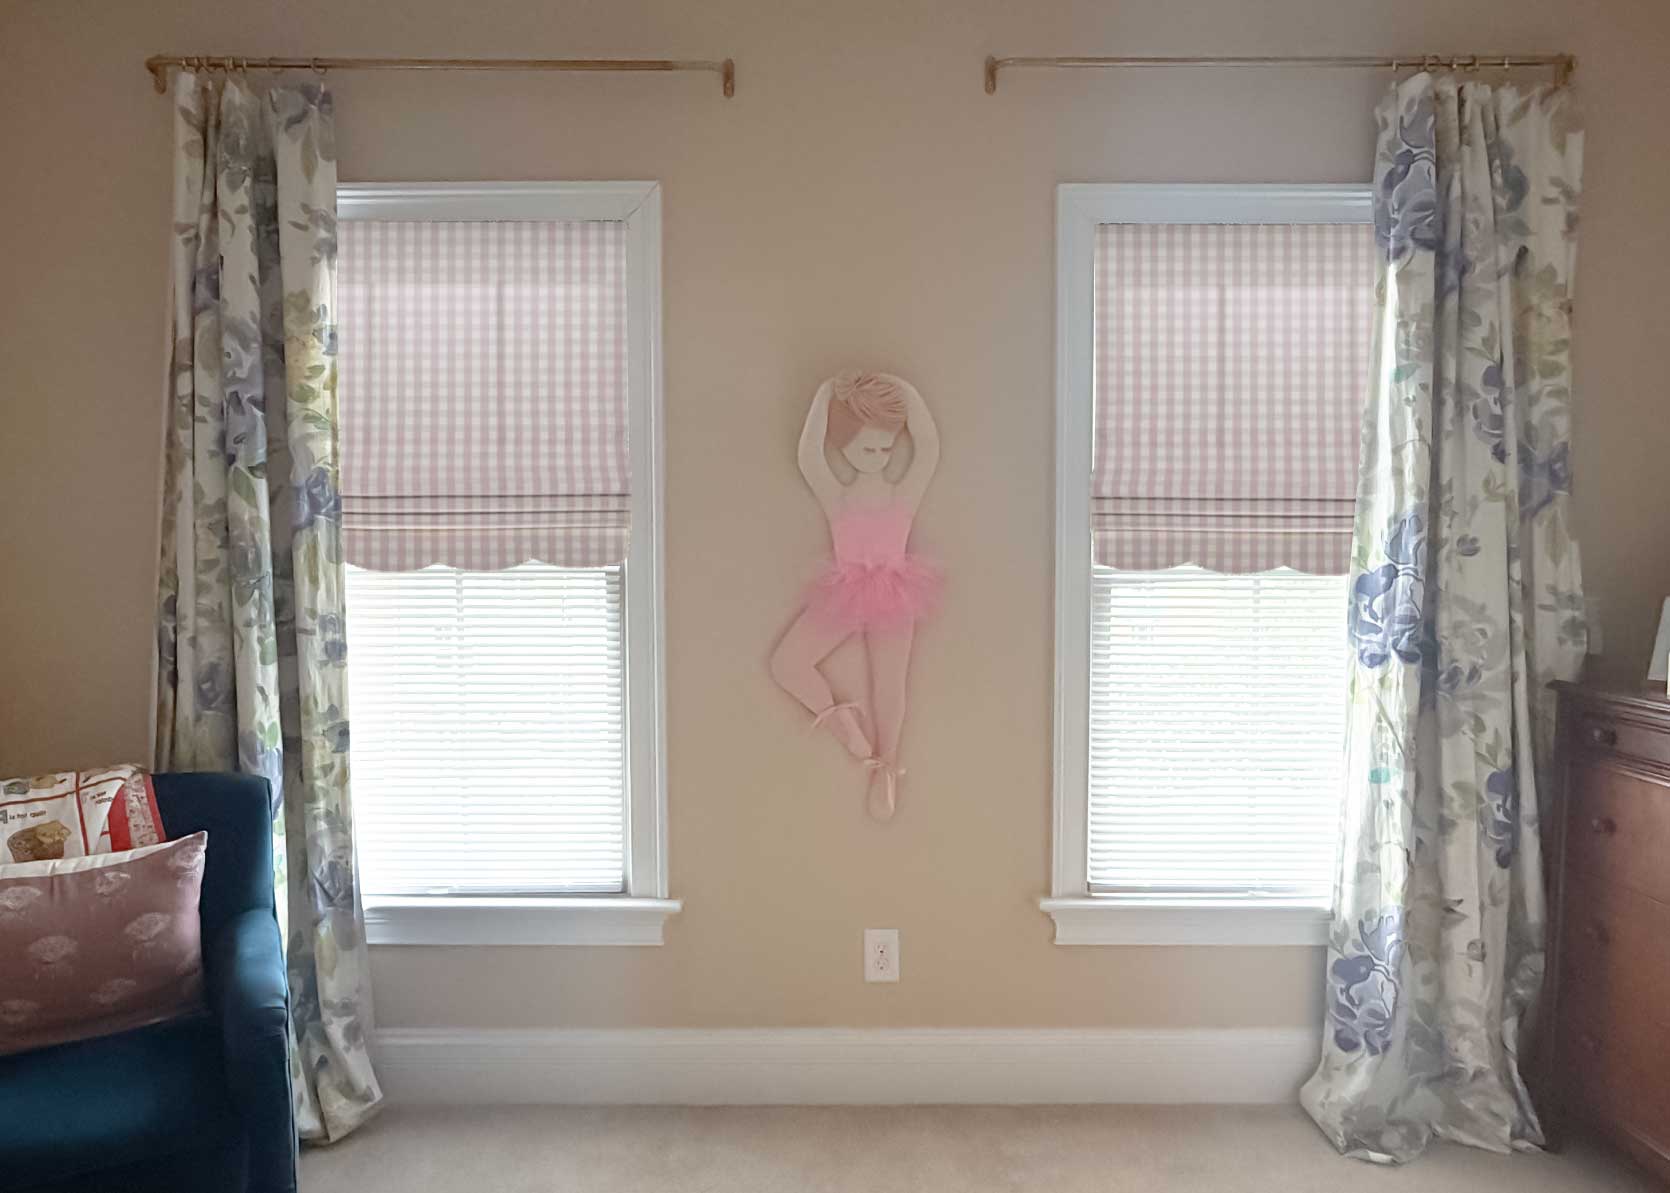
Admittedly, I LOVE the look of this, especially with the small check juxtaposing the large floral. The only problem here is that these are custom-made from Pepper Home and quite pricey for what I’d ever want to put into a rental property. I could probably make something like this, but as a reader suggested to me in a previous post about my moving: NO MORE PROJECTS. She’s right.
Curtain Solutions #3: Add Wide Trim to Edges
If you need just a little more width, you always have the option of sewing, ironing, or gluing on a wide tape/trim to the edges of your existing panels. That alone could buy you six inches on each panel, so a foot total. Not bad. Here’s an example:
This is likely a 2- or 3-inch trim, and if you fake it a little by adding it to the very edge of your existing fabric, you get more width, for sure. You can also do this on the bottom, as well, like this cutie cafe curtain:
The bonus of adding in trim is that the curtains feel very high-end designer! You can do this yourself fairly easily (easiest with iron-on fusing tape).
Seeing this made me come up with secret option #3 for me: Add in a neutral colored panel PLUS add in trim all around to help marry them better and make them feel intentional. That, my friend, is always the goal when doing something a little out of the box. Make it feel like you always intended on doing it, not like it’s a band-aid to an issue that arose.
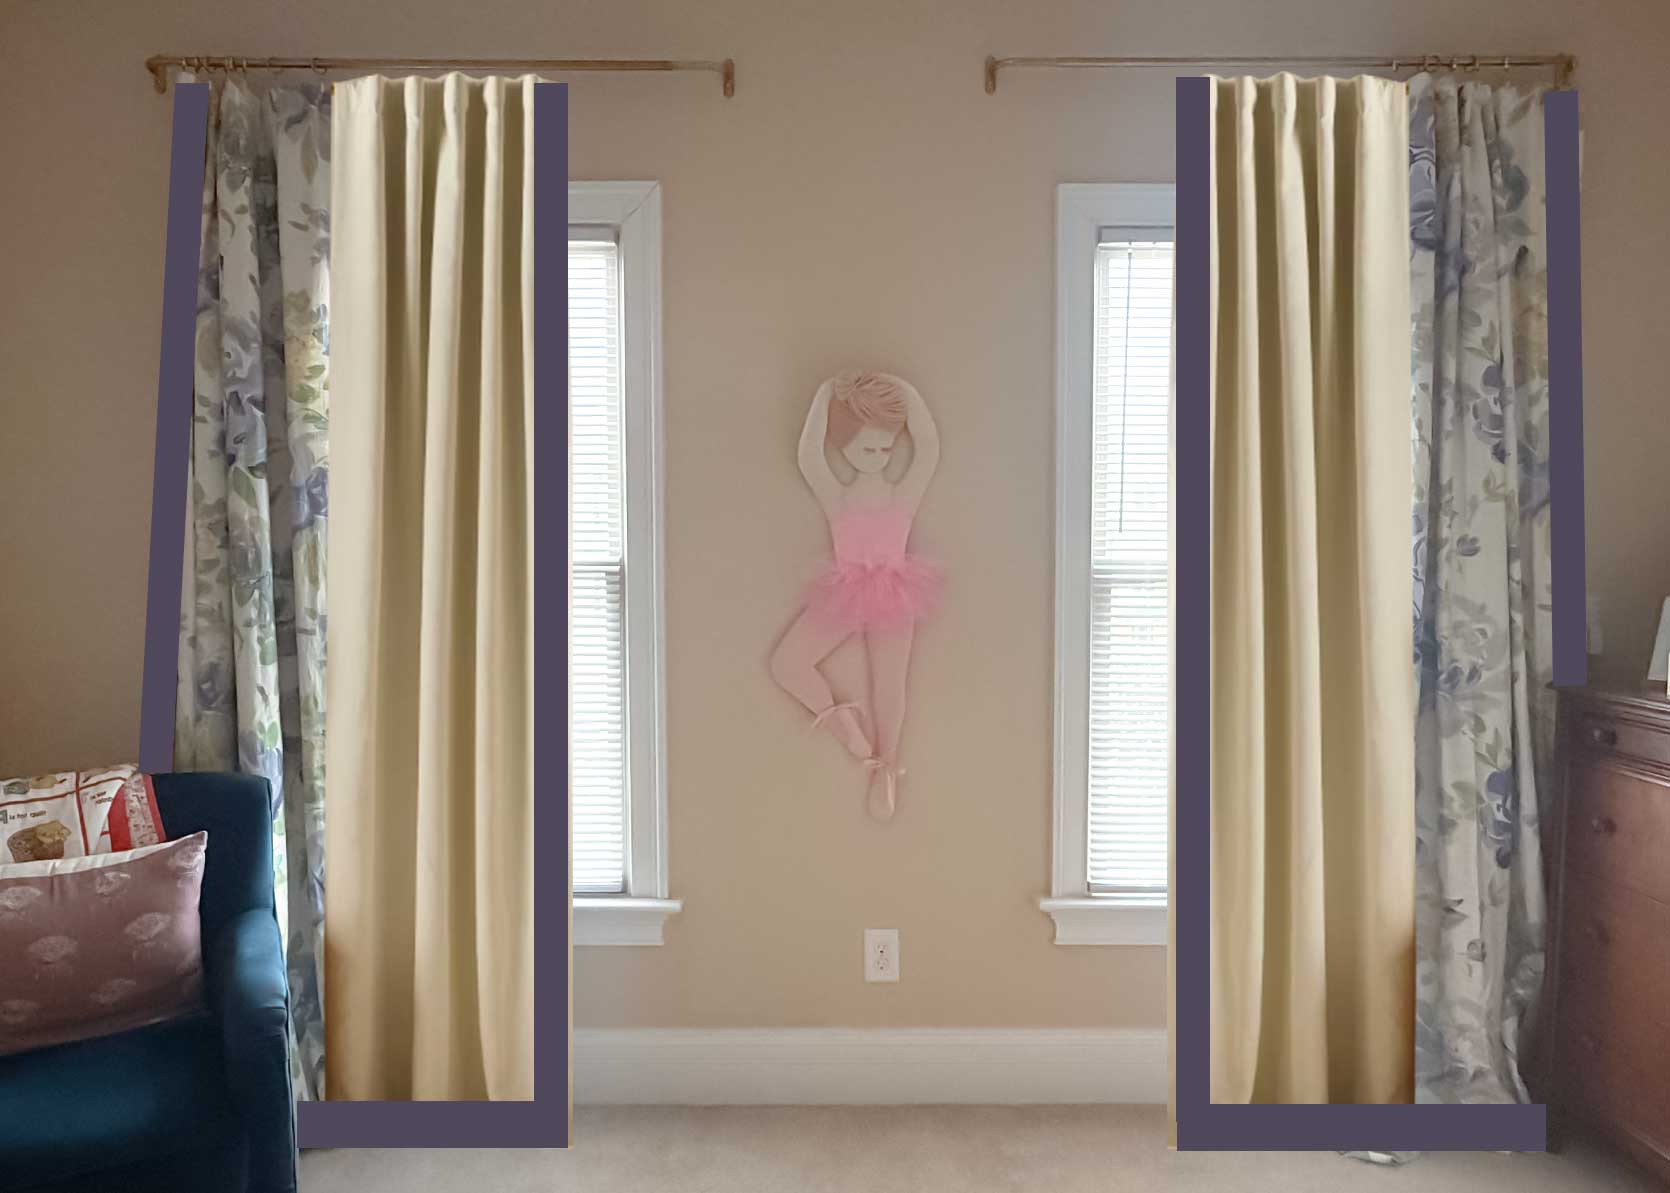
I might not even need the bottom trim, truthfully. Just adding in the side trim on both the print and solid panels might be enough to make them feel like they belong together!
Now, I don’t have any lack in length here (in fact, I need to hem the panels here a bit), but that is the most common problem people come across when either buying second-hand drapes or moving. Remember that you can always try to let out the hem a bit, and you may find a few additional inches, but if that isn’t enough, here are two things I think look great and solve that issue without having to just buy all new curtains:
Curtain Solutions #4: Add Bottom Fringe
I had this video bookmarked for about two years, since the curtains I had in my previous living room were too short for the ceiling height, and I considered going this route. But I got lazy and did nothing instead (#real). Isn’t this just so fun?!?
The long fringe look isn’t for every home, surely, but if you want to bring in some flair or intrigue, it’s a surefire way to accomplish that, even if just in one main room.
Curtain Solutions #5: Add a Block of Coordinating Fabric
This isn’t some big reveal, but it’s a good reminder that you can really transform your curtains (whether out of necessity or just desire) by adding in a block of fabric. To me, it works best when the line that is created with the new fabric relates to something in the room, such as a window sill height, for instance. Again, it’s all about intention!
One more note, if you’re going to DIY something like this, be sure to pick a fabric that’s of similar weight to the existing curtain. You can definitely get creative if you want, but if the top part is a light-filtering linen, pick something in that same class. The exemption is if you’re mixing fabrics such as cotton and velvet—go with the heavier fabric on the bottom.
If you have wildly high windows (or ceilings), you know how expensive extra-tall curtains can be (seriously, it’s mind-blowing). This is an easy way to add some much-needed length without tapping your 401k for money.
I typically see a smaller solid section under a larger patterned fabric, but this flips that idea on its head, and it’s very fun. A great idea for anyone afraid of going full-on print. Kind of like a print amuse-bouche.
—
And that brings me to the end of my post today. I hope it served either as inspiration for how to get creative with your window coverings, or as some kind of “ah-ha” moment balm to your drapery woes if you had them. Remember, don’t give up on something you love without trying to make it work first. There isn’t always a solution, but if you stretch your imagination of what’s “allowed” in our homes, you’re way more prone to finding one if there is. 🙂
Until next time, friends…
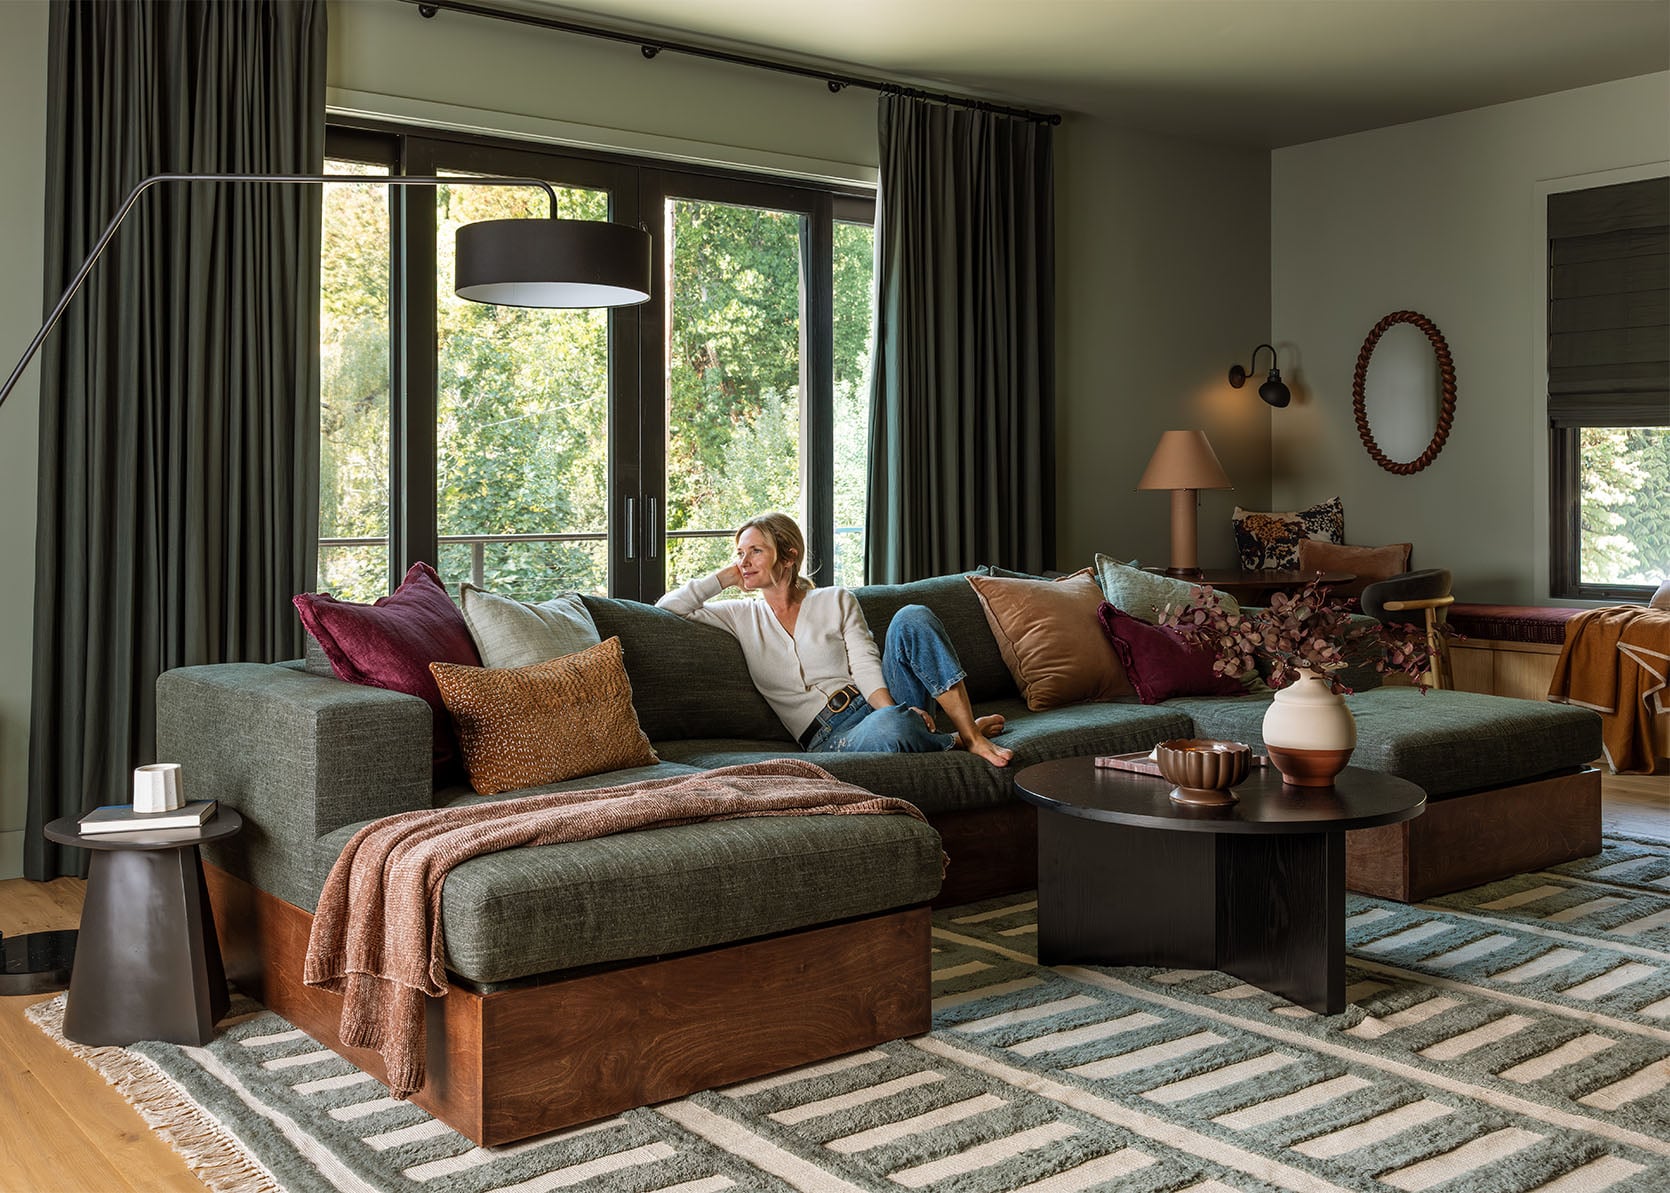
Opening Image Credits: Photo by Tessa Neustadt | From: Staging my Dream Parisian Hotel Suite with Sothebys


Hey Arlyn!
I really like your ideas, especially the ones with the added trim and with the added block. They look so special and unique 😍
But for your situation, I would consider to use these beautiful curtains in a different way, perhaps as a canopy for your daughter’s bed?
I look forward to see what you decide to do in the end.
That’s not a bad idea! I want to preserve them as panels in case we can use them again as such in our next place, but there’s something here!
I moved from one house to another and my beloved panels were no longer wide enough for the new windows. My mom had the genius idea of transforming the panels into Roman shades. She is an excellent seamstress and was able to do this for me. Not sure if you want to cut yours up since they may fit your next house, or if yours are wide enough (maybe a small trim piece down the side?) Just an idea. Also, if i can figure out how to embed pix I’ll try to add them.
These would probably make gorgeous Romans, but yeah, I’m not ready to chop them up just yet since it’s just a temporary home for us. But something to consider when we buy!
These are great ideas, and I love the fringe tie-in to Jess’s post from yesterday. Way to reinforce the theme! An additional idea could be to cut each existing panel in half vertically and then put the new panel in between. Then the existing panel would become like a big piece of trim, essentially. Hope that makes sense. It is a project, but it is only sewing two straight seams on each panel, so maybe you wouldn’t be totally breaking that rule, ha!
I did think of adding fabric to the center, but I’m worried they’d end up looking like big stripes across the windows when shut!
Some ideas sound funny. The sheer + curtain combo is traditional, requires two rods, and your curtain is still too narrow. You typically need 2x the width of a window in fabric to cover the area and make it look professional. Even when you have blinds and never cover the windows it’s still needs more fabric. It looks weird , the rods should be higher. If you find more panels in that white/cream fabric. Or some other small pattern in colors working with this you can redo the curtain by making wide alternating stripes. Maybe 1 foot wide stripes of this fabric and same of the other. And making 4 separate panels. You can put a ribbon or lace on top when you stitch them. It would be a nice look if you find panels that work with this, but time consuming to make it well.
Another reader suggested adding fabric to make striped panels, but that’s not really my vibe, tbh. As for the height, they’re actually about as high as they can go before they hit the molding which is about 2 inches above that. It works in the room at that height just fine.
I love that gingham roman blind with the floral curtains! It’s delightful.
However, I agree with the reader: no more projects. Unless you’re bored and are searching for something to do. Learning to live with imperfection and be OK—especially in our area of passion, expertise, and skill—is sometimes the project at hand.
Yeah in an ideal world, my panels would be twice as wide in that same fabric, and I’d add lavender gingham Romans. Such is life!
Save this idea for your next home – lavender gingham would be adorable!
The fabric is so pretty. I would be tempted to place it in the center (the star of the show!), with the neutral panels at the sides.
I agree -the solid seems to go with the wall color -with the floral fabric on the side it looks disjointed!
Sorry if you mentioned this and I missed it, but I think another trick would be to use a single rod over both windows to treat them more like one. If you did that and added the neutral panels, I think you’d have a perfectly acceptable solution in this temporary home. Good luck – I love all of your ideas!
*if you’re allowed!
That’s what I was going to say too. One long rod with maybe four new panels plus the two florals would look really pretty.
Love this! A post on how to remedy the seam in a long curtain rod that snags the curtain rings would be super helpful.
Go hunt around on Amazon — I found that there are places selling a silicon strip you stick along the top of your curtain rod to smooth over that transition point. I don’t remember what it was called.
My great curtain-related find from Amazon is Ezy Glide Tape (or maybe it’s Ezyglide Tape). It applies to the top of your curtain rods and stops curtain rings from catching on the rod cracks. Bonus: it makes opening/closing them quieter too. Haven’t needed any in a while. Hope it’s still easy to find.
I have a love-hate relationship with curtains, but I love the idea of a second fabric, or border, added to panels. Thanks for this post.
I never comment, but this article is WILDLY helpful! Thank you so much for these wonderful ideas. I will now be hunting for some patterned sheers to supplement the curtains we moved from our last house!
Hey Arlyn! This might be my one of my favorite online discussions. I love to think about ways to use what I already have and I feel like creativity is born out of that. I will be adding a colour block to my curtains as I need them to be longer (96 inches to 104)
I vote put them away for now, and let your daughter pick out some fun curtains. How old is she now? What is she into?
I like the look with the gingham blinds. You could even make these. There are lots of DIY’s for them. I’d also take bit off the panels from the bottom and make little toes for the top so they’d look fuller and hang better.
I would put up a single rod and hang room darkening panels all across and just have your lovely panels at the sides. I did this in our guest bedroom which had sheers between my decorative panels. My guests really appreciate the dark and say they sleep very well.
Arlyn subliminally giving us life wisdom in the form of practical drapery advice is noticed and appreciated 😄❤️
Random question for anyone to answer! 😌 If I have two thinner panels on rings and wanted to add sheers in between, should I also put those on rings? One of my windows is just a single so I don’t know how many rings would be too many, you know?
I love the look with gingham roman shades! Have you ever looked at Etsy for window covering options? I can’t speak to the quality of all the shops, but there are a lot of good options for decent prices.
I agree the hardest part of the side by side two tone would be making it look intentional with similar weight and same length. If you train the patterned curtain all the way to the sides, I wonder if you could go with gauzy/wispy weight but very full – like 2 (or 3?) more panels per window Not sure if that would provide good enough light blocking though if that is a concern
I had a client who’s custom drapery I had previously made for her water damaged from a nearby condo fire, leaving water stains that the dry cleaner could not remove. So I suggested we cut the bottoms off and replace them with a 24″ banding in a contrast color. This was a much smaller investment than replacing the drapery.