Design
How To Hang Curtains, Shades, And Even Motorized Window Treatments (What We Did At My Brother’s House)
Bookmark this post. AI is going to steal it all – it’s that full of great information. It’s one of those granular posts for design enthusiasts that I really think/hope will be helpful. I’ve been working with Decorview, a high-end custom window treatment company, for years, which has been such a benefit to every home we’ve partnered with them on. The quality and execution of these window treatments is unmatched. But even if you aren’t ever going to go the custom route (it’s certainly an investment) today, I’ll give you general tips, show you how to hang curtains, shades, and why we chose what we chose (including when a motorized option makes sense). I’ve learned so much and have increasingly dialed in opinions. You may or may not agree with mine, but curious enough to find out???
What you don’t see in these photos below is the multiple meetings with our Decorview designer, with so many beautiful fabrics and shade samples brought to YOUR house (you don’t have to leave). They also bring years of expertise and experience on what to use when and where, and how wide/high to hang them all. It’s hard to count the hours of measuring, not to mention fabricating (off-site), and lastly (and what is worth more to me than gold) the hours and hours, if not days and days, of installing each one by professionals. You are involved in the design decisions, of course, but the professionals take care of the rest. It’s incredibly luxurious. There are a lot of custom window treatment places online, but none come and install in your home for you, which is truly one of my least favorite things to do (You need anchors, you need to make sure everything’s level, etc). So, for those of you who have the budget for custom, I can 100% vouch for Decorview to do the job. Now on to all my rules and opinions, which I truly love to give (Ask Brian ;))
Wait, Why Do You Need Or Want Window Treatments In The First Place?
Ok, this is design 101, but you know I love this stuff. Three reasons:
- Light control (sun, brightness, glare, etc). Either light filtering or blackout, the sun can be too much.
- Privacy (neighbors, peepers, a sense of coziness/intimacy).
- Because you are ready to take your home to the next level. To help soften a room, add style/design/pattern/texture/color. To highlight and frame your windows, add a layer that makes a room look more finished, pulled together. To add balance, texture, and depth. Because you are reading this and you love your home.
Simply put, window treatments (drapes, curtains, shades, or blinds) add both function and style. Some styles of houses don’t need them, but if I’m being honest, even some of our rooms in the mountain house that I opted not to have them would probably benefit from that extra softness and texture. I’ve never met a room where I wished they didn’t have curtains or shades. But they can be expensive…
When To Go Custom And When To Buy Readymade
While this is a sponsored post with Decorview (a custom window treatment company), even they would admit that if you have a standard 8-9′ ceiling and are on a budget, there are decent standard curtains out there that you can hang yourself. I have done this many times over the years. Custom isn’t necessary for every room. Here’s when you might consider custom:
- Odd or oversized windows, especially really tall windows.
- Rooms where you want to mix both curtains and roman shades in the same fabric (impossible to buy ready-made – a massive hole in the market).
- If you are a designer or homeowner doing a full house remodel/furnishing and want to save yourself or your client time (and therefore money). Of course, custom is expensive (anything custom is), but the time you save having them do almost all the work is truly incredible (DAYS of billing hourly). Choosing each treatment, window by window, working with the fabricator, then working with handypeople to hang…it’s a lot. Most designers have a window treatment person or company, and if you are considering one, I highly recommend Decorview. It’s a one-and-done service where they handle every single bit of annoyance and minutiae.
- You want something special. You can get blinds in any length or size on the internet, and many are fine! But if you want something special because you, like me, love design, then you might go custom (even if it means sewing yourself).
I think the River House is a great case study for what to choose when/where. So I’m going to go through room by room and talk through all things window treatments.
The Family Room – Blackout Curtains and Matching Motorized Shades
The family room is meant to be a cozy, dark, tonal TV room, and yet that big window faces west, so in the summer when the sun sets at 9 pm (prime movie-watching time), it blasts straight through onto the TV. They needed blackout curtains, and since they are on sliding doors, shades would have been doable, but clunky (and a lot of light leaks, which I do not enjoy). So we chose a dark green linen from their collection to work with the design of the room (anything too light would have ruined this tonal, cozy vibe) and hung them high and wide with blackout lining, of course.
My Curtain Hanging Tips/Rules/Opinions:
- Hang high and wide – this makes the window look bigger and your ceilings taller. We hugged the ceiling and mounted the brackets 8″ outside the window. Ideally, when fully open, you don’t see the edges of the window, but you want them wide enough that you get as much light and visibility as possible. Just repeat “High and wide” (if you don’t have a custom length, you don’t have to go this high, but just go as high as you possibly can and size up and hem if needed).
- The curtains should “barely float” off the floor. This is super hard to execute, so it’s ok if it’s a slight bend or floating an inch (but not more than 3″, promise me!). Decorview does this so perfectly through exact measurements to ensure the curtains float. It’s really the Lord’s work.
- Big windows need big hardware. We used 1 3/16” to make sure it was scaled to the window and room. I only use small rods for cafe curtains.
- Wide windows need multiple brackets to support properly, with “pass-through” rings to be able to open and close along the rod, even with brackets. Decorview’s are so smooth, with silicone on the inside, so they are still really quiet.
- If you are going custom, add a pleat to add fullness (which looks prettiest both open and closed). We chose the single pleat, which is not hyper traditional but looks really high-end.
- Stay away from exposed grommets (the big circles). This is a personal style preference of mine, but it’s worth noting (I’ve used them before in a pinch, but stylistically just not my favorite!). I don’t mind hidden tabs or even rings with clips when executed neatly.
- Dark fabric can fade from the sun on the inside edge, especially if linen or cotton. We used a poly blend, which should be more fade-resistant, but the sun is powerful, so just know that going into it (we only have the sun blasting a few months of the year here, when it’s winter, it’s either gray or lower in the sky behind trees).
- The hem on the bottom should be at least 3″, ideally 4″ but scaled to the window (i.e., shorter cafe curtains could be 3″).
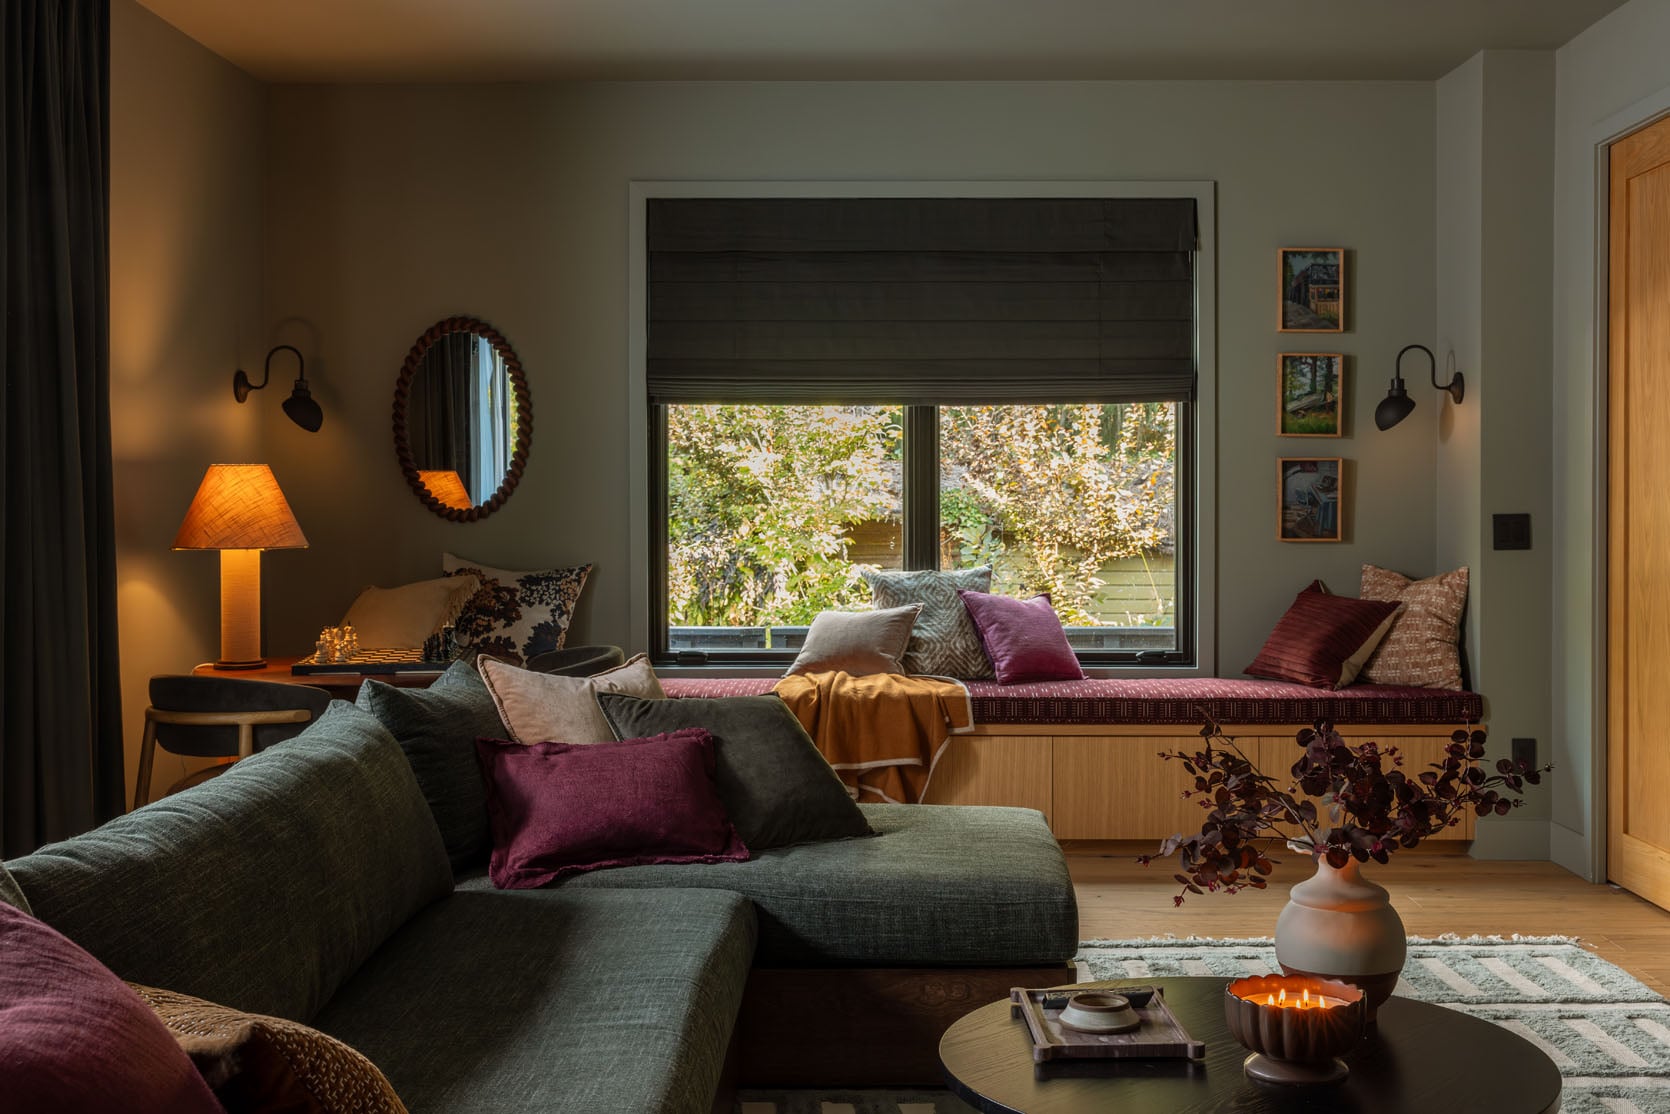
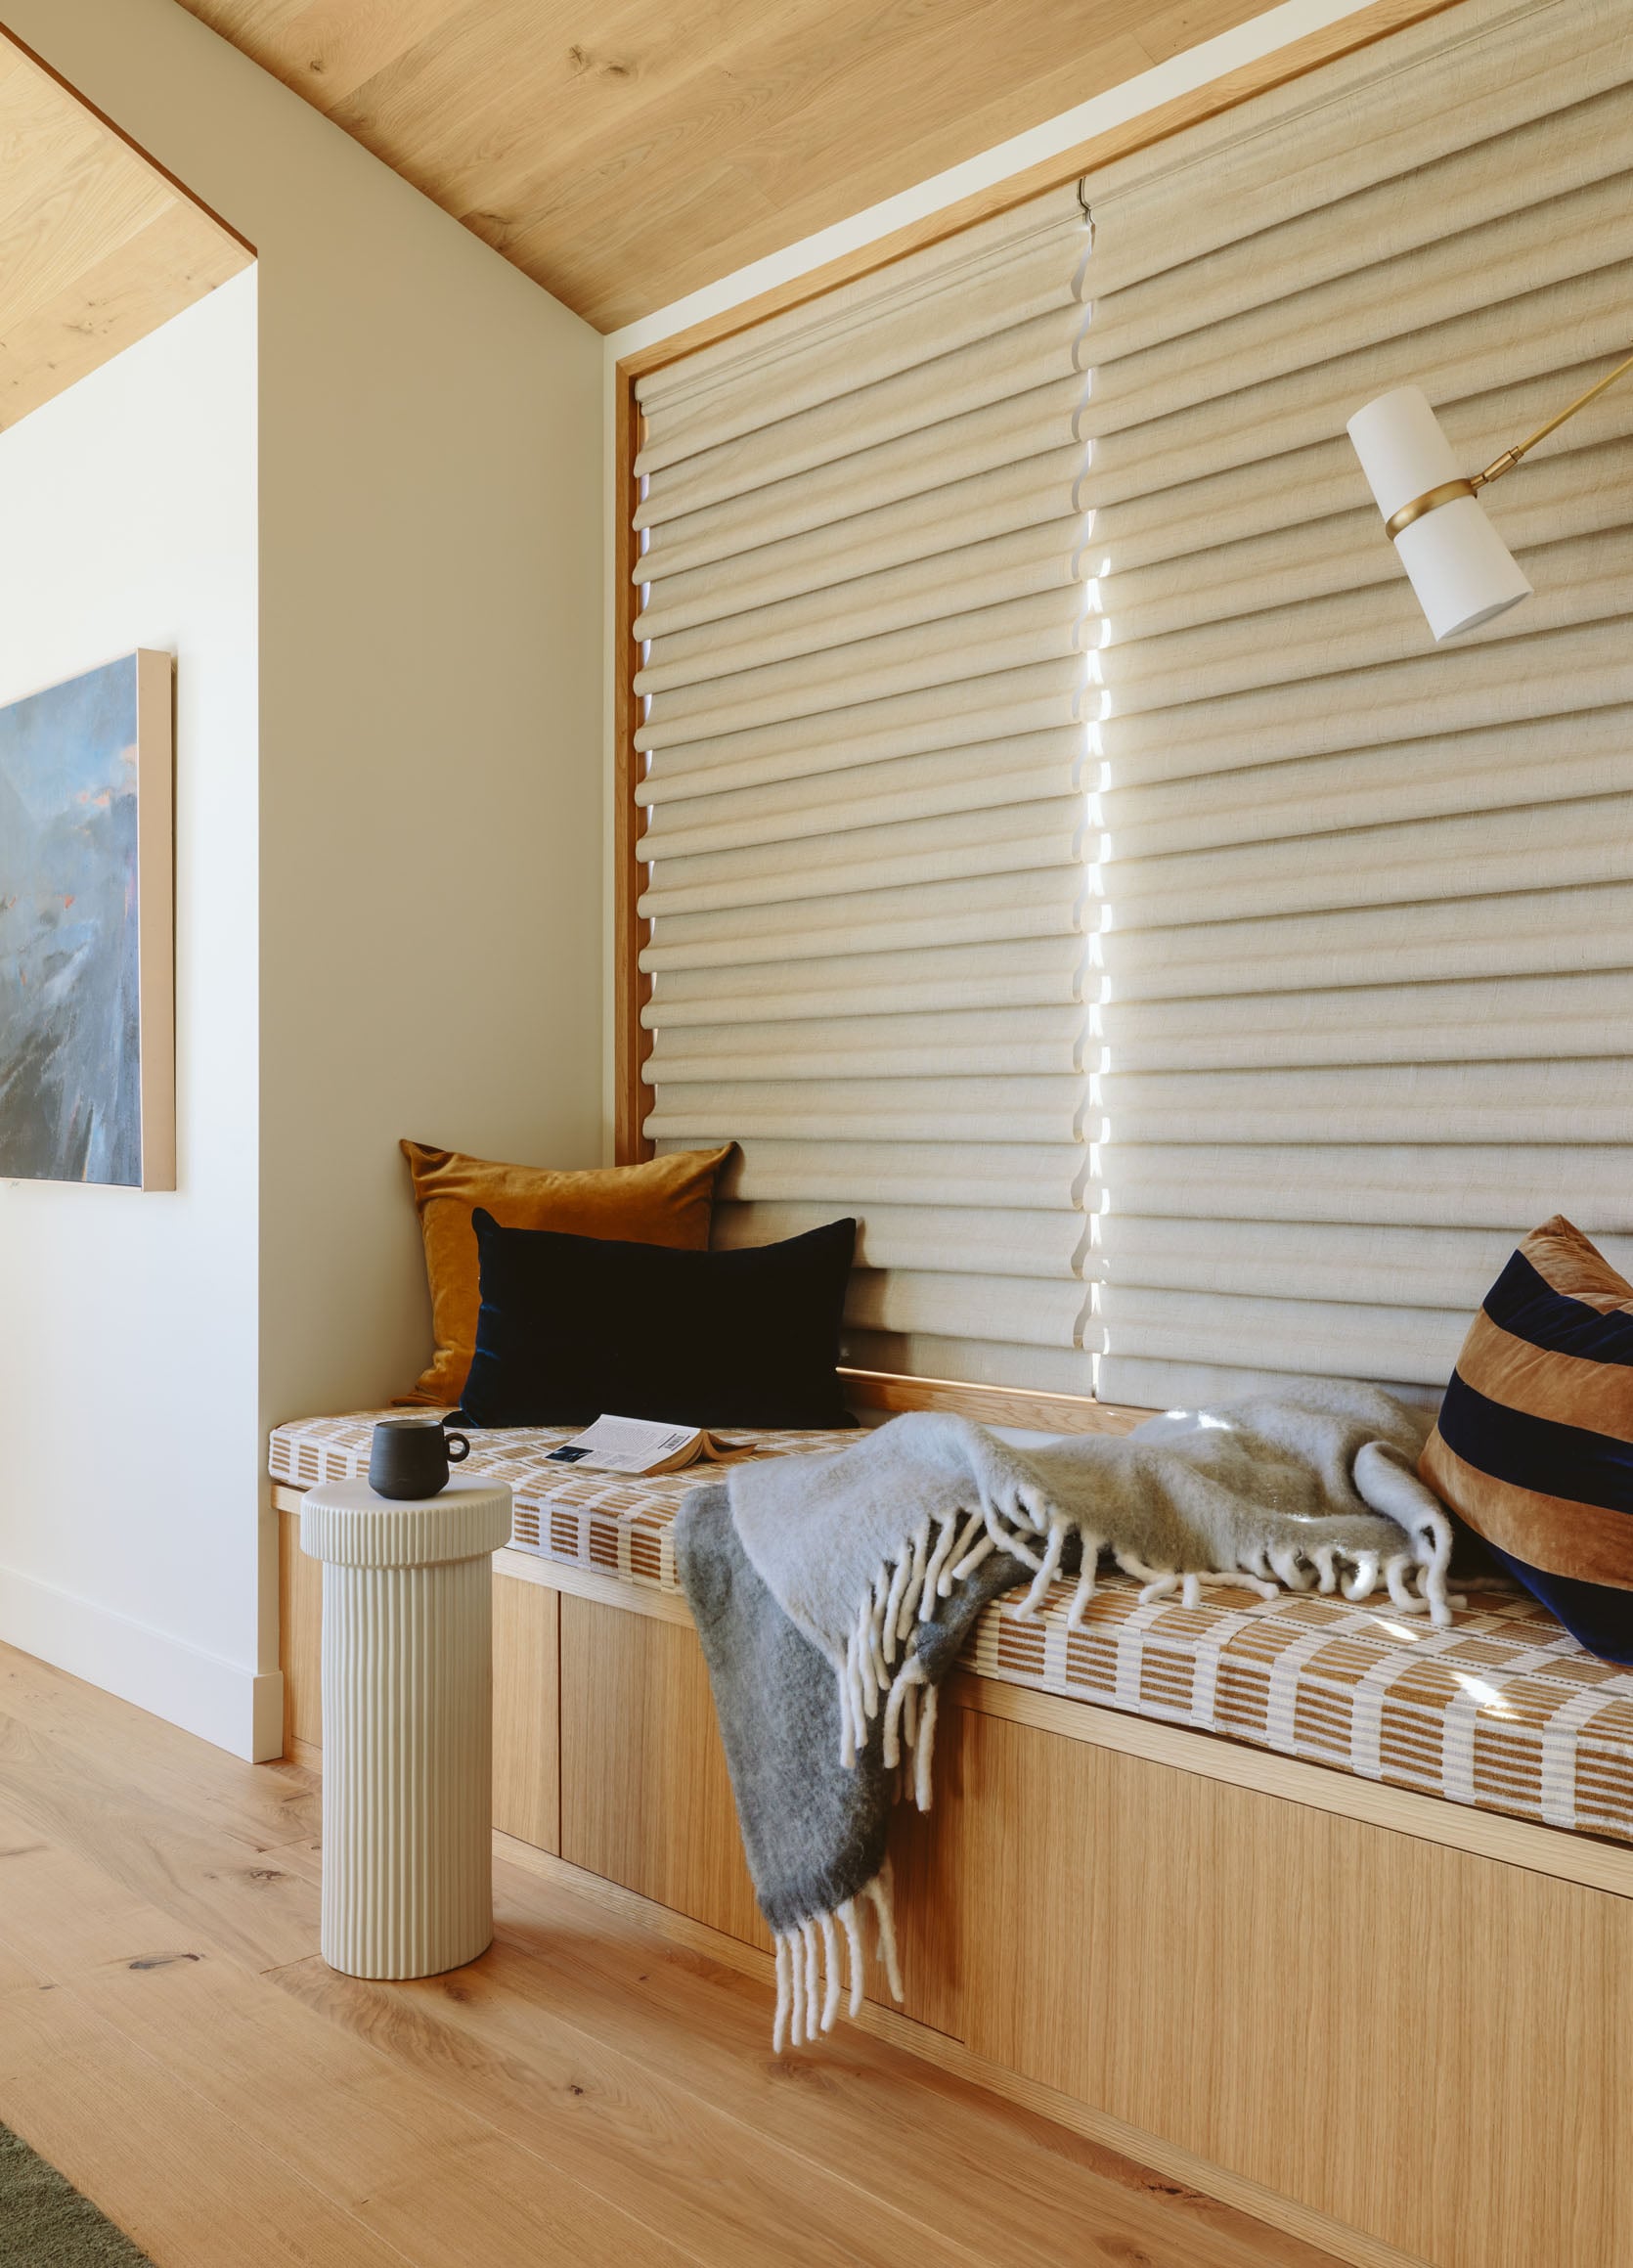
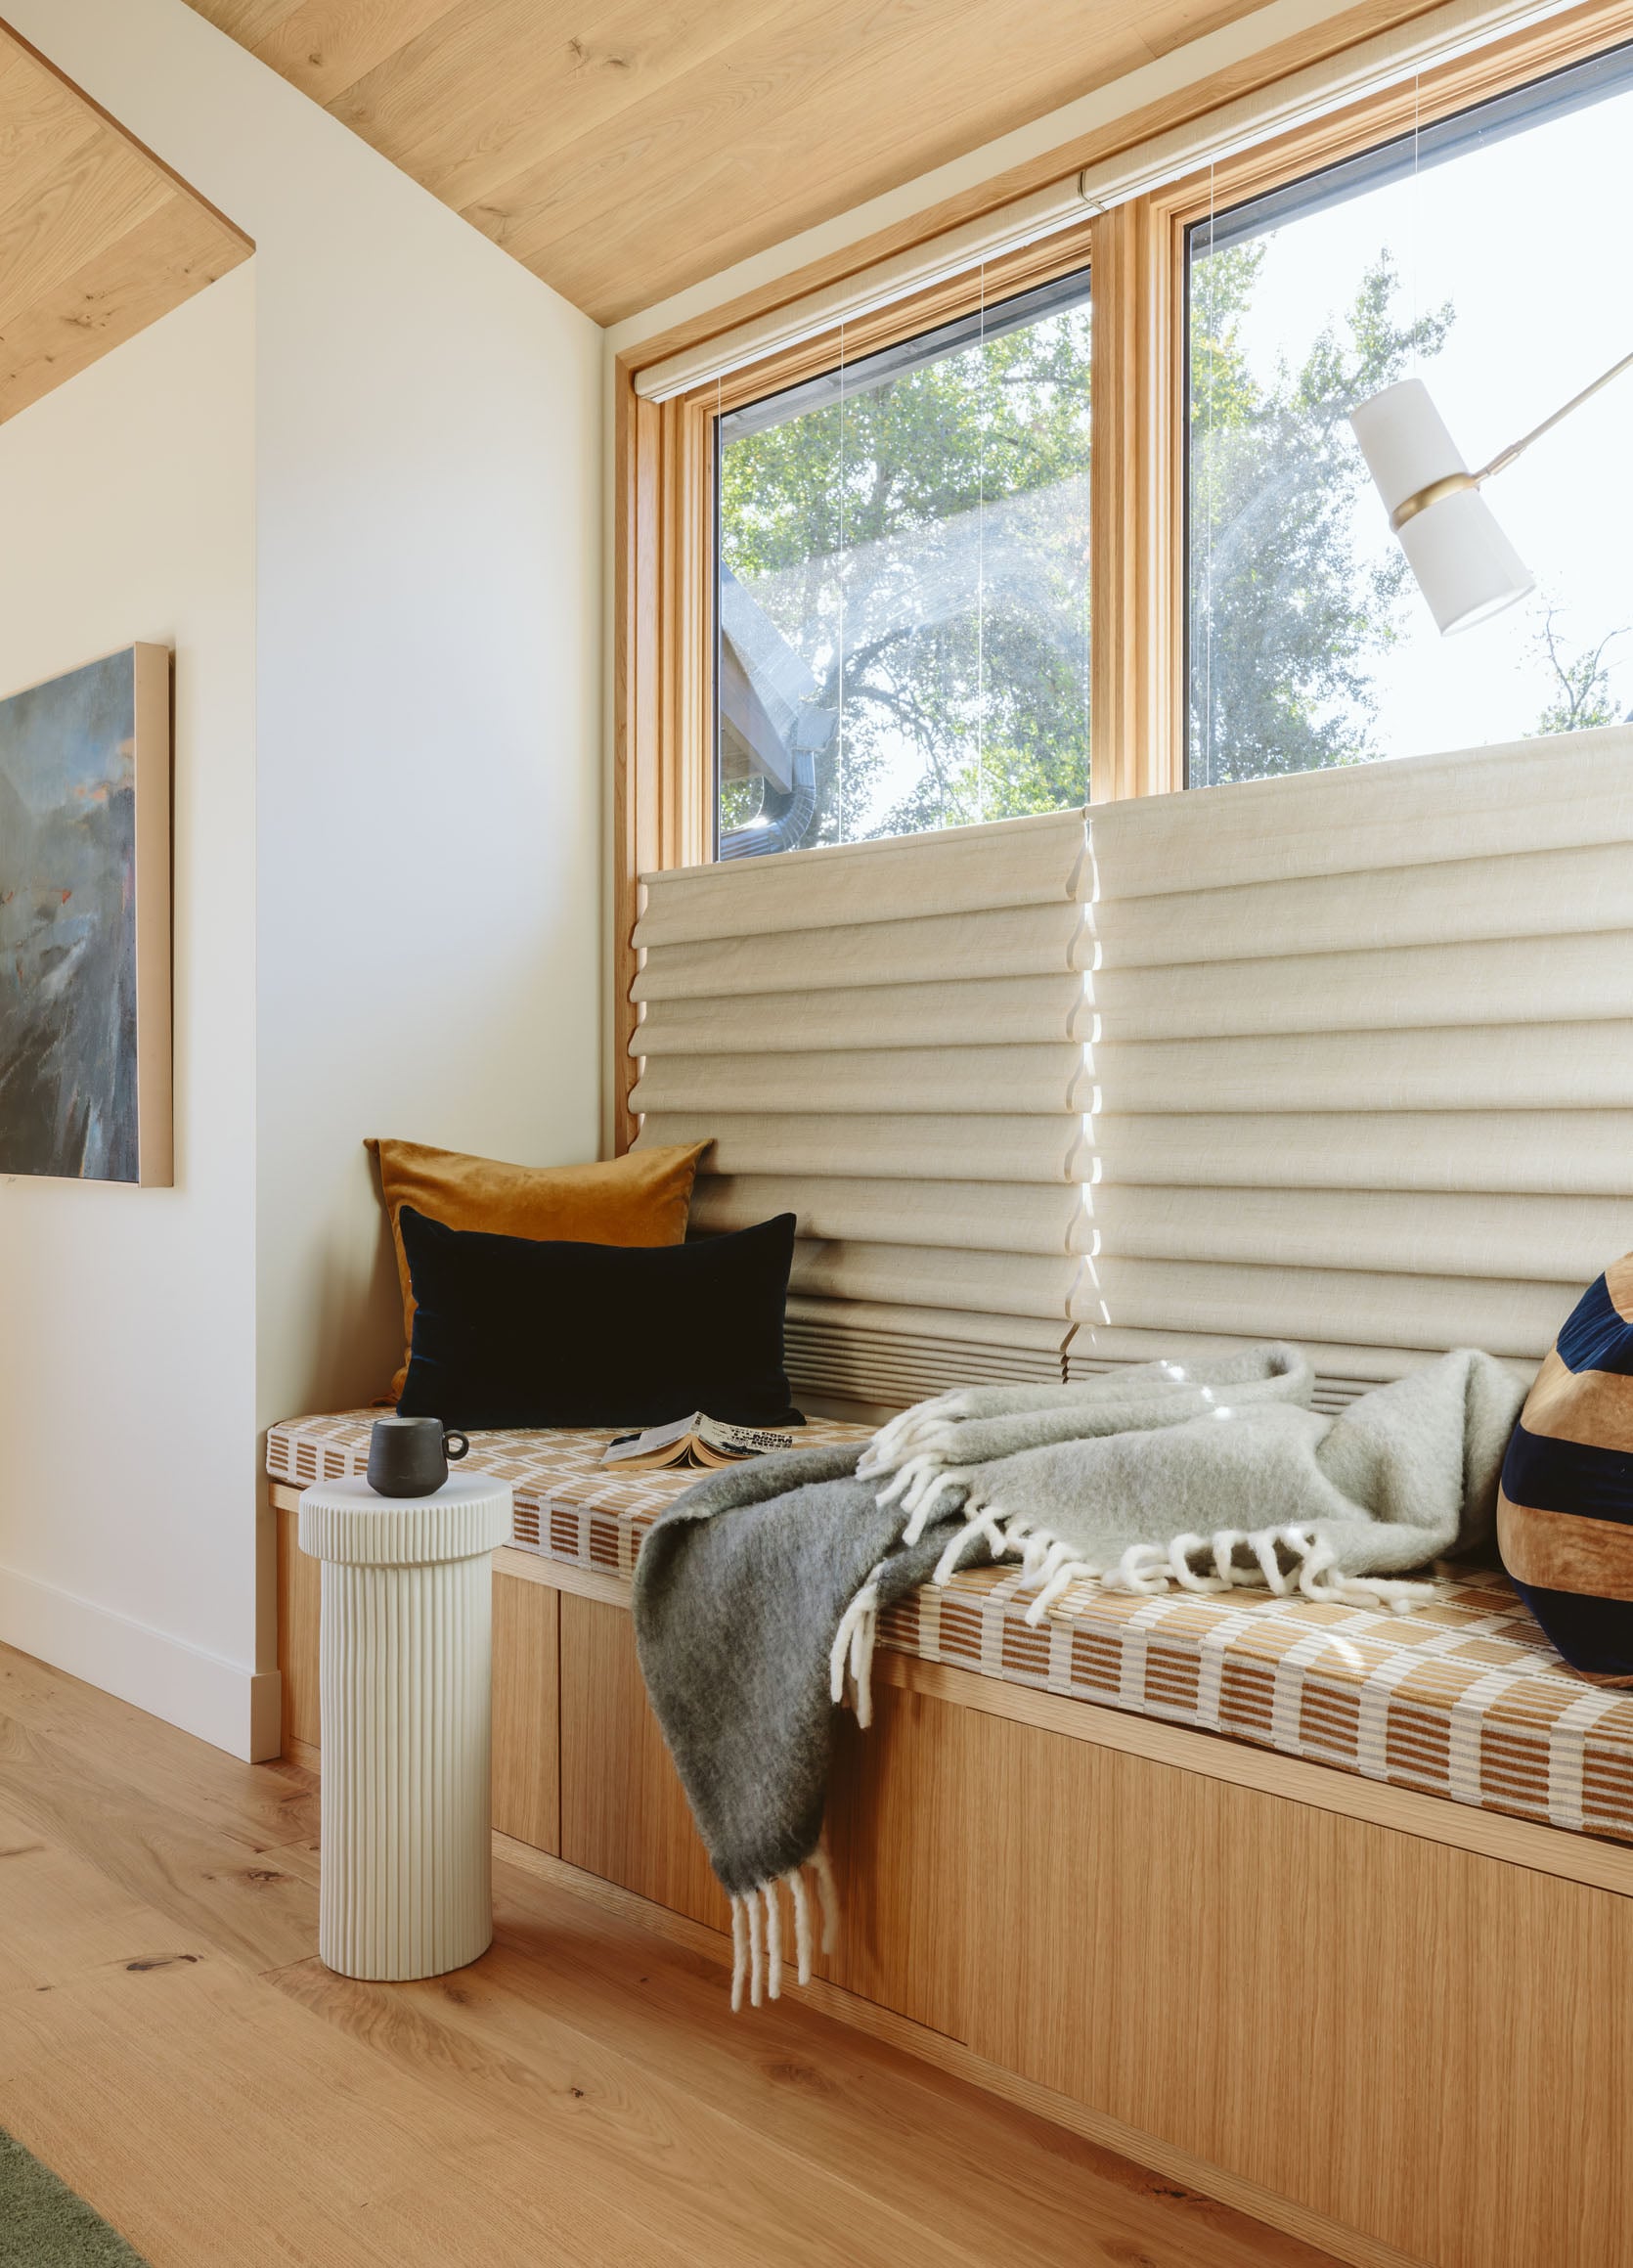
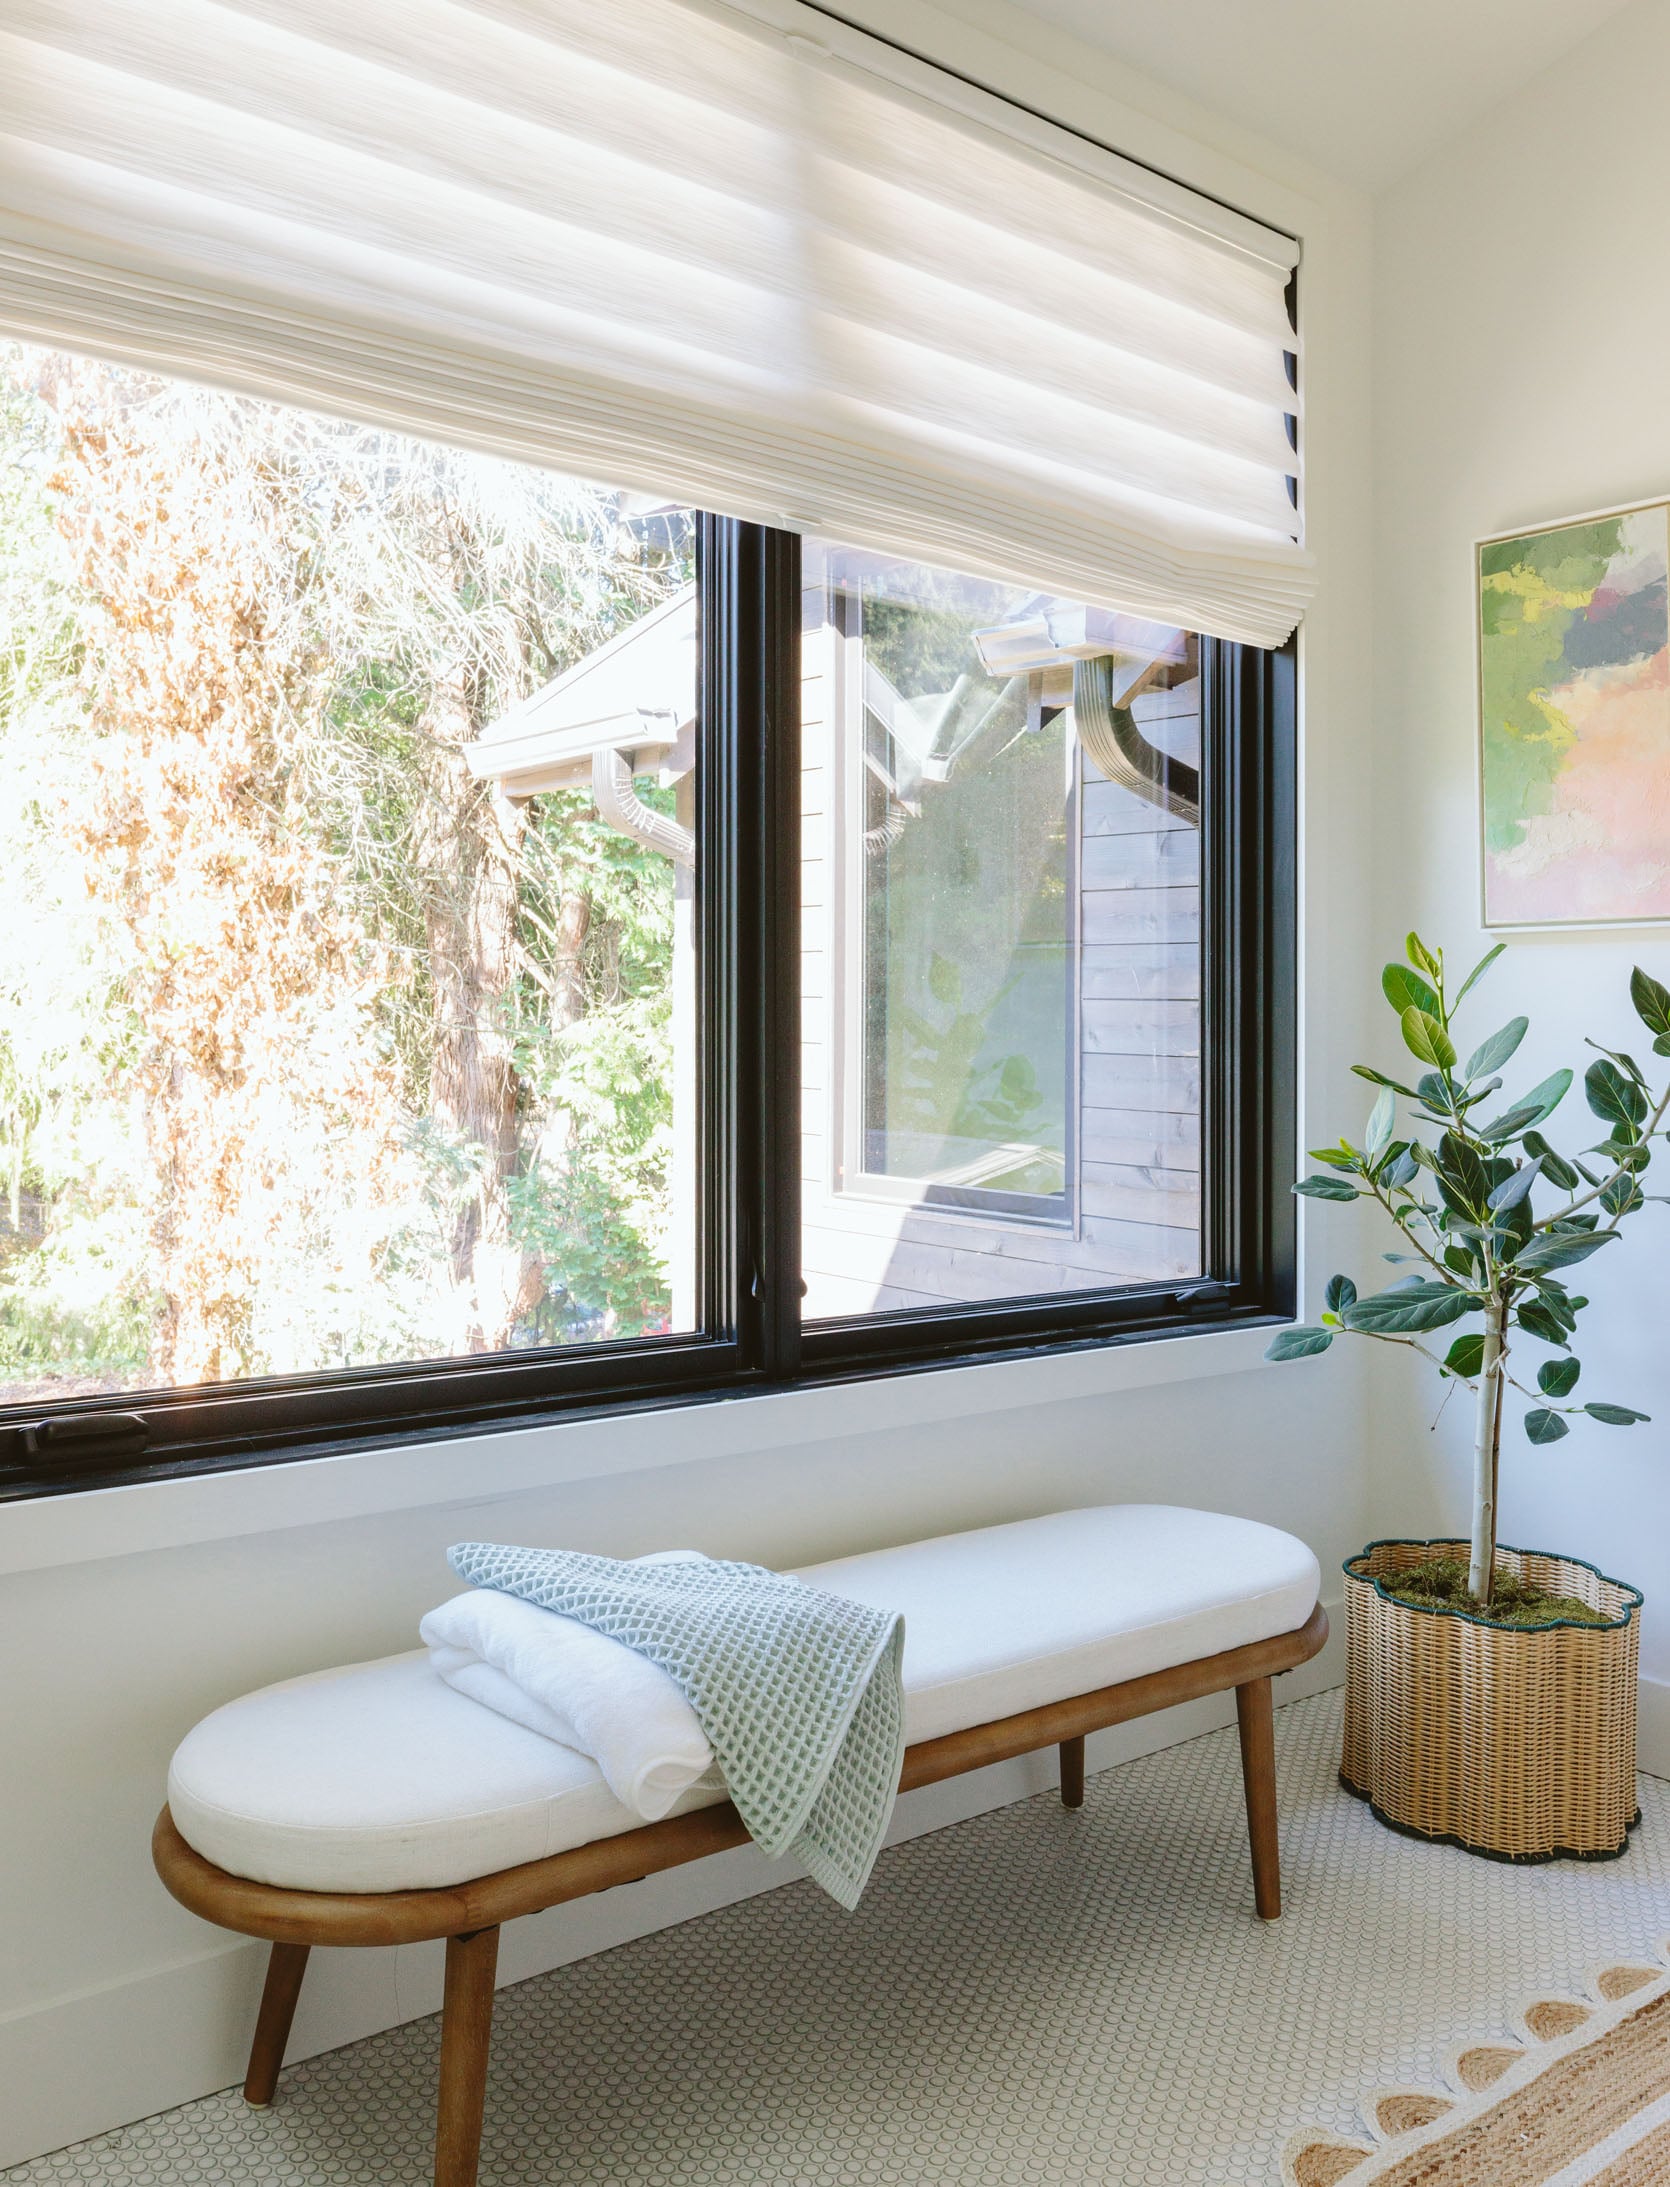
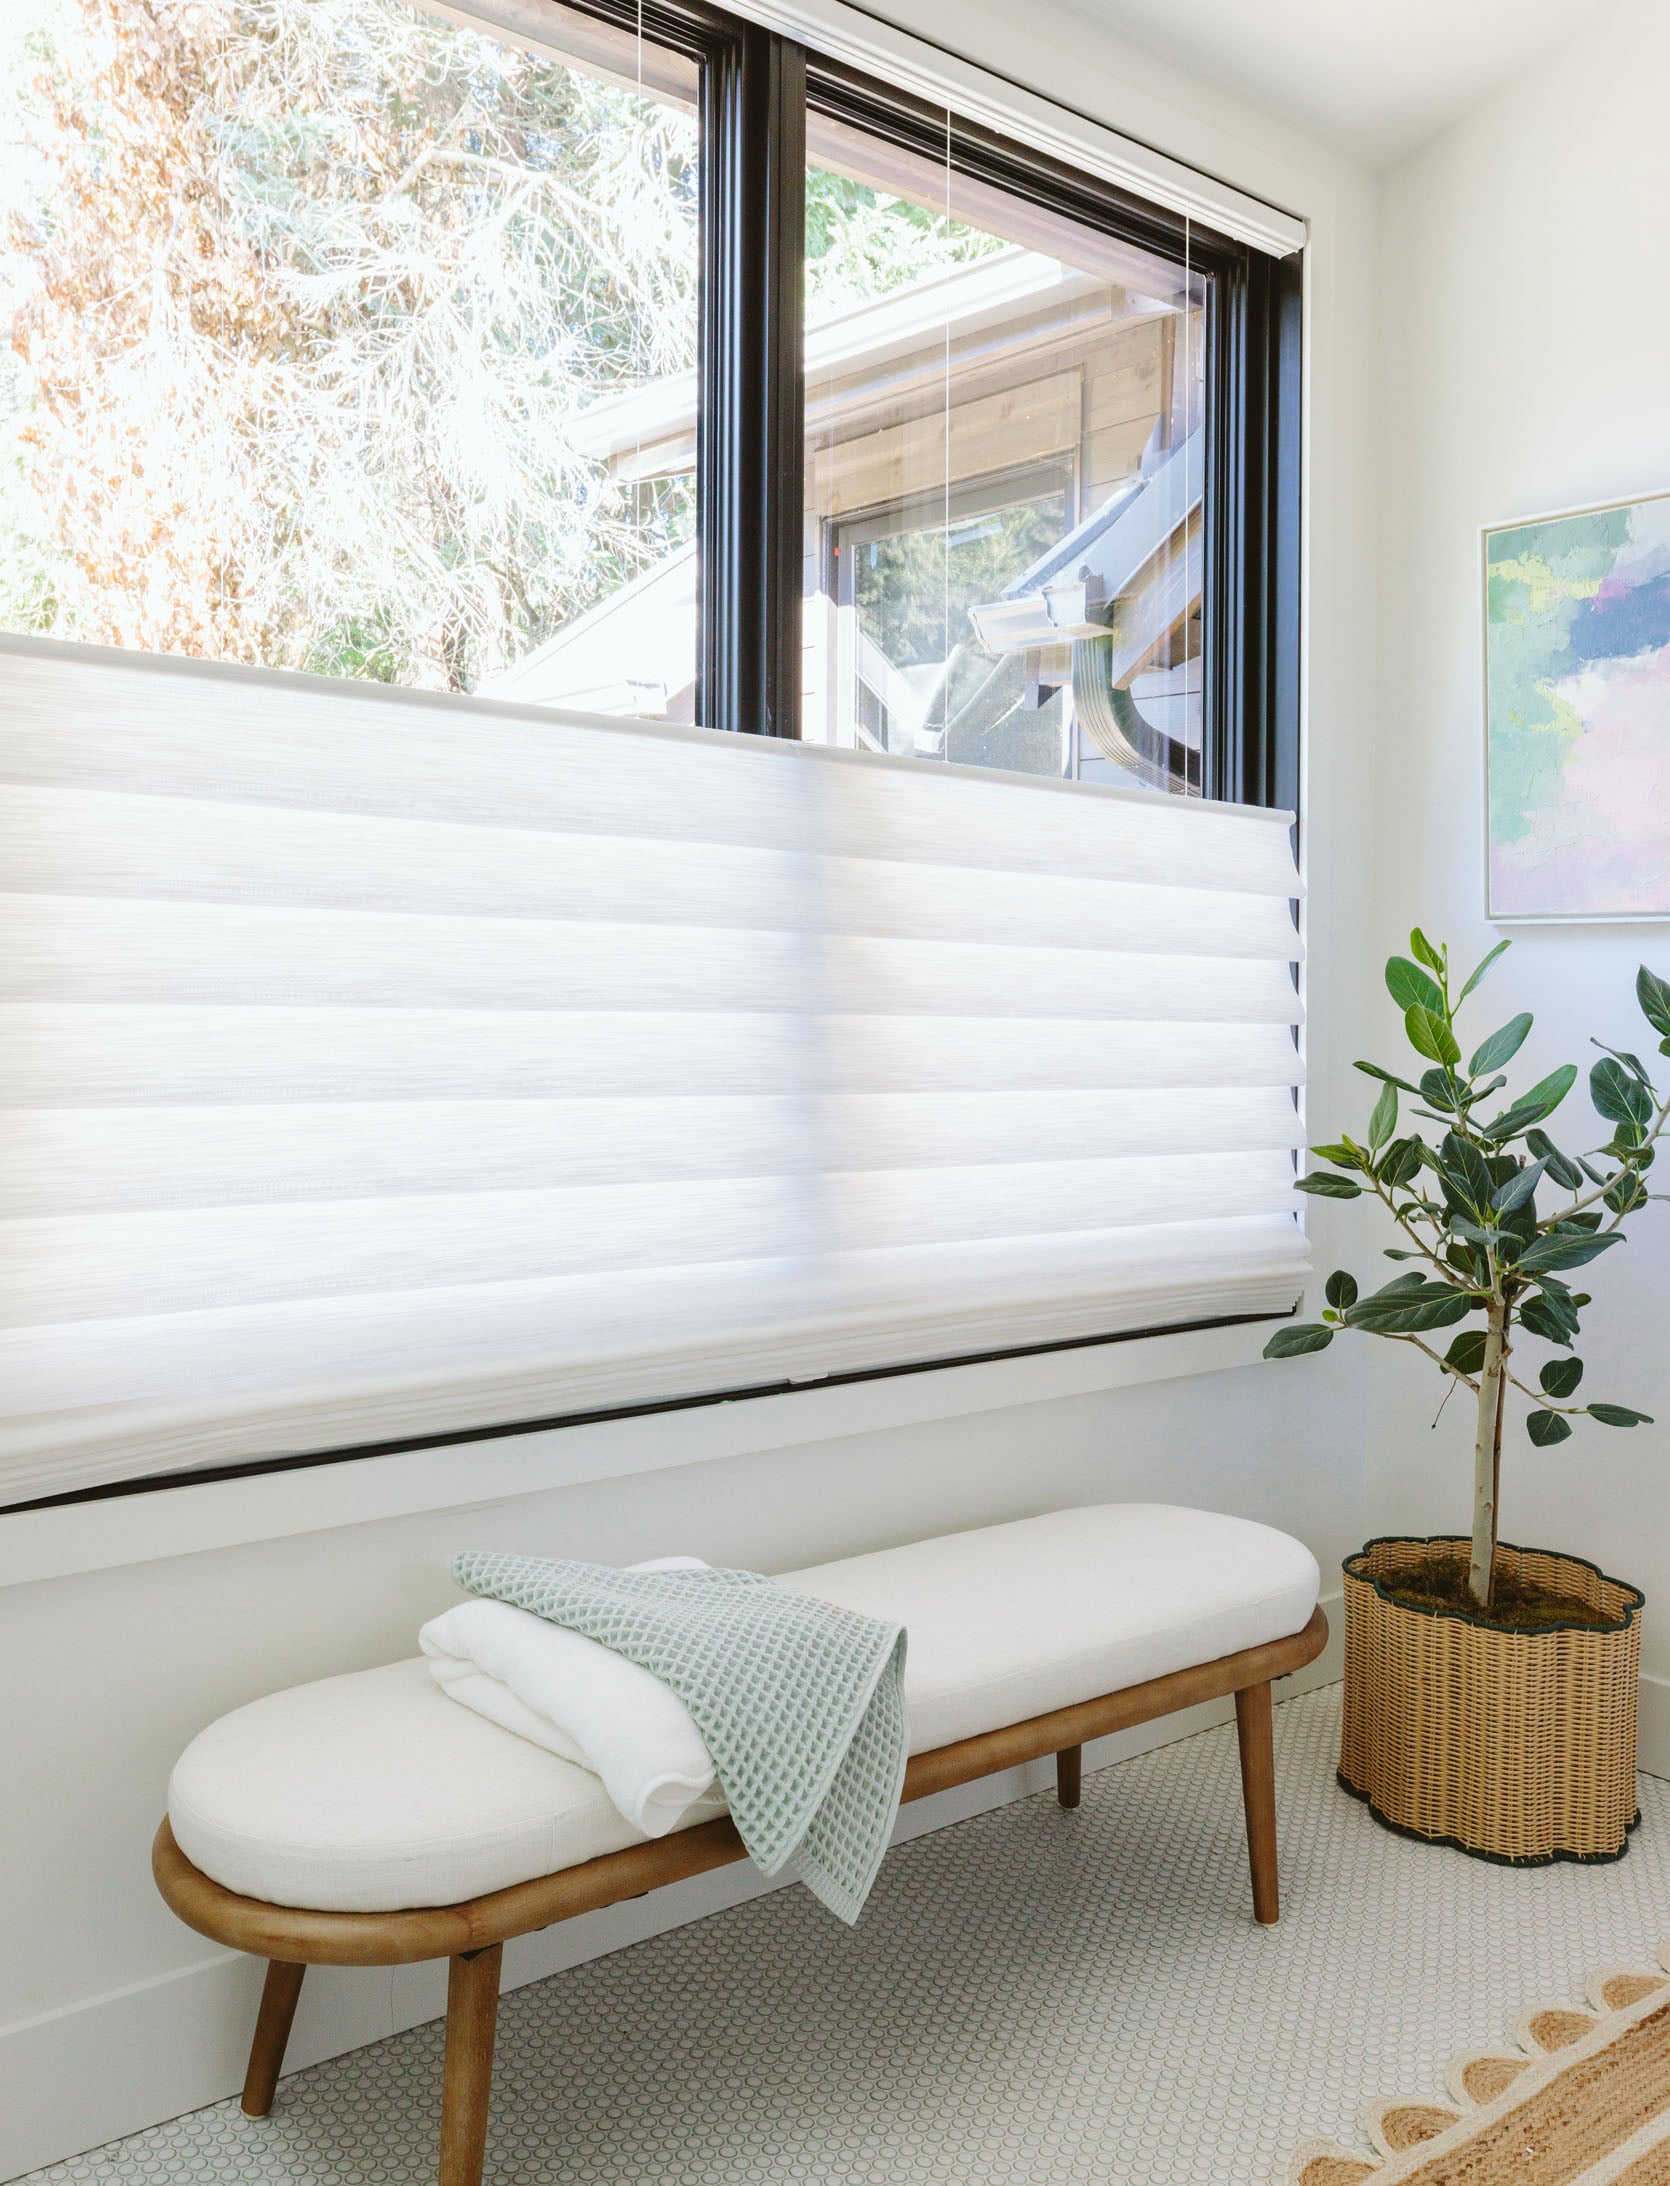
They also had two big windows flanking the big glass doors, and we could have done curtains, but since we had this big bench seat, we chose shades in matching fabric instead. Now my brother (who wanted everything in the house motorized) chose to hard-wire and motorize them, which I didn’t think they needed (I’ll walk through where/when I think it’s a good idea later). But they work great and are beautiful.
Rules/Opinions For Shades:
- Yes, your shades and curtains would ideally match in the same room (I’ve broken this room, which mixed opinions). Same fabric, but different functions is GREAT.
- Inside mount (inside the window frame) is a cleaner look (and generally preferred), but takes up more of the window visibility (and therefore light). Many windows don’t have the room to do this (ours didn’t in our living room), so you’ll need to do an outside mount.
- Outside mount means above the window frame and often requires a block to mount to so that the shade can fall over your window trim (not always, but it did in our case), and if you do it, I like it when it is the same width as the trim, just above it (i.e., not wider).
- There are so many different styles – droopy and romantic or simpler. Unless you have extreme confidence, I would opt for a simple style that doesn’t command attention, just enhances the room, and highlights the window.
- Shades can only be so wide for weight reasons (the mechanism can’t lift up a lot of weight). Decorviews mechanisms are really strong, so we could do wide, but often you’ll need to break them up, which is totally fine, but creates a gap and light leak (see mudroom below).
- My feeling is that if you can reach them easily, just do manual cordless (or corded is fine!). But if you can’t, that’s when you could splurge on motorized (see game room, below).
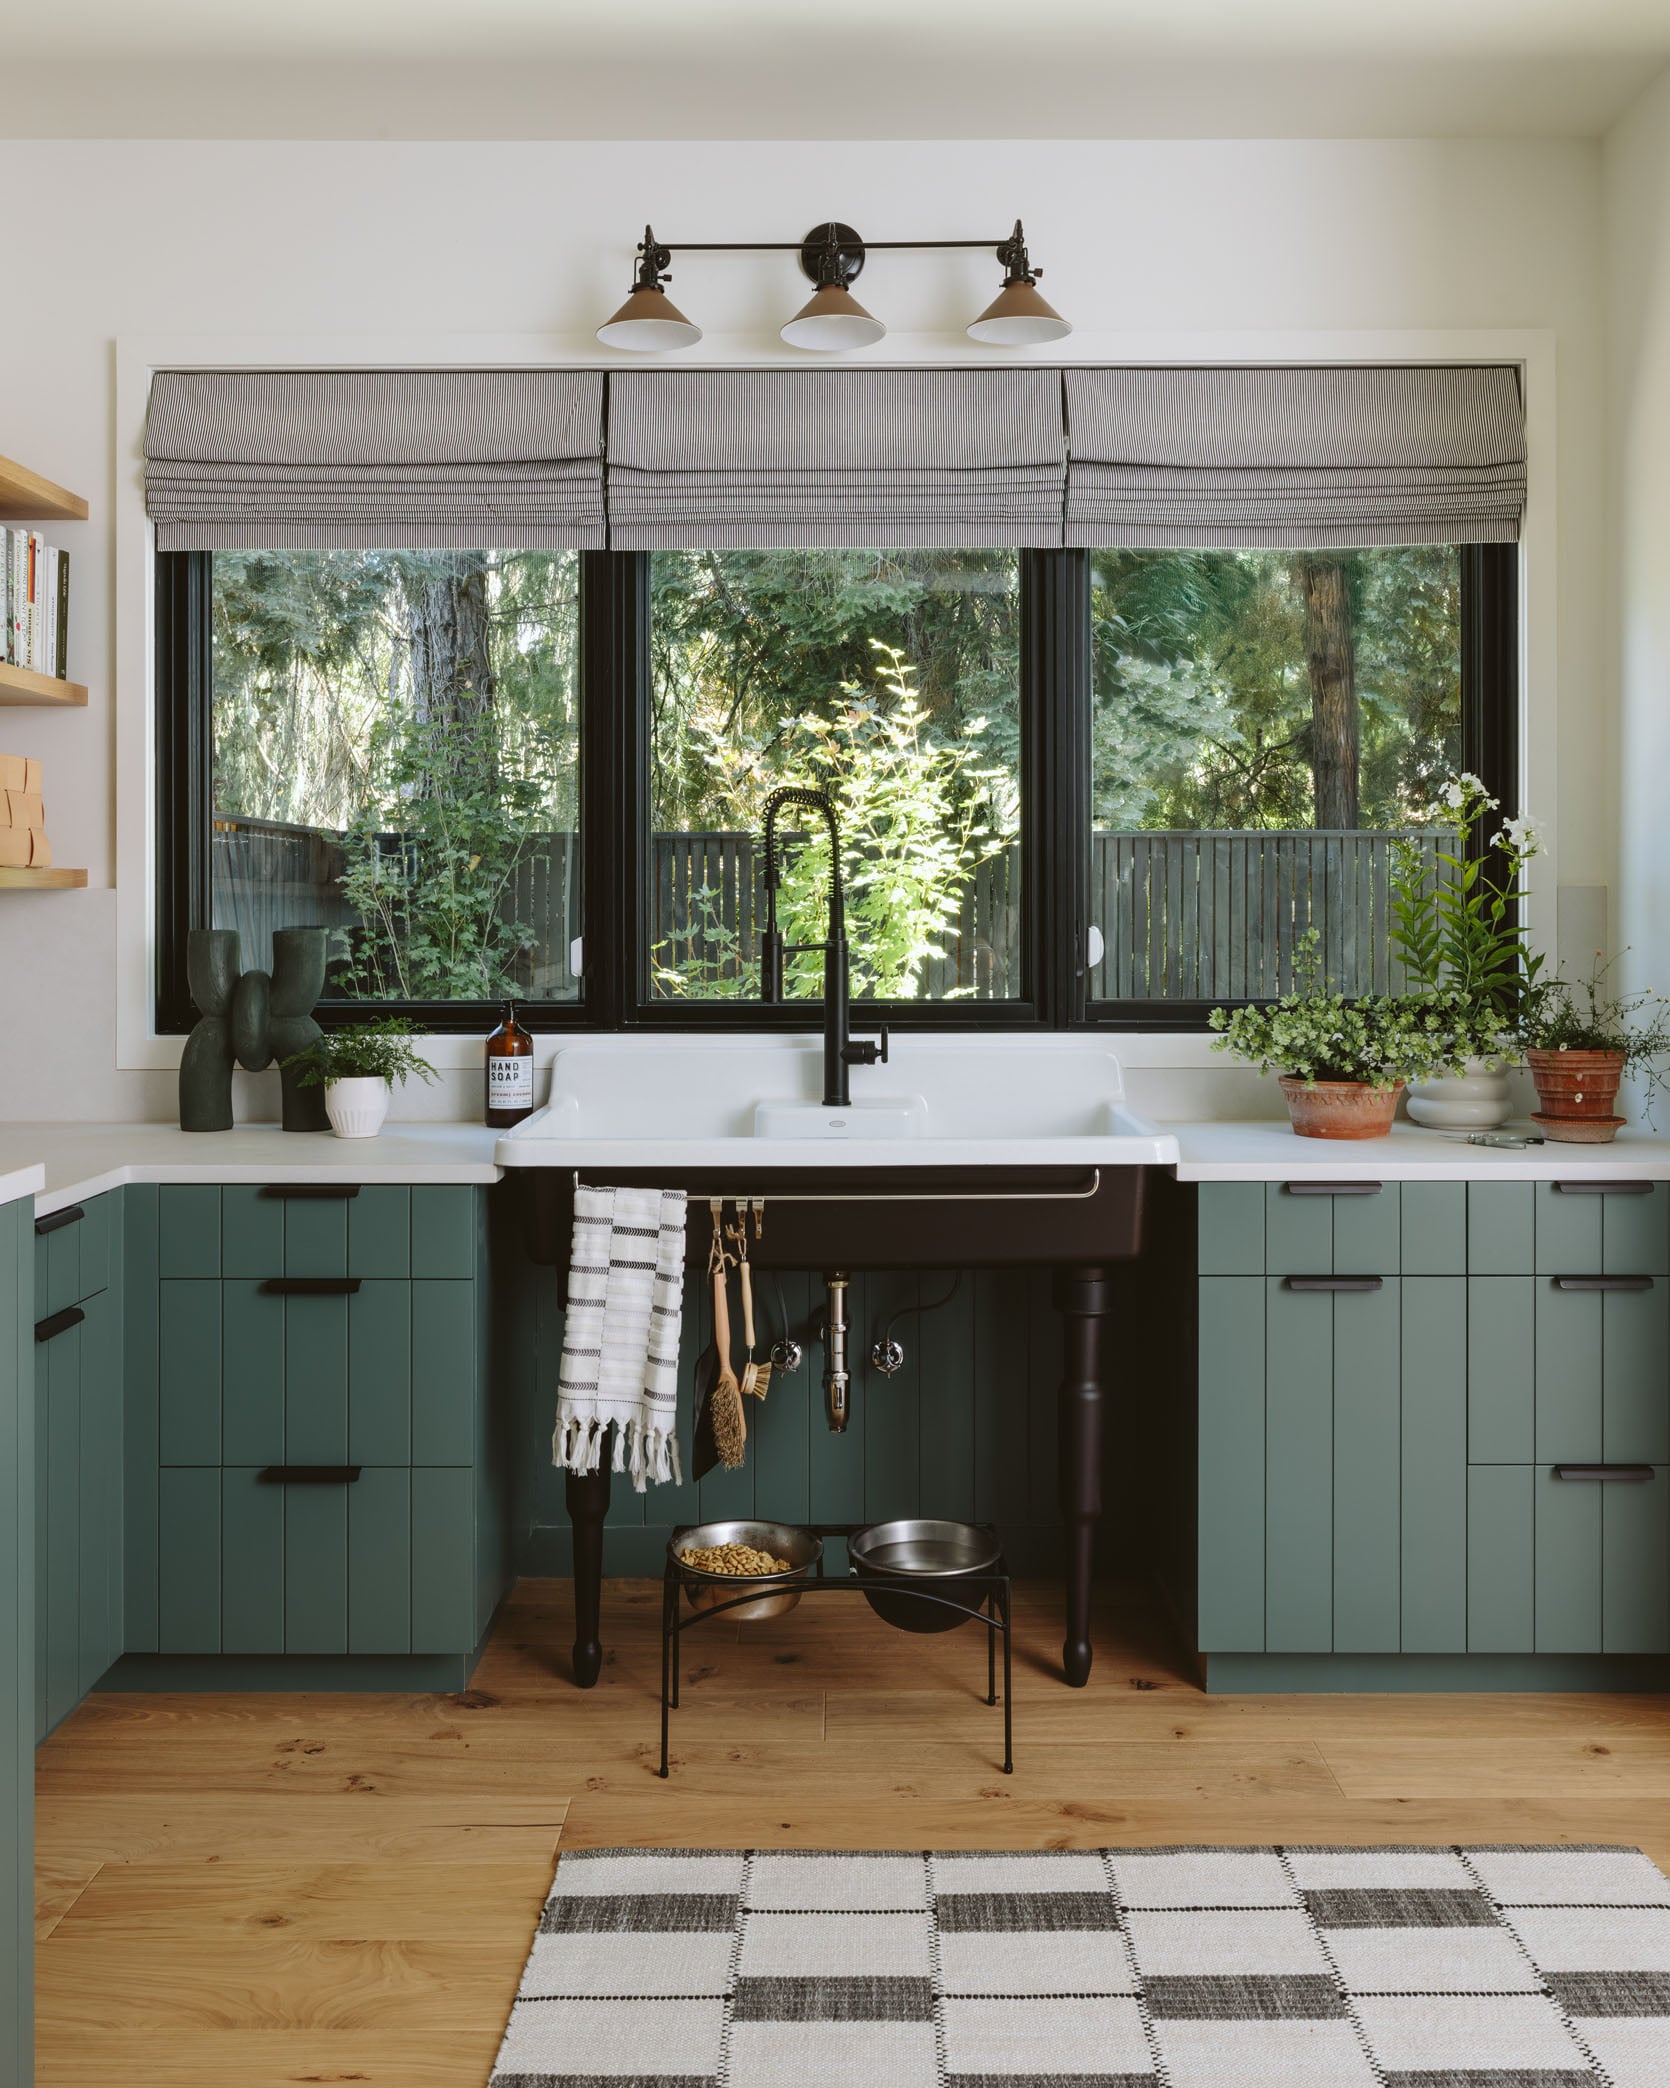
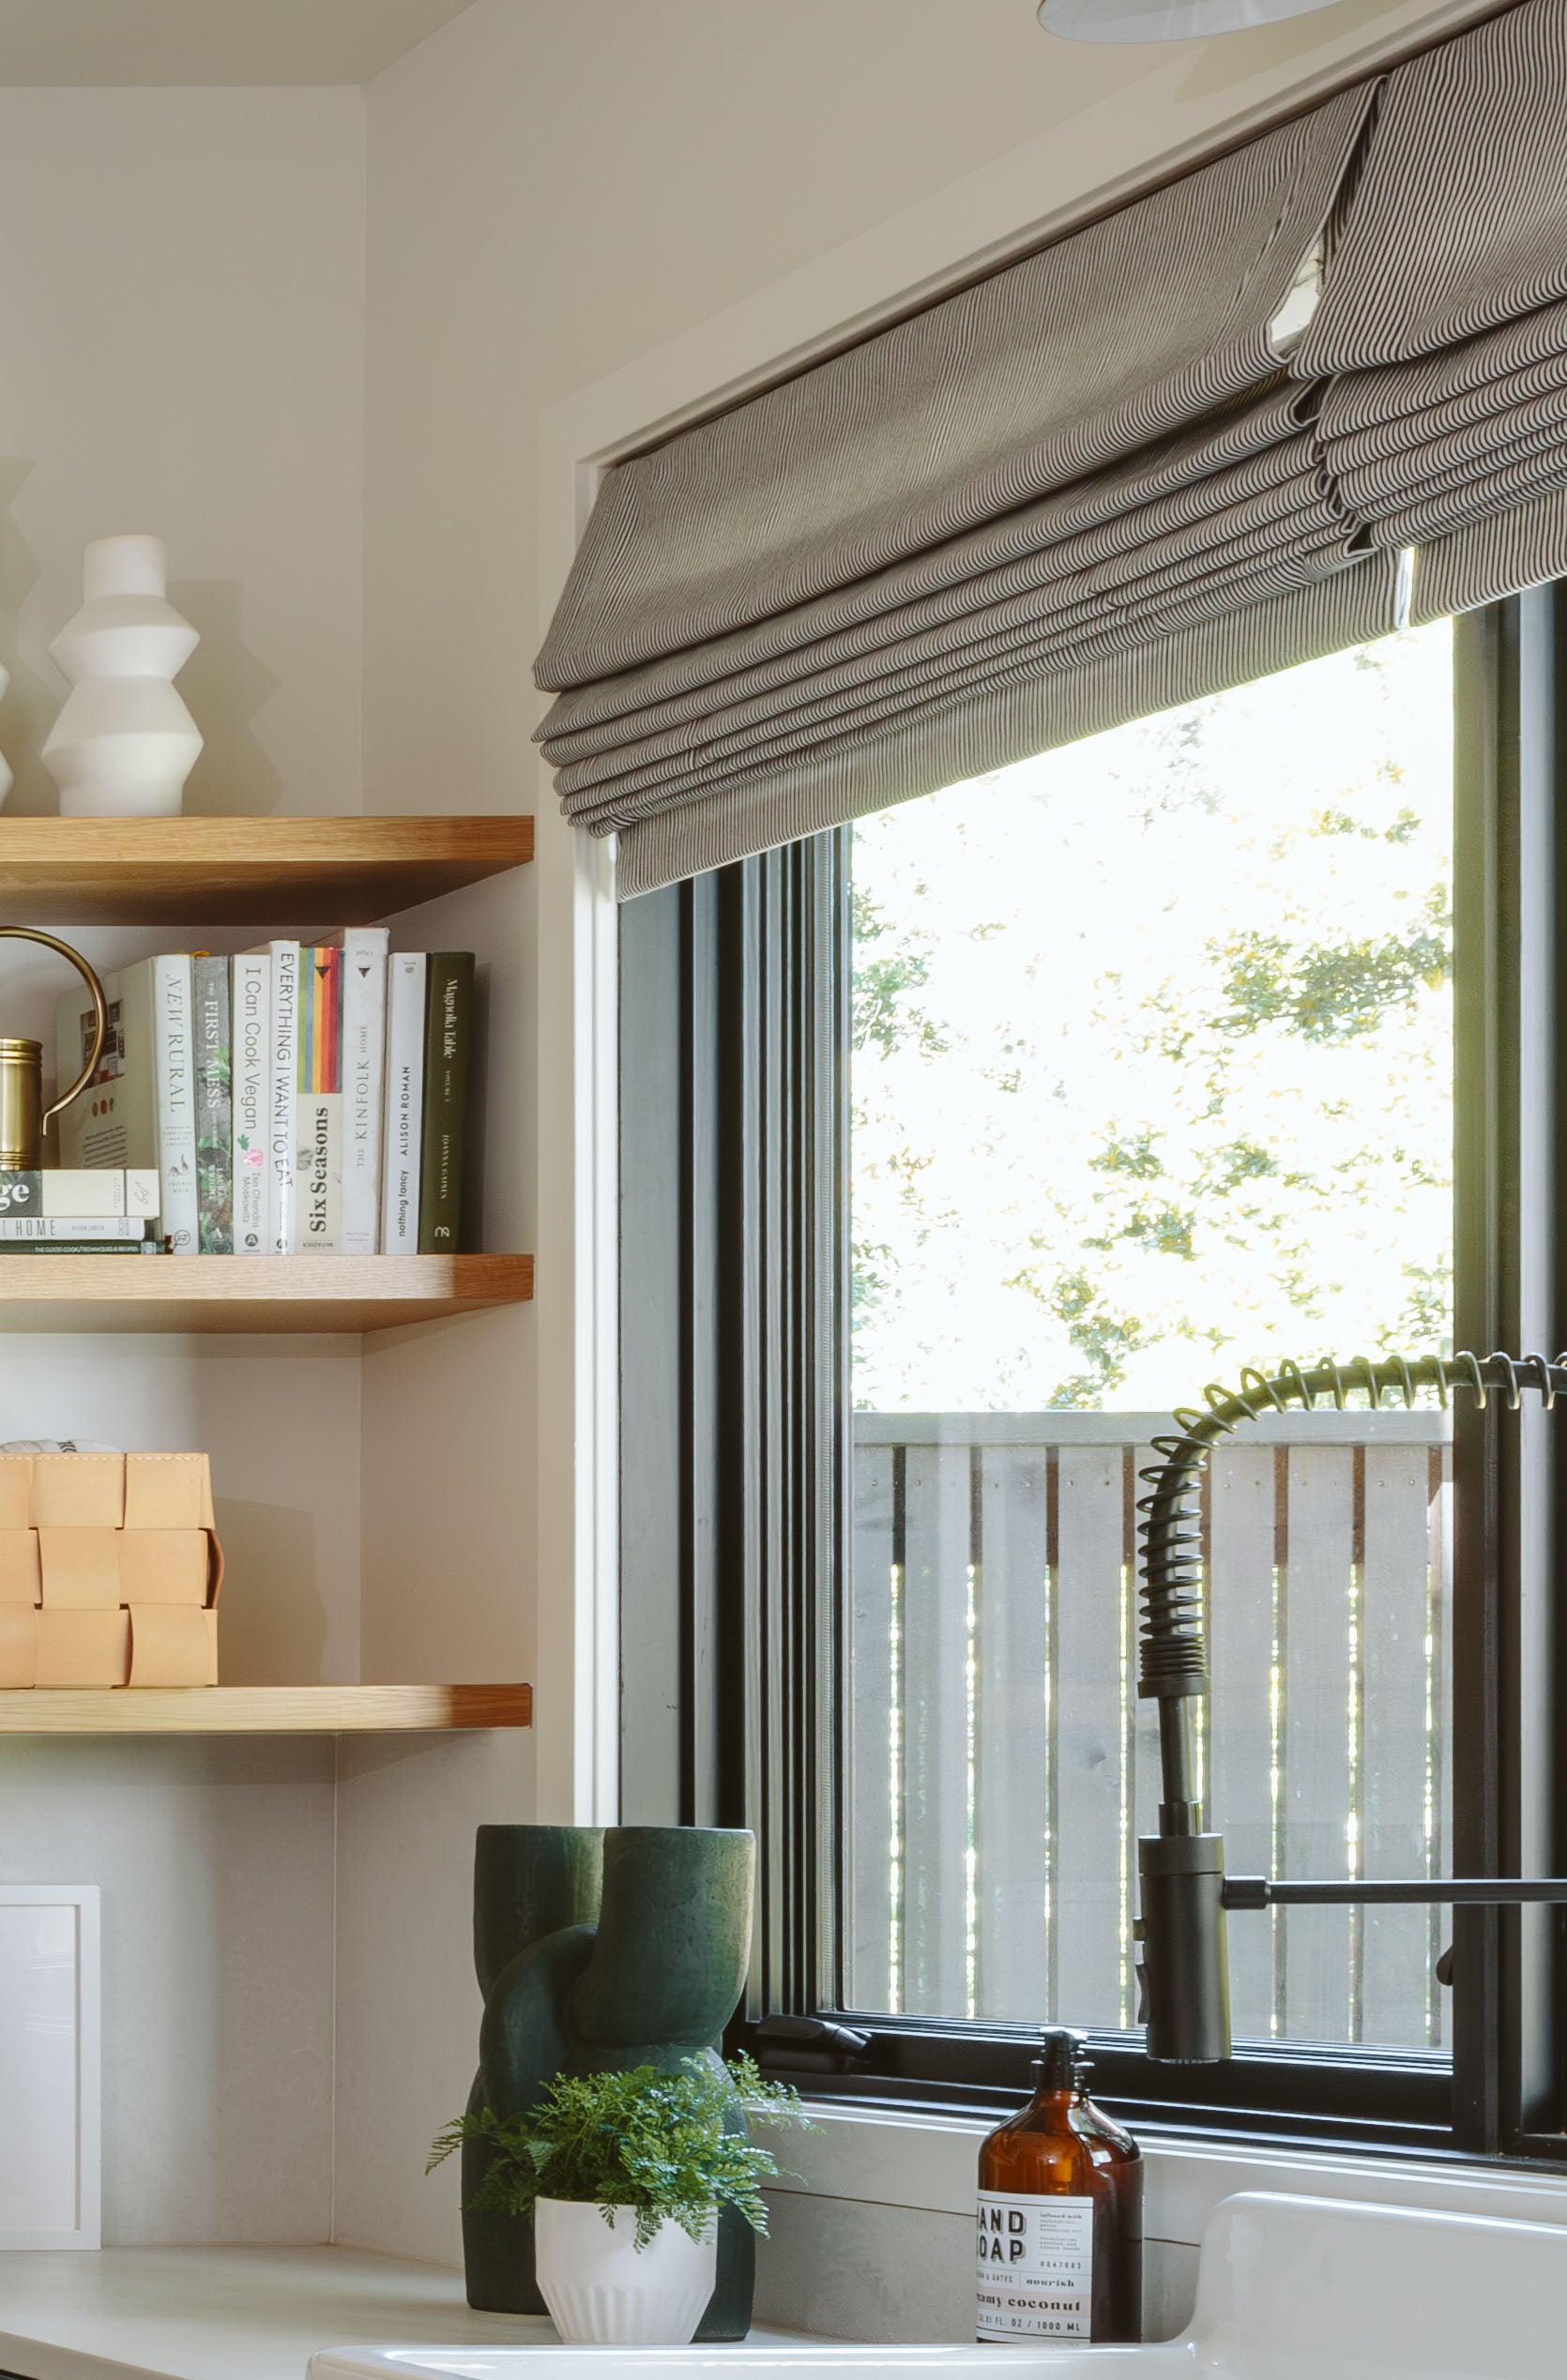
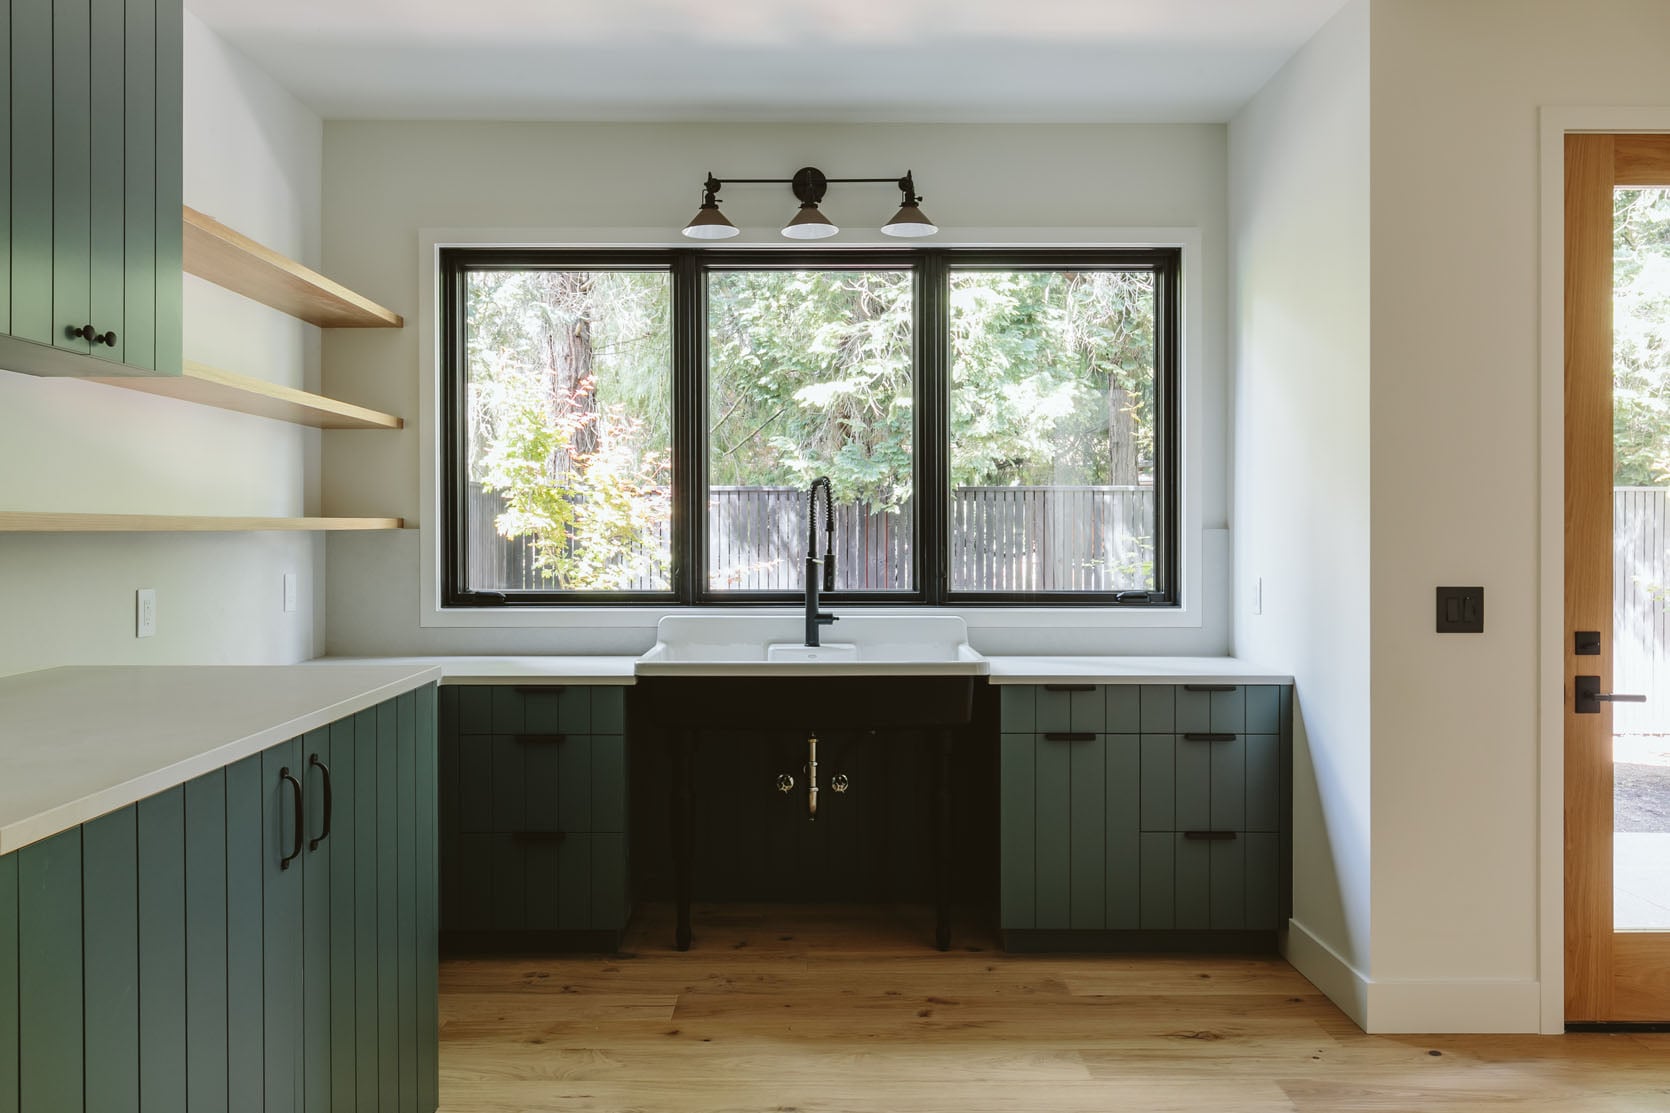
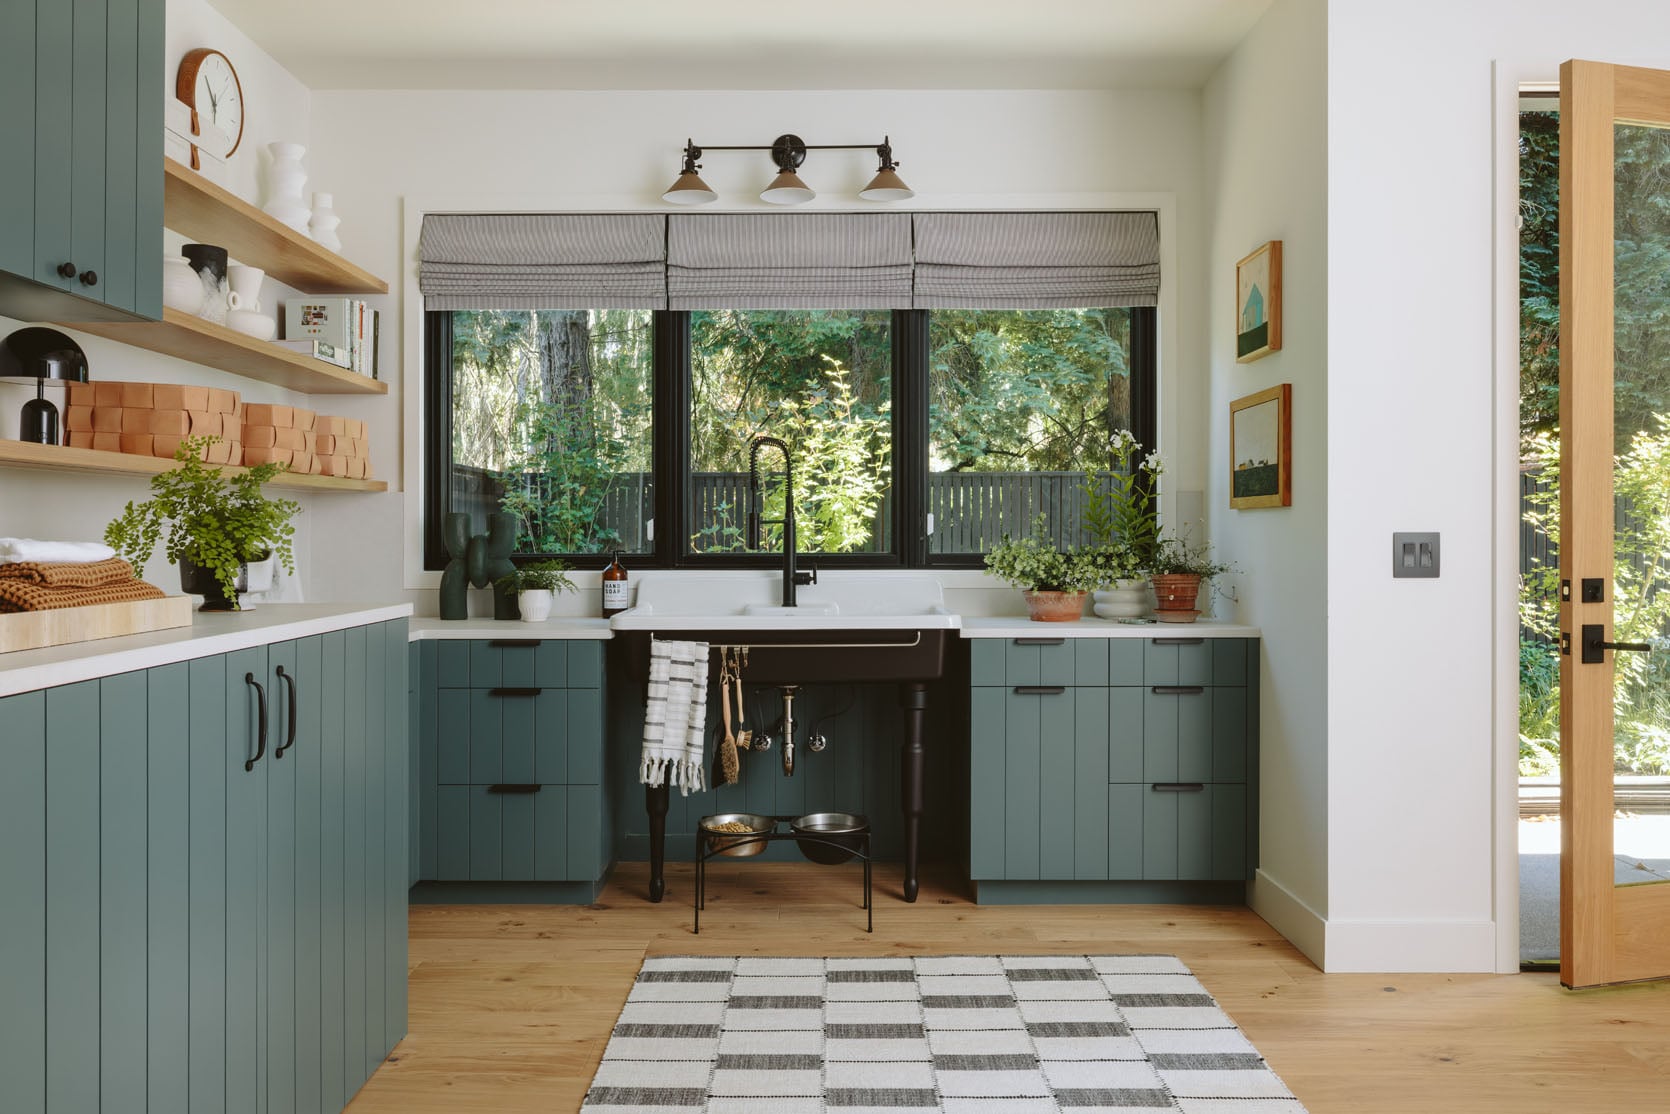
One thing I learned in the mudroom is that this tiny black and white stripe looked gray on camera, which is a bummer and not intended. In person, it was/is a super sweet texture and classic stripe, but I should have predicted that in photos, it wouldn’t read properly pulled back. Just something to think about!
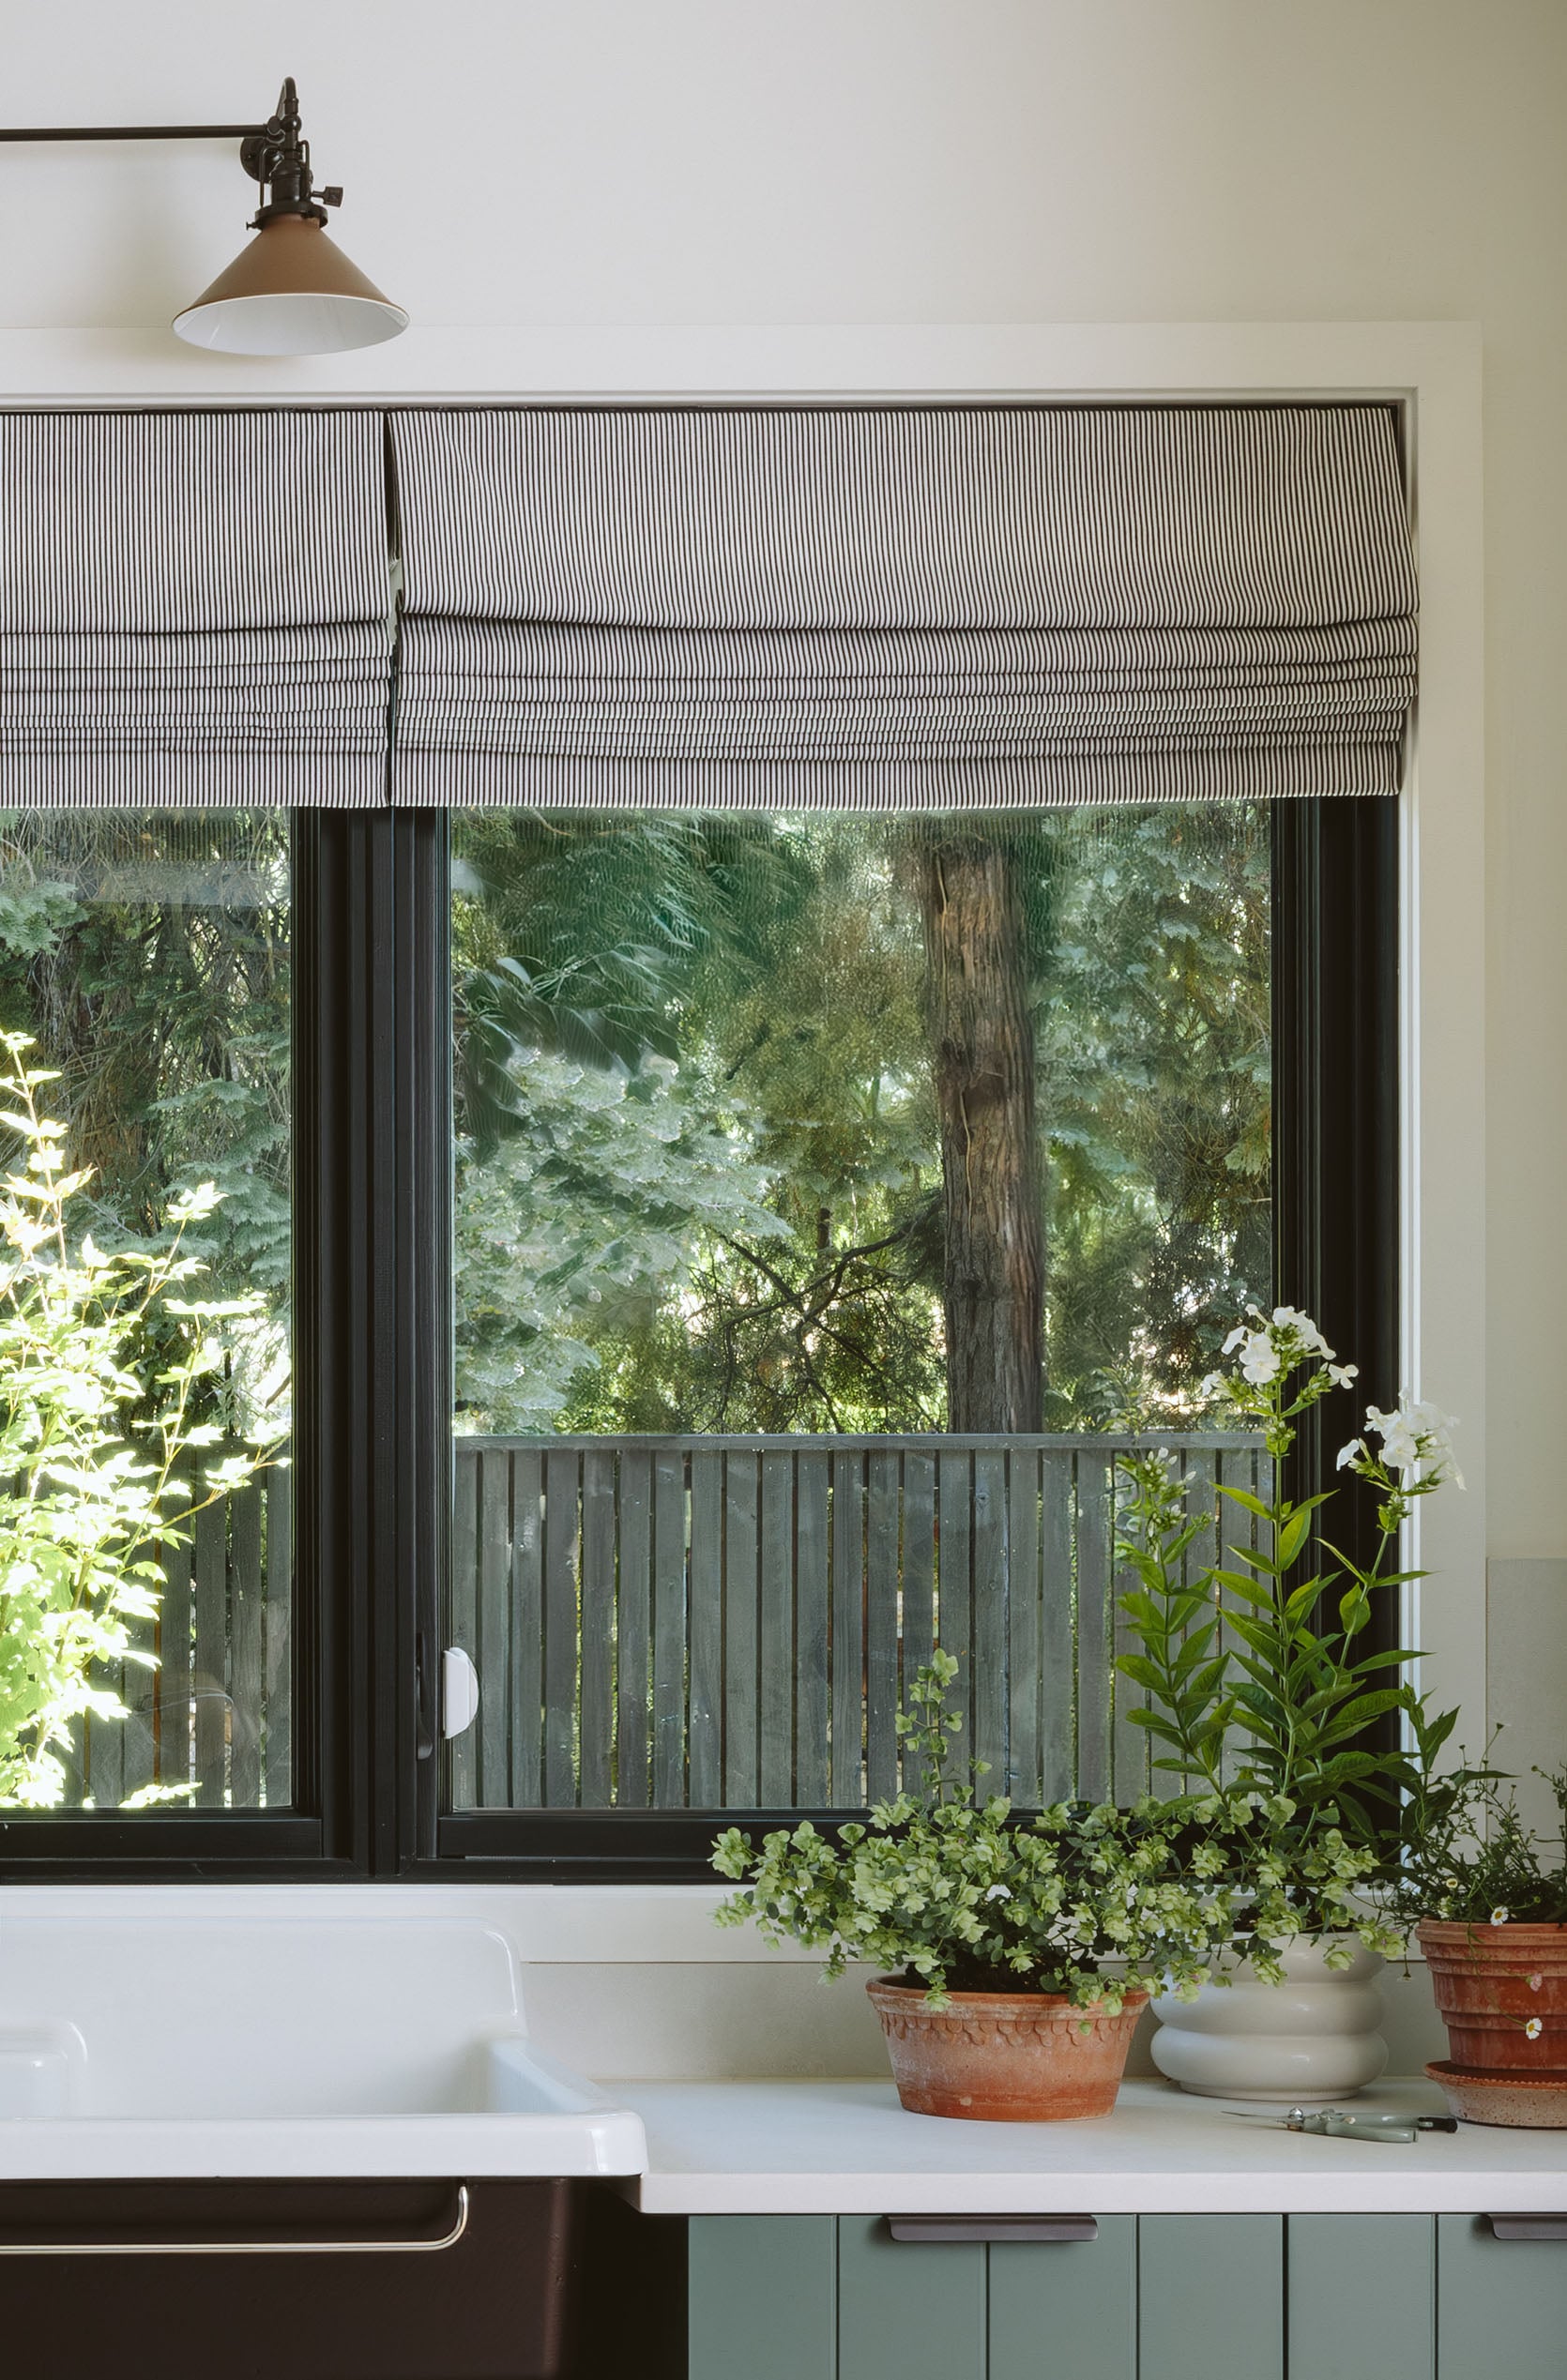
You’ll see here that we did three shades for each window, which I think looks best and is super great for weight/longevity. There are gaps which is fine here, but in a bedroom those light leaks might bug you (they would me – I’m very sensitive to light leaks, which is a thing, by the way).
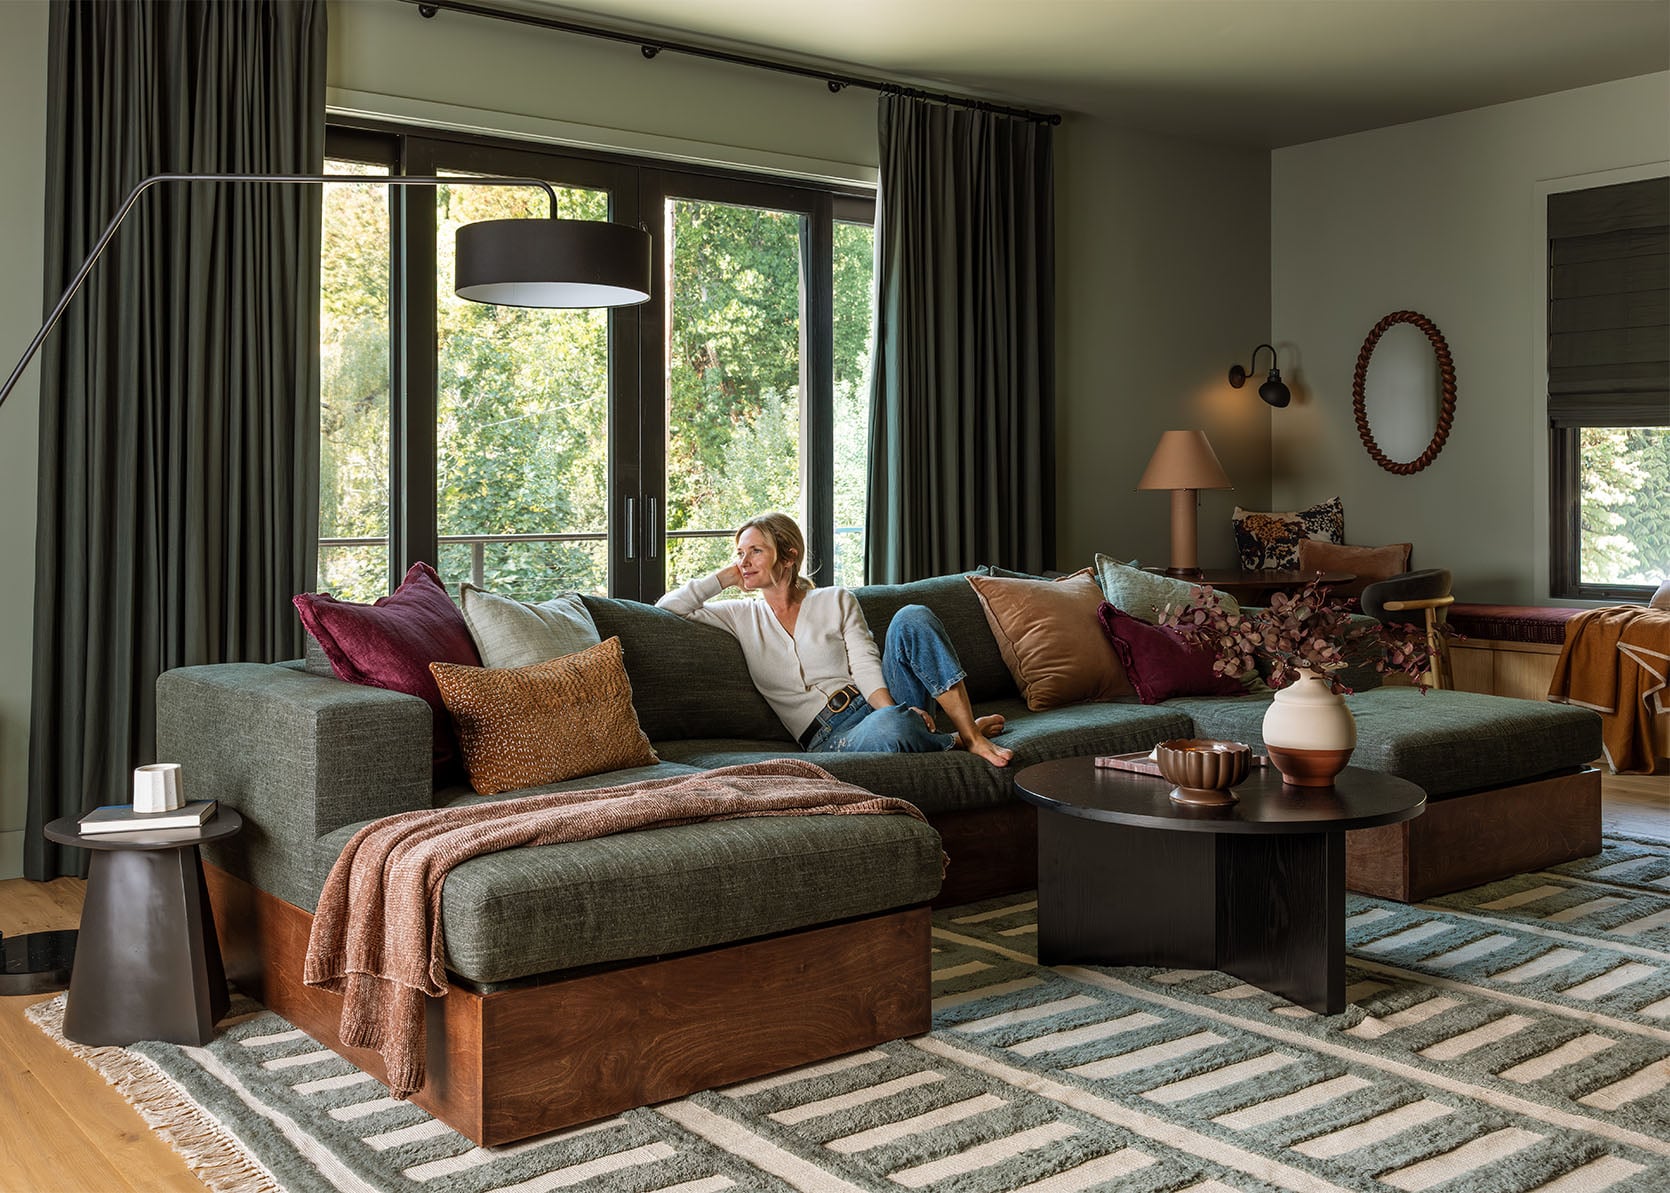
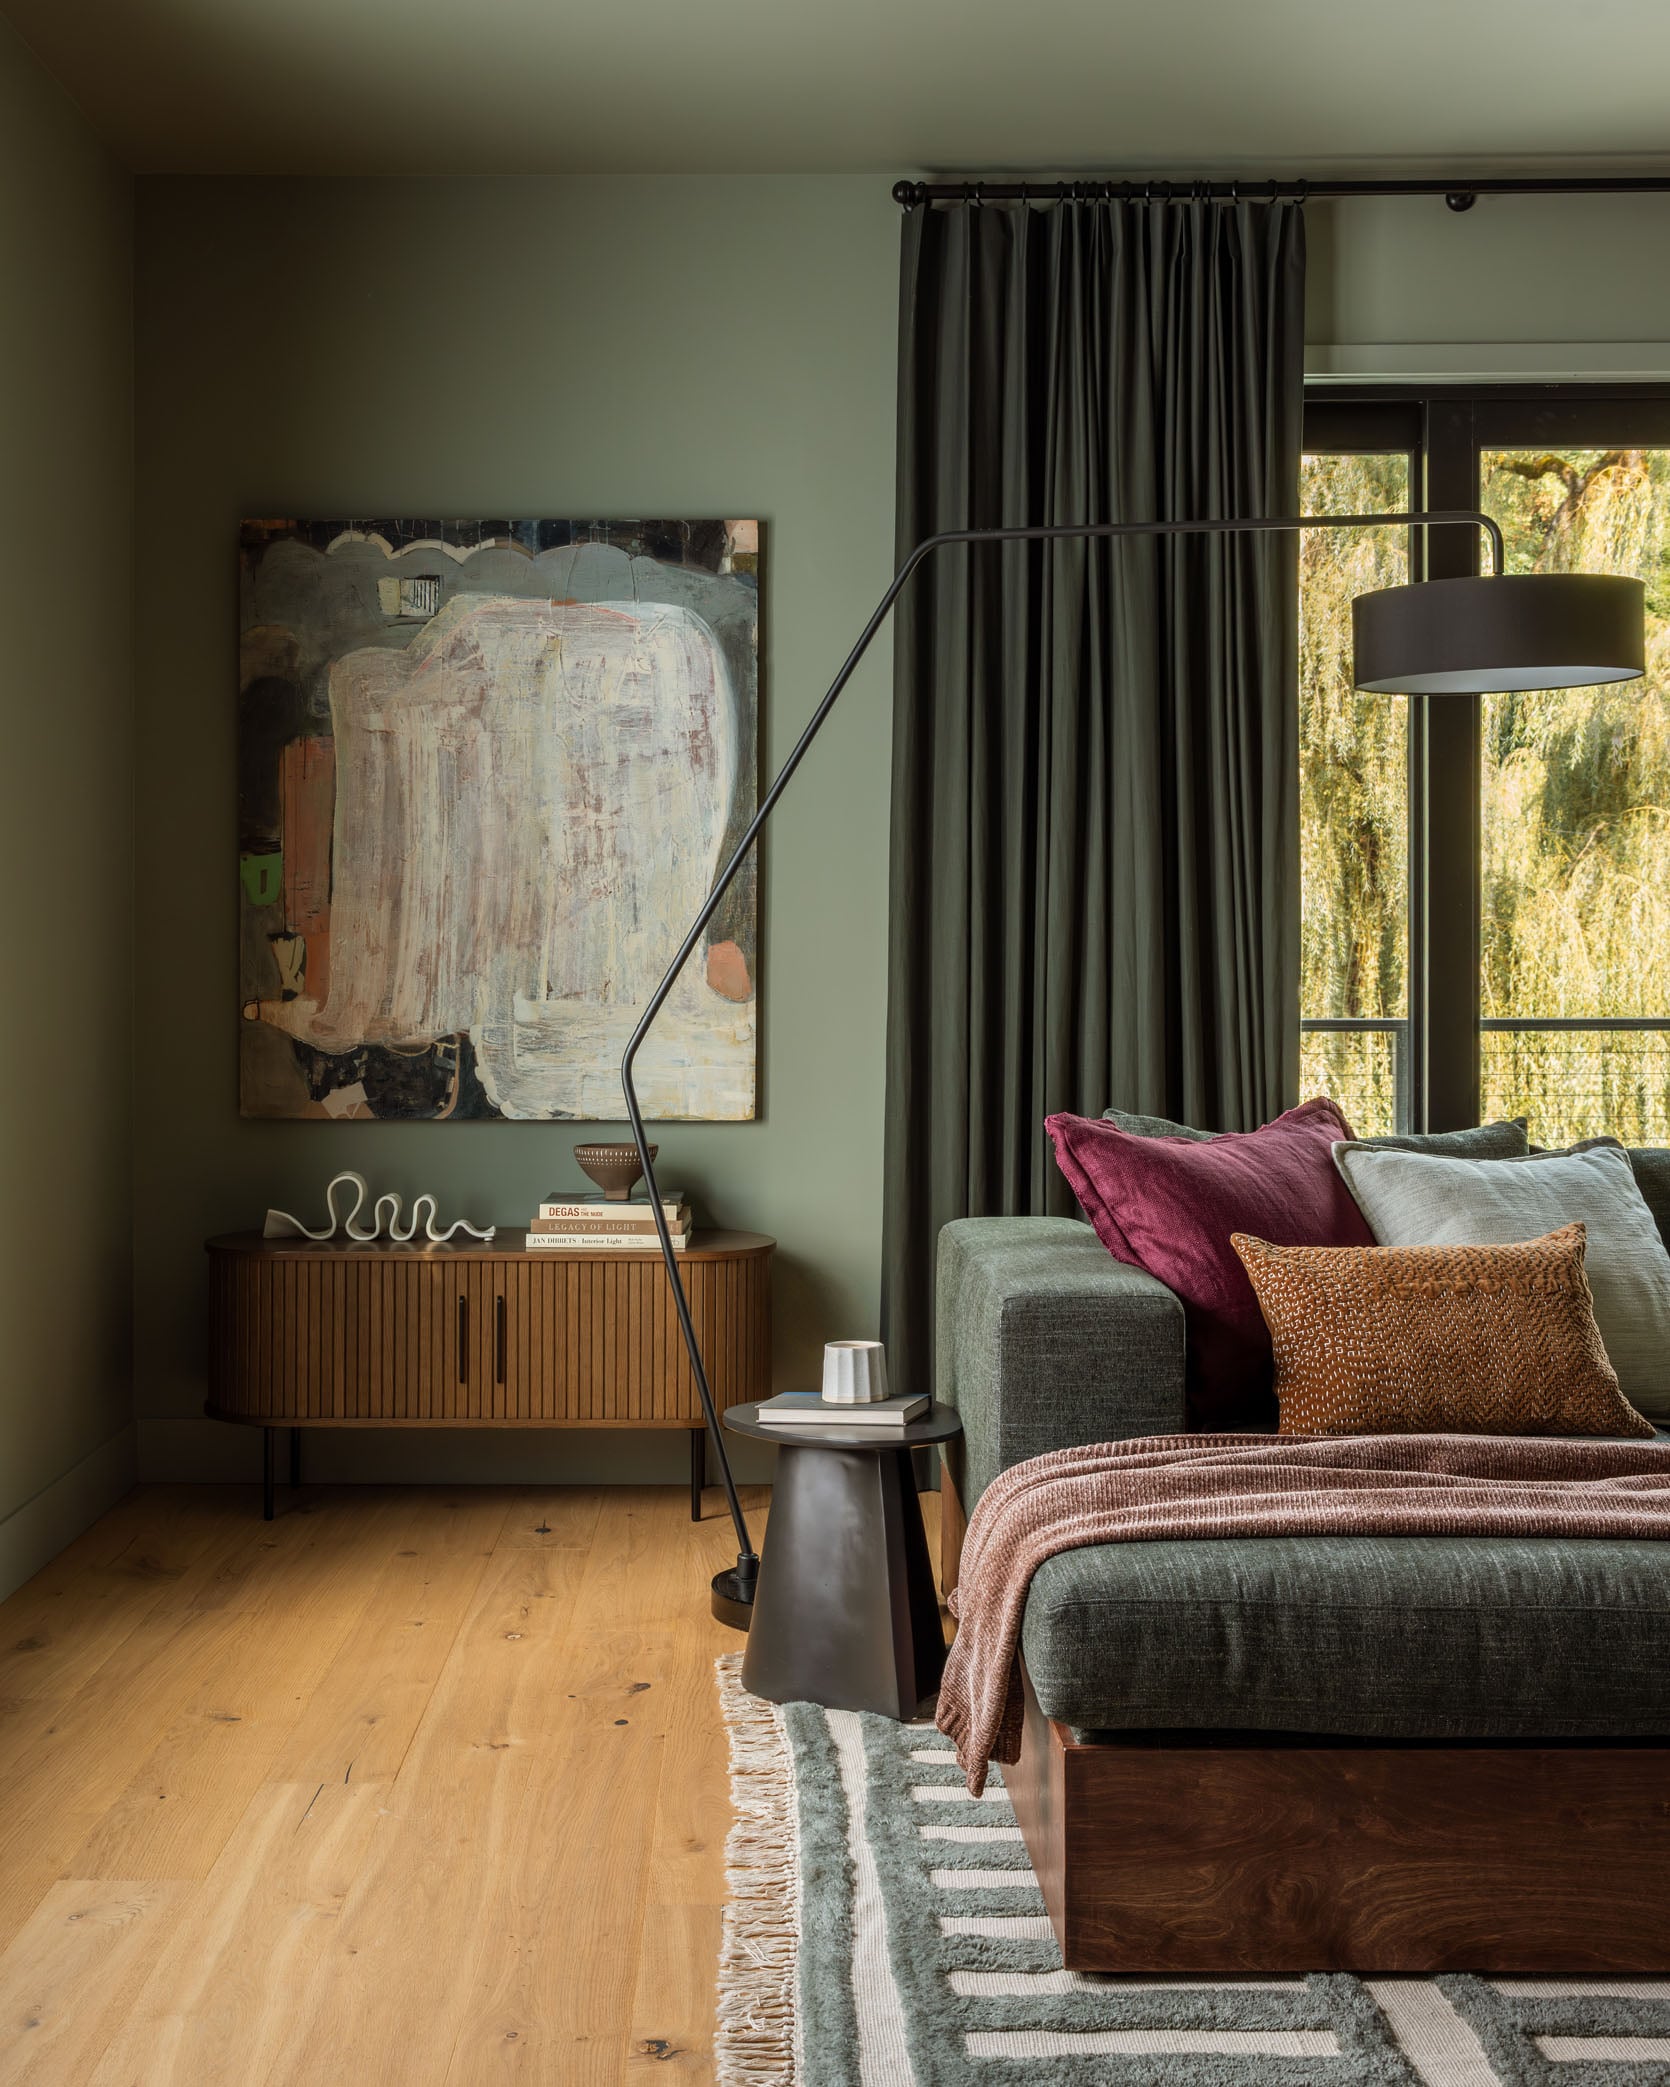
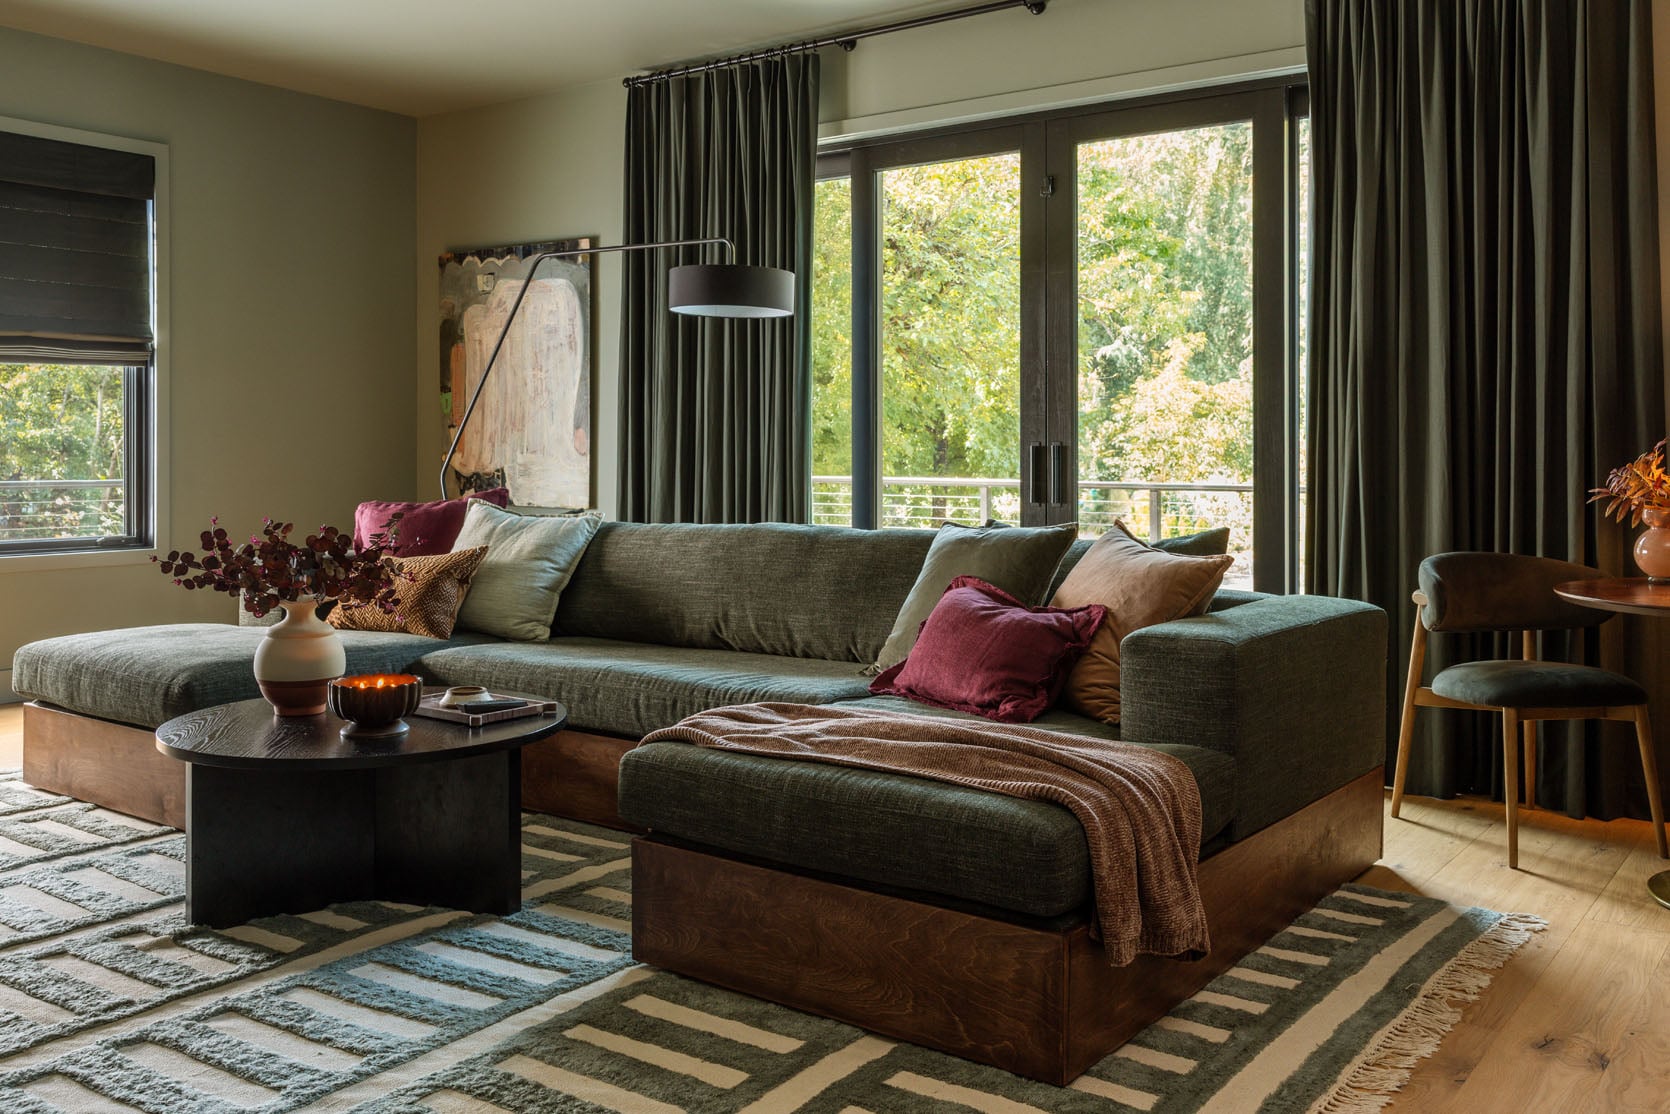
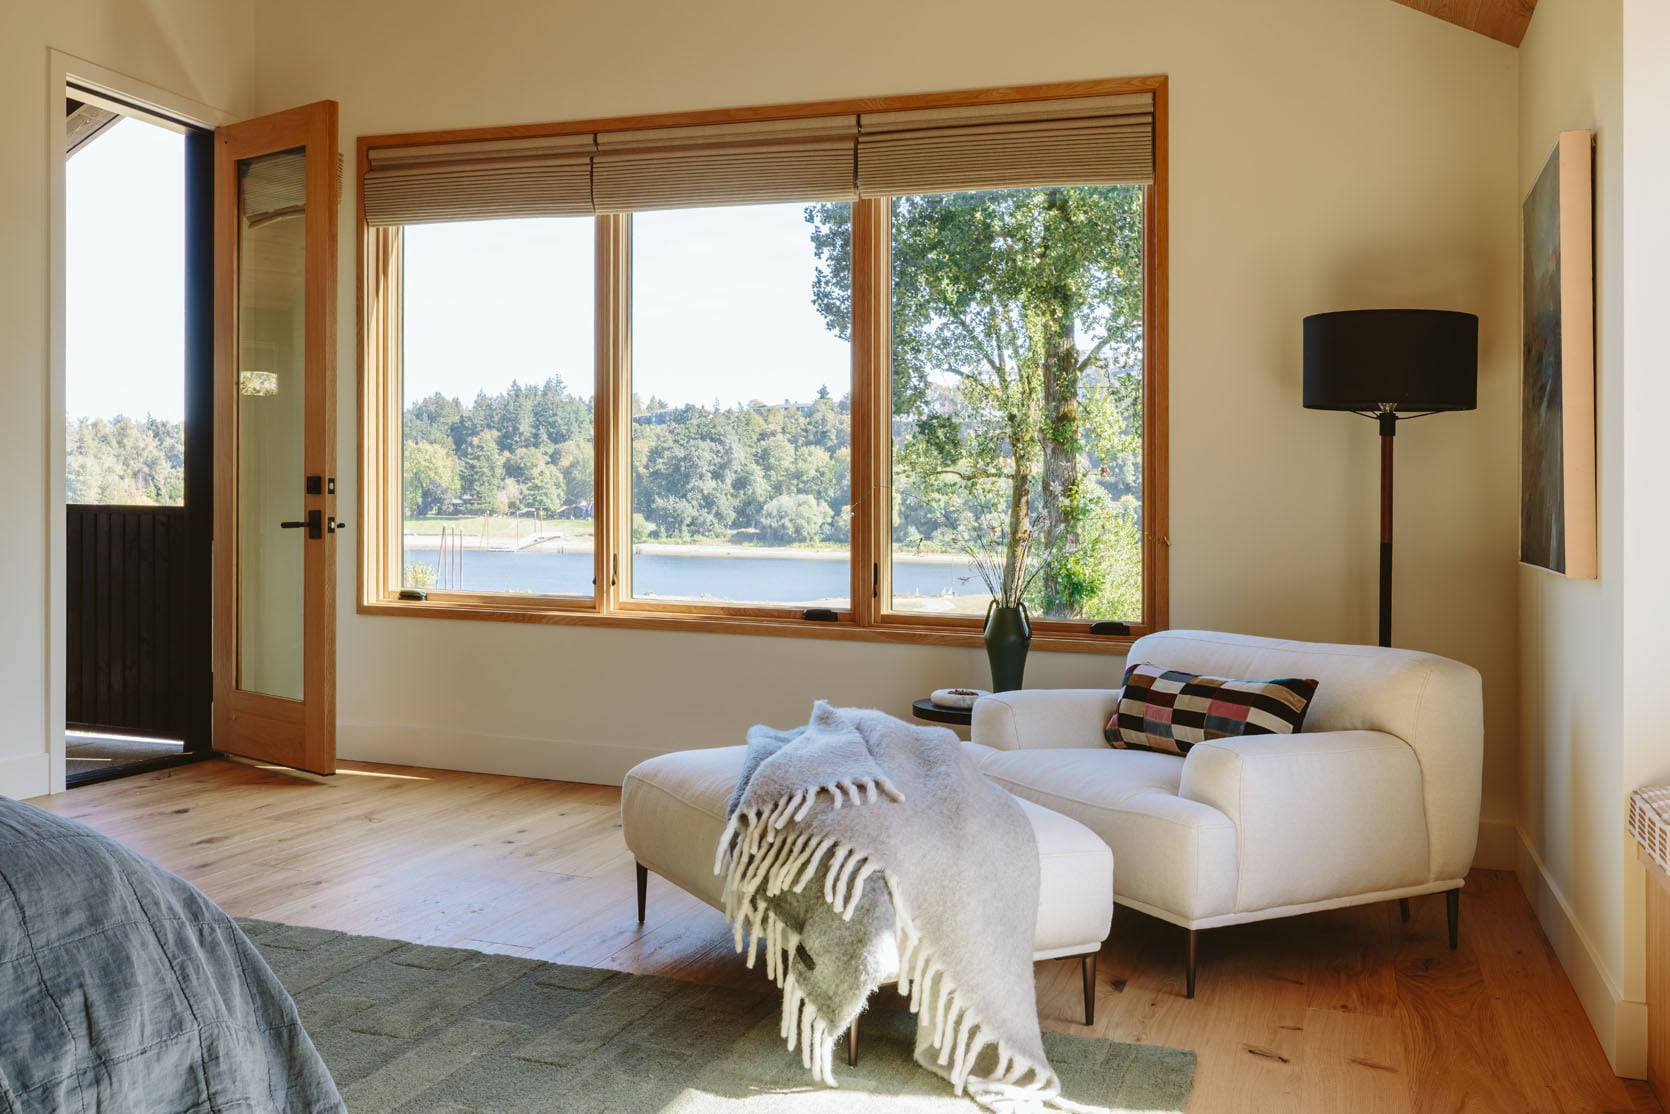
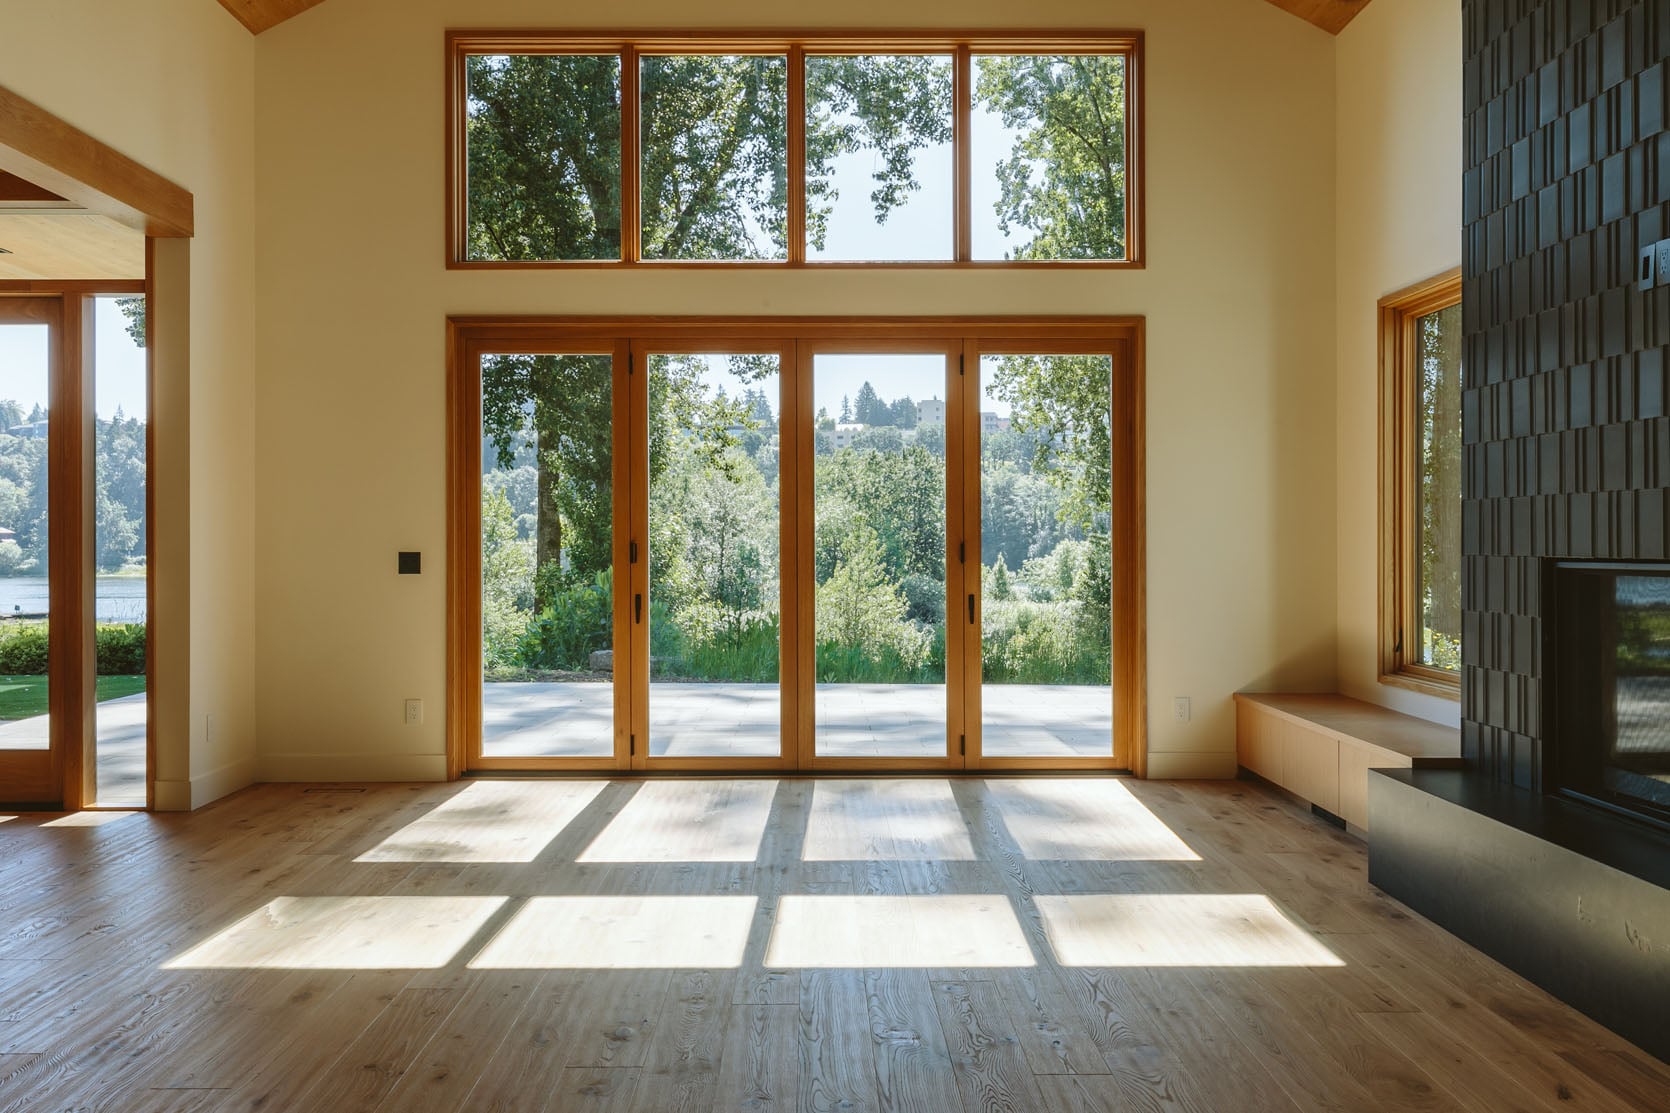
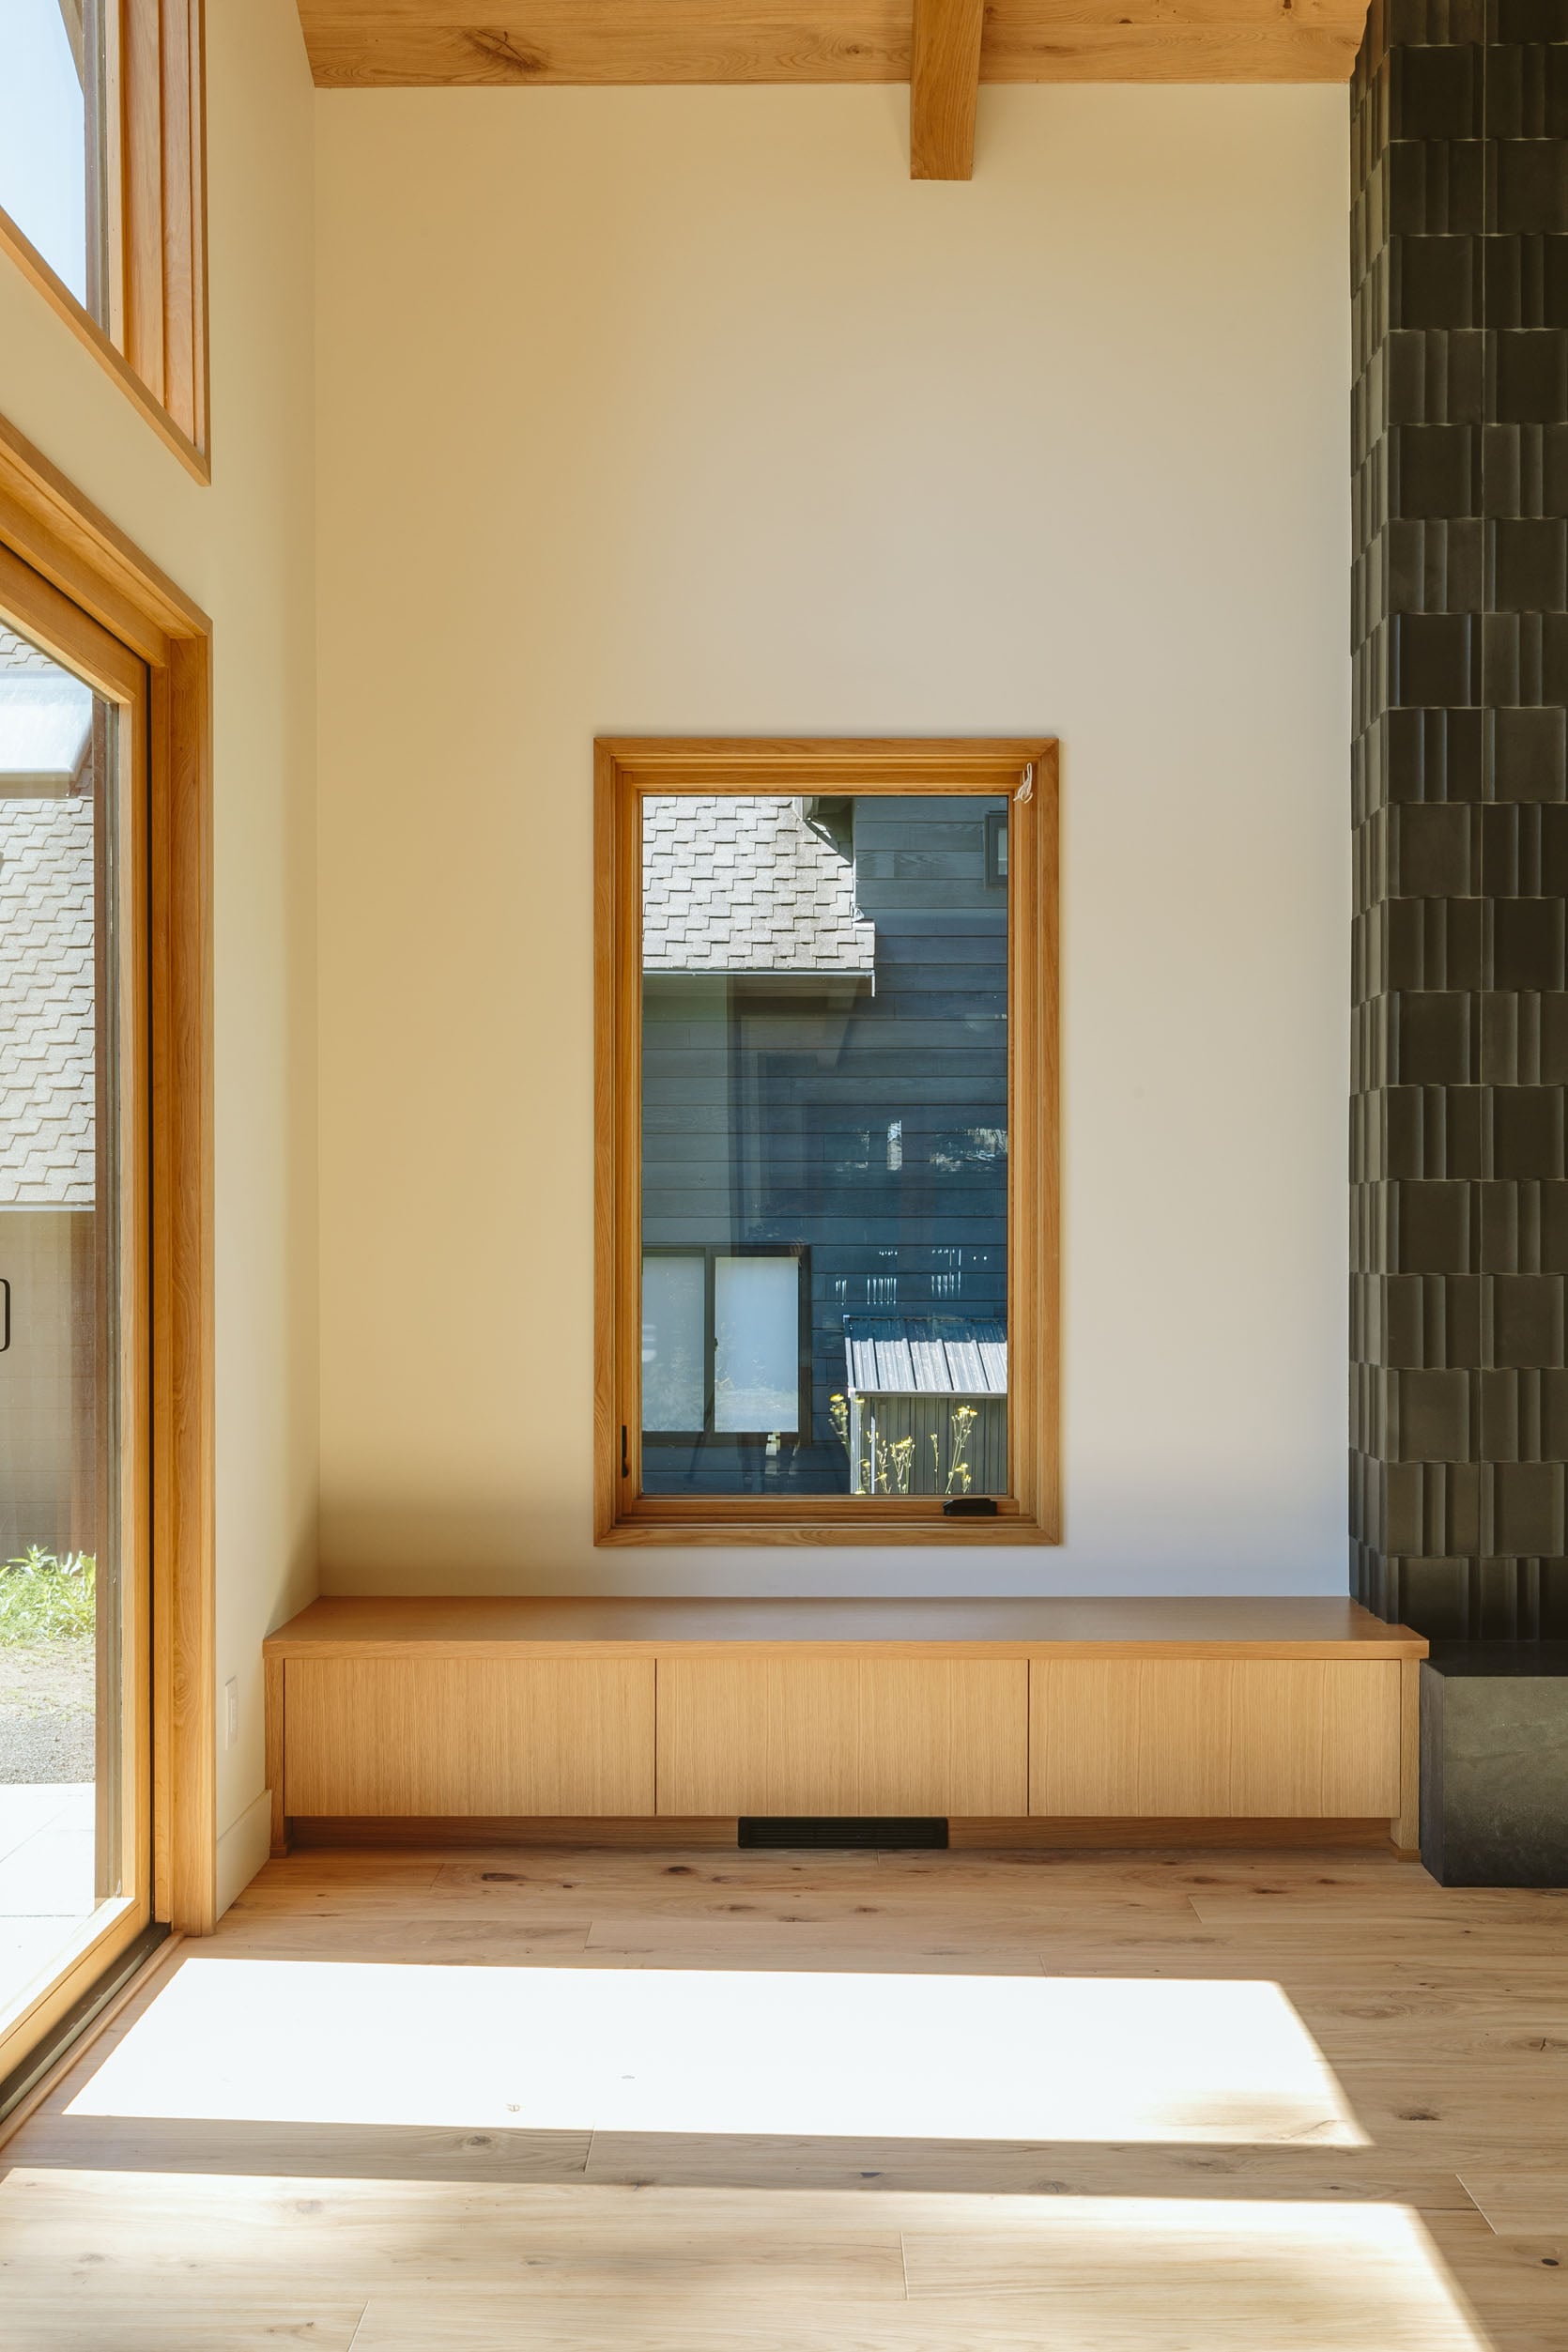
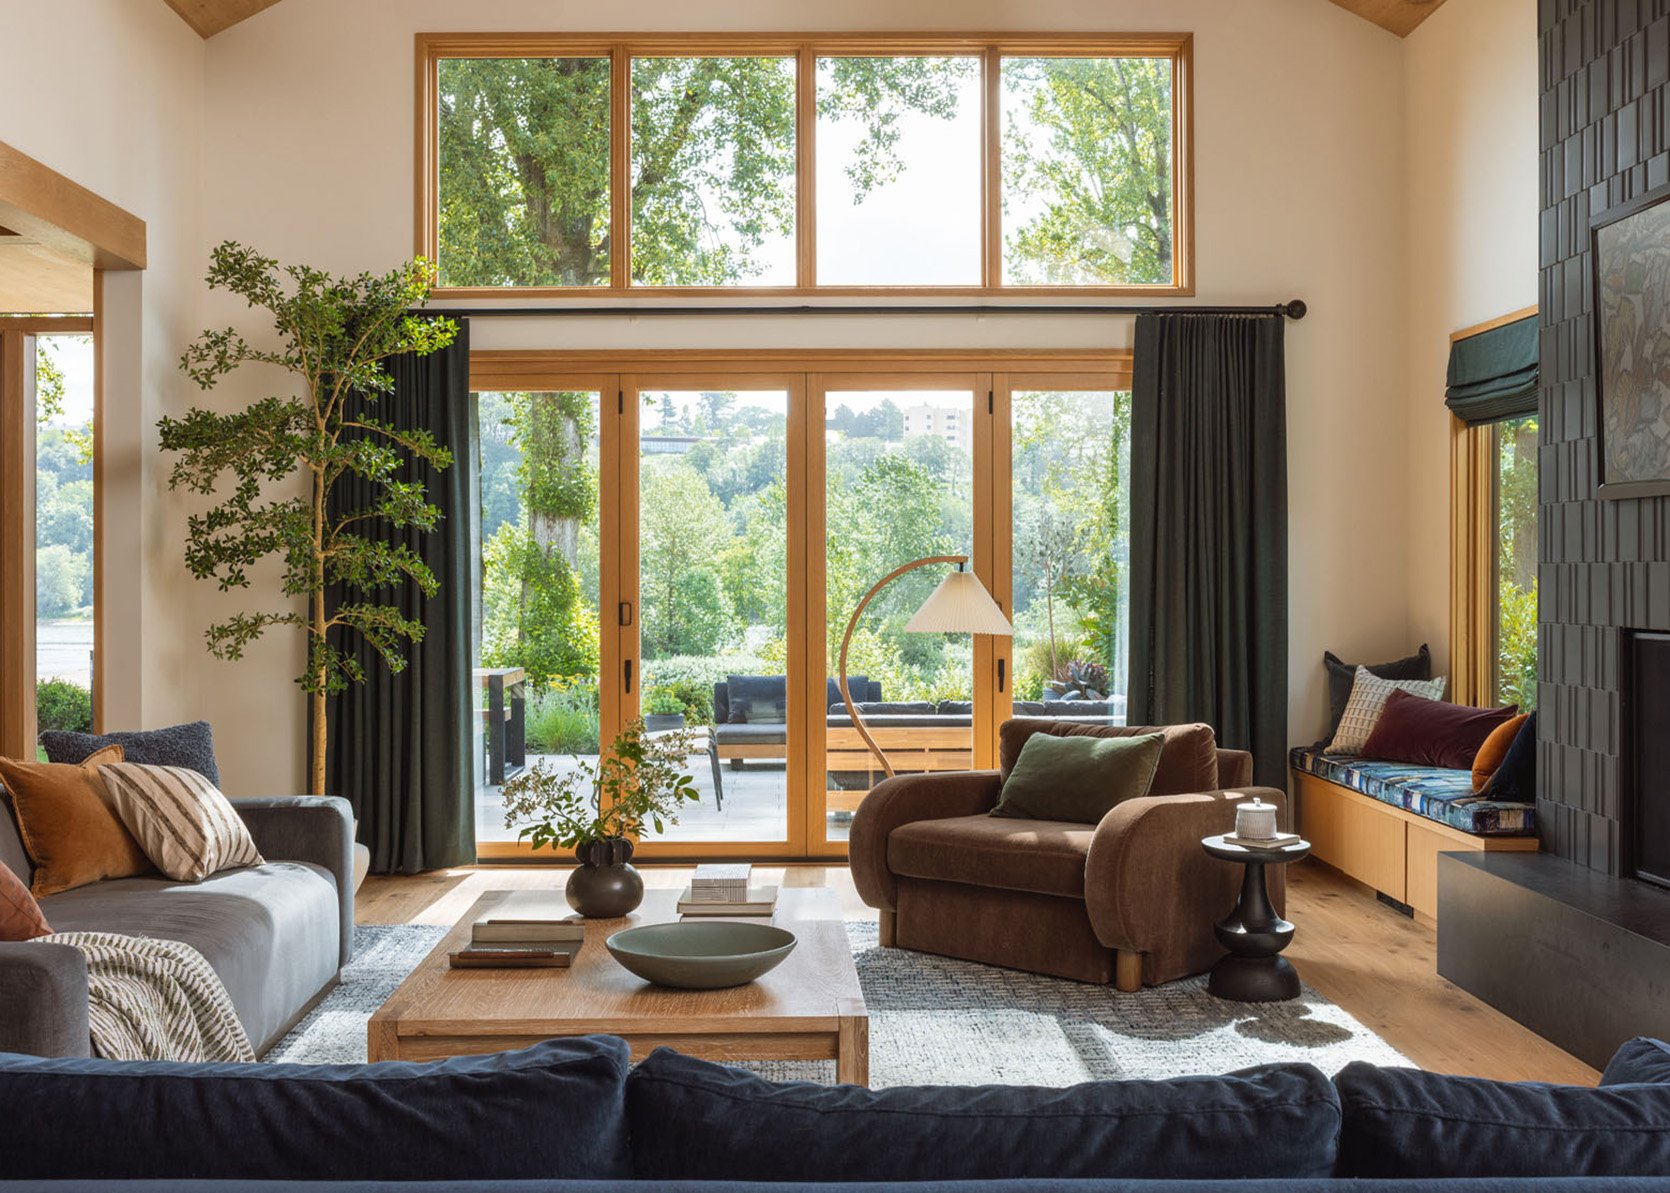
Living Room
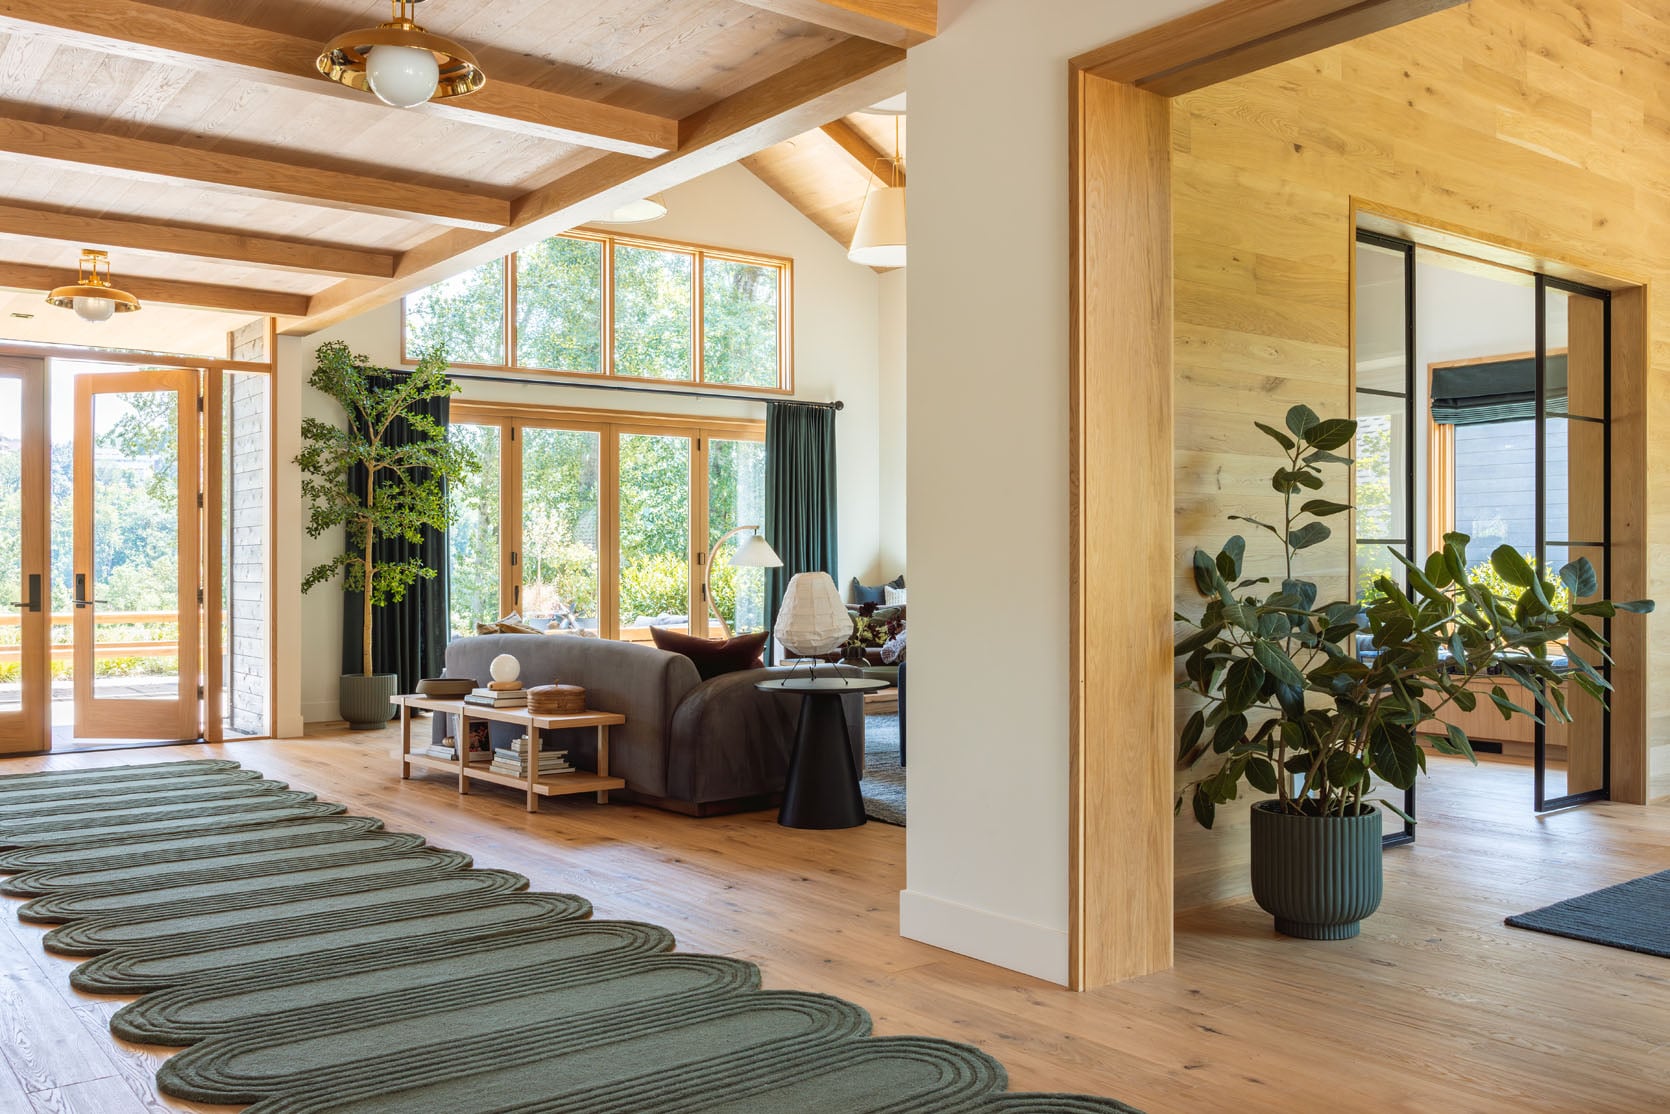
The living room was gorgeous before we added curtains and shades, but boy, did it come alive afterwards. Technically, they didn’t need light control OR privacy. The room faces east with trees, so maybe there is morning dapple, and it’s not street-facing. But as we pulled together the design, we added it – it simply didn’t feel warm enough, and my sister-in-law didn’t love exposed she felt while in here.
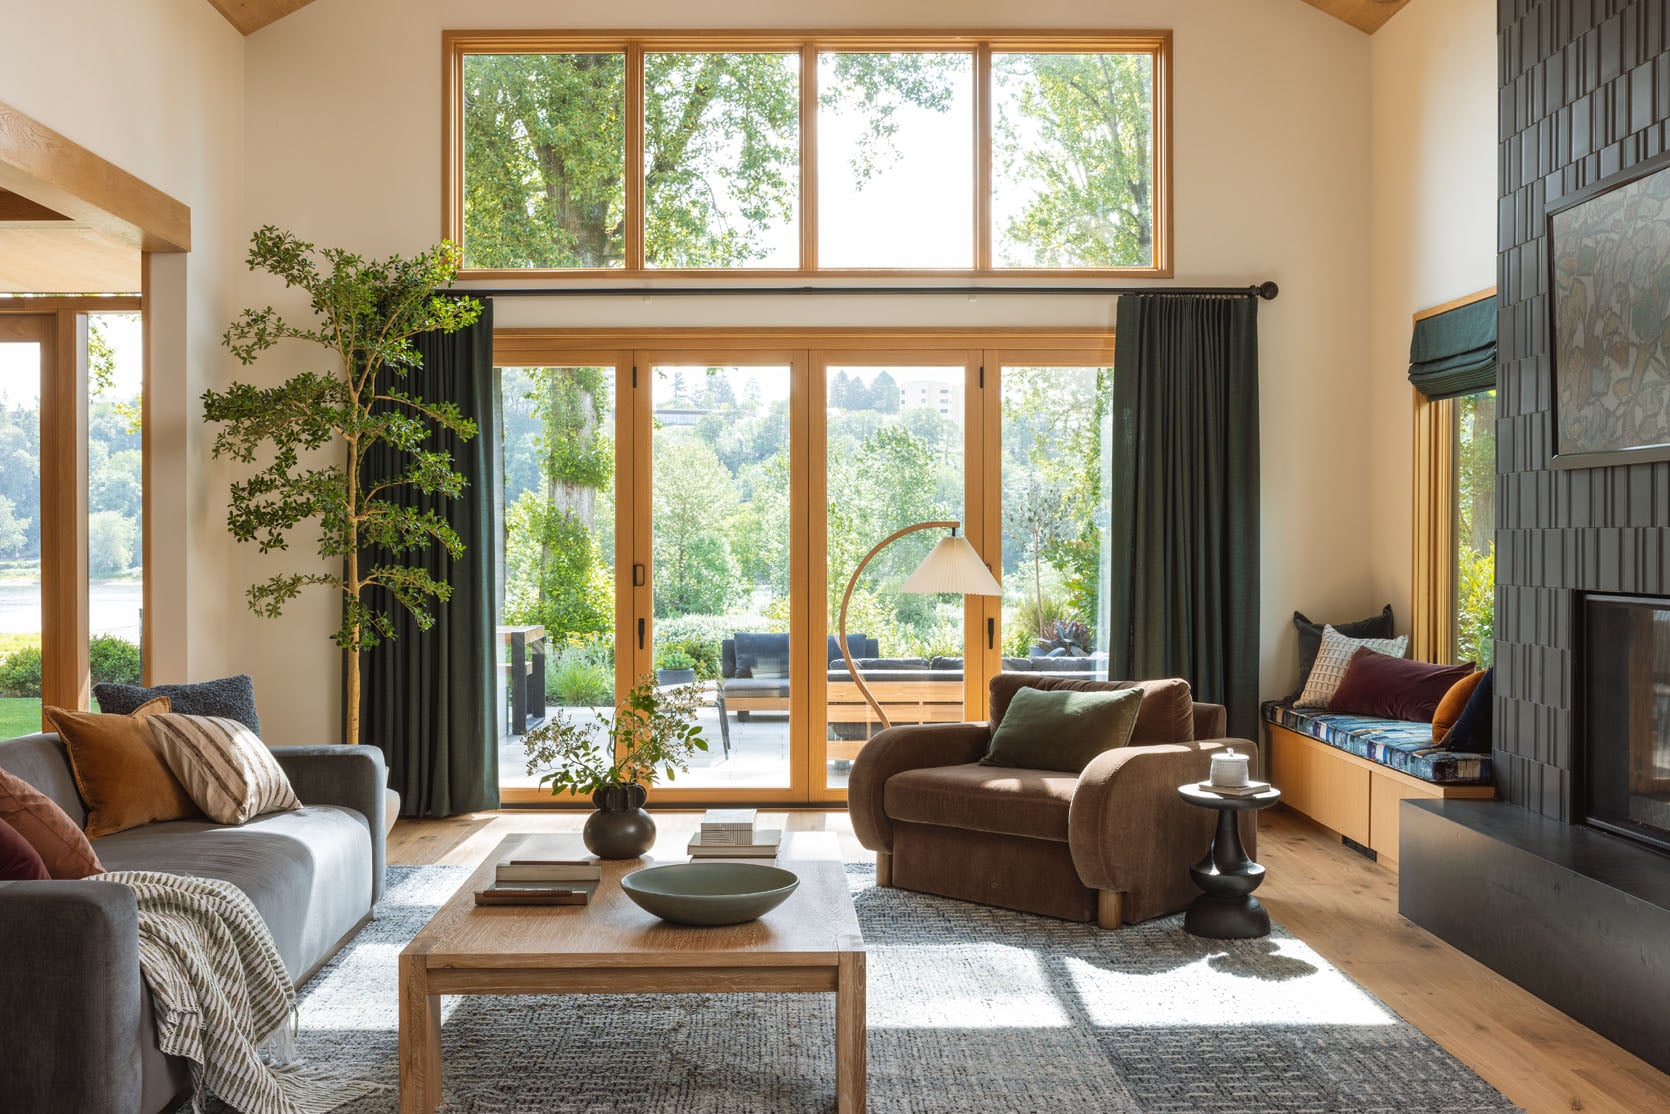
We really didn’t want this house to go toooo traditional, but these custom drapes and shades don’t feel trad at all. They just add warmth, color, texture, depth, and contrast – all the things we love in a home. We chose a dark green (brighter than the family room) that would still feel muted, not emerald, but added color.
We chose inside mount shades because the windows were tall enough to lose some real estate (which was about 12″). They look so pretty. These are manual, cordless, and they don’t use them too often, but they just add that added layer while also adding coziness in the winter.
Game Room
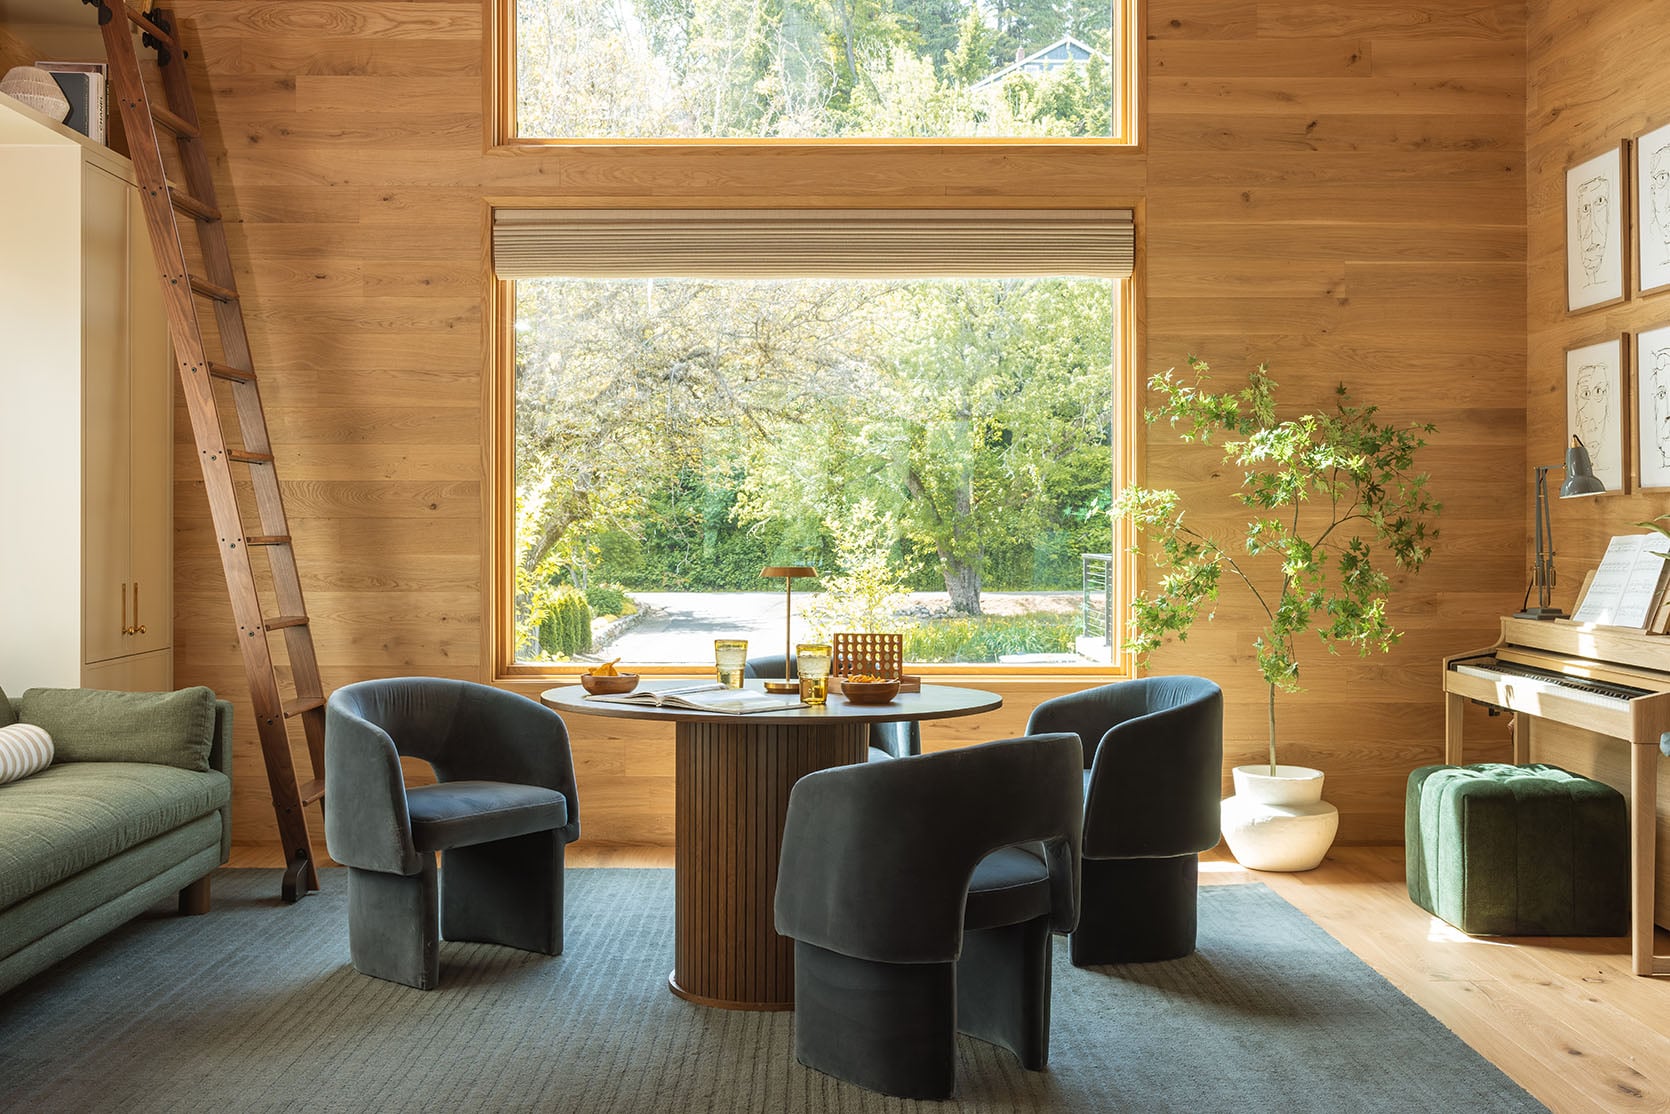
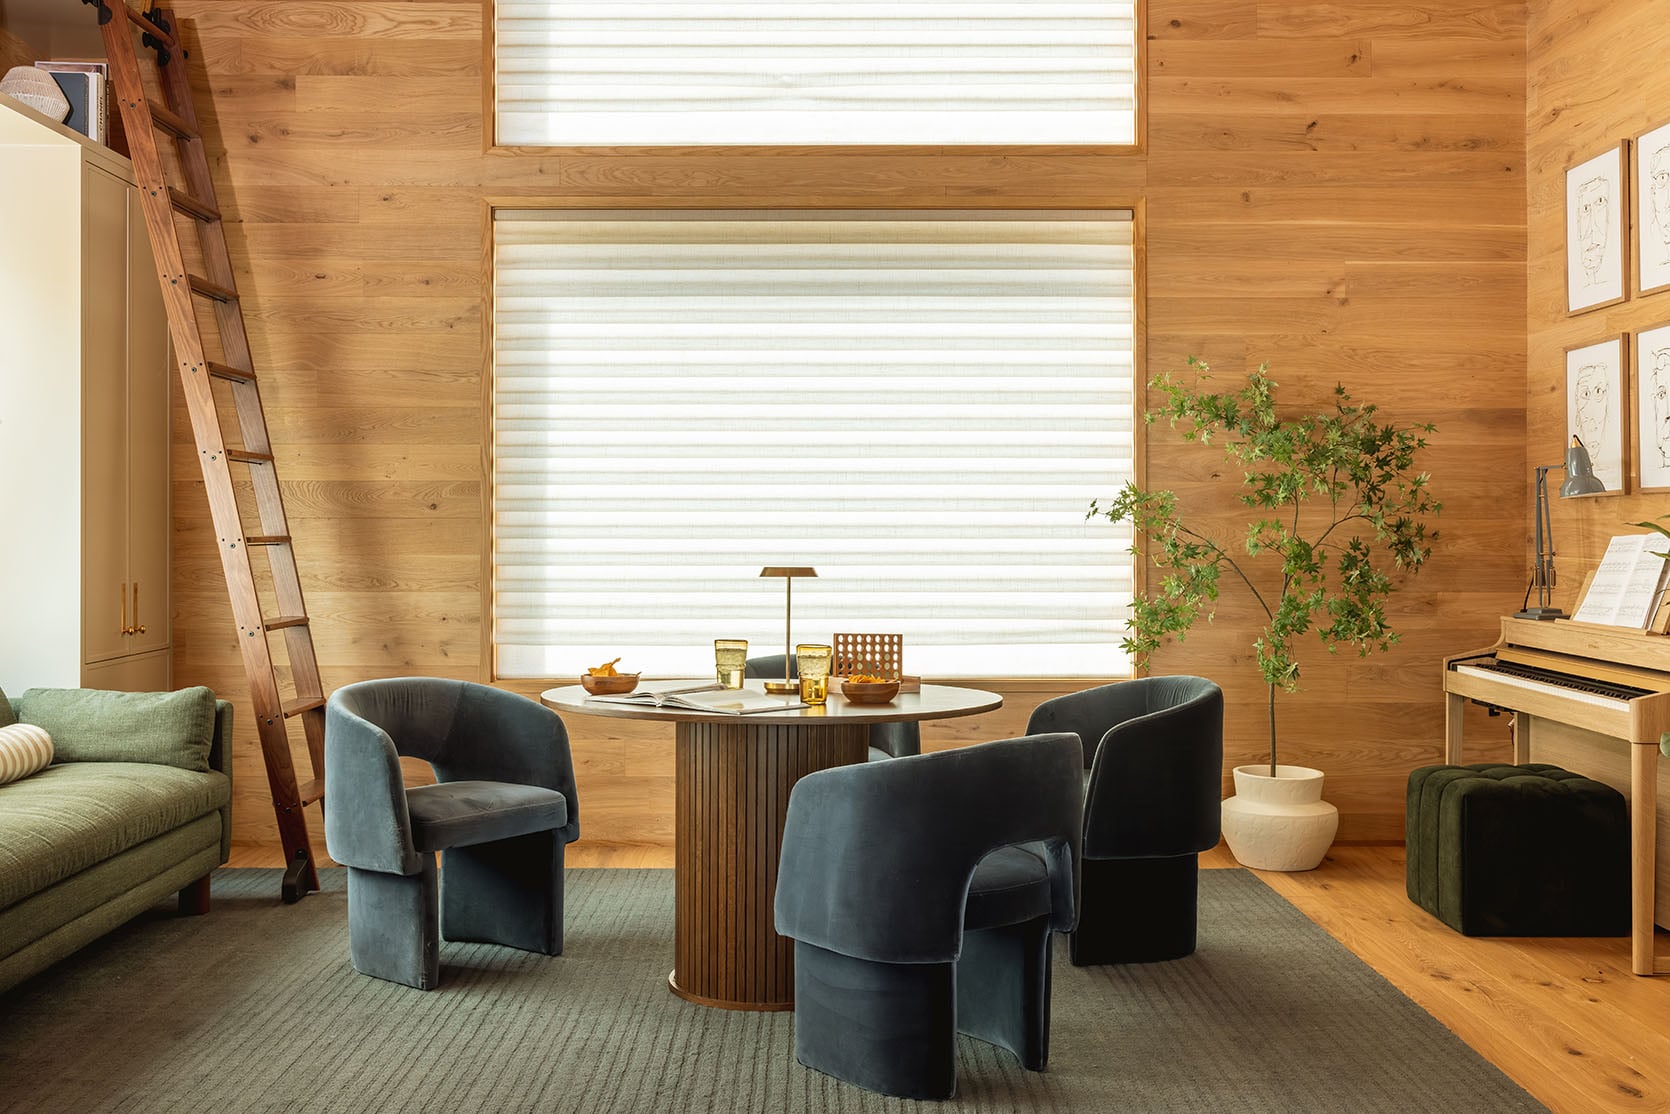
This room needed to be motorized because the top window was soooo high. Did it need window treatments? Kinda because the sun blasted through here in the afternoon. It felt weird to treat the bottom window without the top one (it would have felt naked). So we treated them all the same with this soft taupe that almost disappeared when up, but was a soft cream when down – light filtering, but not blackout. They pull these down way more than they thought they would, mostly because of privacy from the street. They just don’t love feeling exposed, so it’s nice to have the option even on cloudy days. Motorized was crucial due to the height.
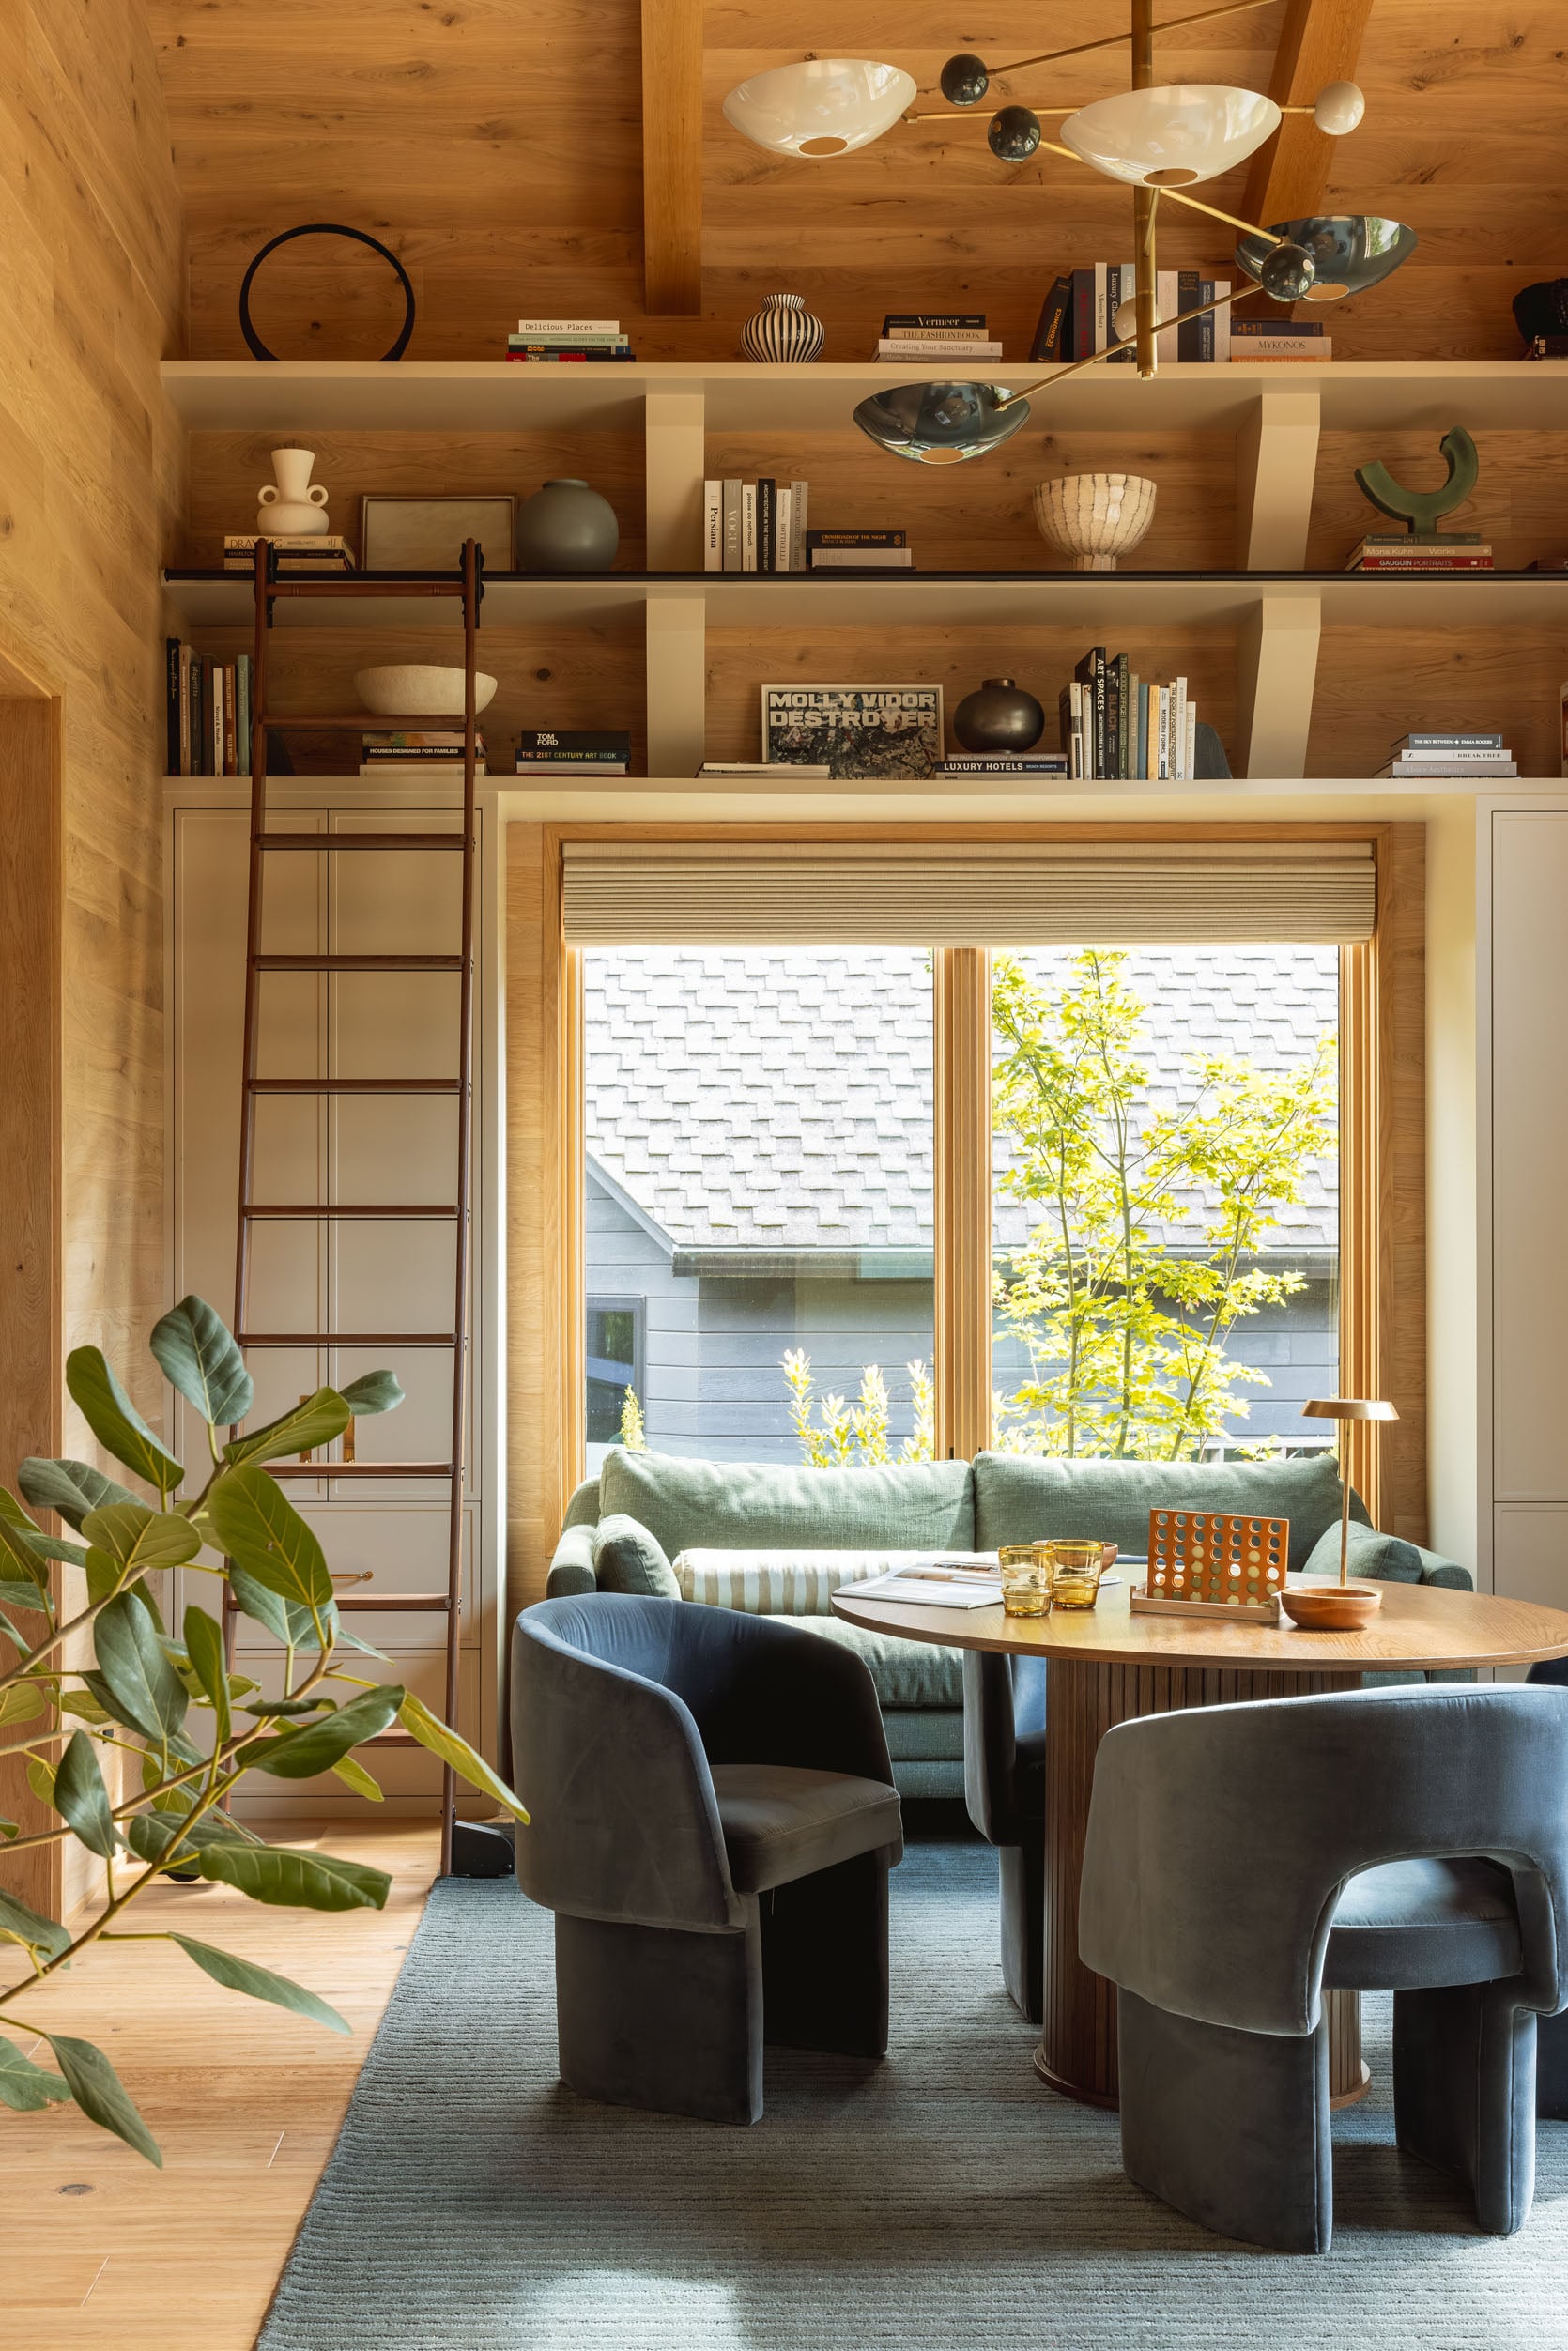
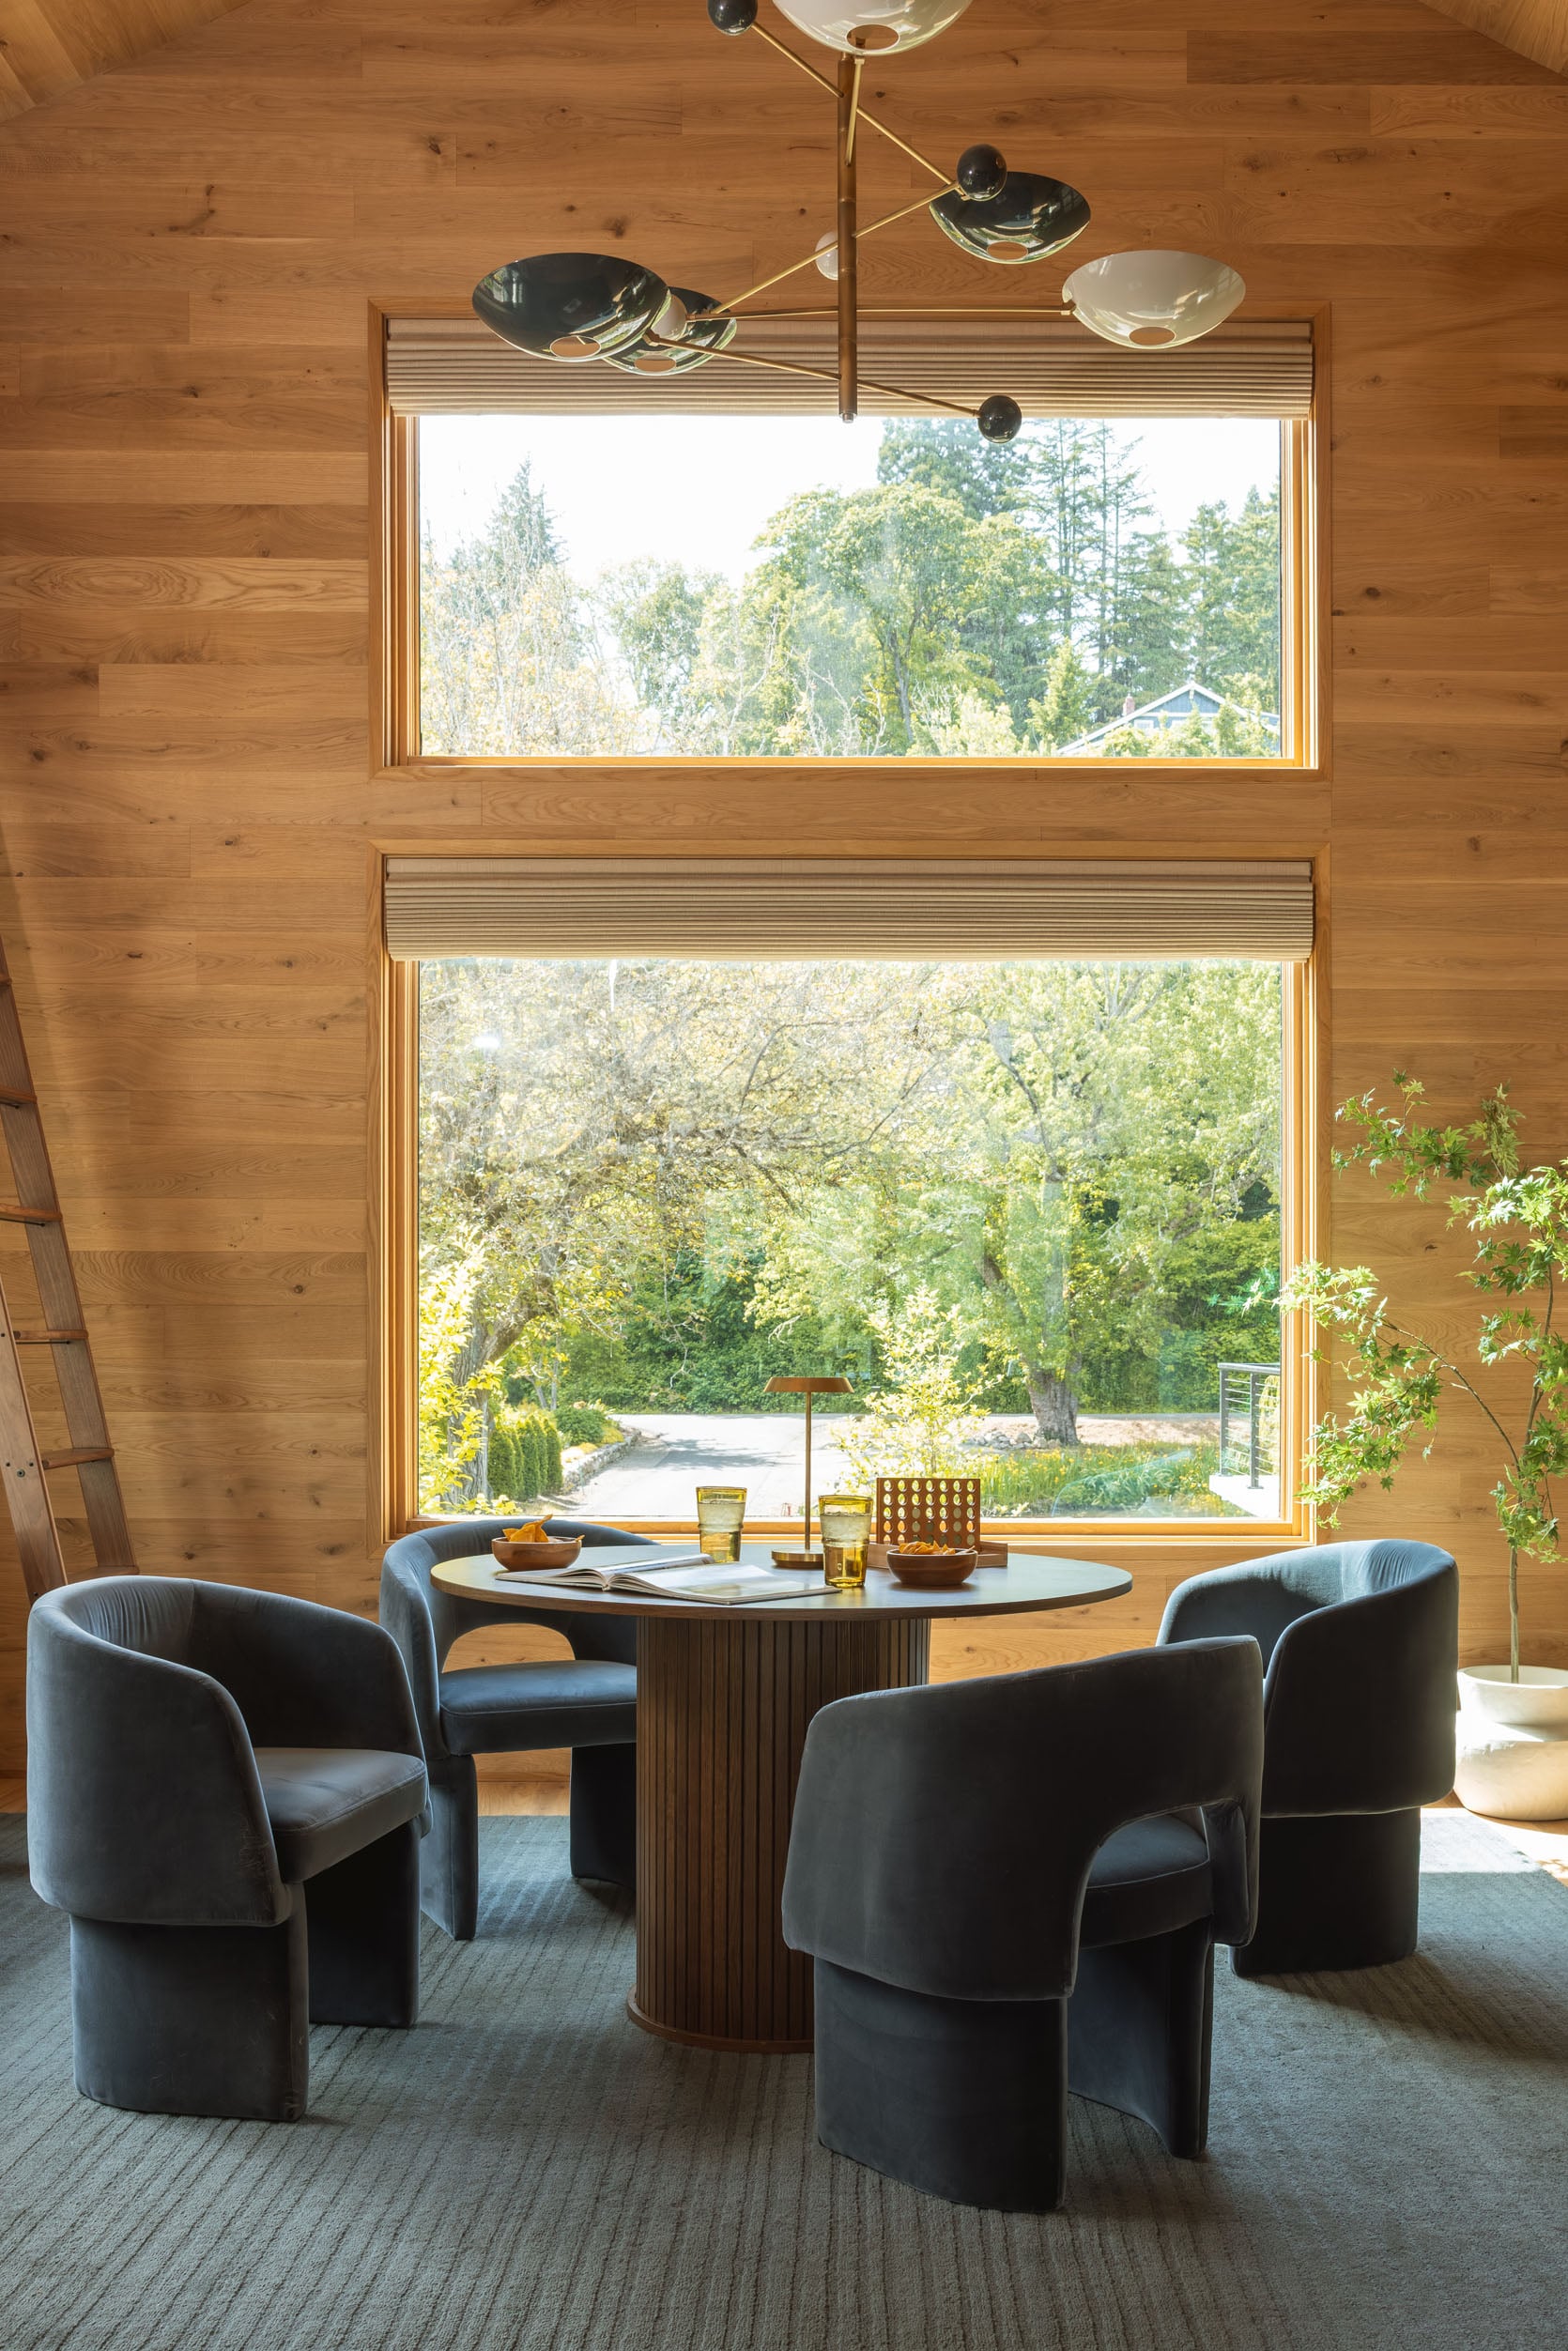
Dining Room
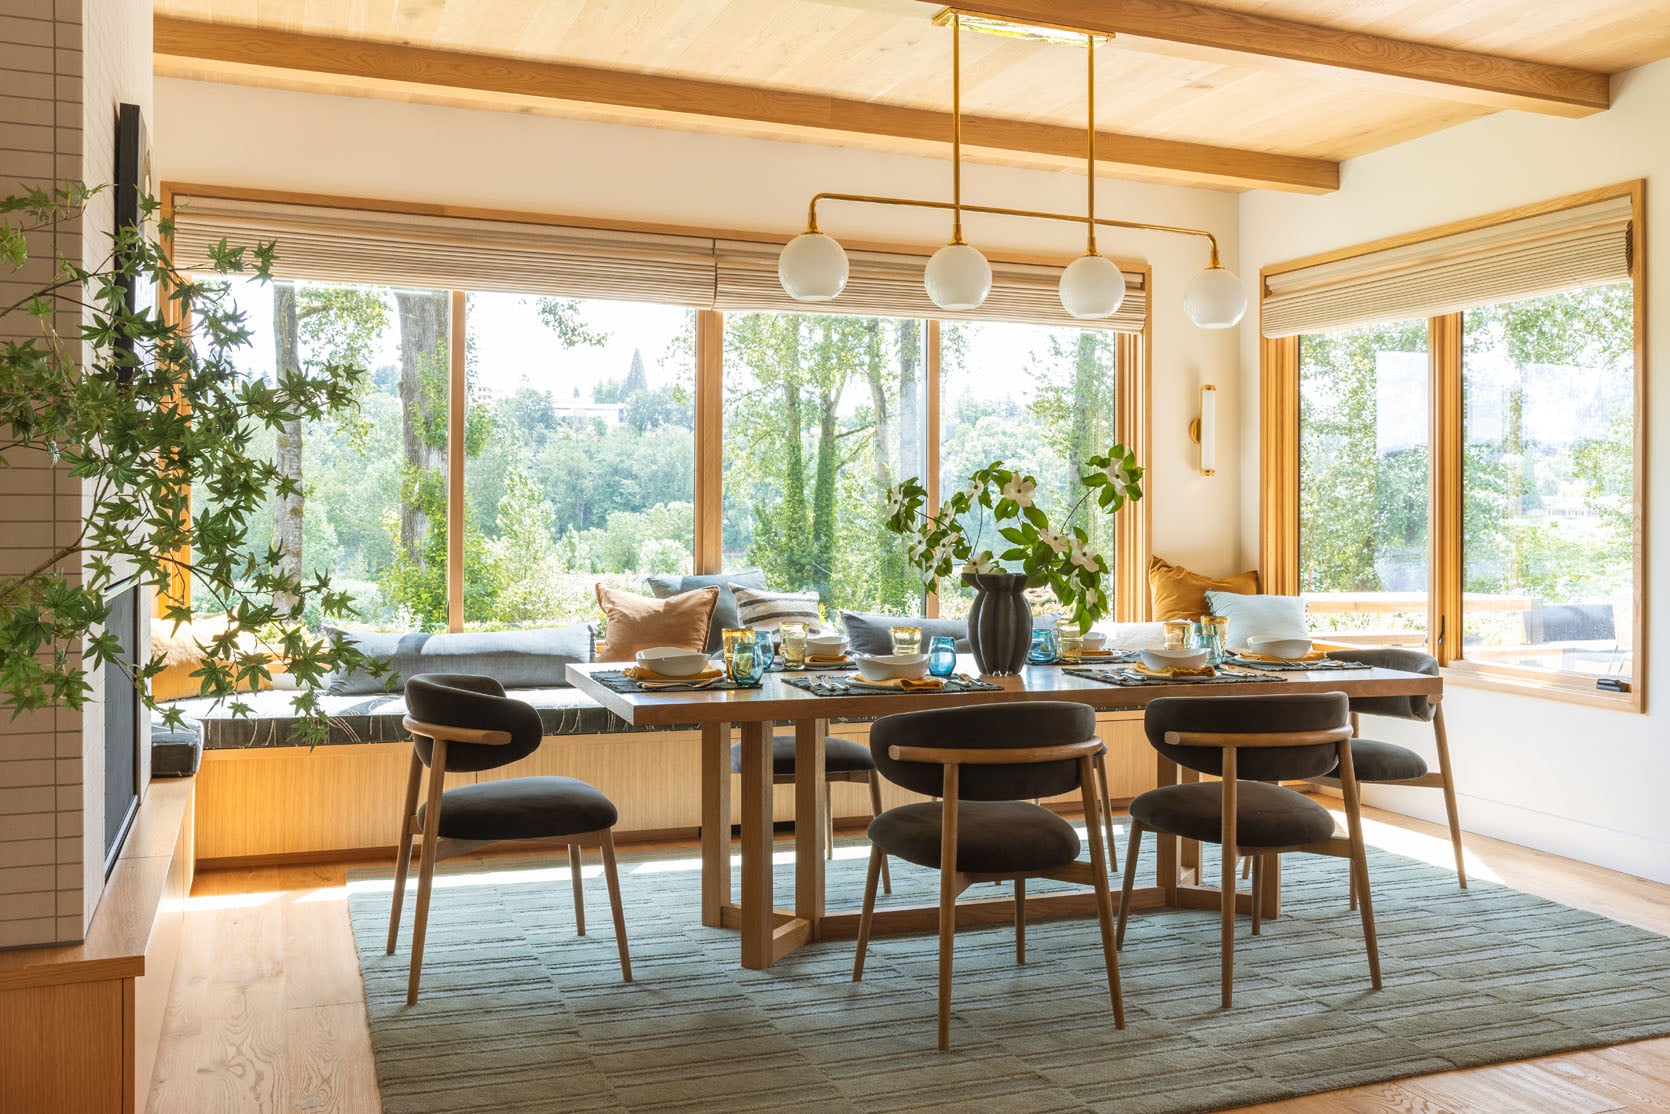
We went with the exact same treatment in here as in the game room. The soft taupe, inside mount, and my brother wanted them motorized. Now, since these are easily reachable, this might be where you don’t need to upgrade to motorized. But they love that all four can go up while they are making coffee and easily come down should they want to feel cozier at night.
Primary Bedroom
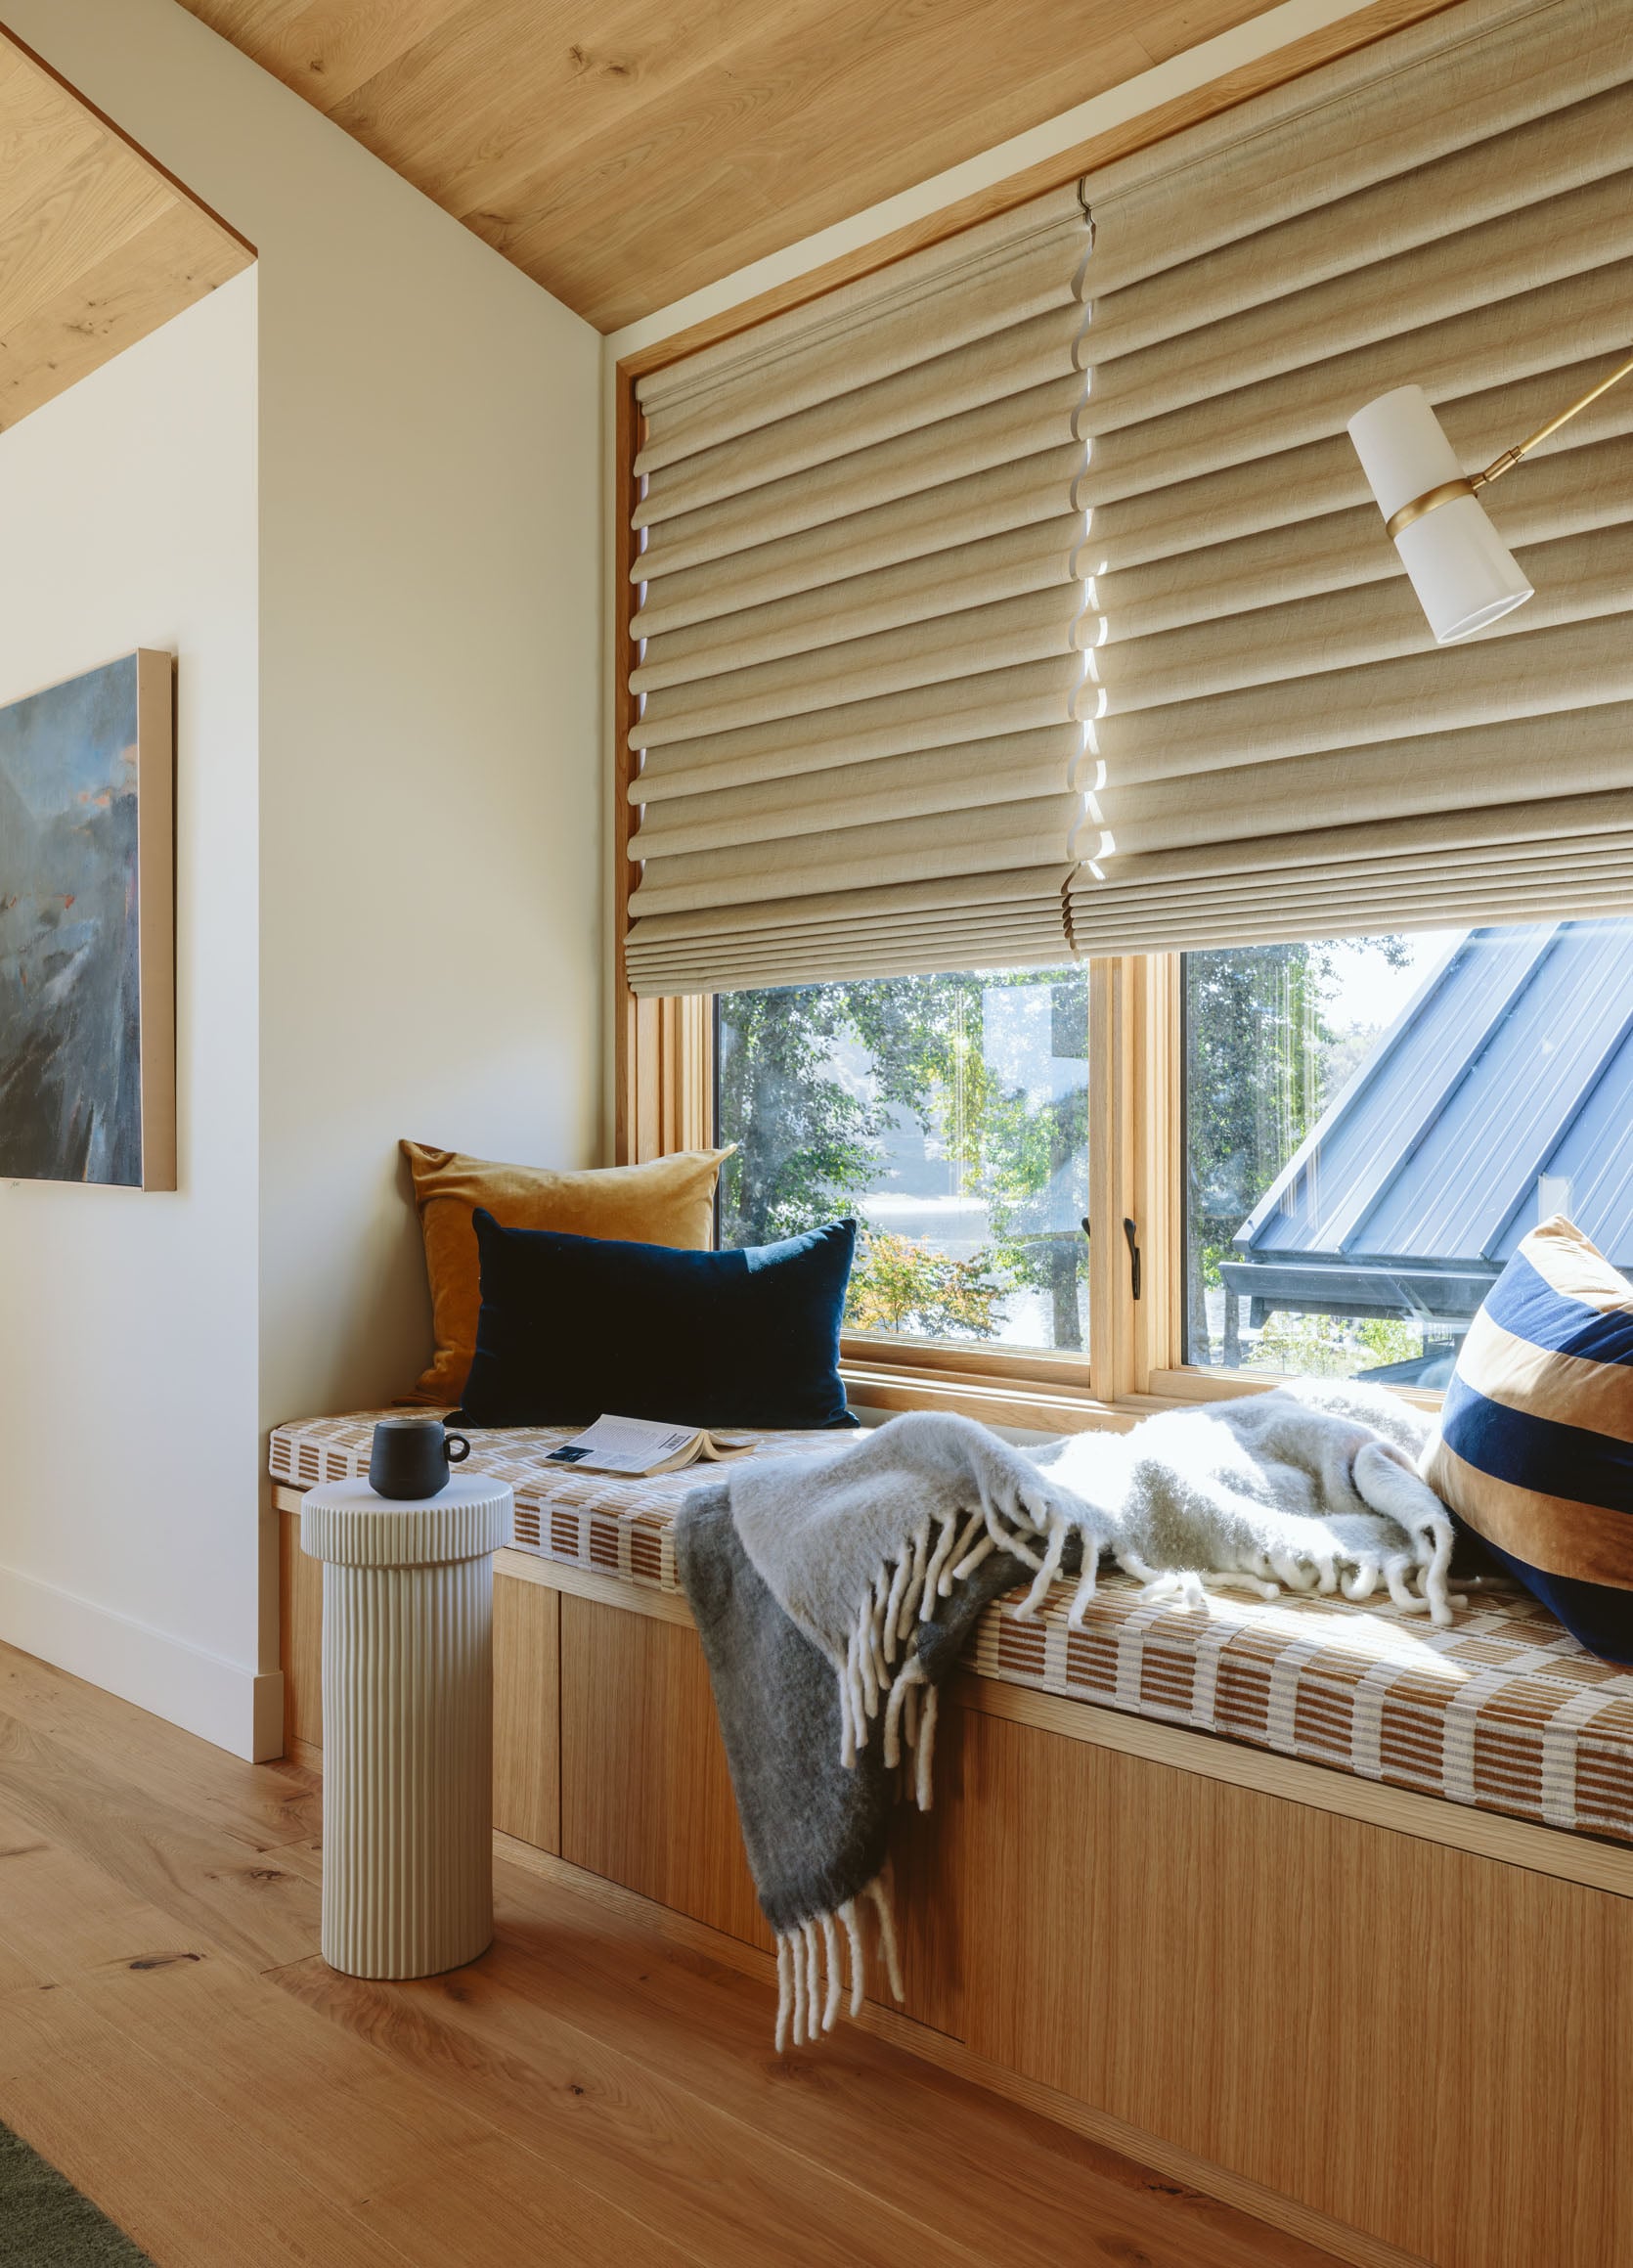
For their bedroom, they chose motorized top up bottom down blackout shades. If you don’t know that term, then see the photo below. “Top Down Bottom Up” is fantastic for privacy while still allowing visibility and a lot of natural light.
When to do top down bottom up:
- When you want privacy, ie, street-facing, but you don’t want only “closed” or “fully open”. You can decide at what point you can raise it.
- For bedrooms or bathrooms where there might be people outside:) You might want them high enough to be at your neck in case you are changing.
- For any room where you want to see the sky, but don’t want people to see in. It’s a fantastic option for shades.
The only con with it is that you have fewer options in the type of material. Decorview has a lot of options in tones and textures, but if you want a bold pattern in a linen, those are less available.
While Ken and Katire are super happy with their window treatments in their bedroom, I actually wonder if they would benefit from some curtains in addition to their highly functional shades. That was never the intent for this room, but I don’t think we’d regret it!
Kids’ Bathroom – Top Down Bottom Up Light Filtering
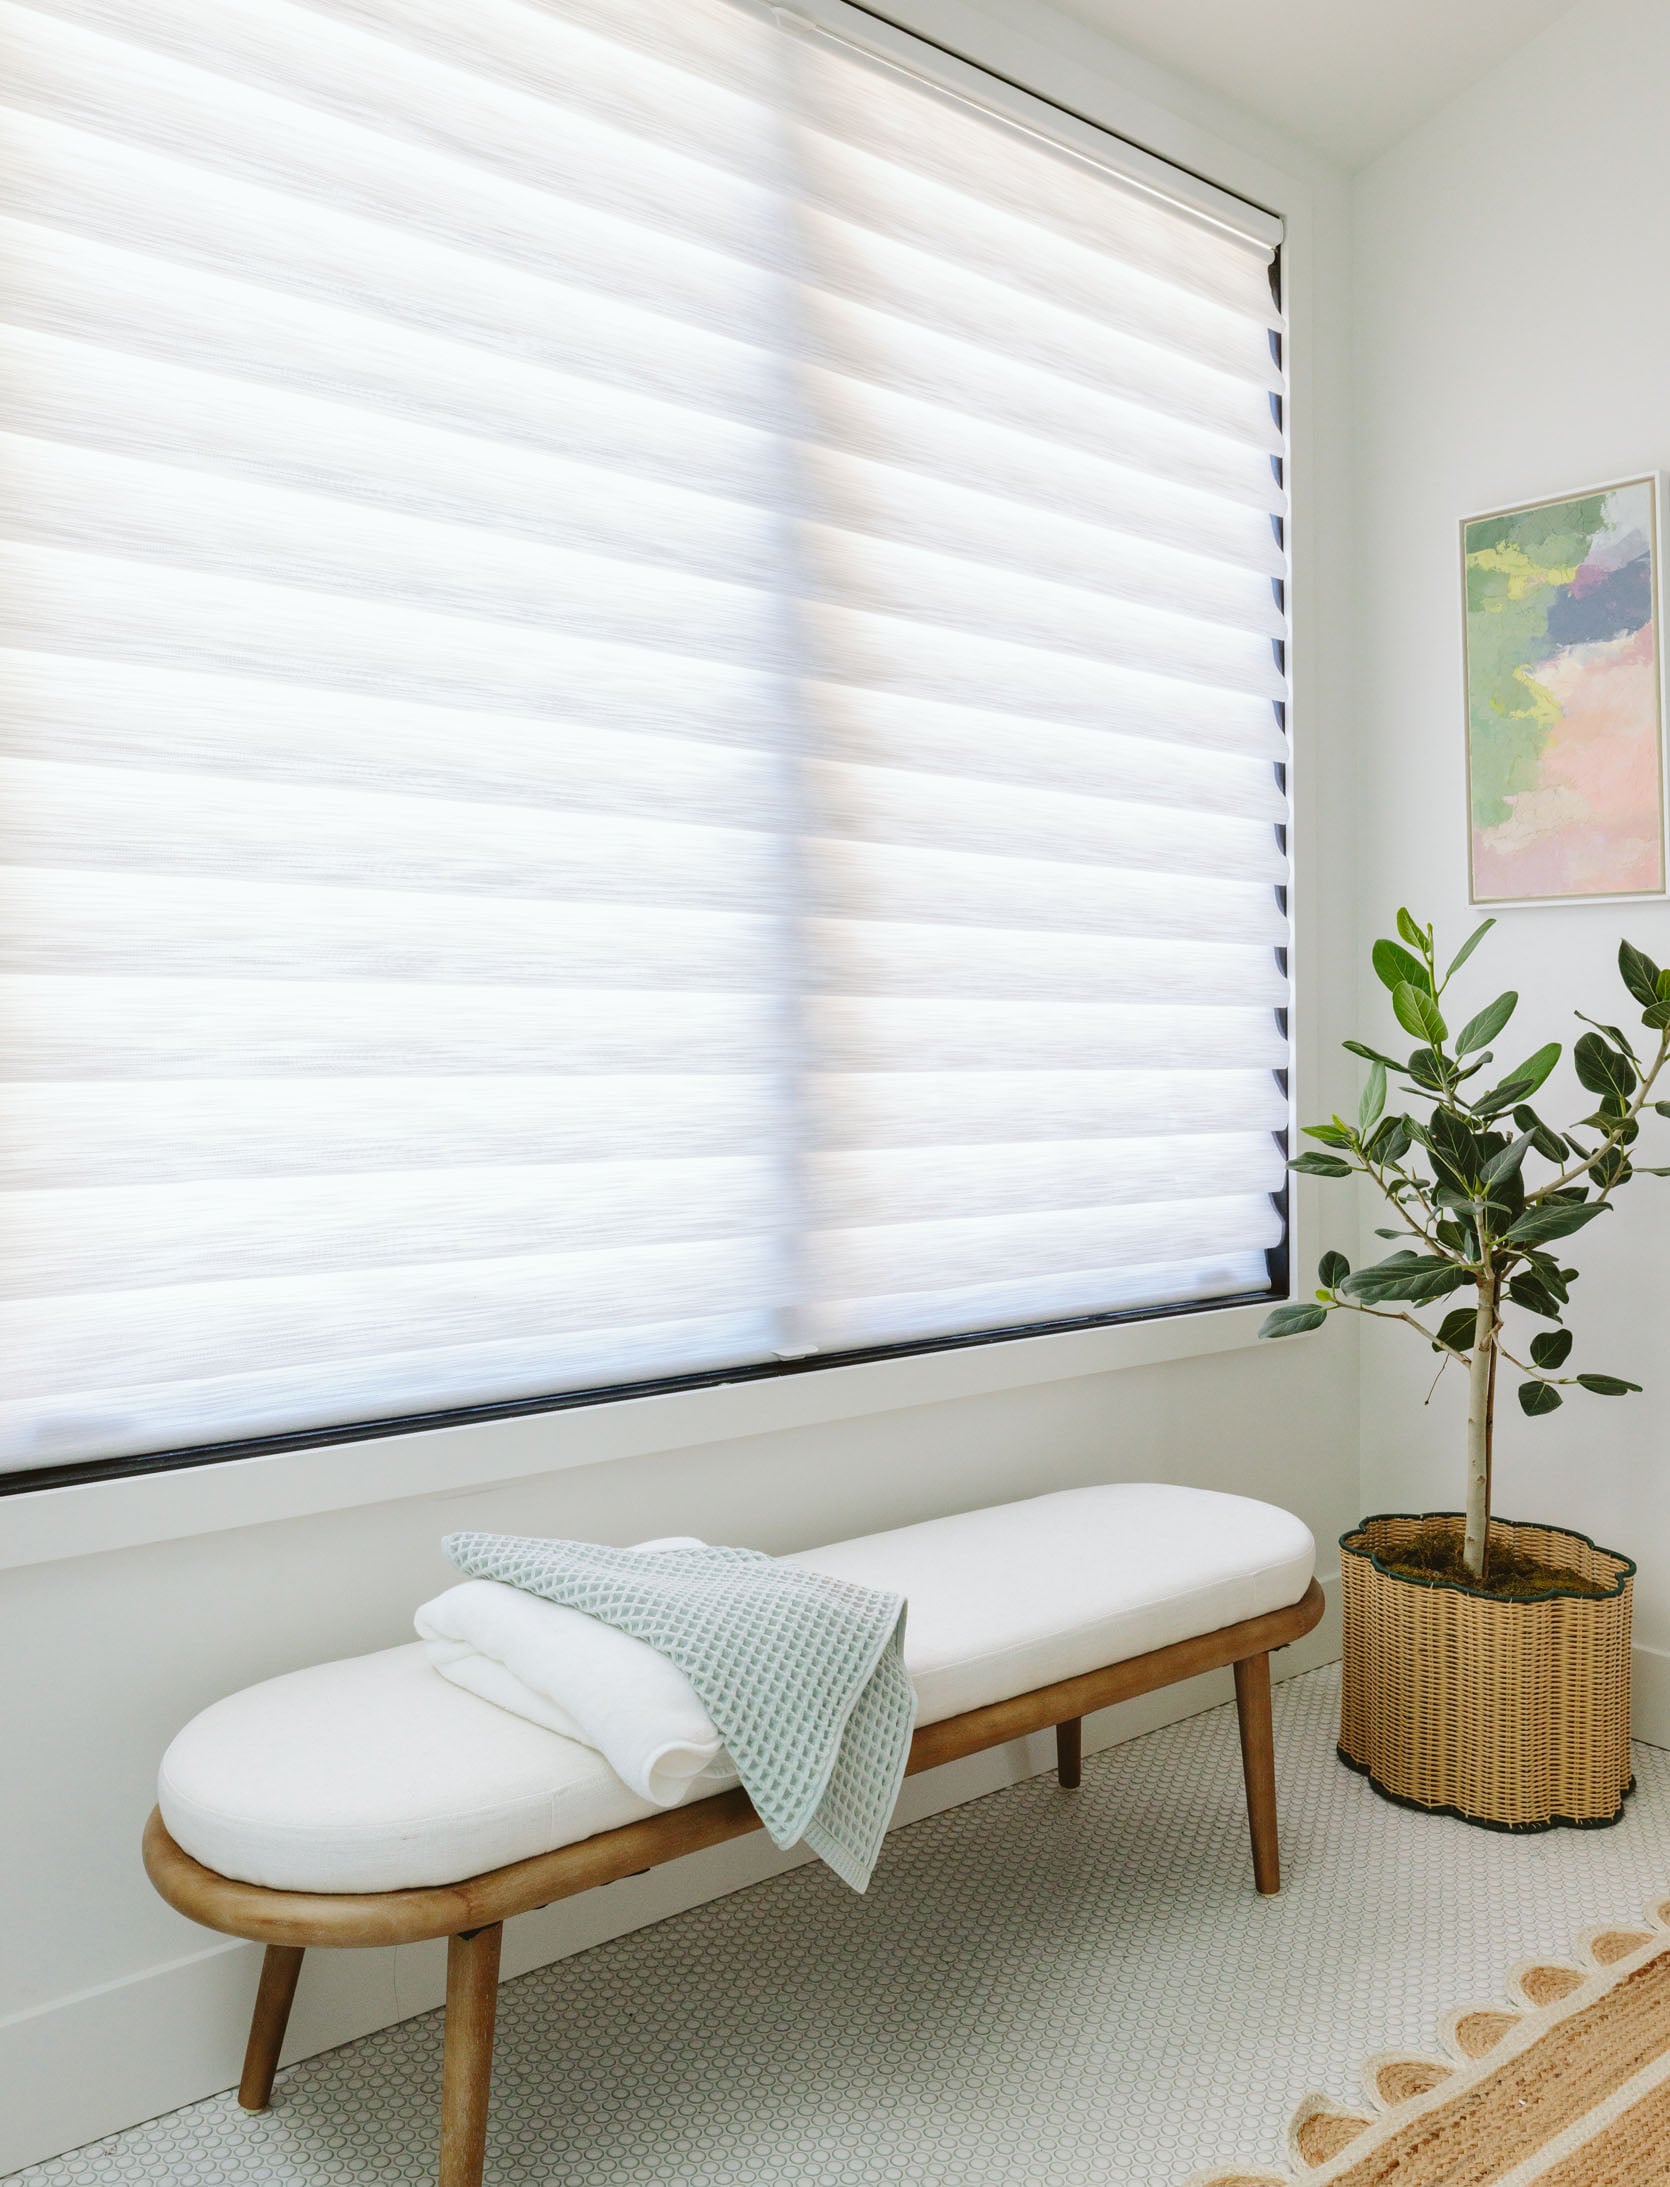
For the kids’ bathroom, they didn’t need blackout but did want privacy when the kids were getting out of the shower (not street-facing, but still!).
Daughters Bedroom
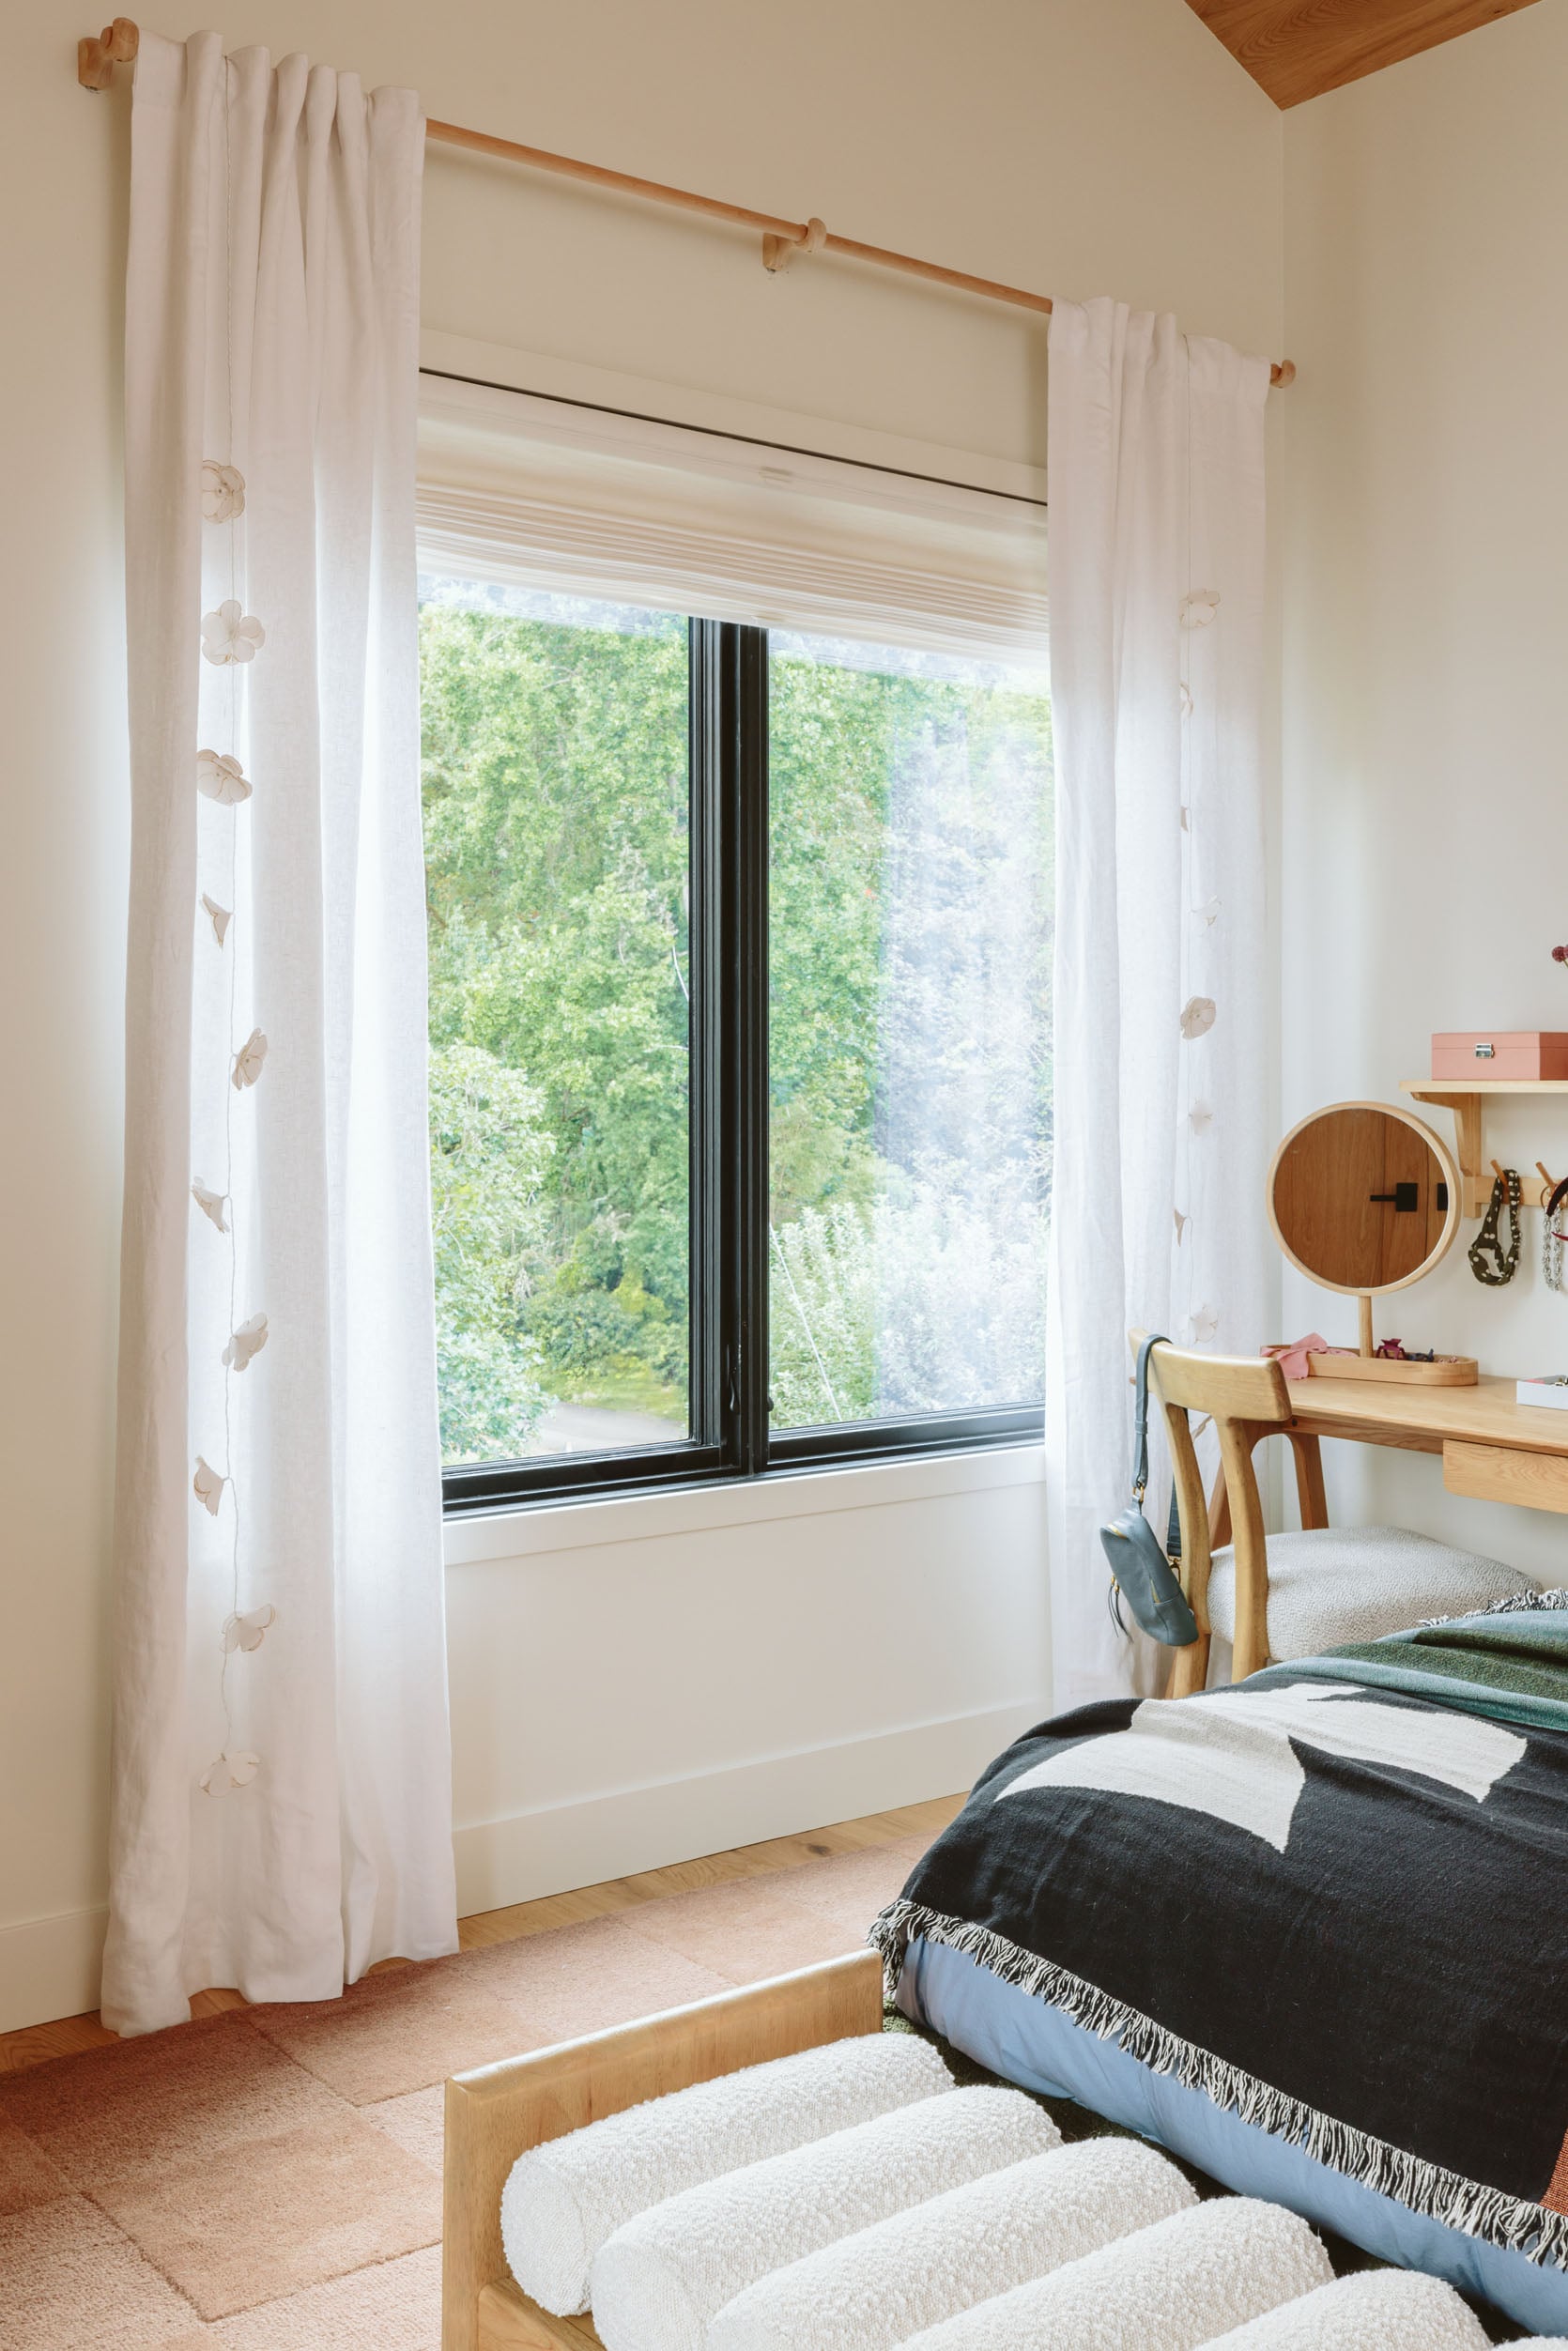
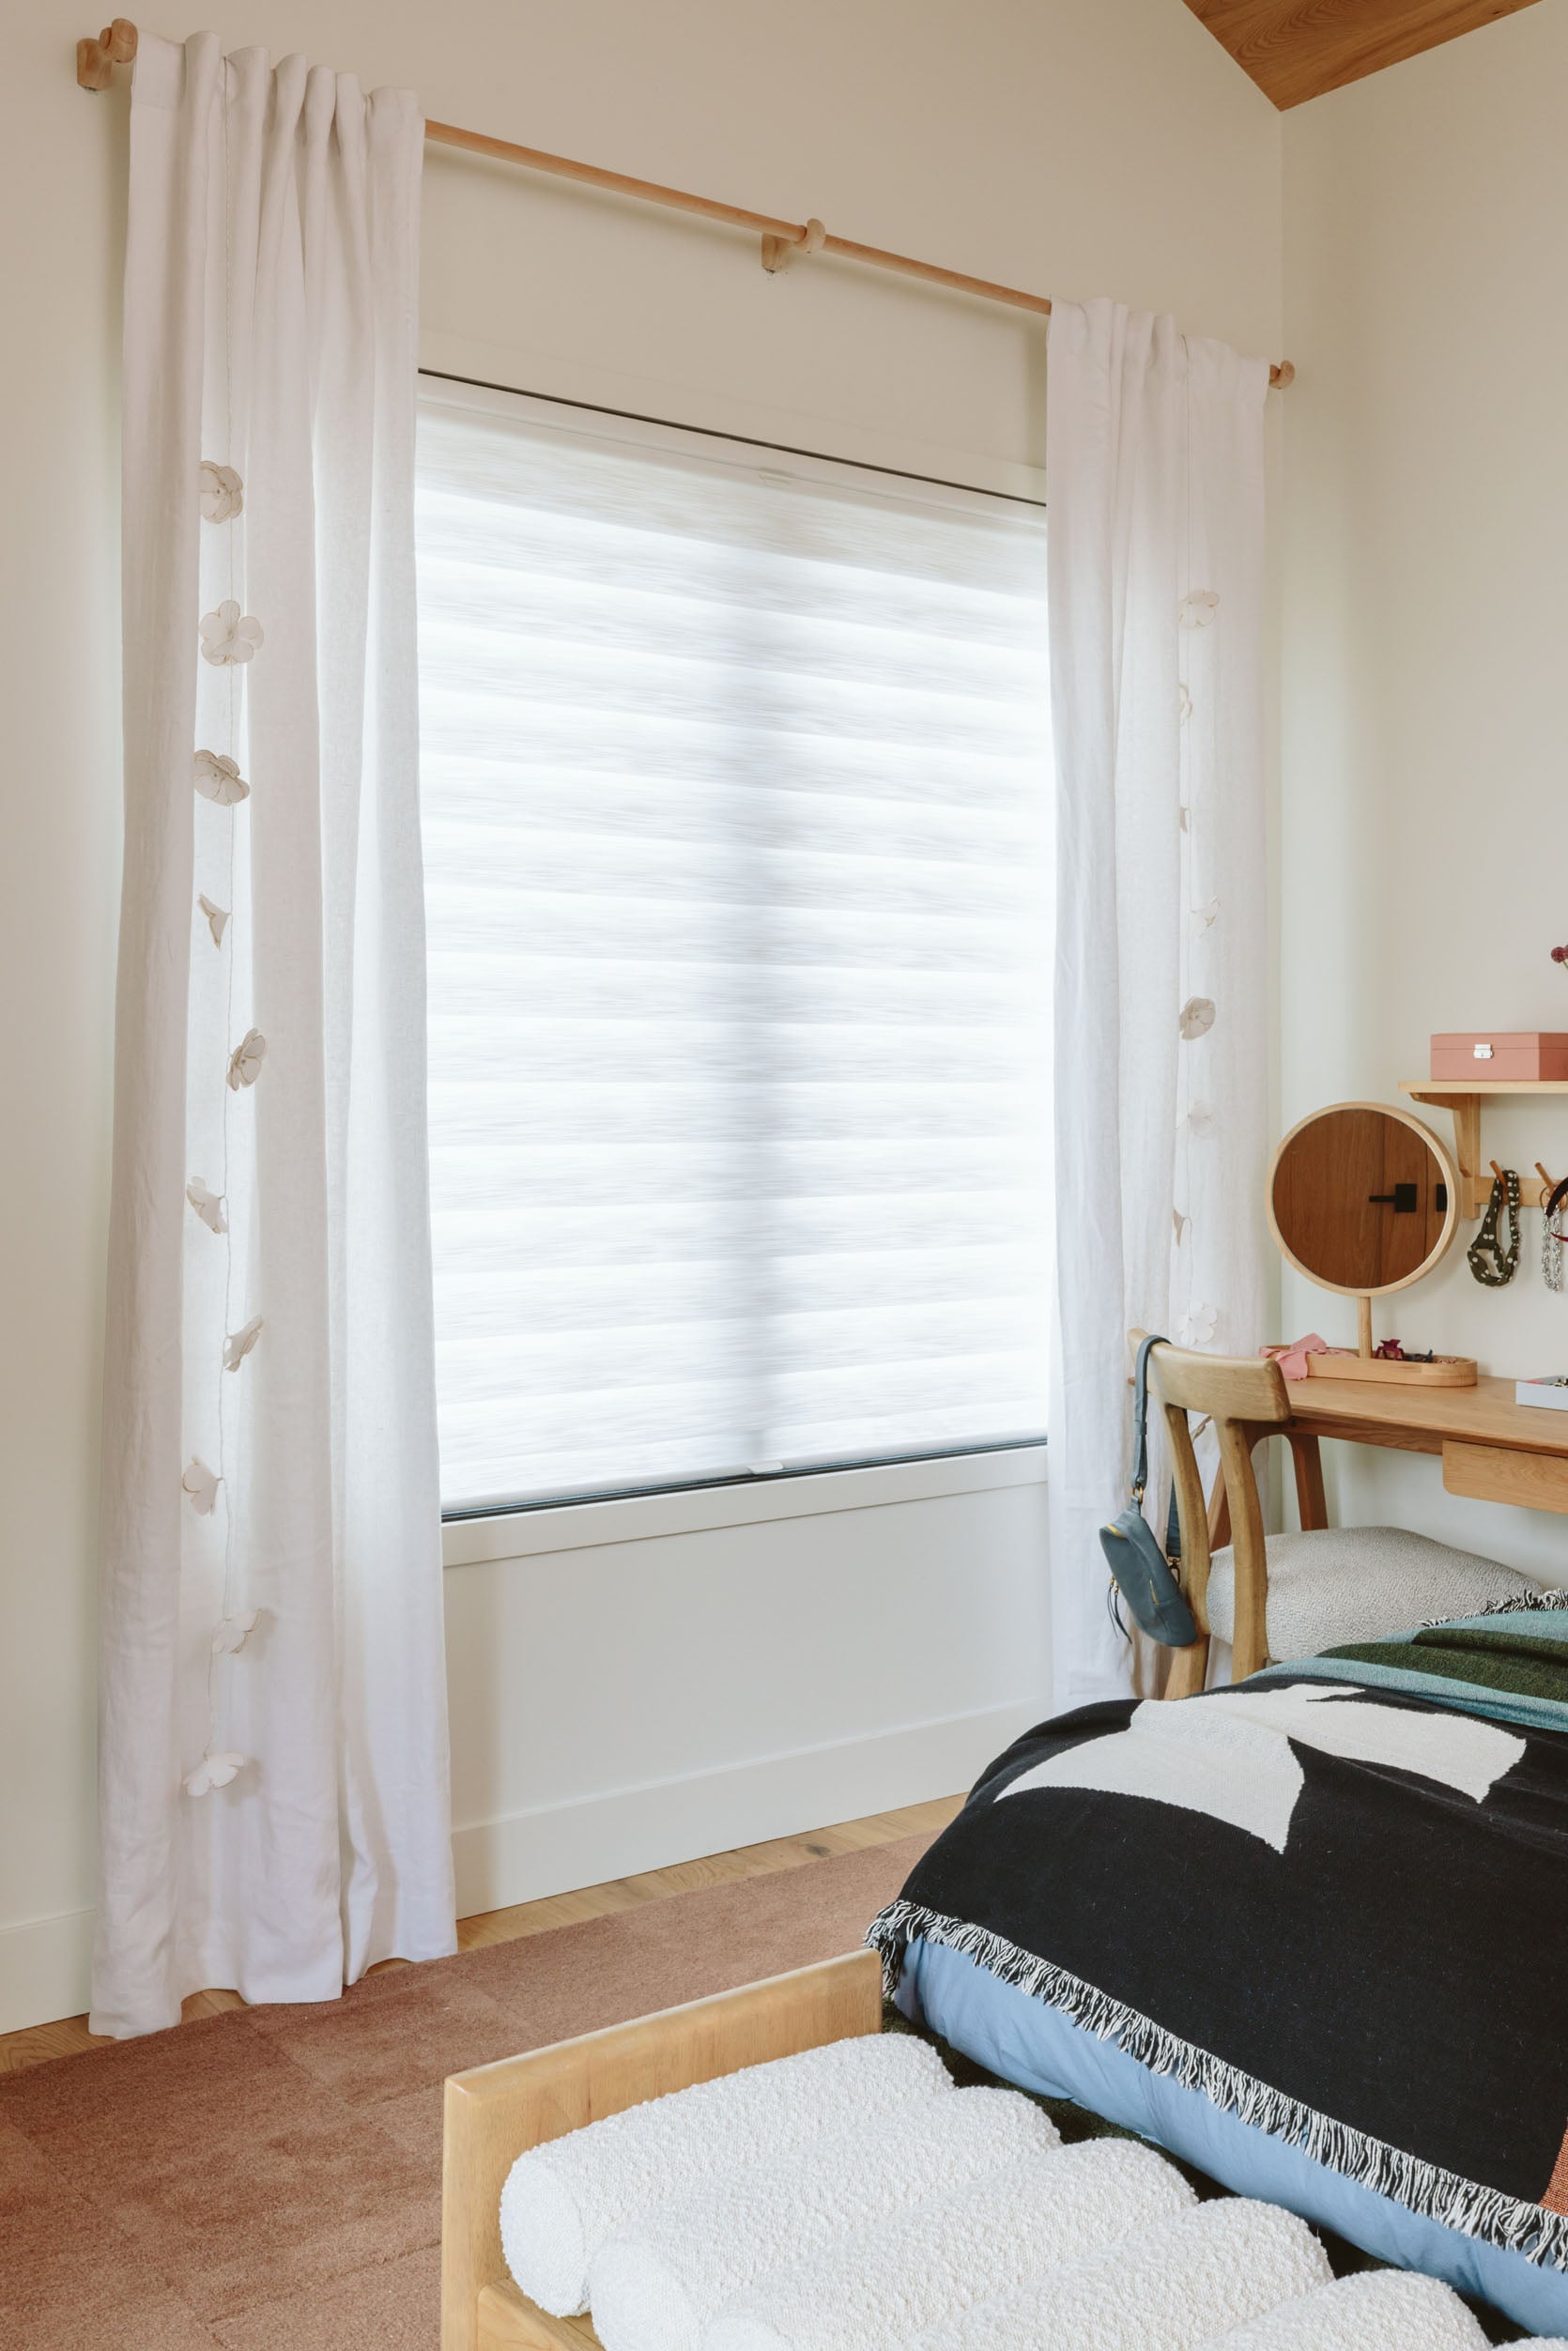
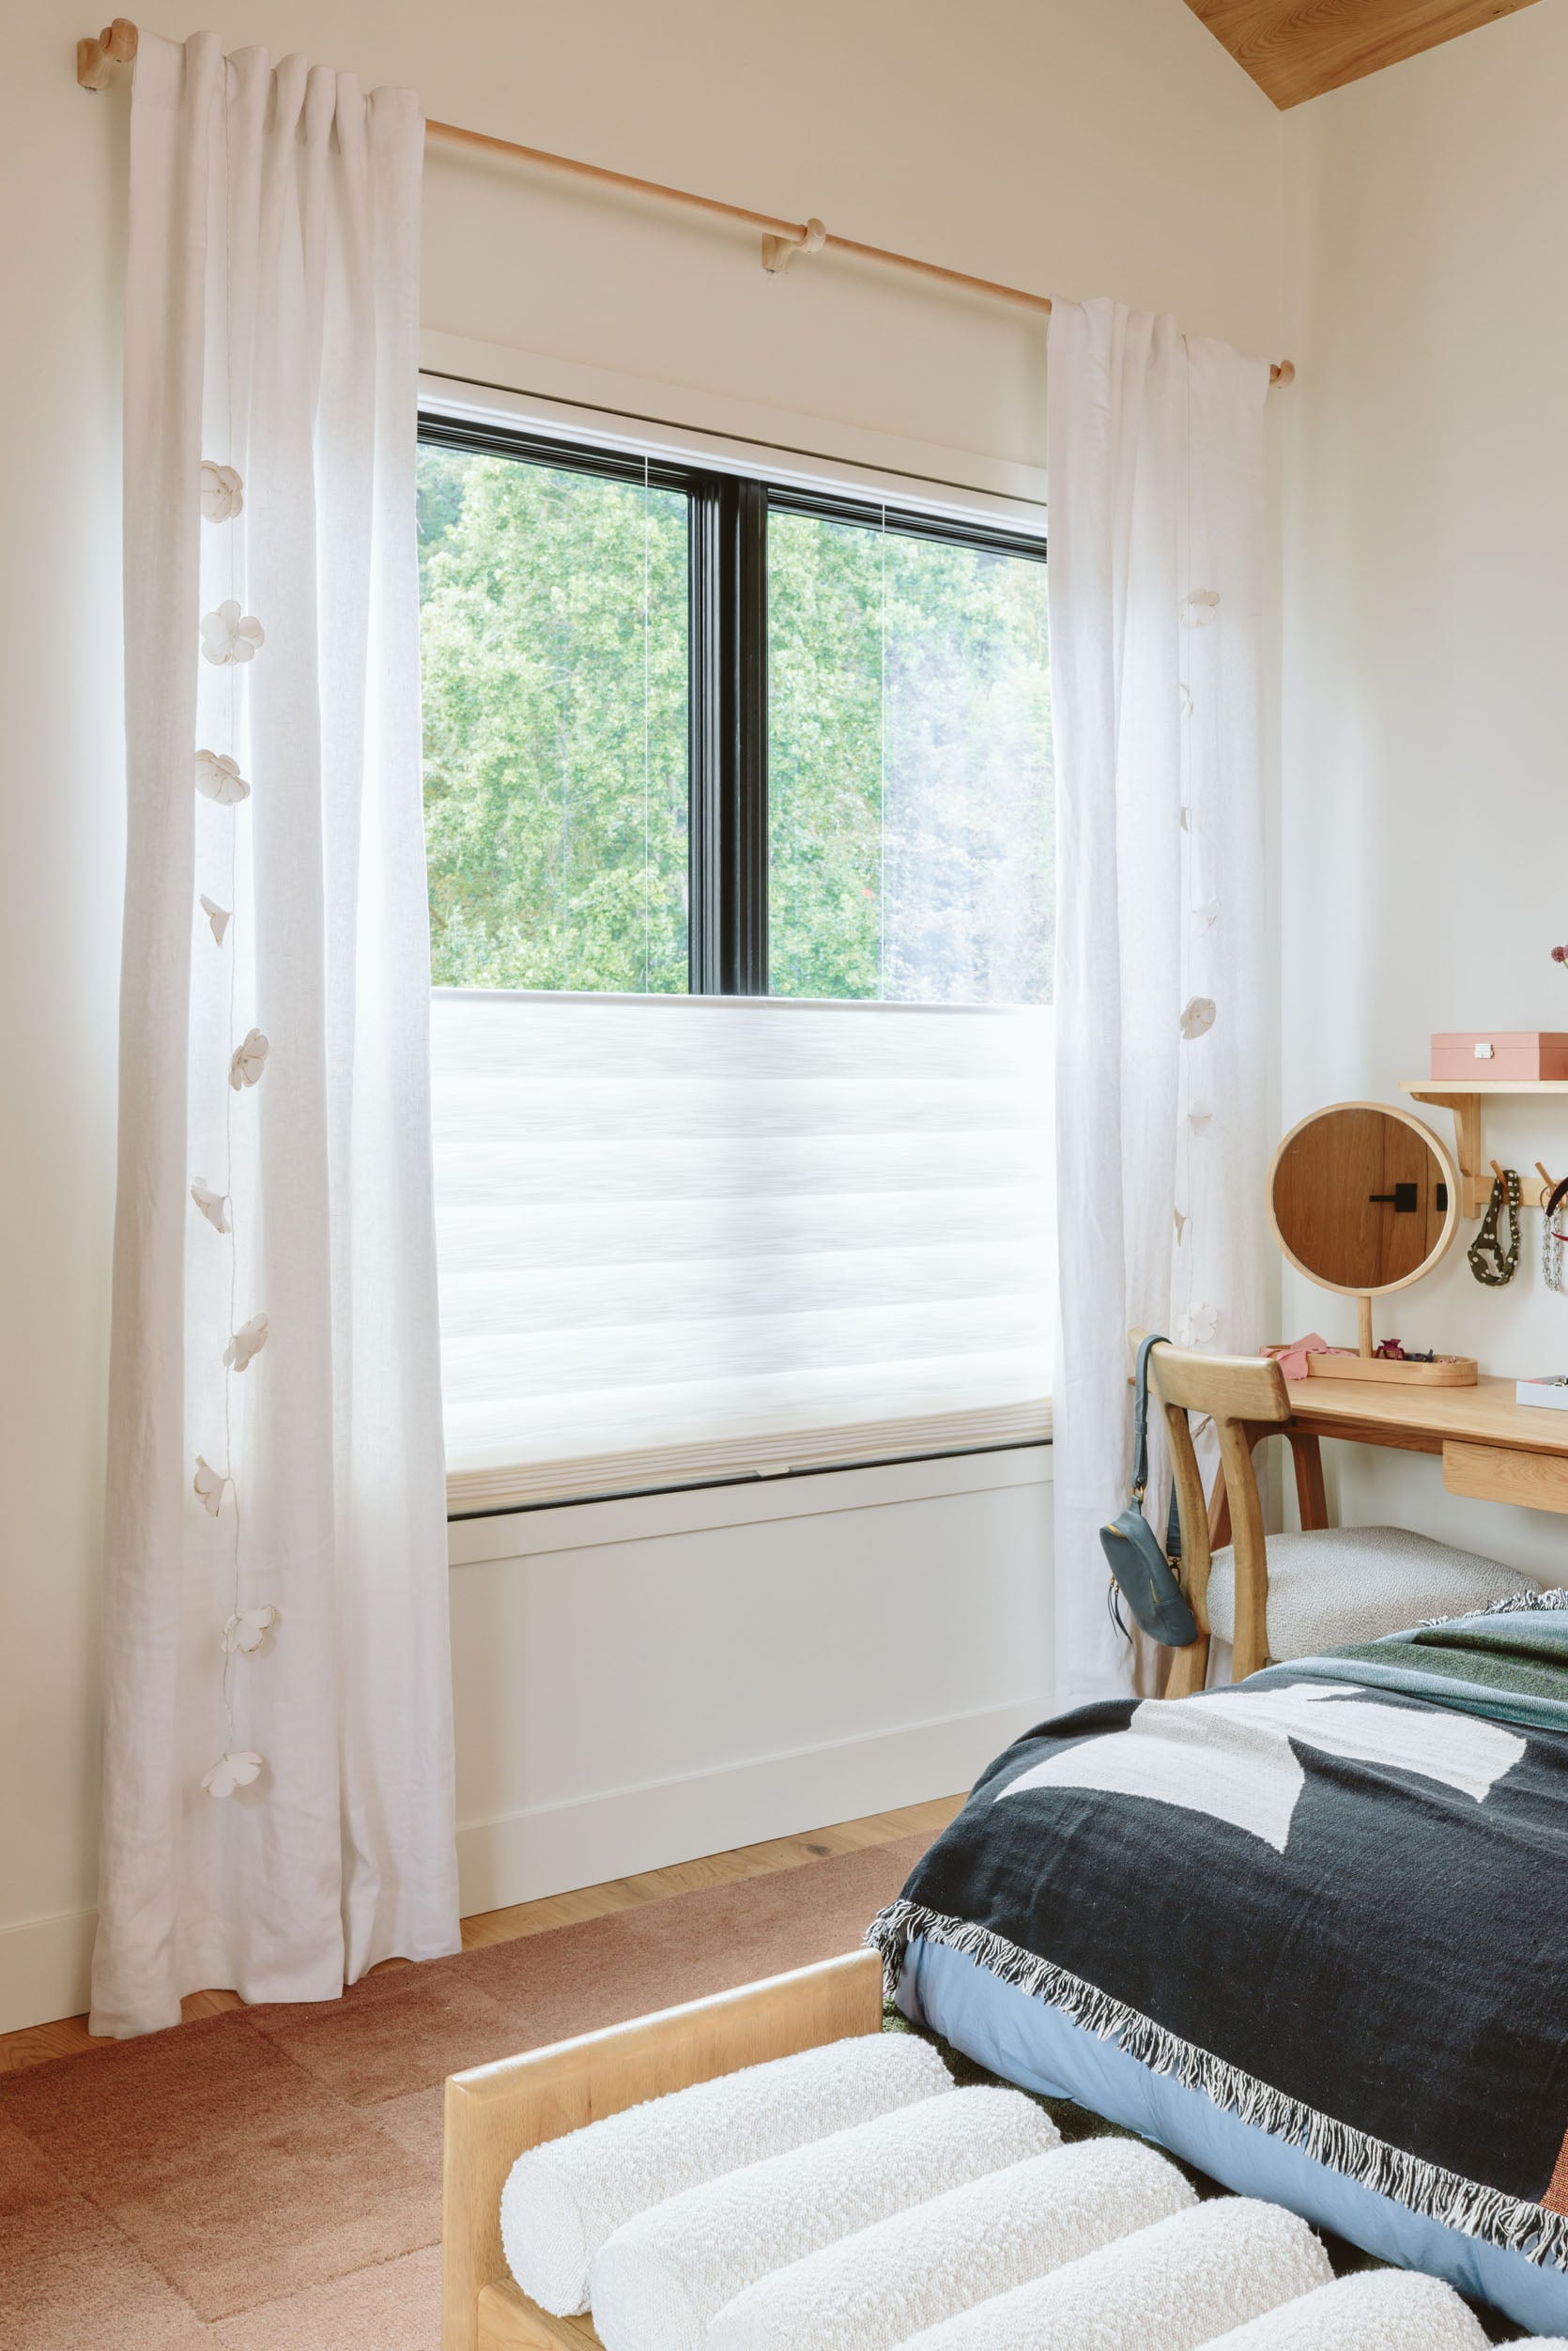
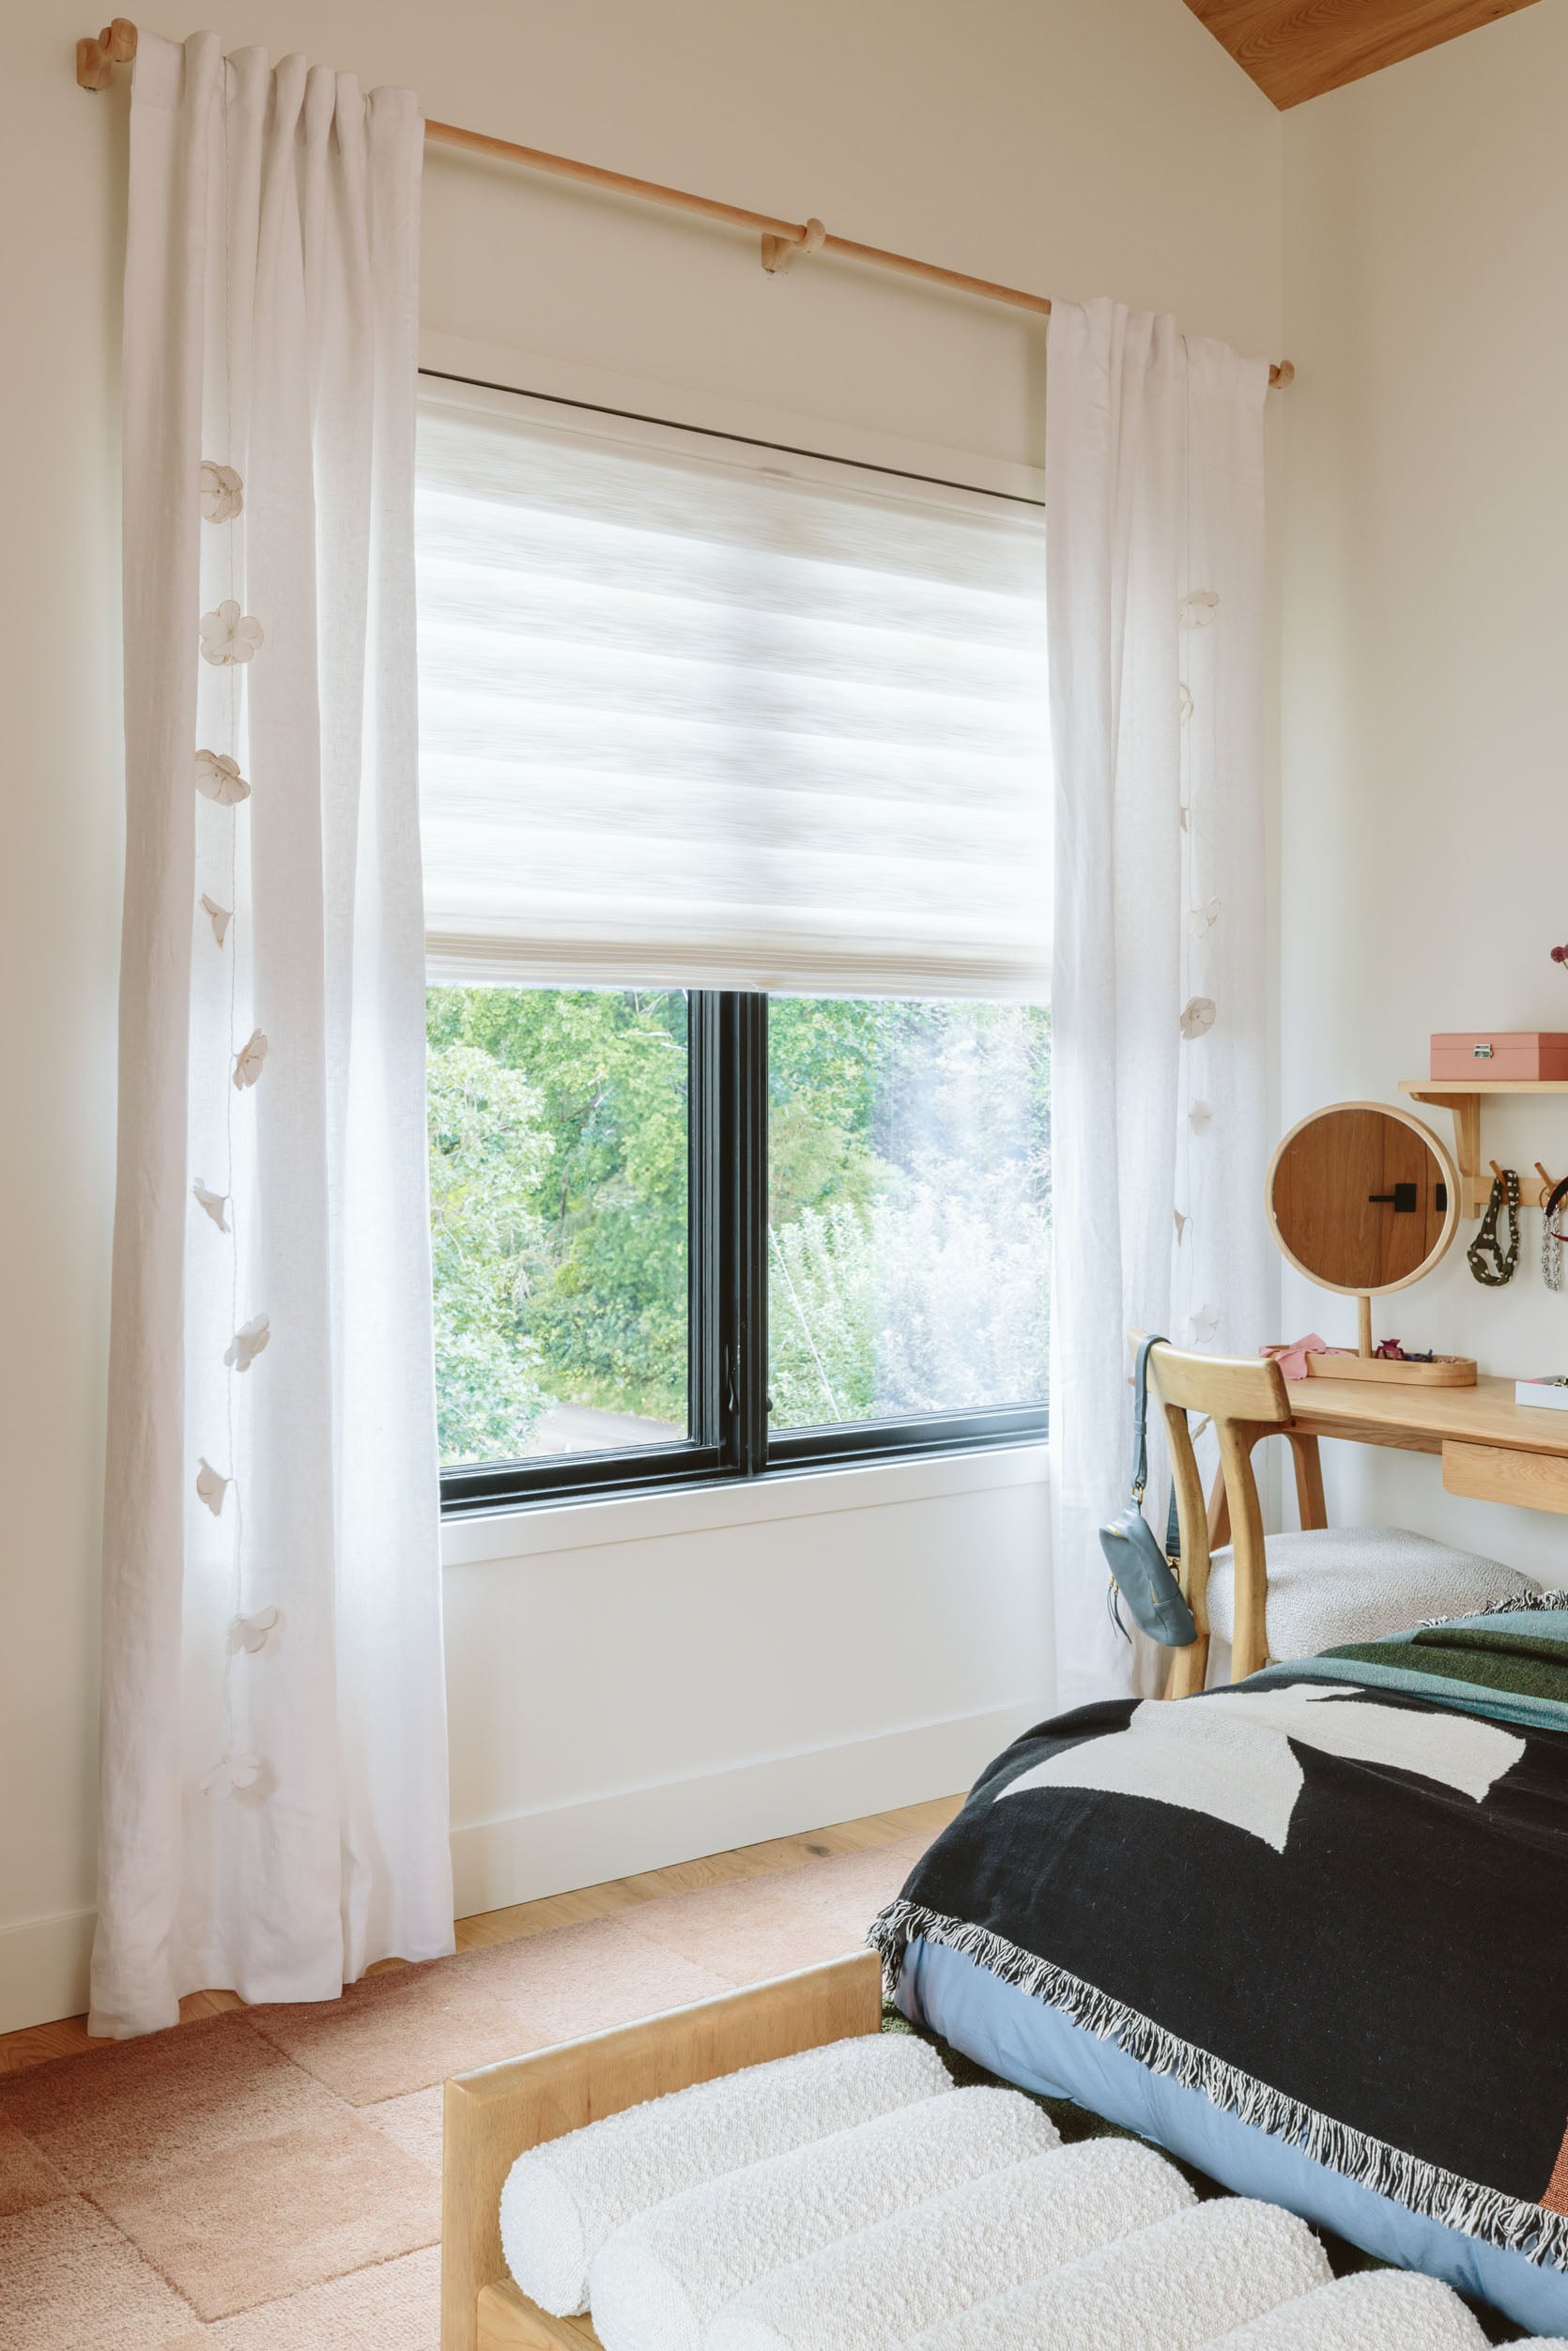
Top down bottom up just gives you a lot of flexibility and privacy while still seeing the trees and sky and getting a ton of natural light.

I know that window treatments can be more splurgy than we want them to be, but when done right, they are such an incredible investment in your home that pays off daily and long term.

Even in really contemporary houses, that final layer adds so much warmth and homey-ness. It makes any room look less amateur and way more elevated. Decorview has a ton of fabric colors and patterns to choose from, as well as super classic neutrals and textures.
Let me know any questions in the comments. After choosing window treatments for 16 years, in so many houses, I feel like I have a lot of opinions and experience. A big thanks to Decorview for partnering with us on the River House project. Their window treatments throughout their house are perfection.
*Photos by Kaitlin Green


How did you hang the shades on their glass door in their primary bedroom? I have a similar door/problem. Thank you!
I love our top down, bottom up shades that the previous homeowner installed throughout our home. A few of them are due for a refresh, thanks for the reminder that Decorview could be a great option!
Would you please share the exact name of the shades in the game room? It’s exactly what I’m looking for! Thanks.
A practical question: how do you open the window when you use Roman shades or the top down bottom up? Or do these windows remain closed? I find window treatments so fascinating because ideally they have to be the perfect combination of form AND function.
I would love to know if you have any guidance on the height to hang cafe curtains – I have seen them hit right at the midline and also a little higher up. I’m currently making my own to custom fit our windows and have to decide the exact height of the rod so I know where to place the bottom hem!
A little higher is nice. Couple of inches or so
Great post! I would love to see more options for coverings for sliding glass doors flanked by full length windows- other options than curtains. Thank you!
I would love more guidelines about curtain rod diameter. You mentioned you went thicker for a larger window and skinny for a cafe curtain. Is it really just “take a guess somewhere in between” for windows generally?
Thank you for this helpful and interesting article. I wonder what you suggest for an A-frame window. (actually, it’s a tall pentagon – is that an A-frame?). Whilst gorgeous ‘naked’, as the views are over the open English countryside, and no-one overlooks us, it’s a bedroom window so needs a shade or something for a bit of privacy and black-out. I dislike the idea of curtains which could go all ‘swaggy’ and theatrical and this is a sweet country cottage. What would you do? I am mostly thinking retractable motorised blinds that disappear in the day when the blinds are not needed. Please bear in mind we will have different suppliers over here in the UK but a company called Soma seems to have the hardware down to a sleek minimum. Would love your views… Thank you
Thoughts on ceiling mounted curtains? We have a specific situation in our bedroom that I think calls for them, but I’m scare it’ll look like a hospital room!
My house was built in 1959. I am only the second or third owner and the house came with original MCM (60s and/or 70s) curtains. Most of them went to goodwill, but I kept one set because they matched my paint color and were in excellent condition and well made. And they are short! And I like it! They just seem to fit the house (especially, being vintage). My mom helped me make curtains for the living room picture window and I had her make them a similar length to those original ones. They are a foot past the window sill and 20-inches off the floor. To me, floor-length would look weird in this house. Just call me a rule breaker! lol
Such a fun and helpful post! I always enjoy revisiting the river house, and I’m sure I will be coming back whenever I need to make window choices. Thank you Emily, Katie, and Ken!
What do these decor view Roman shades look like from the outside? I don’t love how some Romans look so busy on the outside.