
Budget Ideas
Make Your Art Feel New Again — Non Traditional Frames, Cool DIYs, And A Couple Quick Tricks
As people who love design, I think it’s pretty normal to want to switch things up every now and again. But making changes does not have to require buying new. Em has often said over the years that the easiest way to make your home feel fresh is to take different decor pieces from one room and style them in another. Easy, free, and dare I say, fun. Well, the same concept could be used for art and how it’s framed. I’d bet that a lot of us have amazing pieces that mean a lot to us, but it’s time for a little makeover because either our styles have shifted, or we just have a need to mix it up. Now, new fancy frames can get real expensive, real quick. So today, I pulled together 10 really easy (ok, some might require some extra creativity) and pretty affordable ways to renew the beautiful art you already have. I’m telling you your walls are excited:)
Let’s start with the easiest one that I’ve also used (and loved). Plus, it’s maybe the most affordable…
Cool Clips


A cute metal clip could not be an easier way to hang a piece of art. Plus, they are so affordable it hurts! As you can see, I am speaking from experience because the photos above are from my old apartment, where two pieces were being hung by little bull clips. I loved the added mix of material (the metal) and the visual break of those pieces not being framed. It just made for a more interesting gallery wall. However, those pieces there are still being held up by those clips in my current apartment, but each in their own stand-alone spot.


Alryn and Julie used this method too in their gallery walls, and they look awesome. It’s also a great hack for a “not standard” sized piece of art, where you’d otherwise have to get a custom frame, which really adds up. One important thing to consider is the type of paper you are hanging. I personally think either a slightly heavier weight paper or vintage paper looks best. Of course, I’m happy to be proven wrong, but printer-style type paper will likely not give you the elevated look you may want.
Here are some quick shoppable options, but if you keep your eyes open, so many little shops have things like this. Just remember you want to be able to easily hook the clip onto a nail, so make sure there’s a hole in the top:)

1. Hollow Out Paper Binder Clip (set of 10) | 2. 4 Inch Large Bull Dog Clip | 3. Gold Bull Hinge Paper Clip (set of 10) | 4. Small Bull Clips (set of 50) | 5. Stainless Steel Small Clothes Pin (set of 40) | 6. Colorful Mini Binder Clip (set of 100)
I like any and all of these. Definitely consider the size/weight of your piece so that you know how big and/or how many clips you’ll need to use. There are no rules on the number, just use how many you think will look great (and hold up your piece). How fun would the colorful ones be??


Wooden Clip | Circle Wooden Hangers
I know these are meant for quilts and other types of fabric, but I’m pretty positive these would work for paper art too! I love the shapes and think they would be rad. These are each $30, so not super cheap, but since you’d likely only need two for hanging paper. That’s not too bad for a special type of art “frame”.
But if you love the look of an oversized wooden clip, then these are perfect! A little whimsy for your art, but in the coolest way. The natural wood tones are awesome, but the colorful ones are too good and would be so fun in a house. Don’t worry, there’s a hole to easily adhere to the wall.
3D Mounted

I’ve always loved how Julie mounted these three pieces of art over her bed. I mean, who needs a traditional frame anyway!? Here’s how she said she did it:
“I bought $3 woodblocks from Home Depot, painted them black, and nailed a picture hanger on the back. Up they went. This frameless option works because they are lifted off the wall, which still gives that ‘elevated’ feeling that a frame would’ve done.”
Affordable, simple, and requires just the tiniest bit of DIY skill. Of course, this type of mounting only really works if the art itself is on a thicker, almost board-like material. That way, you don’t have to worry about the paper flopping back or forward.
Wood Hangers
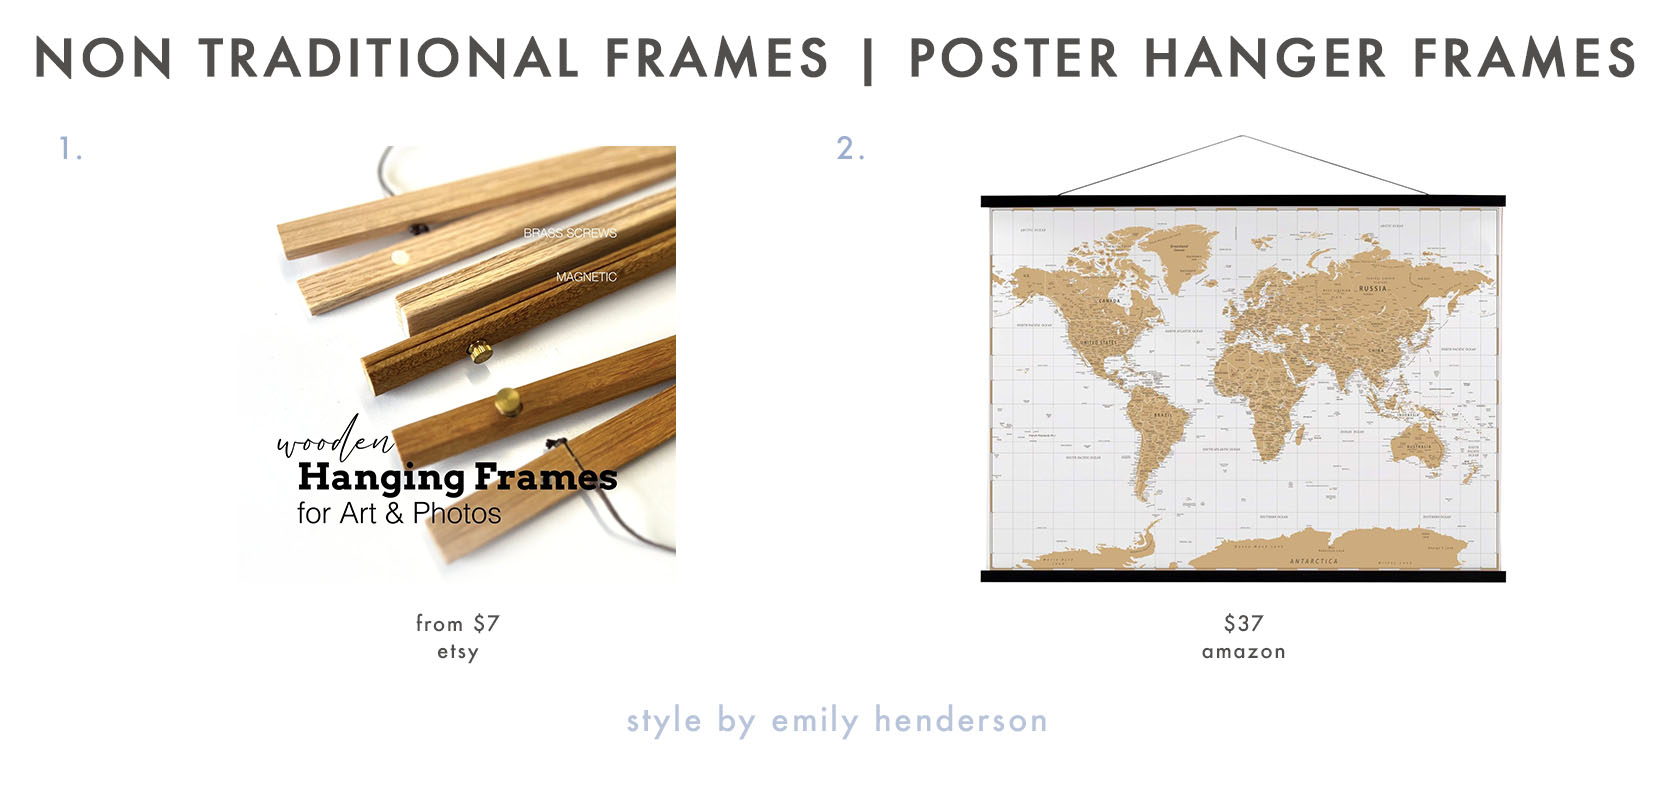
1. Wooden Magnetic Poster Frame for Art & Pictures | 2. Large Magnetic Poster Hanger Frame
We can’t forget about these magnetic poster hanging frames! They cause zero damage to your art and are so affordable while also giving you a little something different, style-wise. The ones on the left go from 6″ up to 38″ and come in 3 different wood colors. But if you want a really large one, The option on the right is 48″ baby! This one also comes in a teak wood tone. I love the idea of using this hanger style for a really large piece, especially when large frames are so much more expensive. This style won’t work for every style, but for the right home, it could be awesome.
Hanging Gallery Walls


Here’s where things get slightly more involved…and a little more expensive:) Don’t worry; these are the priciest options on the list! Ok, so you probably remember seeing Emily’s entry reveal and Em’s best friend’s living room reveal, where both had really awesome but different ways to hang a gallery wall. These give off more of a traditional style vibe, but of course are versatile and look so chic. Emily’s is a picture rail with chains that the art connects to, while in Robyn’s living room, those are picture rail rods that hang off the picture moulding at the top of the ceiling. Here’s a whole tutorial. But fear not! If you don’t have picture moulding, they sell brass bars that you can hang the rods off of instead. Trust that your art and home will look different in the best way. But in terms of budget, the picture rail rods were less expensive, coming at around $100 (at least from Emily’s experience:)). Not too bad if you ask me.
DIY Painted Frames
Painted, patterned picture frames really started to hit the design scene last year, and we still can’t get enough. Mallory actually almost wrote an entire post about them. I mean, look at fun these are! And while the photo on the right is clearly a kids’ room, that doesn’t mean these kinda of frames are just for kids. Look a the photo on the left, so cool yet sophisticated. I most definitely have a soft spot for stripes and checks, but if you are into more of a floral/blockprint look, check these out…
These require a bit more artistry (or a good stencil), but so worth it if you have the time and space to make something like this:
I had to add this one too because I love the pattern, the colors, and the cowboy:)


If you don’t want to put in the effort and gather paint (which also adds up), I love the colors and simple strips of these! Also good inspo;)


Geometric Burgundy Painted Frame | Baby Blue & Burgundy Painted Frame | Baby Blue & Berry Check Painted Frame
If you know me, then you know I LOVE these above. Also, pretty simple in design (well, less so about the one on the right). I’m just so into these colors, and if you can support the artists who make them, please buy! But if you have or can easily access the supplies, these are also great inspo. Just always remember that the art should live in the same color palette as the fame.
Add Fringe Or Trim To A Frame
When I saw this reel by Virginia Chamlee about stylist Marianne Cotterill, my jaw dropped, and I knew I wanted to talk about it. Marianne added chic fabric trim/fringe to vintage frames, and it’s genius. Instant (beautiful) makeover. Of course, just make sure the trim fits perfectly into the frame, and that it also works beautifully with the frame’s style as well as the art piece itself.
Frame Within A Frame
Tell me this too isn’t incredible and so creative. The light and dark color contrast, the fun pattern with the serious portraits, all perfect. If you wanted to recreate, it seems as though you could get a really affordable thrifted frame with a back and completely painted over it, add a pattern, and then hang your smaller pieces on top. You’ll need paint and brushes, but then just your imagination!
Then another masterpiece by stylist Marianne Cotterill, where for a textile shoot she hung a smaller piece of art off center (chef’s kiss!) over a stunning tapestry. Interesting, smart, and fairly easy to create your own version with the right pieces:)
Add A Mini Object


And finally, I just wanted to remind you of a classic trick that I learned from Erik/Bowser/Sara, and that’s to add little tiny minatures on top of picture frames. That’s right, you don’t have to change out a single frame. All you need to do is plop a little decor piece on your hanging wall frame, and you’re done. If you look at my old apartment, Julie’s bedroom, and now Erik’s bedroom above, all of us have done that in different ways. It adds personality, is cool, and simply fun. We always just place them off to one side as opposed to the middle of the frame.
That’s it from me! Hope you got a few fun ideas and maybe even the urge to DIY. Have a great rest of your Tuesday and see ya tomorrow.
Love you, mean it.


The Marianne Cotterill pics killed me. So so good. I’ll look at the pink walls and golden couch 10 more times today- just want to take it all in!
On another note…how’s your bedroom coming along? Is a joint MOTO still in the pipeline? ????
Agreed on Marianne and YES to MOTOs! We have deadlines:)
Yay! I loved the ideas in this post but even more I loved revisiting your old apartment, and Arlyn’s. Total cool girl vibes!!!!!! Loved those years on the blog.
Can’t wait for the MOTOs????
Don’t forget instead of paint you can also use wallpaper to cover a mat and/or frame!
absolutely!
Yes, what a great idea! I may need to attempt some Gusto inspired frames and mats.
This is very helpful thank you! The videos on the ads in my peripheral vision as I’m reading does make things a bit grating but I guess it’s what it is. I do enjoy your content.
Thank you<3
Great, creative ideas. And seem doable too. Love the examples. Jess, I still get a thrill when I see your first apartment, a favorite of mine.
Thank you so much!!
Great ideas, some of which I have already implemented, like small objects on top of frames. How do you do the frame layering like in the last photo, where some frames are sticking out in front of others? What kinds of hooks are used to do this? Thanks to anyone who can help answer this!
Would love to know this, too!
Did you click thru to the post linked under it? He explains how he did it in the post. “Using the longest nails I could find at the hardware store and strategically layering smaller pieces onto larger ones, it started to take shape. Occasionally having to use a wad of blue painter’s tape behind certain ones to make sure they hung flush against the other frames.”
Thanks Lani!
This was a great post, Jess! I’m in the middle of overhauling art in my house, so this was very timely. Thanks for the great ideas!
O amazing! Hope you have a blast doing it<3
A while back, I bought the Pepe & Carols wall mounted brass picture rail from Emily’s entry. It felt splurgy but brings me joy and gets so many compliments. <3
We have pix of road trips, family, my own artwork, and more to hang and, finally, frame ideas that align with our style & vibe!
TY!