All Things Renovation
We Demo’d The Guest Cottage Ourselves – Here’s How It Went
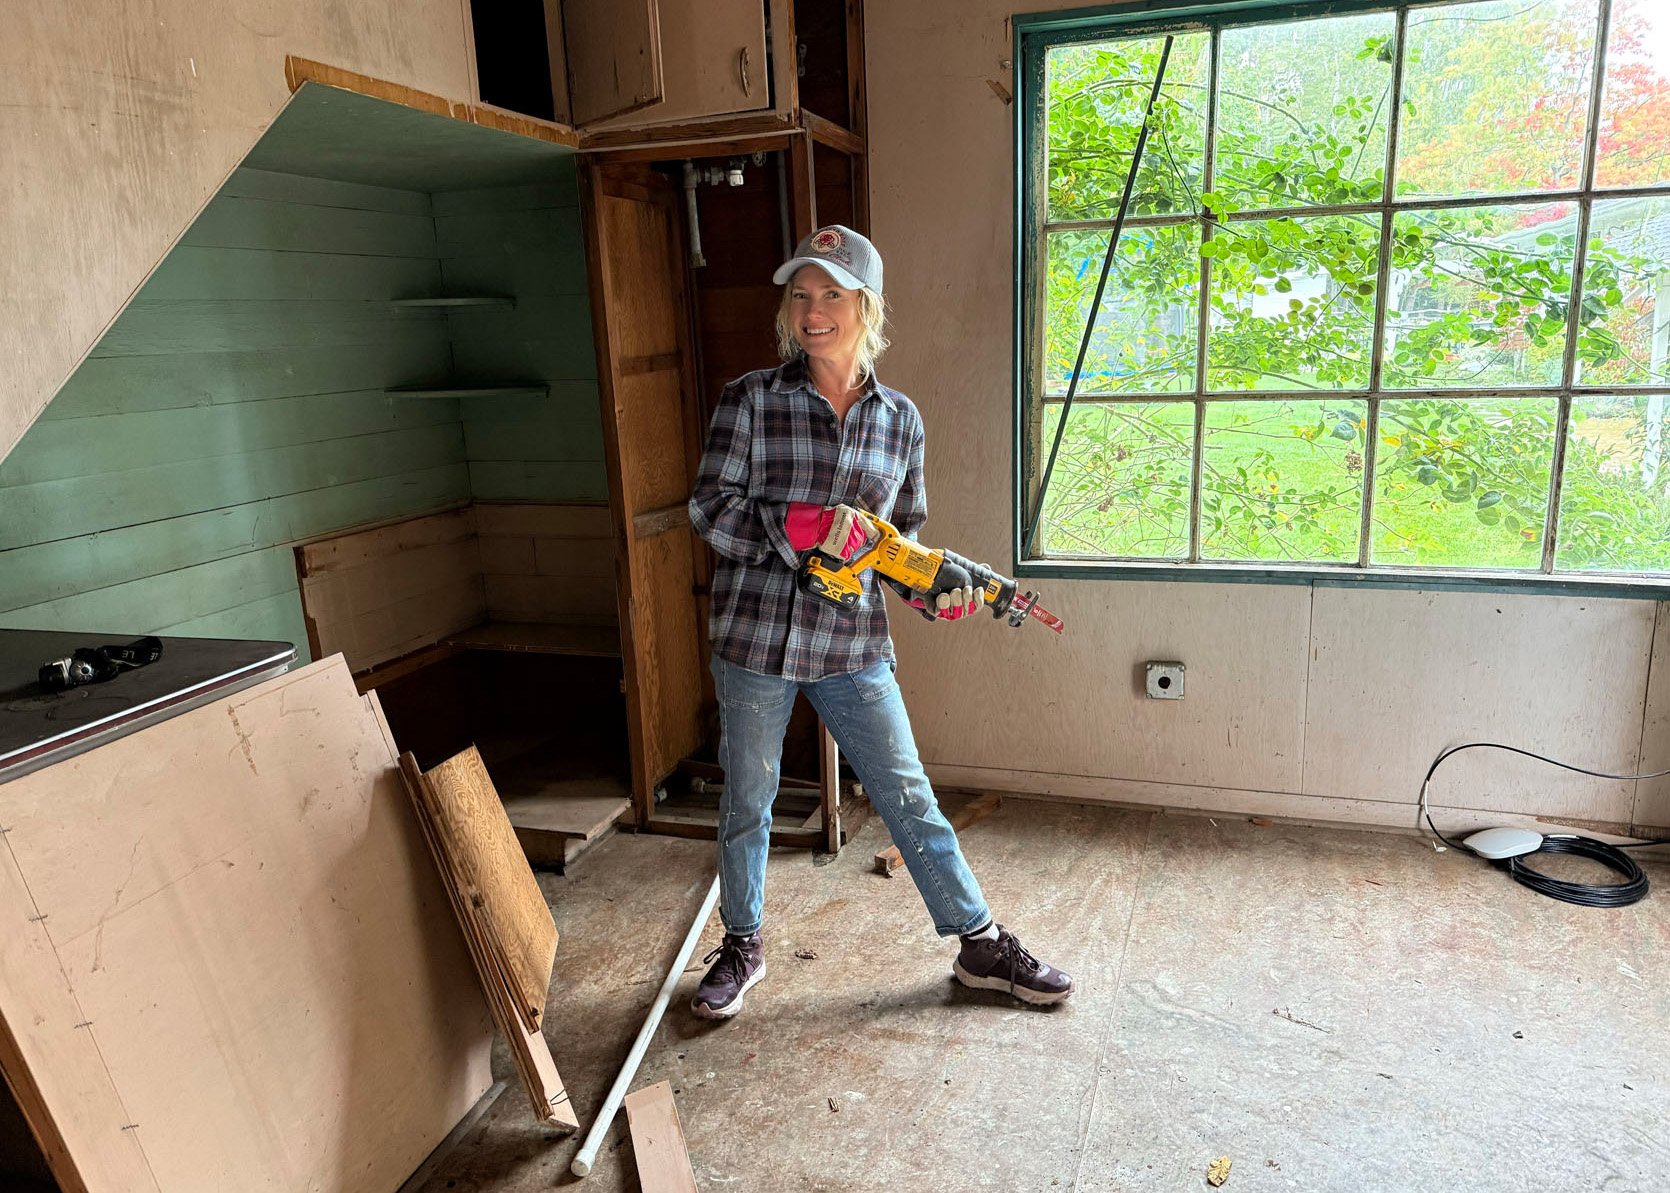
Well, that was fun. The DIY demo of the guest cottage was set for a random morning recently, and Brian and I had enlisted the help of my brother, Ken, who was “born to demolish” (my parents will agree). I had never done anything like this before and frankly thought I would take to it easily (I’m strong! I like getting my hands dirty!), which perhaps isn’t as true as I thought. So here’s how it went, how much it cost, how long it took, and what we actually demo’d out.
The “Kitchen”

The kitchen was teeny tiny and in very vintage condition. It all had to go, and only the floating shelving was usable.
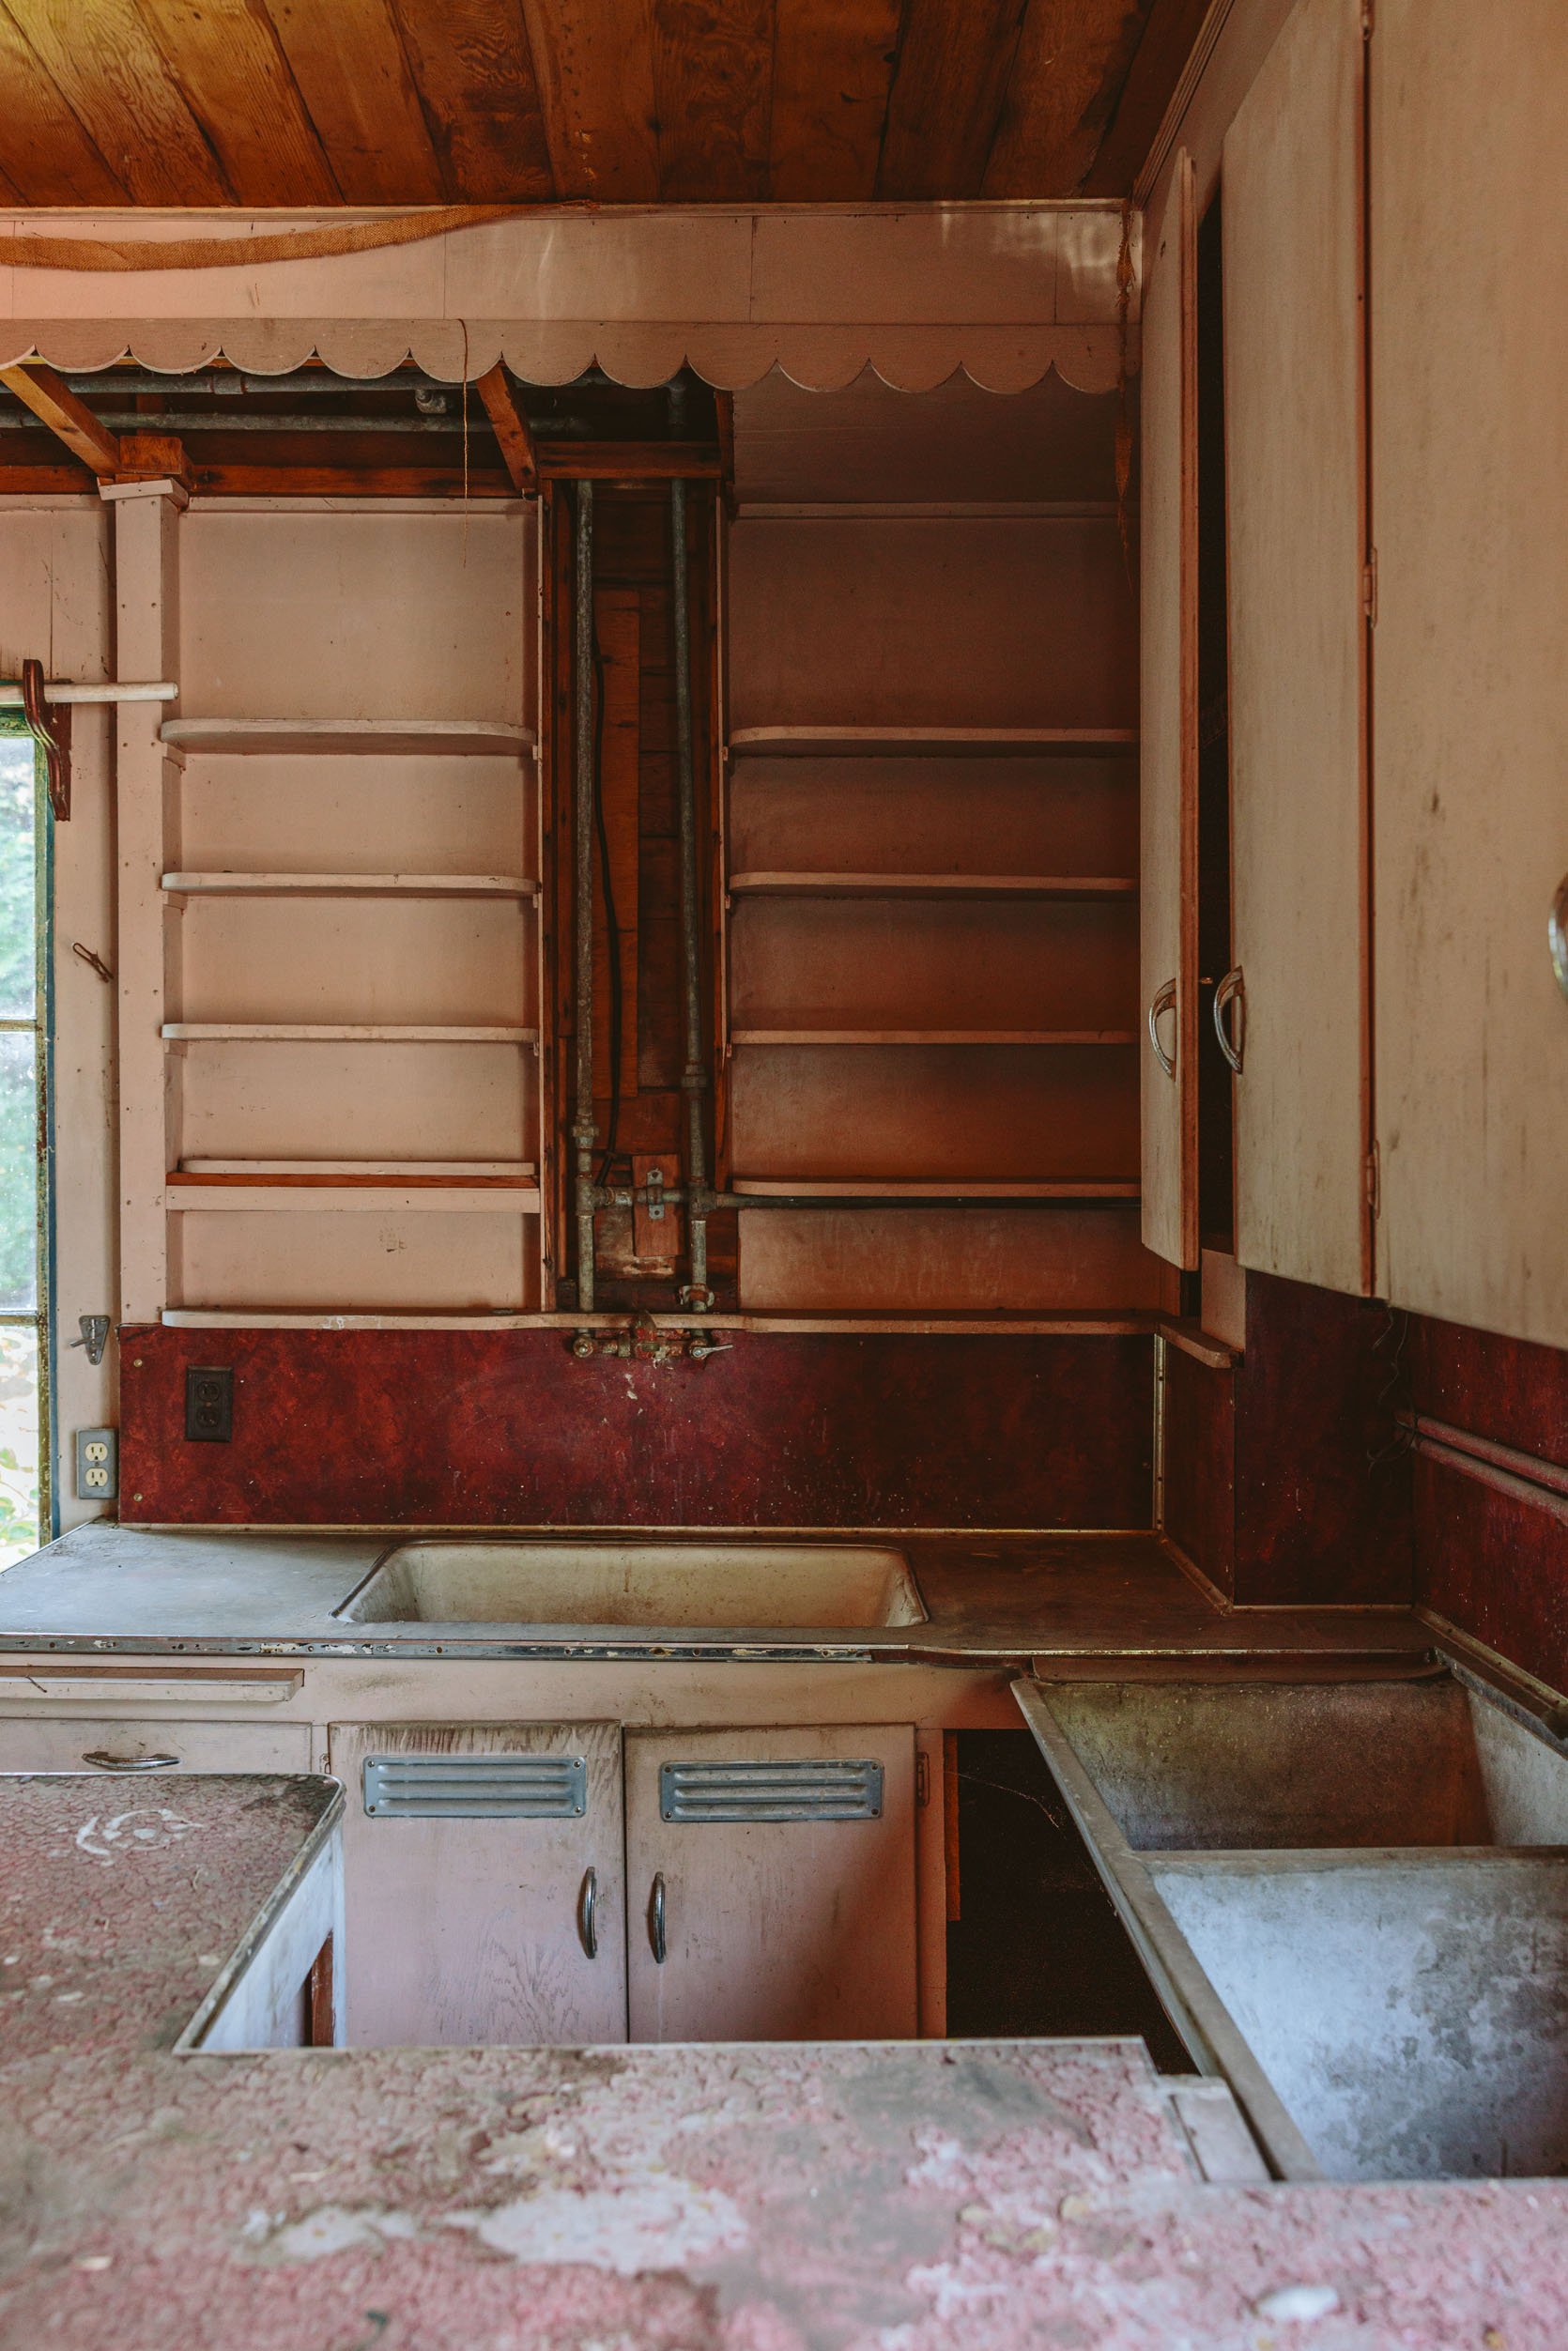
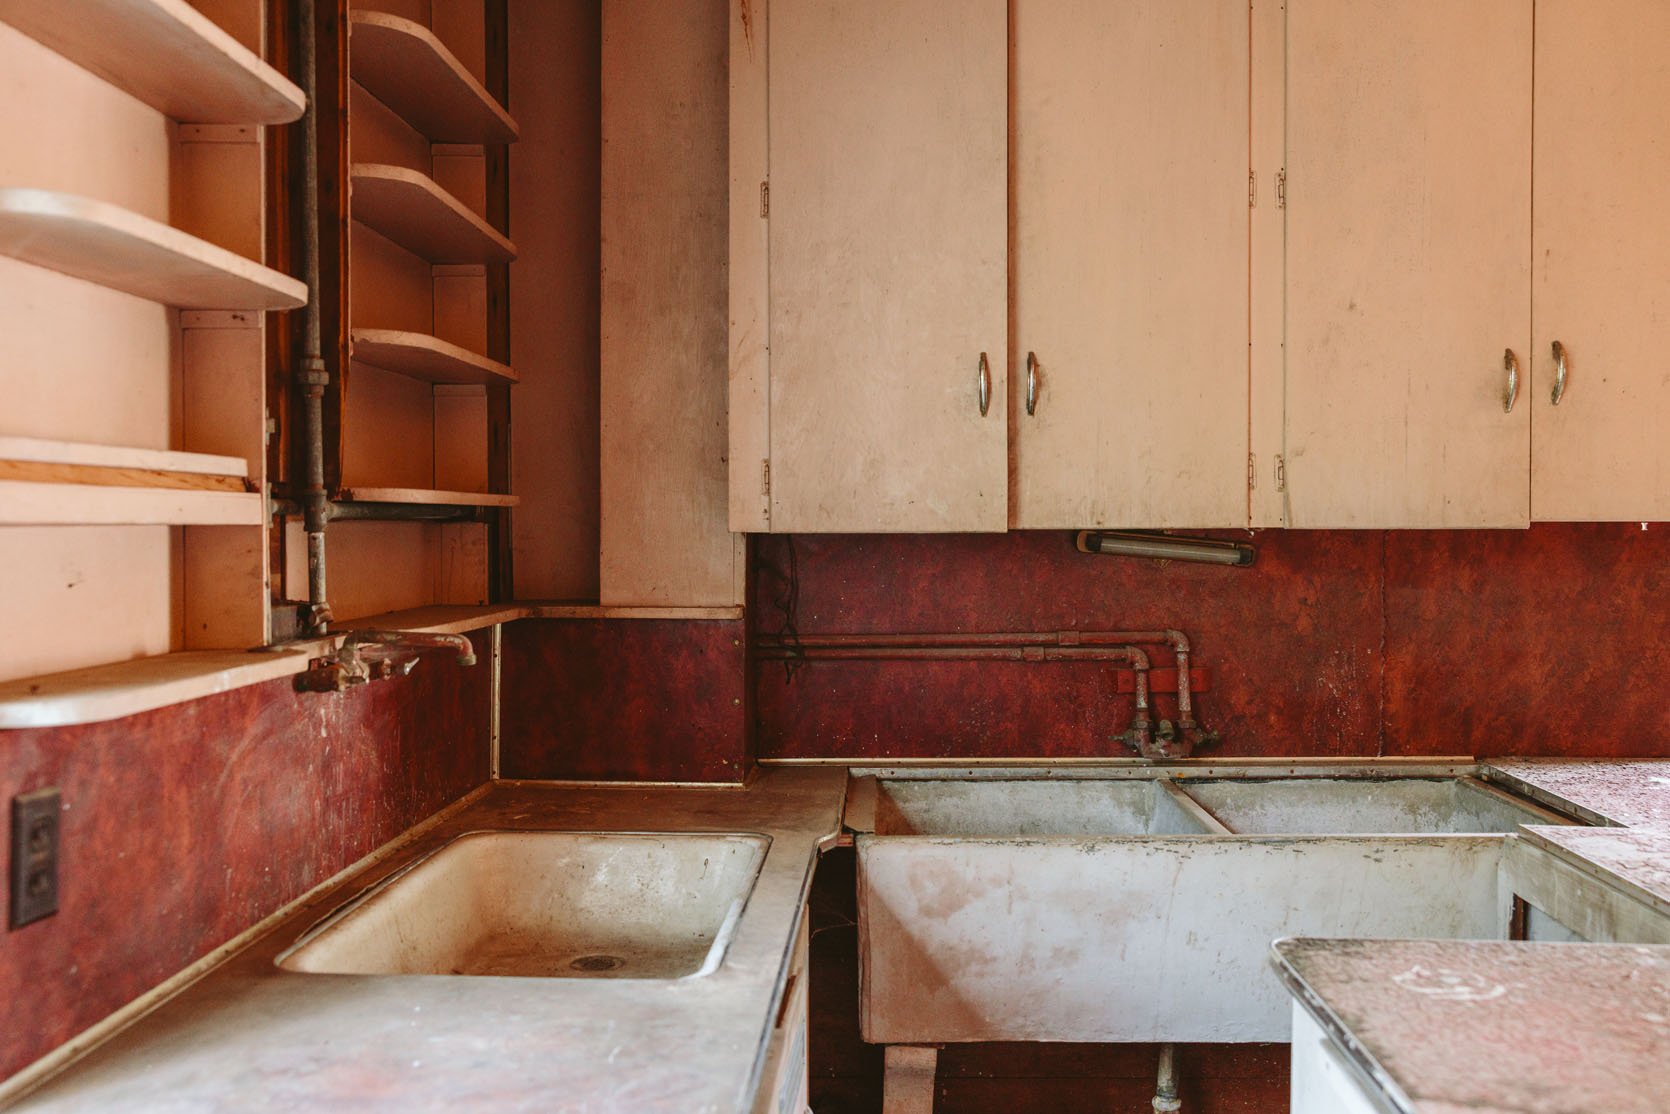
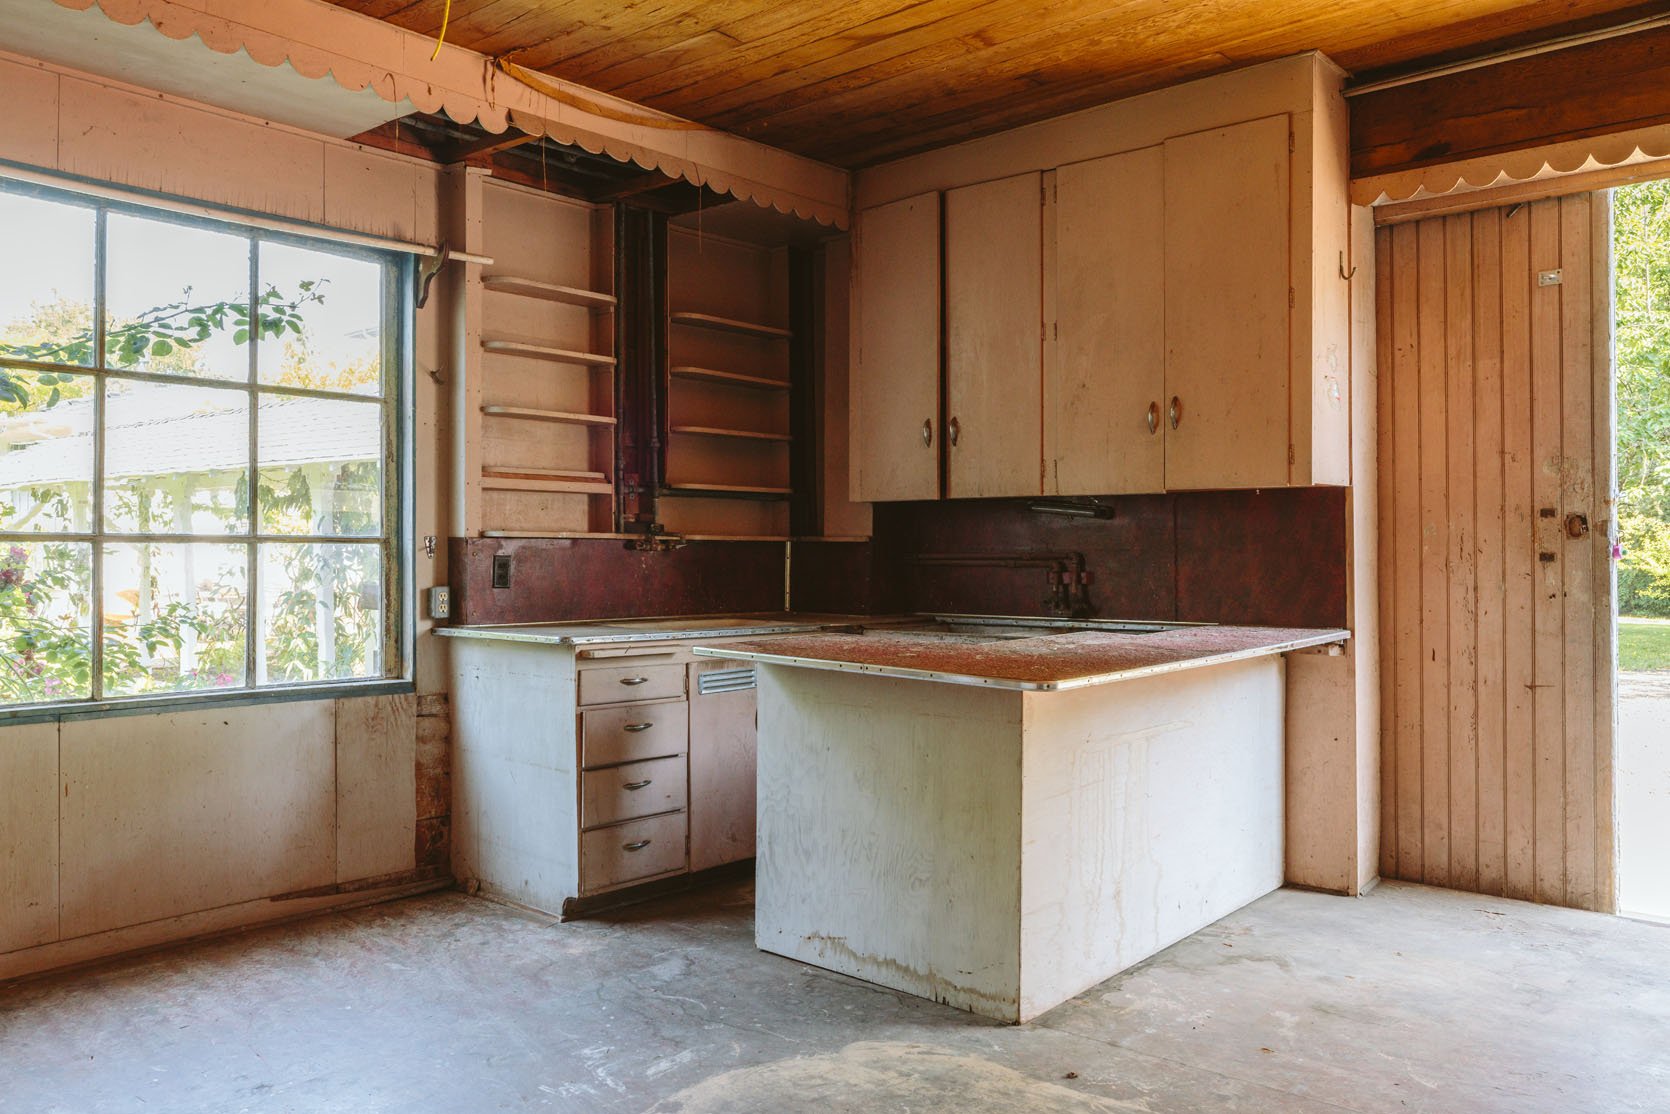
The island was actually unattached and super easy to just throw in the dumpster, but the cabinets were STRONG, hard wood, and a lot harder. If they weren’t covered in lead, they would make fantastic firewood. I have no idea why there were two sinks, both of them super heavy and in bad condition.
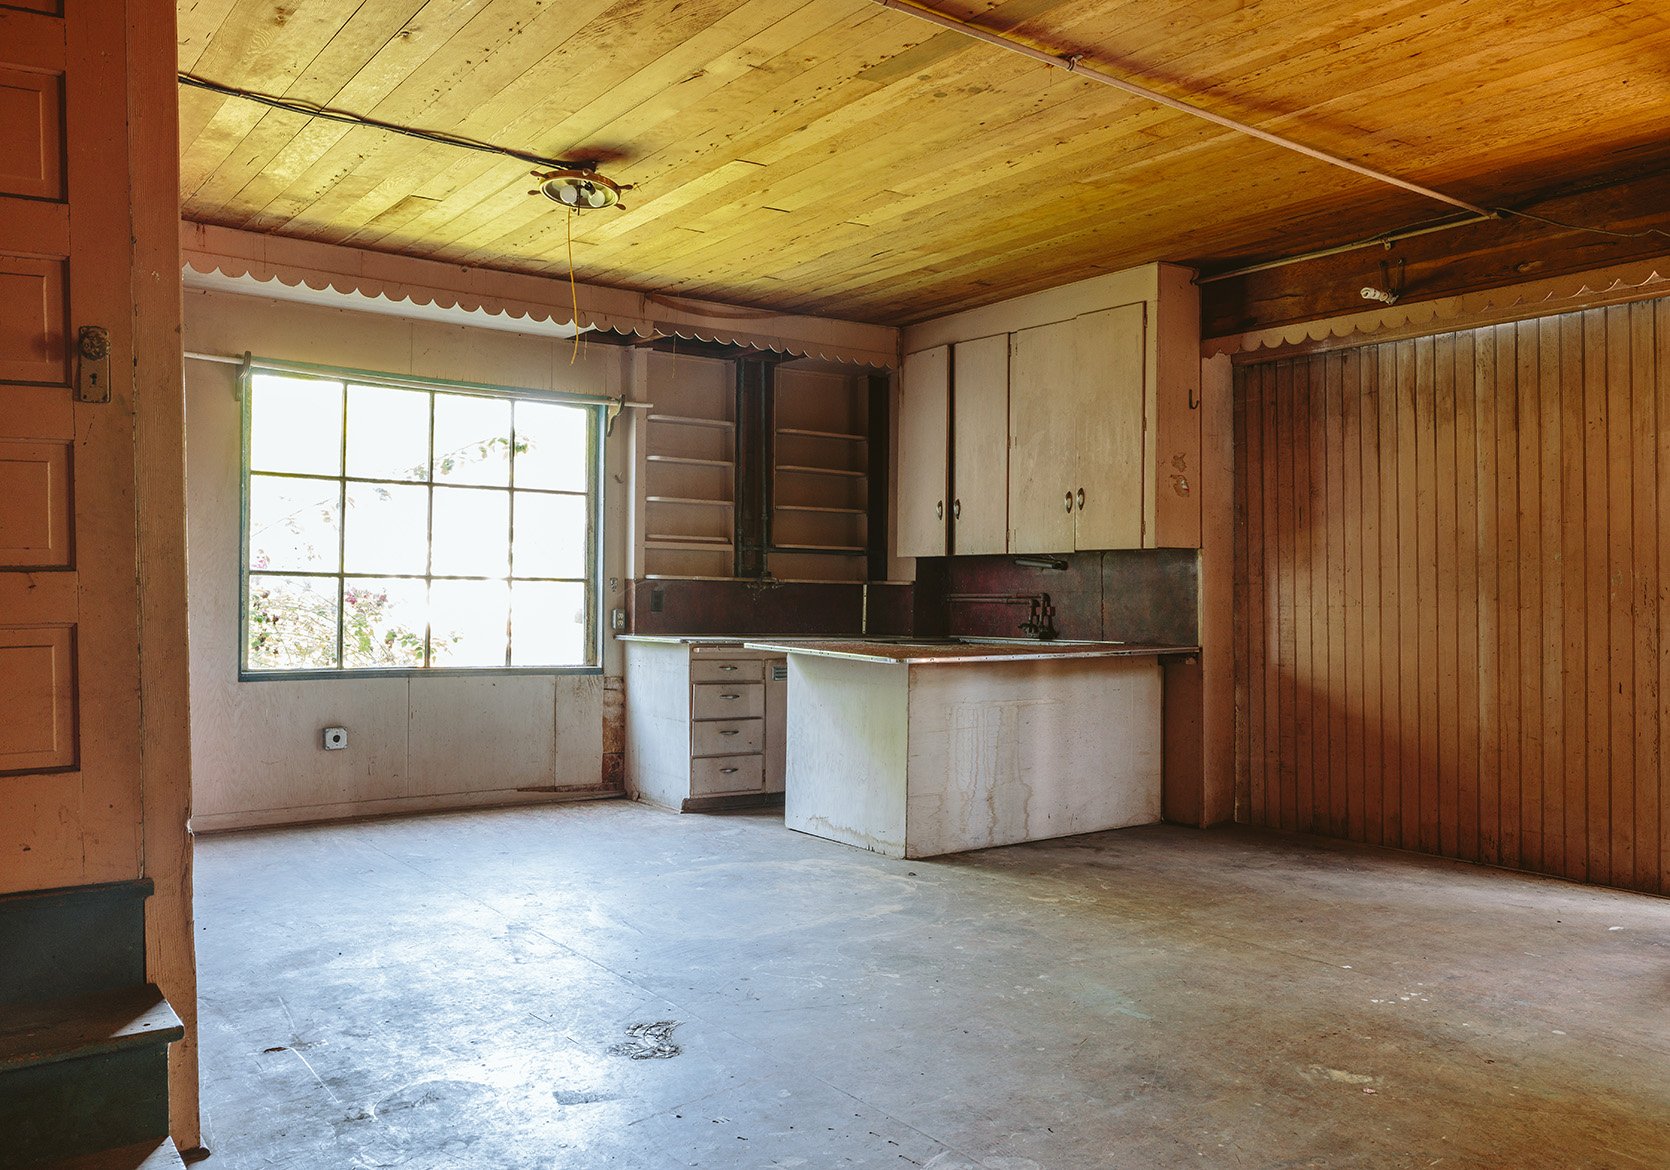
During DIY Demo:

Turns out I’m much more of a homemaker than a home breaker. I just didn’t trust myself swinging the sledgehammer with the amount of force needed to do the job. I was hesitant, likely because I’m kinda clumsy. I’m also the type of person who picks up a piece of furniture without clearing the way or making sure that it will fit where I intend for it to go. In other words, I can be kinda reckless and not very careful, so I was scared that if I really went for it, it would bounce back and hurt me or worse, Brian or Ken.
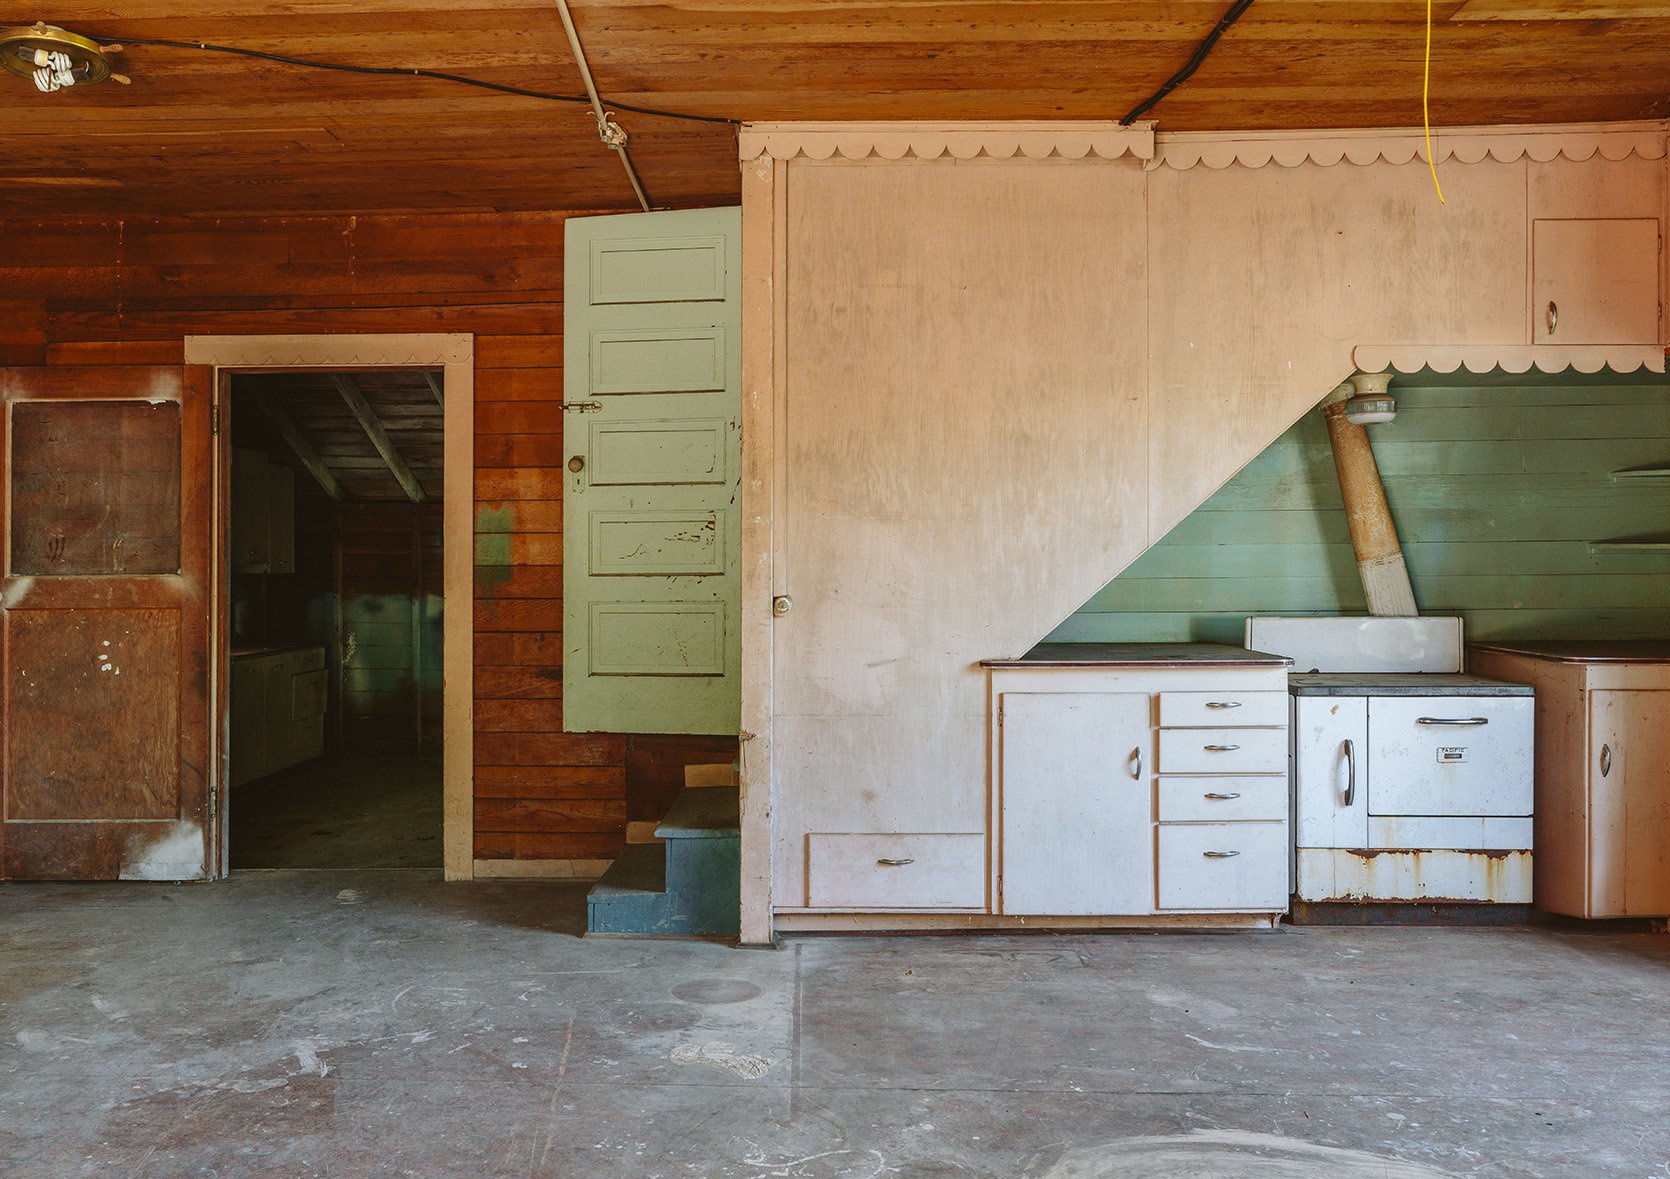
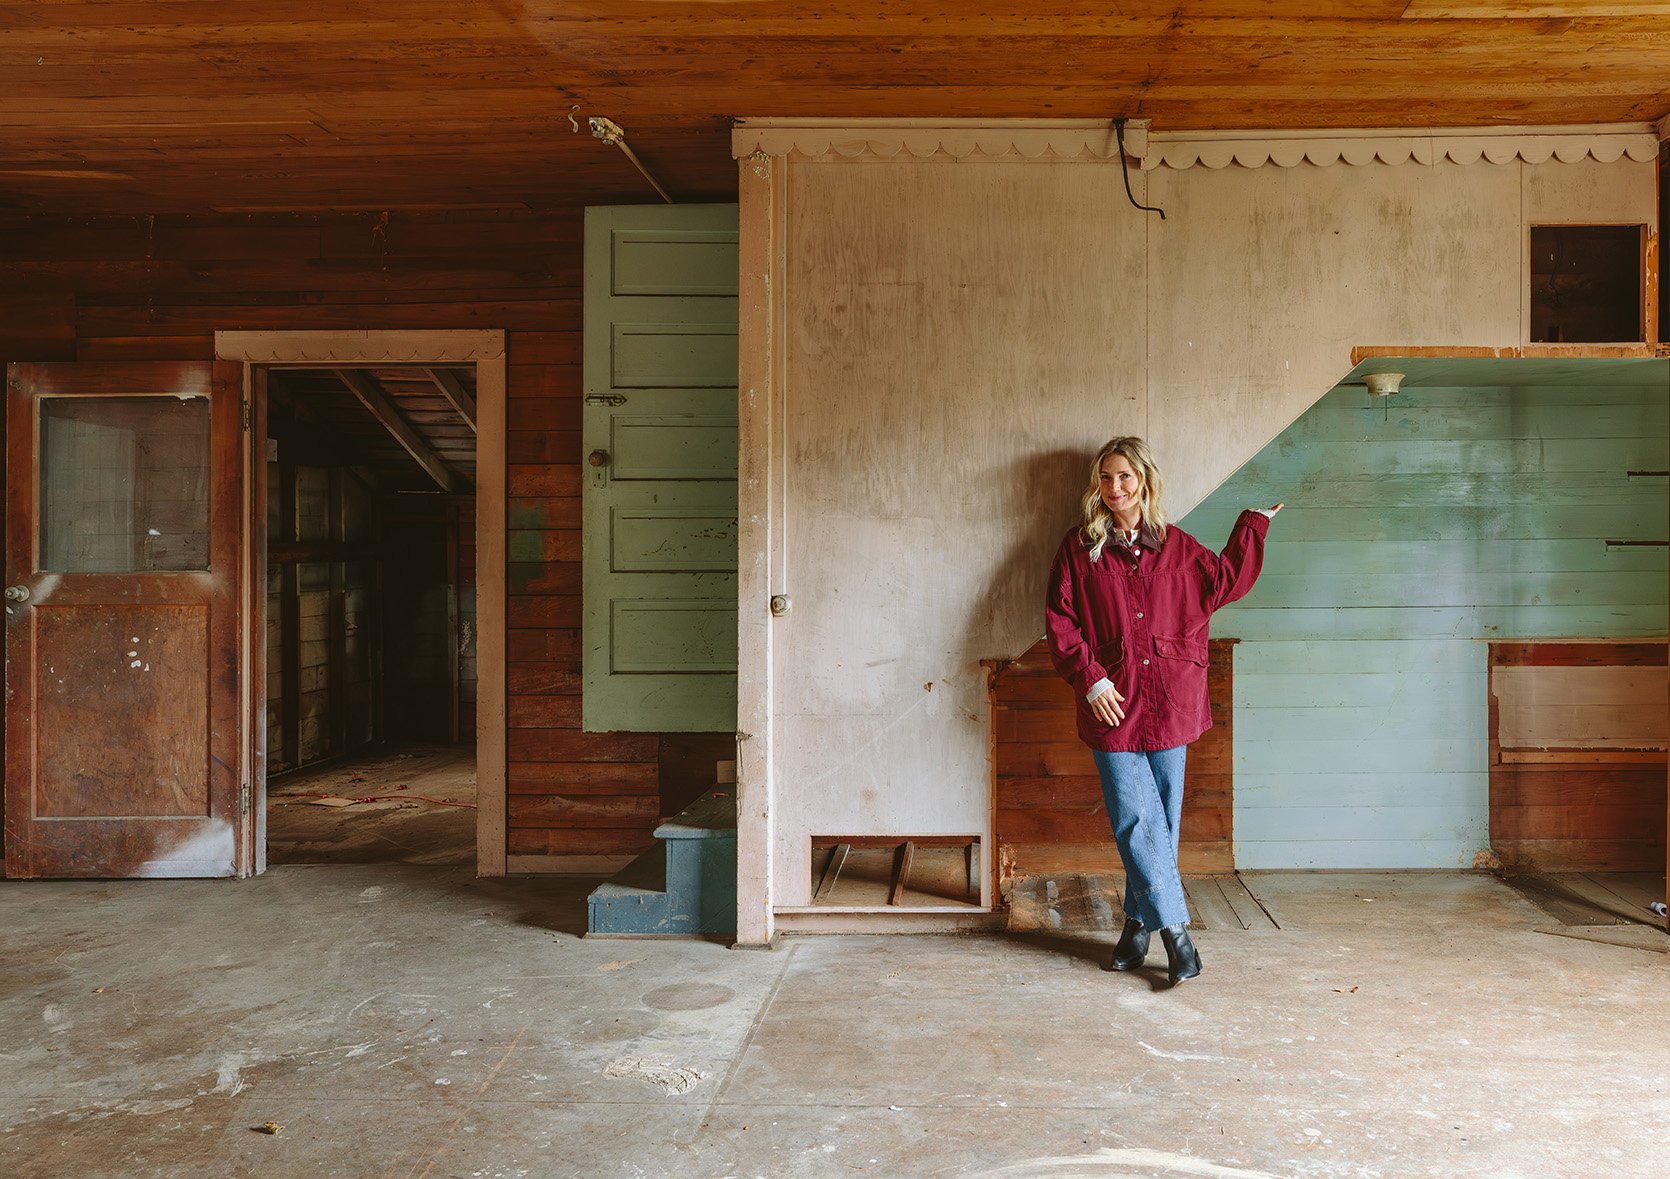
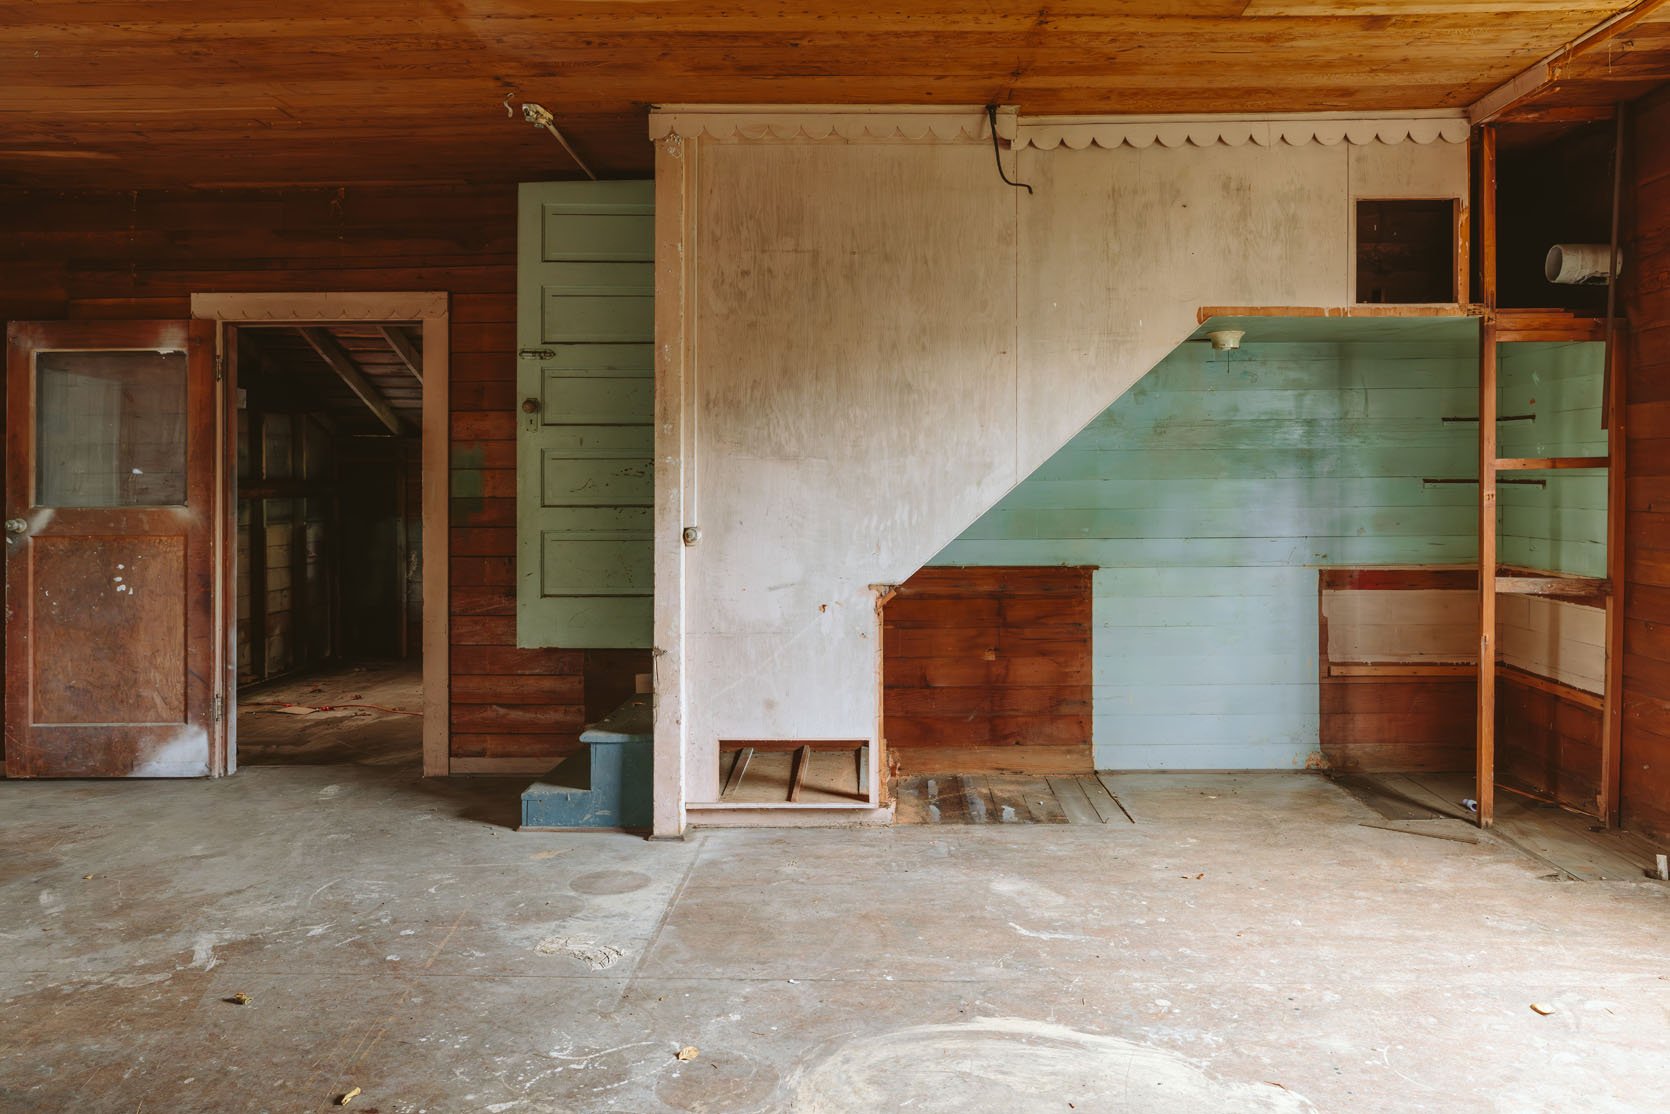
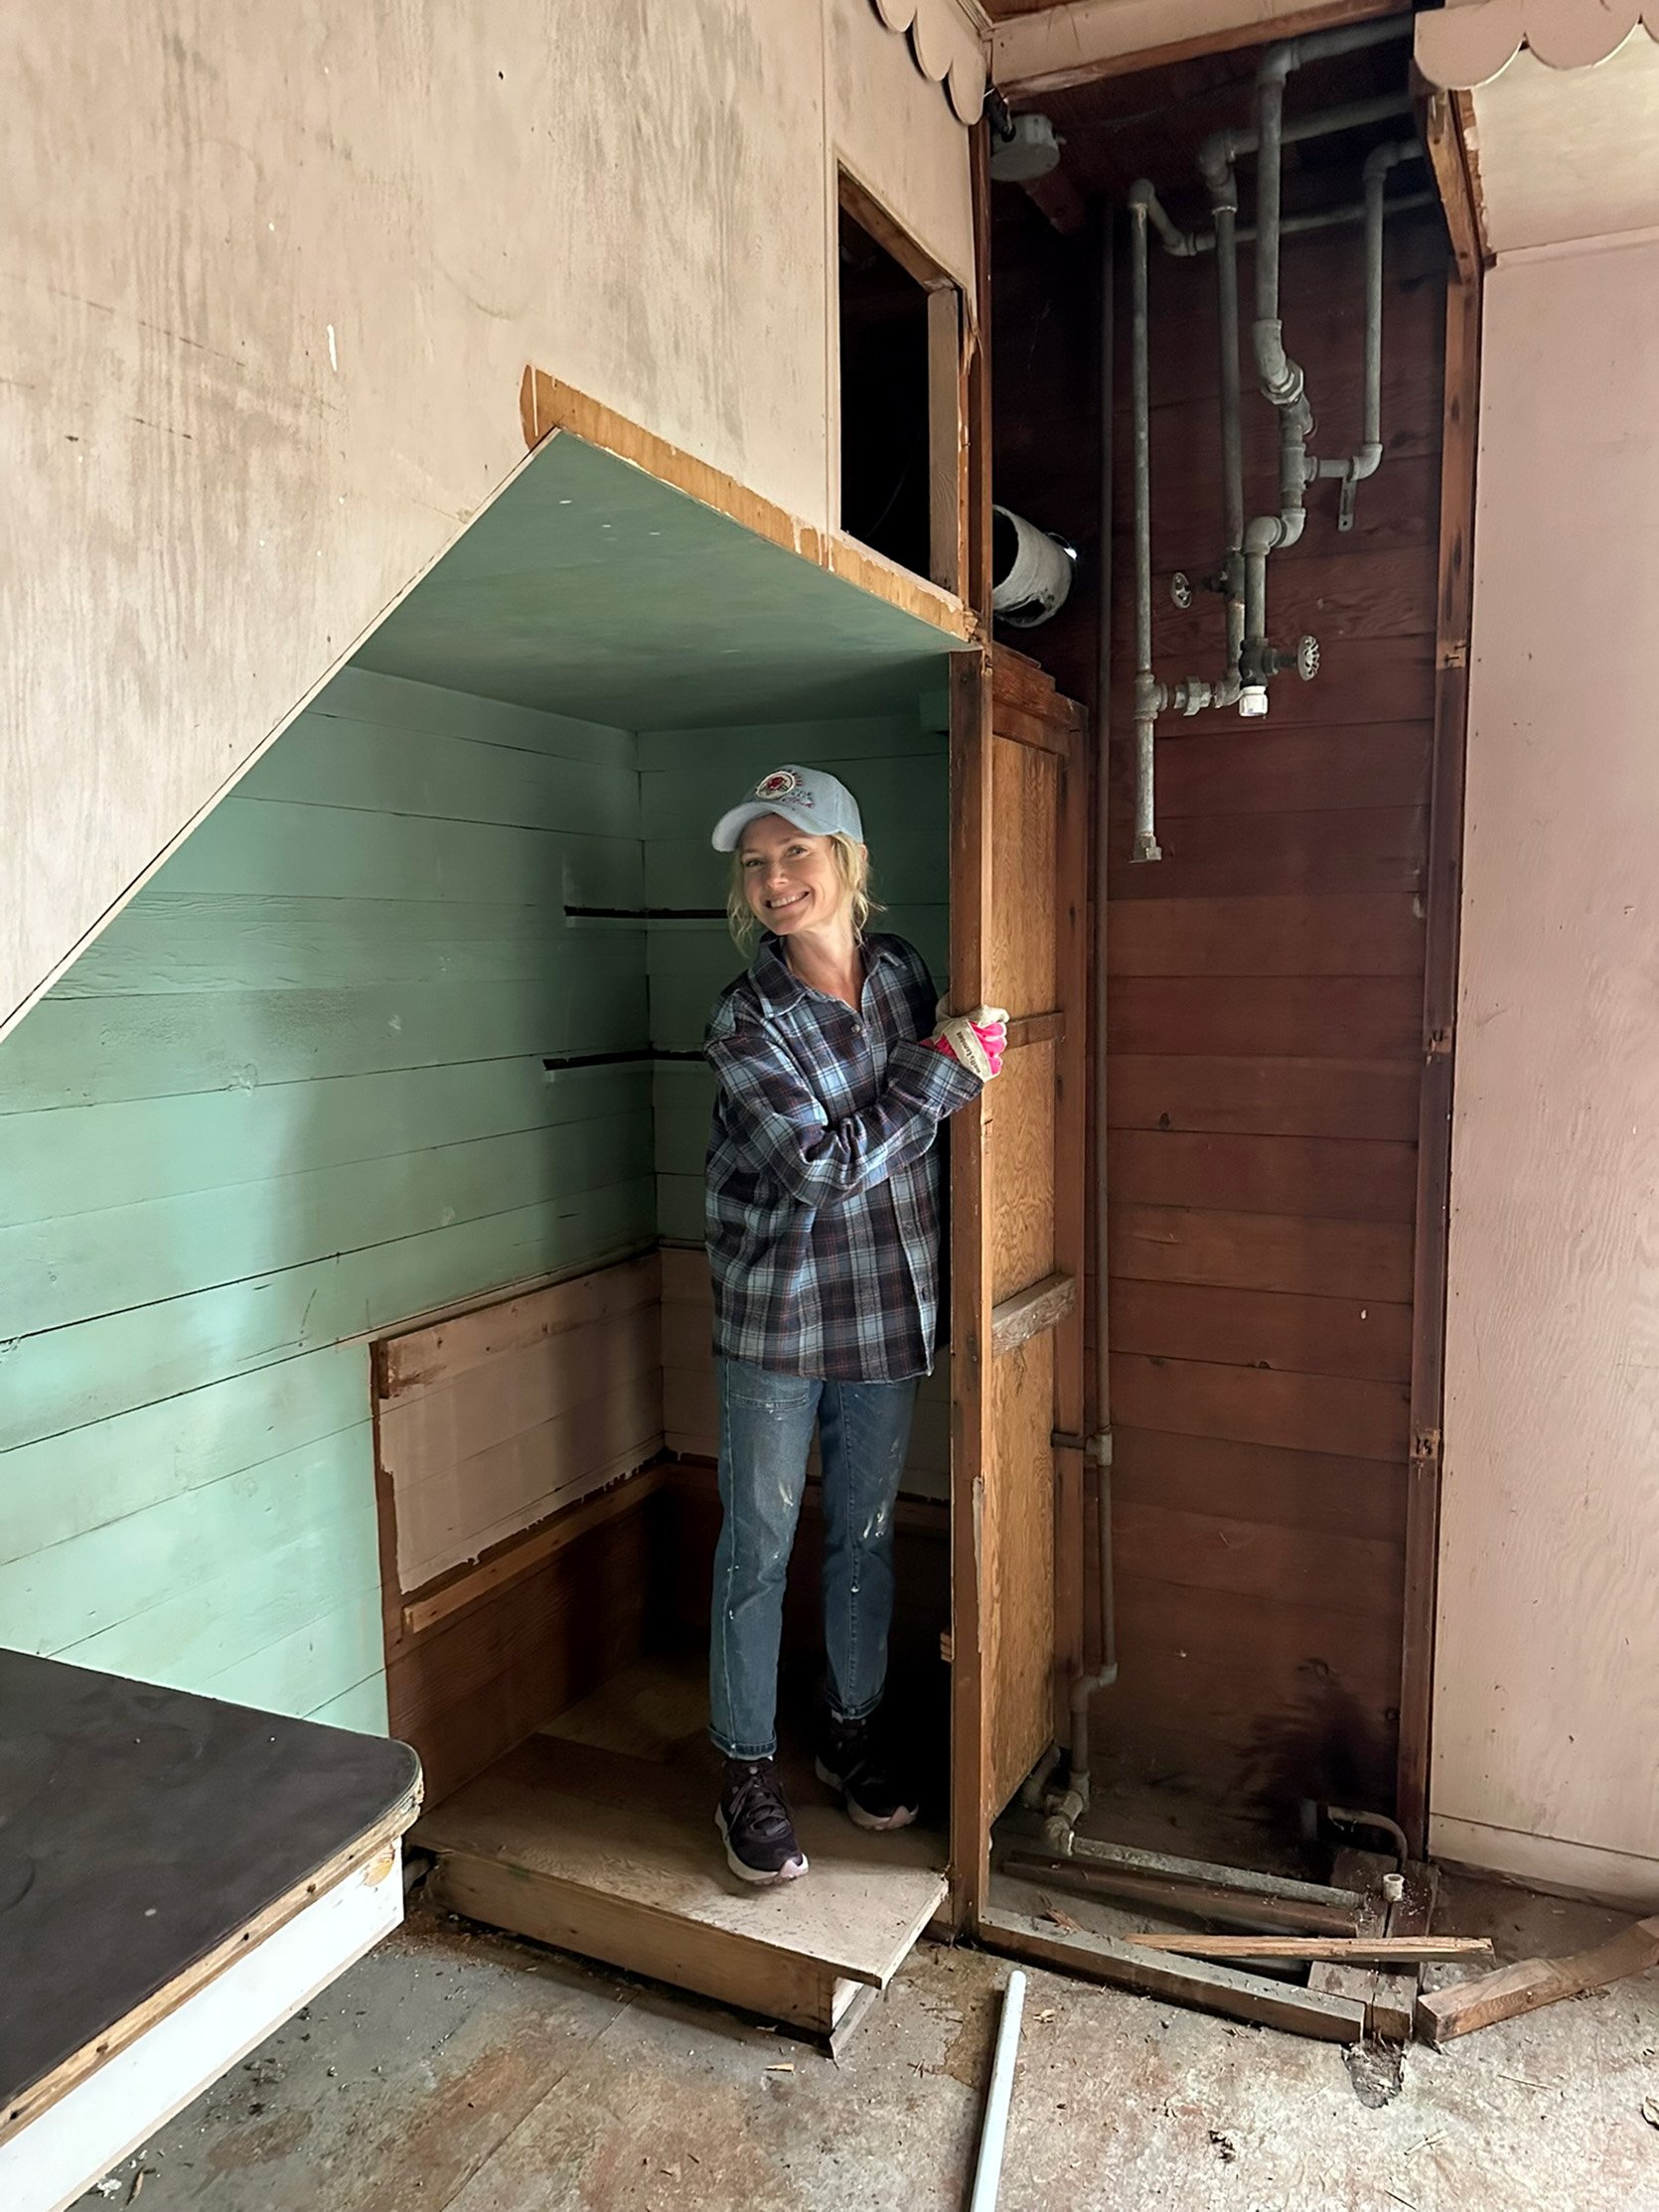
Under The Stairs
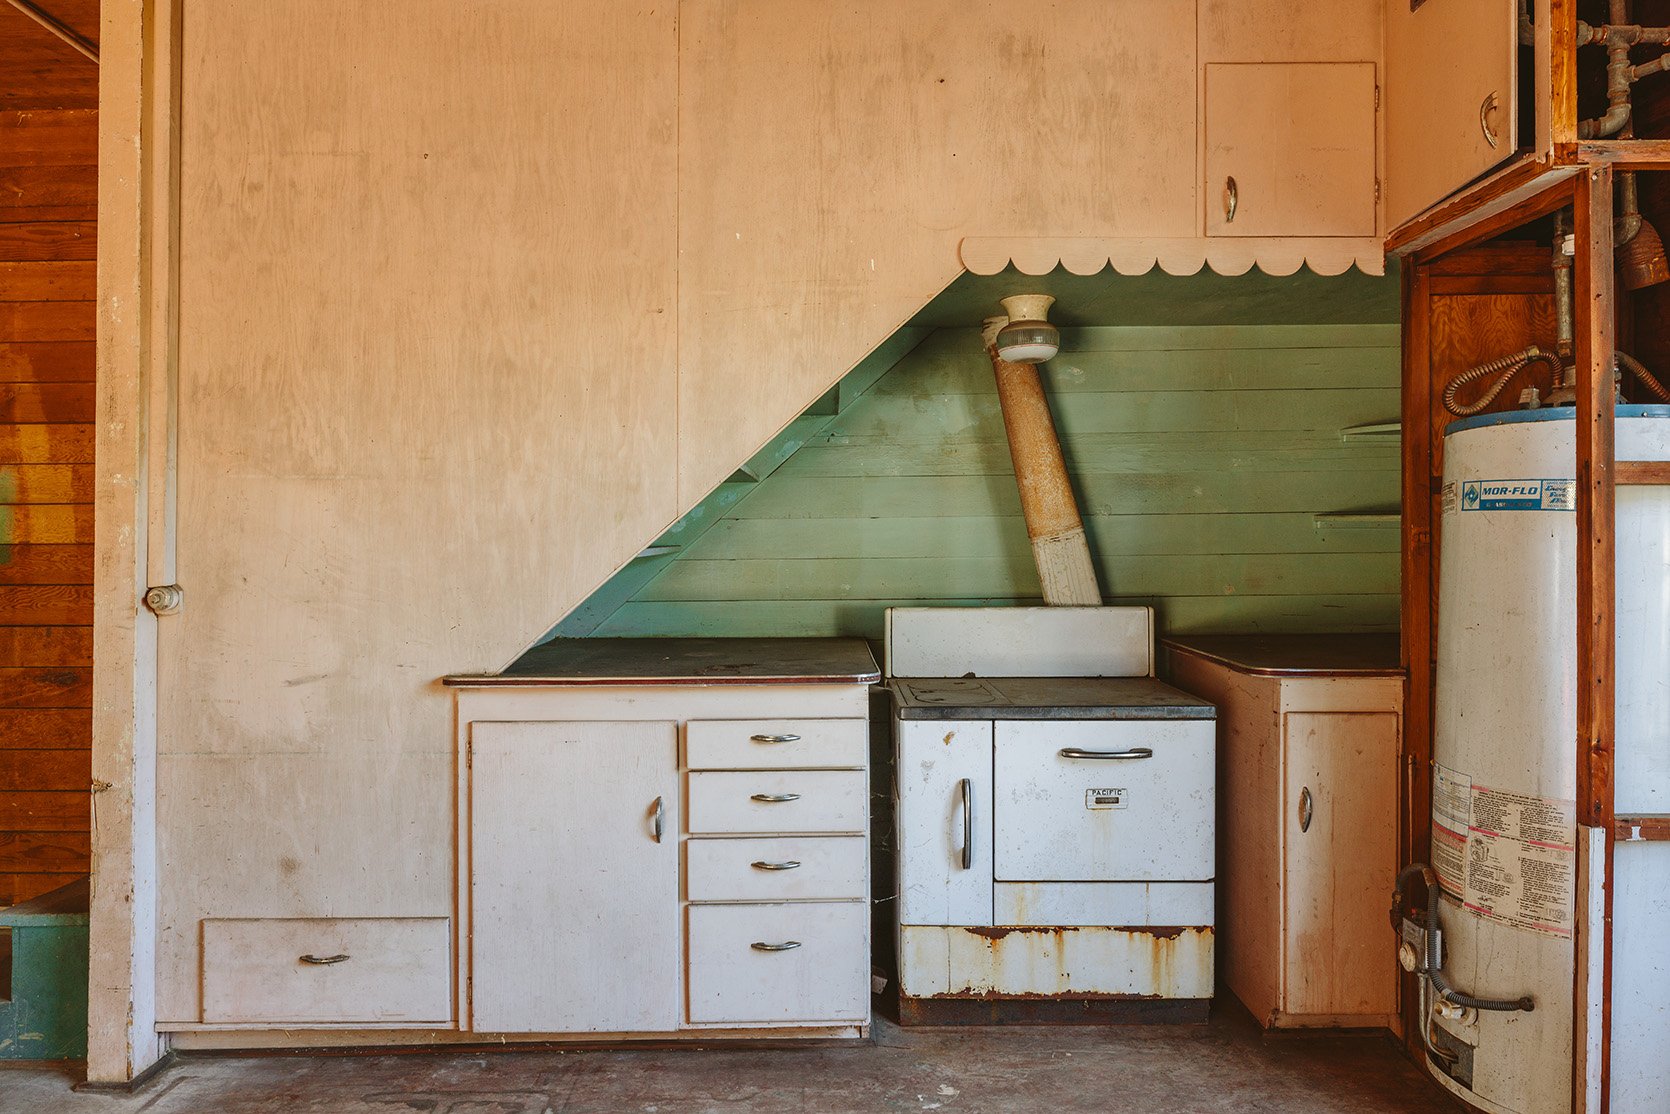
The area under the stairs had the vintage wood-burning cooking stove, cabinetry, and old hot water heater. Thank god for Ken and Brian – these things were heavy and we needed some serious muscle.
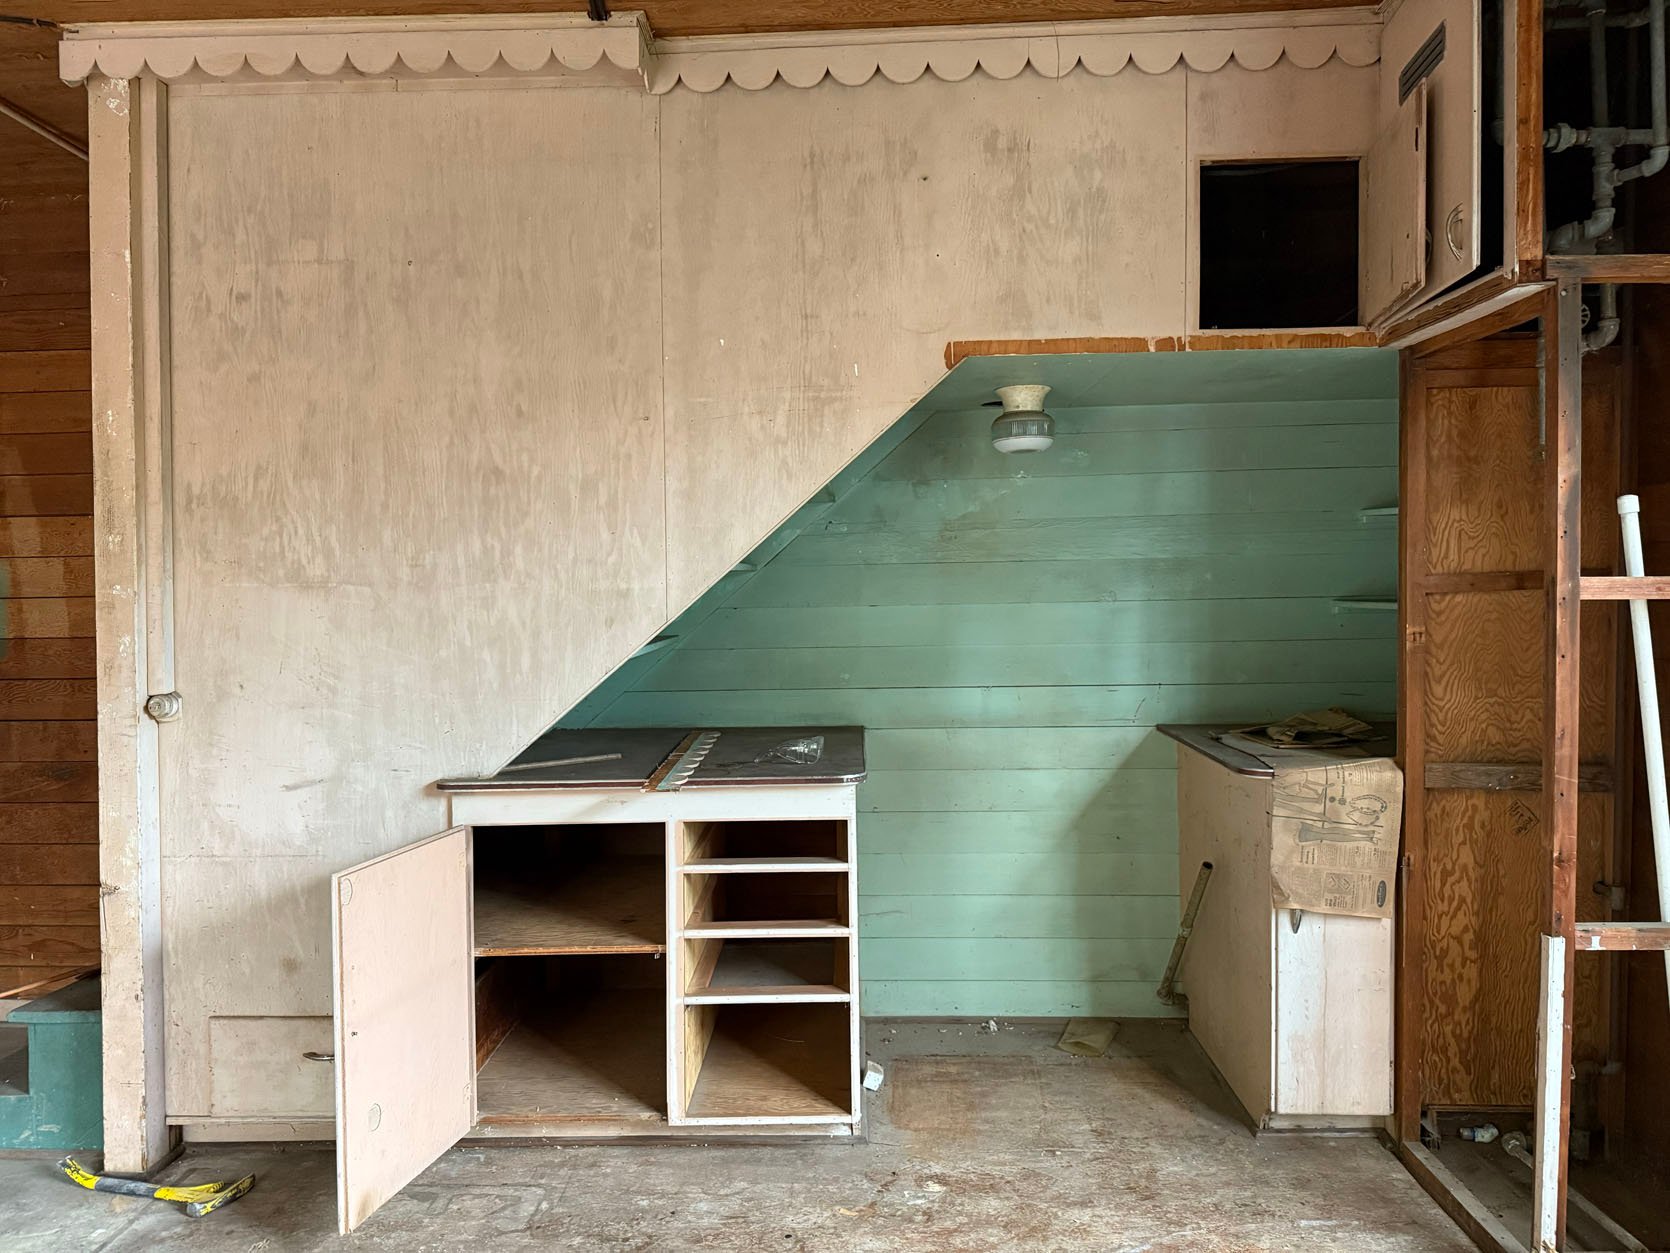
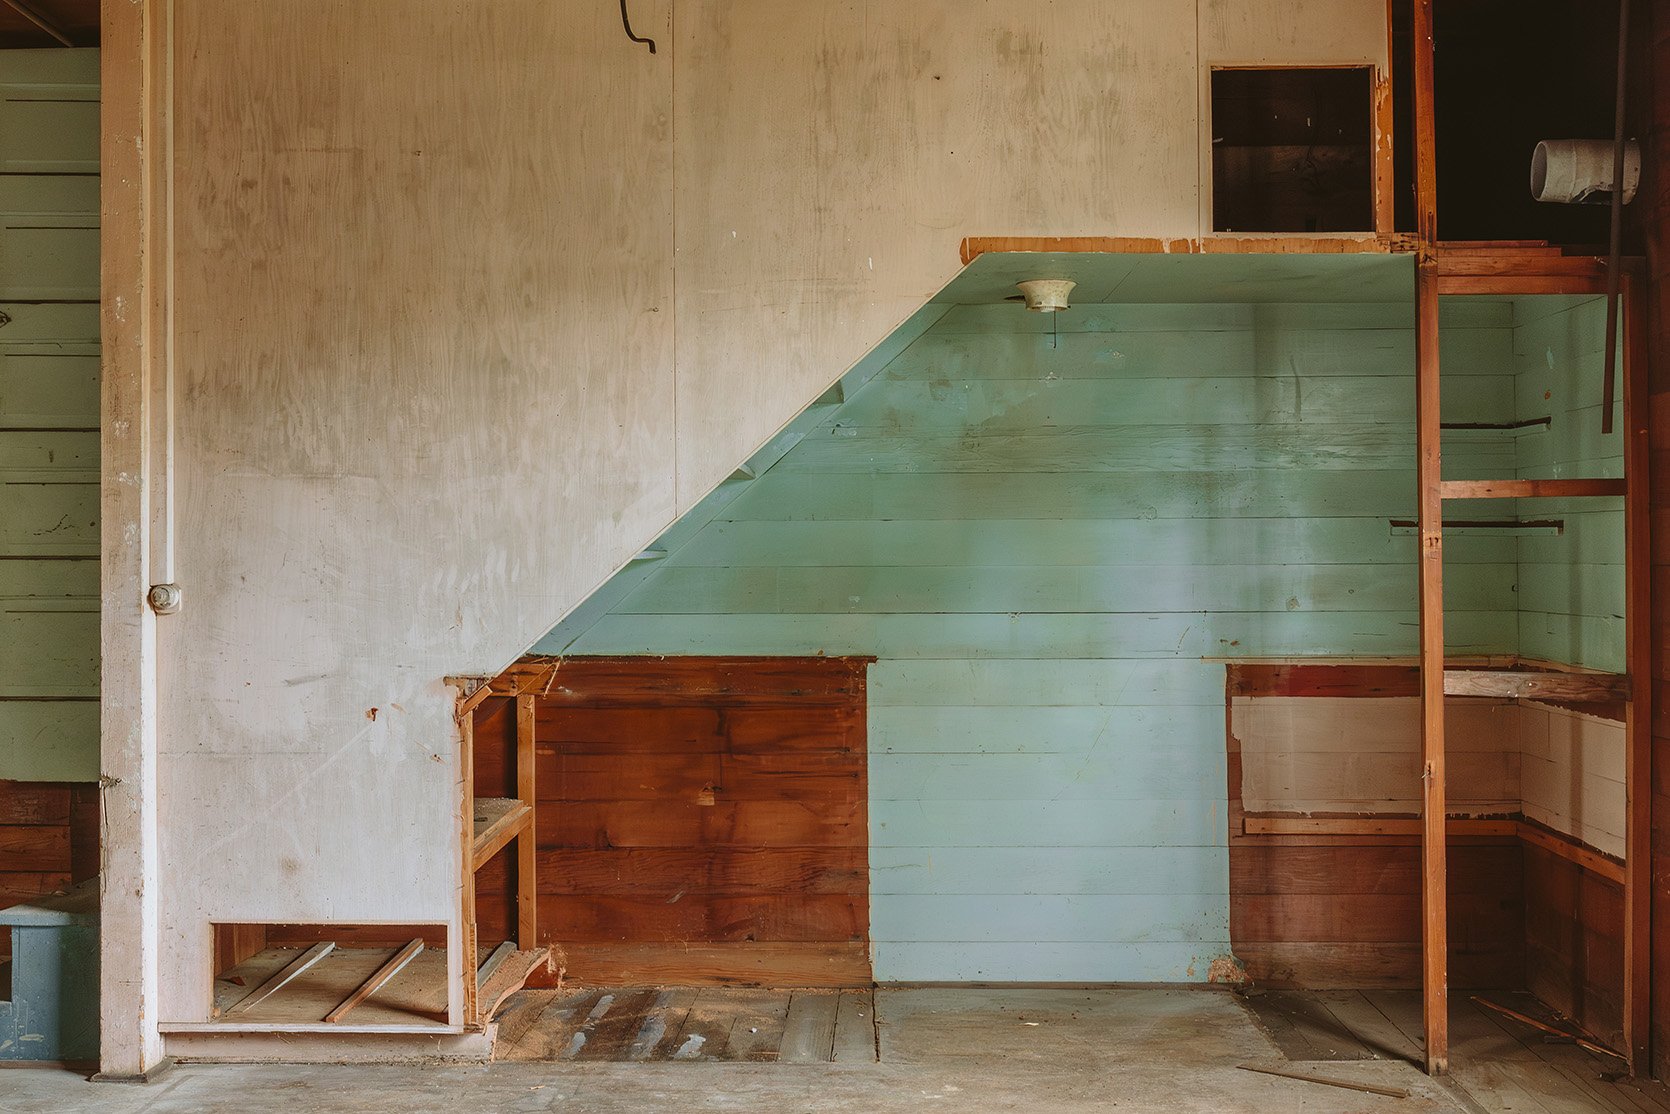
During DIY Demo:
Now that it’s empty, I can lay out the kitchen with more proper measurements. I’m playing around on Spoak (a design program that is meant to be really intuitive yet powerful for people like me who don’t know AutoCAD or SketchUp). I’ll show you what I’m working on soon – it’s incredibly fun.

The “Canning Room”
BEFORE:
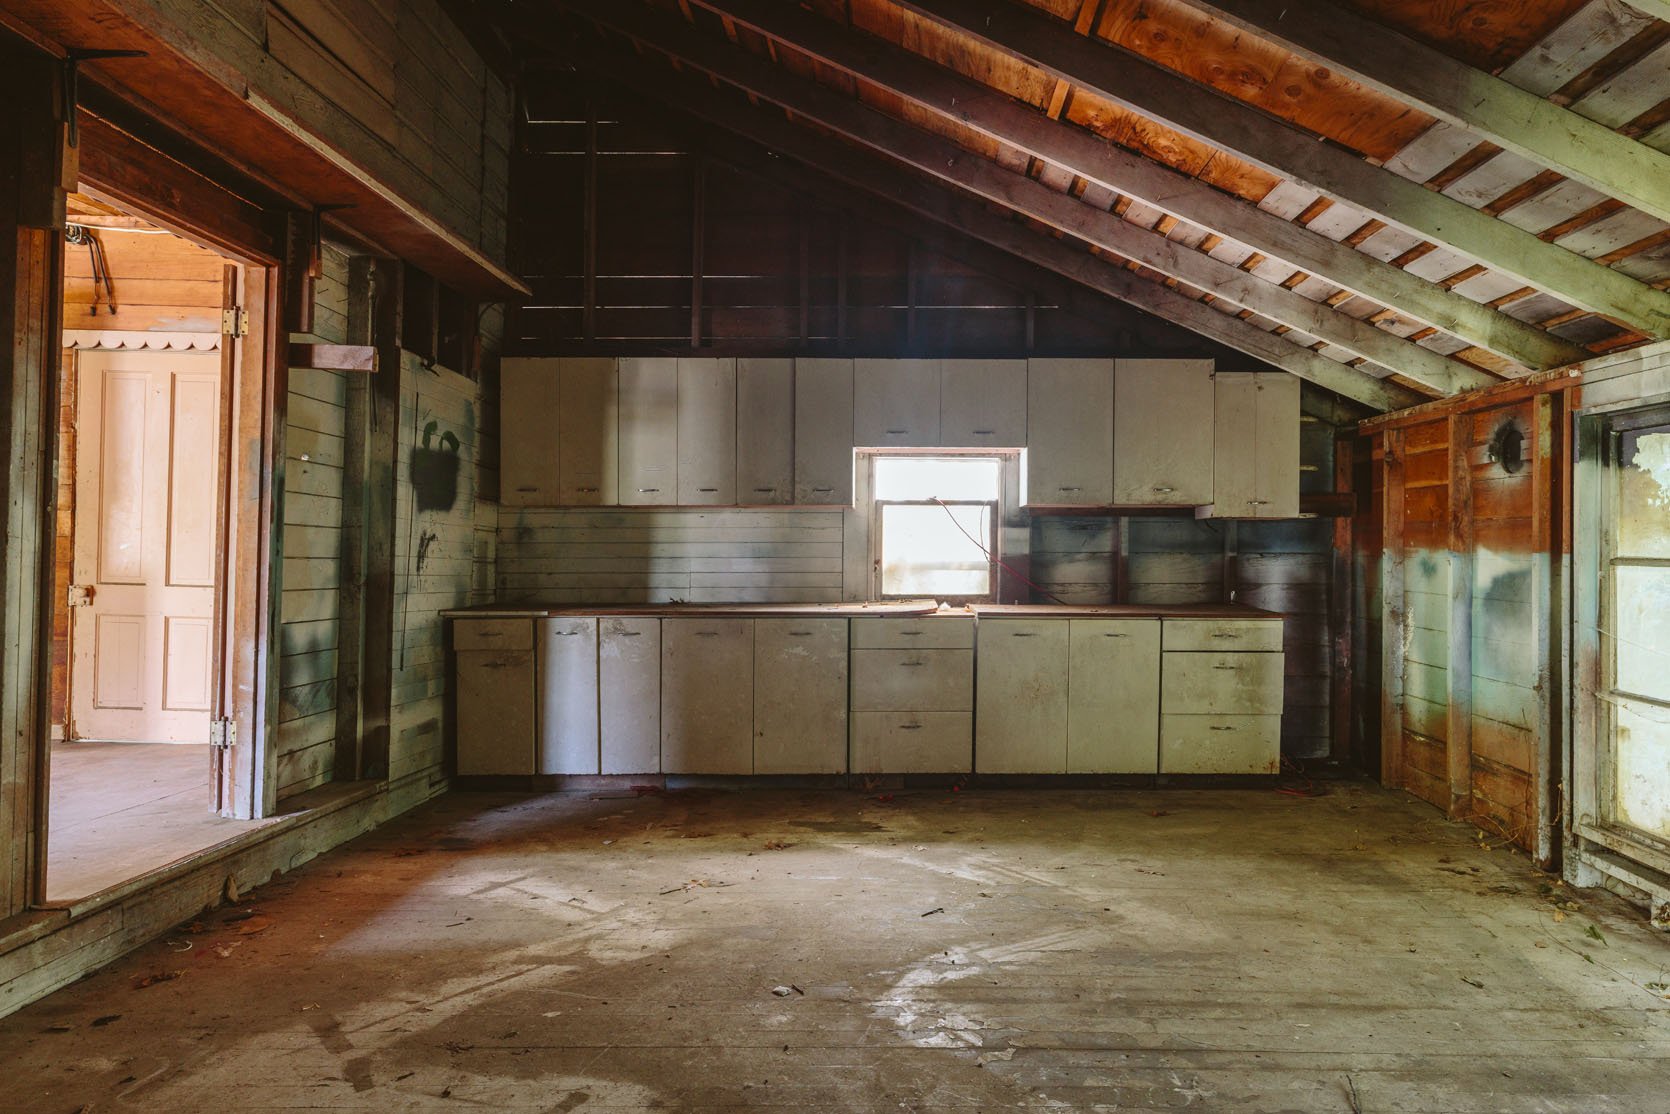
This room had all the aluminum cabinetry from the 40s or 50s, not in the best shape. They were actually super easy to remove and really lightweight. It’s a really big room with high ceilings and walls/ceilings that need to be repaired (and done properly).
During DIY Demo:
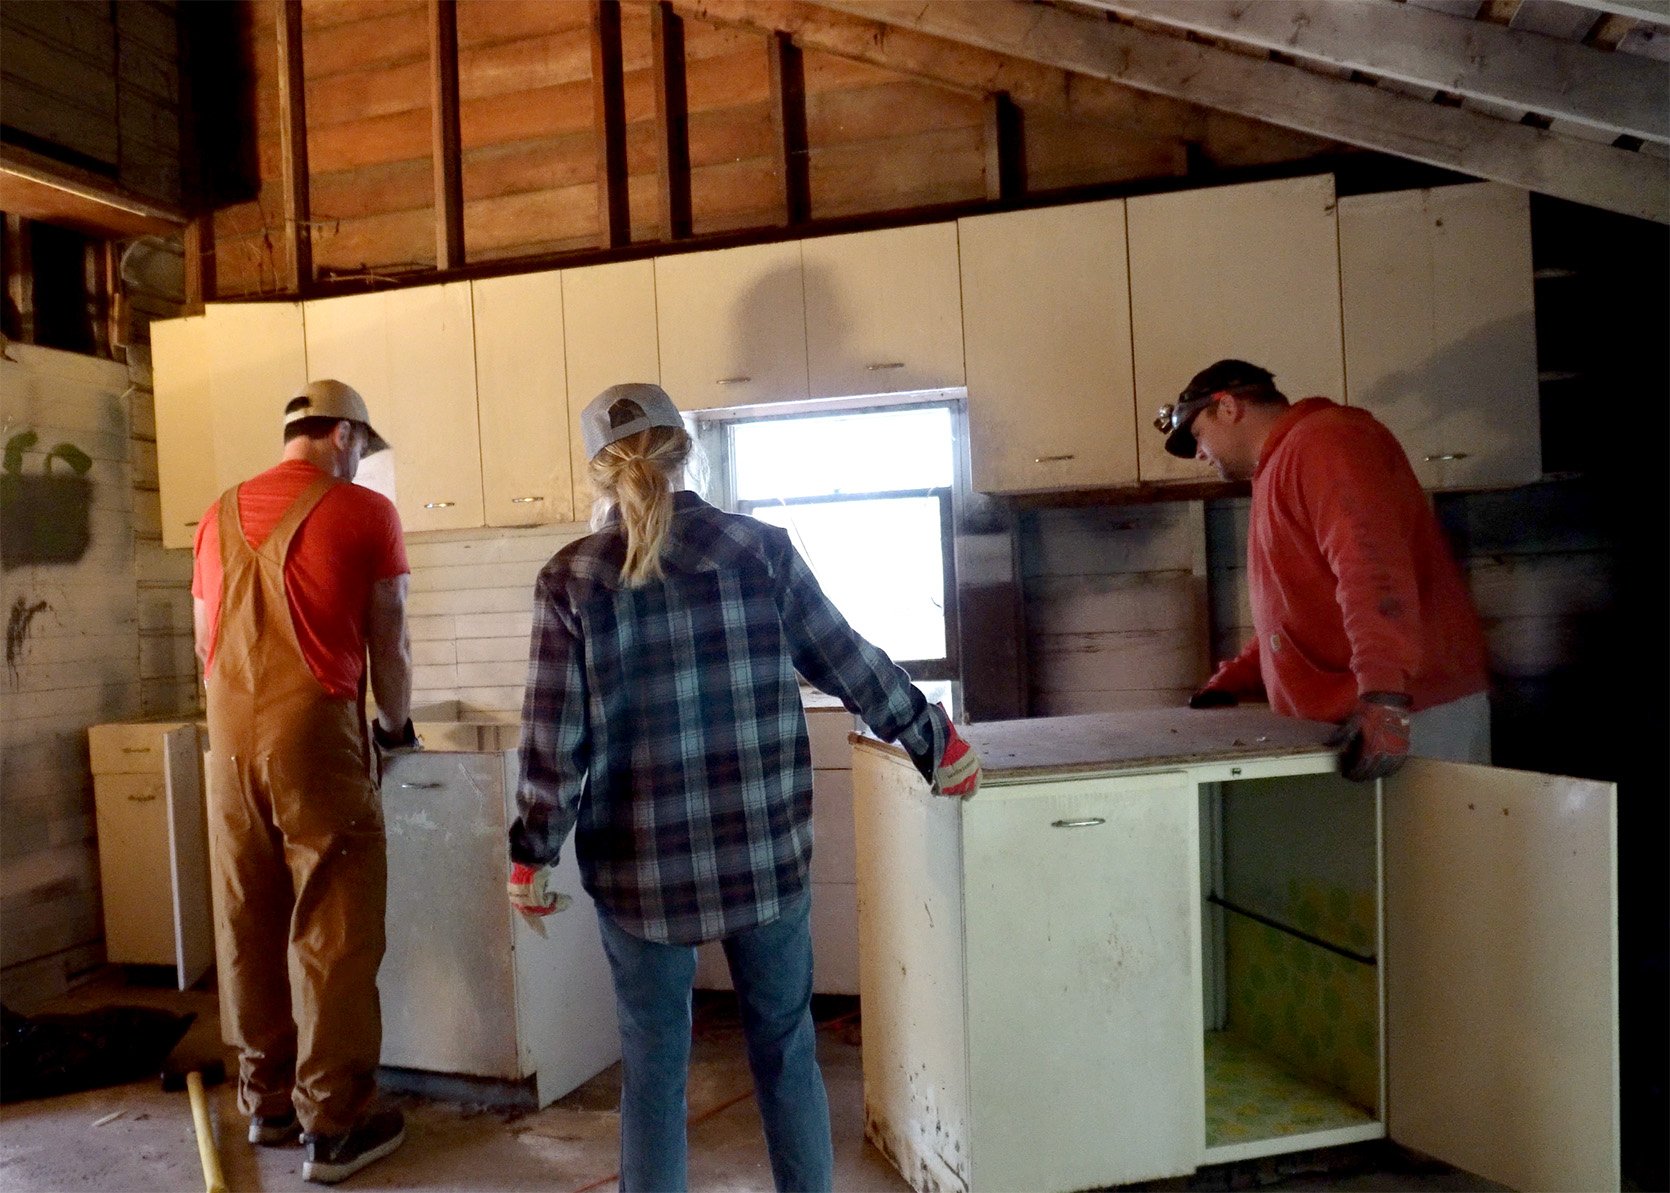
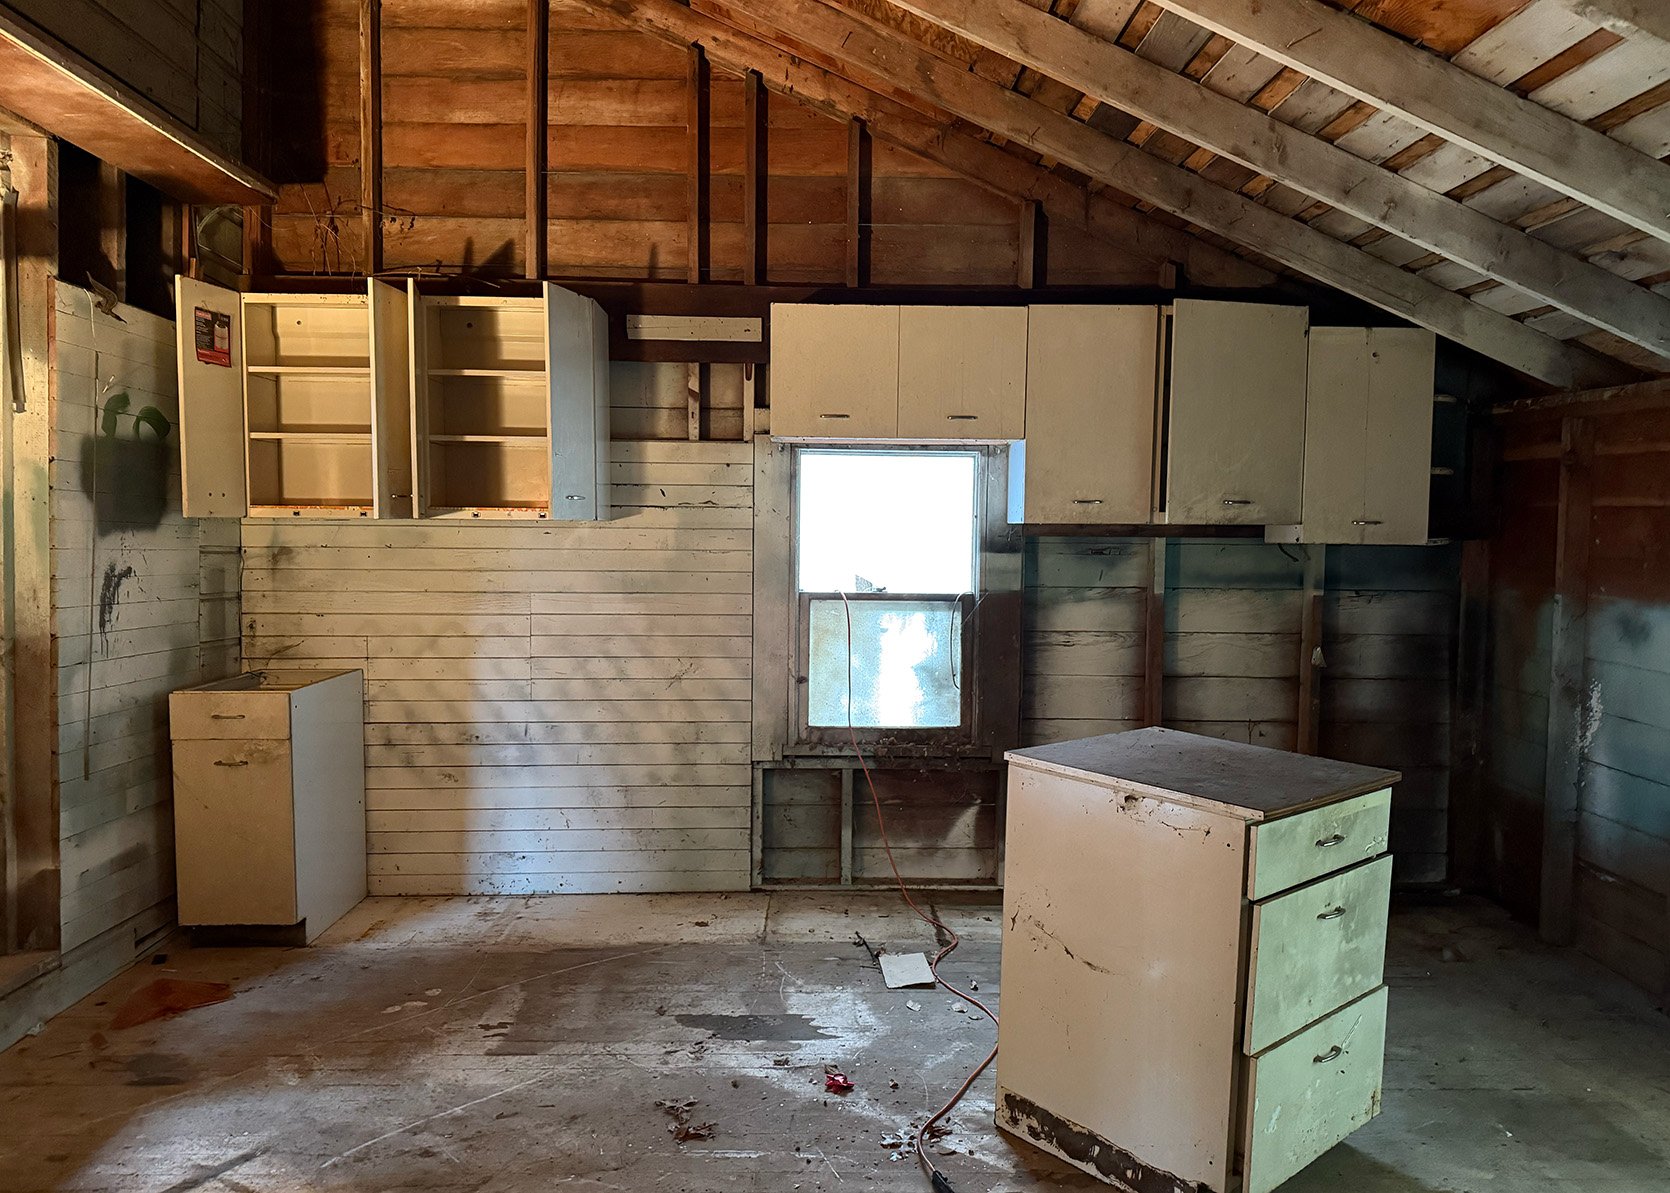
We were able to pull out the cabinets, and Ken or Brian could carry them on their own – VERY strong men, these two. These were a lot easier to remove than the wood cabinets in the other room, which were solid.

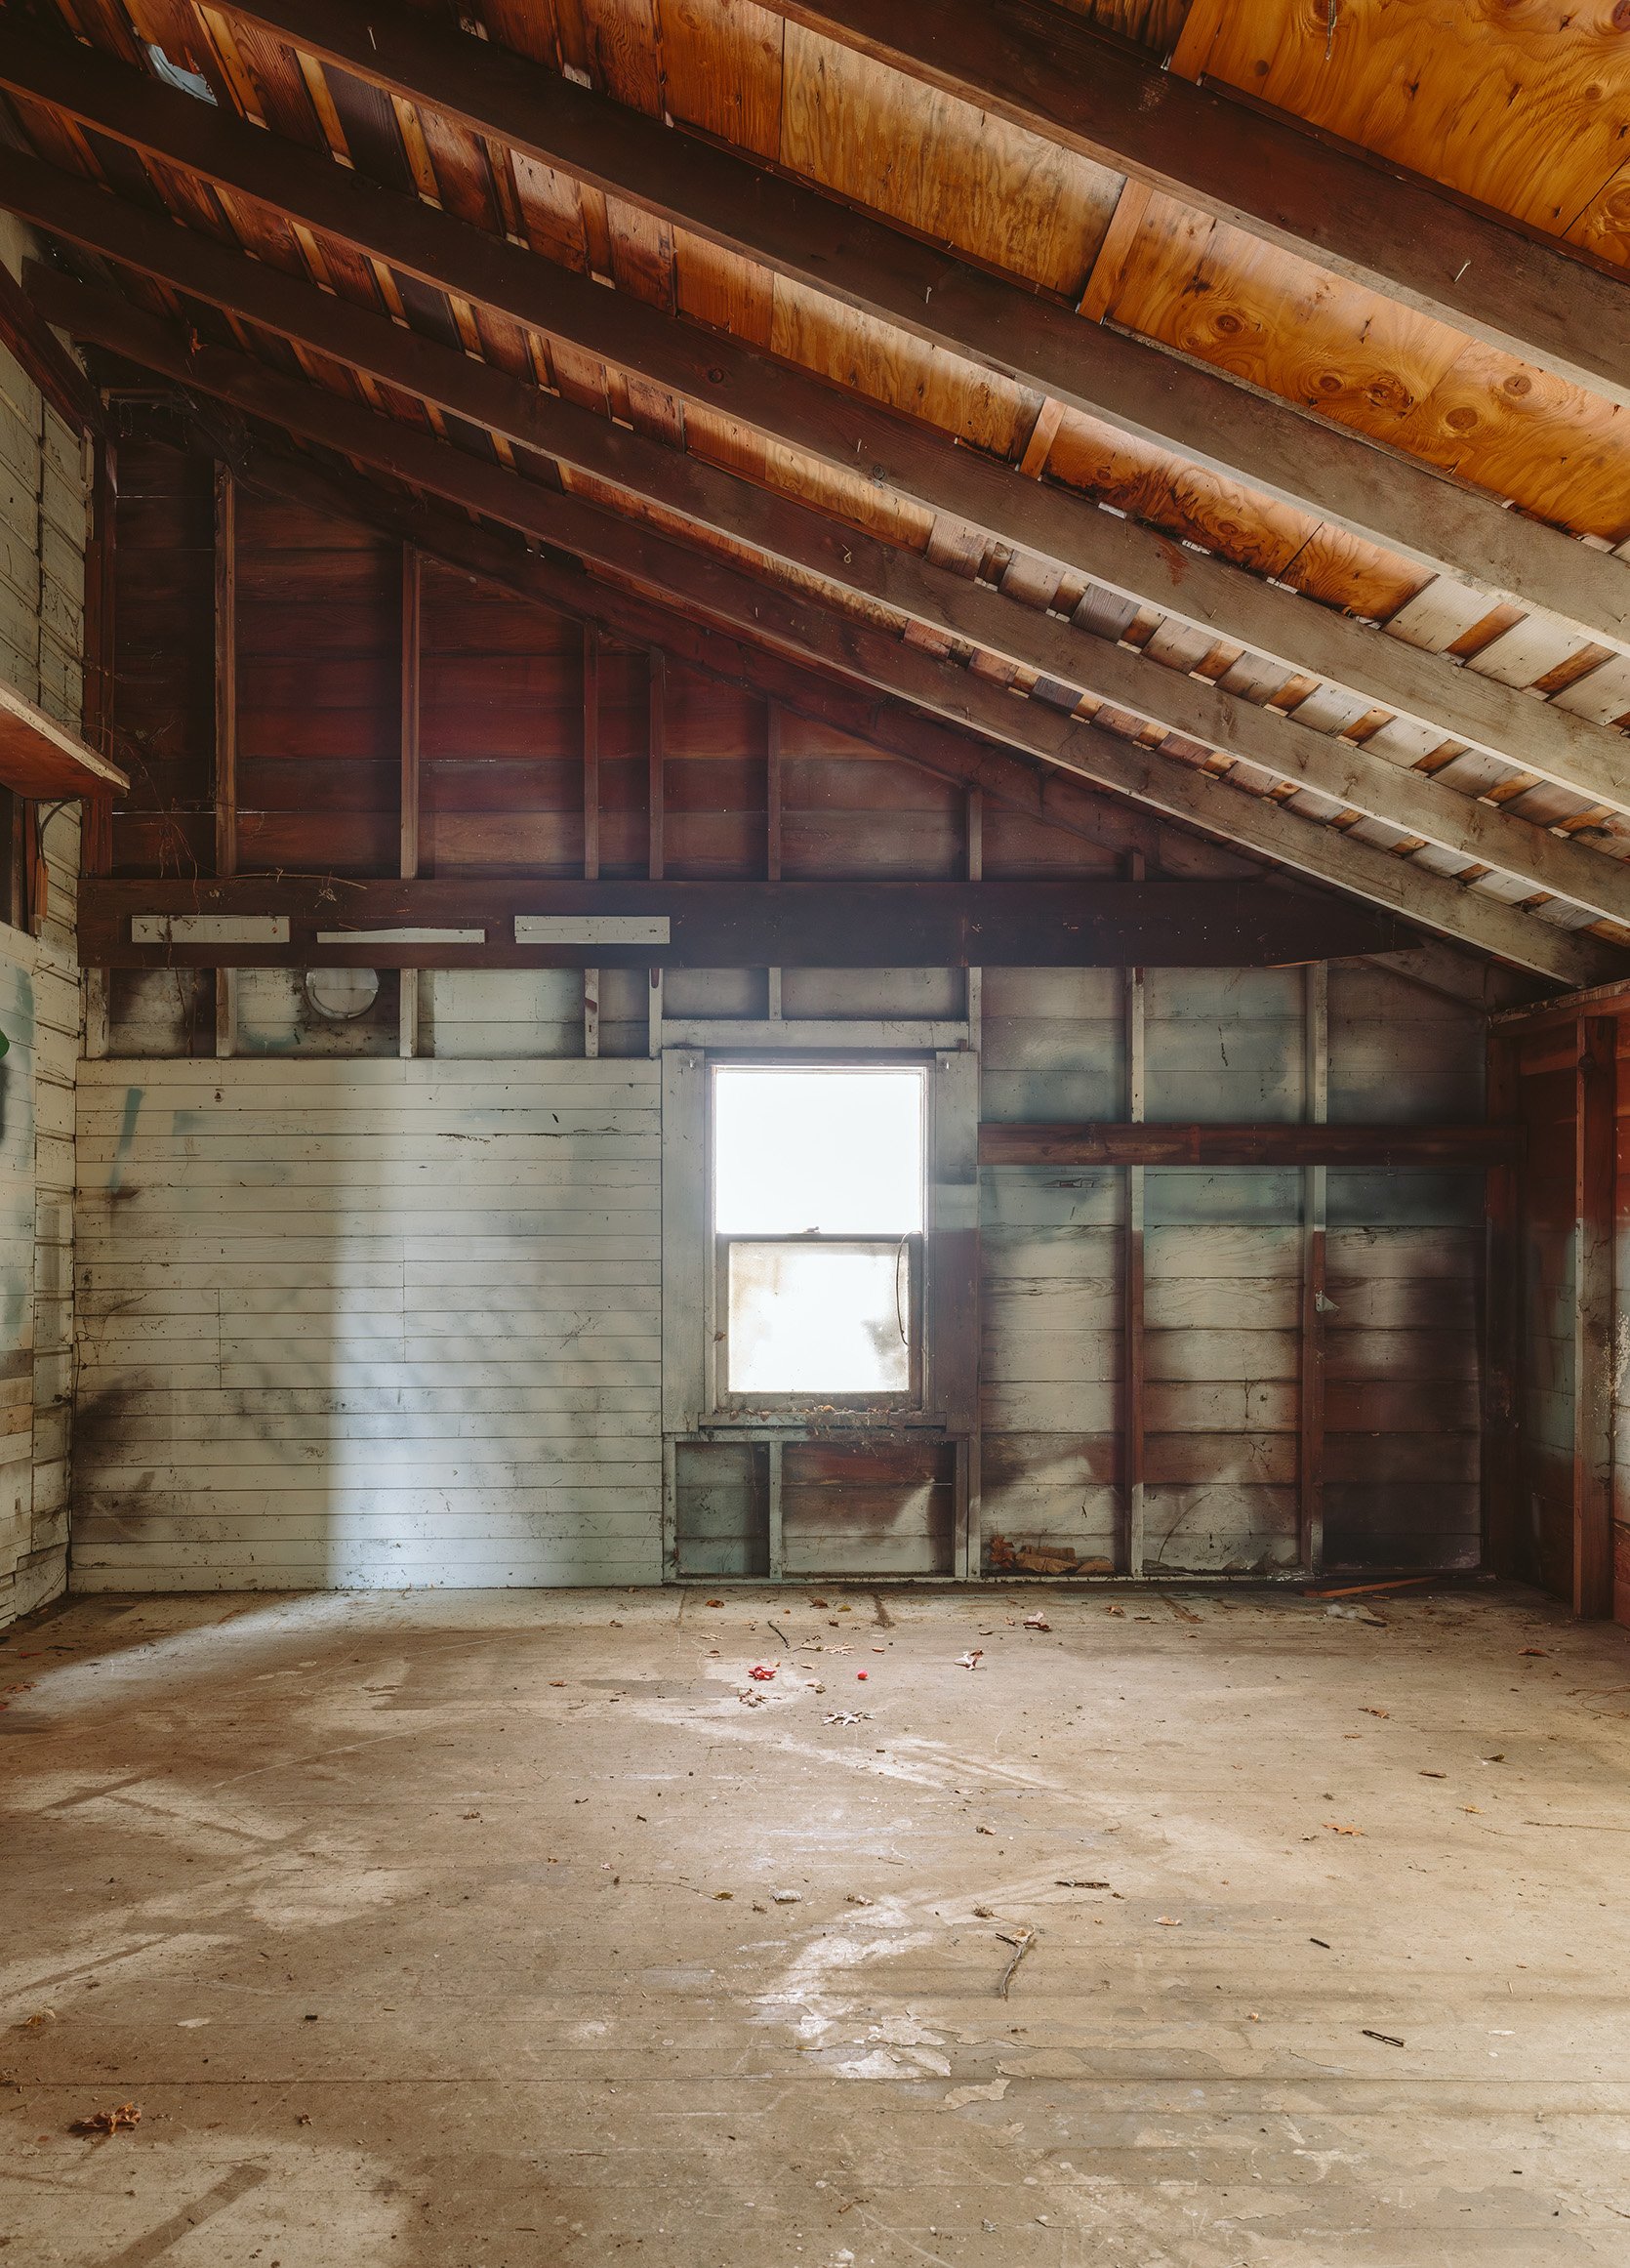
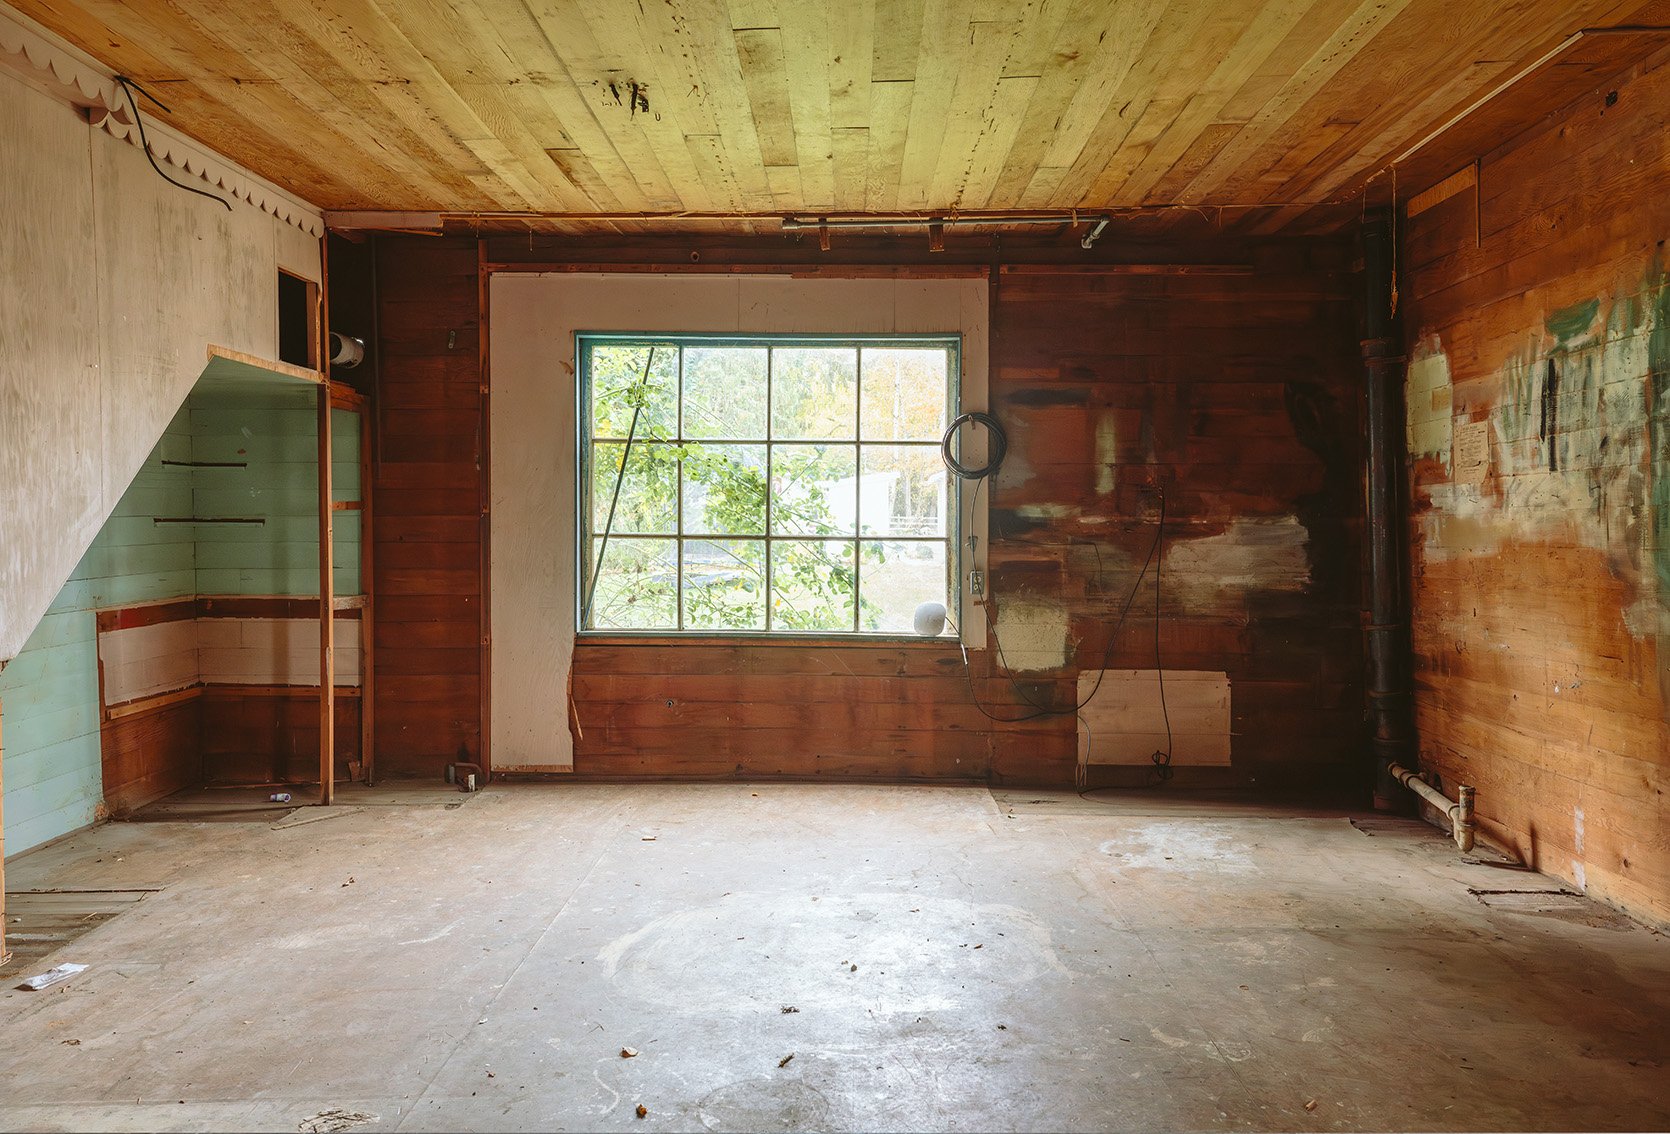
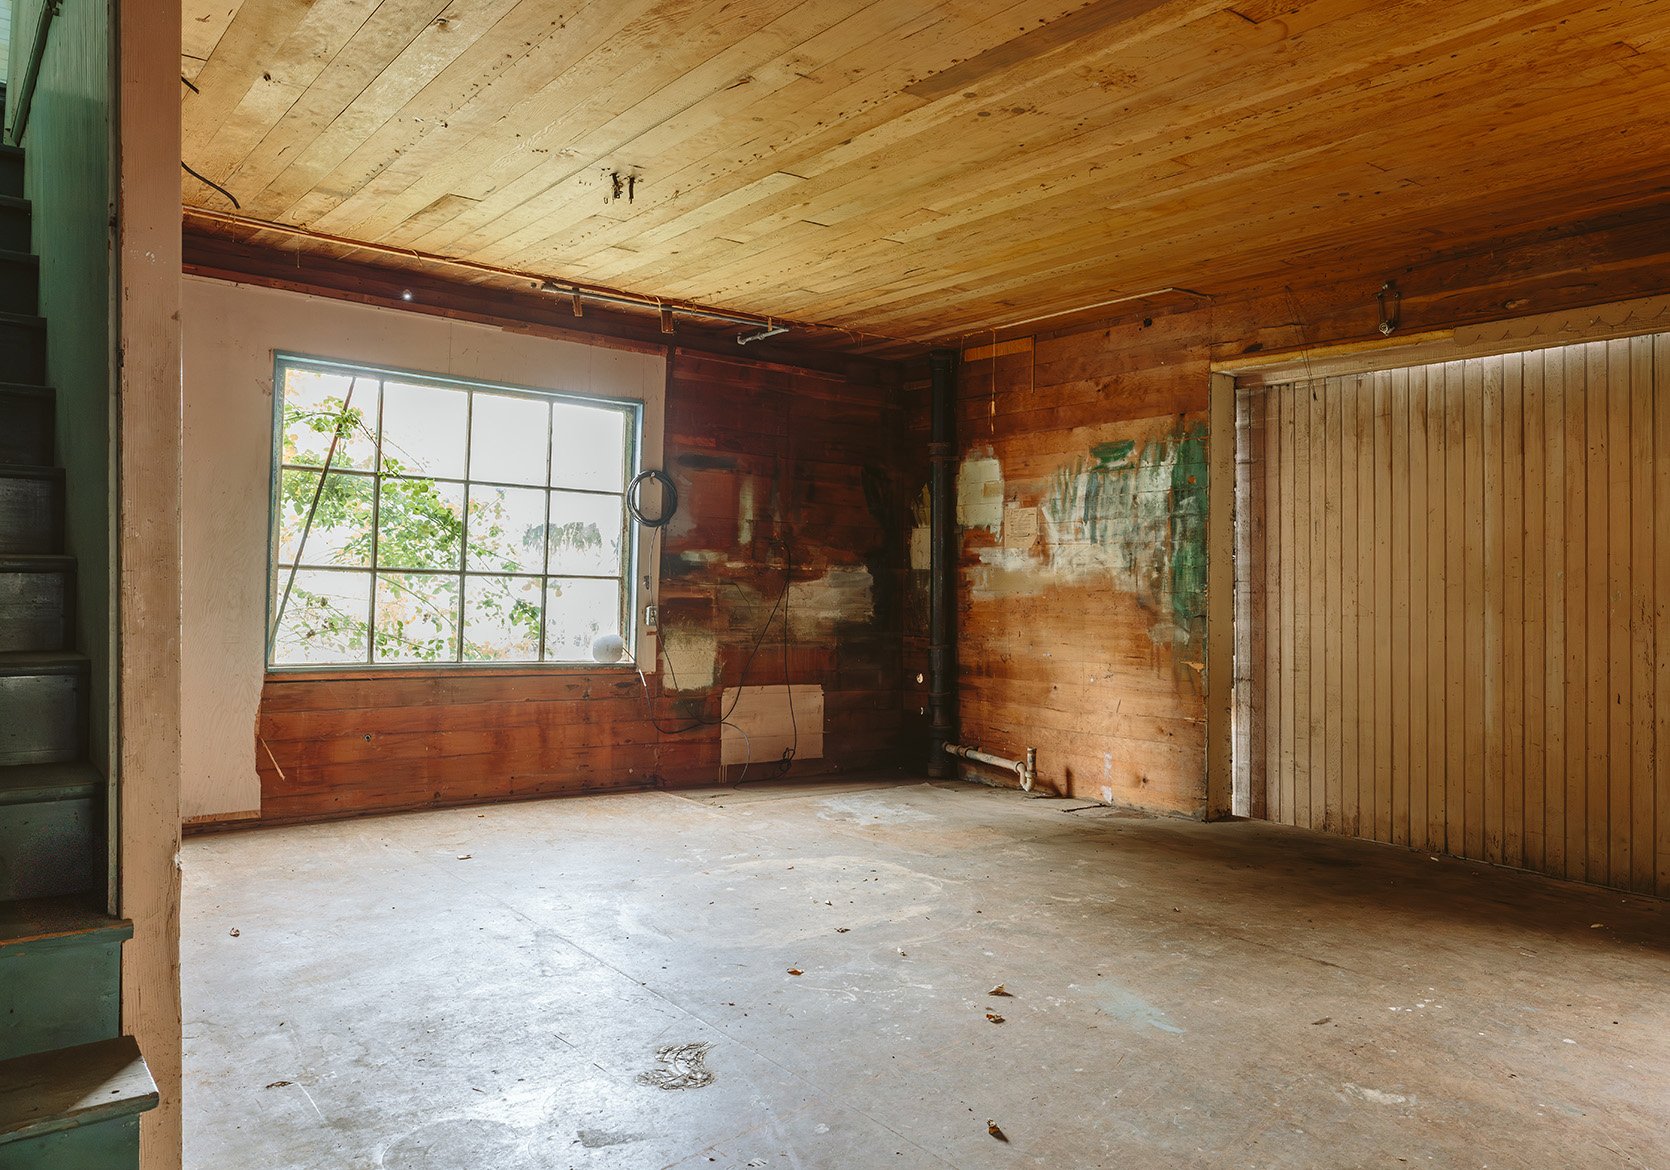
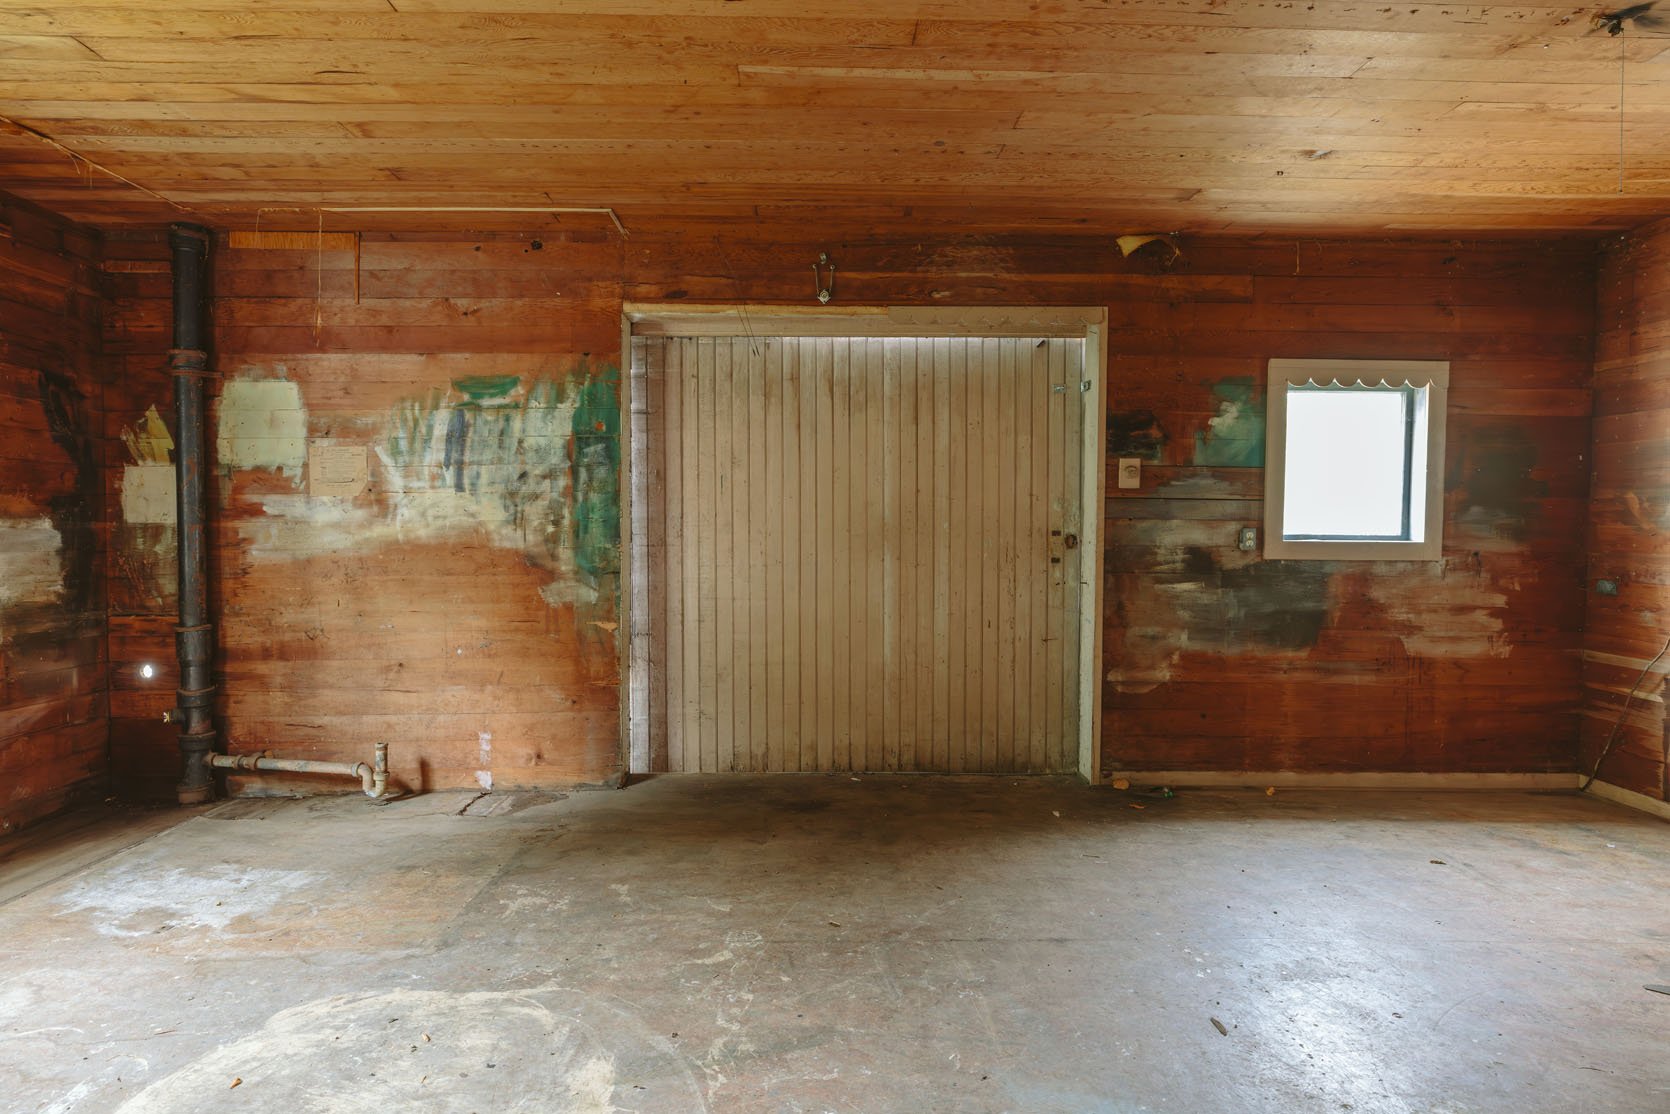
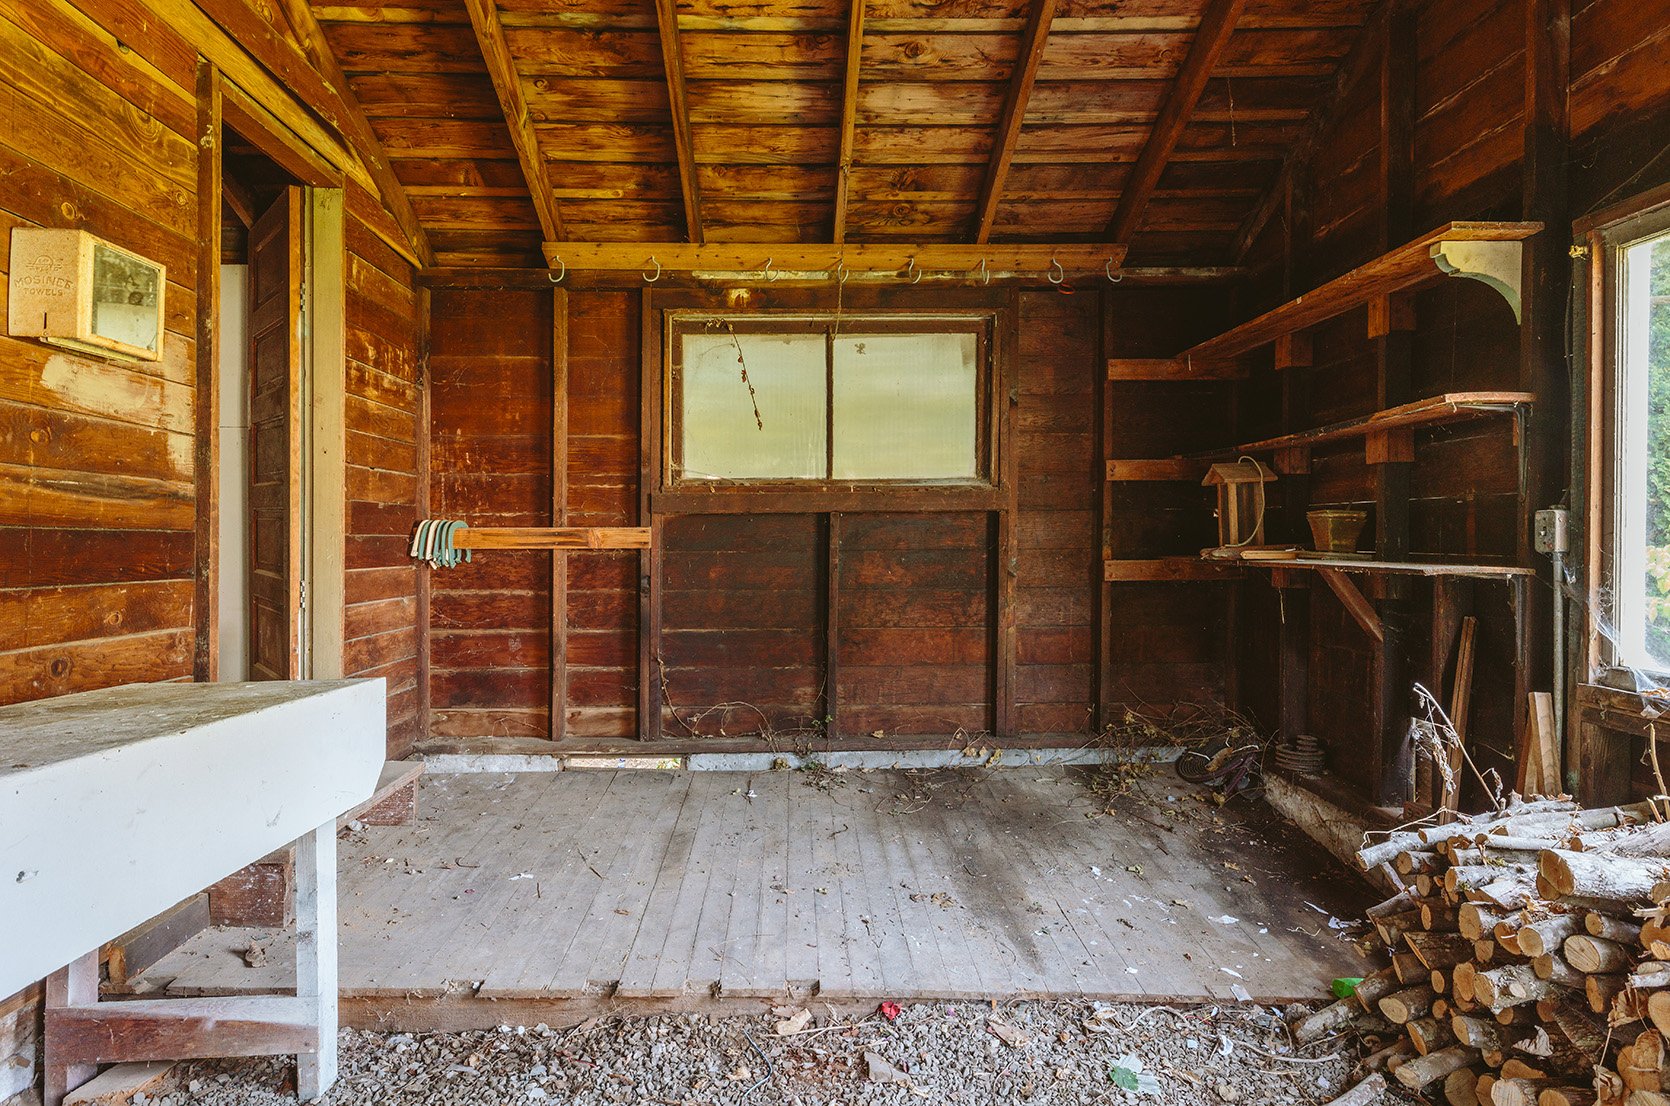
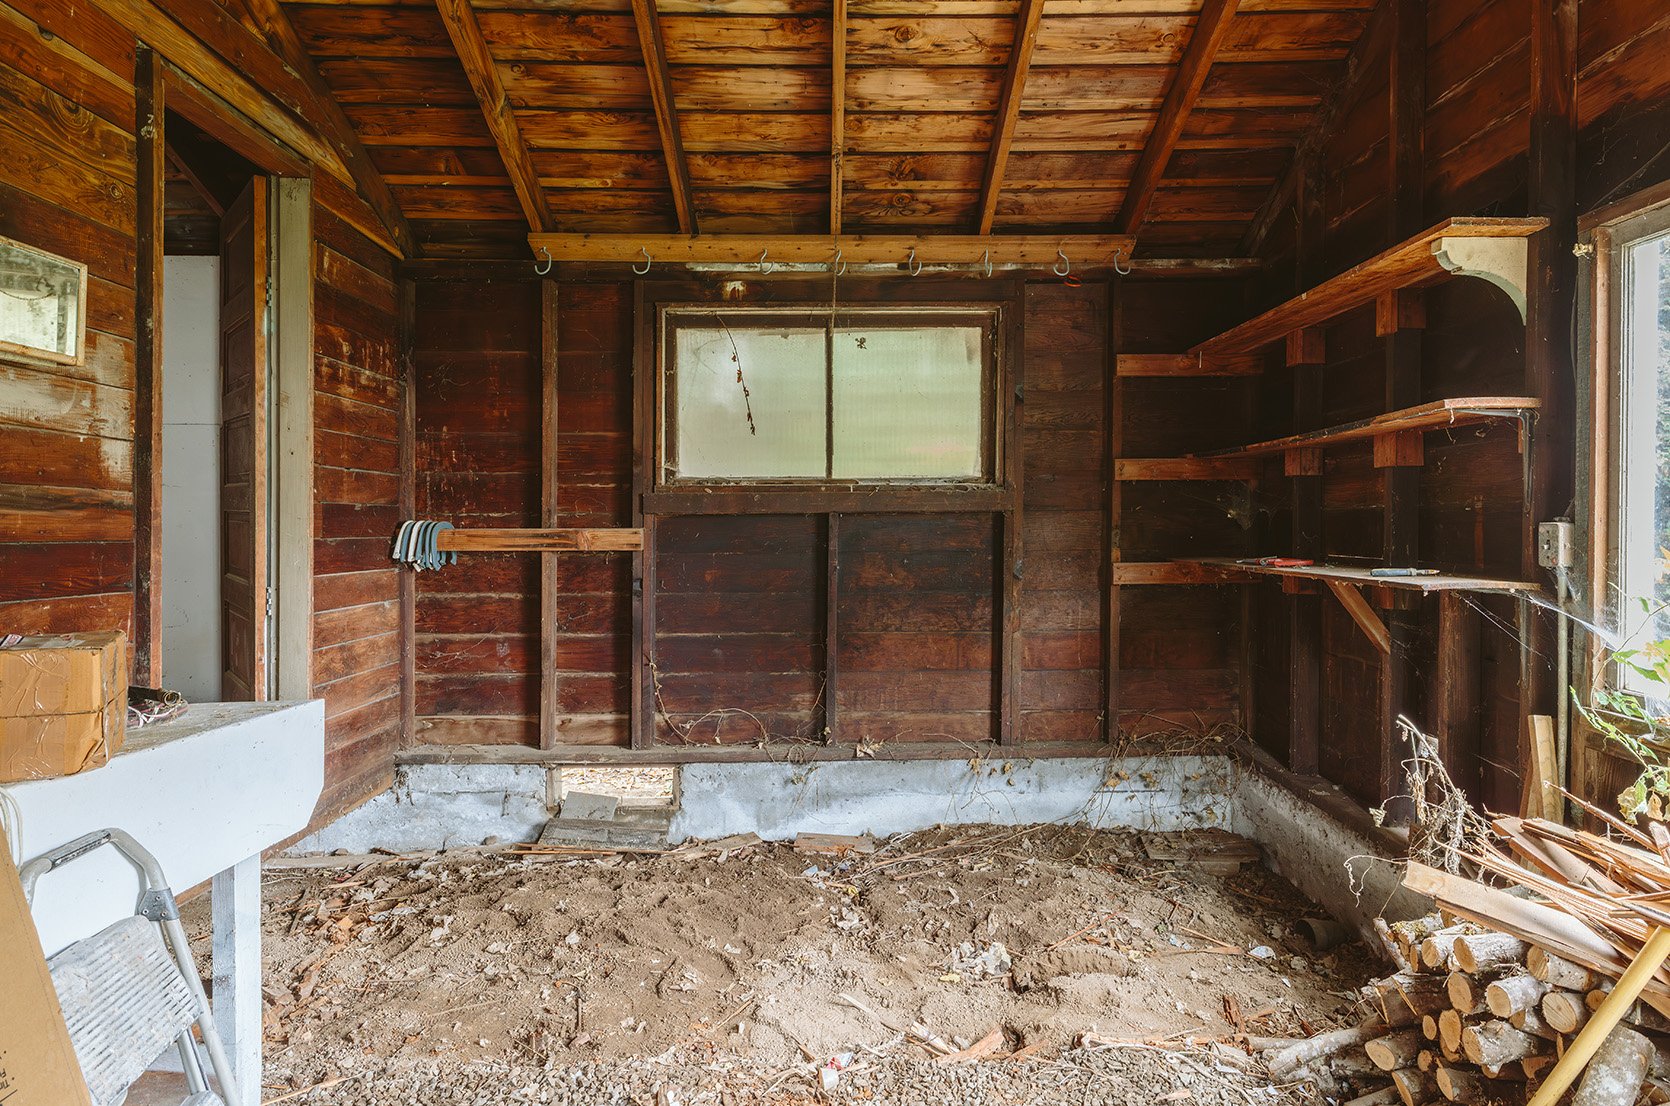
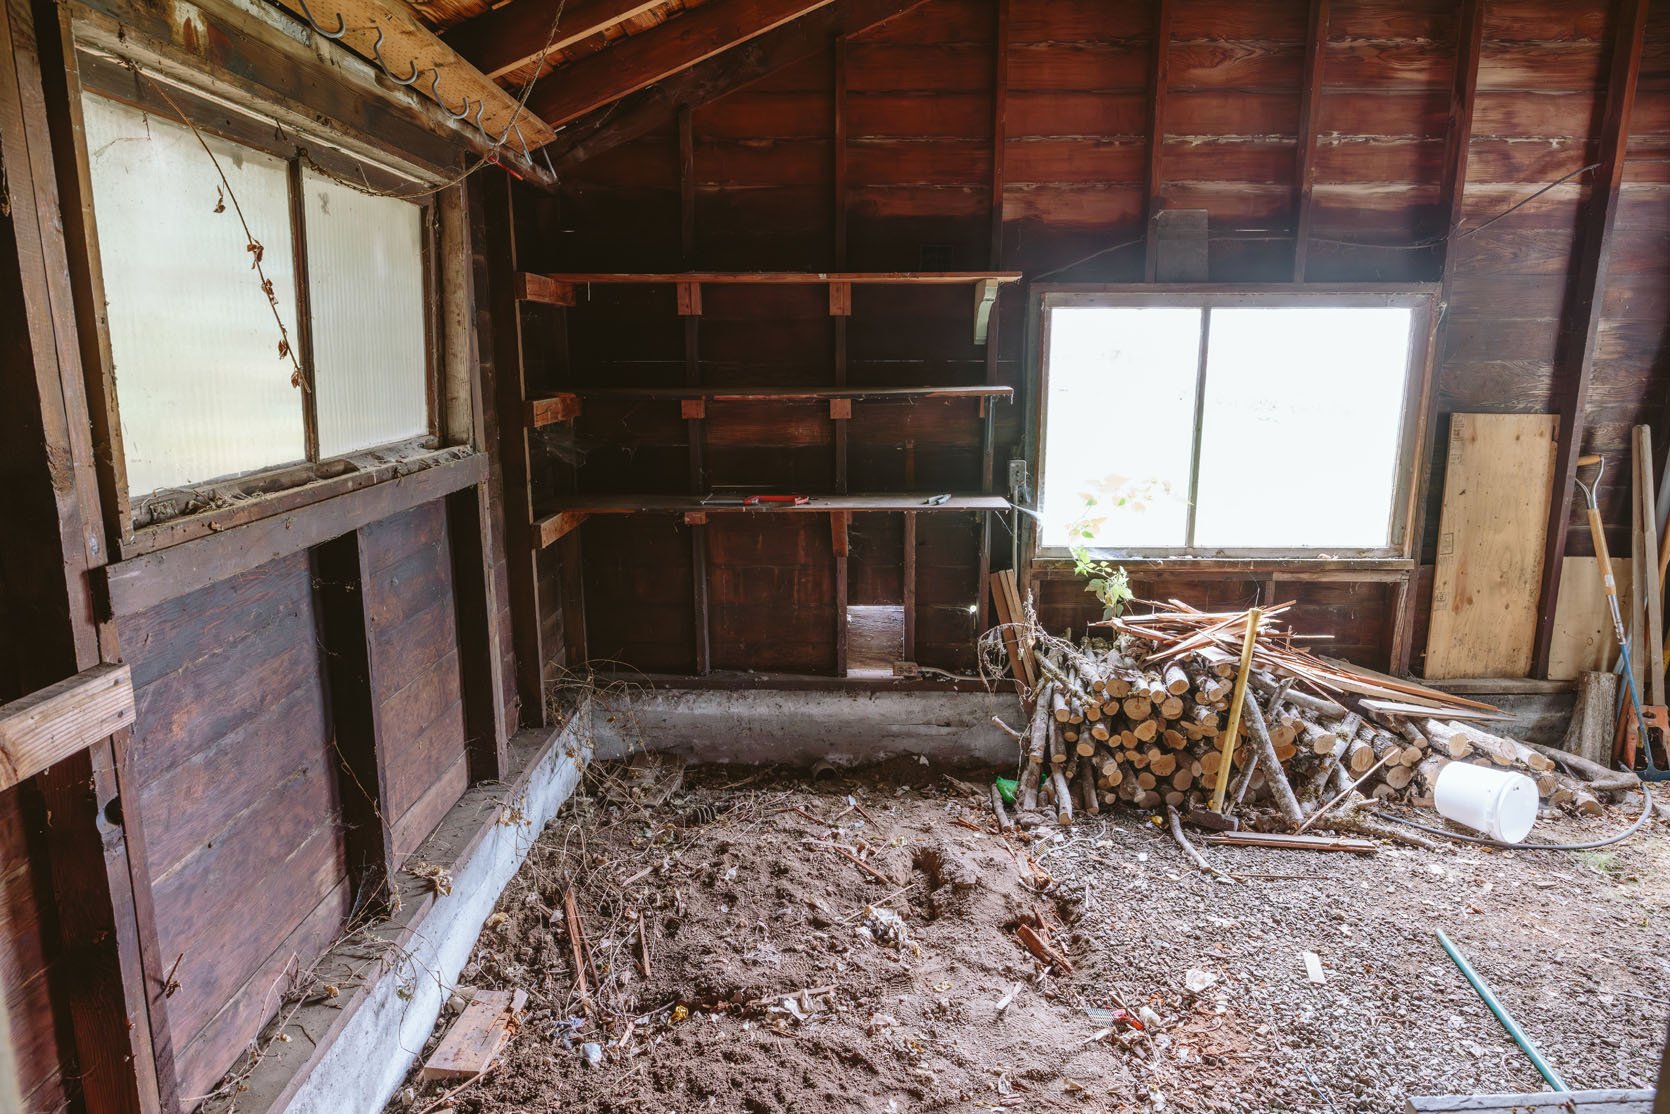
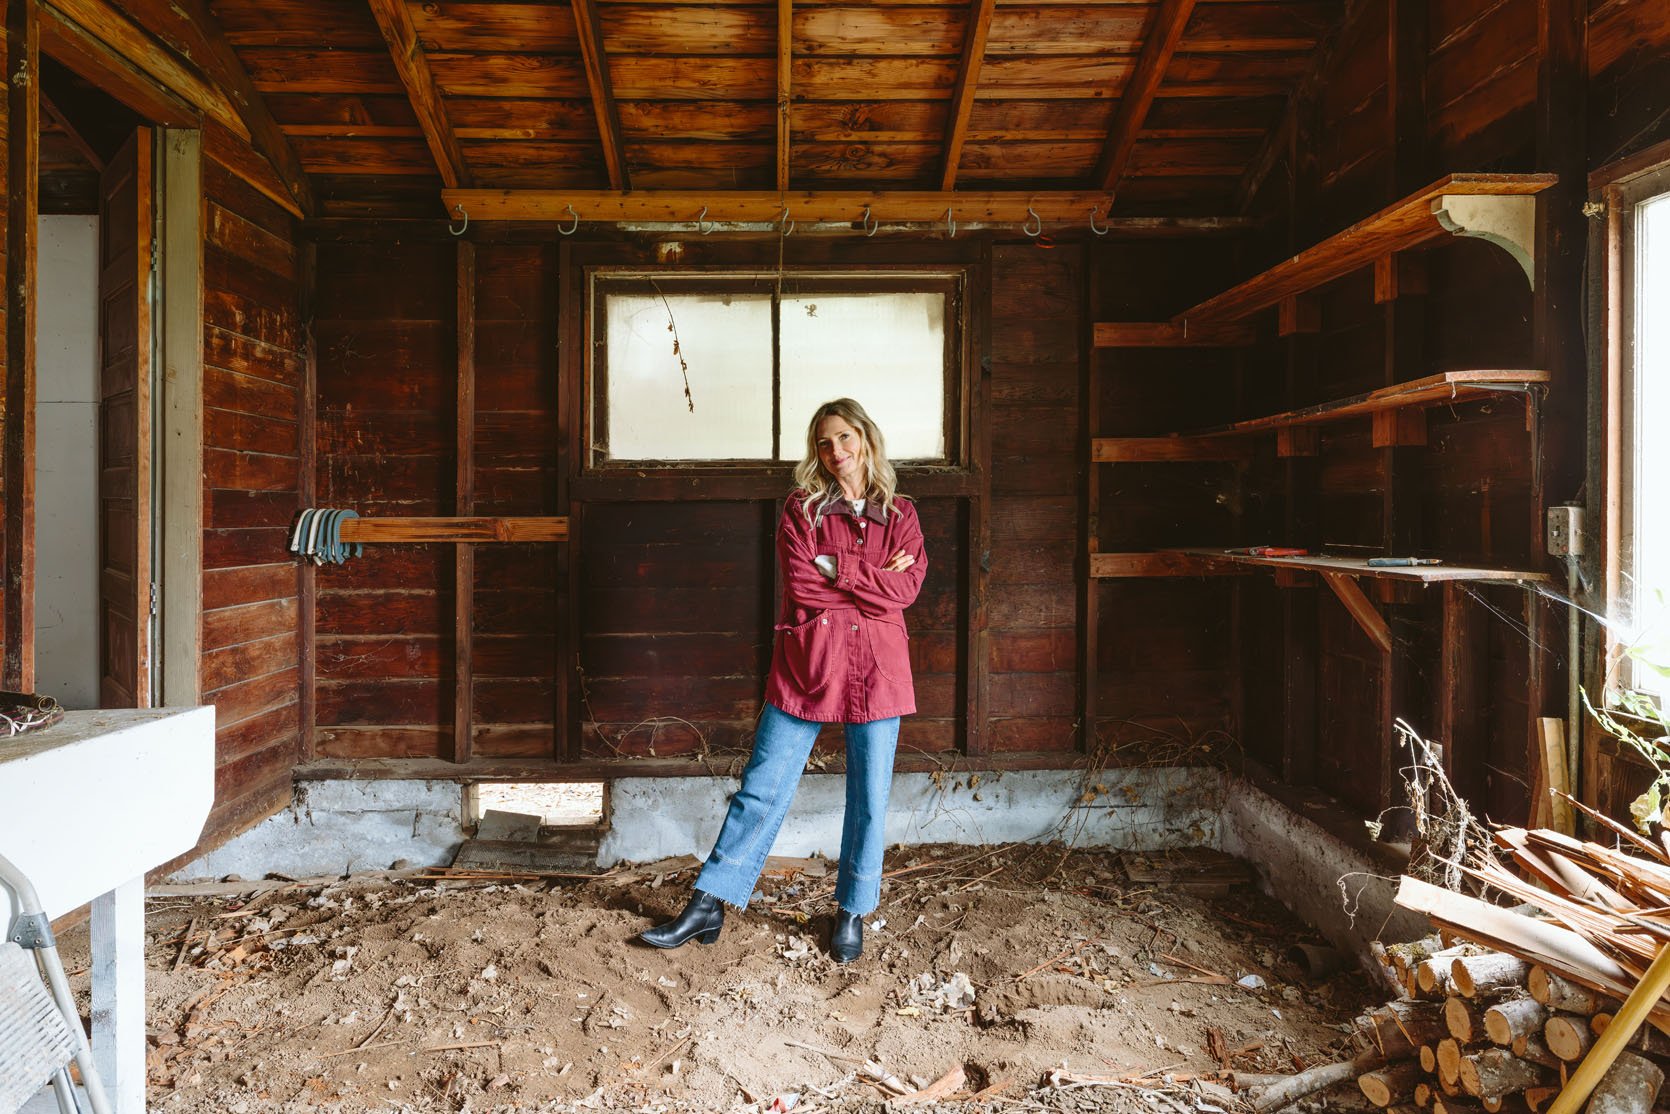
The “Gardening Room”
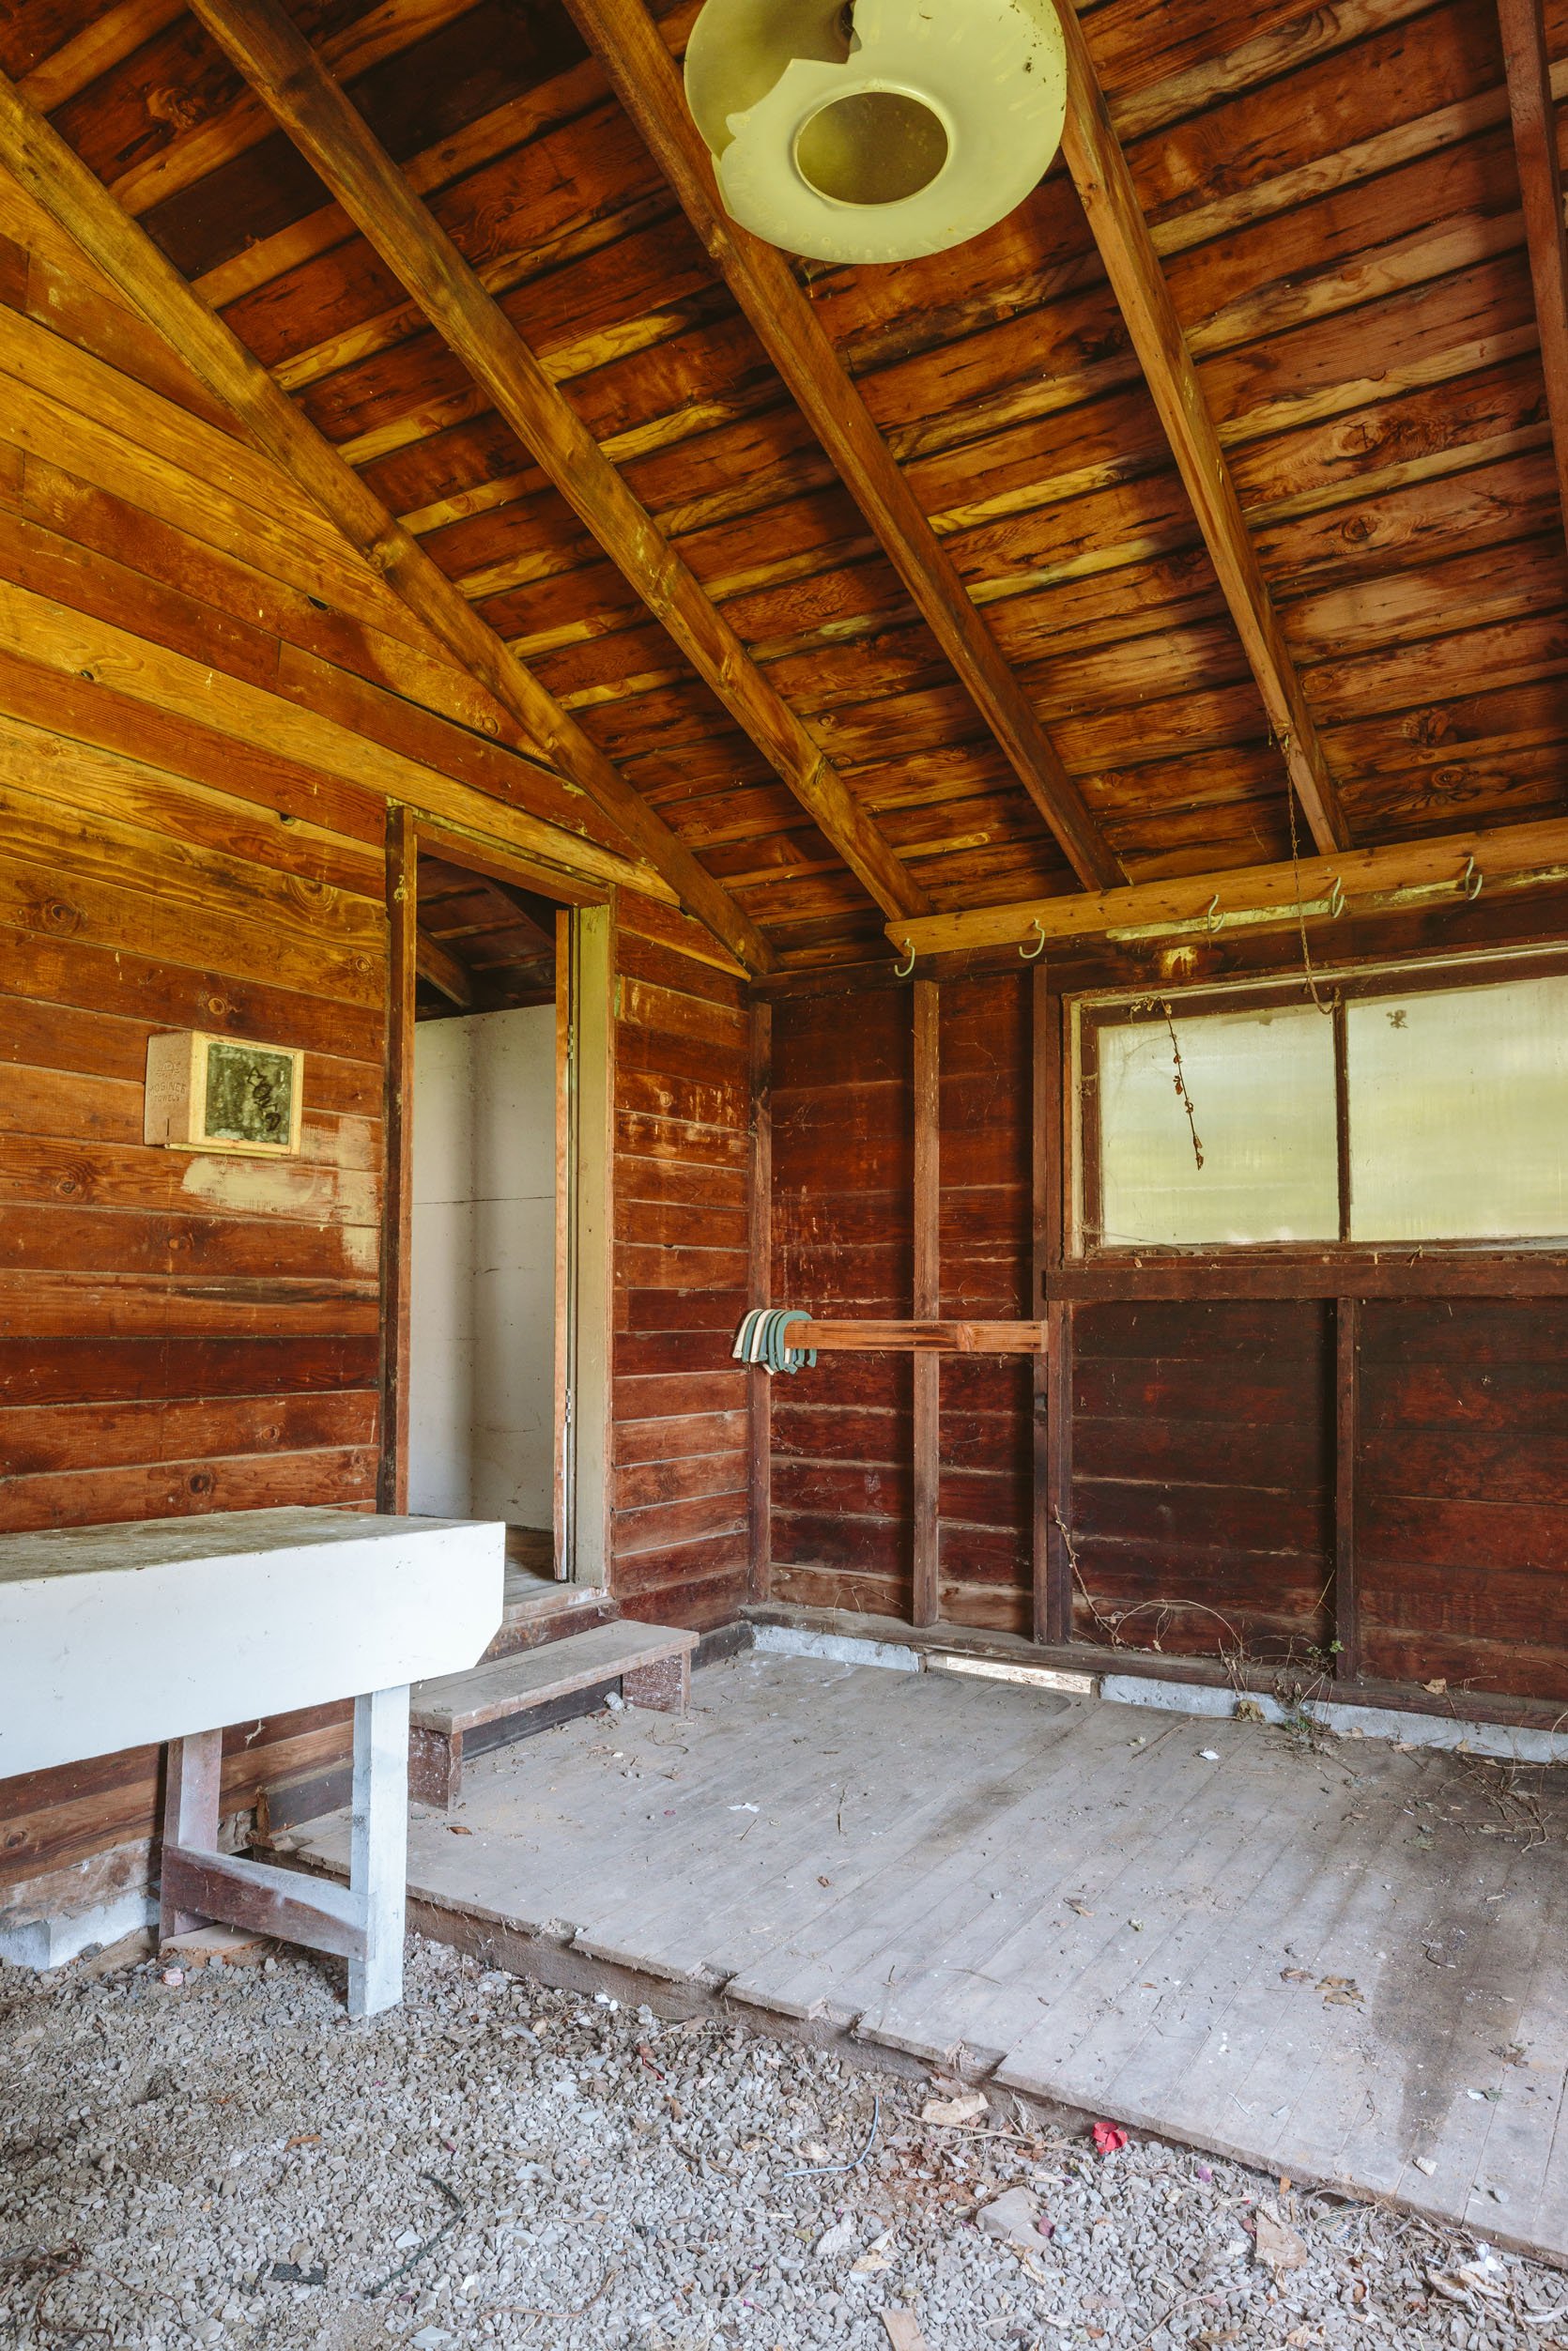
This room mostly just needed its old floor to come out so we can start fresh – either with a framed floor or poured slab (leaning towards framing it for plumbing reasons). More on that later. Now this part was really tedious for Brian (it was too dangerous for both of us to be doing it – he had to full force rip it out with crowbars, and no one could be within 10 feet of this man. This took him the longest, probably 2 hours just in here.
Here’s How It All Broke Down:
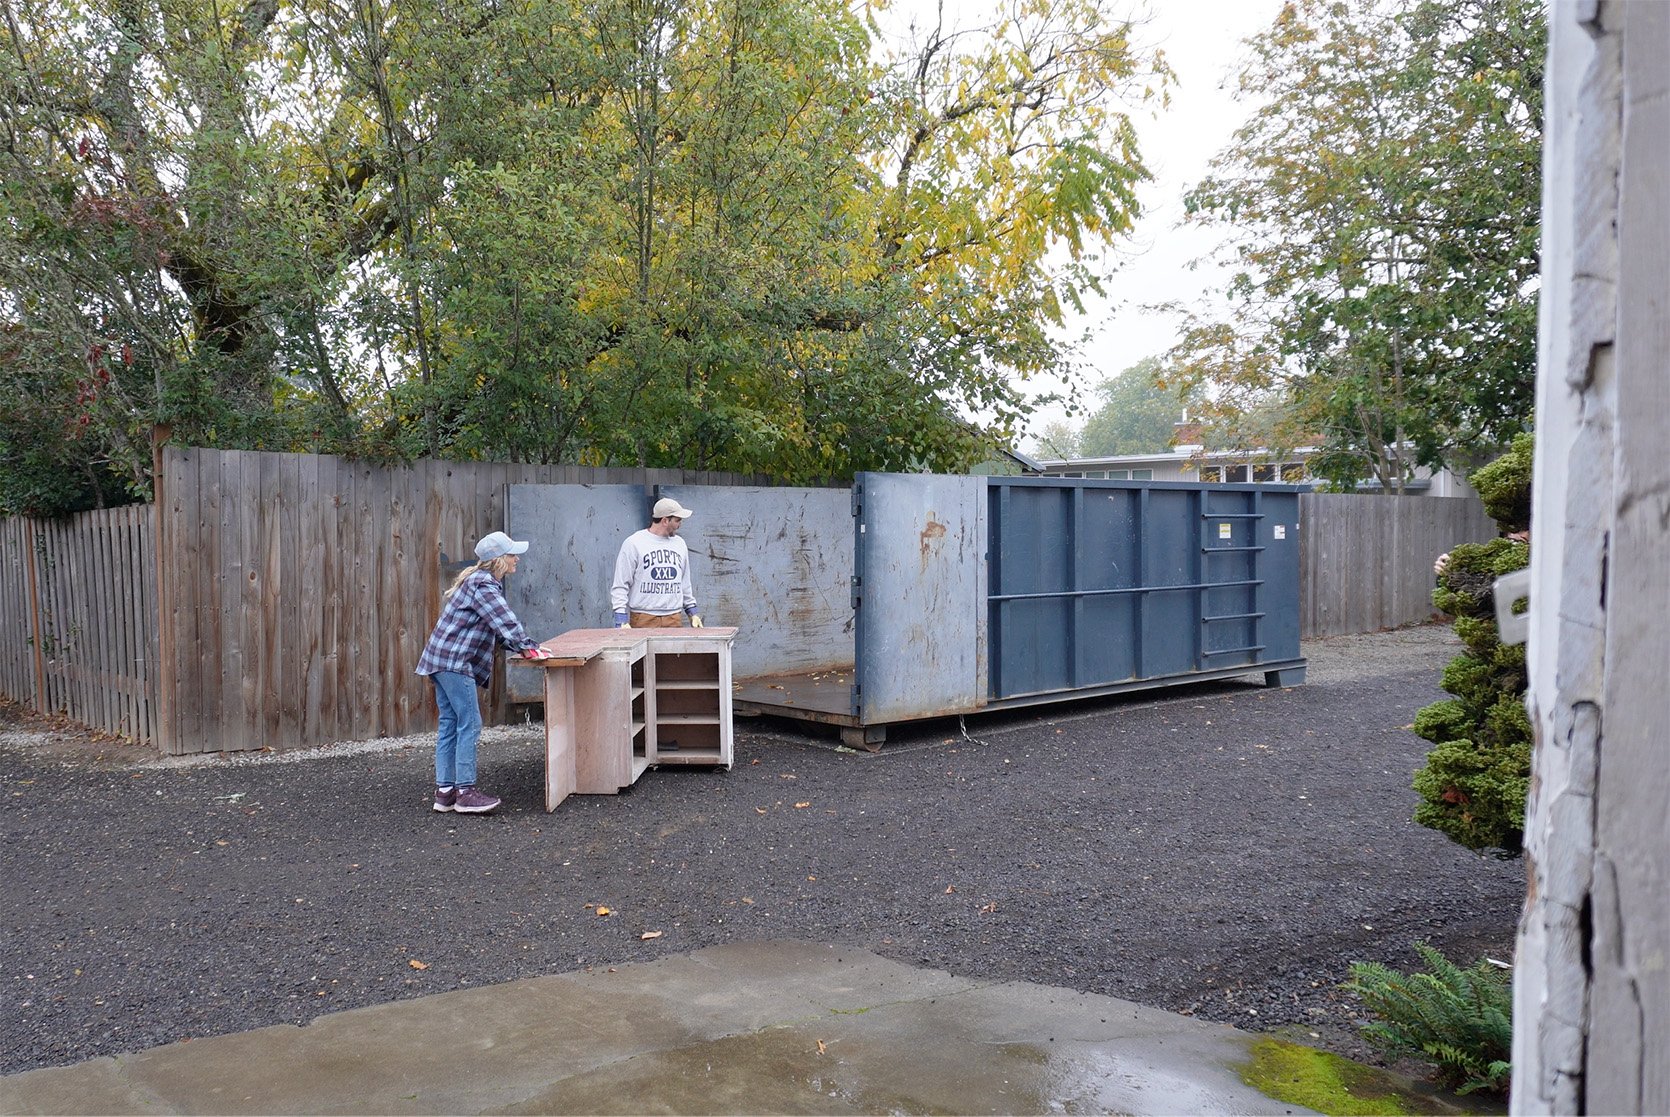
We rented a 30-yard dumpster – my brother thought that 20 would be enough, but we’d have to be more strategic on how we put things in because it can’t stick above the edges. He was right – 30 was perfect. It cost $950 + pickup/delivery, which I think totalled around $1,200. They dropped it off on a Thursday and picked it up on the following Tuesday.
We were done with most of the demo in 3 hours. Ken was gone after lunch, and then Brian stayed to finish the floor, which took longer.
I was not nearly as helpful as I thought I would be. I mostly schlepped things to the dumpster because I just didn’t love swinging that sledgehammer as much as I thought I would. I just didn’t trust myself not to hit something that would fling across the room and hurt someone. I’m naturally way more inclined to take care of something than use my brute force to destroy it. I was very, very, very grateful that Ken and Brian really thrive at using their strength to demo out this house – really takes all kinds 🙂
Now, this demo job was pretty easy because we didn’t need to open up the walls – no old drywall to remove or gross insulation. The walls are either paneled and so pretty (not removing) or are already open. We had already removed the asbestos (except the knob and tube wiring), so it was really just some cabinets.
Wait, So You Aren’t Opening Up The Walls At All???
If you are already wondering how we are going to put plumbing and electrical in without opening up the walls, that’s a fantastic question. My hope is that unless an electrician is willing to pop off some panels and thread through that, we’ll likely explore feeding electrical through exposed conduits. The UK has a lot of great brass conduit system options that go on the outside of the wall (they have a lot more stone/plaster/brick buildings, which they don’t want to demo out). So I’m looking into what is legal to use here (I’ve found Jim Lawrence and The Workshop Below). We can hide plumbing more easily since we are keeping it only in that kitchen corner of the house, OR feeding it under the house to the new bathroom. But the lighting and outlets will be more of a thing, which is an exciting challenge to solve. I’ve looked into copper conduit or painting conduit, but would love any and all suggestions. Is there an American company that does pretty conduit systems? I know I can buy the parts from the UK companies, but their plugs and light switches are obviously not compliant with our systems, so unsure what I would do for those.
What About Heating And AC?
For heat/cooling, we aren’t doing a ducting system. We are doing Quilt mini splits (have one in our gym and LOVE IT and excited that I can panel it to match each room. I might be convinced to put heated floors in the bathroom and not put a mini split there. GreenSavers is coming soon to quote and map it out, so I’ll know what we are in for soon.
Next Steps?
Well, I have the foundation repair scheduled for early December, likely 5-7 days of work (shout out to Foundations First, they have been super on it thus far). You can do simple repairs without a permit or engineering, so that’s what they are doing. I’m still figuring out what permits we need (or if the individual subs will pull them). It’s not my strength, but I do have so many design elements to show you that I’m really, really excited about. I’m pretty intimidated by the permitting process – I jumped on a free 15 minute consultation with the city where I felt like I was in trouble the whole time but I think it’s their job to have you try to get every permit possible (I don’t think anyone believes that we aren’t going to use this as a rentable ADU but we really aren’t!). I’m enjoying it firsthand and since this is such a public project, we aren’t doing anything that might not be considered 100% above board. I’m also not stressed about it at all, which is lovely (again, since there is no rush getting it done).
*Pretty Photos by Kaitlin Green

Wow, I can’t believe how much of a clear-out you did in such a short time. Talk about instant gratification! Fingers crossed the next stages go as smoothly
It’s almost 2026. I’m not sure how you can talk about a 30′ dumpster’s worth of demo without at least mentioning options for disposal, how you decided to handle yours and why. Aside from the lead-painted cabinets that otherwise seemed solid, was there anything else to salvage or recycle in some way? What were your local options? And what led to your decision?
Accounting for waste in construction is such an important topic these days and, if there are different options with their own costs or caveats, it would be really helpful to know about them!
I get the impulse to finger wag, but it’s really not a proven effective way to influence people. Why not just ask “I’m curious to hear if…”?
I’ve demoed several rooms and houses over the years and have learned a lot about disposal options. The biggest surprise is difficult it is to find takers for stuff that I think is reusable but don’t have a use for myself. It’s kind of shocking how hard it is to give things a second life! I once had to take a beastly heavy, pale yellow cast iron tub that was in fine condition to the dump because no one on Craigslist would take it, even for free, and none of my local architectural salvage shops would take it either. A few other things I’ve learned: Demoing with the intent to reuse things is slower and more painstaking than demoing with the intent to put everything in a dumpster. Contractors generally aren’t interested in doing it that way. Salvage lumber is absolutely reusable and if it’s from a historic home, is often higher quality than new lumber from Home Depot. However, it’s usually full of nails that have to be removed one by one. I’m down to do that work, but lots of people aren’t. Lumber holds on to mold. If there’s a lot of mold in a building that’s getting… Read more »
Thanks so much for publicly sharing this. It echoes much of my own research and experience in this regard, and this is exactly the kind of information that I’d love to see mentioned in a post like this where, as you said, much is being saved and reused, and it’s my understanding that the whole project is an opportunity for Emily, and us, to learn.
The status quo doesn’t necessarily present a learning opportunity and, if you’re going to go through this much time, work and expense for the sake of a building that you’re not sure you have a use for, you may as well consider the alternatives to all these materials ending up in a landfill.
I agree. I wish these material (the cabinets and hot water heater?) had a future use. They were not re-usable in any way. Its why it only took 3 hours – there was very little to actually remove.
Construction waste is a real and important topic of consideration but as I drive past our amazon fulfillment center and watch the people across the street from me getting near daily deliveries from Amazon, food delivery, grocery delivery and the amount of waste that generates just on my block alone, I get sick to my stomach. We had a garbage dump near me close because it was full, so now we are shipping literal garbage so it can be someone else’s problem. Your concern is so valid but I think our daily habit of endlessly buying things that get dropped at our doors is way more harmful. We have 3 different delivery trucks on our tiny street every day. 10 years ago it was maybe 1 truck twice a week. I have a hard time believing we all need daily amazon boxes just to live.
Susan, This is especially important as we go into the holiday season of gift giving. Do adults really. need to exchange gifts? Save money, save time, save your sanity and only buy for gifts children 18 and under.
You can make a suggestion without sounding sanctimonious
Our city has a dumpster company that is an arm of the city’s recycling center. I haven’t used it myself, but the idea is that you just fill it like normal and they sort out what can be recycled. It is the state’s only non-profit construction recycling organization. It seems like a great model that other cities should adopt, and doesn’t require us all to be experts.
From the company:
“Our professional and experienced staff will work with you to meet your construction and demolition (C&D) recycling needs, whether the project is large or small. We’ll make sure your debris is handled in an environmentally-responsible manner, and can help you achieve LEED certification. Our goal is to recycle the maximum amount of material from each construction site. We offer: *Roll-off container (dumpster) services *Construction and demolition (C&D) debris recycling….”
I appreciate the question and i’m pretty aware/sensitive to this stuff, too. There was literally nothing to save except all of the scallop trim and the shelving (which felt like a hoard, honestly but I did because it was sweet and a nice homage). I think had we needed to take down the paneling that would have been a great thing to give/sell, but all the good stuff remained. There is simply no way anyone wanted to take the super beat up aluminum cabinets or the asbestos filled linoleum countertopped cabinets. We have multiple resources we give to in Portland – The Rebuilding center (old windows, doors, cabinets) and Aurora Mills (they tool an old clawfoot bathtub, many built-ins, bookshelves, doors and windows). We would never put anything worth saving in a dumpster 🙂 I 100% agree its such a bummer to just contribute to a landfill so we try to avoid it when we can.
I’m glad you kept the shelves, and I know you’ll love having that patina to add back in later! I was able to reuse some old open shelves in a weird nook in my bedroom within the built-ins we eventually added, and they make me so happy.
Check out electrical wiring in India. Our apartment in Mumbai has exposed wiring covered with conduits and painted to match the walls and ceiling. You forget after a while that it is there. The place was built in 1967
I have two log cabins I am renovating. Fixing old wiring and adding lights when you can’t open walls because they are solid wood is definitely a challenge. I had my electricians drop off some electrical conduit and junction boxes that I spray-painted matte black so they could run lights over my sink.
It looks great, Amanda! Spray painting it black was a nice touch.
OOH great inspiration!! Thank you for sharing. that looks awesome. Based on my research I think we might end up this route. thank you!
Hi Emily! Long time reader, first time commenter.
I’m a forever renter at this point, so none of the renovation content has ever been applicable to me. But I was really excited for this project! If you could, might you try to teach us more in the future? It’s cool to see the transformation, but if you’re going to document another renovation, can you please go into more depth? I guess I’d like to learn how to think about the process, not just read a few sentences about what you did. How did you decide to do it? What factors went into the choice?
I wonder if ChatGPT could be a helpful tool to help you lay out these posts. I’m sure it could provide some jumping off points for you! I was just hoping to learn something and wished this was a bit meatier. Please bring us along the WHOLE process! I’d love to be able to use this series as an instruction manual should I ever be able to renovate my own property. Thanks for considering!
Have you seen the previous posts Emily wrote about the Guest Cottage? She’s written several, breaking down the decision-making process and the ups & downsides of it all.
I have been reading! I was just hoping this post would be more like the ones around Tudor renovation, where things were documented in extreme detail. I would love that level of information with a DIY bend!
I’m happy to go super into detail – Every post will break down different things. I’m still working through the design – things take time to pull together, so as a design element comes up (like the new doors where the slider is, the conduit, where to put the plumbing in the new bathroom) everything will be a post – in as much detail as you can possibly stand. I have to say i’ve never been accused of not giving enough details or information of the process, LOL. When you are documenting in real time I give the pertinent information based on that post – todays was demo. There just wasn’t much to talk about re the demolition because it was so minimal. And no, we aren’t using Chat GPT to write any posts nor teach from Chat GPT – they really just scraped my site for the information anyway – i’m not interested in using Chat GPT for anything outside of productivity. Maybe its helpful for me to, at the end of each post, recap what i’ve written about in case you missed or and talk about what is coming up? I’m currently designing the tile, looking into powder… Read more »
I by no means want you to use ChatGPT to write. I love the blog too much! But it feels like it might be helpful in thinking about what us lay folk would like to read. I was thinking that it could more help inform what to share. As in, you might prompt “I am writing about DIY demolition, what questions should I be sure to answer?”
Again I adore the blog! It just feels like the process content from the Tudor was more actionable or in depth. Thank you for such a generous response!
Oh yes that is a good idea! I’m open to prompting them to prompt me, LOL. and thanks for reading and all your support 🙂
Really appreciate you holding the line on AI! Love to see you normalizing doing the thinking yourself, and if readers want to see more, they can always comment and ask for that!
Emily wrote an entire book about renovation. Maybe consider checking that out
I own both books. But I think Emily undertook this project to learn to DIY; I would love to learn more about that process vs. learning the language to work with contractors.
I’m with you Carly! For example why do demo sequences on HGTV rely so heavily on swinging sledge hammers? Most cabinets are affixed to walls with screws or nails and can be more easily removed by taking out or cutting through those fasteners. Not as dramatic but usually faster, safer, more efficient, doesn’t rely on brute force and allows for salvage if desired. I grew up watching the pros on This Old House. Such a different way of working, and of presenting how work is done, that allows for real learning.
Ours were 100% long nails so had to use a sledge hammer 🙂
I’m sorry but this is incredibly entitled. Do you have any idea how much time it takes to put content together? Emily doesn’t owe us anything. As someone who has followed her for going on 20 years, along with other design sites, I can say for sure she shares a lot more about process than most others. She does not owe us handholding. Maybe YOU should use chat GPT to research this topic for yourself since you put so much faith in it. I’m here for the ORIGINAL content that Emily has always excelled at.
It’s a content suggestion! Emily is here to make money. This is a business. While you consider it free content, it’s not. It’s paid for by advertising using your data to target. And it’s Emily’s full time job and a highly lucrative product and the whole team would be spending hours on the business development side, working through best story lines to maximise readership and views, and ultimately, clicks and sponsorship deals for her and her brother’s house. Emily doesn’t have to act on it but the blog functions through engagement, and readership suggestions are highly useful and to be encouraged, not shamed.
I’m down for suggestions and this felt not ill-intended at all. Just surprised since I typically over-talk and over-write so it made me laugh. Listen, I’m HAPPY to break things down as granular as you all want. Its my favorite thing to do (besides styling shoots). I’m learning so much and desperate to share.
You don’t have to agree with her perspective, but Carly’s post was positive in its intent and yours is dripping with criticism and sarcasm. Comments are open for readers to make requests about what they’d like to see. It’s Emily’s prerogative on whether or not to respond to those requests. Your comment was mean spirited and completely unnecessary.
Eeeep, I’m so excited, Emily! One of my friend’s built a new home recently, and what she wanted more than anything–more than big windows or any particular floor plan or other fancy features– was radiant floor heating instead of forced air. It was her DREAM, and let me tell you, it is soooo nice. She always lamented the “gates of hell” when the furnace kicked on at her old place, and how cold it was when the air went off. But her new radiant floors keep her house cozy and evenly heated all winter long, and it’s lovely.
The canning room looks so much brighter without the cabinets around the window! Great job on the demo!
We used fish tape for rewiring in an old home with lath and plaster (getting rid of the old knob and tube). It’s sort of a pain, but very doable and you mentioned hiring the electrical out; an electrician would be able to do it for sure. It would save $ you wouldn’t have to spend on conduit which, even if it’s “nicer” conduit, is not typically where you want someone’s eye to look in a room!
OOOH I have NEVER heard of fish tape!! thank you so much. about to google it and add that to the list to learn/share. Thank you!
I actually thought I misread something in the post, because fishing wires is so standard in my fairly extensive experience with old house renovation! (Though I have learned the hard and expensive way that it is way cheaper and easier to cut bigger holes and then repair the plaster vs. rewiring a whole house through minimal holes!) From what I see in, for example, the pictures of the kitchen wall with the exposed studs on the right and the horizontal paneling on the left, the main issue will be insulation (you may have to blow in through those weird holes they drill from outside once everything is closed up); wiring looks to me like it would be SUPER easy since the bays between the studs aren’t even closed up on top! In your case, though, I would be shocked if the electrician isn’t willing to work with a few removed panels. Personally I would never have the electrician do the removal, though! Your carpenter will be waaayyyy better at removing the pieces in a way that will make it easier for them to replace them later. Have the electrician indicate which panels are most in their way and you can… Read more »
I’m sure you are right! We are starting to make all the electrician appointments now. Admittedly i’m pretty ignorant to what is normal in really old houses. i remember ARCIFORM saying that some electricians will do this and others won’t. I think its a case of me simply not knowing how typical the ask is. stay tuned but thanks for the insight. I’ll push to fish 🙂
Fingers crossed for you but I truly think you’ll be fine. I bet electricians who specialize in old houses won’t blink!
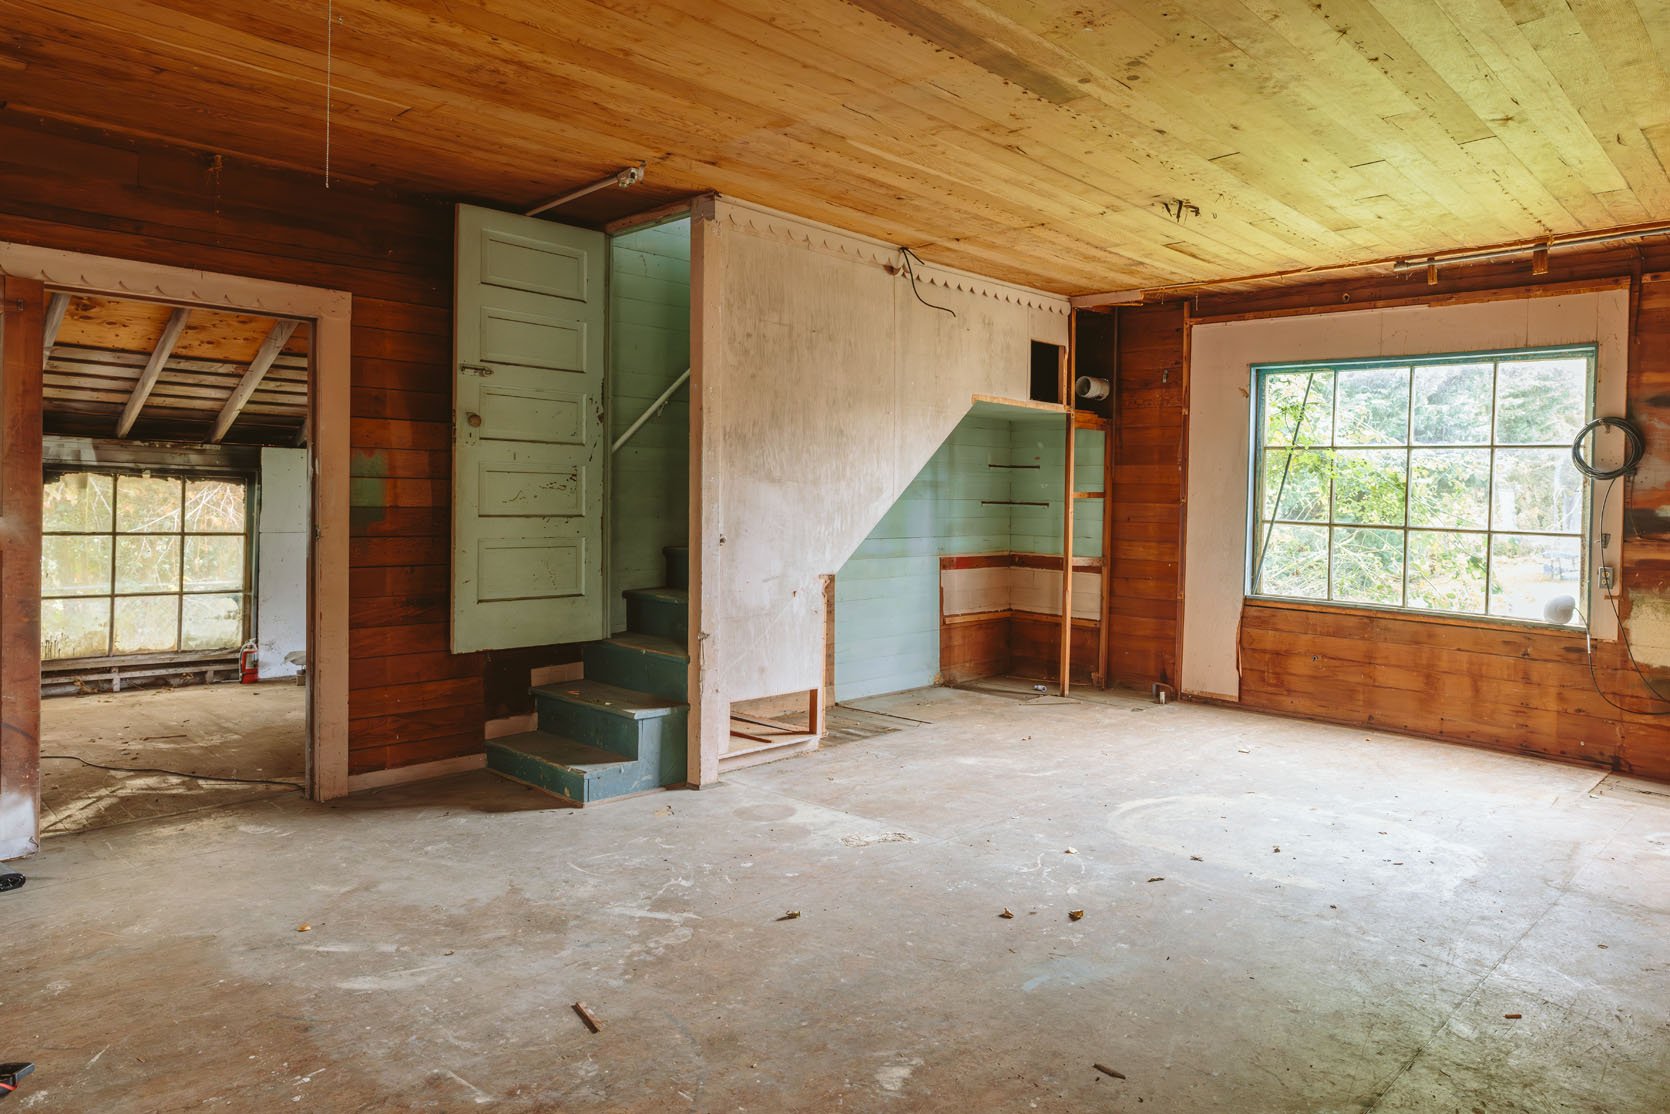
Love that you can go your own pace (fave Adele line). The little drawer below the stair was so cute! Why remove Are the stairs getting redone? I find it hard to throw stuff away whether it’s food or this sort of thing. How do you get over sending to the landfill?
Using salvage stuff in the design would be a nice way to incorporate circularity
OMG. it was SUCH a mistake and a regret!!!! Good eye. we thought we were going to take out all of it to put in the tiny bathroom at the time. It wasn’t until it was sooooo buried in the dumpster that I was like ‘why the heck did we do that?’. we are going to need to repaint anyway so i’ll have to rebuild that drawer front or just panel over it.
thanks so so much for sharing this with us! All your thoughts, doubts, expectations, numbers, strategies… this is incredibly helpful. I always wonder how “people actually do it” and who and how everything gets decided… this is so fun! Thanks, Emily!
this is why i love this blog, because i would be so into an entire blog post on conduit options. i have plaster walls and the paintable conduits are …..fine but if there are more design-forward options, i know you’ll find them!
Annie, I just replied to another comment at great length with wiring thoughts but I’ve had one house with circa 1914 horsehair plaster/lathe walls completely rewired from top to bottom, as well as doing extensive renovation (multiple rooms gutted but lots without opening walls) in our current 1892 home. I’ve learned a LOT of lessons and am happy to share if you have specific concerns!
Ooh Kate, you seem like a FANTASTIC resource. Thank you 🙂
Literally happy to talk about this stuff any time :-D; during my work on our renovations my ADHD has manifested in deep deep dives into the nitty-gritty on stuff like radiators/manifolds, HVAC, wiring possibilities, you name it. I love understanding the HOW of the project as well as knowing enough to be able to push back on fastest/easiest vs. more functional. (In our kitchen reno recently I was able to get the entire air return run across a wall in the basement instead of eating up the entire wall/under stairs area in the kitchen. As a result we gained an under-stairs pantry closet and a kitchen wall holding open pantry/toaster station, extra-deep drawers, AND the fridge! In the basement the duct came straight off the air handler and ran deep and flat against a family room wall where I was able to disguise it with shelving.)