Design
Mallory’s Rooftop Reveal: You Have To See This Crazy Outdoor Kitchen DIY
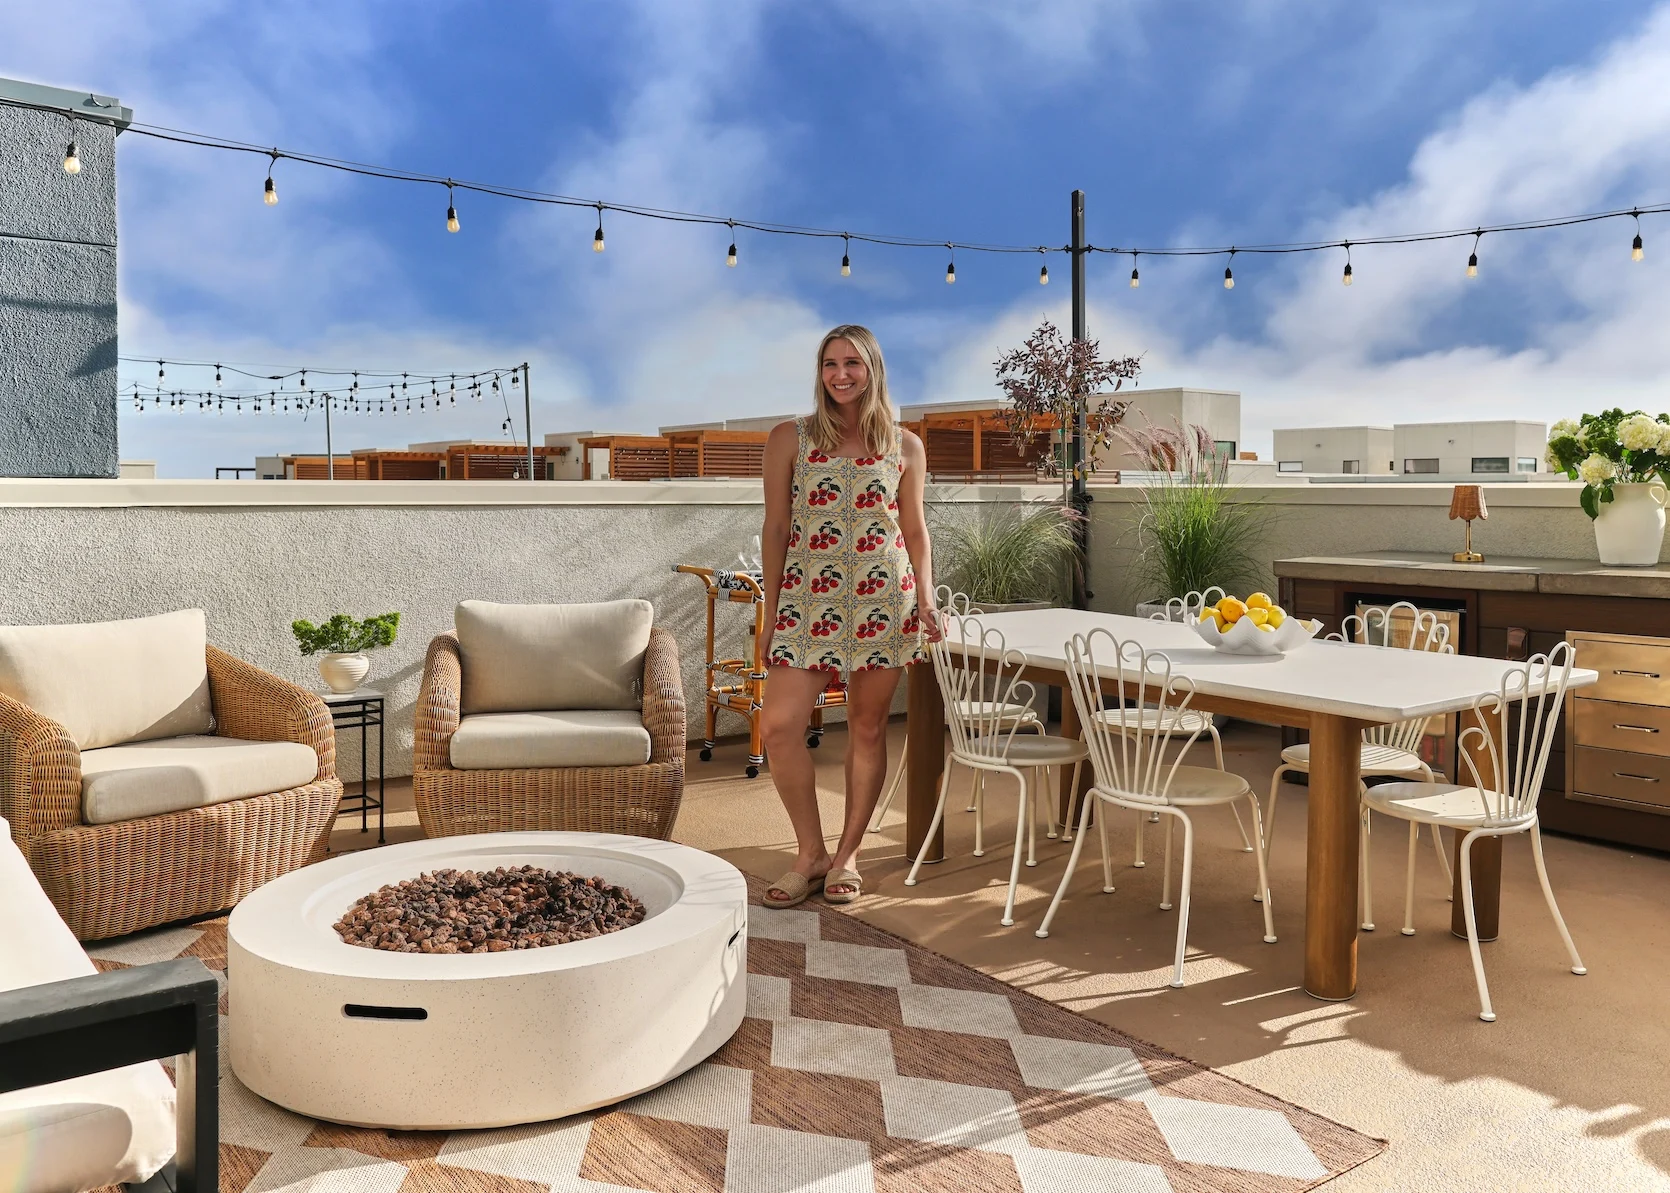
YOU GUYS IT’S THE FIRST REVEAL IN MY NEW HOUSE AHHHH!! I am absolutely thrilled to be here sharing my rooftop with all of you today! Quick recap: I moved from my Los Feliz apartment (see all of those reveals here) to my boyfriend, Austin’s house in February of this year. We hit the ground RUNNING on some fun house projects – the first of which was OUR ROOFTOP!!! We live in a townhouse that’s very vertical and therefore doesn’t have a traditional backyard, but what we do have is a decent-sized square on the top of our house that was just begging to be the ultimate party spot. It was begging for an outdoor kitchen DIY. It’s not a small space by any means, and it’s definitely the largest outdoor space I’ve ever had as an adult, but it’s also not crazy huge, so we had to get creative on how to fit all of the “zones” into it to make it as functional and comfortable as possible. Let’s start from the beginning:
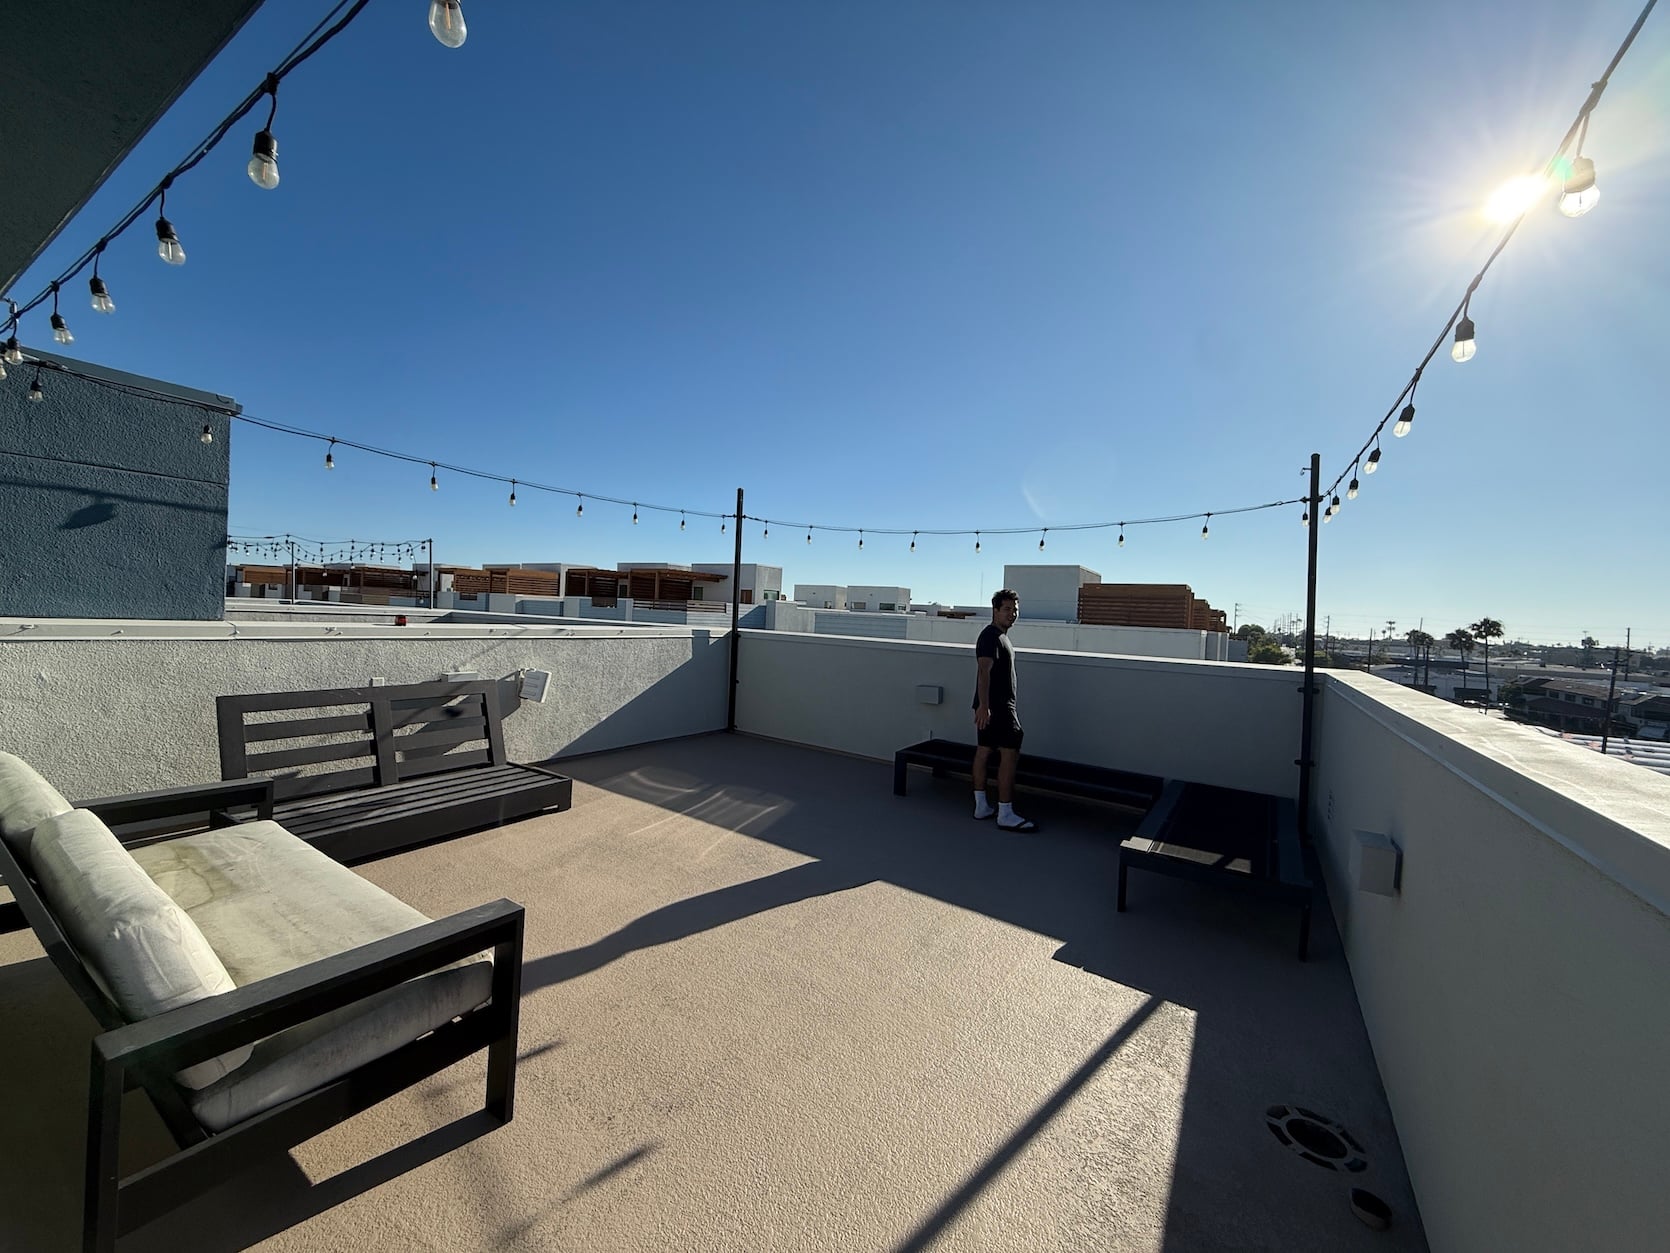
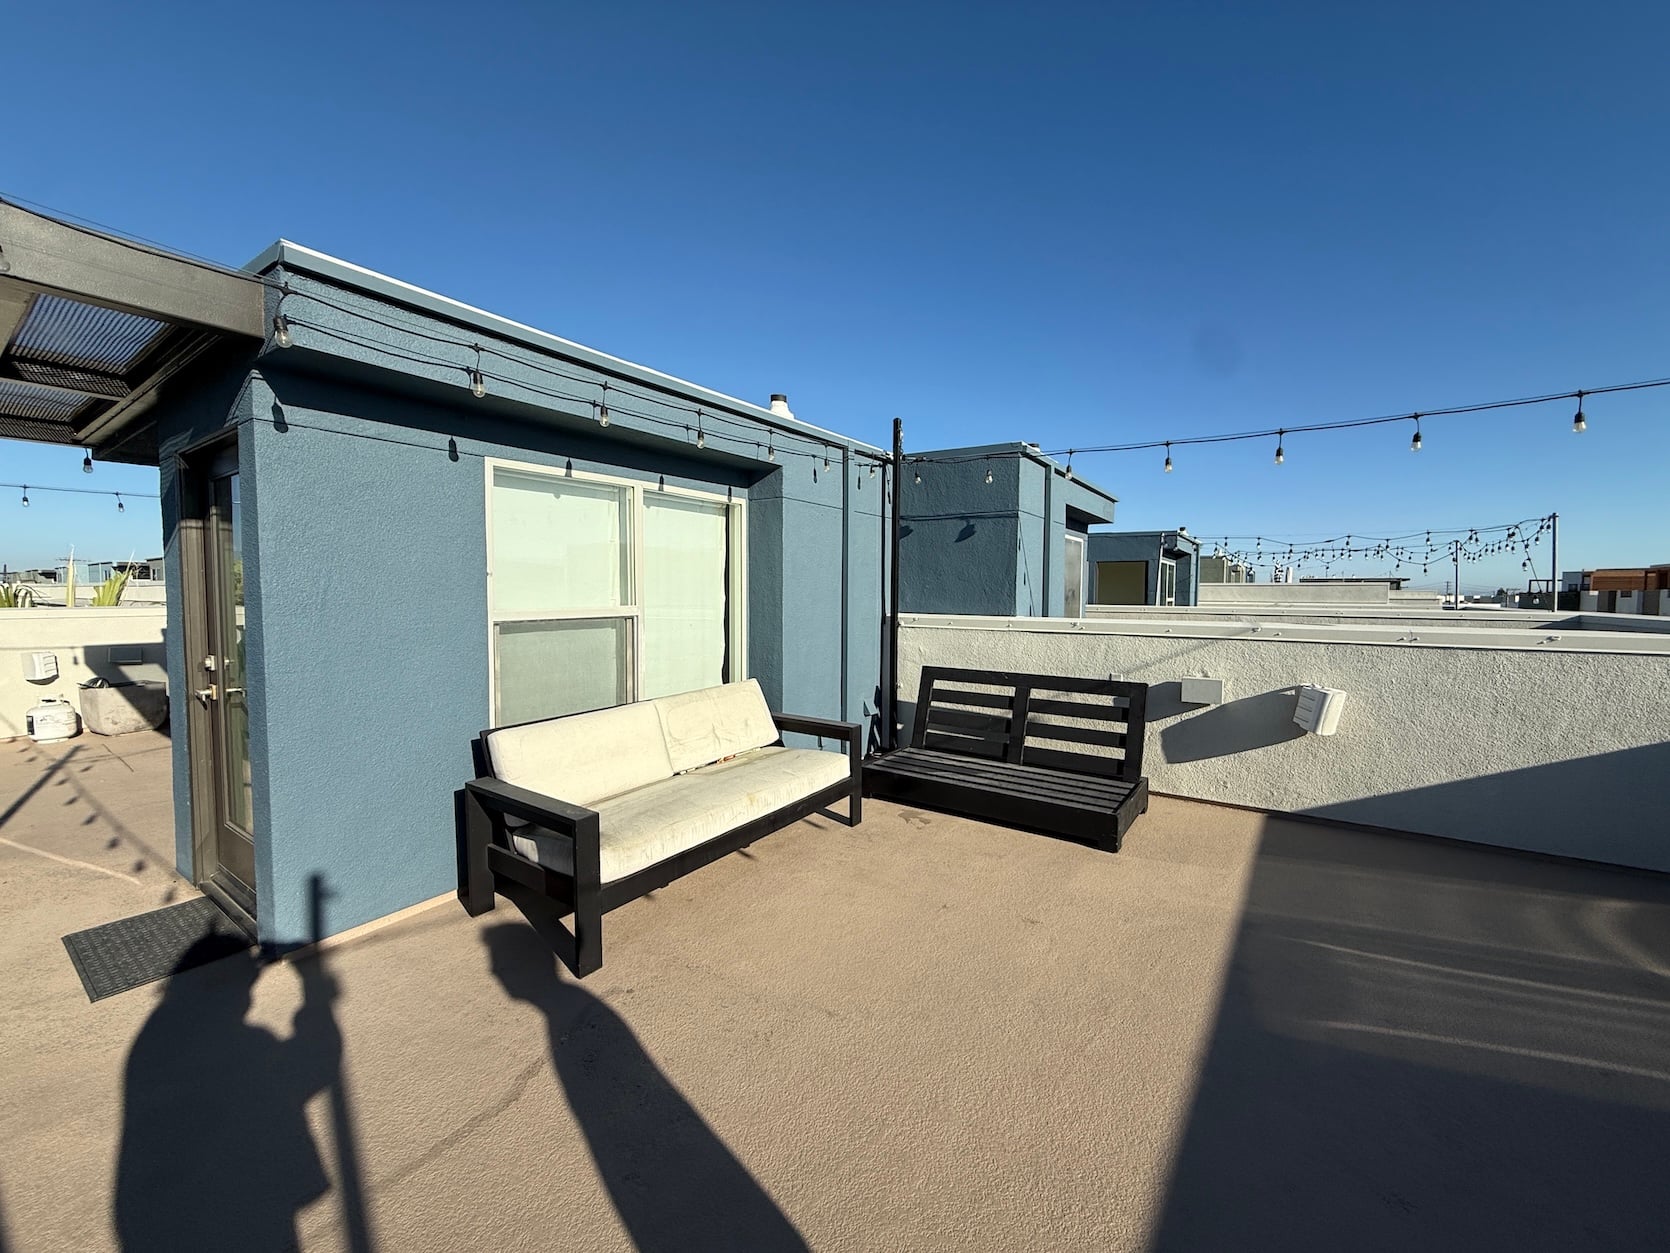
So here’s where we started. There wasn’t much out here other than a sofa with some white cushions in desperate need of attention, but we dreamed of it becoming the ultimate hangout spot for our friends and family. We already entertain A TON, so we knew this roof would get a ton of use (especially in the summer) if we just put in a little elbow grease. Also, I got SO lucky because right before I moved in, they repainted the paint color on the wall from a crazy orange to this more nautical blue. I was absolutely thrilled!! So we had a fresh coat of paint, some string lights, and a dream; it was time to get to work. The opportunities were endless, but we knew we wanted 3 areas ideally: an outdoor kitchen to grill delicious food, a dinner table to eat said delicious food, and then a fire pit area to digest the delicious food while talking with our friends for hours. So after a lot of space planning, we came up with this…
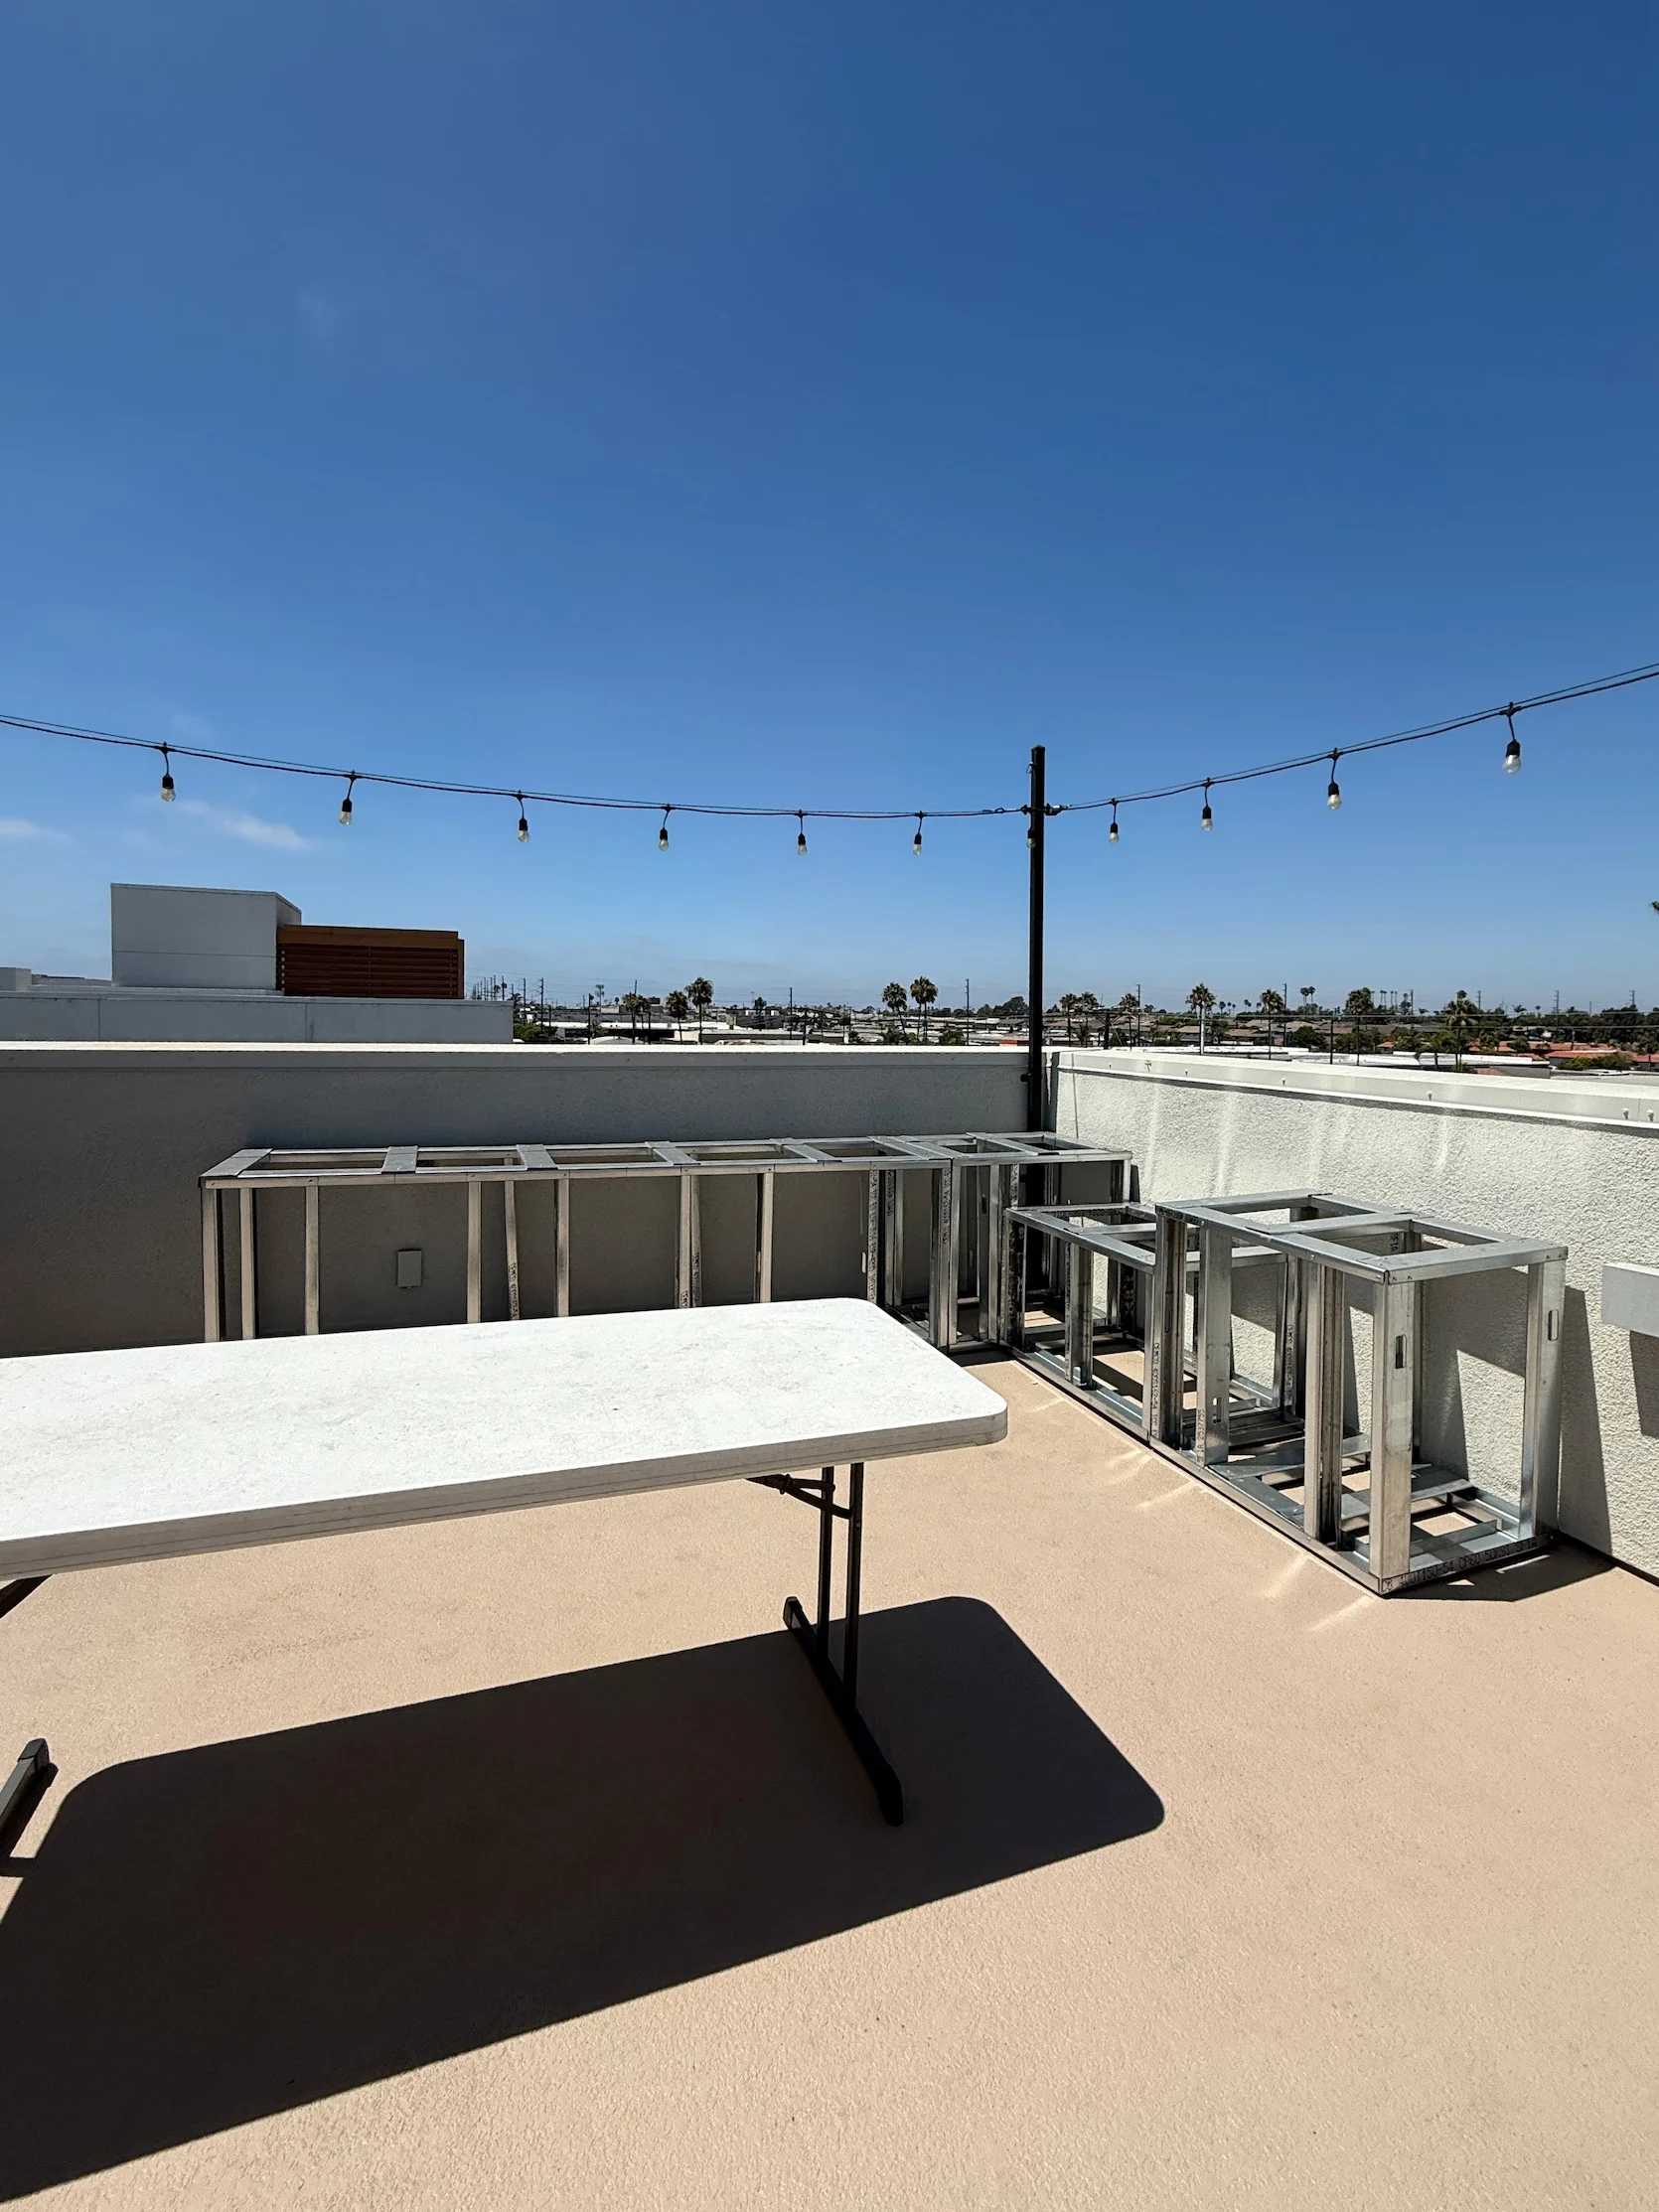
We decided the best spot for the outdoor kitchen was this corner because it’s the only area that doesn’t look directly onto our neighbor’s deck, and it has the best view hands down. Although had we faced the kitchen the other way, it would’ve looked over at my parents’ house, which is actually hilarious… For context: Austin and I met back in college (we actually studied abroad together in Madrid!), but we were more acquaintances than friends who hung out all the time. Then a couple of years ago, I was driving over to my parents’ house when I spotted Austin working out in his garage (he likes to say he was on his 1000th rep). I pulled over to say hi, and the rest is history. Flash forward two years, and now I am neighbors with my parents (like literally 7 doors down…it’s actually kinda awesome). So yeah, you can literally see this rooftop from the window in my parents’ living room makeover. Life is so weird sometimes!! And to answer your question, yes, we see them a lot, and they hang out on this roof all the time 🙂
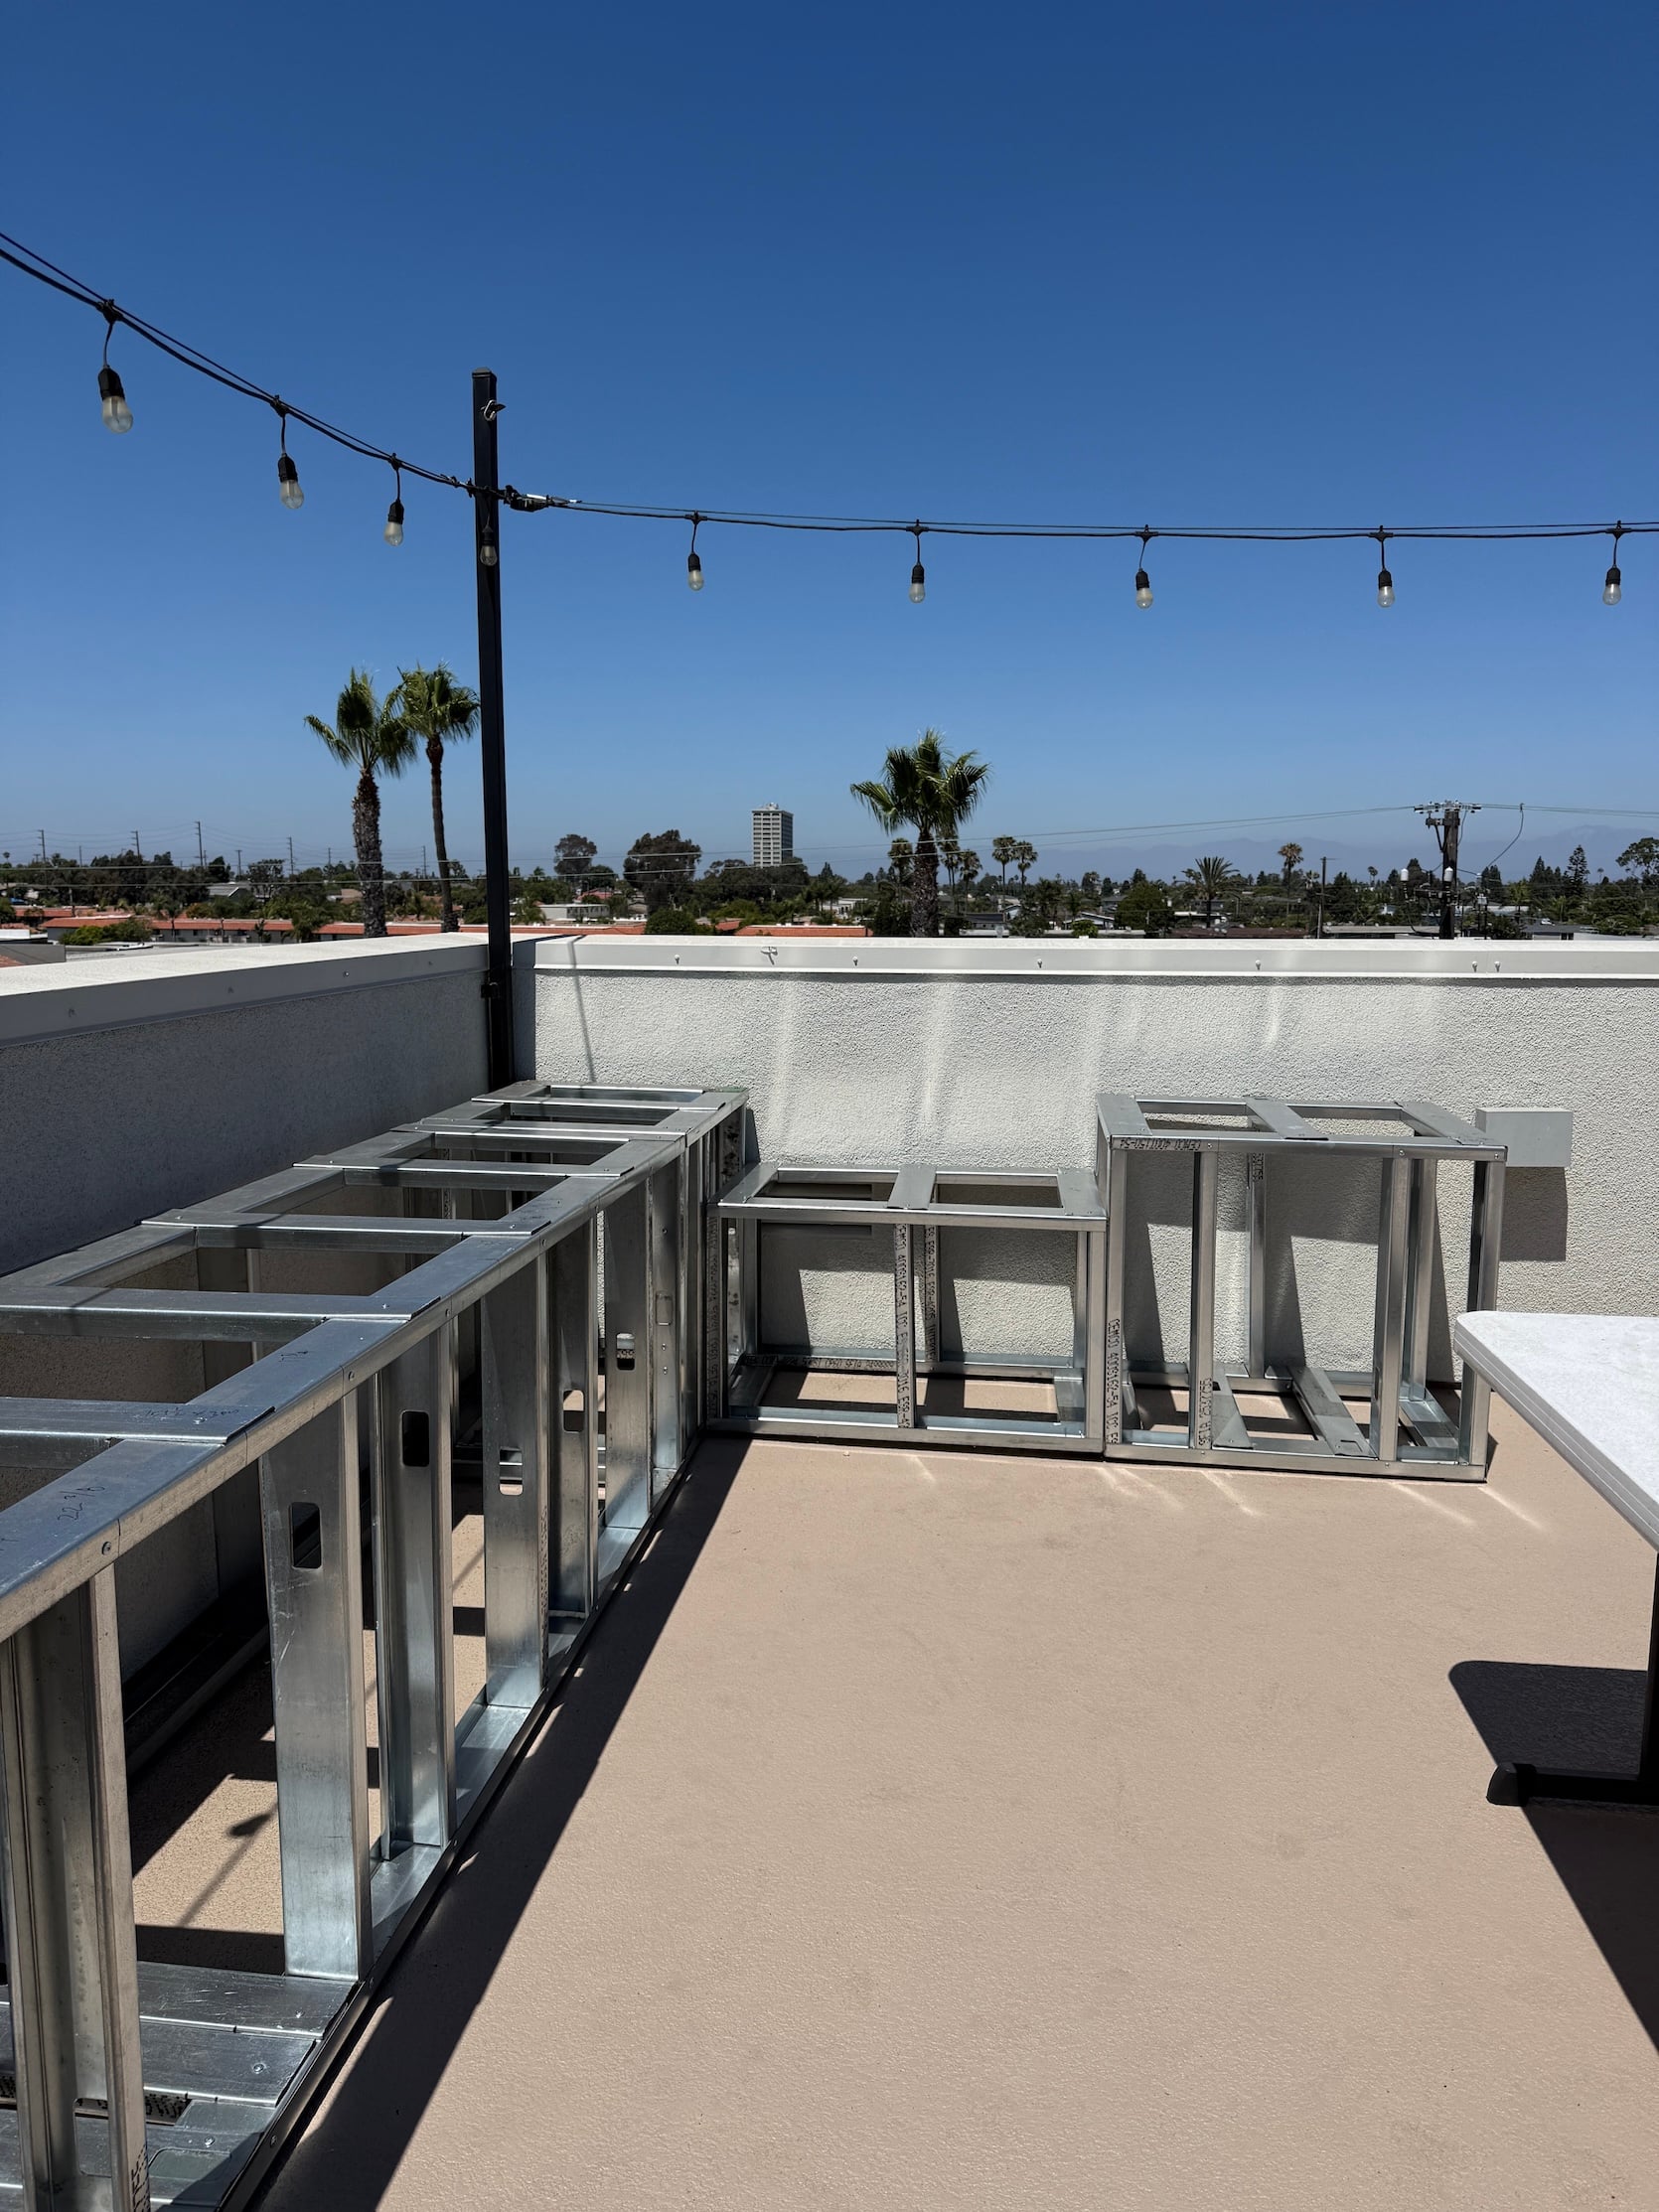
Okay, now back to the design and DIY of it all. Austin and his dad built the whole outdoor kitchen together, and I was genuinely so impressed by everything they did. They started this project a few months before I moved in, so I will try to give you the details as best I can, but I wasn’t there for a good portion of the build! So a family friend who works in construction provided all of the steel, which was incredible. Austin says it was something similar to this. They borrowed his special steel-cutting saw and screwed the steel pieces together with special metal screws.
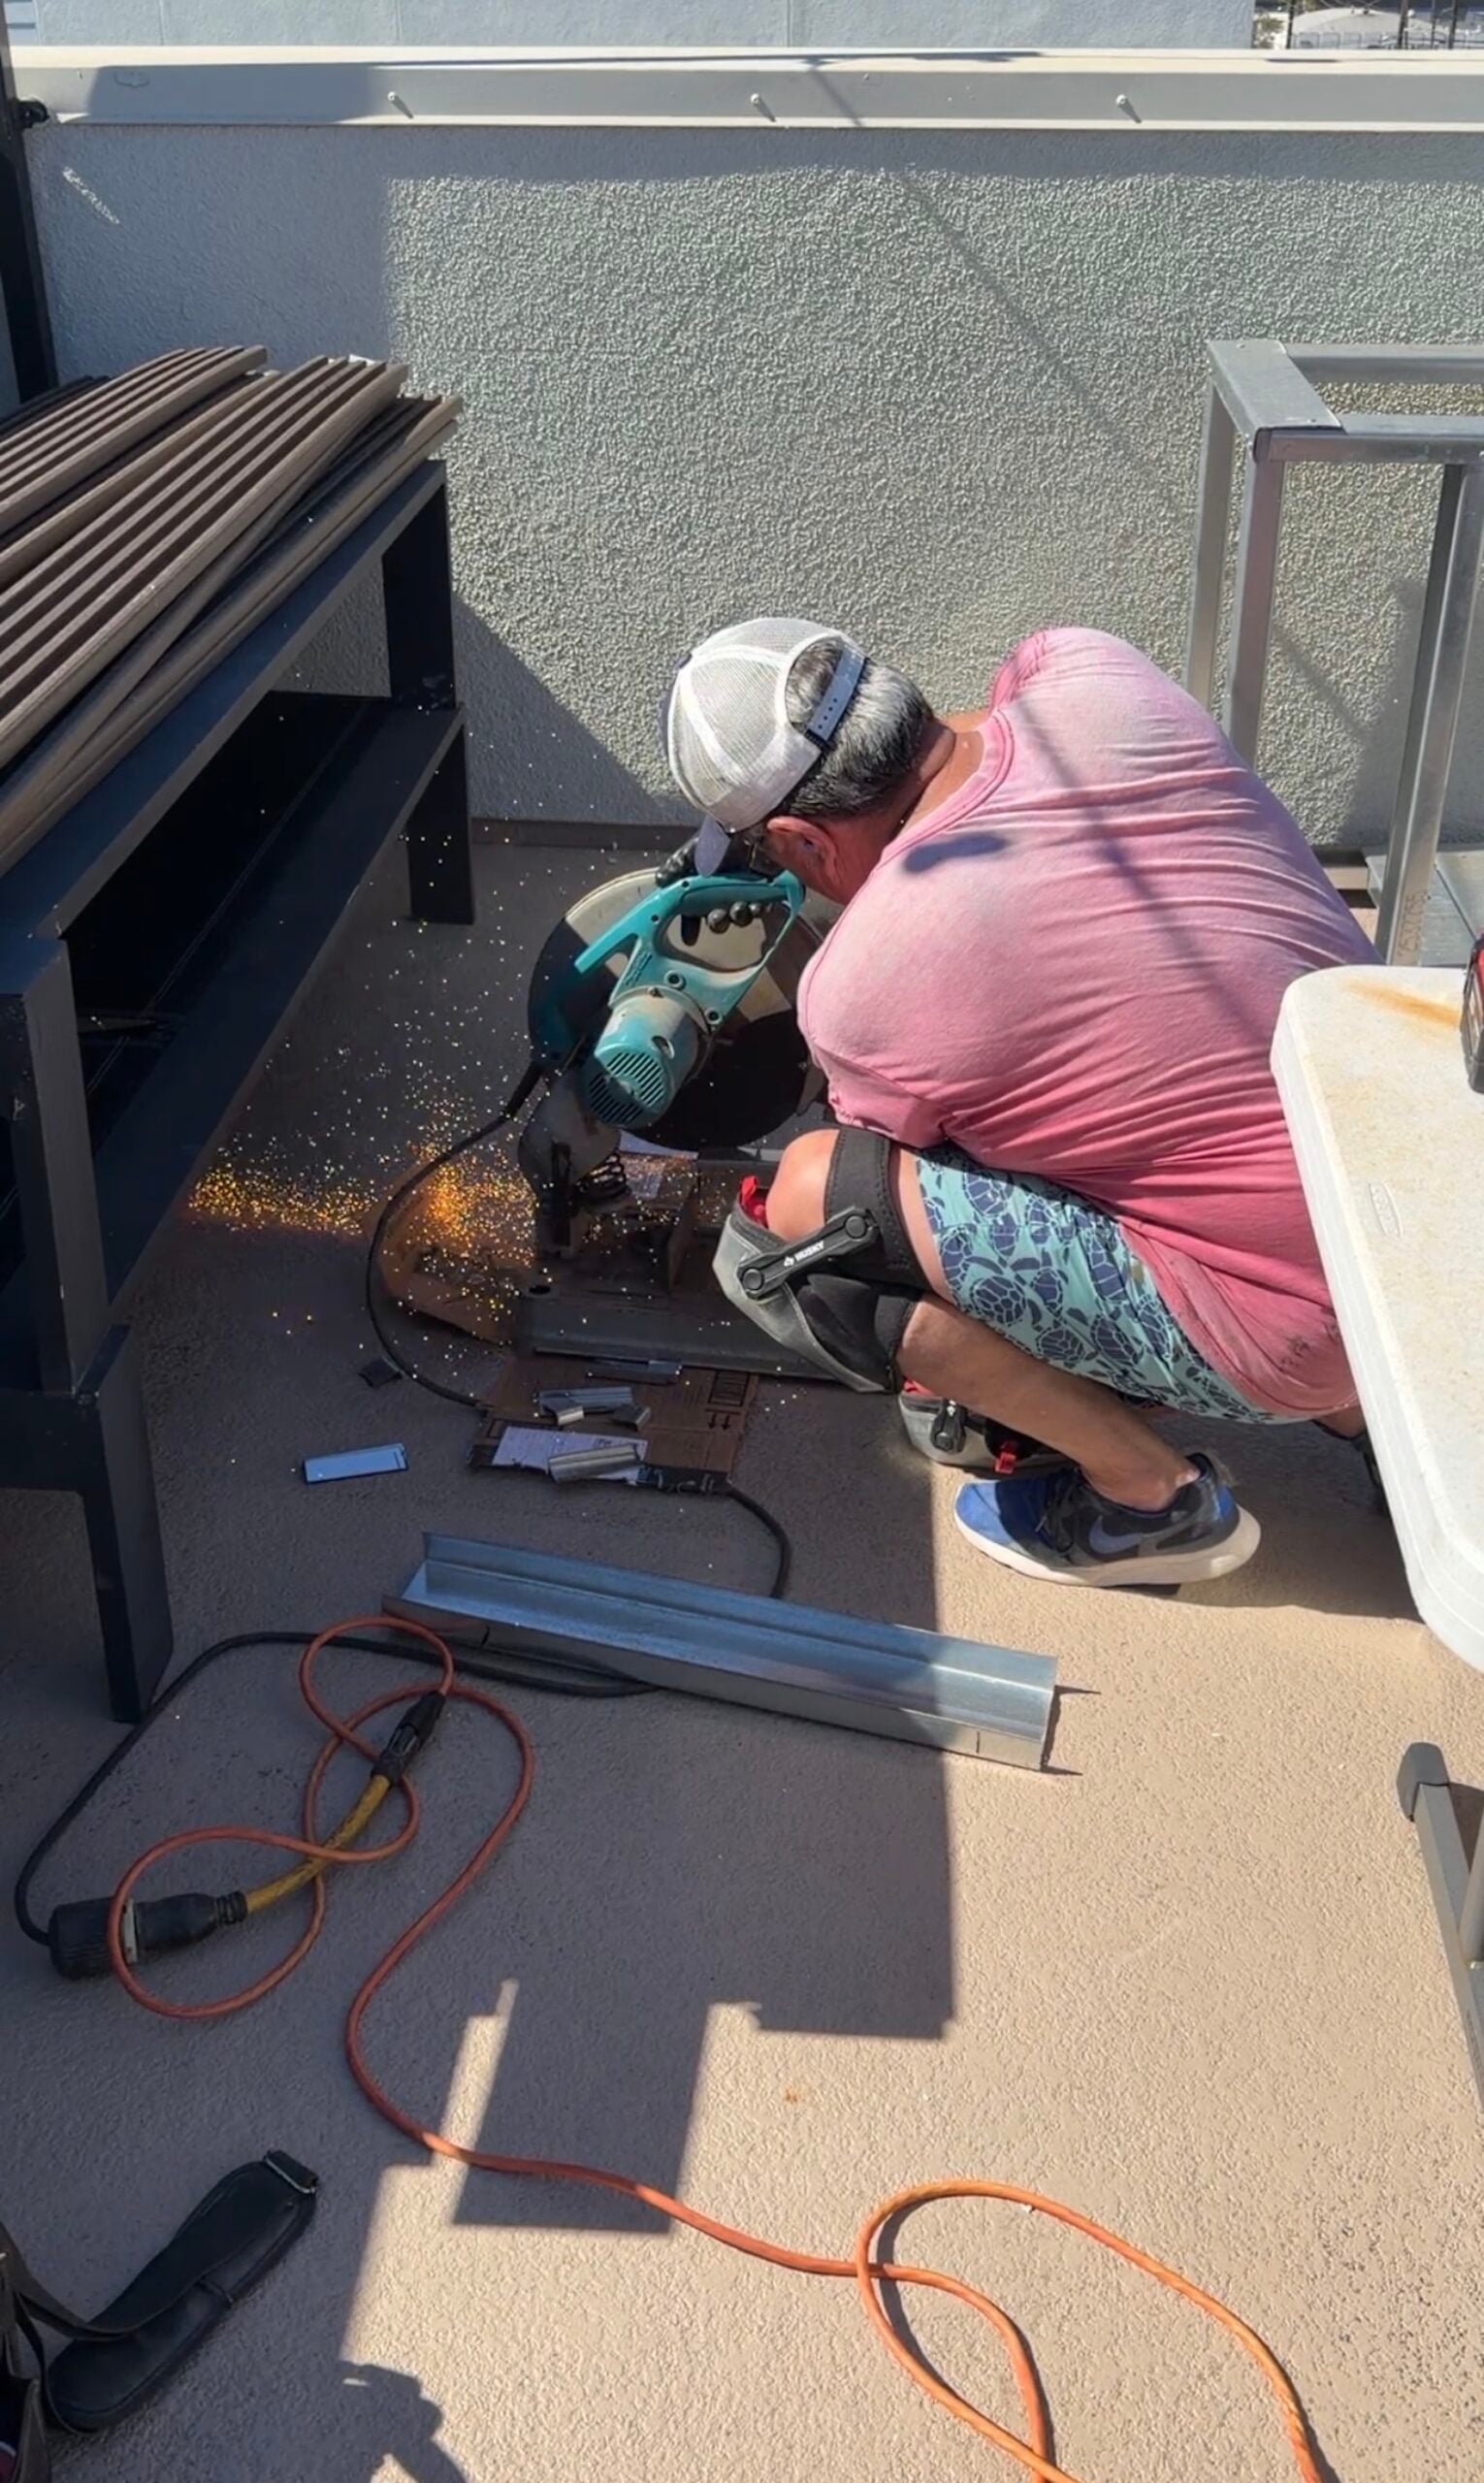
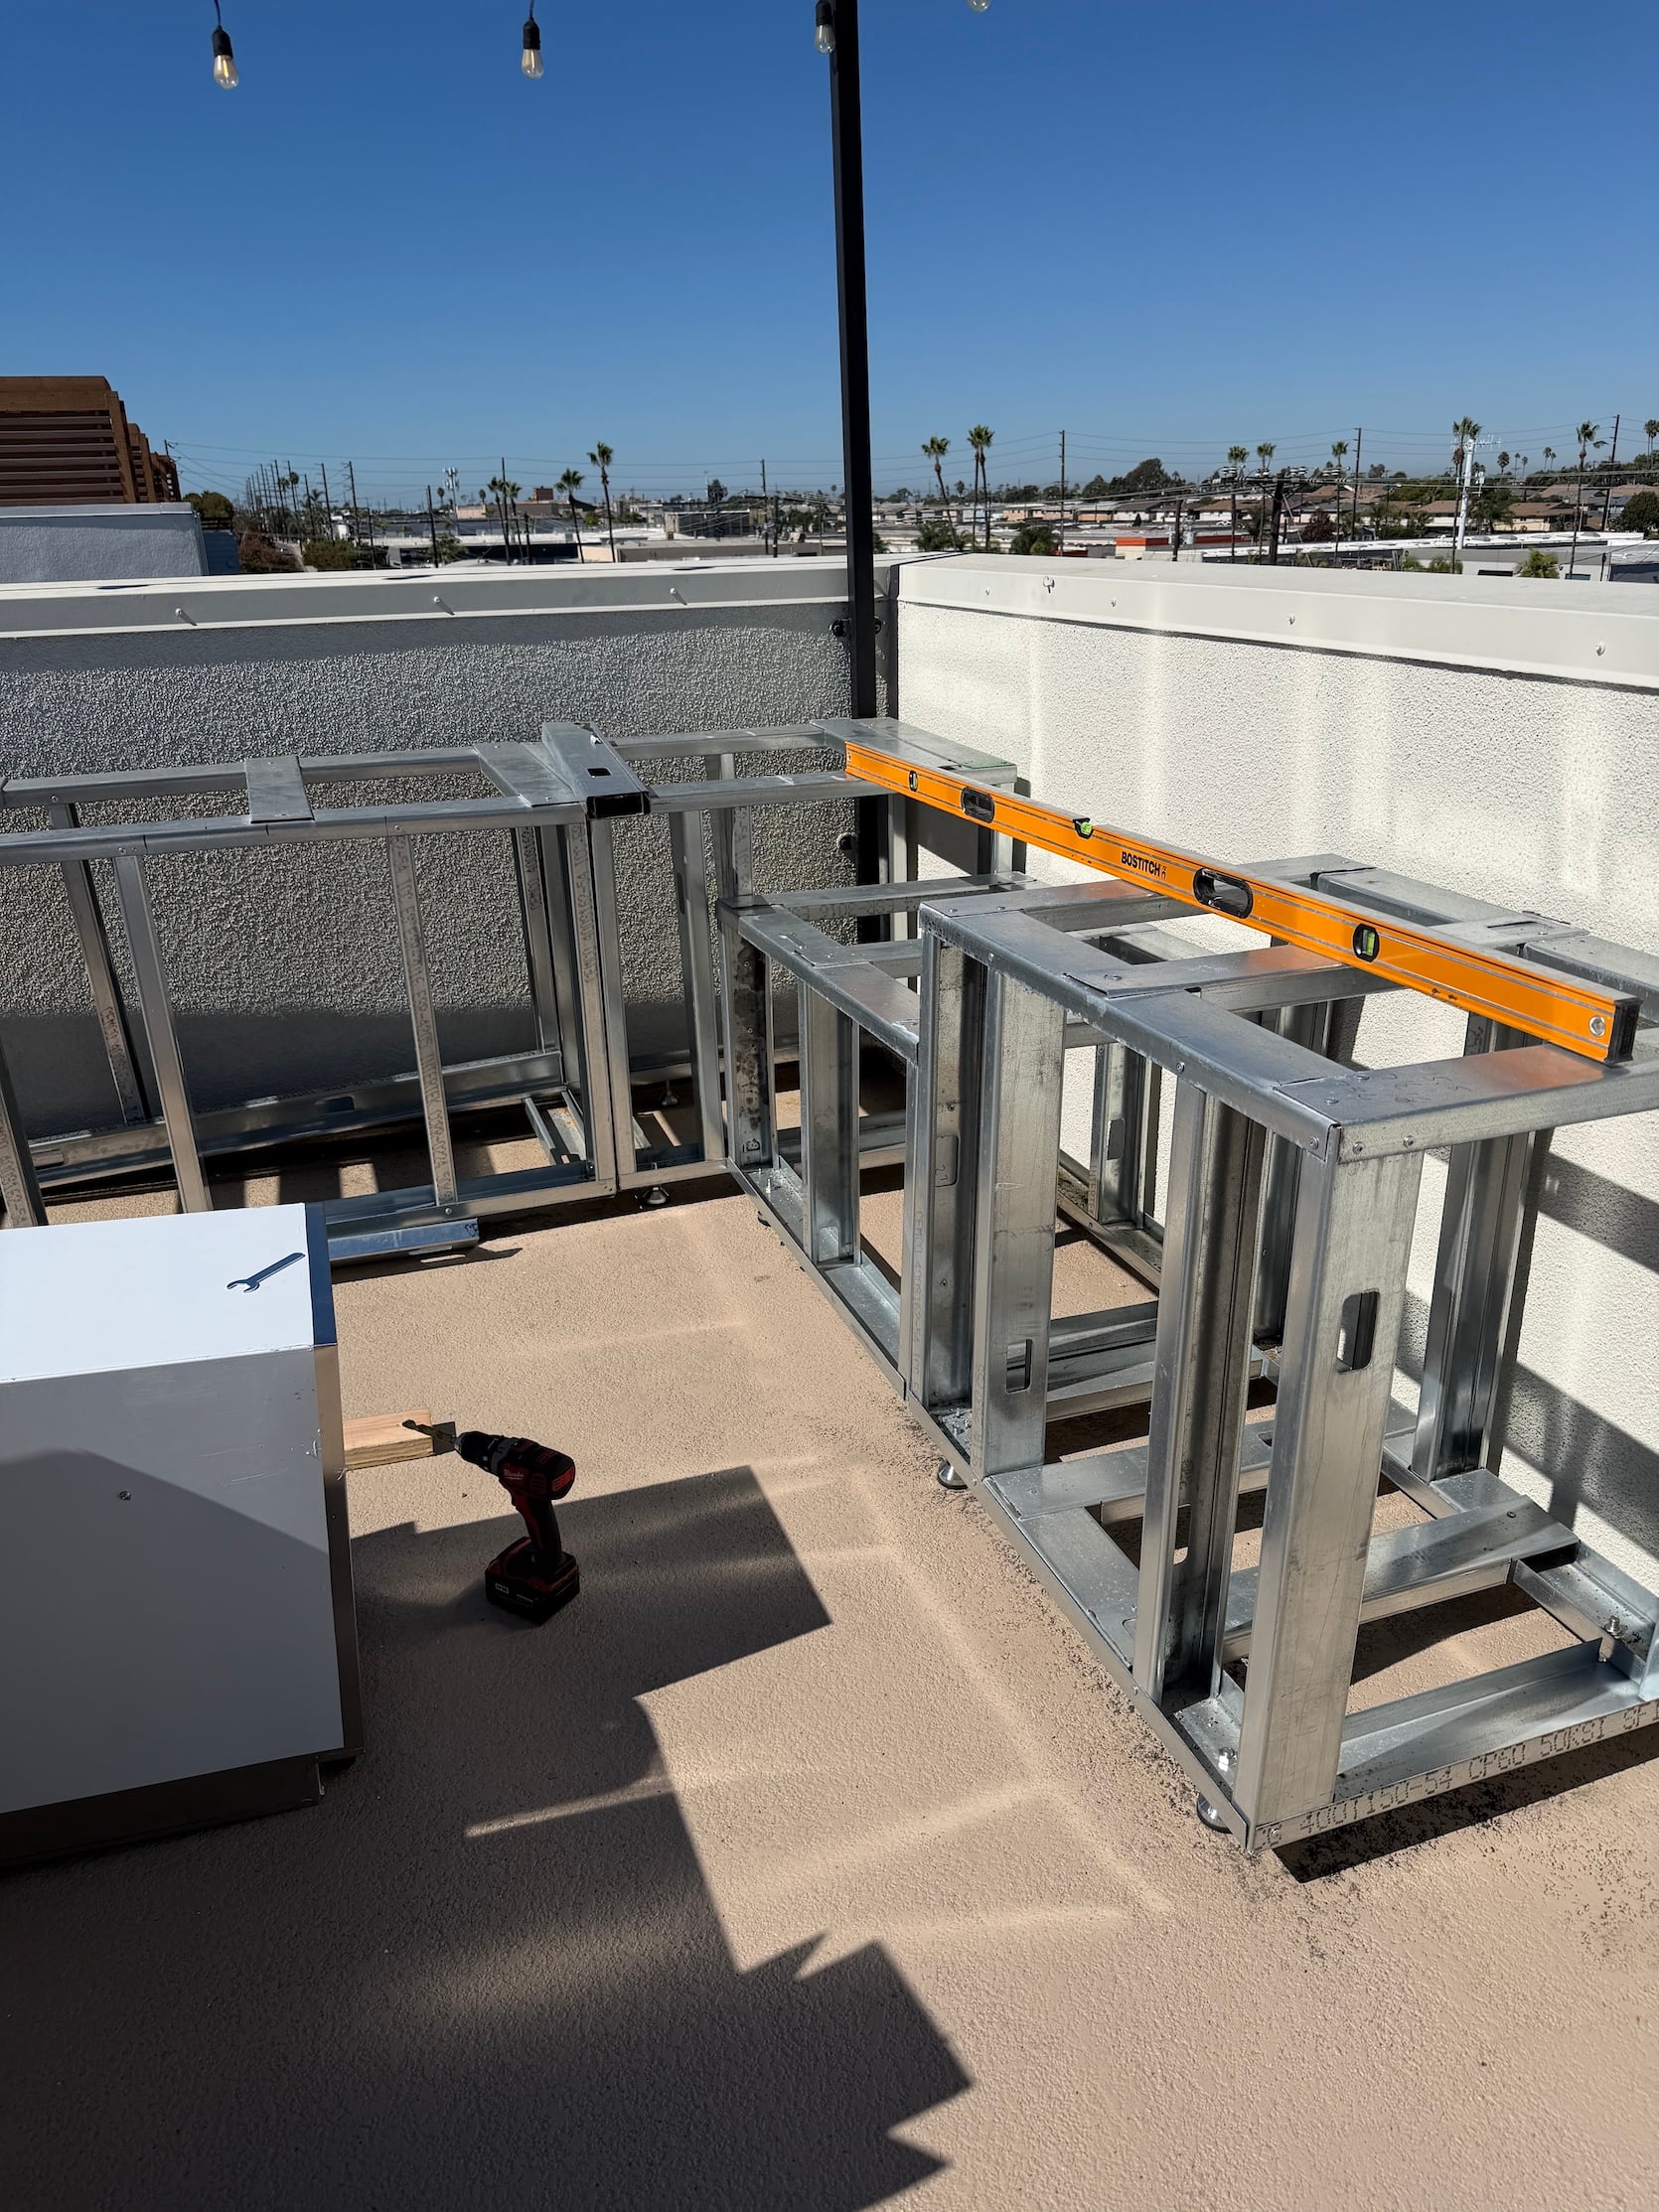
The roof slopes down so that rainwater can drain, so they used these feet to level it out. Also, I’m fully aware that cutting steel is a wild DIY for most people (me included), so if you’re looking for something similar, I actually found a ton of ready-made steel frame options online like this one at Home Depot that’s a bit smaller than ours or this big one that’s fully modular and customizable (but it’s definitely pricey). They also have more affordable options here that seem a little less heavy-duty but might work well depending on where and how you’re planning to do this DIY.
Some of these ready-made galvanized steel frames can definitely get pricey, so if you’re looking for something more plug-and-play, you can also sleuth the Pottery Barn and Crate and Barrel Outlets to find pieces like this. That option definitely takes longer since you have to wait for the pieces to get to the outlet and go on sale, but you can always call the outlets to see if they have any in stock:) Also, shop around for the exact layout you’re looking for – the internet has a ton of ready-made options!
The next part of the DIY goes crazy…get ready…
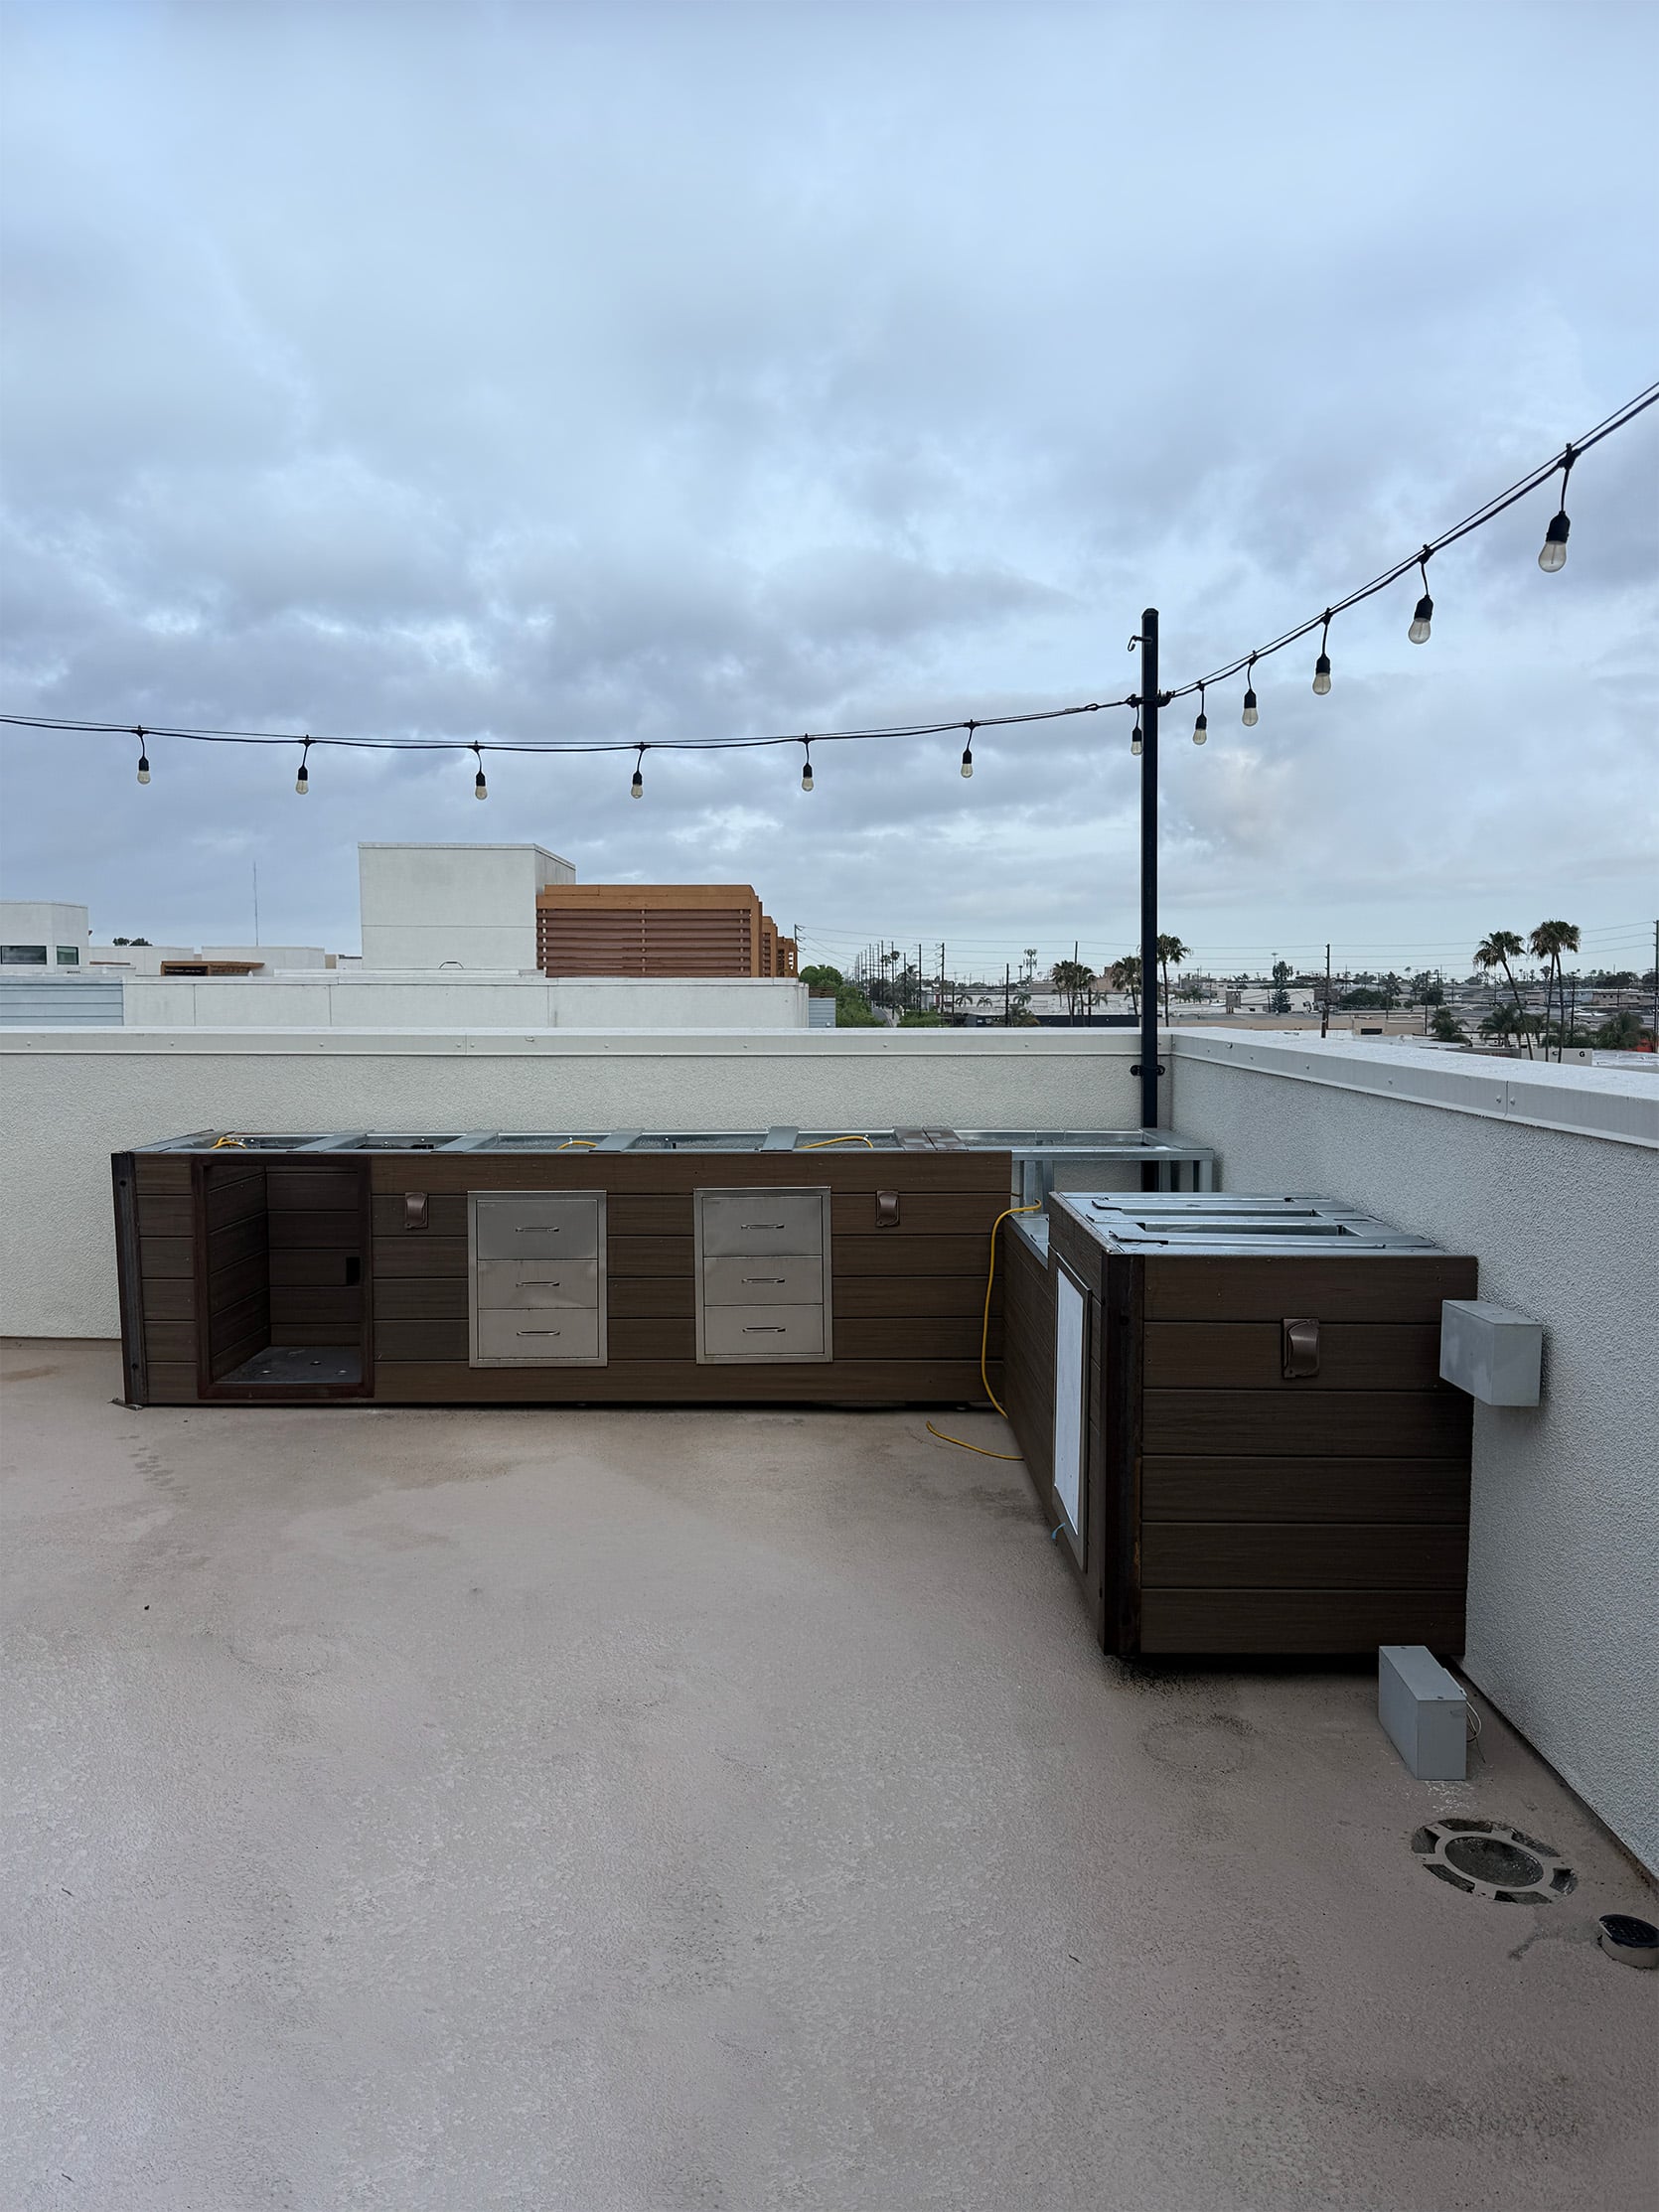
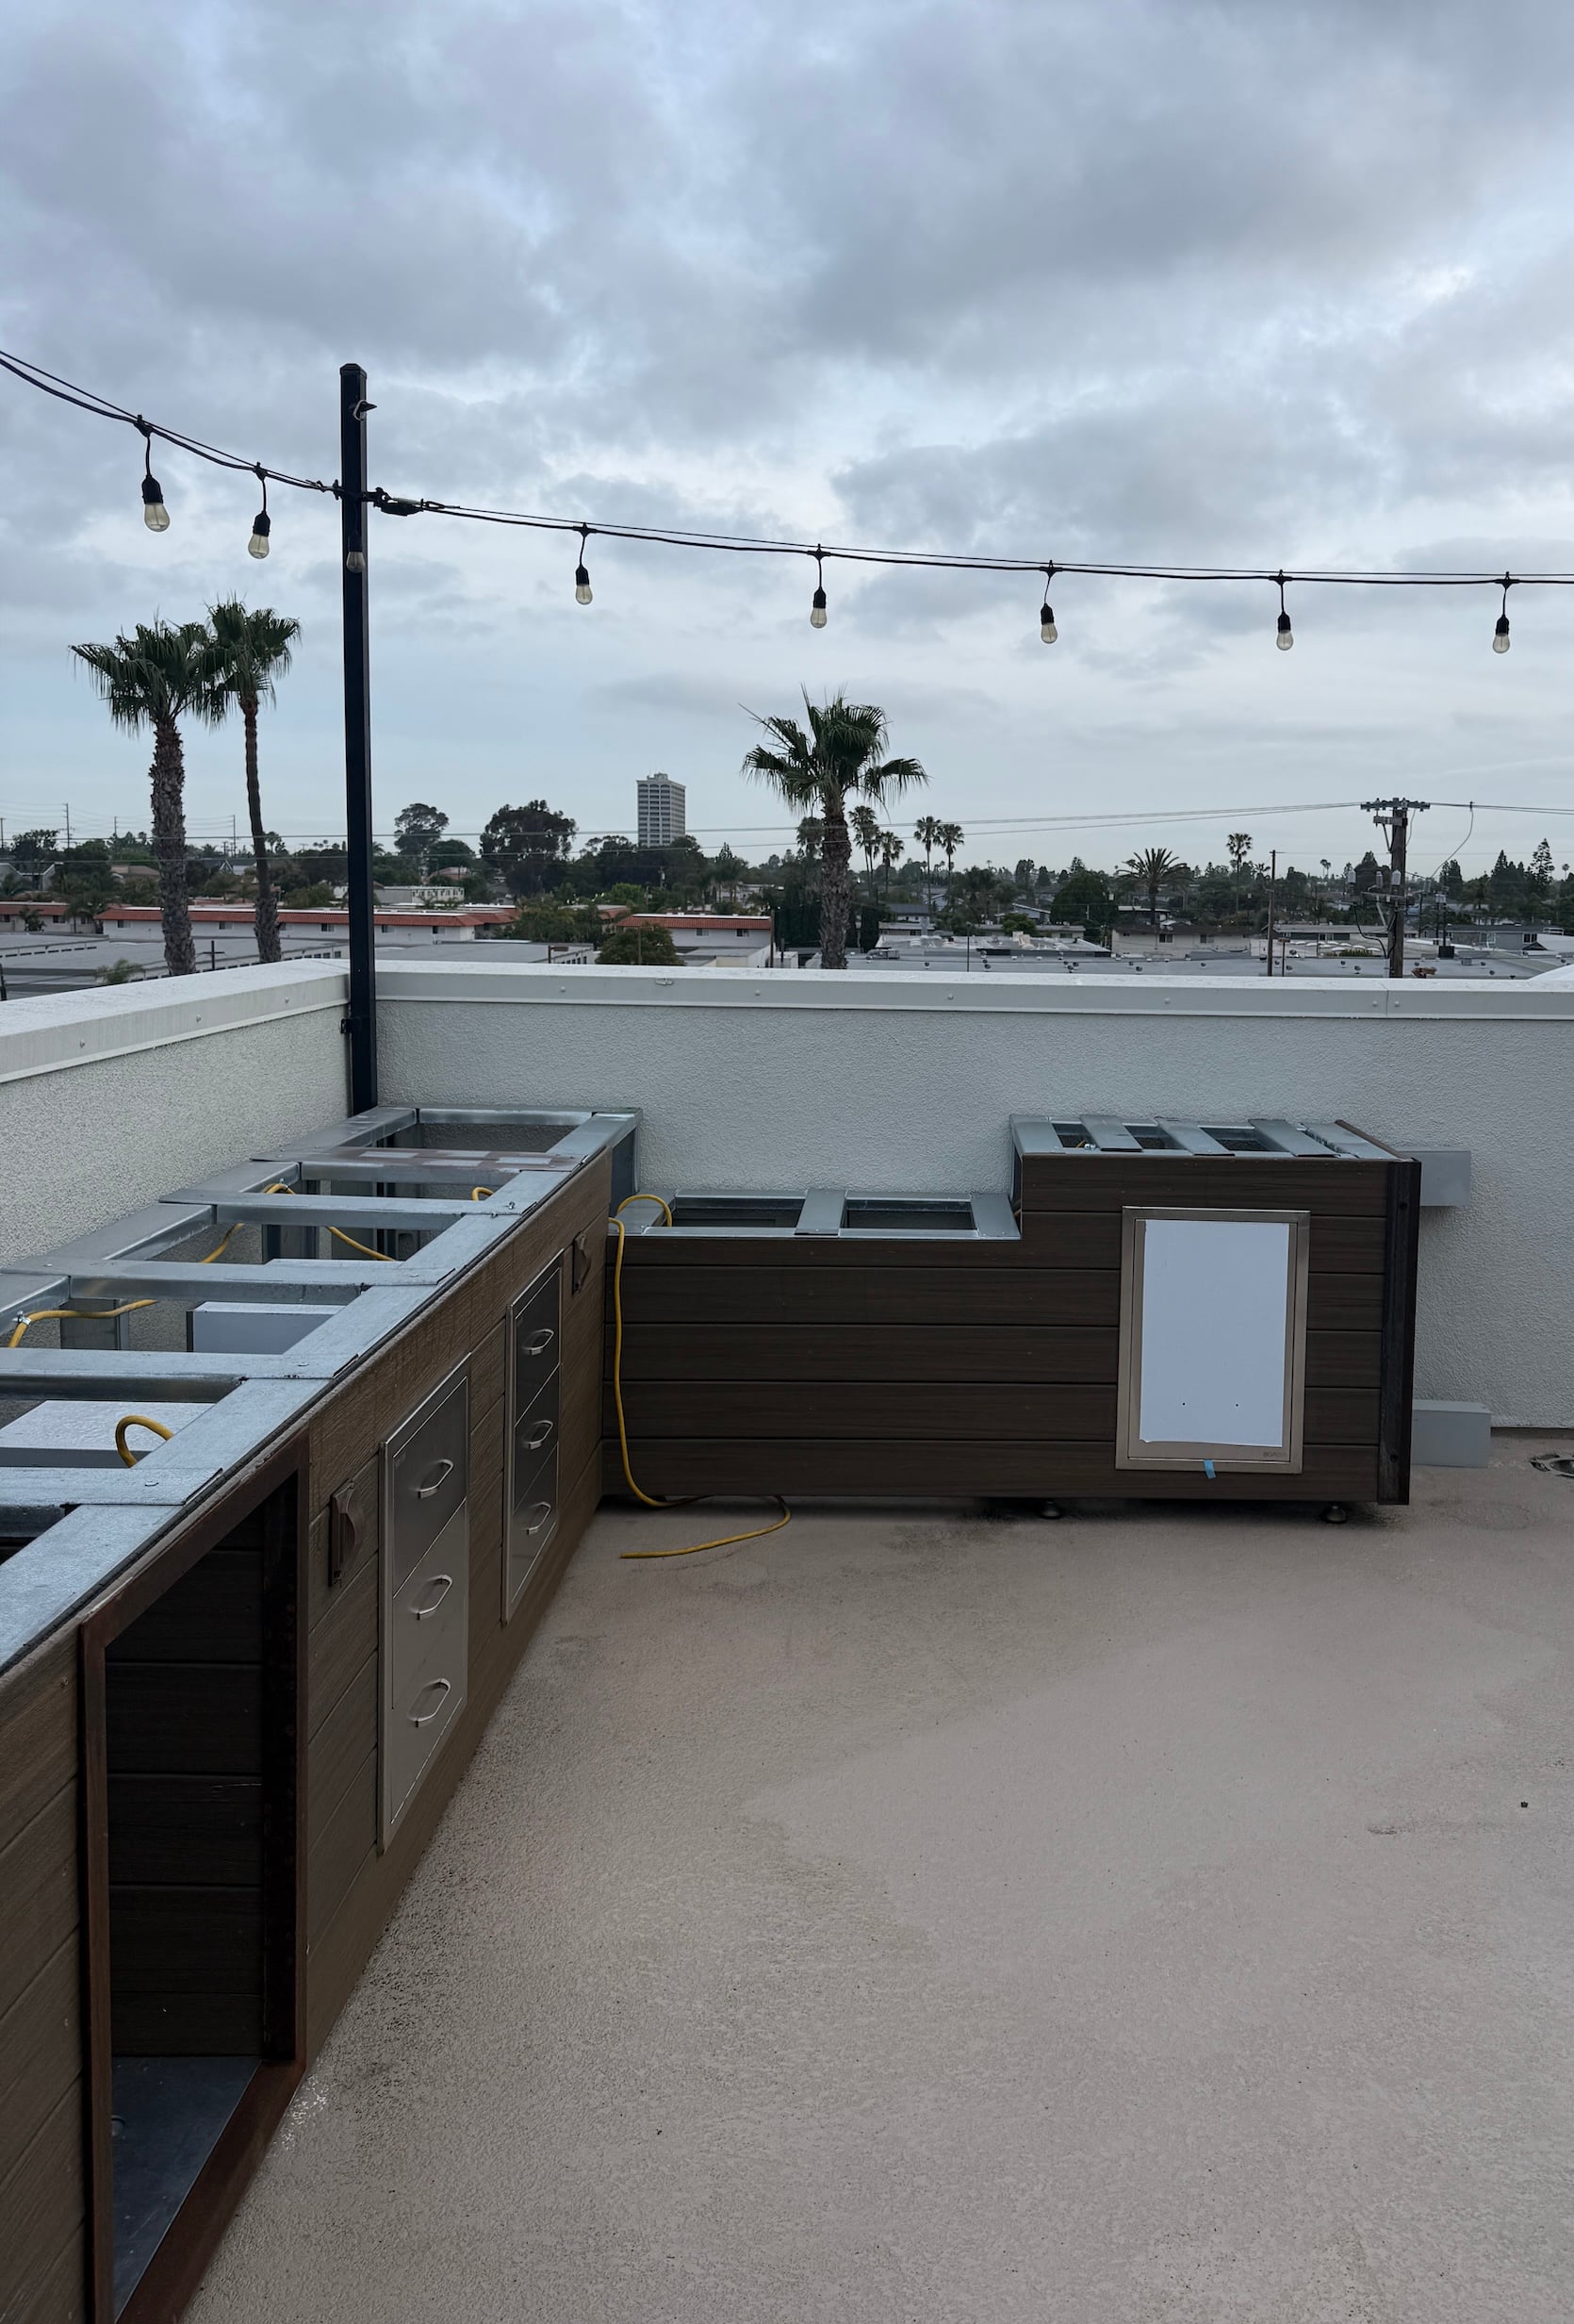
They screwed composite decking into the steel, so this thing is crazy durable. This material is ideal since our rooftop is really exposed to all the elements (which is mainly just marine layer from the beach since we live in Southern California but still). They snagged about 14 12ft planks of the decking (in the color “toasted sand”), which ended up being around $350-$400. Then they installed some stainless steel drawers and this propane pull-out next to the grill. The open cavity on the left was the space they left for the mini fridge!
Then the wildest part was they wired electrical through the steel frame and installed a few outlets for appliances like our slushy machine (which we’re obsessed with and use for parties all the time). You guys, Austin and his dad are so handy; it is wild. This genuinely was so impressive, and I was shook when I walked up here, and it was just like…done. I’ve always been the one doing DIYs (but obviously never on this level), so this was pretty awesome to just walk up and see the whole thing basically finished. Dating into a handy, DIY family is actually incredible, and I feel so lucky!!
As you can see, it was A TON of work to get to this point, but we still needed one major thing for this kitchen: the countertops!
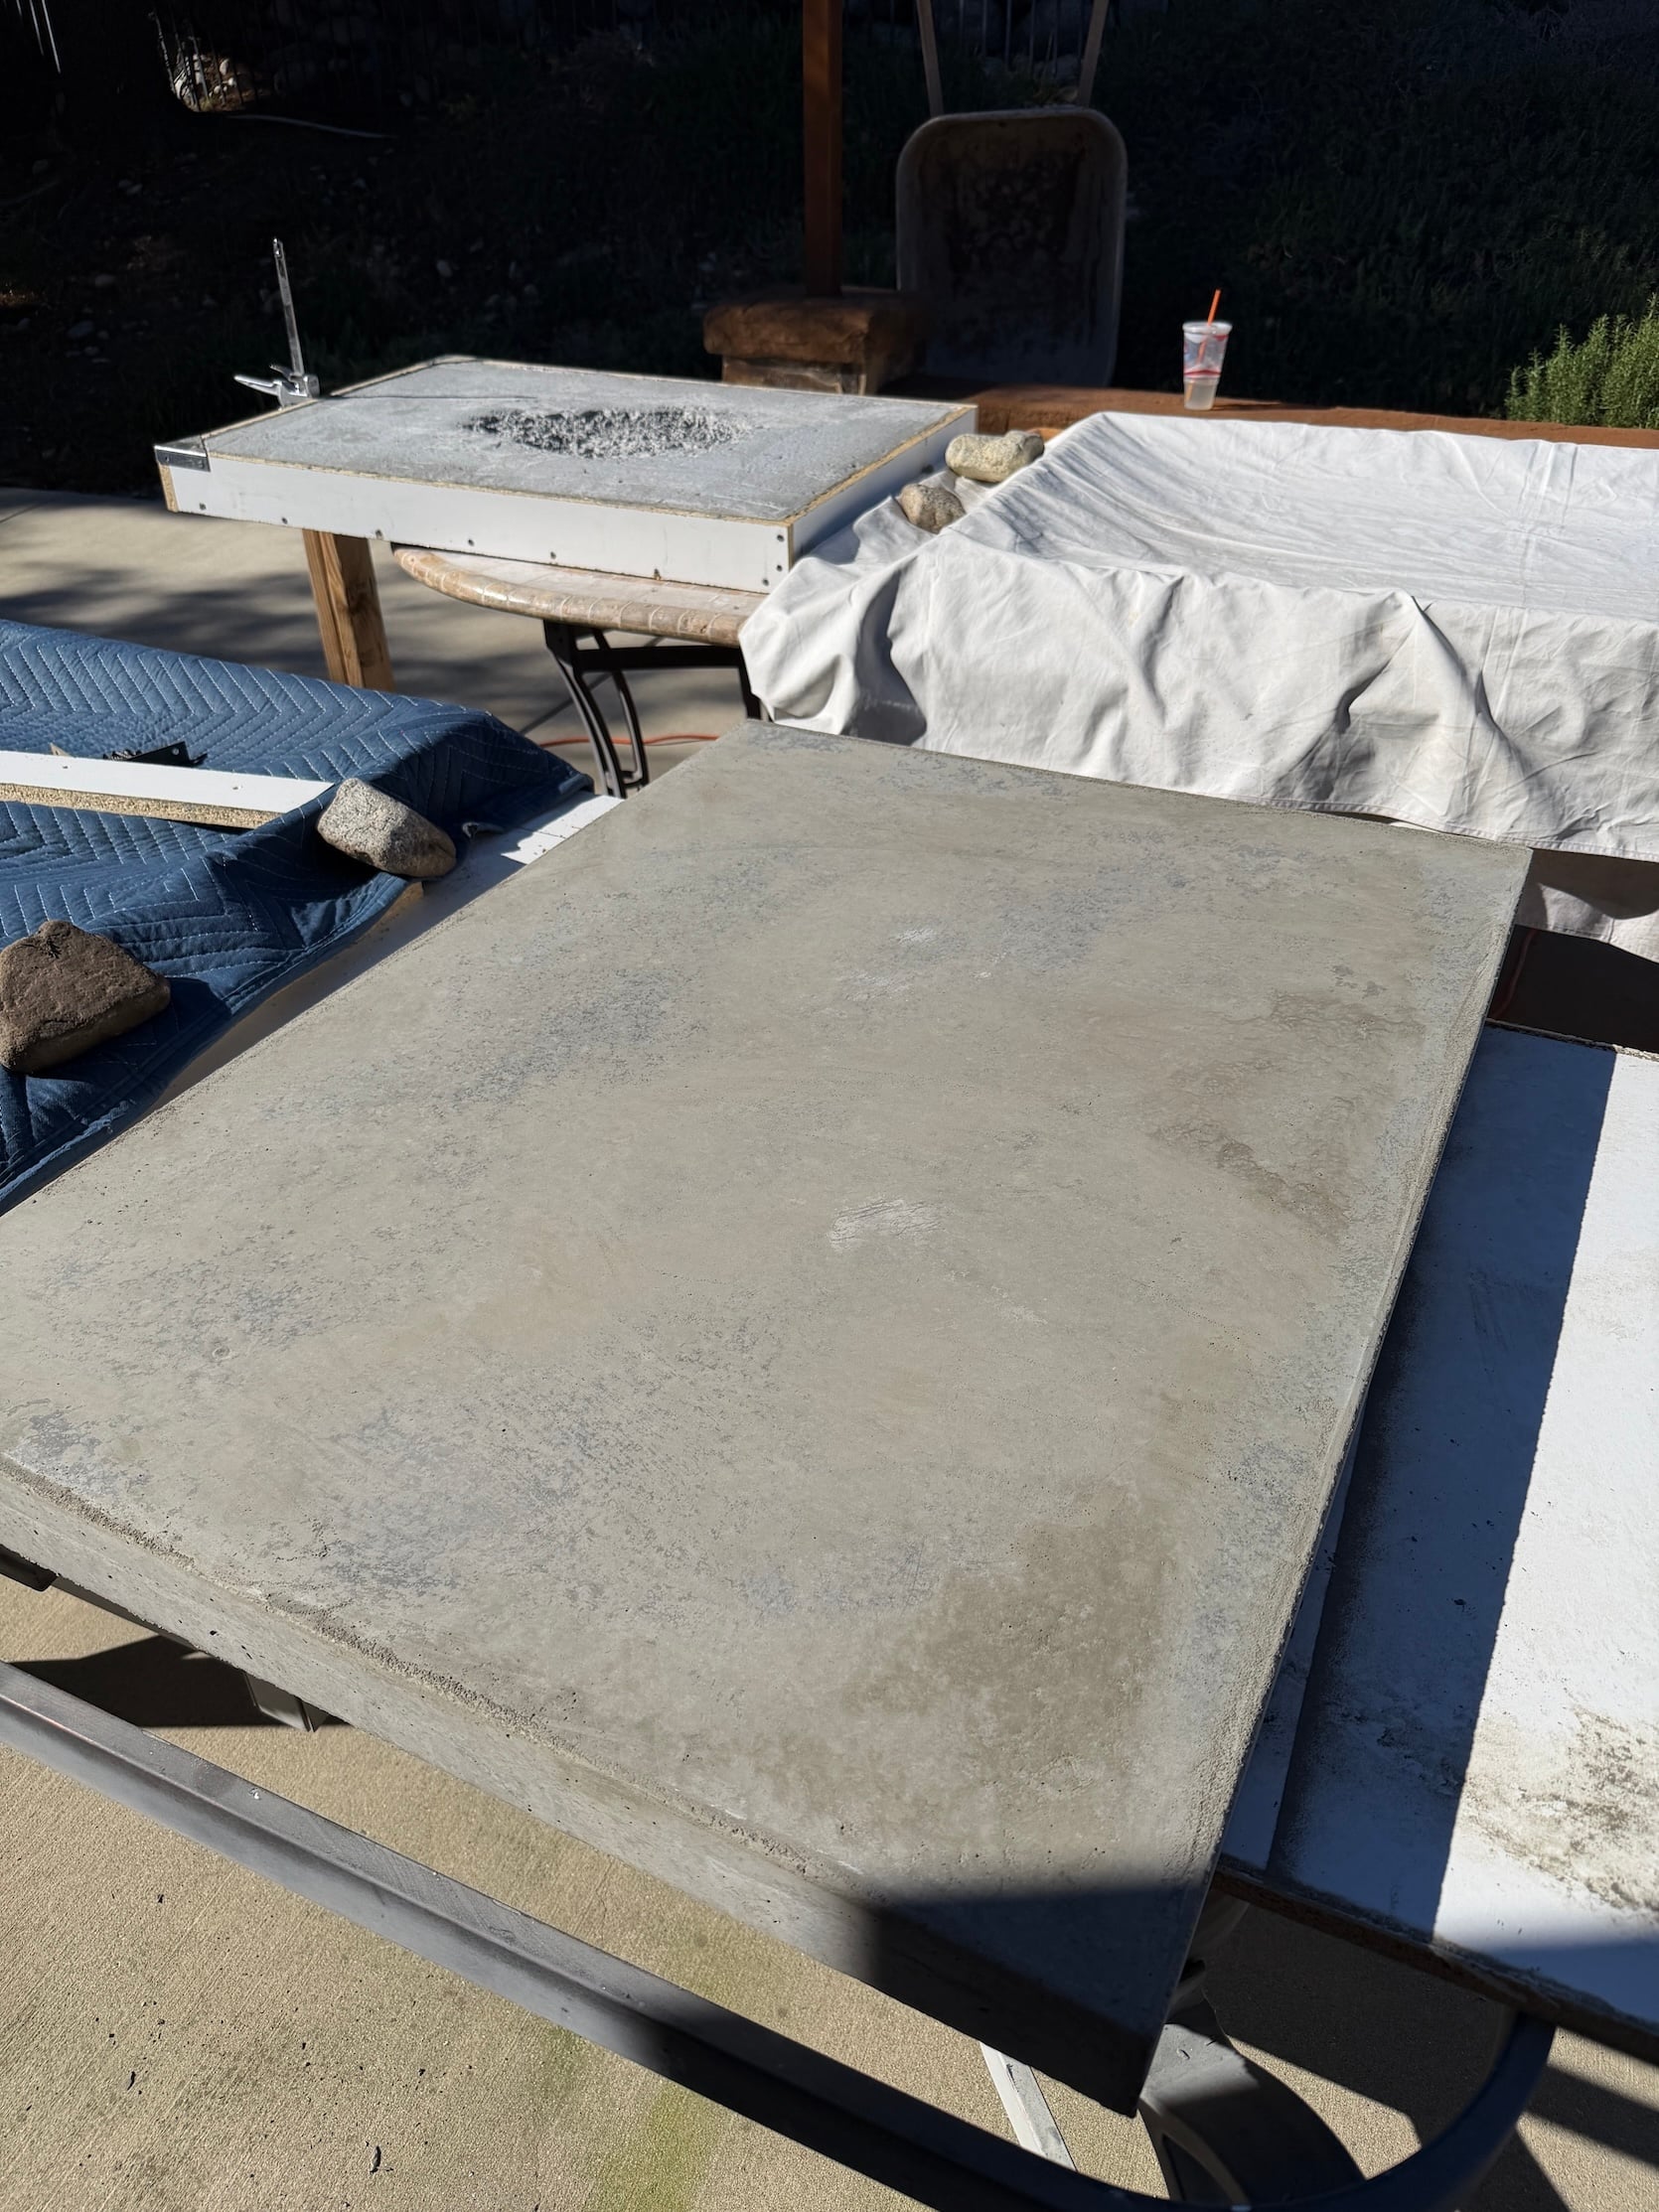
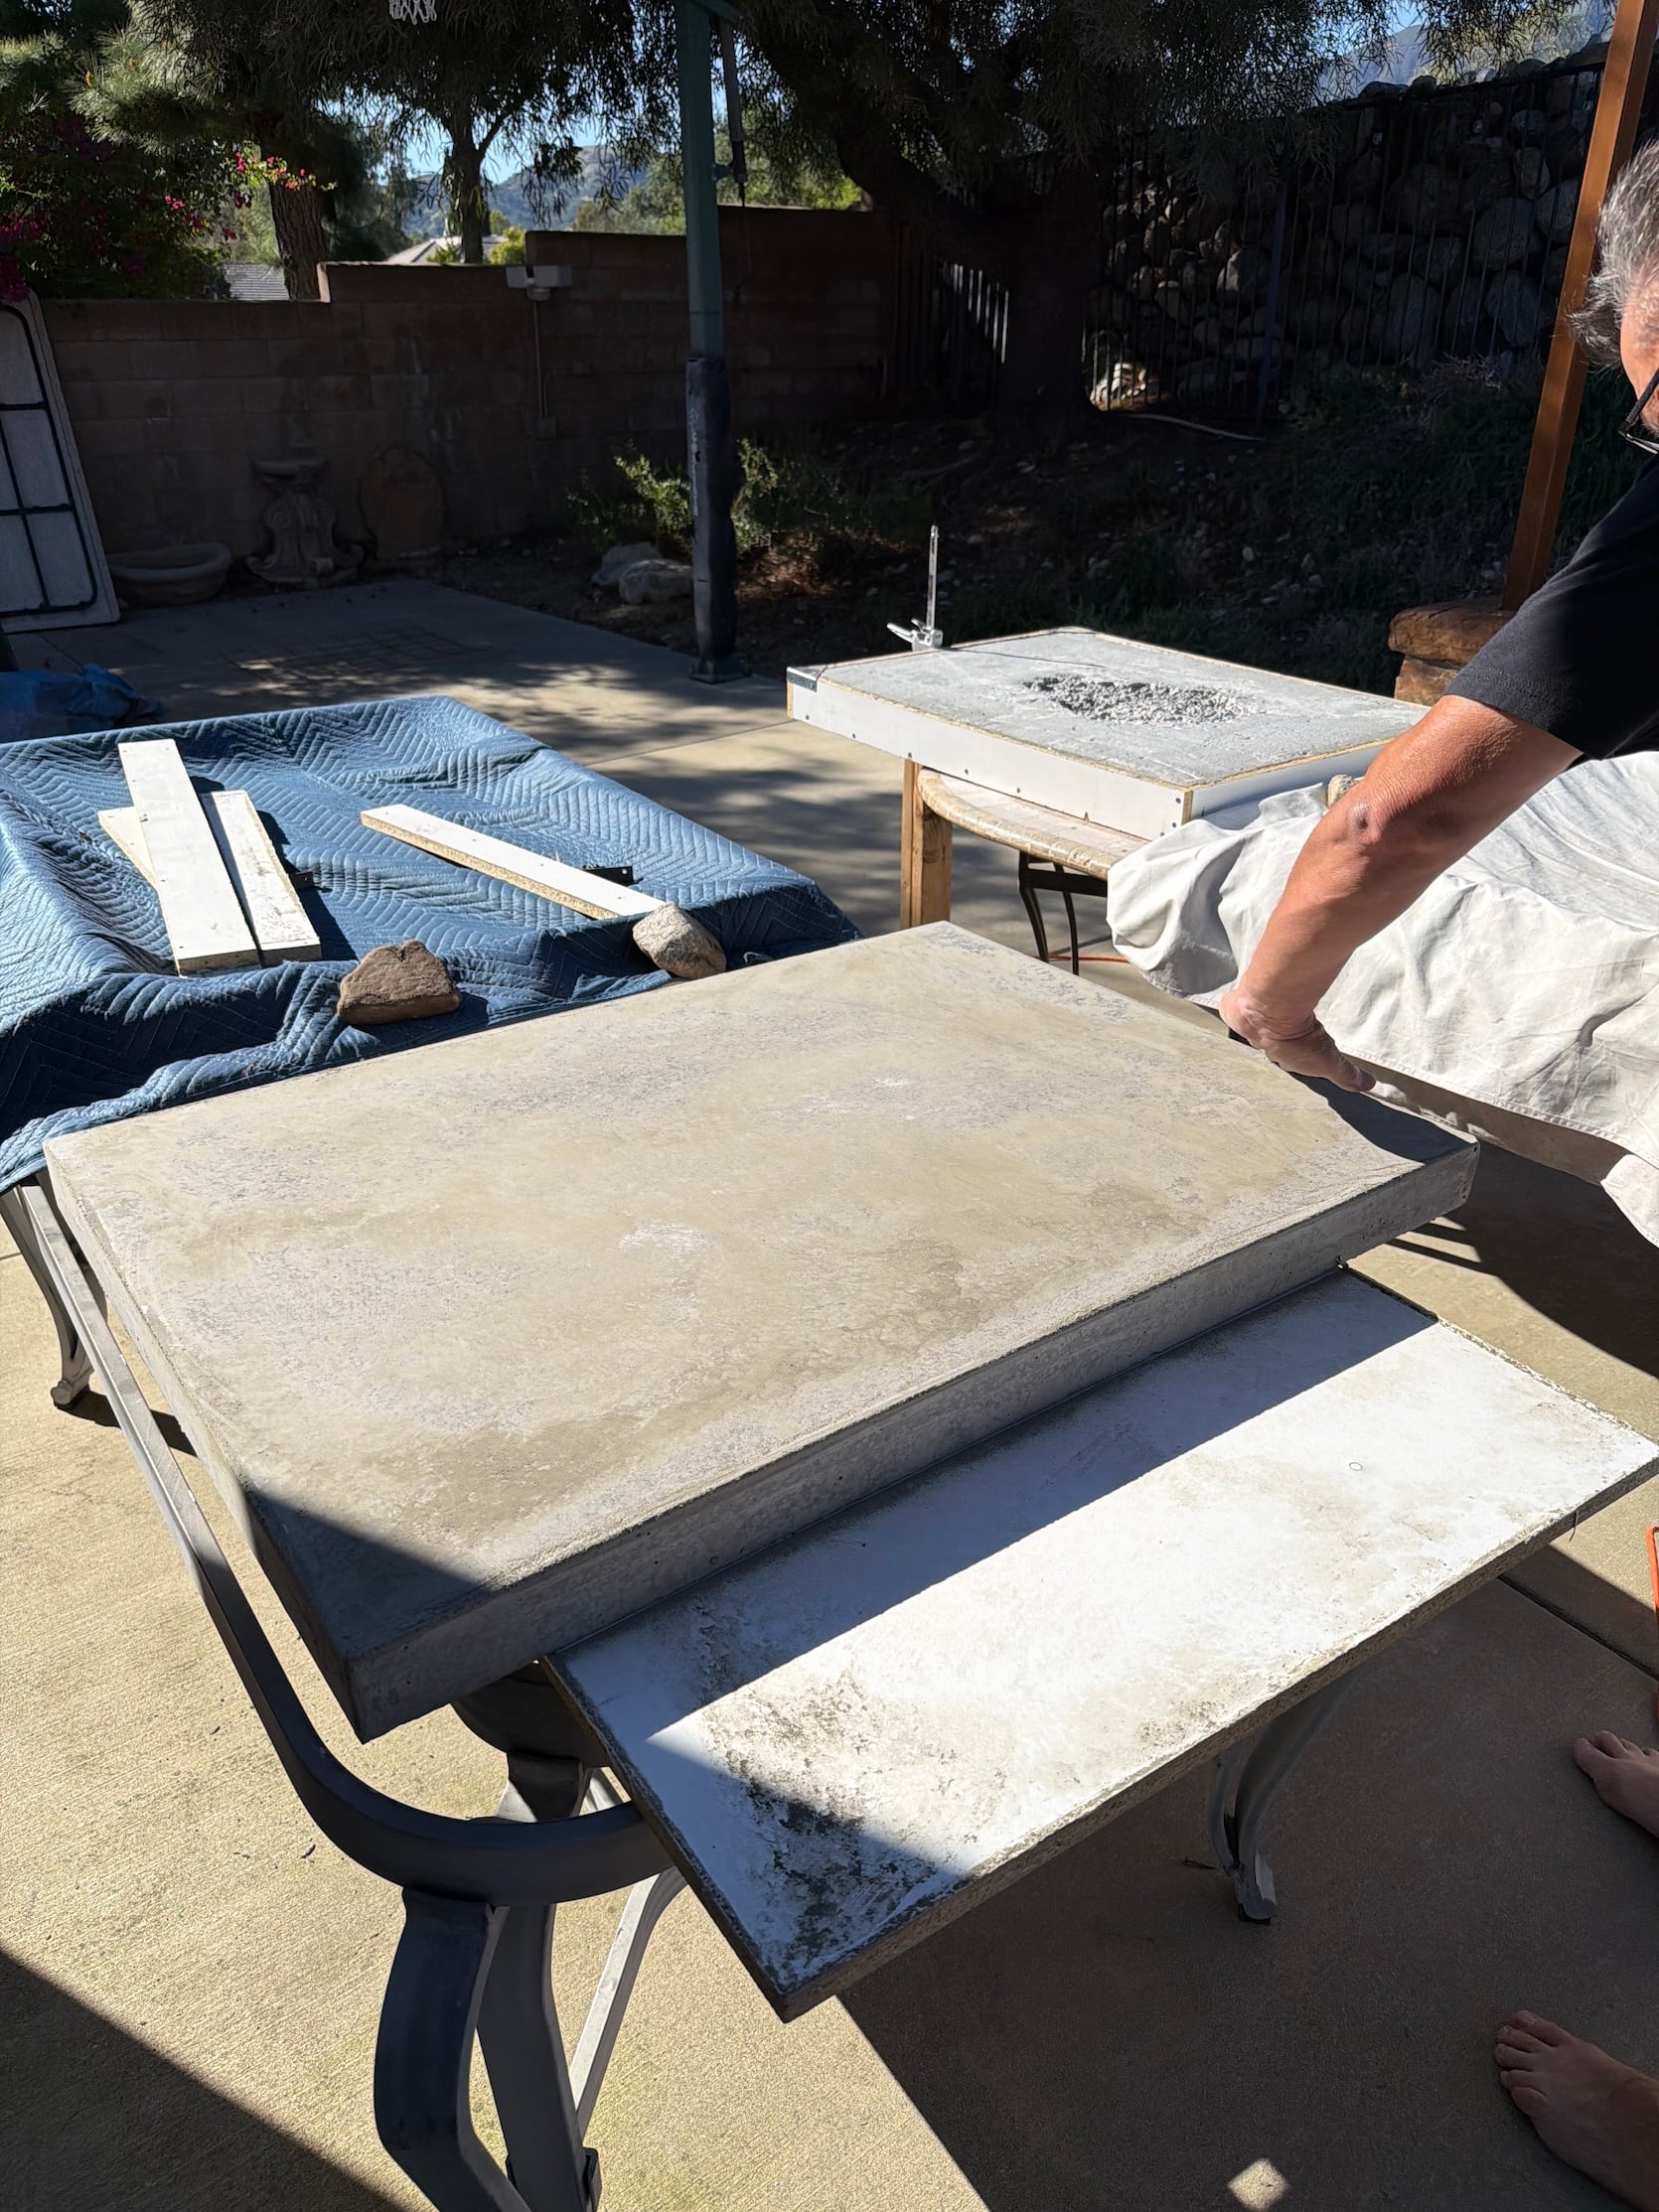
Austin’s dad went back to his workshop (his house), created some molds, and poured a few concrete slabs for the top. You are not ready for what’s about to happen next. Once they were dry, we got a call saying he was going to come drop them off and…
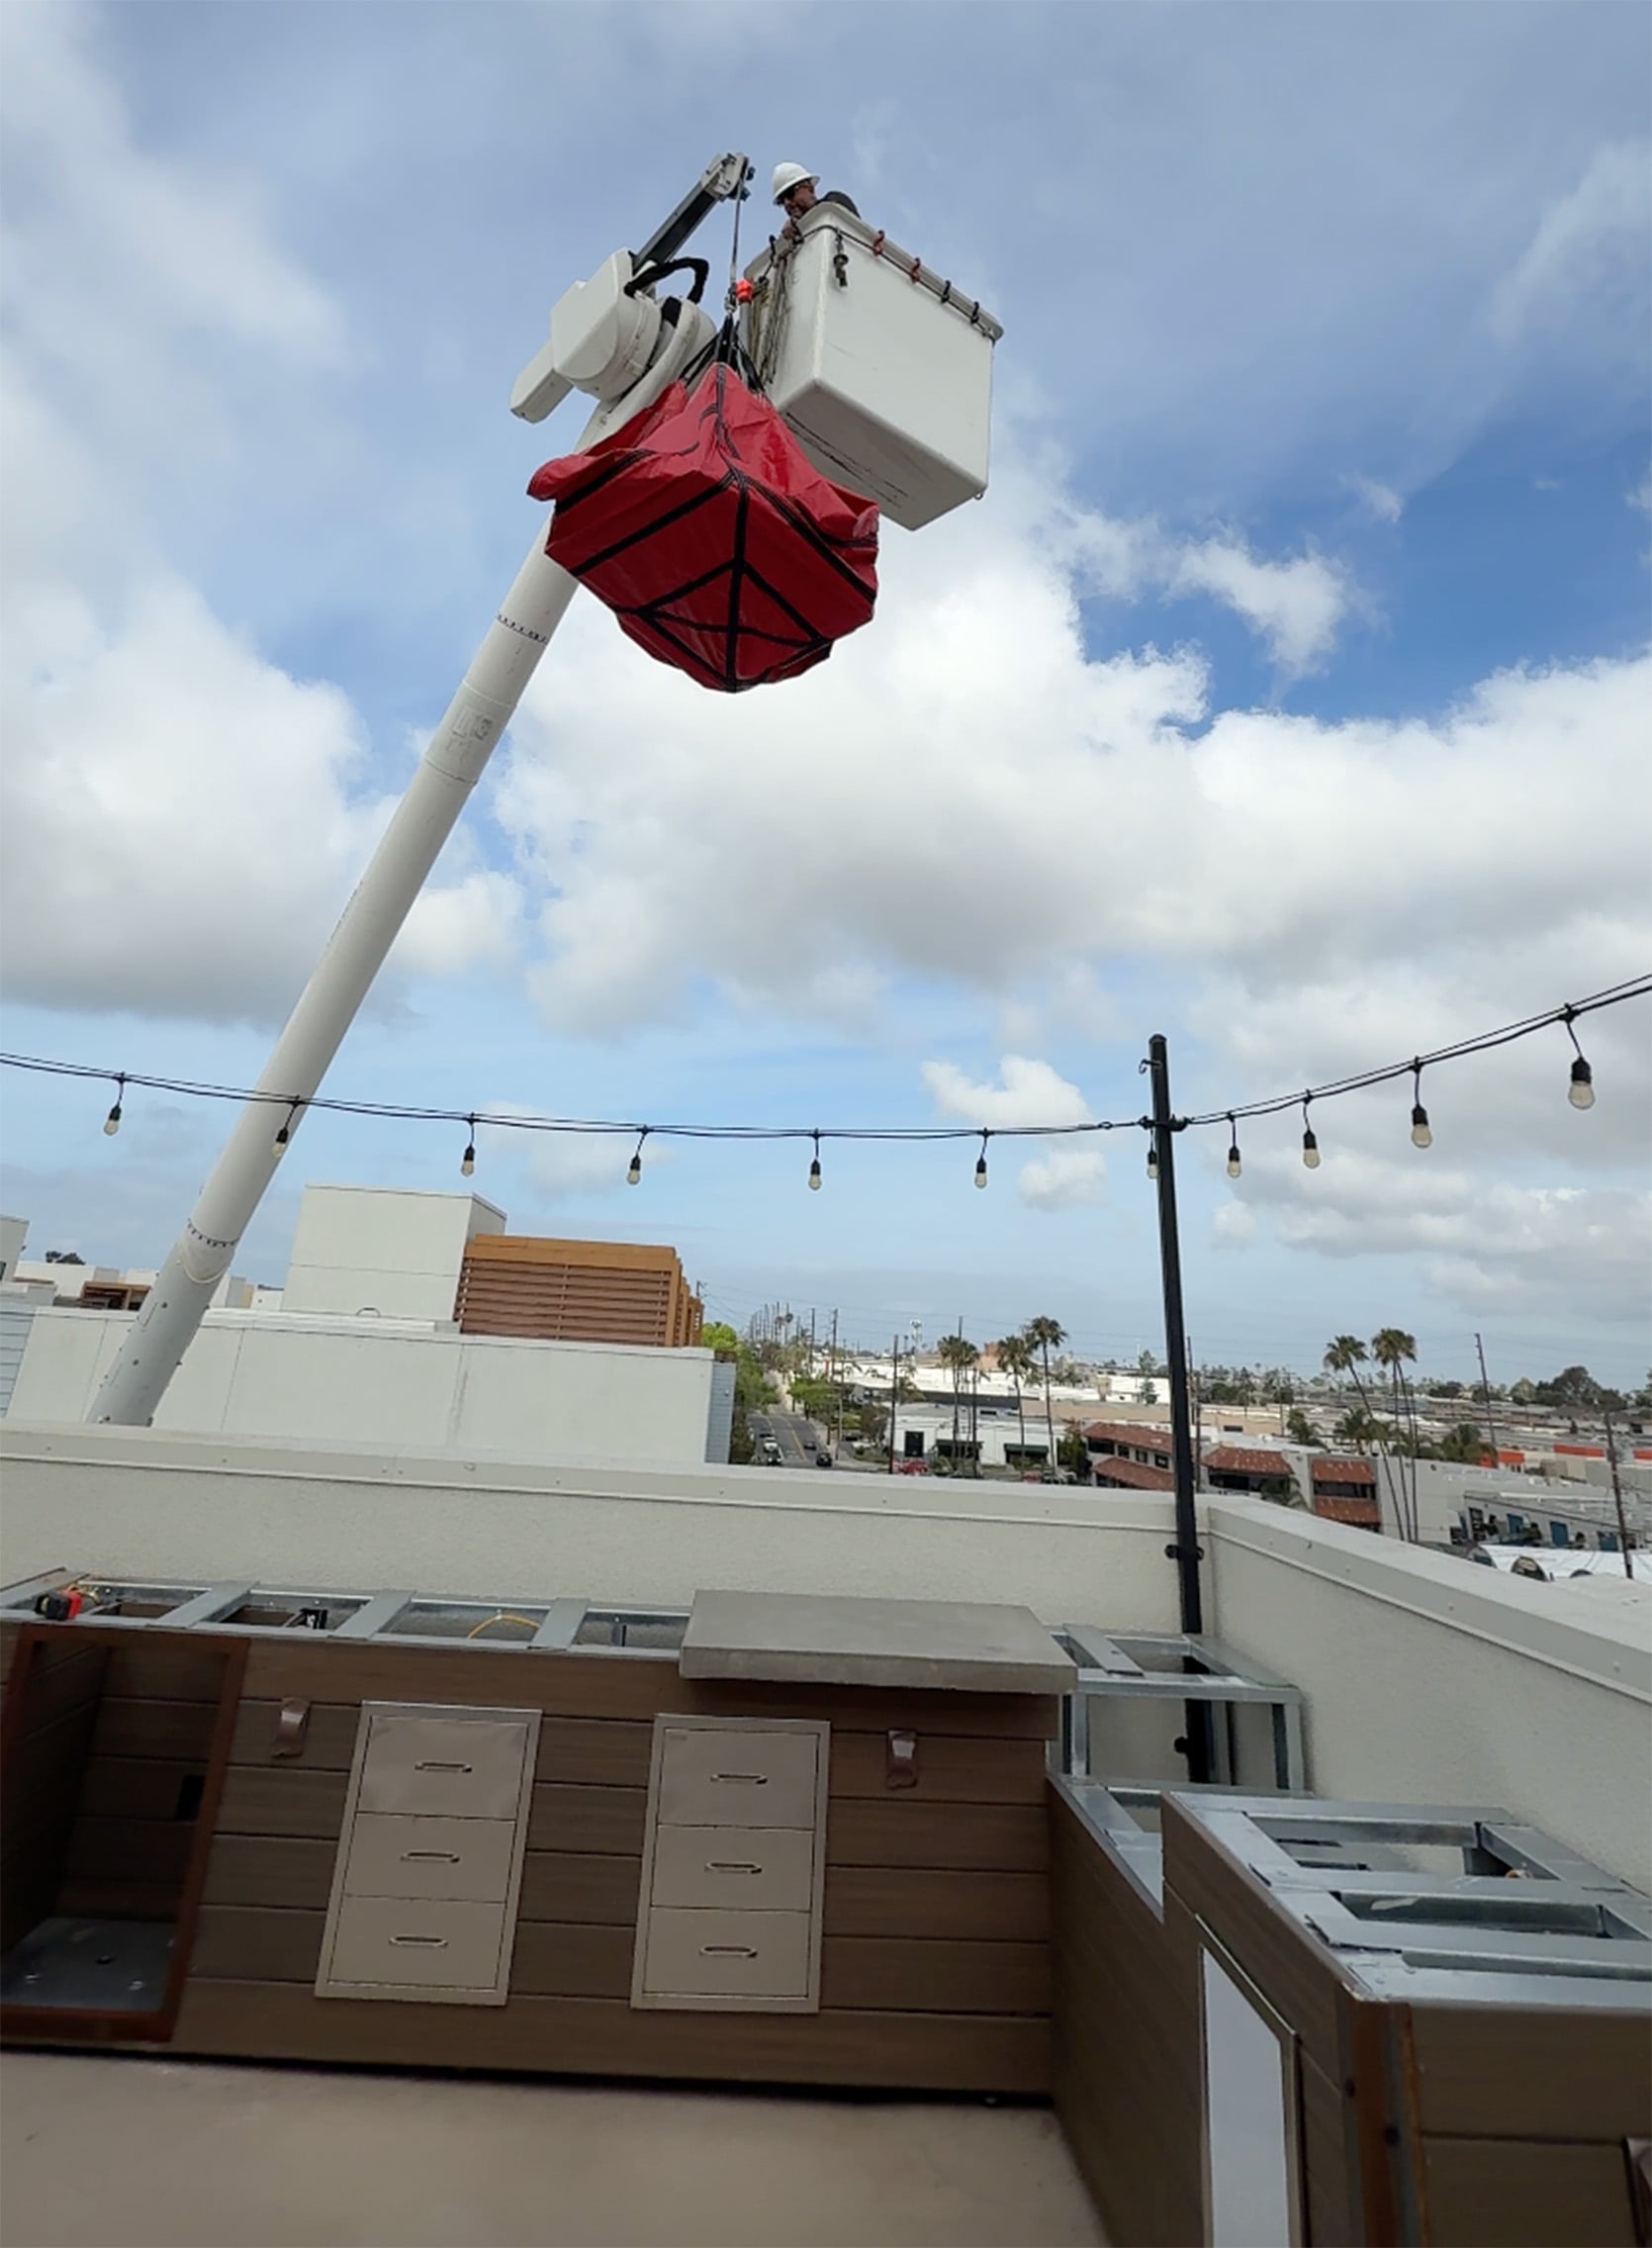
This crane shows up at our house 😂 Like WHAT?! This felt like a total fever dream to me, and looking back at the photos, I am still in shock. I guess when you work in construction, there are a few perks haha! This actually was a miracle because those slabs were HEAVY and carrying them up the stairs would have been a nightmare…crane to the rescue!
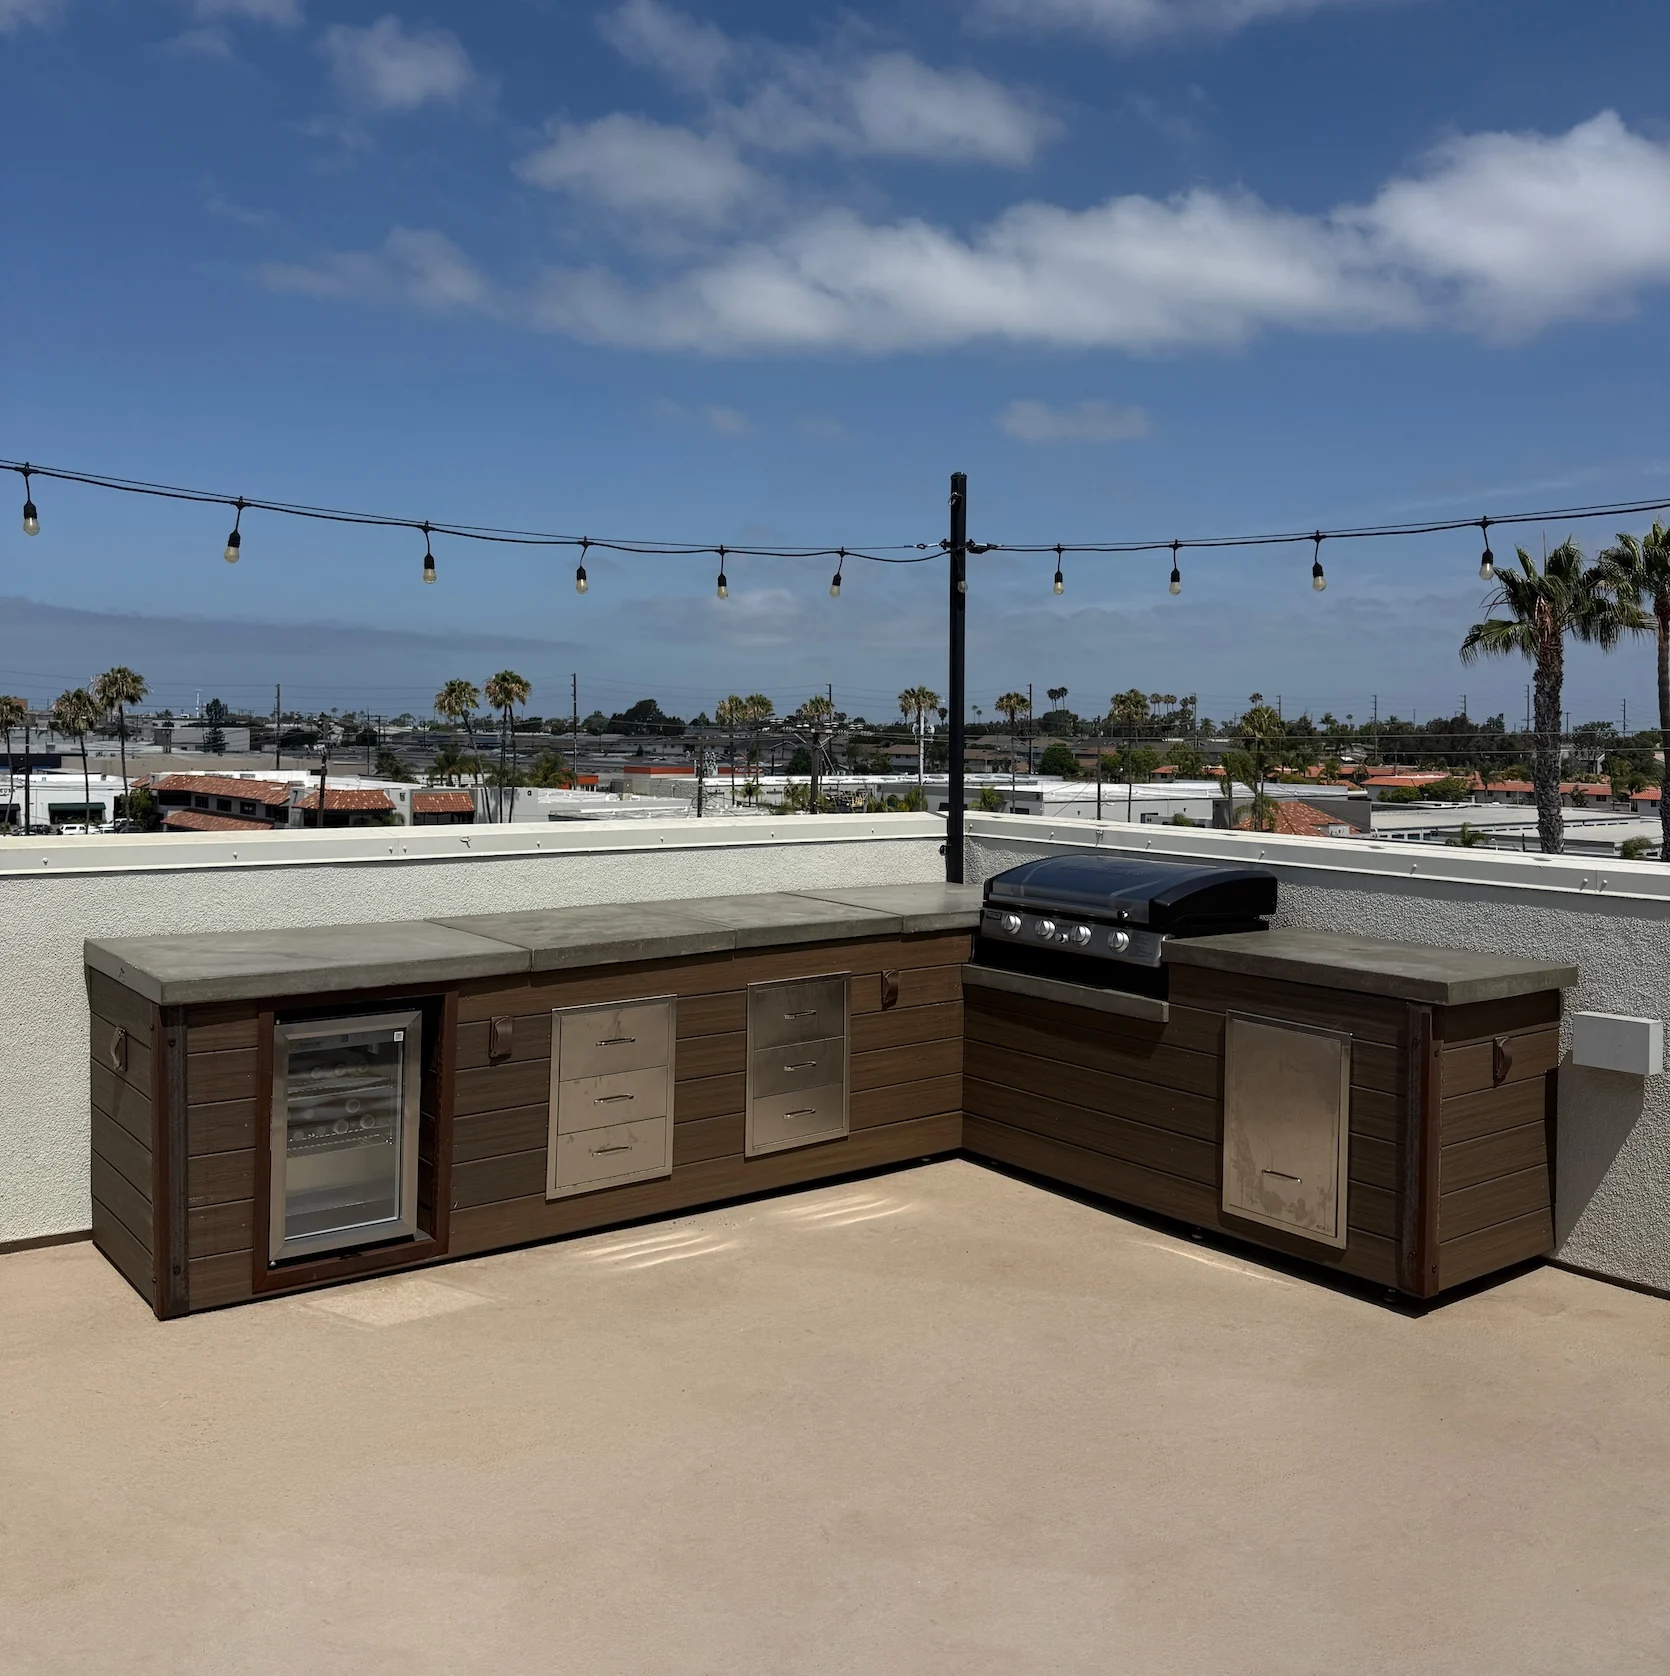
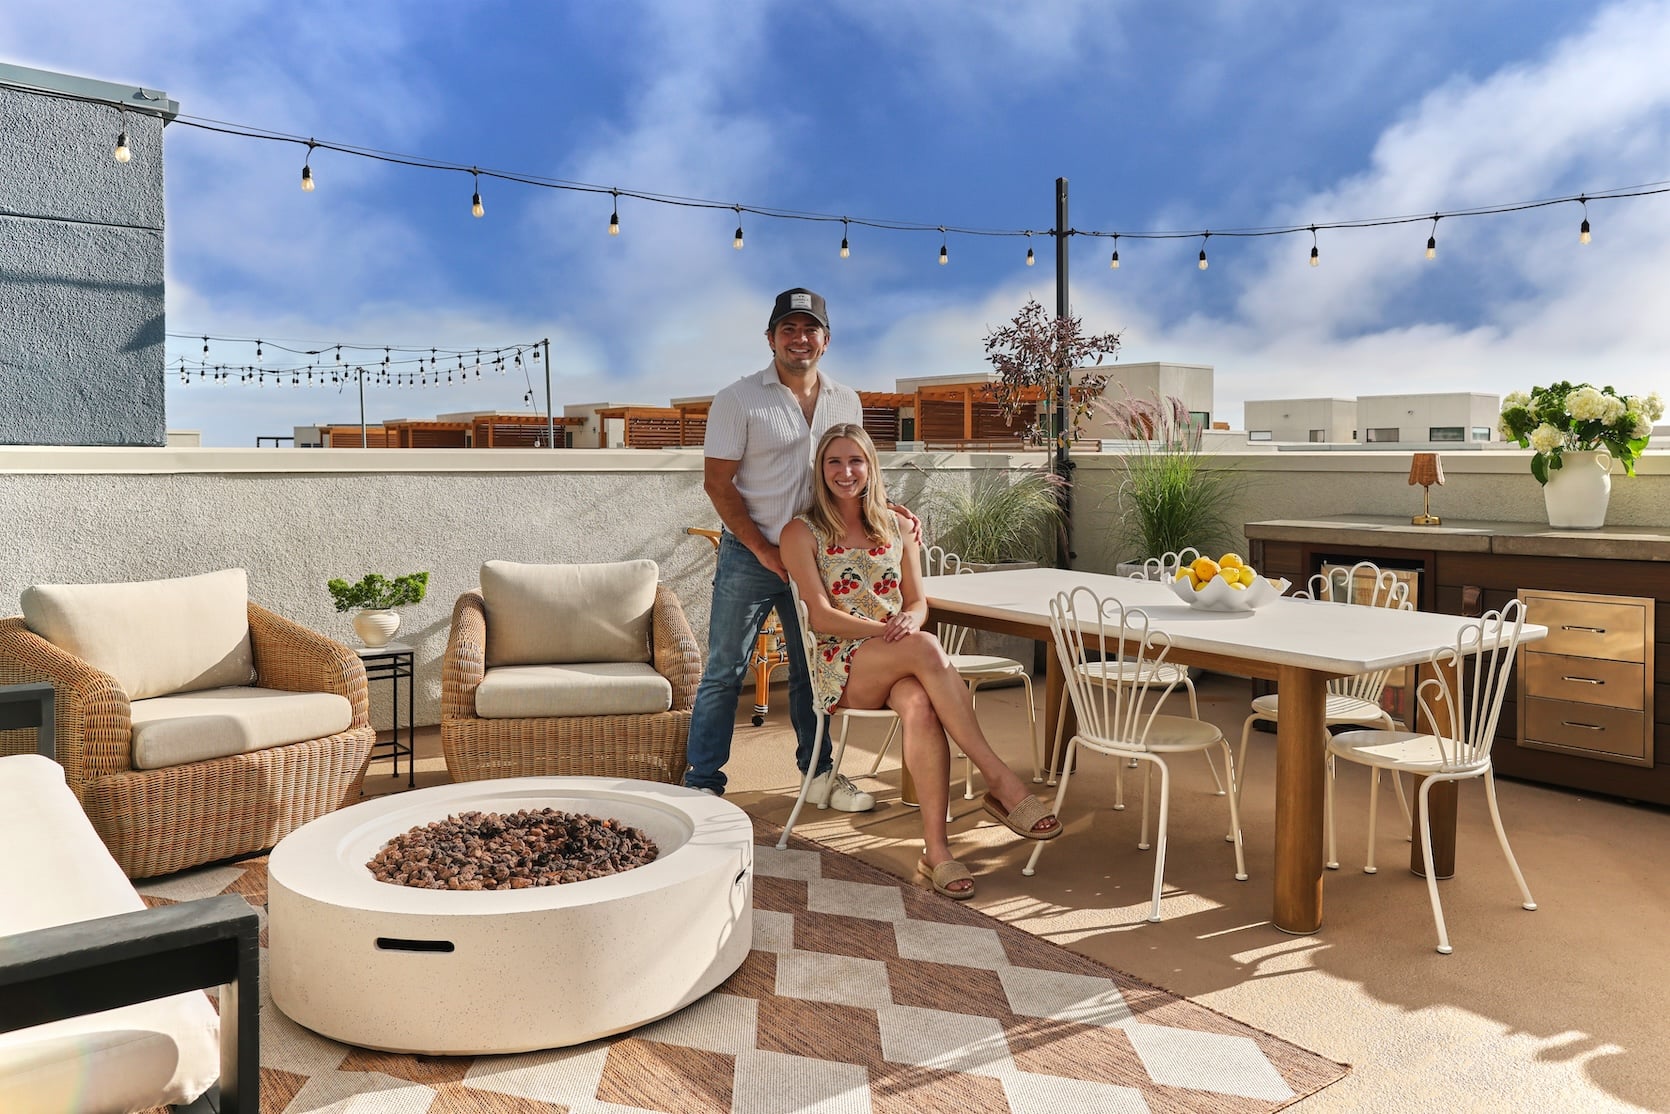
So after some cranes, trains, and automobiles (literally) – WE HAD AN OUTDOOR KITCHEN!! The fridge was put in, and the blackstone grill arrived (which is now completely out of stock or 4x the price…we got it on sale for $400 so timing is everything!) and WE ARE OBSESSED. Hot tip: GET THE BBQ COVER! We’re anal about protecting this grill, so this cover for the inside and this one for the outside have worked so well so far. I actually can’t believe how the outdoor kitchen area turned out – we use it ALL THE TIME. Once the grill area was complete, all we needed to add was some seating! That’s really where I came in…I was like, guys, I got this. The two zones left to add were: dining area and a fire pit…so cue the pretty photos because it wouldn’t be a reveal post without them!!
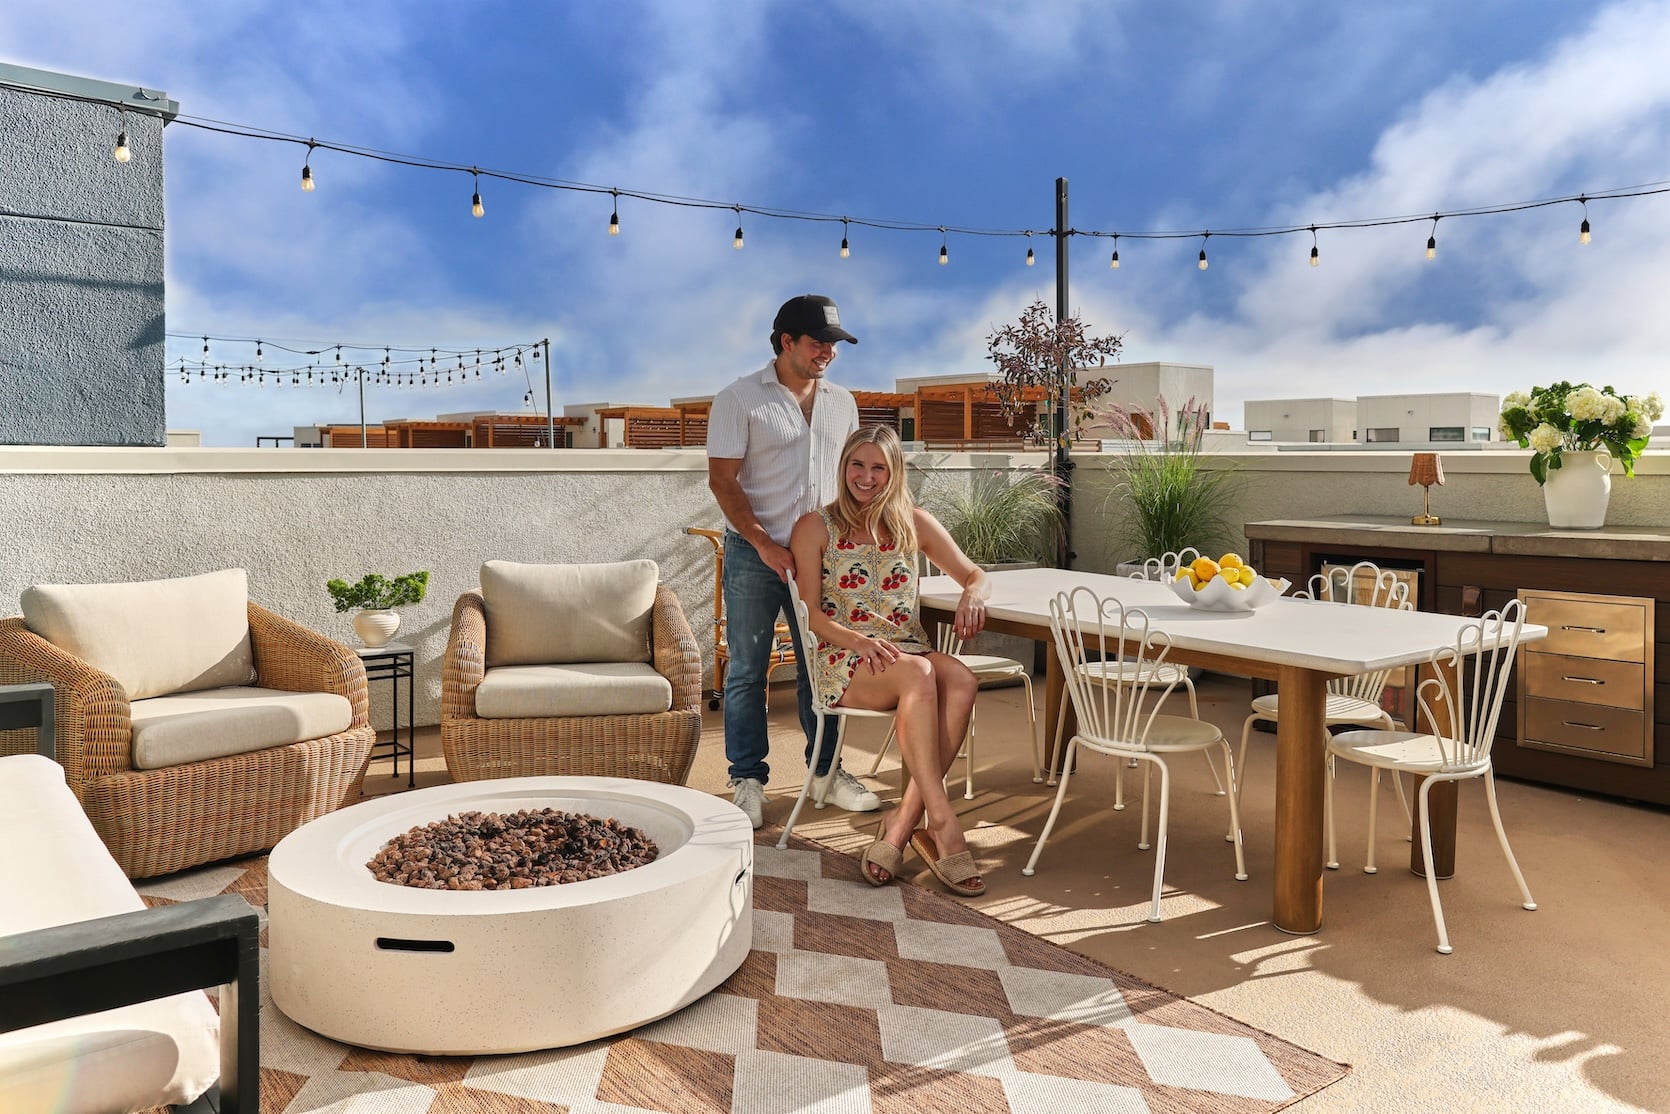
Swivel Chairs | Fire Pit | Rug | Dining Table | Accent Table | Shell Bowl | Sofa | Bar Cart | Cordless Lamp | Dining Chairs
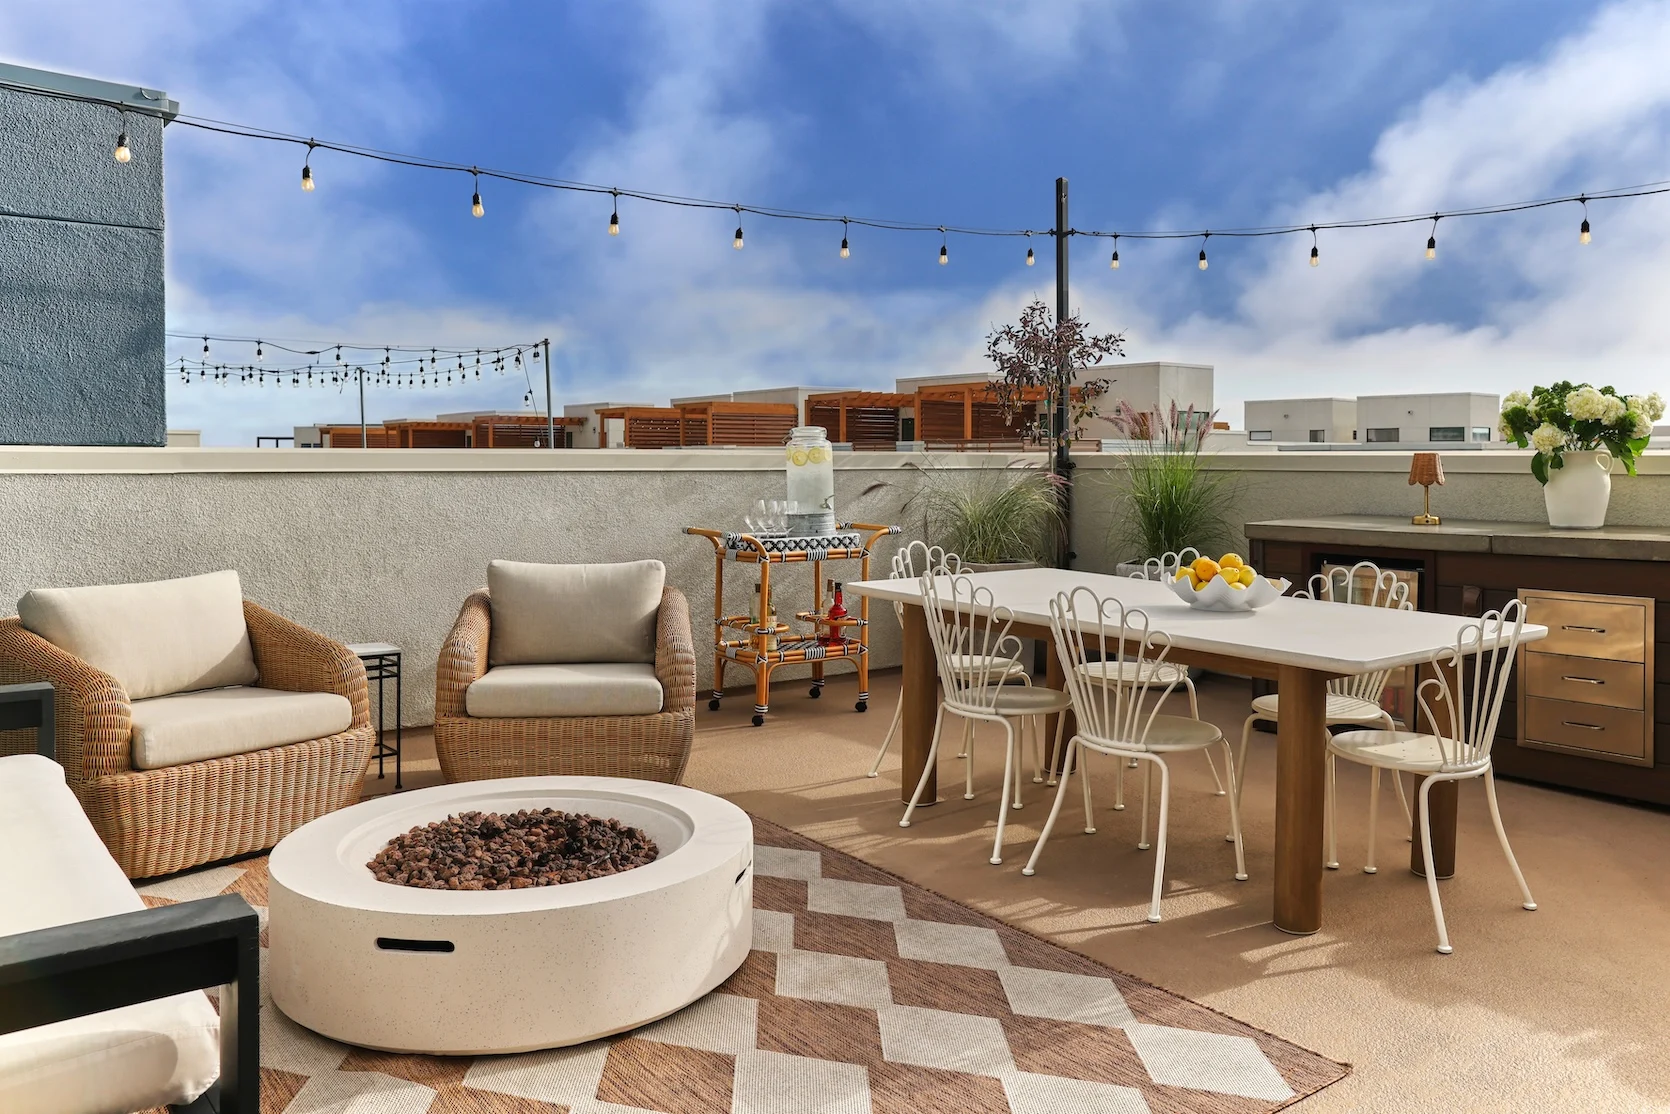
WE COULD NOT BE MORE THRILLED!! I’ve never had an outdoor space of my own that’s big enough to entertain, and it really is so special. Our whole summer has pretty much been spent up here, and I am not mad about it! The dining table and chairs were the last thing we added to the space, but they made it WAY more functional considering how much we cook out here. The table was a splurge from West Elm, and the chairs were super affordable from Target (sadly not available anymore?? Like Target, PLEASE put them back in stock!) They’re also stackable, which is awesome if we want to put them away after we have our larger parties.
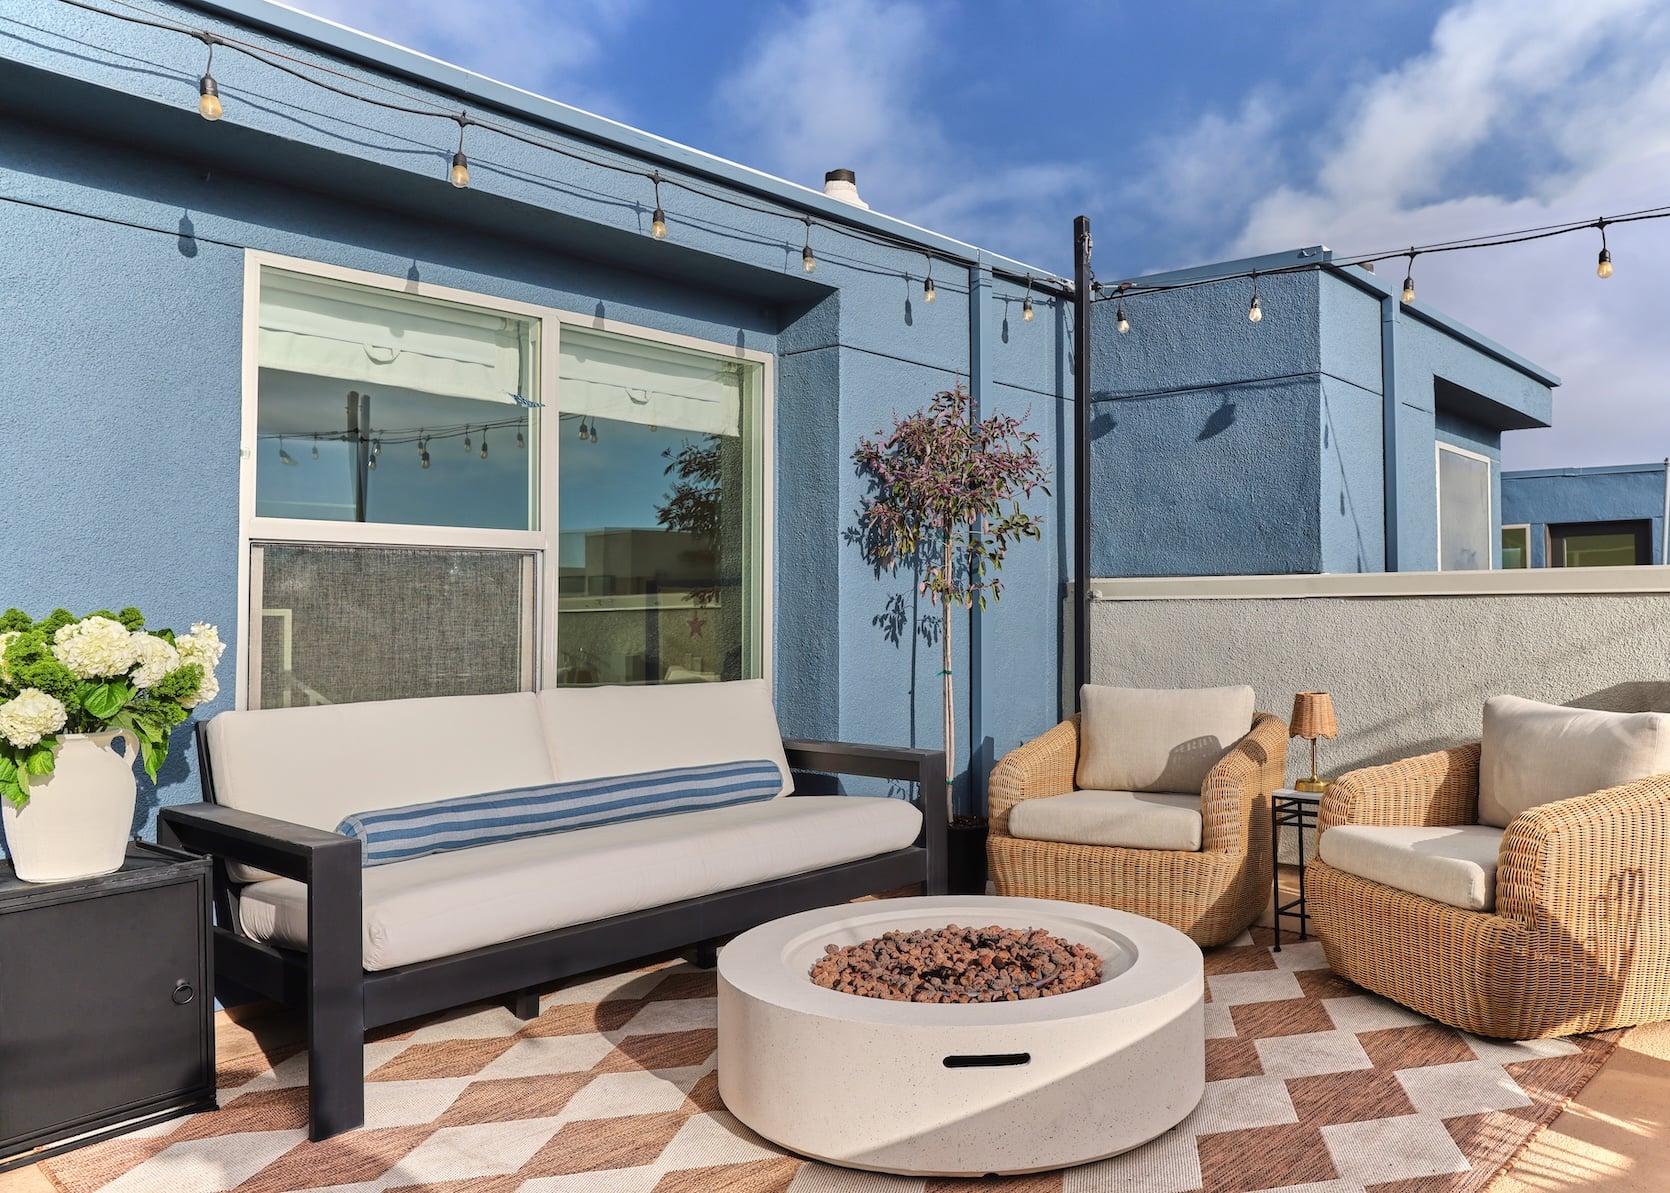
Swivel Chairs | Fire Pit | Rug | Accent Table | Sofa | Cordless Lamp | Propane Tank Side Table
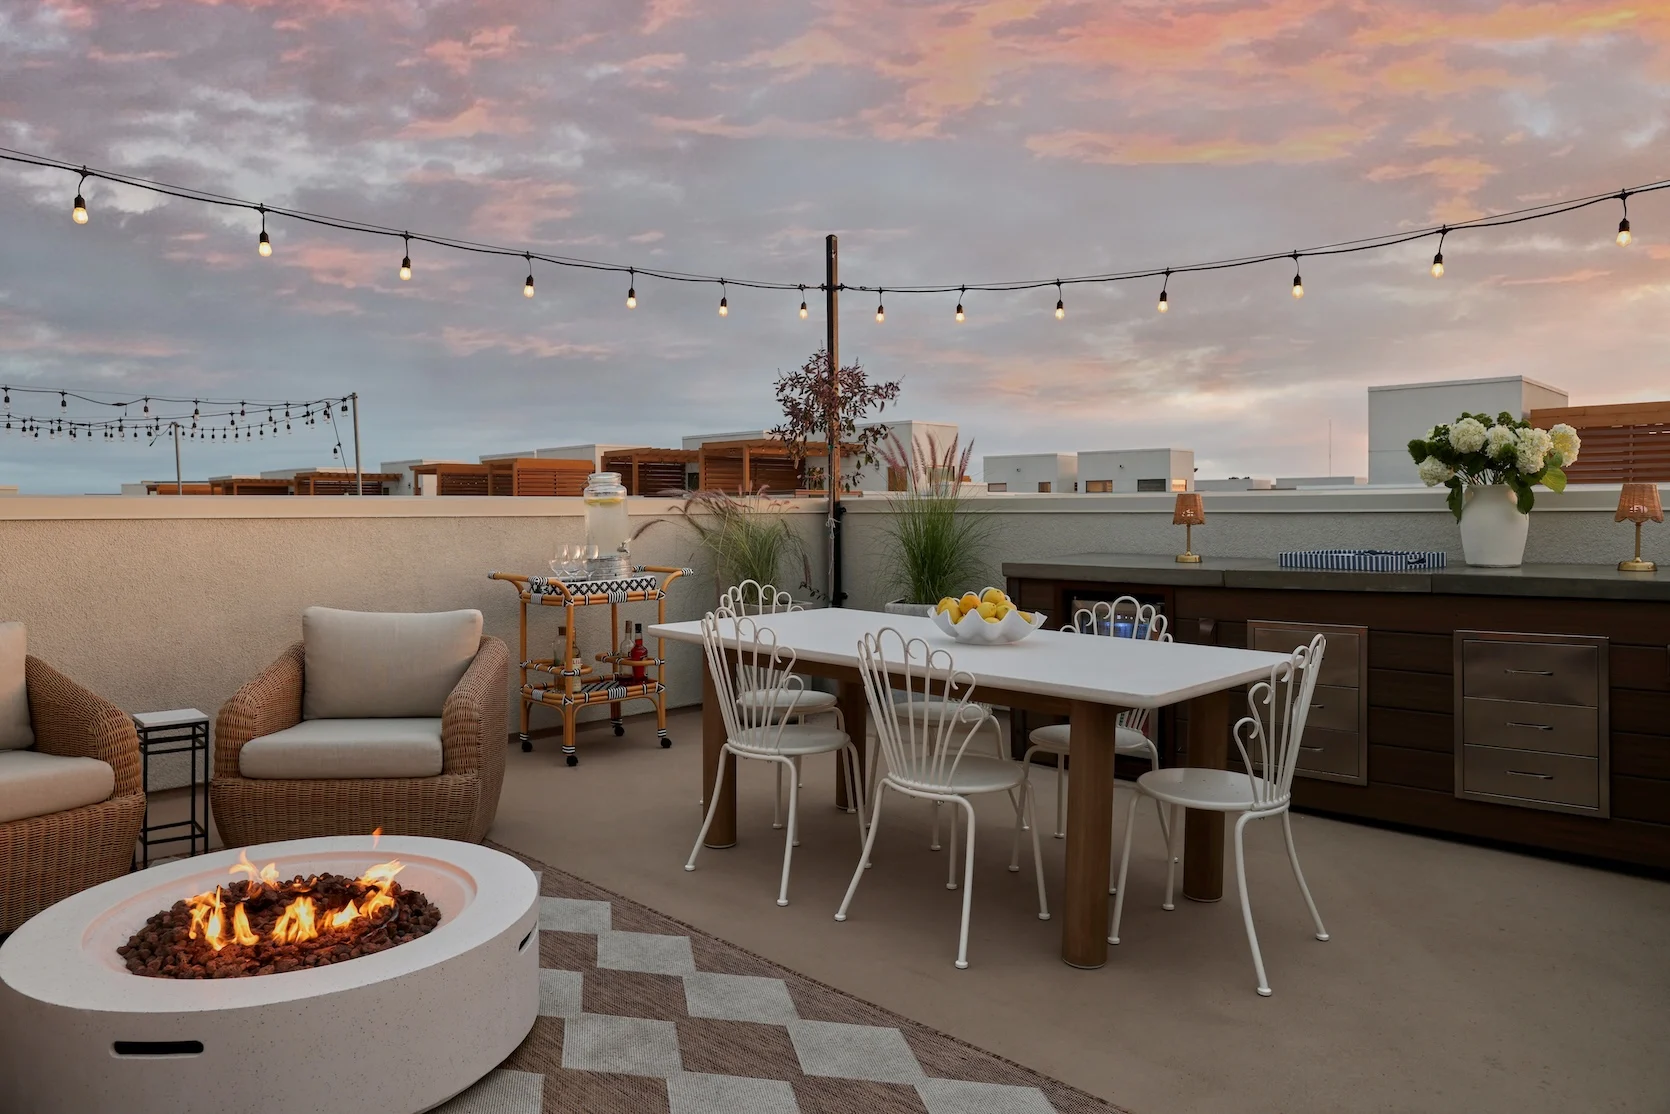
Let’s take a look at our little fire pit area, shall we? You might remember the sofa from the before photos; Austin already had it before I moved in (pro-tip: they got it at the Pottery Barn outlet for a steal – so again, always be sure to check the outlets if you’re looking for a great deal!) You also might remember that the cushions were absolutely nasty…Well, I looked up the cost of a replacement, realized you HAD to buy the whole cushion and couldn’t just get a cover, so it was going to be $700 to replace them, then I immediately went on the longest journey to get them clean again…and you guys…IT WORKED! Well, for the most part. There’s still a little bit of slight discoloration, but literally no one ever notices. We store all of the cushions inside now so they should last a very long time 🙂 The rest of the product is all super affordable – I did a Wayfair partnership earlier this summer (which was SO COOL!) and was able to furnish it with some of my DREAM pieces! The fire pit is one of the more cost-effective ones I’ve seen, and we absolutely love it. It’s also hollow on the inside, so it’s not CRAZY heavy (which was great for us moving it upstairs), but it’s still heavy enough where it’s certainly not going to blow away. We cut a small hole in the rug and ran the propane cord underneath. It’s hardly noticeable and is a great solution if you want a fire pit but can’t run a gas line. The propane side table is the best because it has a door that opens to the front as opposed to the ones you have to lift up every time that are crazy heavy. It’s the little things!
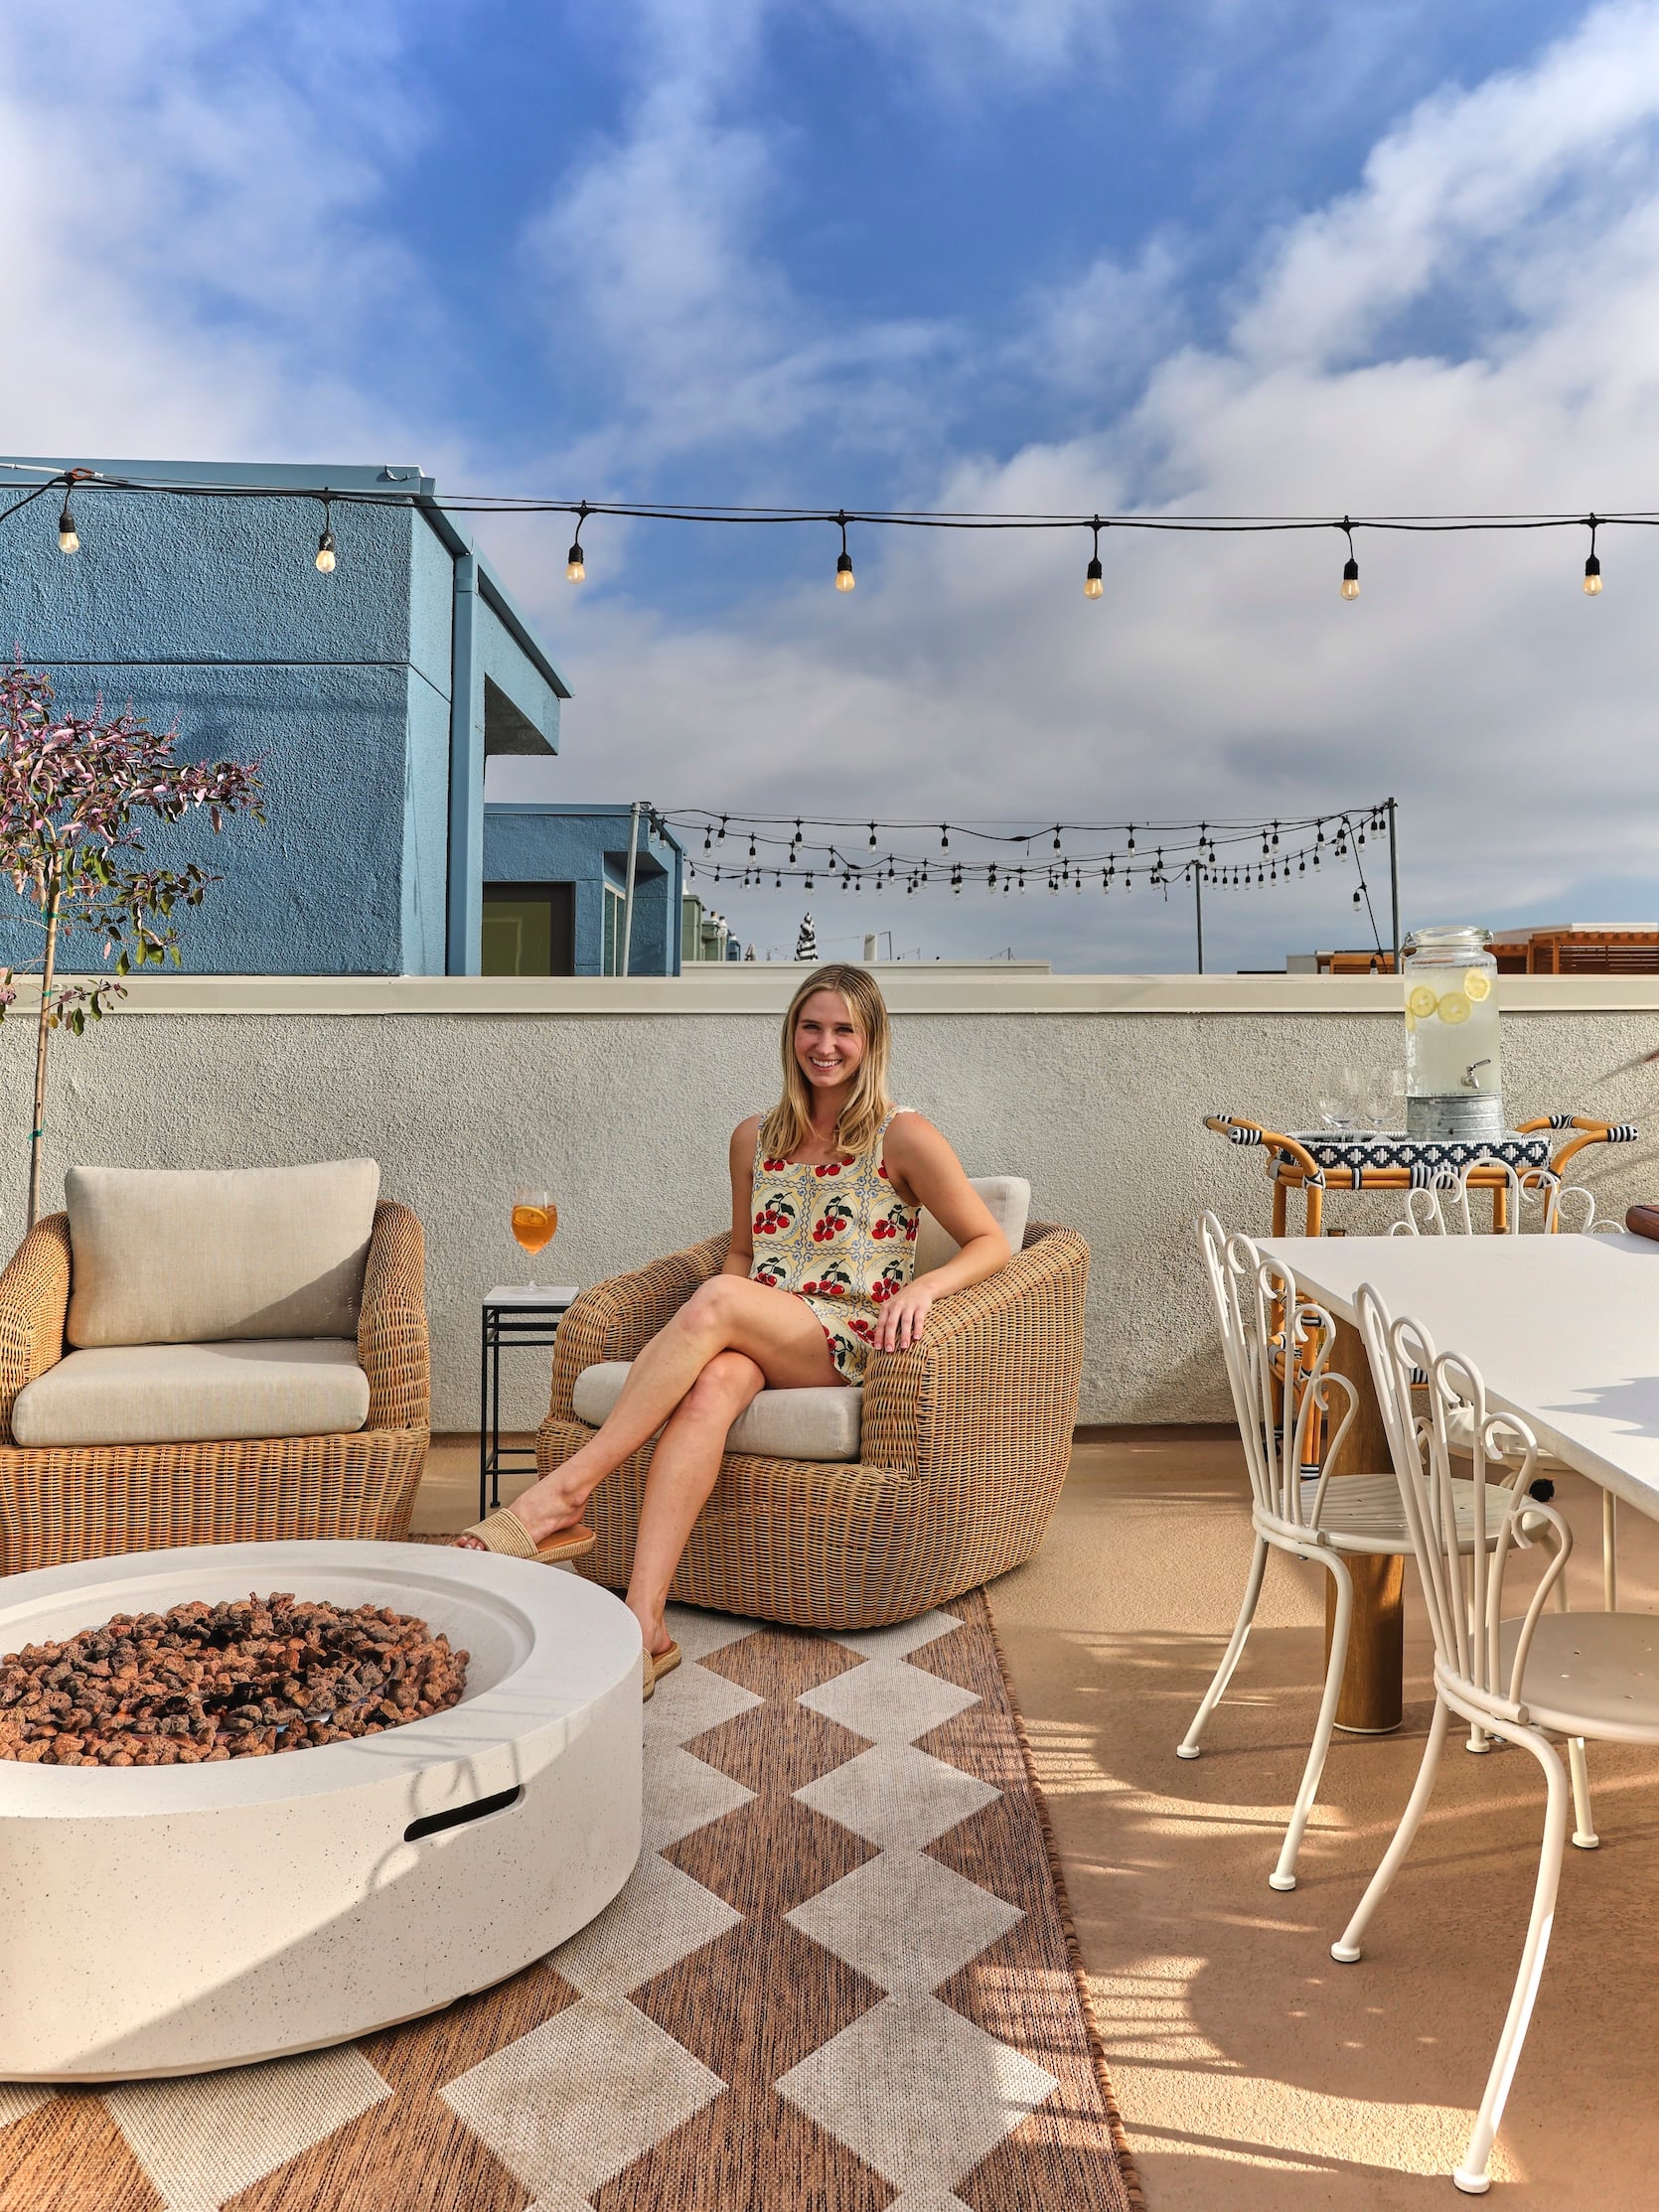
Swivel Chairs | Fire Pit | Rug | Dining Table | Accent Table | Bar Cart | Dining Chairs
Like I said, there’s not a crazy amount of space up here, but it’s the perfect amount of space to fit everything we need. I’ve called this “roof summer” because for the last 2 months all we’ve been doing is hosting events with like 10-15 people at a time, and the space honestly works GREAT. People end up spinning the dining chairs around, and we can form a big circle around the fire pit and make s’mores or just drink our slushy drinks and have a blast.
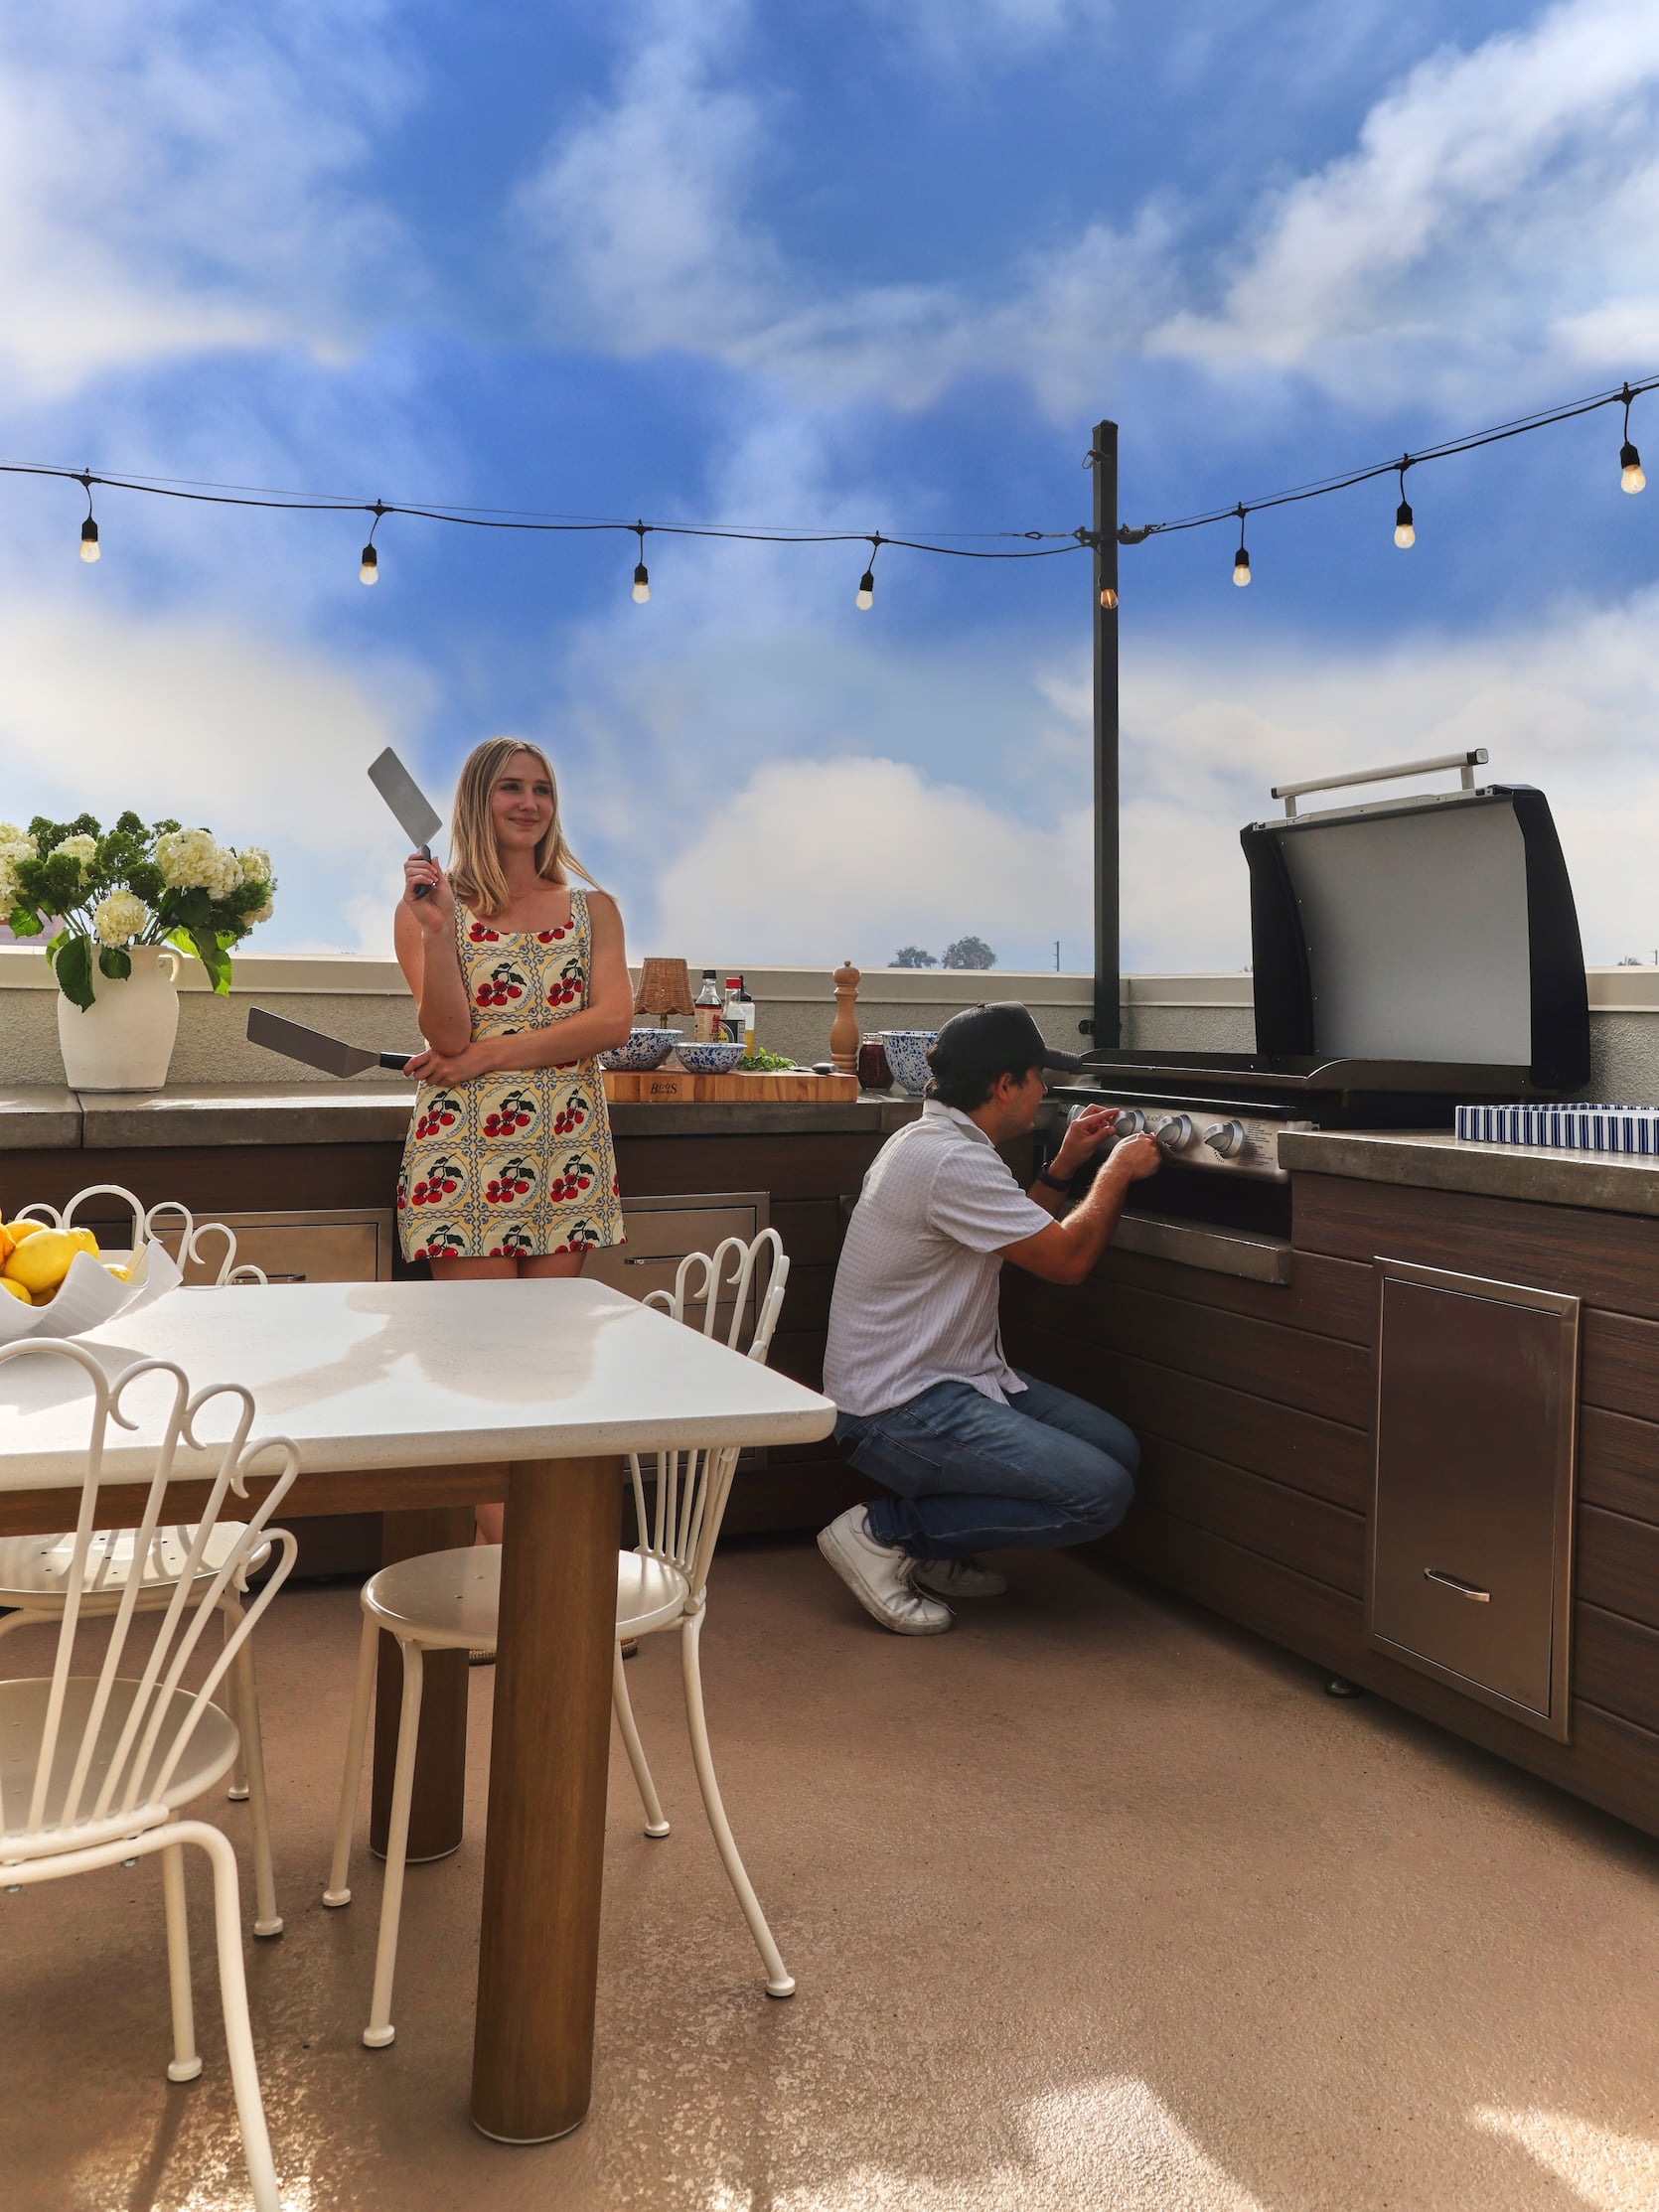
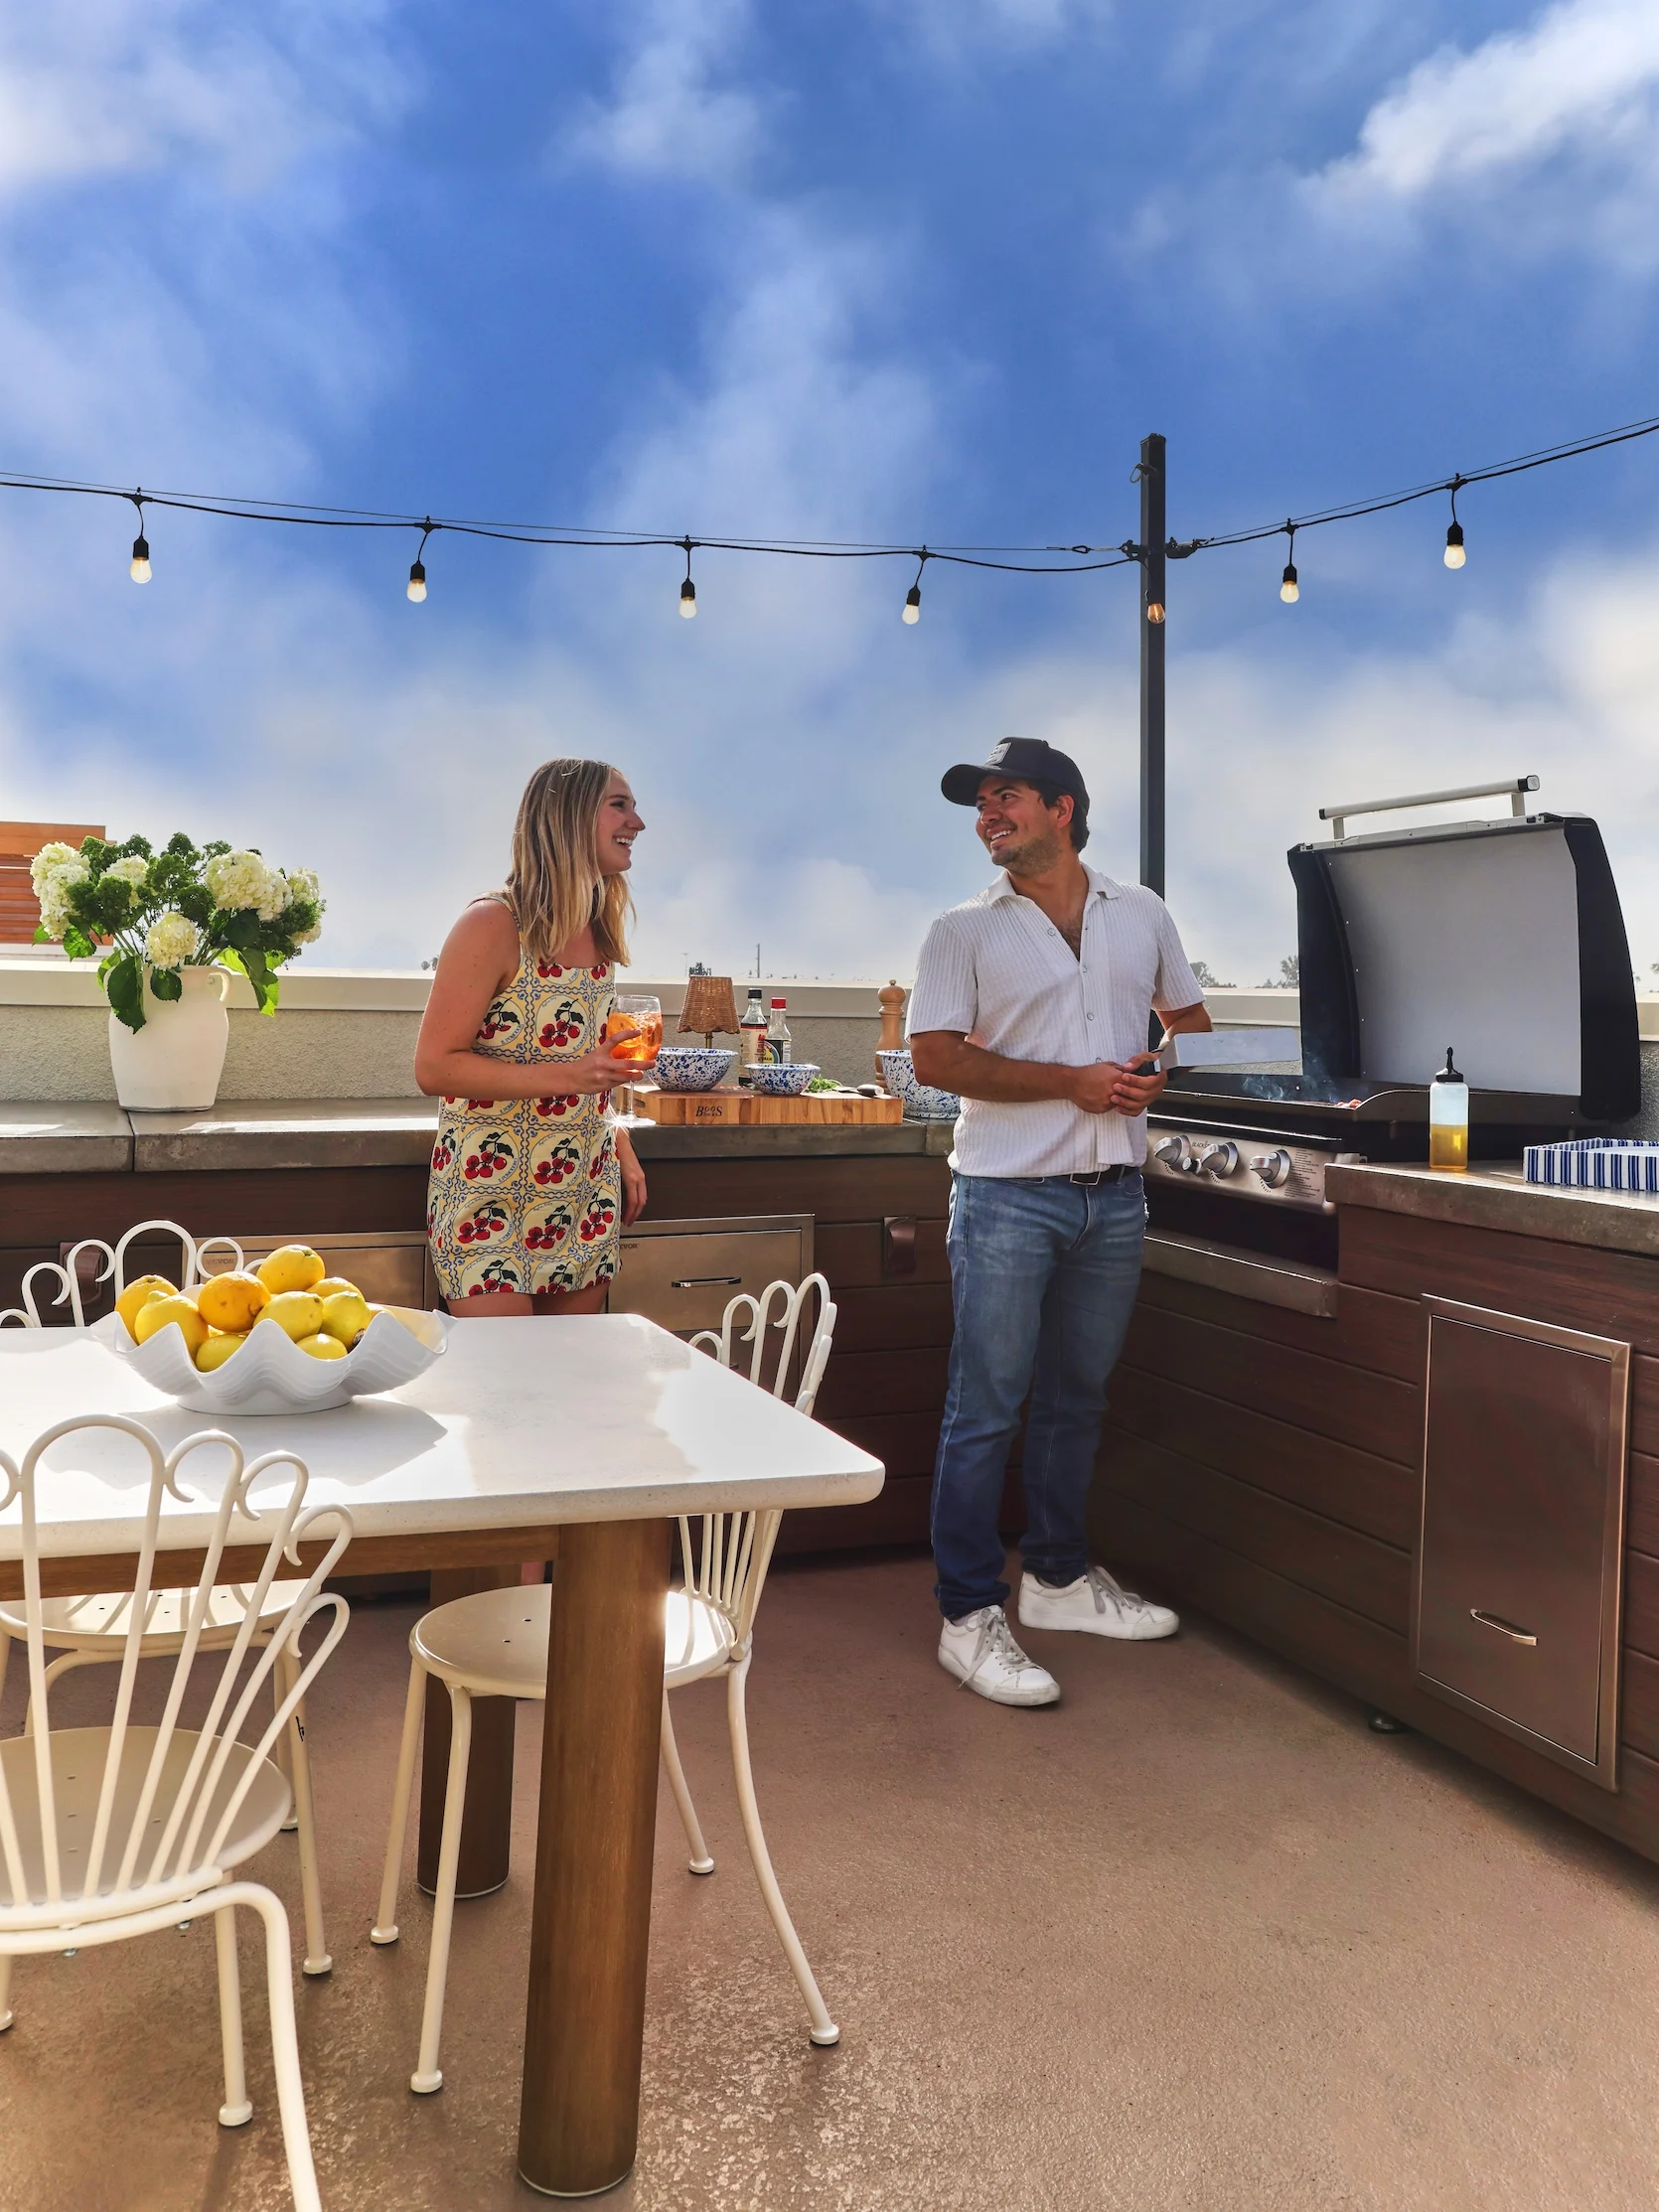
We cook up here all. the. time. Austin is an incredible cook – he is always cooking up the most insane dishes from steak au poivre to sushi to literally the best lasagna I have ever had. There are A TON of things you can do on the Blackstone griddle too, so we’ve had taco nights, smash burgers (of course) and one of our favs…
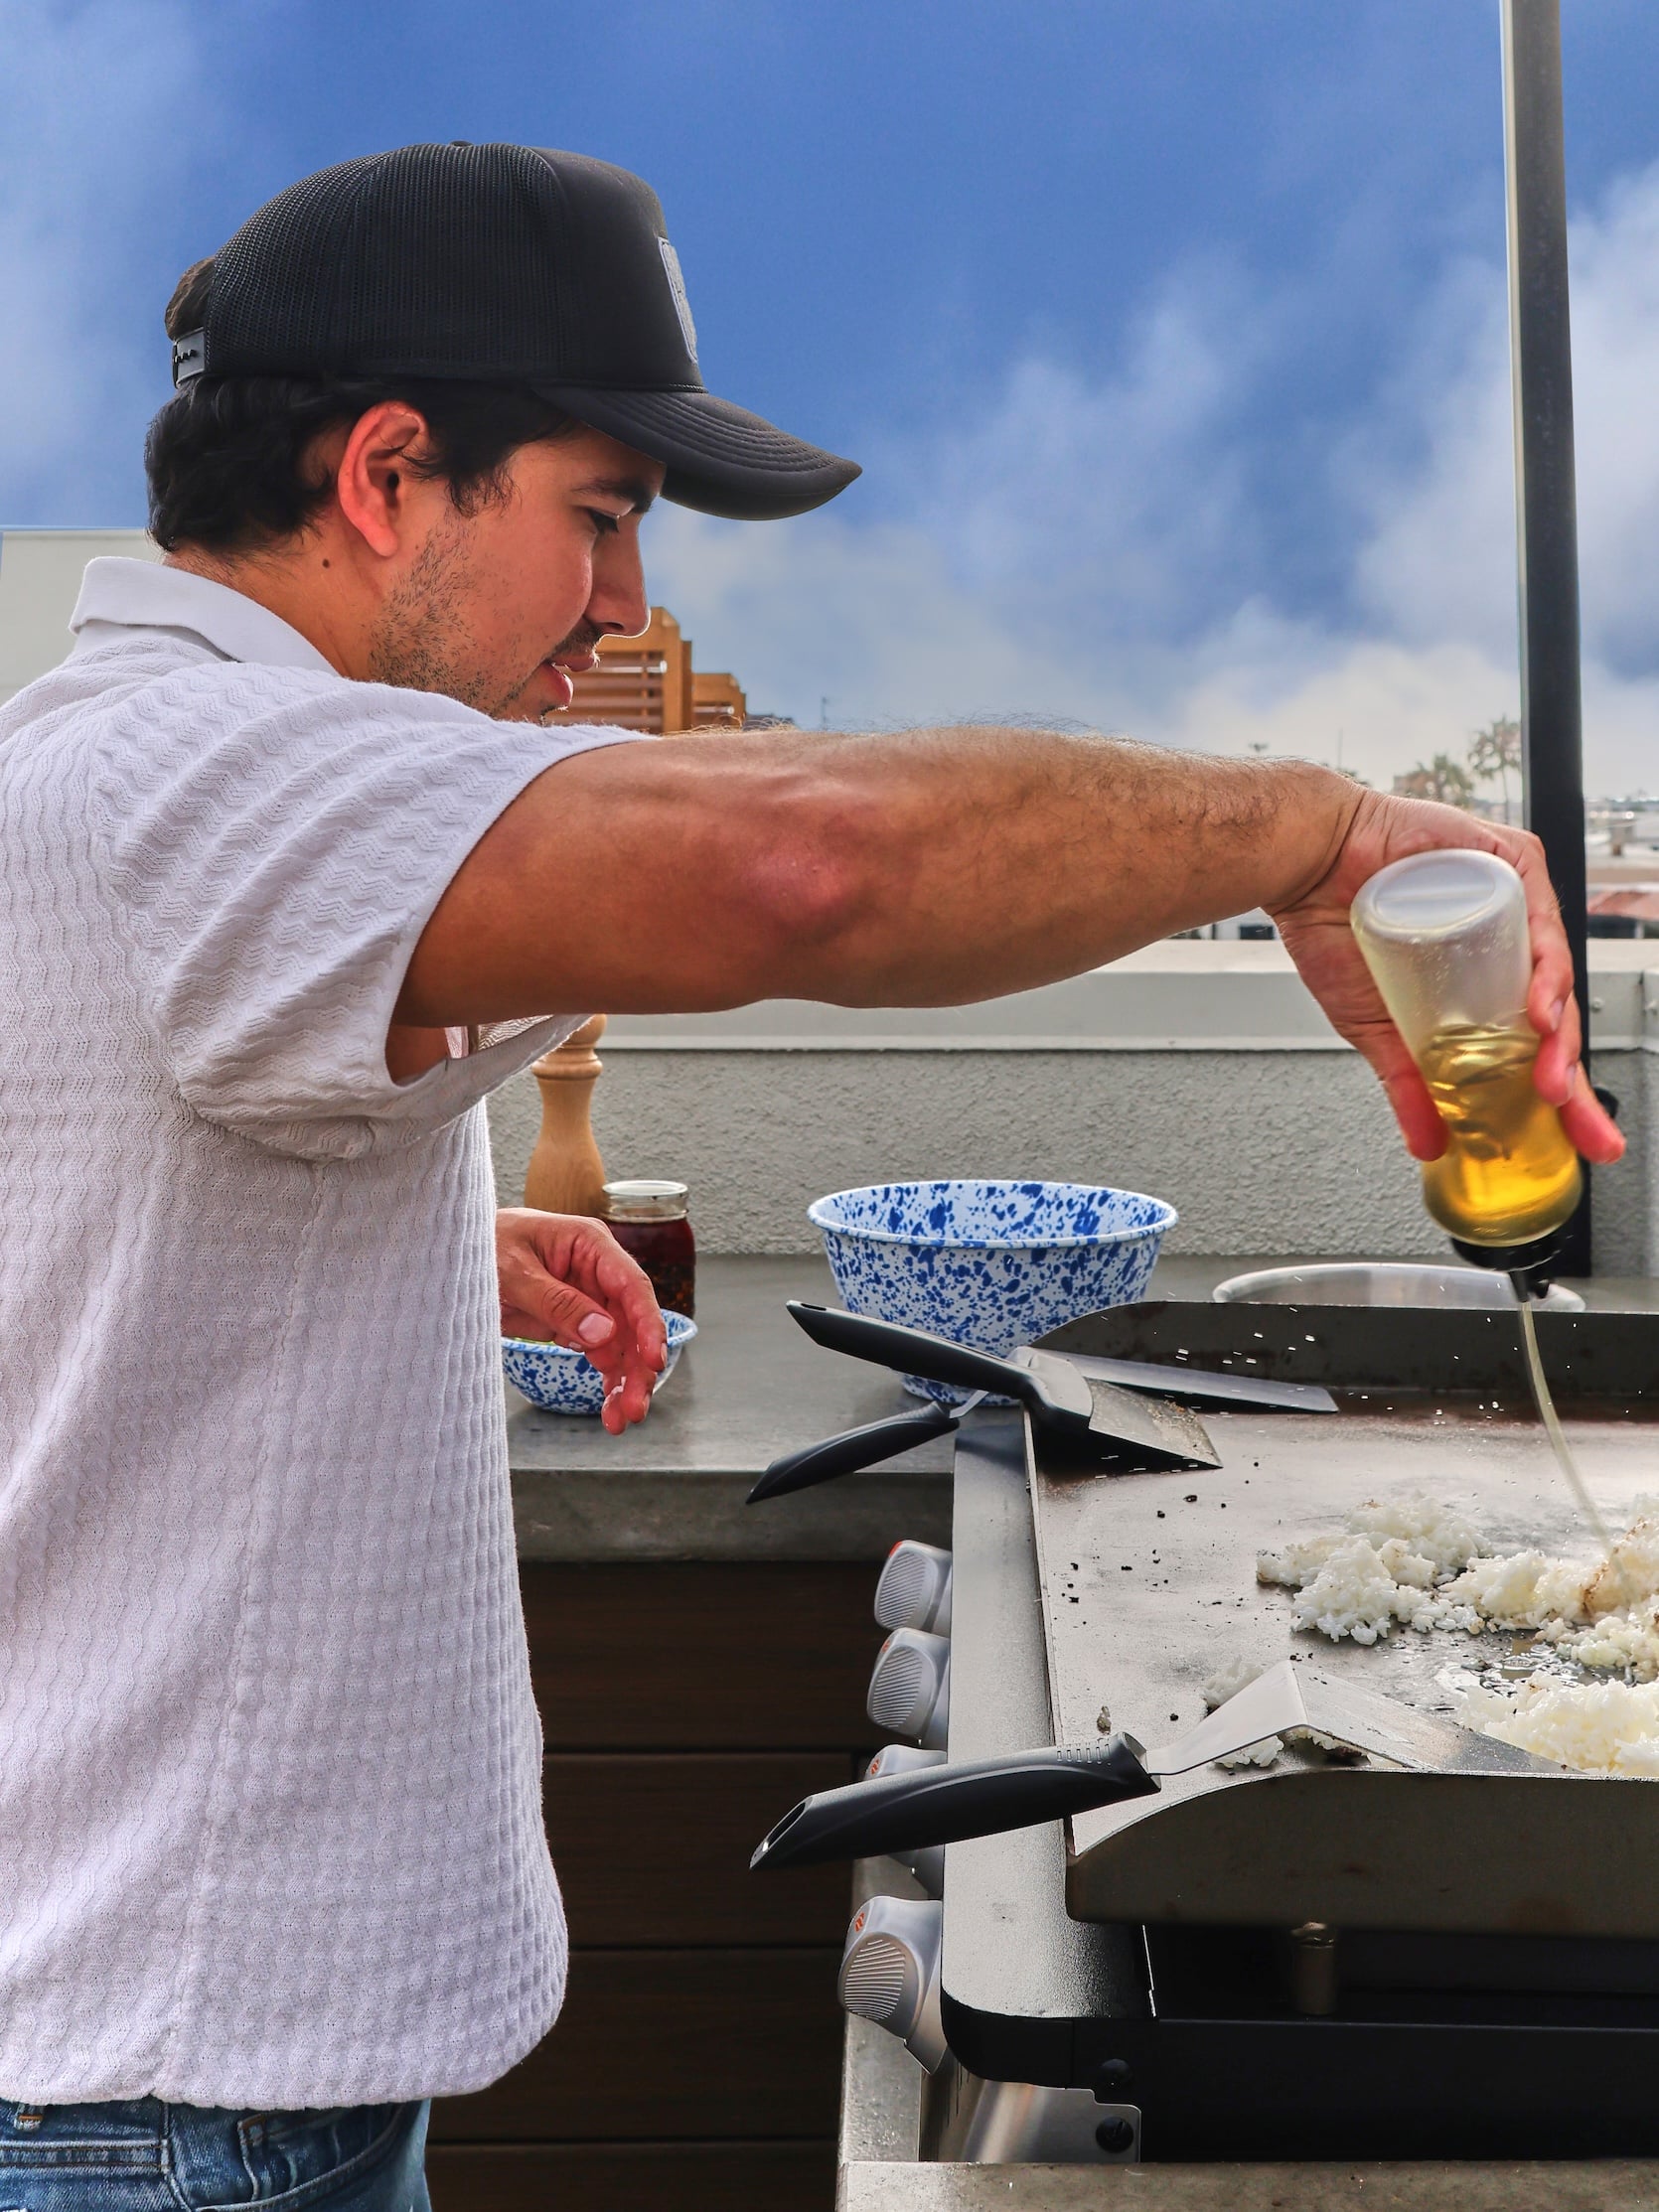
HIBACHI NIGHT! We just did this last week with some friends, and it was a blast. Austin makes incredible fried rice so this has been really fun to cook 🙂 Oh, and if you’re wondering about the beating sun up here…let me show you our solution!
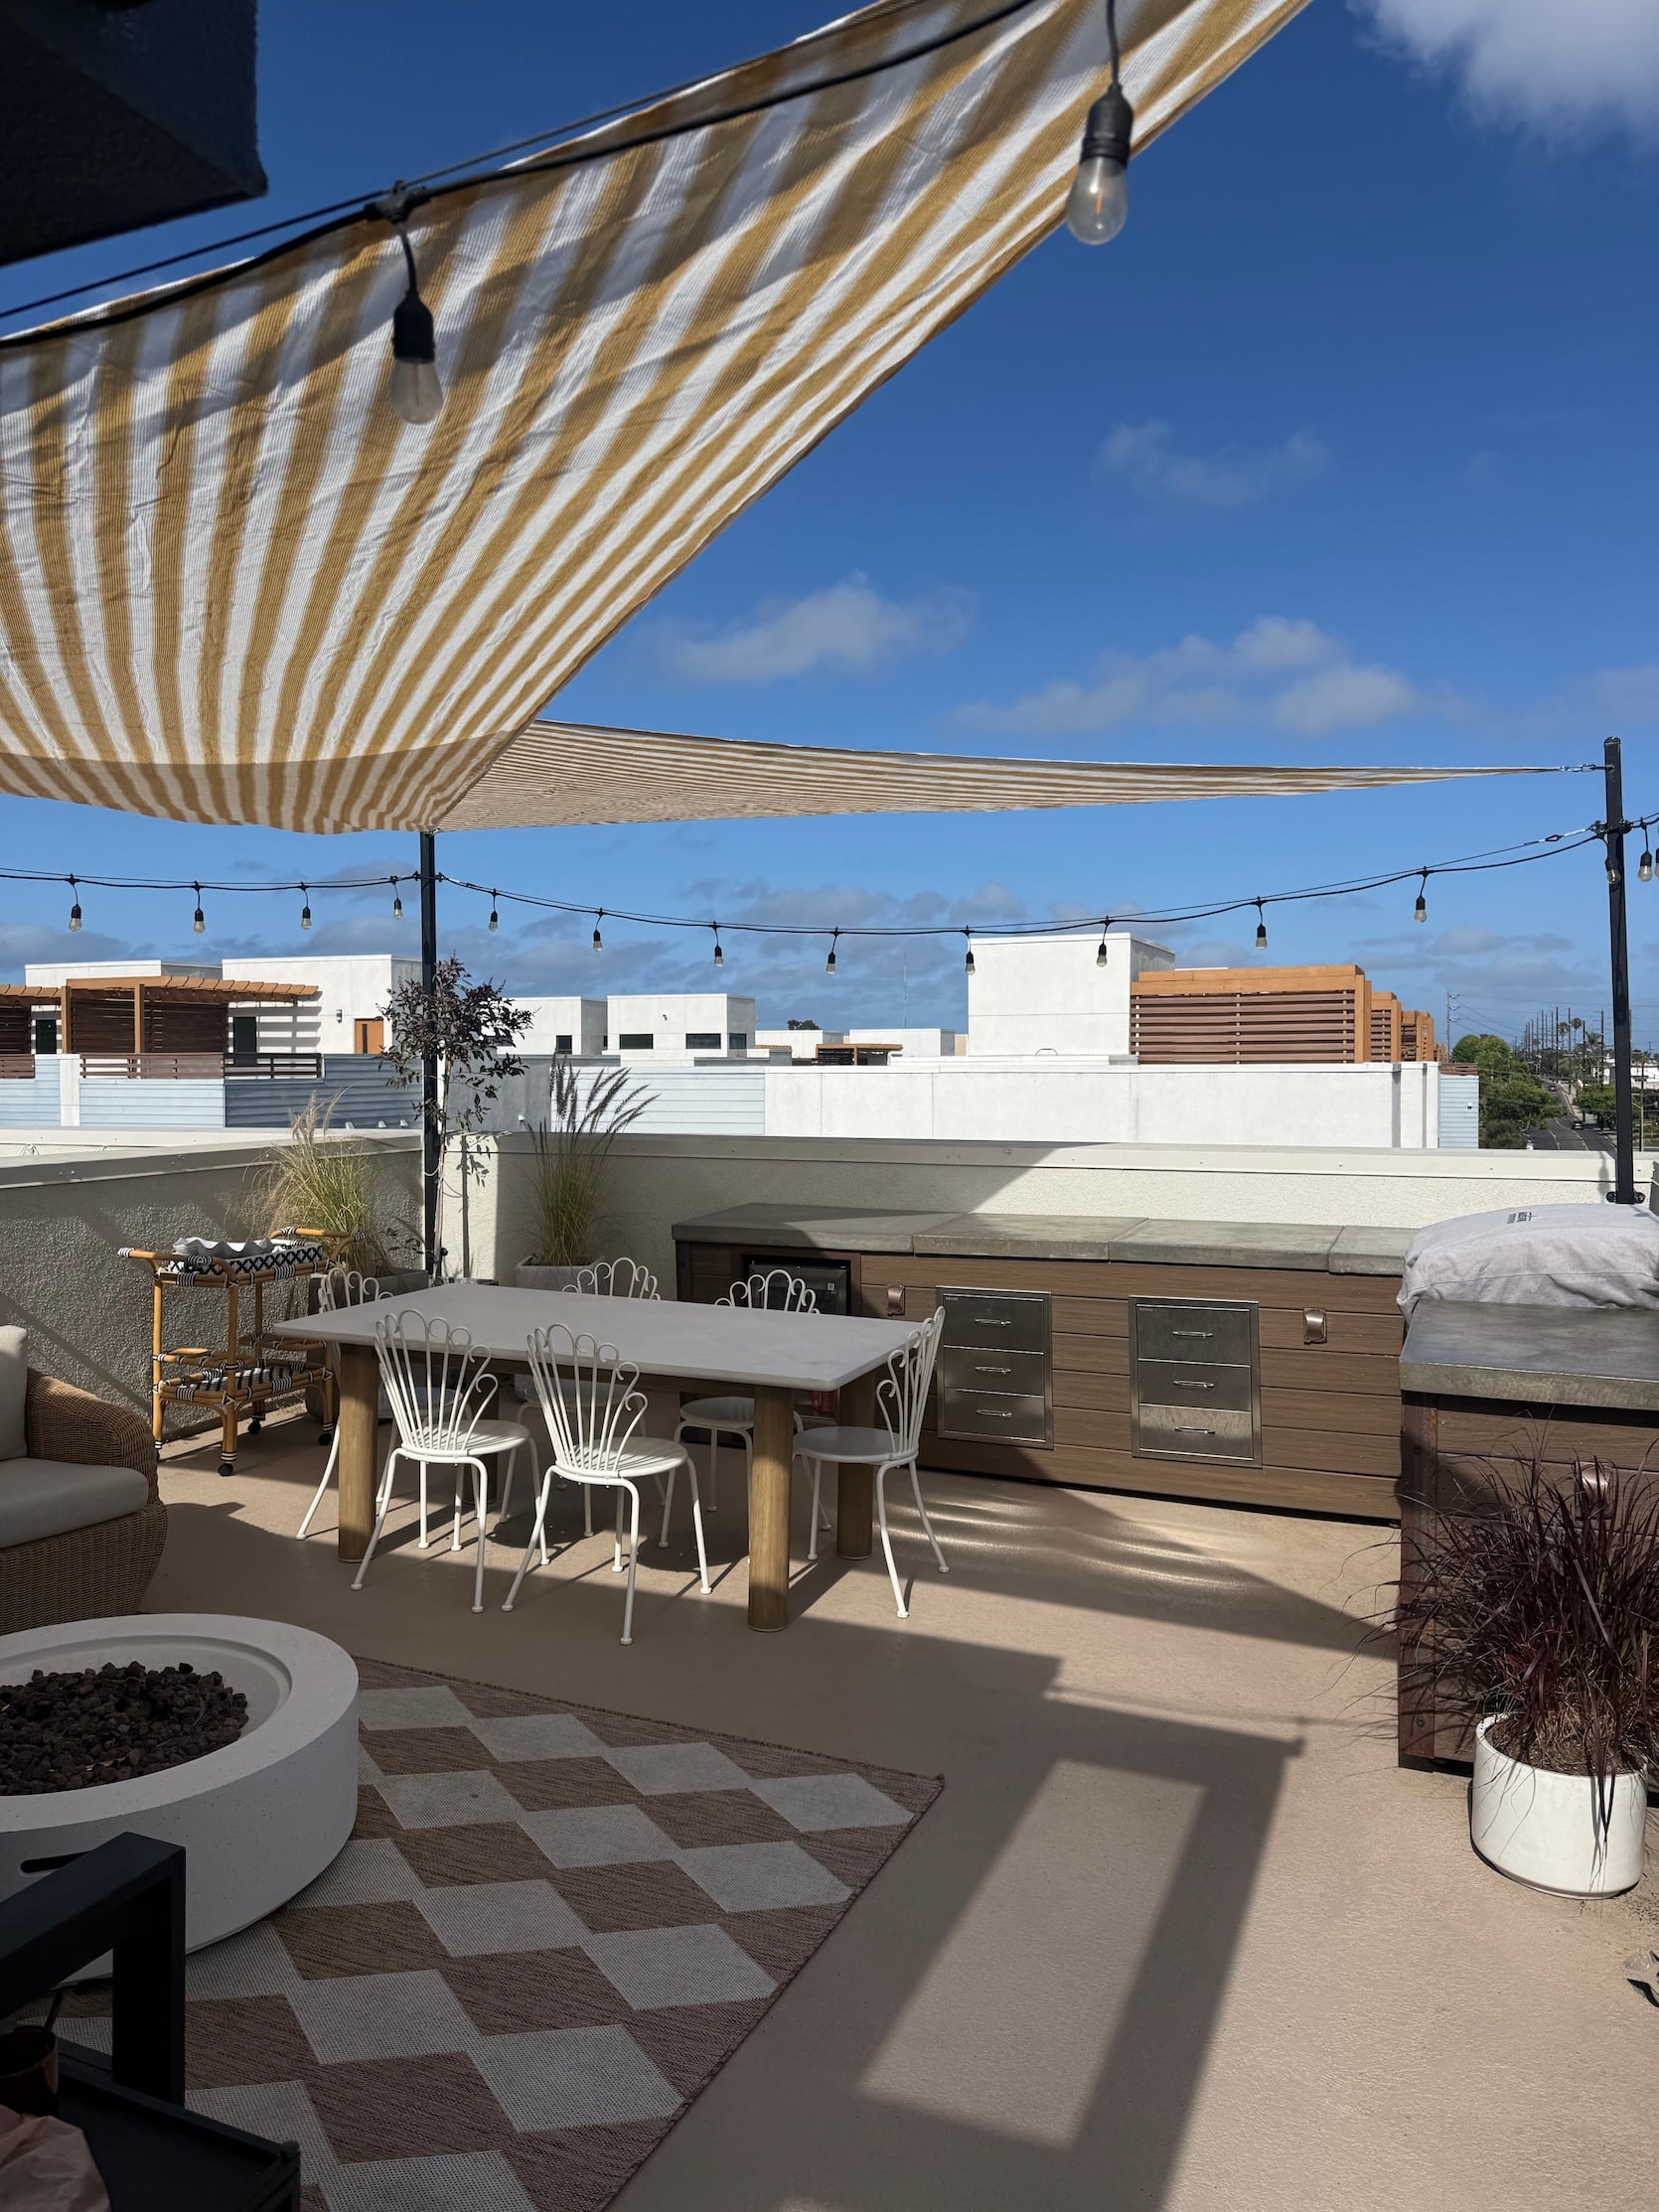
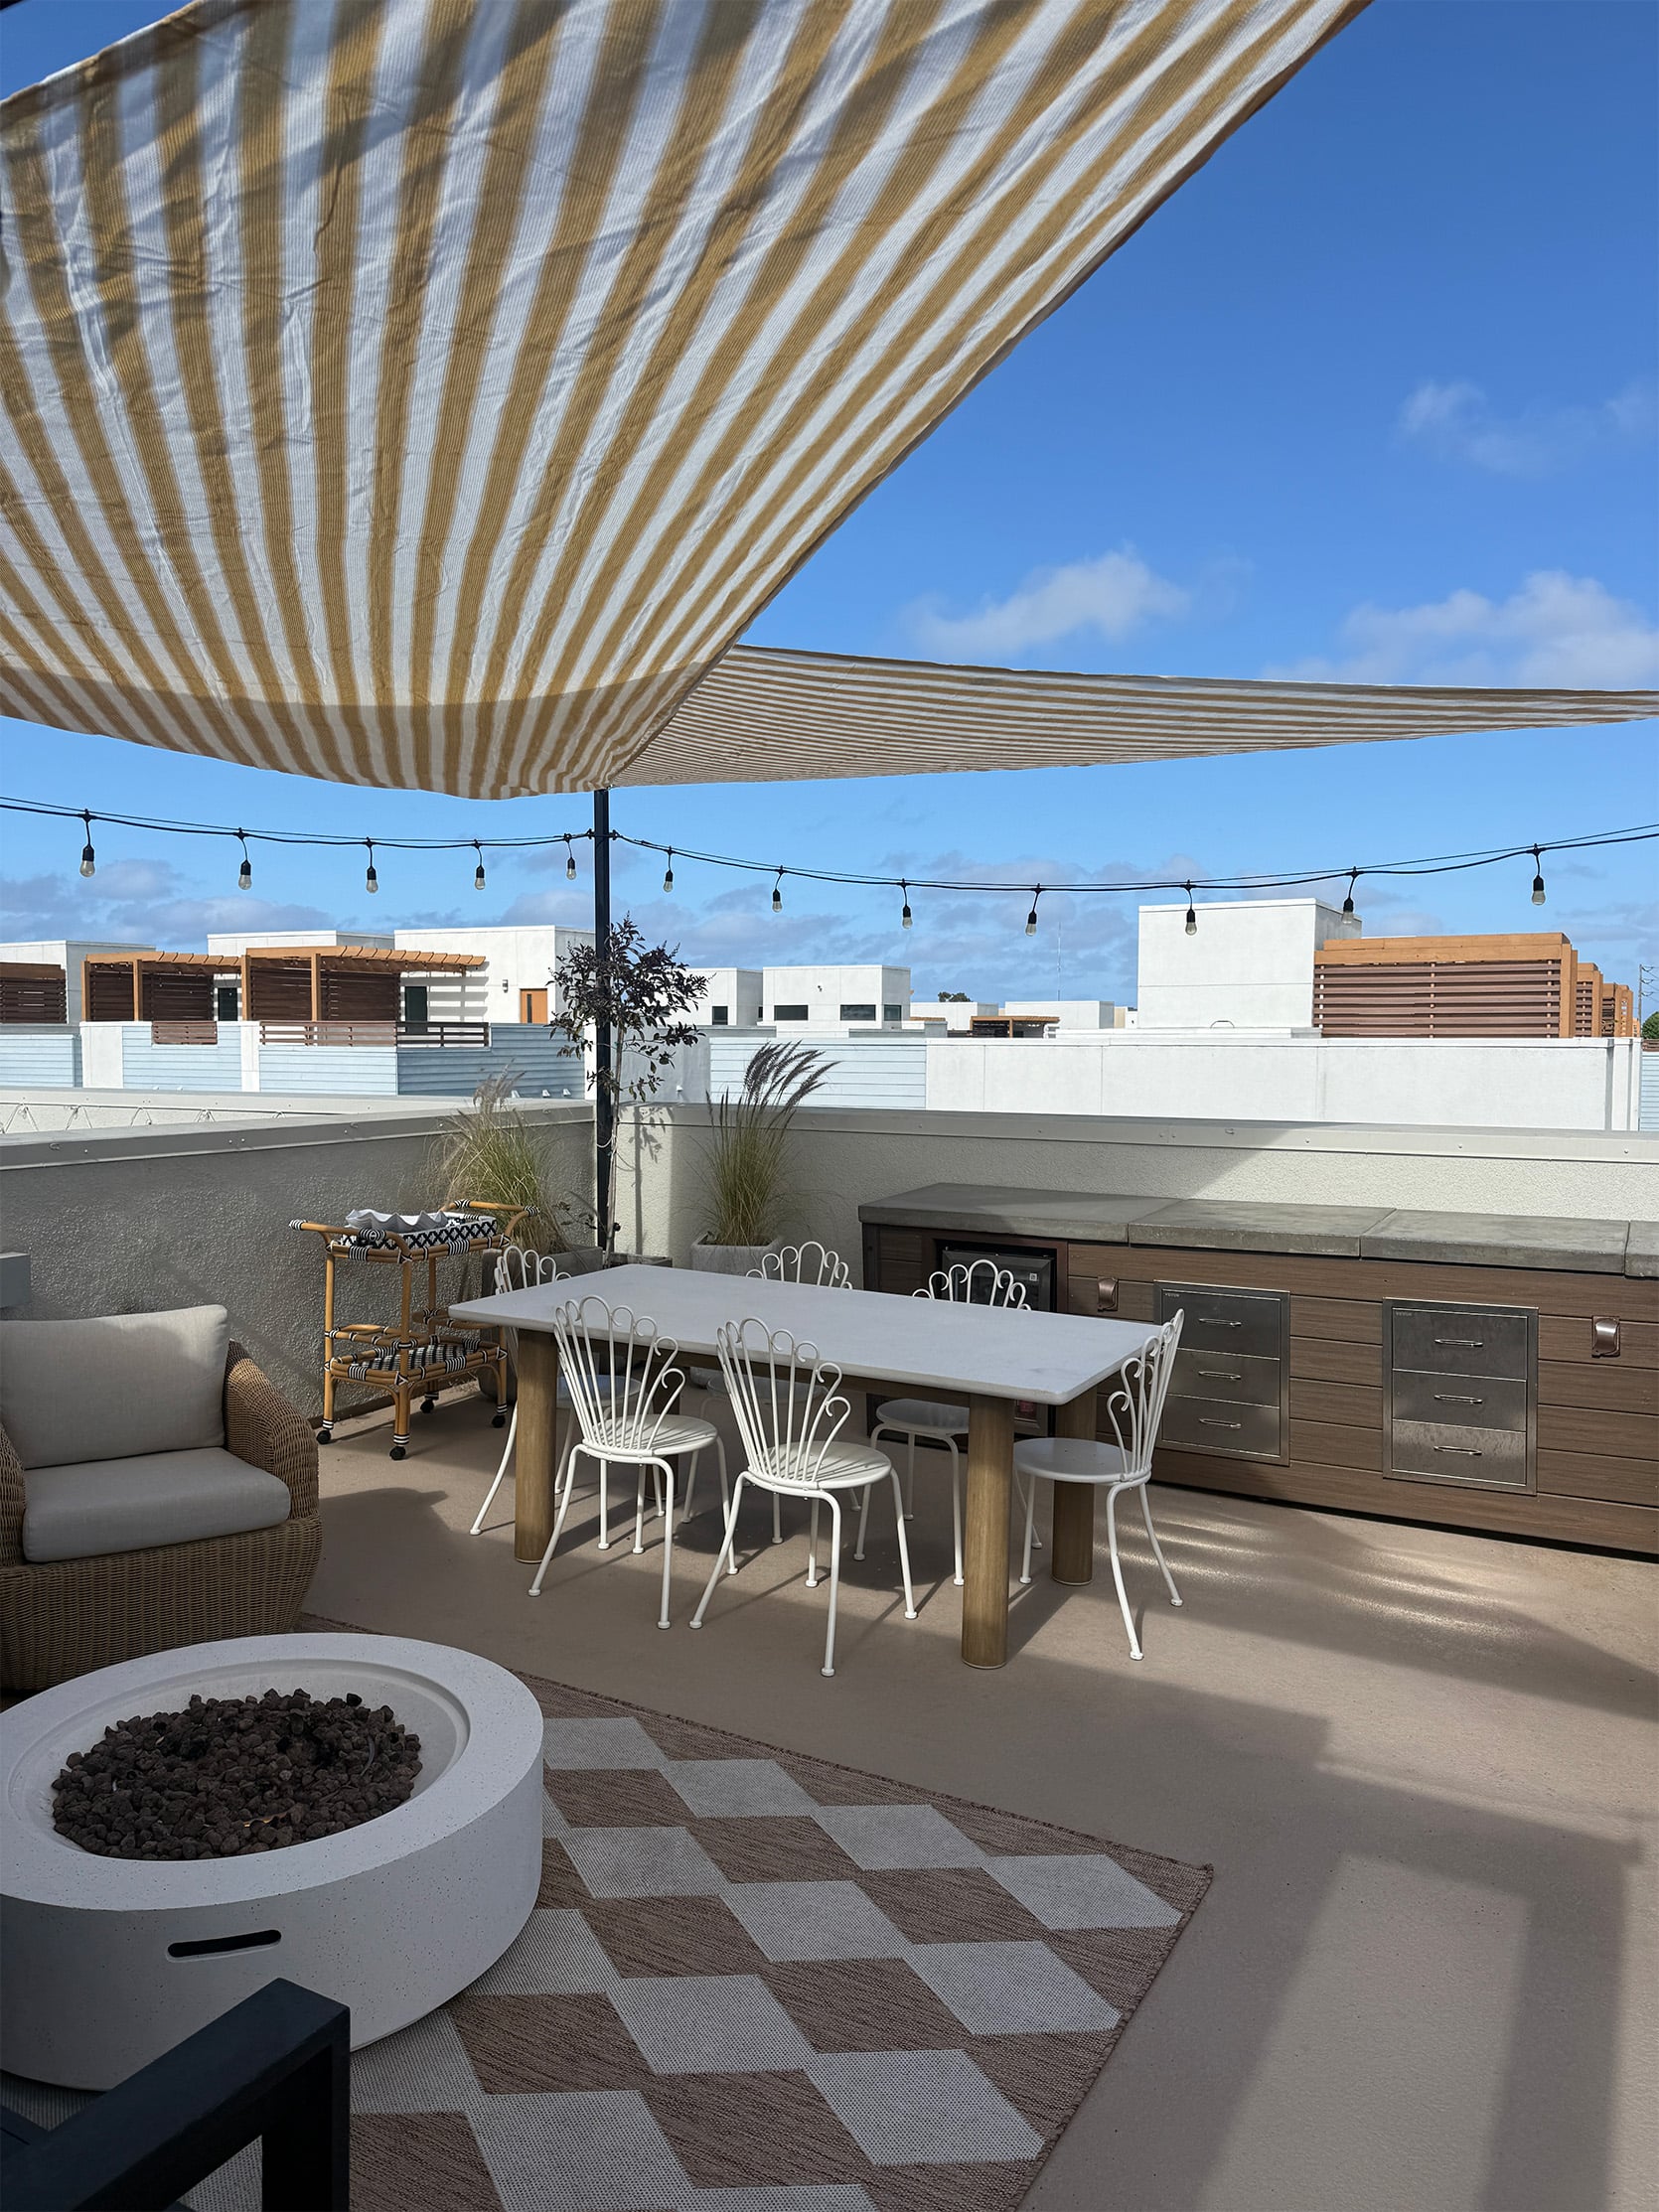
Yes, it gets crazy hot up here, and you’re really just standing in the sun with nowhere to go UNTIL – we put these guys up, and they made the biggest difference. We’ll take them down in the winter when we’re not using this space as much, but boy are they incredible in the summer (and I LOVE the yellow stripe). We left the area above the grill open so that the smoke can go off into the distance and not directly onto the shade (which would’ve been giving fire hazard)…
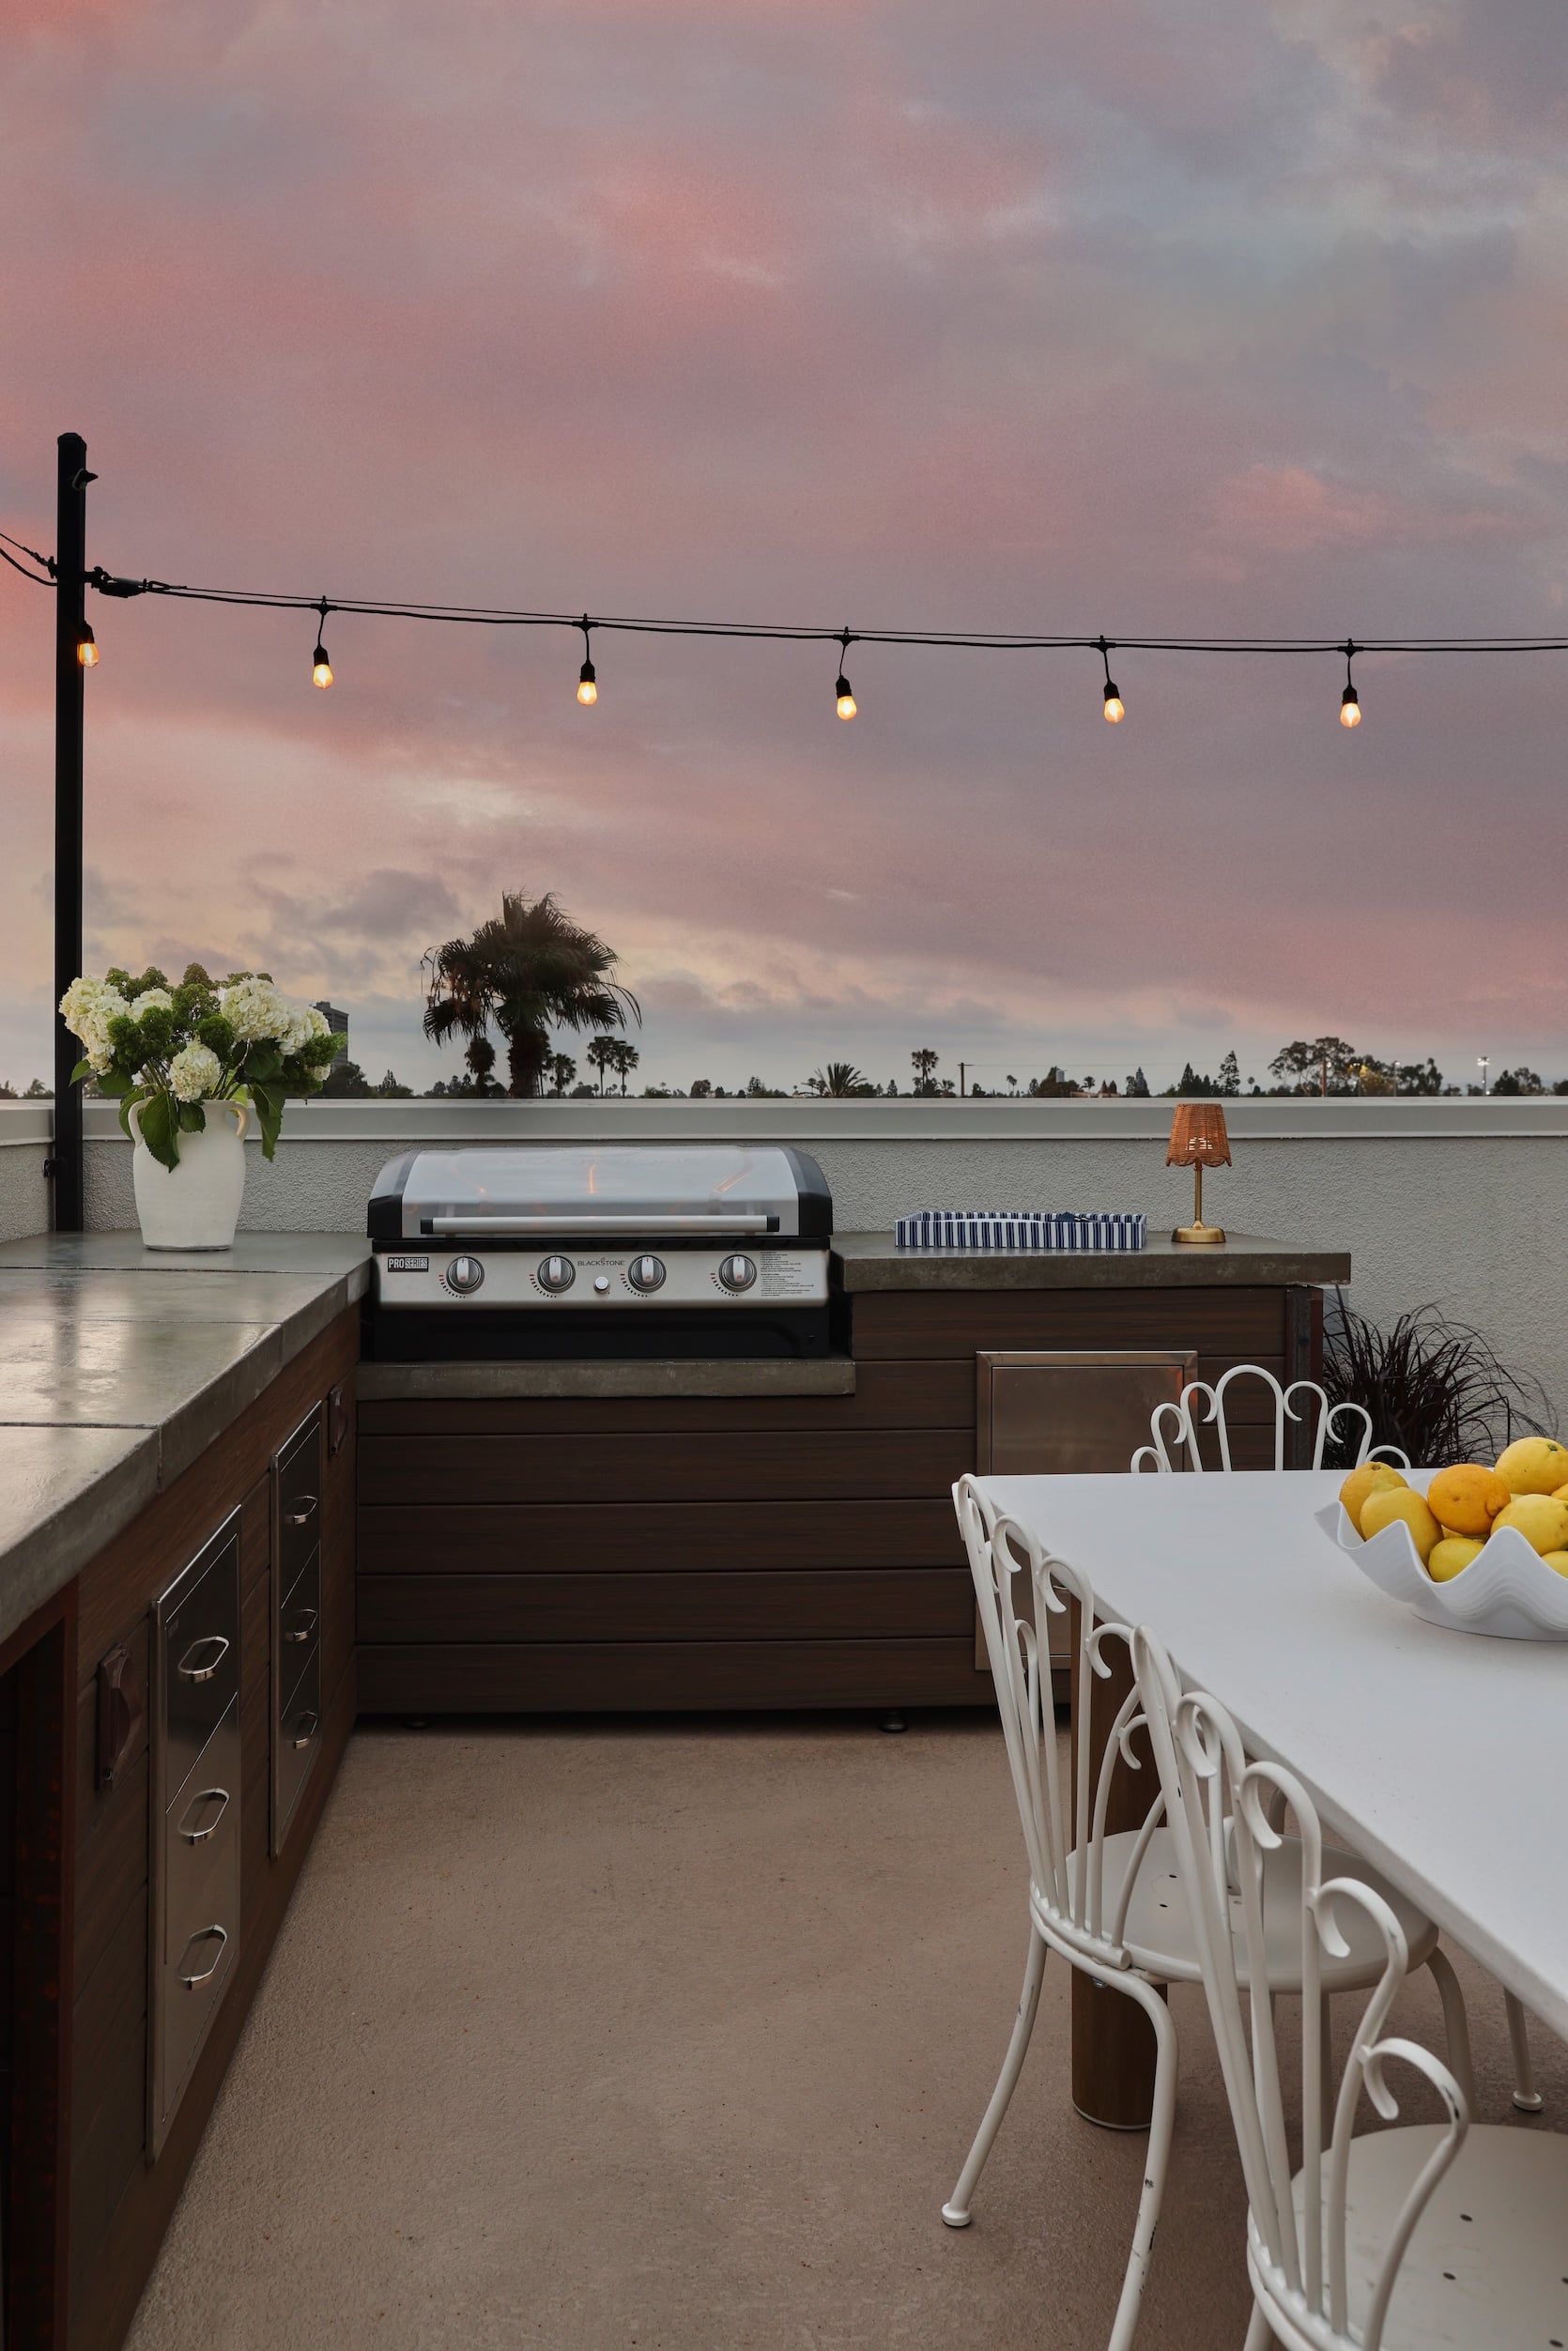
But when it becomes sunset, the shades are totally not necessary, obviously. And this roof THRIVES at sunset; it’s truly become one of my favorite places in the whole world. Slide the slider, and you’ll see what I mean 🙂
So that’s our roof!! It’s come a long way, and I just feel so grateful that we get to call this place ours! If you’re wanting to see more photos and videos, you can follow me on IG here 🙂
We are just obsessed with it. Thank you for reading and for following along. Just so happy to be here. You guys rock!
*Design by Mallory Wackerman
**Photo by Sara Ligorria-Tramp
I bought Sunbrella chair cushions a few years ago. I called Sunbrella and now every year I take them off from the pillow and put them in my washer! Sunbrella even said I could use some bleach if needed. They are on my chairs right now and look brand new again.
yes I washed these! I did a bleach bath on them but they were so stained that it didn’t get everything out. After that the oxy white revive worked SO well and so did the 303 mold and mildew!
Mallory – I just love your posts! This looks incredible – but I am not surprised!
ah thank you so much for the kind words!!!
Beautiful space and you 2 couldn’t be cuter!
thank you!!
Two things struck me as amusing in this post: (1) the idea of a roof thriving, and (2) the fact that this is considered a DIY given the professional skills and equipment involved, but regardless, YOU are clearly thriving, and what an amazing space! Seems like you have found a great match with a personality and skillset that really complement yours. Lots of parties, both sets of parents hanging out, sunsets over LA. Take that, forces of lonely Internet-addicted isolation. Thank you for sharing your joy, I couldn’t help smiling. 🙂
ha those are pretty hilarious put like that! So glad you enjoyed it 🙂
Love it Mal! It looks like the perfect spot for relaxing and entertaining!
thanks lea!
Mal – what a great space, and I could feel your joy as you described hanging out there. I have my eye on the sunshades, we have a similar challenge on our 2nd story deck. Curious how these do in windy conditions? We get lots of swirling winds because of proximity to a lake. Also, LOVE the DIY kitchen buildout – so inspiring and has me giving the side-eye to our current grill setup…
Thank you for the kind words!! It can get pretty windy up there and they’ve been totally fine – I think the main thing is making sure they’re pulled tight enough. I would highly recommend getting a turnbuckle to fasten it for that reason – you can make it as tight as you need!
Wow! You’ve done so much in such a short timeframe.
it was definitely quick!! We wanted it to be usable in time for summer and I’m SO glad we made that happen 🙂
Bravo Mallory! Such a wonderful space and such an enjoyable post. I love your can do spirit and you are clearly coming into your own as a designer, but I hope you never leave this space! To my fellow EHD readers: I started following Mallory on Instagram a year or so ago and I highly recommend.
thank you so much!!
Wow!! It looks amazing and so happy to hear that you live near your parents and love spending time with them (I’m a parent of teenagers and am hoping for similar or at least the spending time together part)!!
I love those vintage looking dining chairs and can’t believe they are from target! What a great find!
right?! That target find was everything!! I hope they come back in stock!
this look amazing! Can we get the instructions on how you DIY’ed the poles for the string lights and sunshade and a floorplan dimensions for your rooftop? Would love to set up something like this in our outdoor space!
Totally! Austin and his dad also did those but basically they had their family friend make some steel posts and then they bolted them into the walls. They secured turnbuckles to the top so the shades can hook on!
I also did a similar DIY on my parent’s rooftop actually where we got industrial steel plumbing pipes from home depot and used a U bracket to secure them to the wall! We zip tied the string lights to the top (but they don’t have the shades although I’m sure there’s a way to fix a hook for the shades to those too!)
Beautiful space; would spend all my time up there 🙂 And love that all the neighbours have party lights too!
it’s so fun right!? the fourth of july is awesome up here with all the neighbors!!
Gorgeous! Would the shades survive the rain? Does it ever rain there over the summer time? Thanks!
It rained once this summer (we’re lucky here in so cal!) and they did totally fine. We’re planning to take them down in the winter when it rains more but so far they’ve held up great!
Turned out AMAZING! When can I come visit? I’ll be ready to catch a grilled shrimp in my shirt pocket
Better than catching it in your hair!! THANKS BOOTS
This is an amazing transformation! It looks like the most perfect place to spend summer evenings!
What a great space!! Thanks for sharing with us!
It looks great! I love a multifunctional outdoor space!
This is such an awesome space! I’m just curious, how do you manage without a sink when cooking?
It’s actually not bad at all! We have a few large trays that makes it easy to bring the dishes up and down the stairs. We also use plastic baskets with liners for a lot of big gatherings so you just throw the paper away and no dishes are used!
How about – Mallory Austin Cookbook?