
Design
The Easy, High Impact Upgrades Mallory Made To Her Vintage Bathroom
It’s the last reveal in my apartment before I move you guys!! If you want to see the rest of the space, I already revealed the kitchen, living room, dining room, and of course, the famous closet speakeasy. I’ve done A LOT to this space as a renter, and yes, I’ll have to reverse some of these DIYs when I move out (which is sad but also expected). To me, I’ve gotten to live in such an incredible space that healed me and truly felt like home. That was my one goal when moving in here: to make the space feel like home.
As someone who’s moved a ton of times throughout their life, I know it can take a lot to finally feel settled in a new space (months, years, even). Growing up, I moved all around Orange County because my middle/high school was a charter school, so you didn’t need to live in a specific city to attend (shout out to Orange County School of the Arts). So my parents took that as an opportunity to move around and try out some different cities. I always tried to make my room feel like “me” wherever we went – even if it was just for a year or two. I think this really helped me get into decorating because I had so many fresh, blank slates. Then I went to college, and we all know how that goes – you move pretty much every single year, and your furniture is just a hodgepodge of things you can scrounge together. So I set up and decorated what I could, but I can’t say any of my college apartments were homey (or even cute…)
Once I graduated, I sublet month-to-month in New York while job/career searching, and then I eventually landed this EHD job in LA and moved into my first studio apartment in Hollywood, and that was the first time I was really able to make my own space feel like home. It took a solid 3 years before it stopped feeling like a barebones Airbnb and actually felt like mine. But right as I dialed it in, life threw me for a loop, and I moved to New York (again) only to break up with my ex and come straight back to California, and a few months after that debacle, I moved into this apartment in Los Feliz. So that’s my life story: home edition. Moving into this space – I really just craved the feeling I had in my Hollywood apartment, where I would walk in, and every muscle would relax, and I felt like I could just breathe. Home can give you the feeling of peace and safety when the world outside lacks so much of it. So yeah, I did a lot to this apartment (especially in those other room reveals you saw) – but I FINALLY got it to feel like home, so I was really happy to accomplish that goal.
On the flip side of things, as a renter, it’s important to know what upgrades are going to be the most high-impact to you and then do those things. This is your permission the leave the rest behind. It’s important to remember in the world of picture perfect homes, sometimes, ‘good enough’ is totally fine – ESPECIALLY in a rental. In my bathroom, I was originally considering wallpapering (which I still think would’ve been awesome) but once I realized that my dining room was the room that needed wallpaper more (this wallpaper, to be exact), I invested my time and resources there instead. Had I been here for longer, I would have considered wallpapering, but I really didn’t want to add to my plate of taking even more wallpaper down when I move out (it’s a thing, trust me), and this bathroom was already pretty dang cute. So I decided to just elevate and swap a few small things to make it shine a bit brighter. Let me show you…
BEFORE
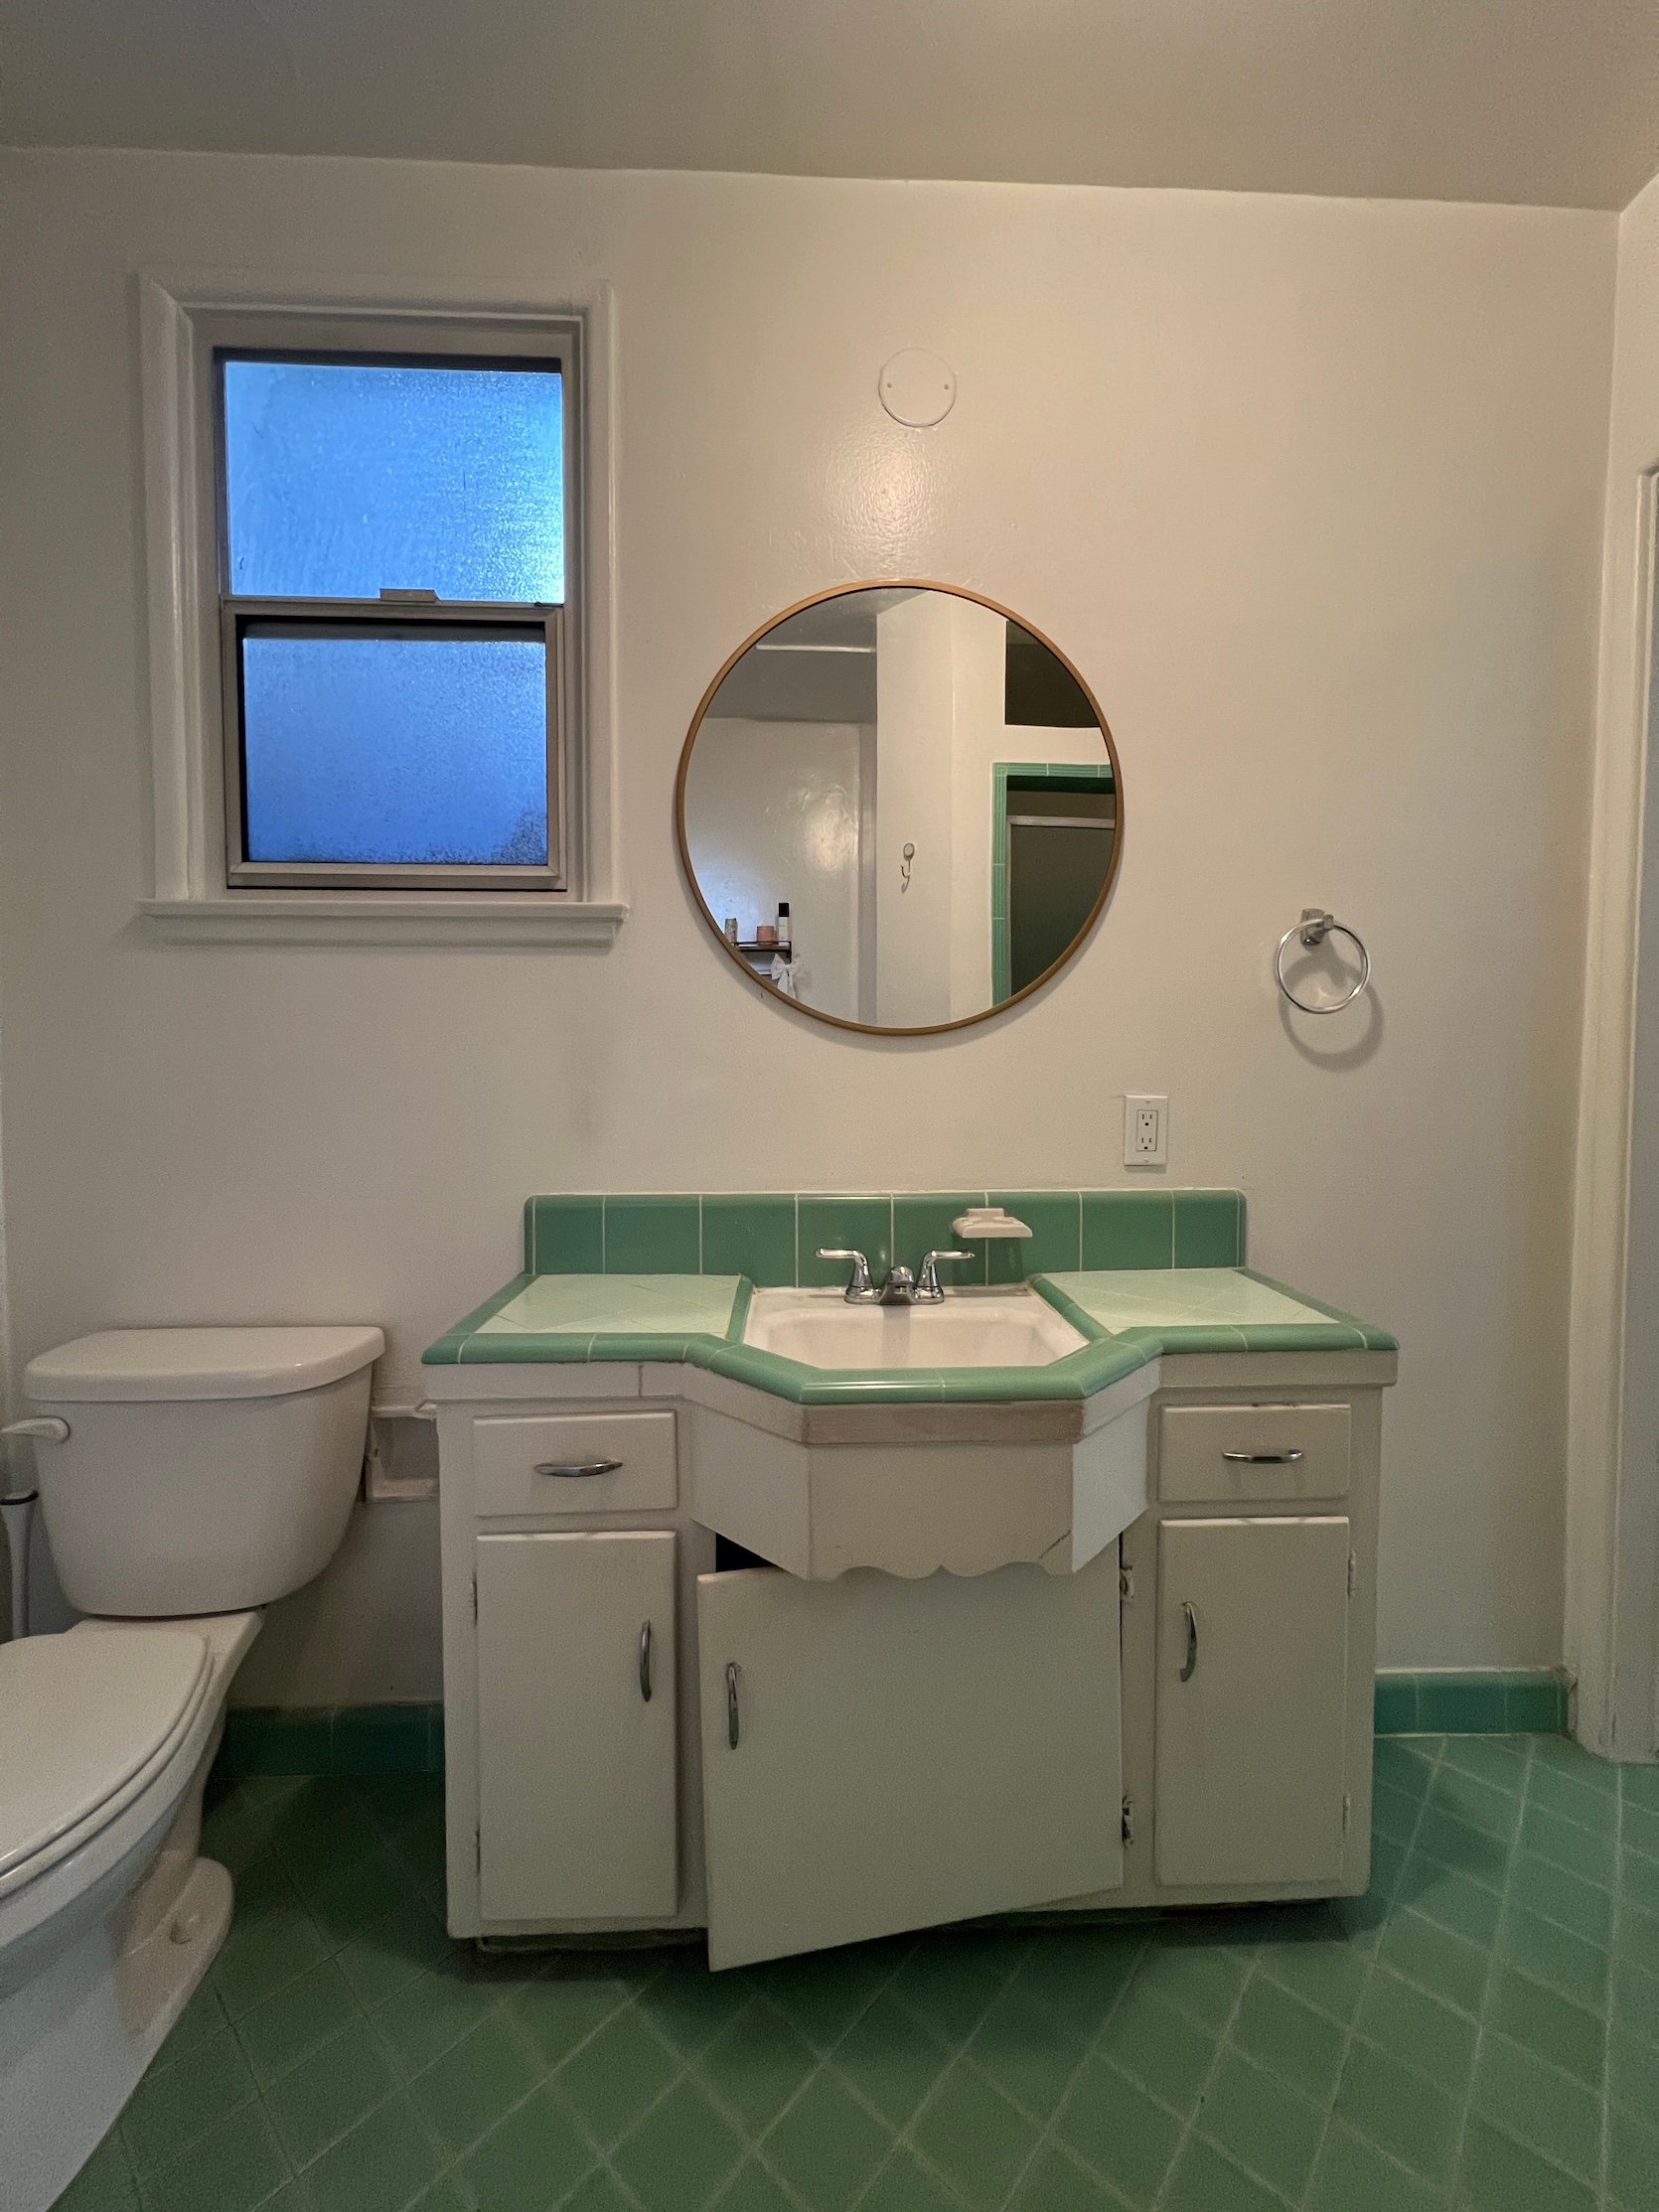
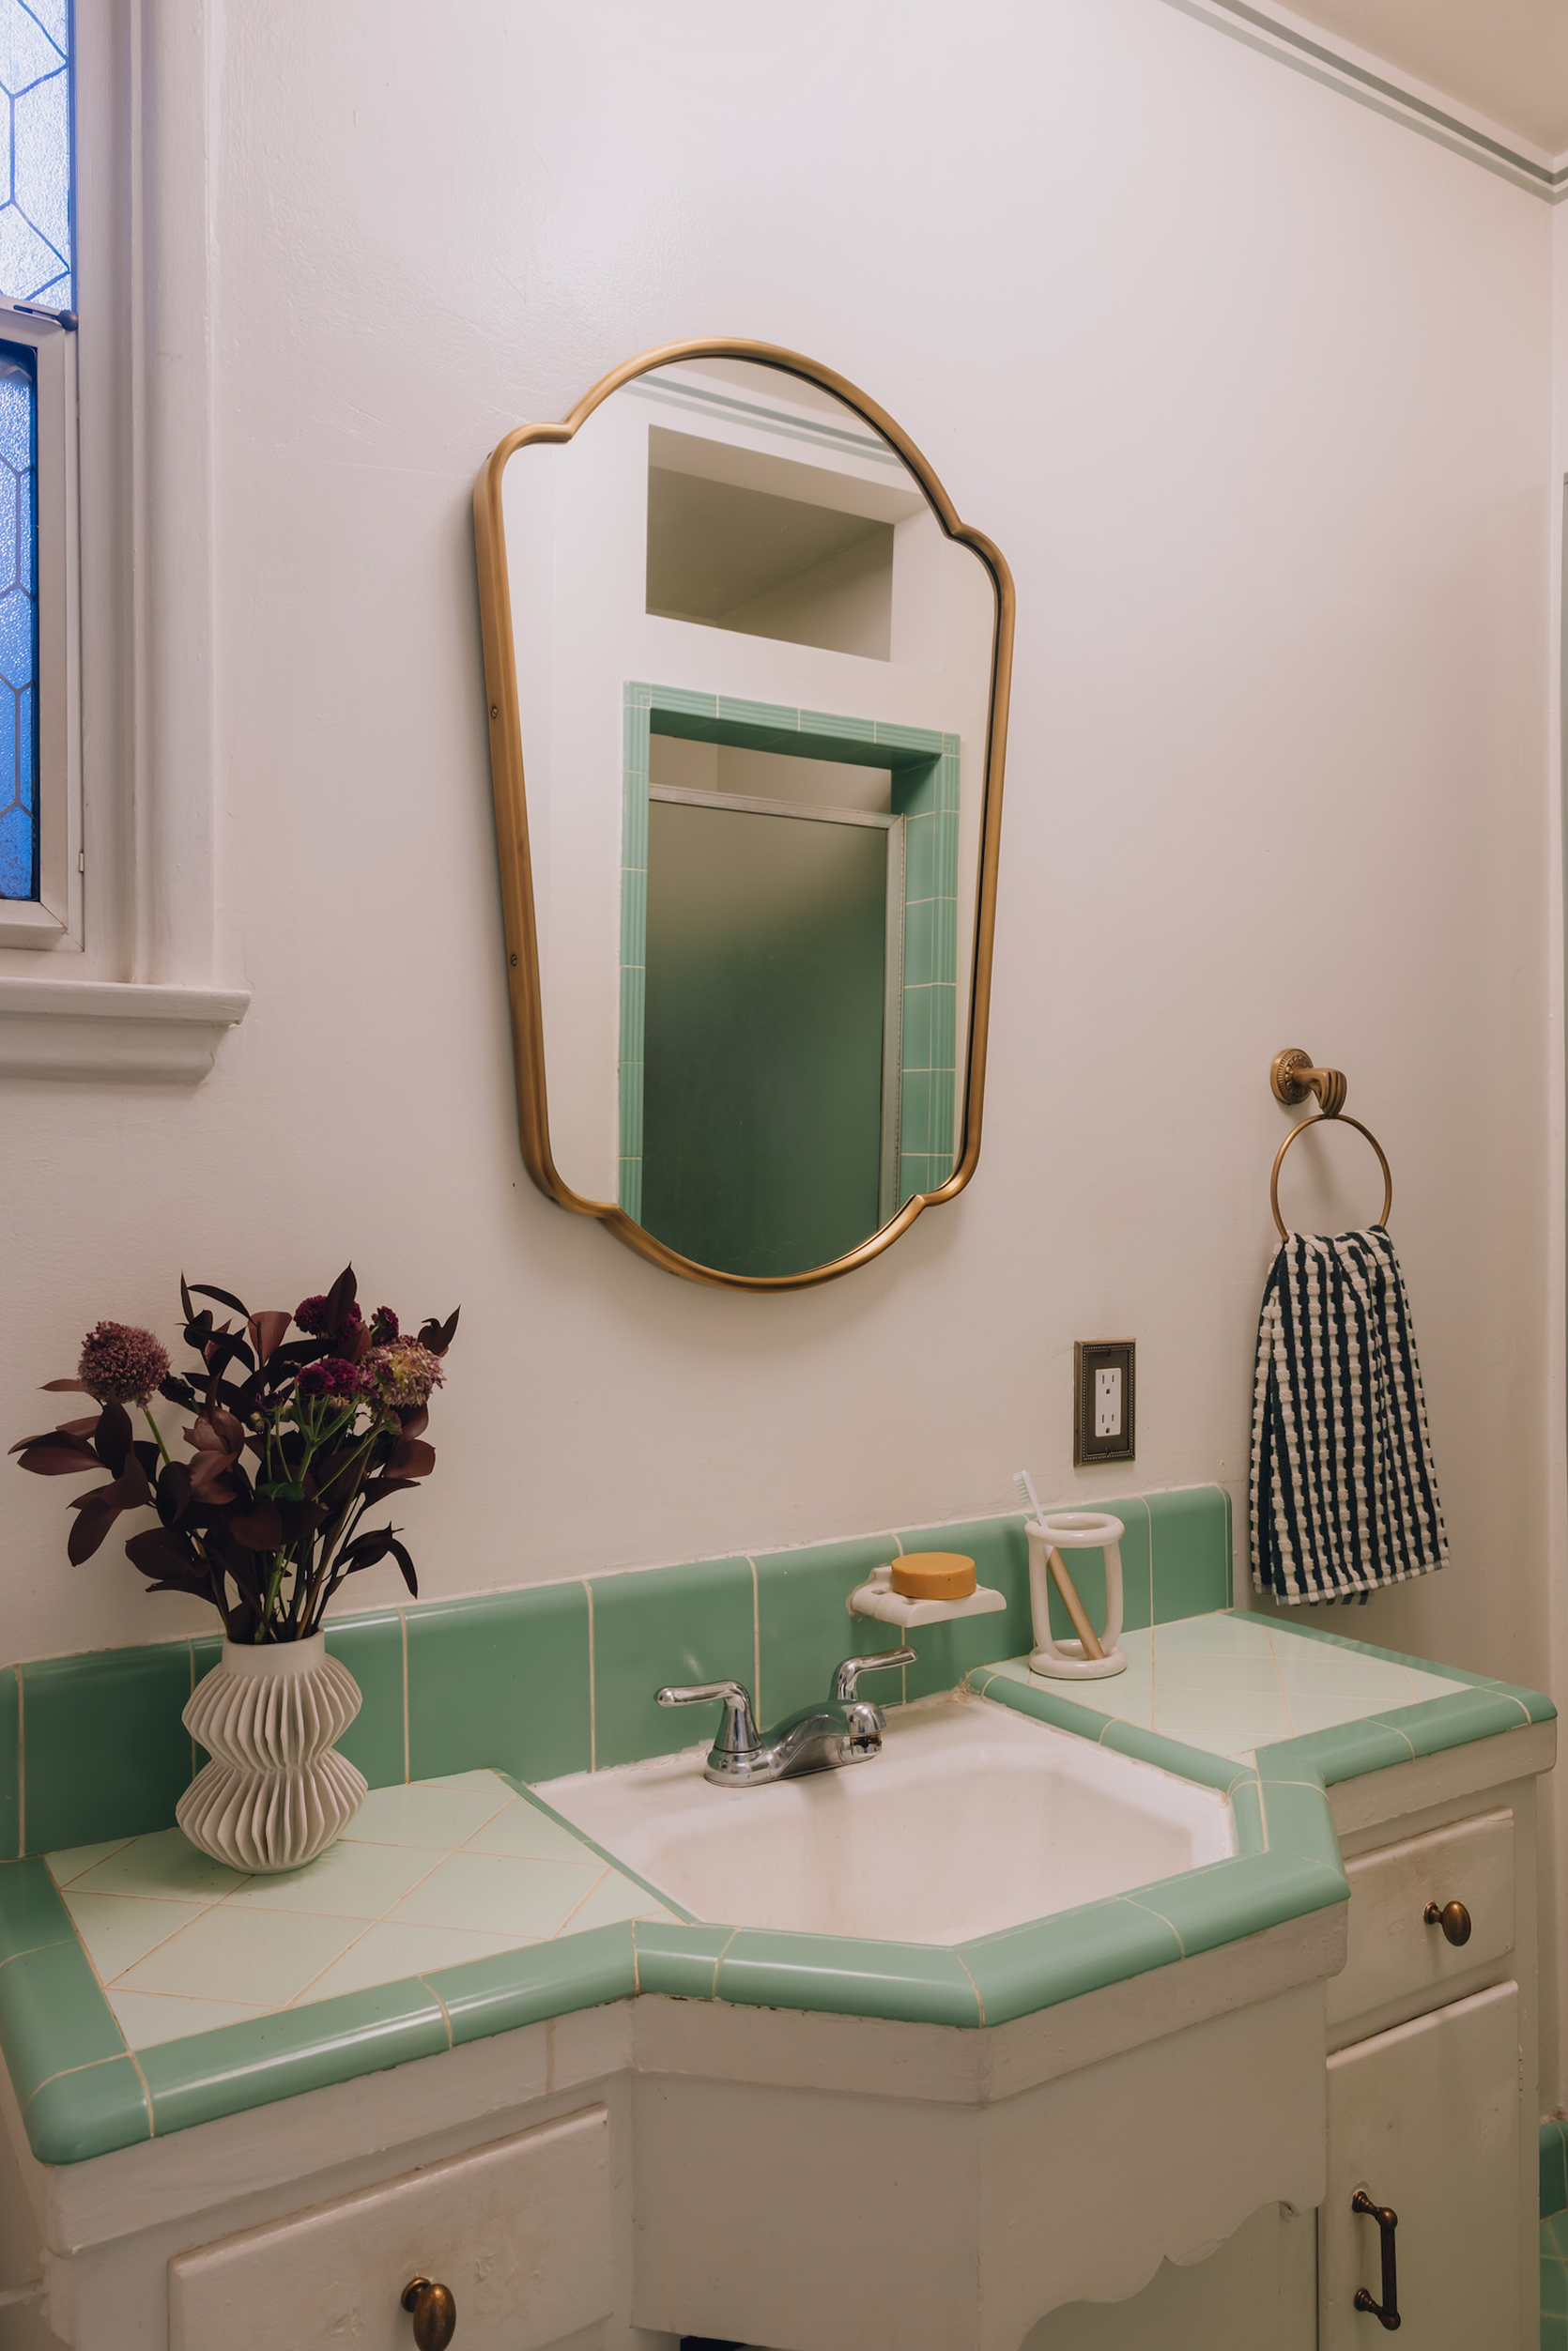
That tile!! The little shelf!! THE TUB! It’s all so adorable. The only wonky thing is the fact that that cabinet just doesn’t close all the way (maybe a new 2026 design trend??) The green vintage tile really just sings – I actually found the perfect wallpaper I was going to install but like I said, it ultimately just ended up not being worth it for the cost, effort and removal. So I cut my losses, and instead came up with some affordable, easy swaps that would make the space feel like mine without breaking the bank or having to spend hours undoing it upon move out. And they were all totally worth it.
So I was looking for design ideas other than expensive (but awesome) wallpaper, and I saw this inspo photo and immediately knew I wanted to do something similar.
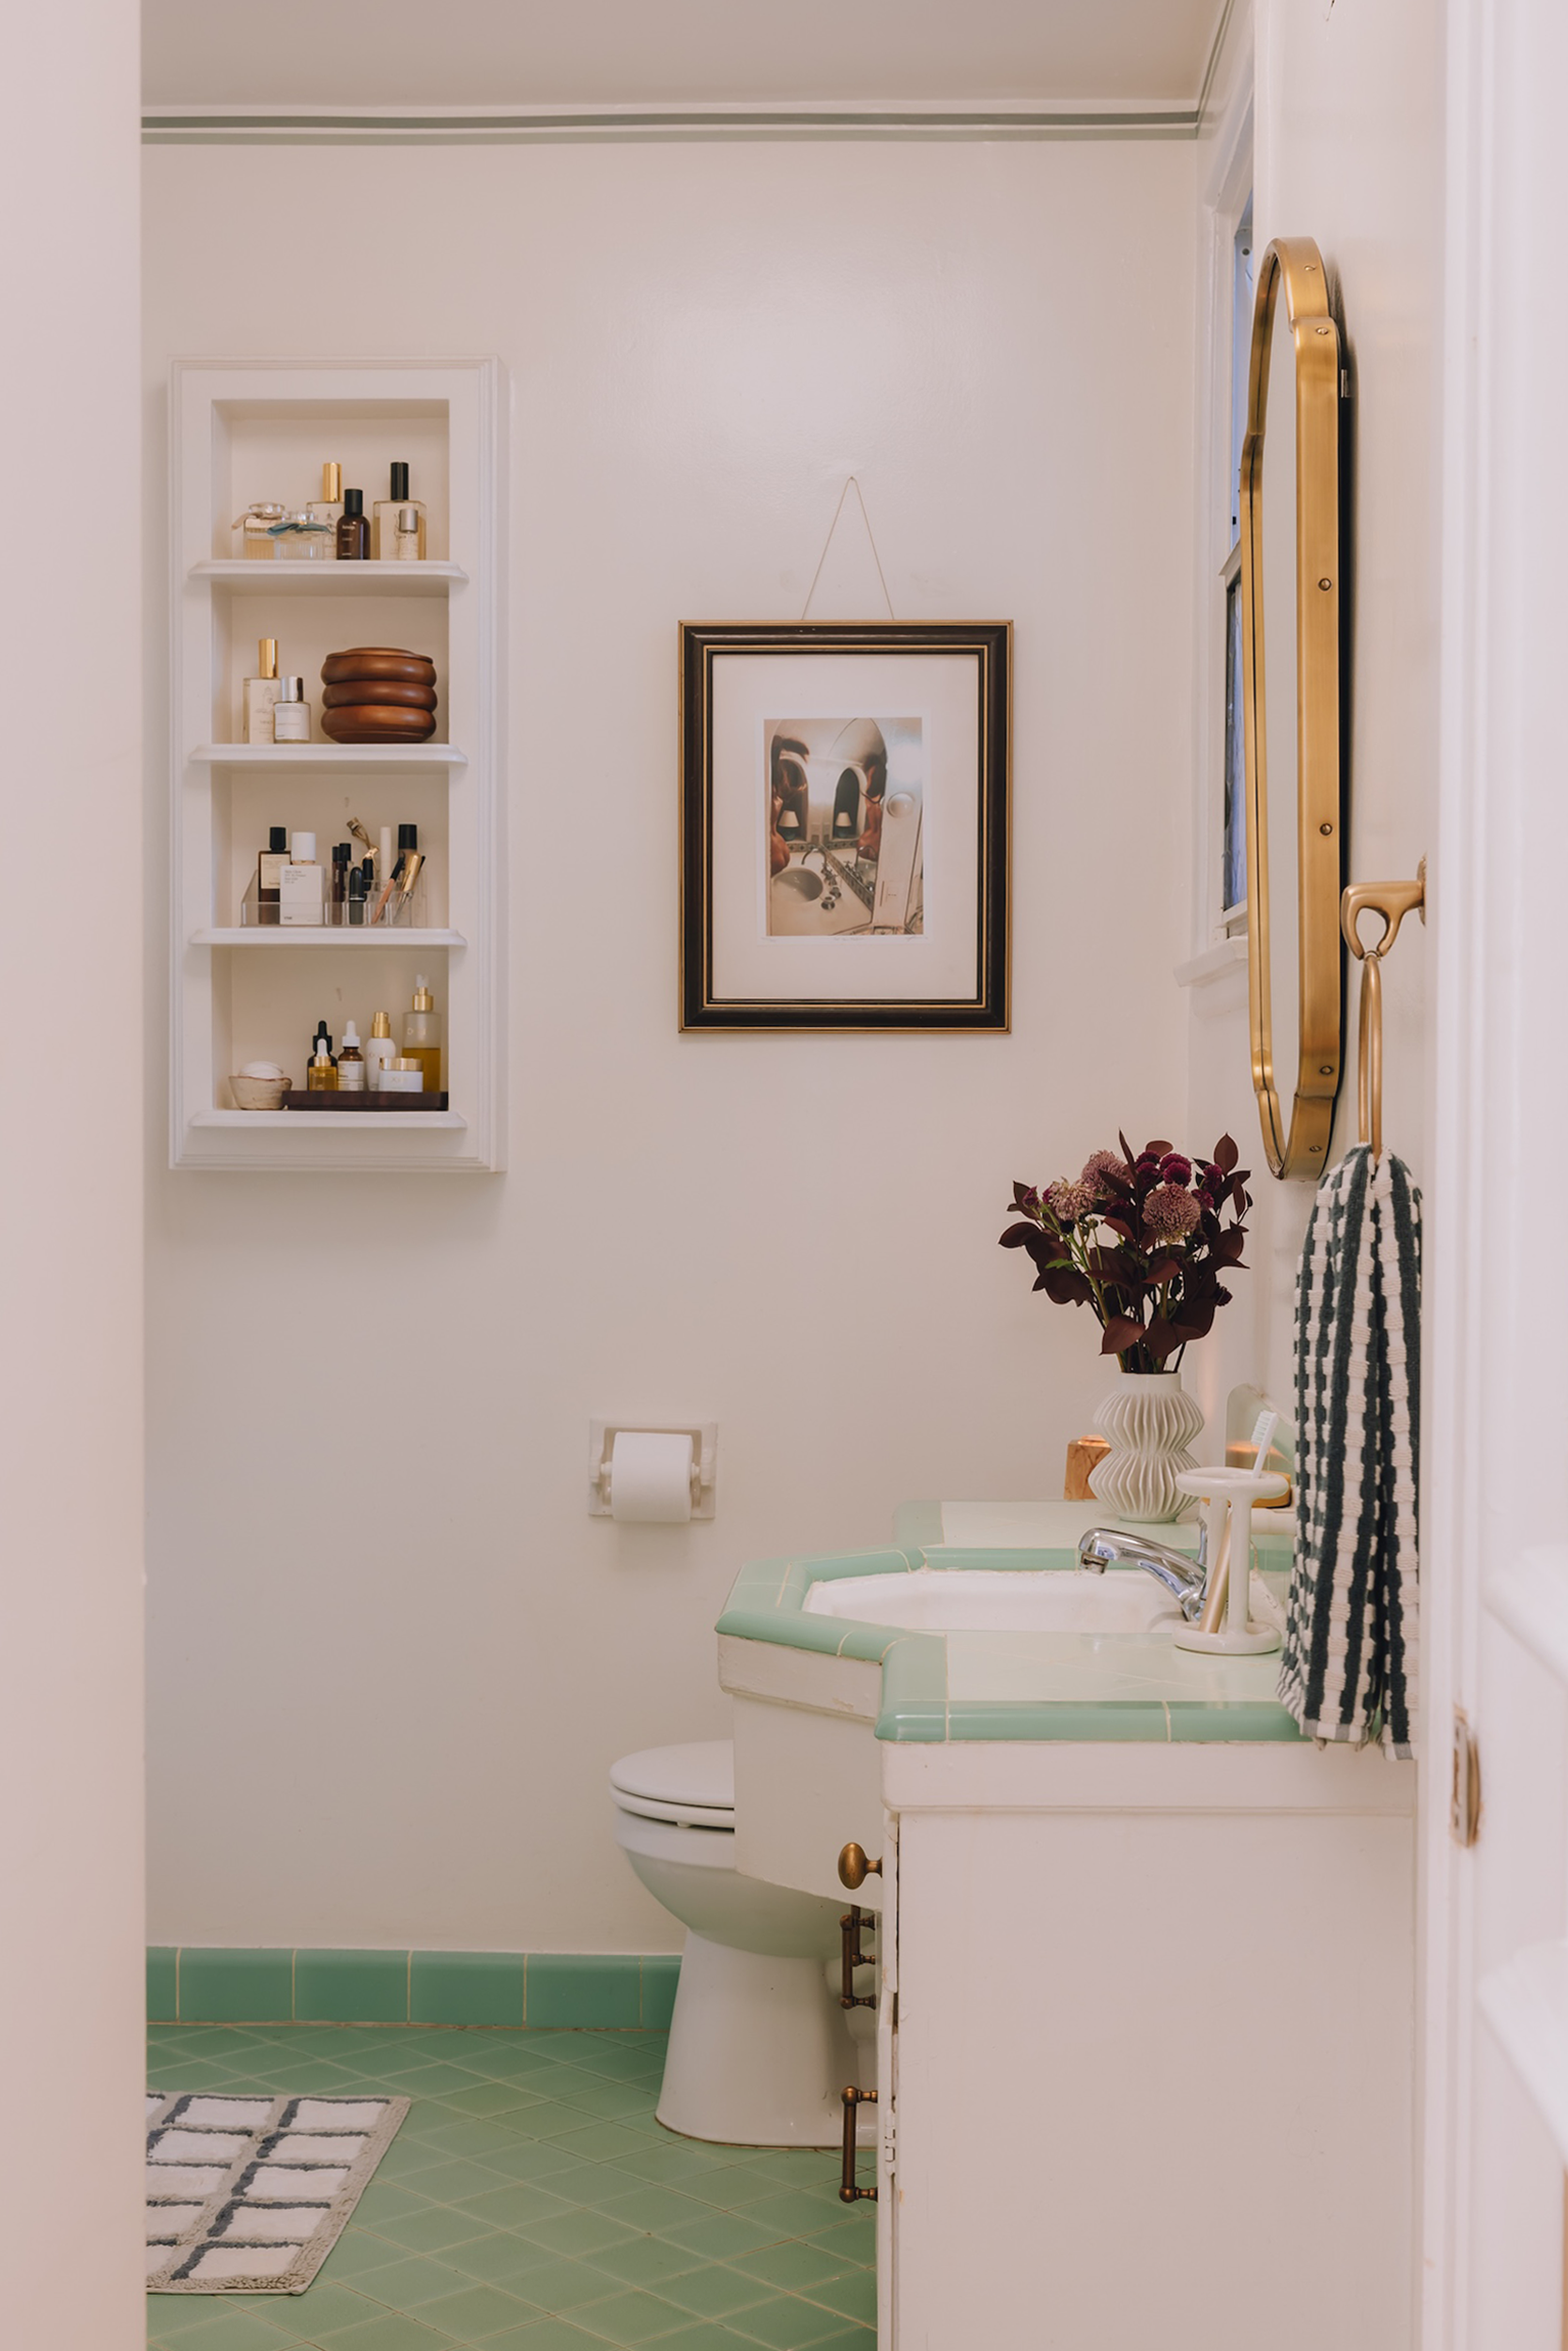
I loved the idea of doing a “painted crown moulding” to draw your eye upward (and knew I could figure out an even easier renter-friendly way to do it)…
Bath Mat | Towel Holder | Towel | Toothbrush Holder | Vase (Similar) | Stackable Wooden Bowls | Mirror
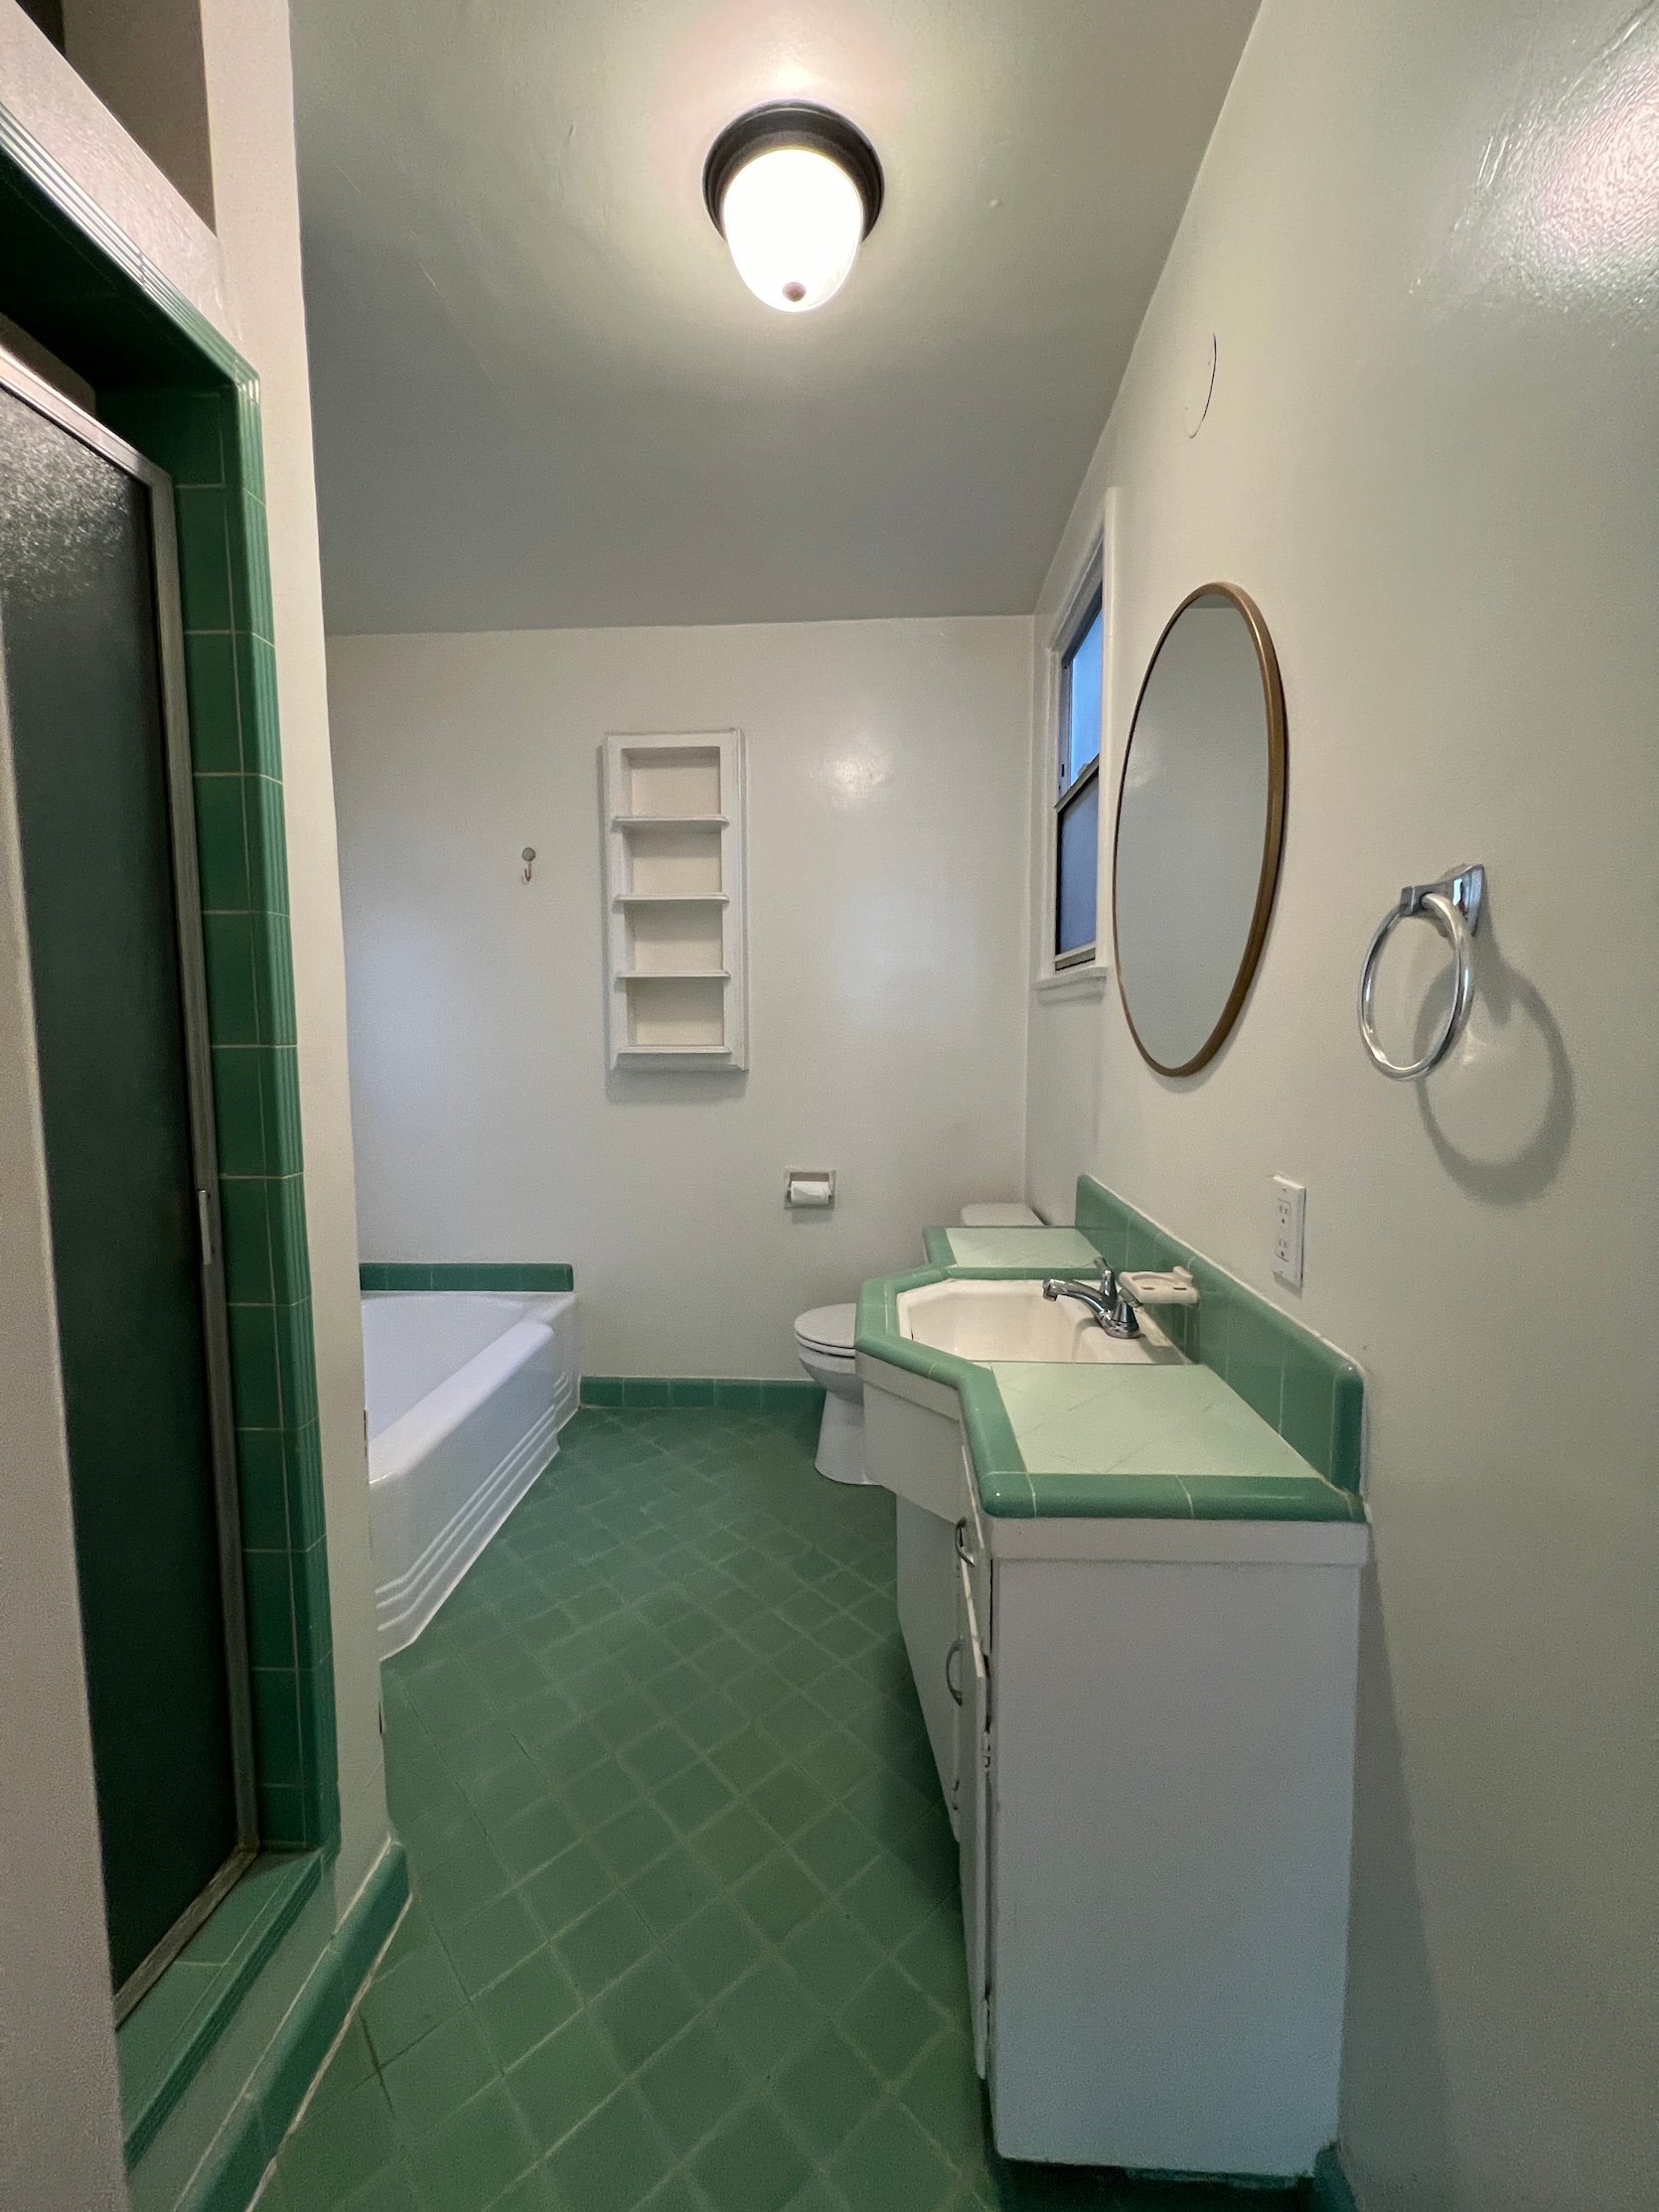
So this is the new view into the bathroom after my simple renter-friendly upgrades!! The space has so much more personality now, and I can take almost everything with me when I move out, which I love.
I loved the look of that inspo photo so much – so I used this washi tape in two different colors (I could only find this variety pack, so I ended up ordering 3 sets – so I used 6 rolls total, and it covered the whole room). Now, washi tape notoriously doesn’t stick well to dusty surfaces, so I was wary that this would hold up since my apartment can collect a lot of dust being in a city, but I just thoroughly cleaned the wall before I applied it, and it stuck on – no problem. And now it’s held up great for over 6 months! It genuinely worked so well for this space and will be so easy to remove when I have to leave.
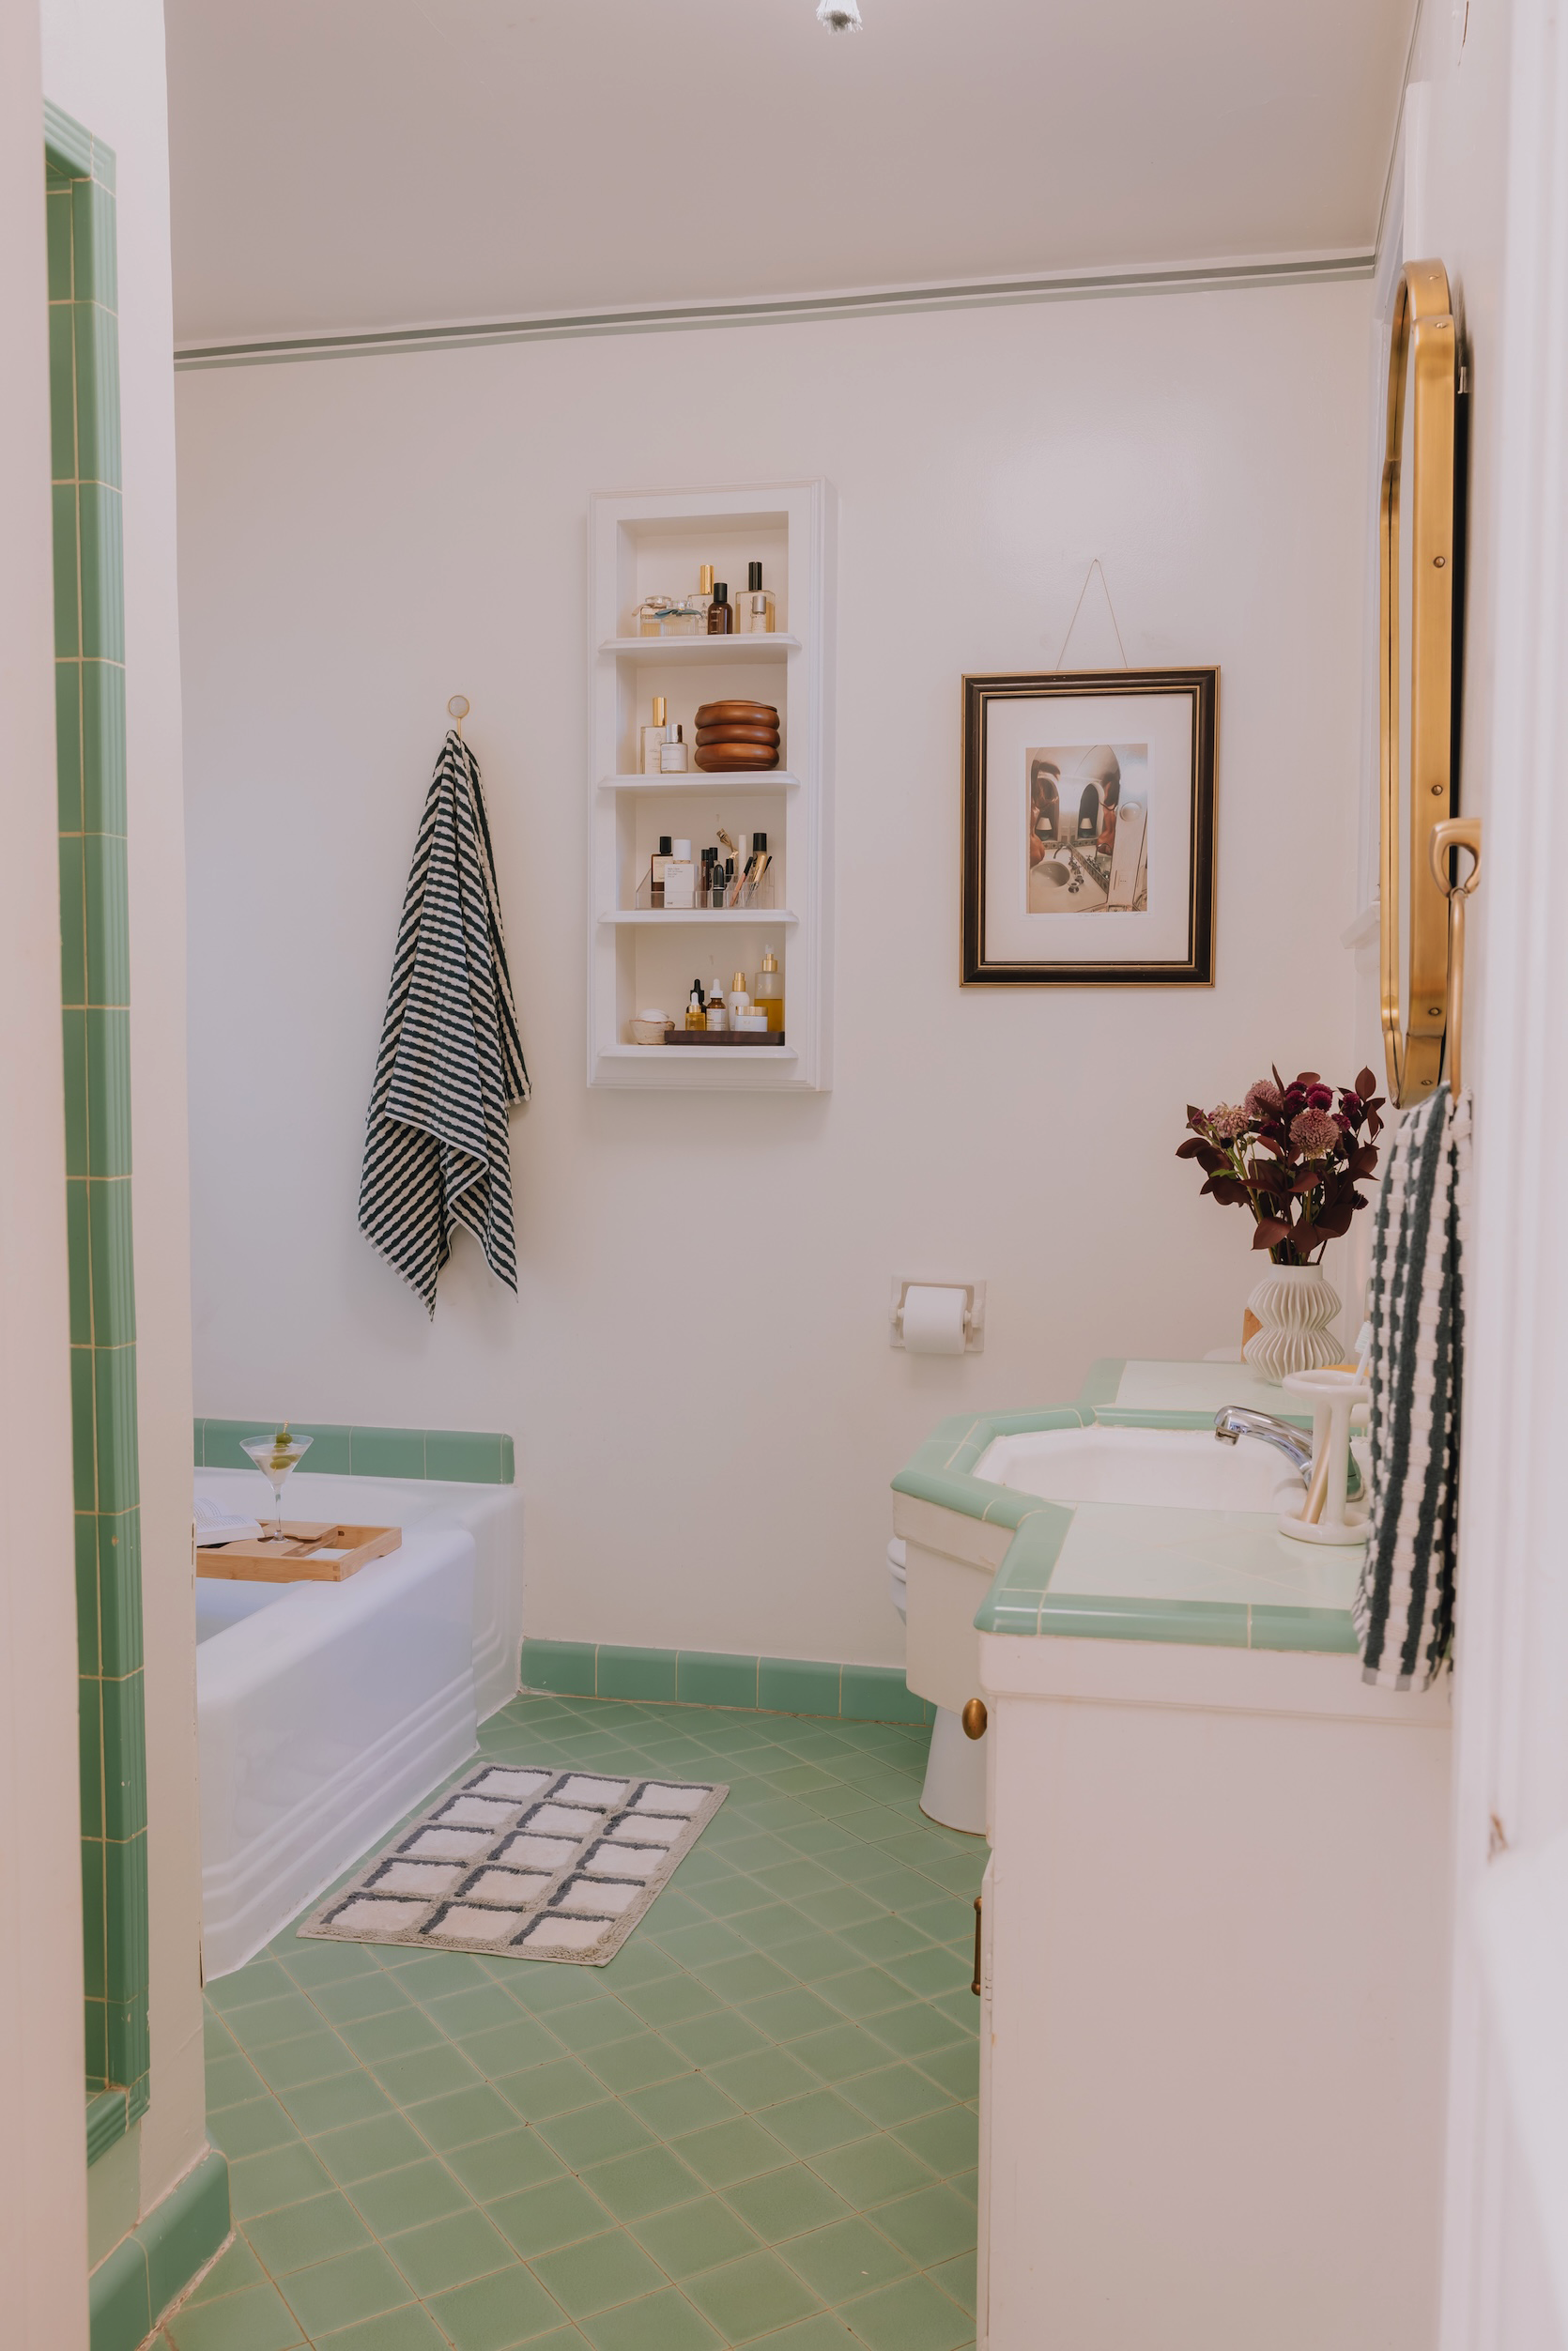
Washi Tape | Towels | Bath Mat | Towel Holder
Those towels are so good, I bought a second set for my boyfriend’s house that I’m moving into next month!! They’re the Parachute x Target collab, so the quality for the price is awesome (Parachute’s towels are normally $60-$70+) and I think they’ll last a fairly long time since they’re so forgiving (and are so so soft).
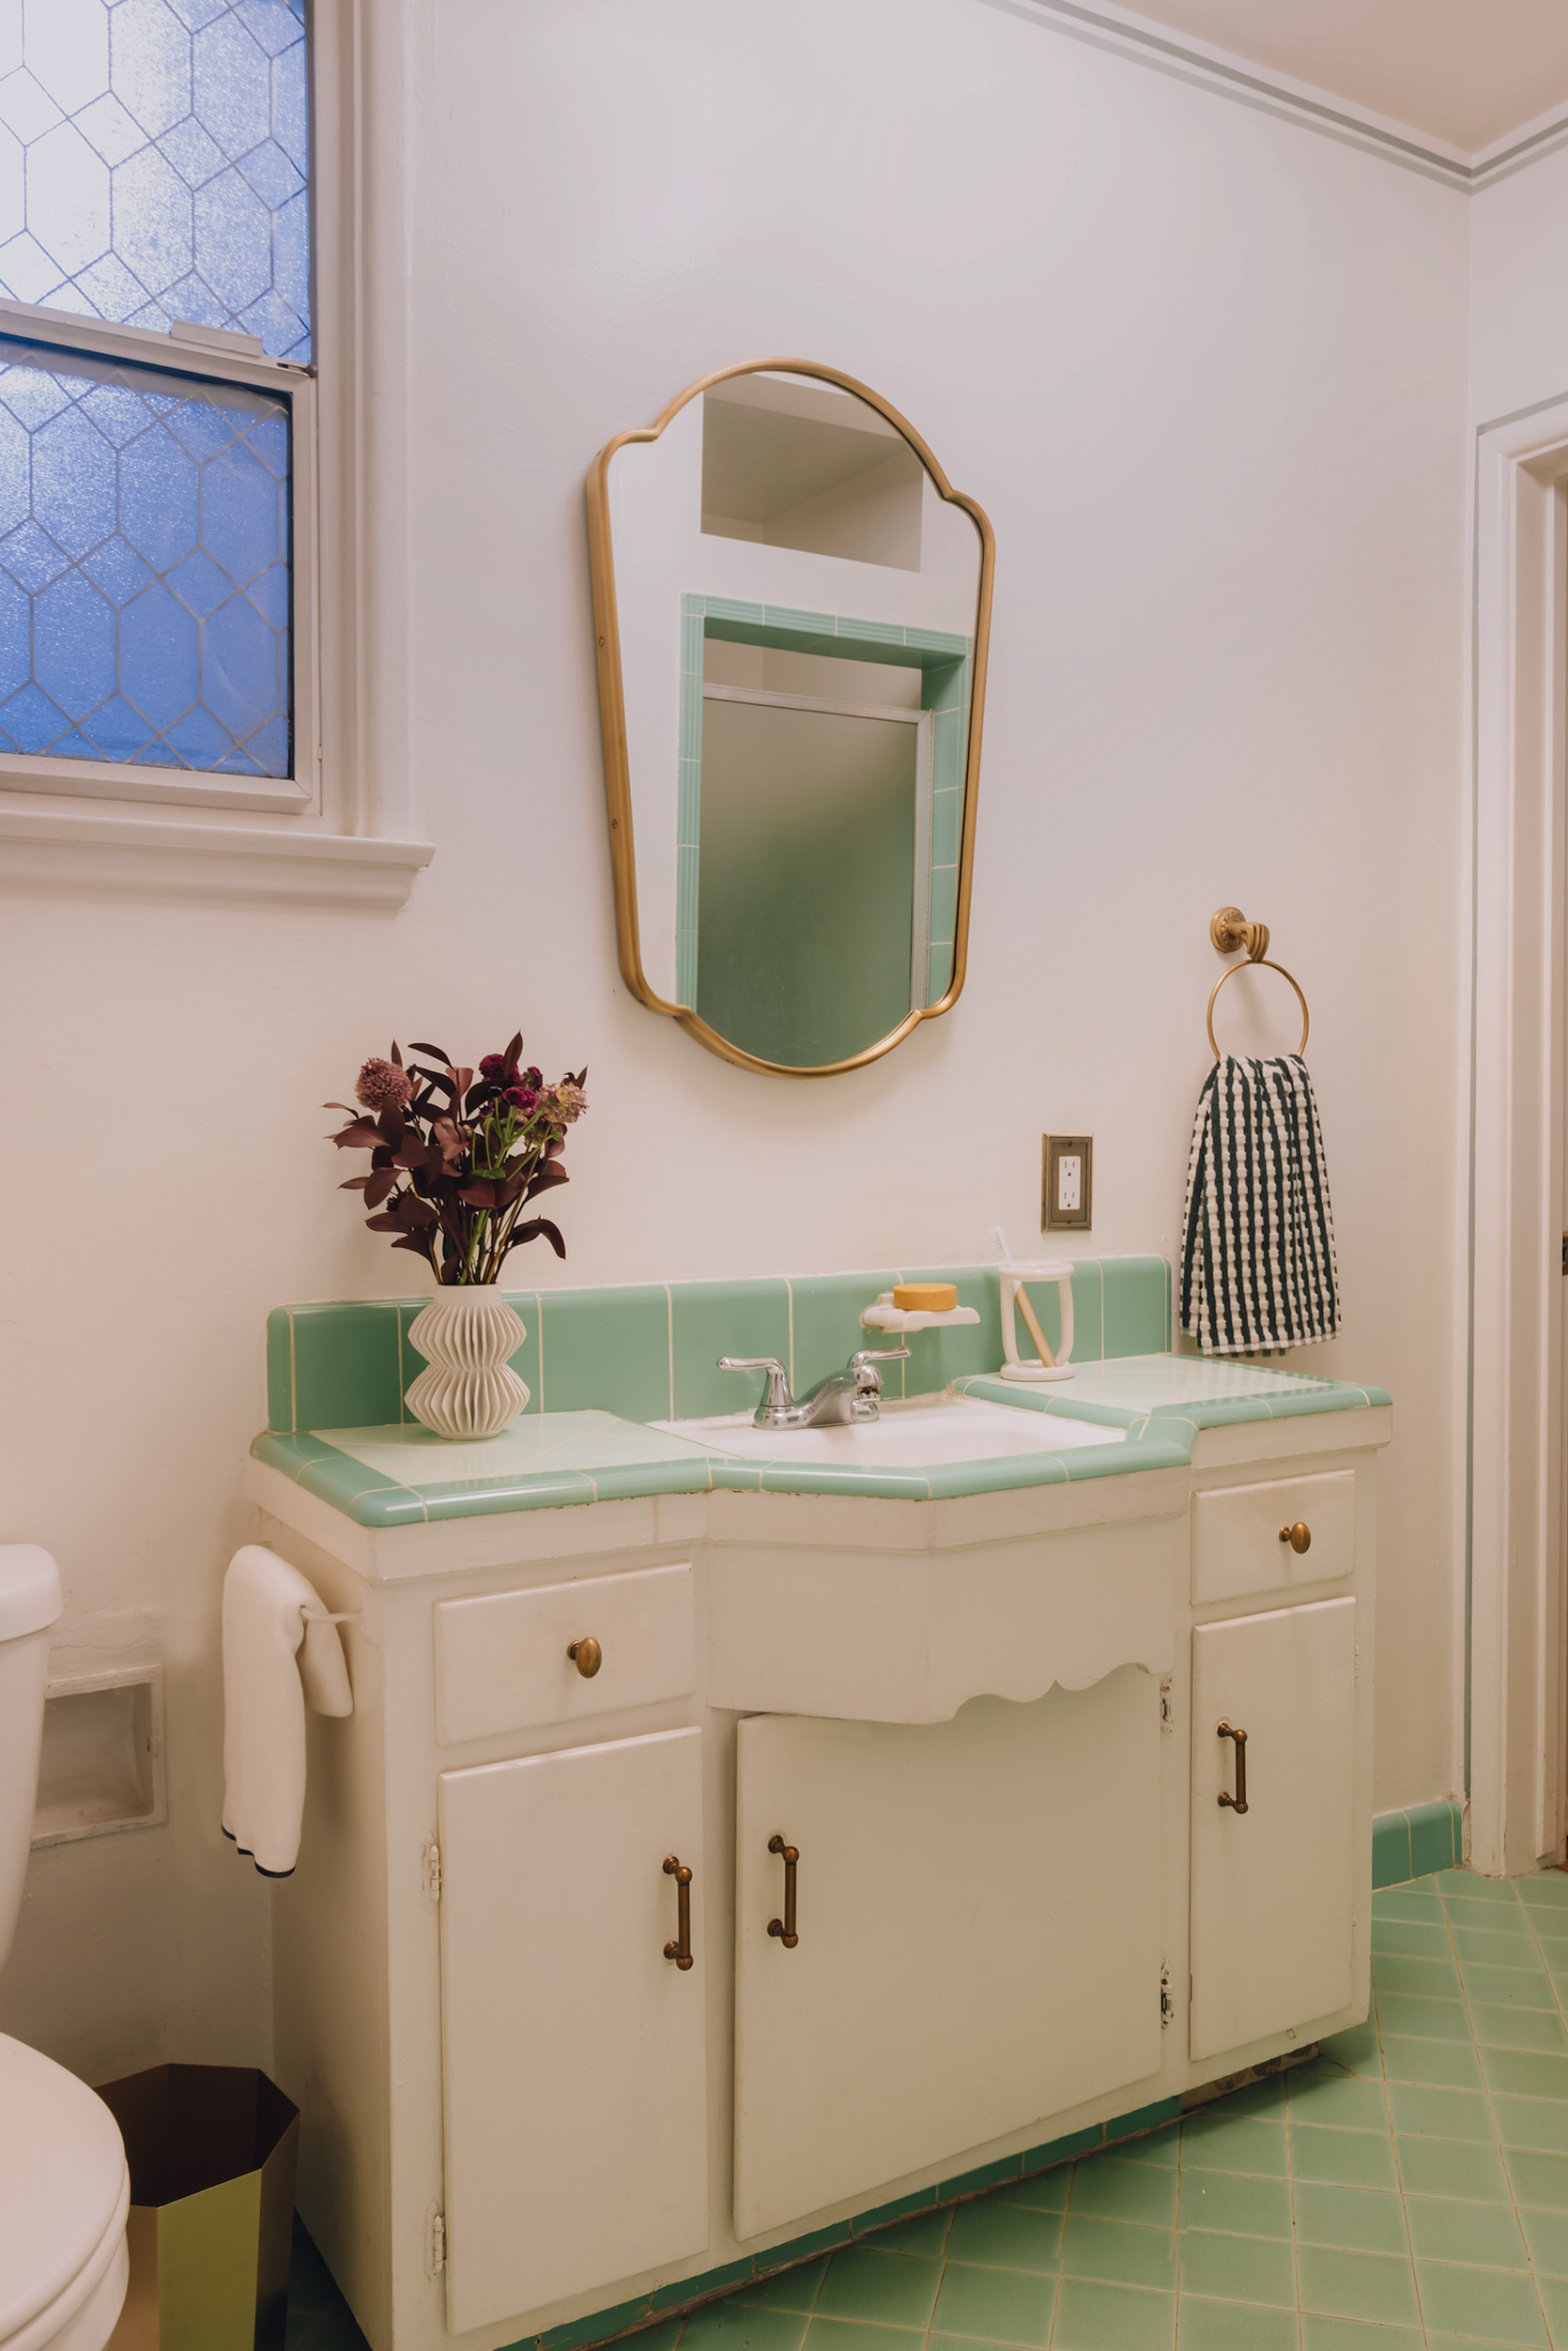
Mirror | Pulls | Knobs | Outlet Cover | Towel Holder | Towel | Trash Can | Mirror | Toothbrush Holder | Window Film
These were truly the easiest swaps – my goal here is to show you that not every space needs a complete overhaul or remodel to look and feel better. The very first thing I did was swap the hand towel holder to this one – it’s from Anthropologie and I had my eye on it for a LONG time. Then, I changed out the boring circular mirror to my DREAM mirror from Soho Home (which I can’t wait to take with me to my boyfriend’s place), then added new hardware (the old ones were crumbling in my hands which was cool, so I didn’t buy super expensive ones because I’ll likely be leaving these), and then added this pretty window film to add some more pizzazz.
OH, and upon moving in, I swapped every single outlet and light switch cover in the apartment to these fun brass ones. They were super affordable but made such a big impact to my everyday.

I’m a firm believer that a bath is basically the same as having a hot tub inside your house. Taking a bath here is actually magical. This tub is so perfect, and if you light a few candles, get your dirty martini and bubbles going, it is DIVINE.
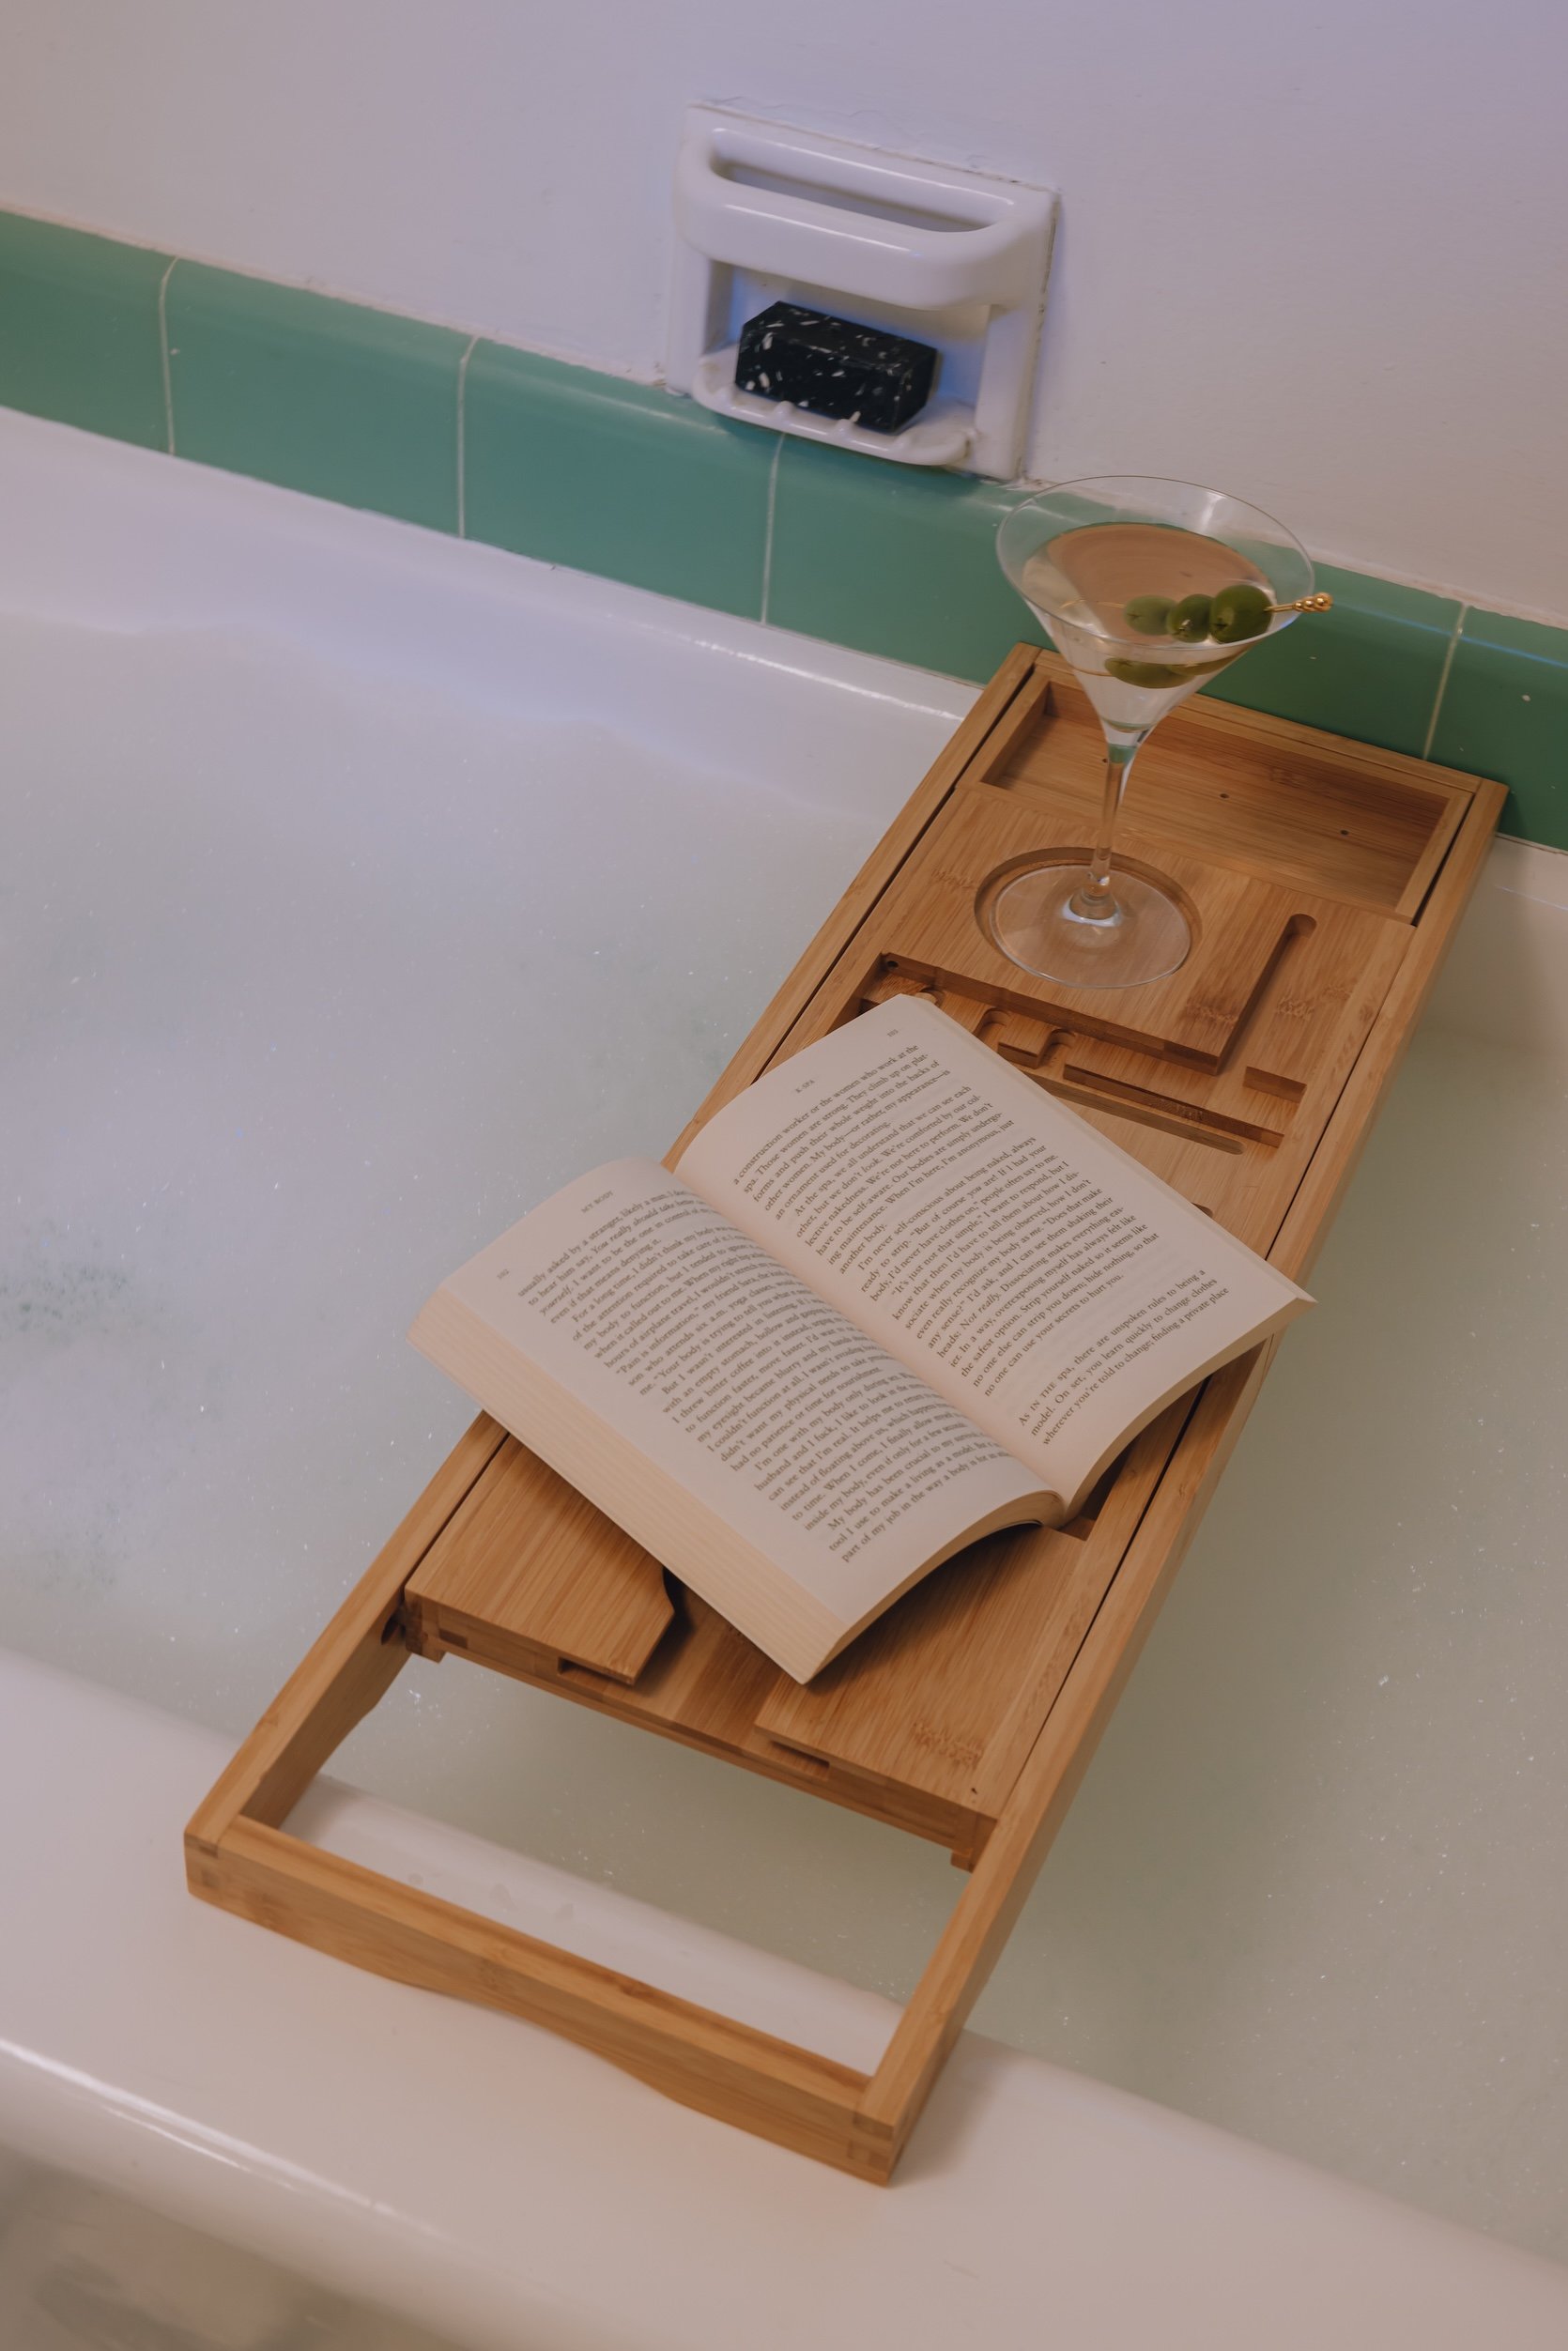
I usually read on my iPad or Kindle (my sister got me into the fairy smut genre, and I cannot get enough…My Fourth Wing, ACOTAR, and Throne of Glass fans RISE UP!), so when it came to styling I only had a few physical books, so please enjoy this photo of My Body by Emily Ratajkowski, hahaha.

The art pieces above the tub are some of my absolute favorites. The skateboard guy I found at Market Market in Palm Springs (if you haven’t been – GO!), the top right is by Mucci (who I found at the Laguna Beach Sawdust Festival and have now put his artwork in 3 of the rooms in my apartment!), and then the top left is actually from my Hollywood studio (it’s a sketch of the view of the Chateau Marmont by the Max Gooding Co).
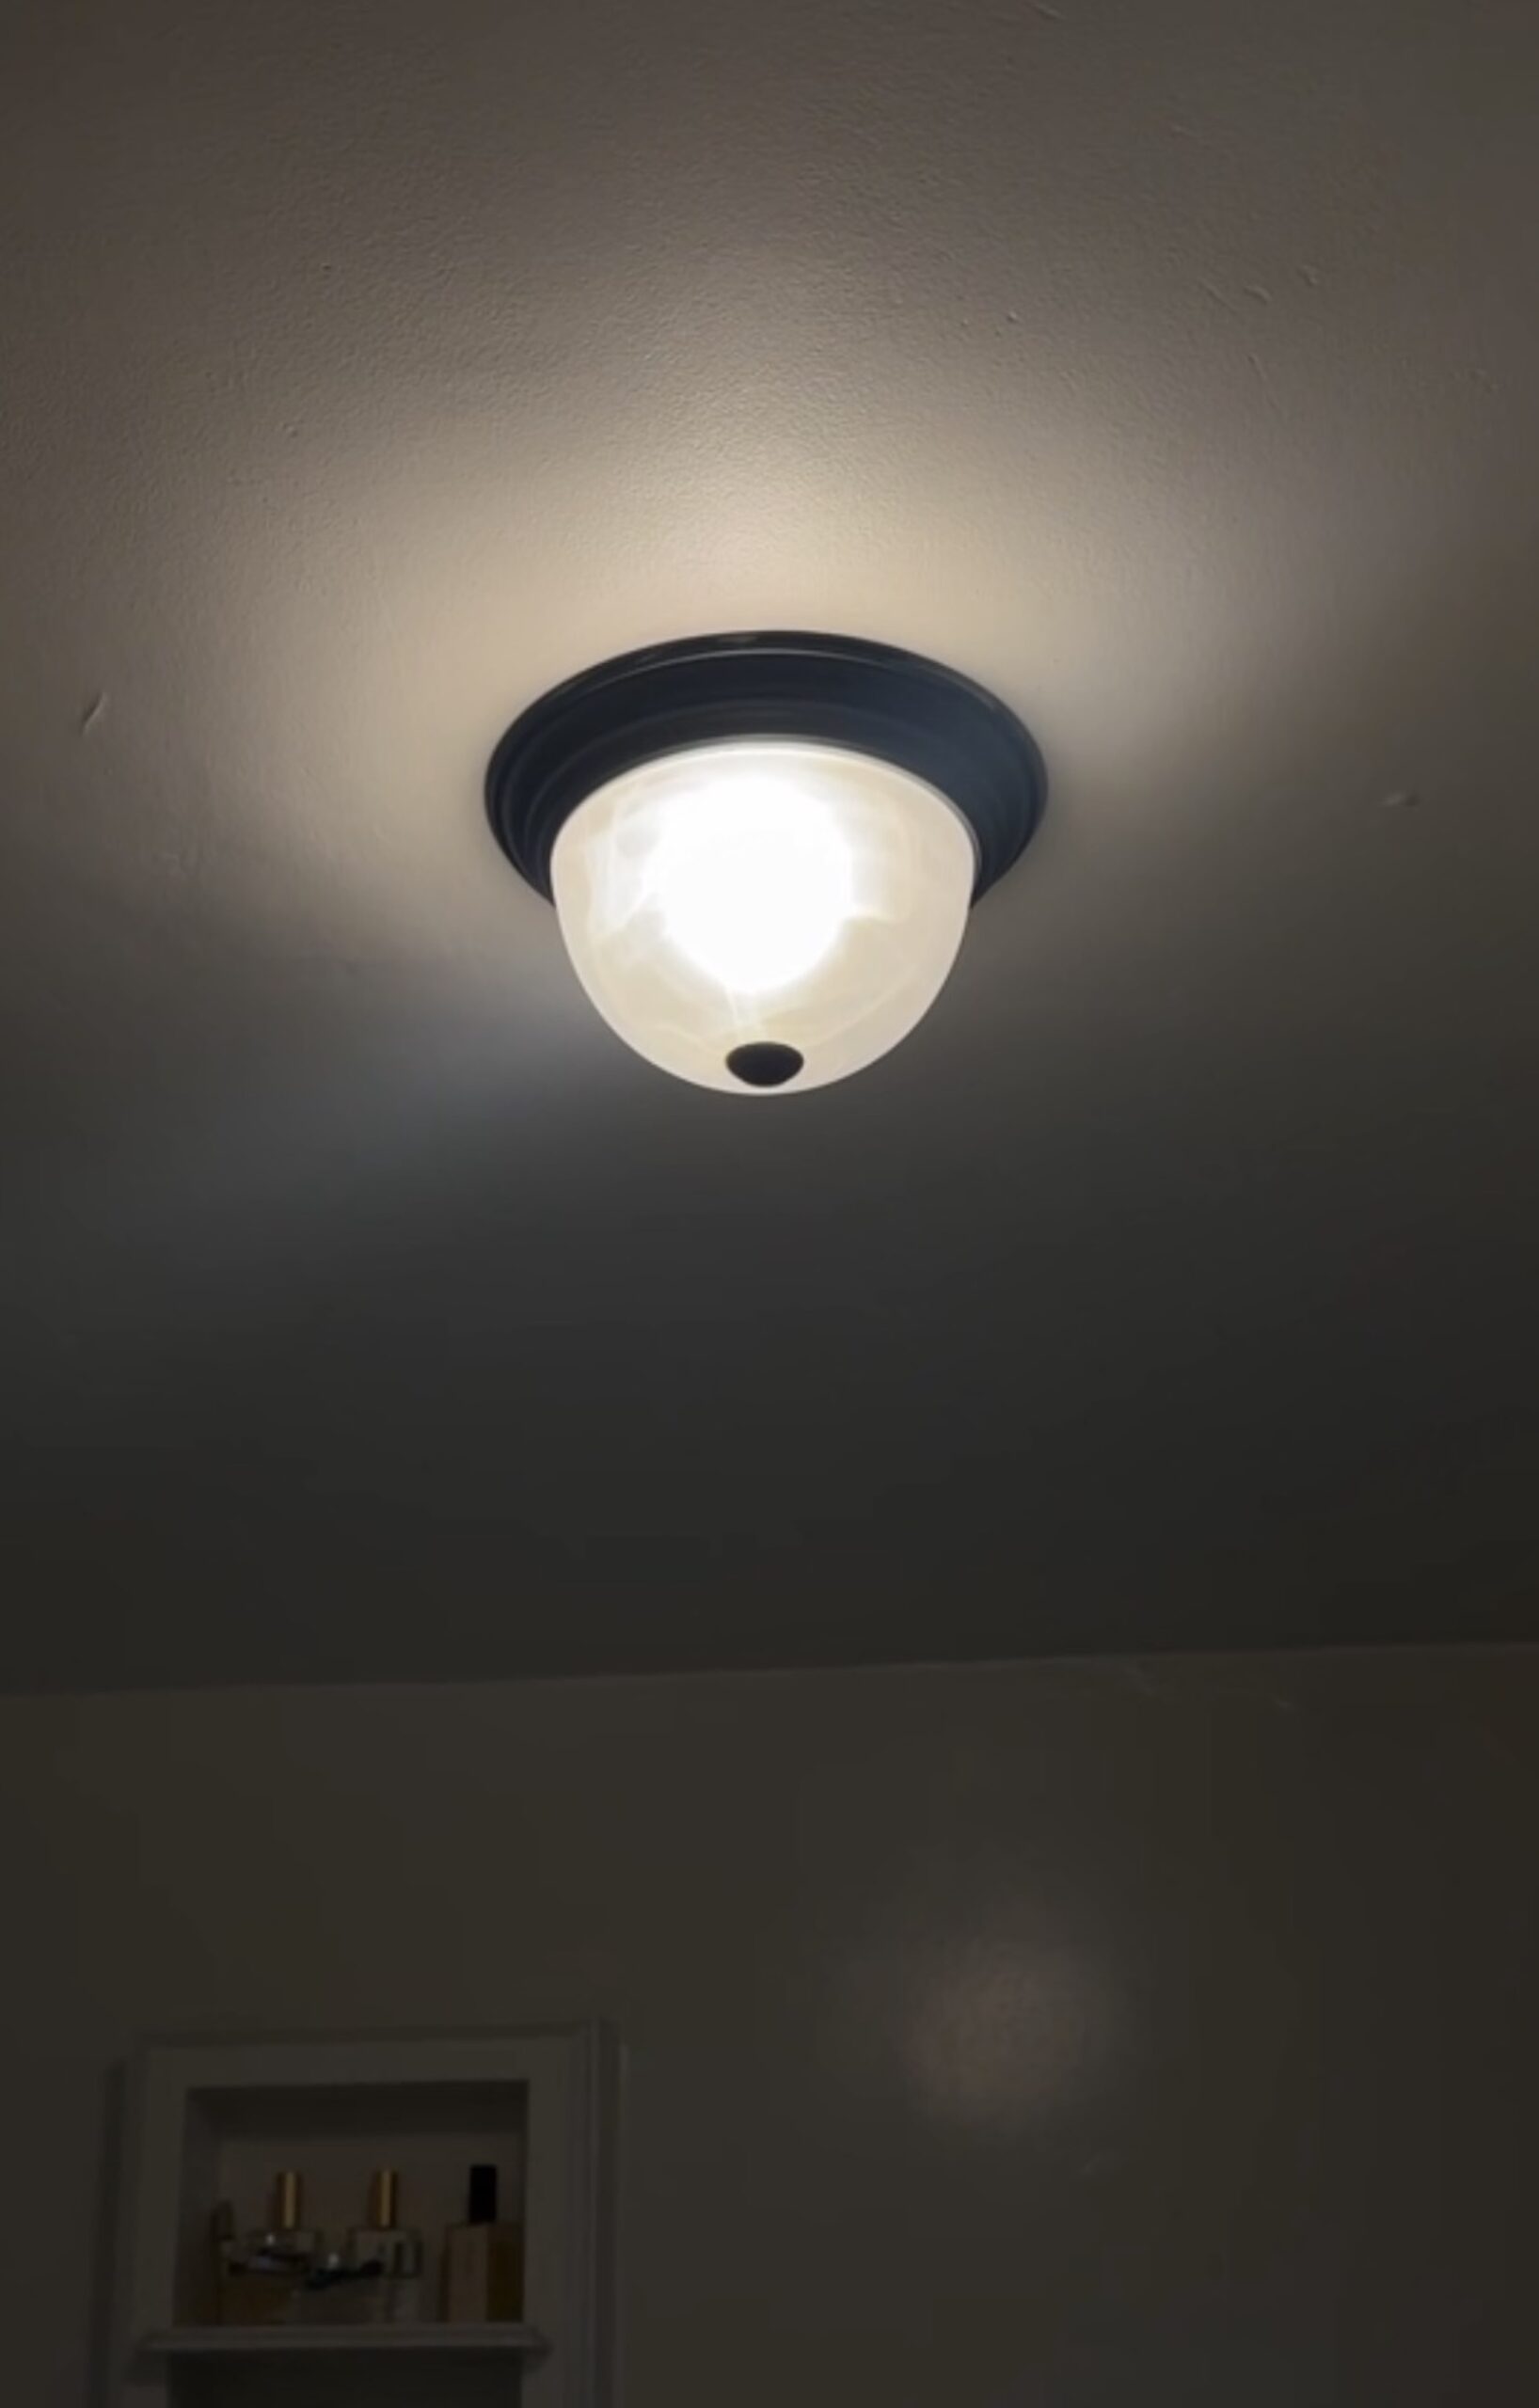
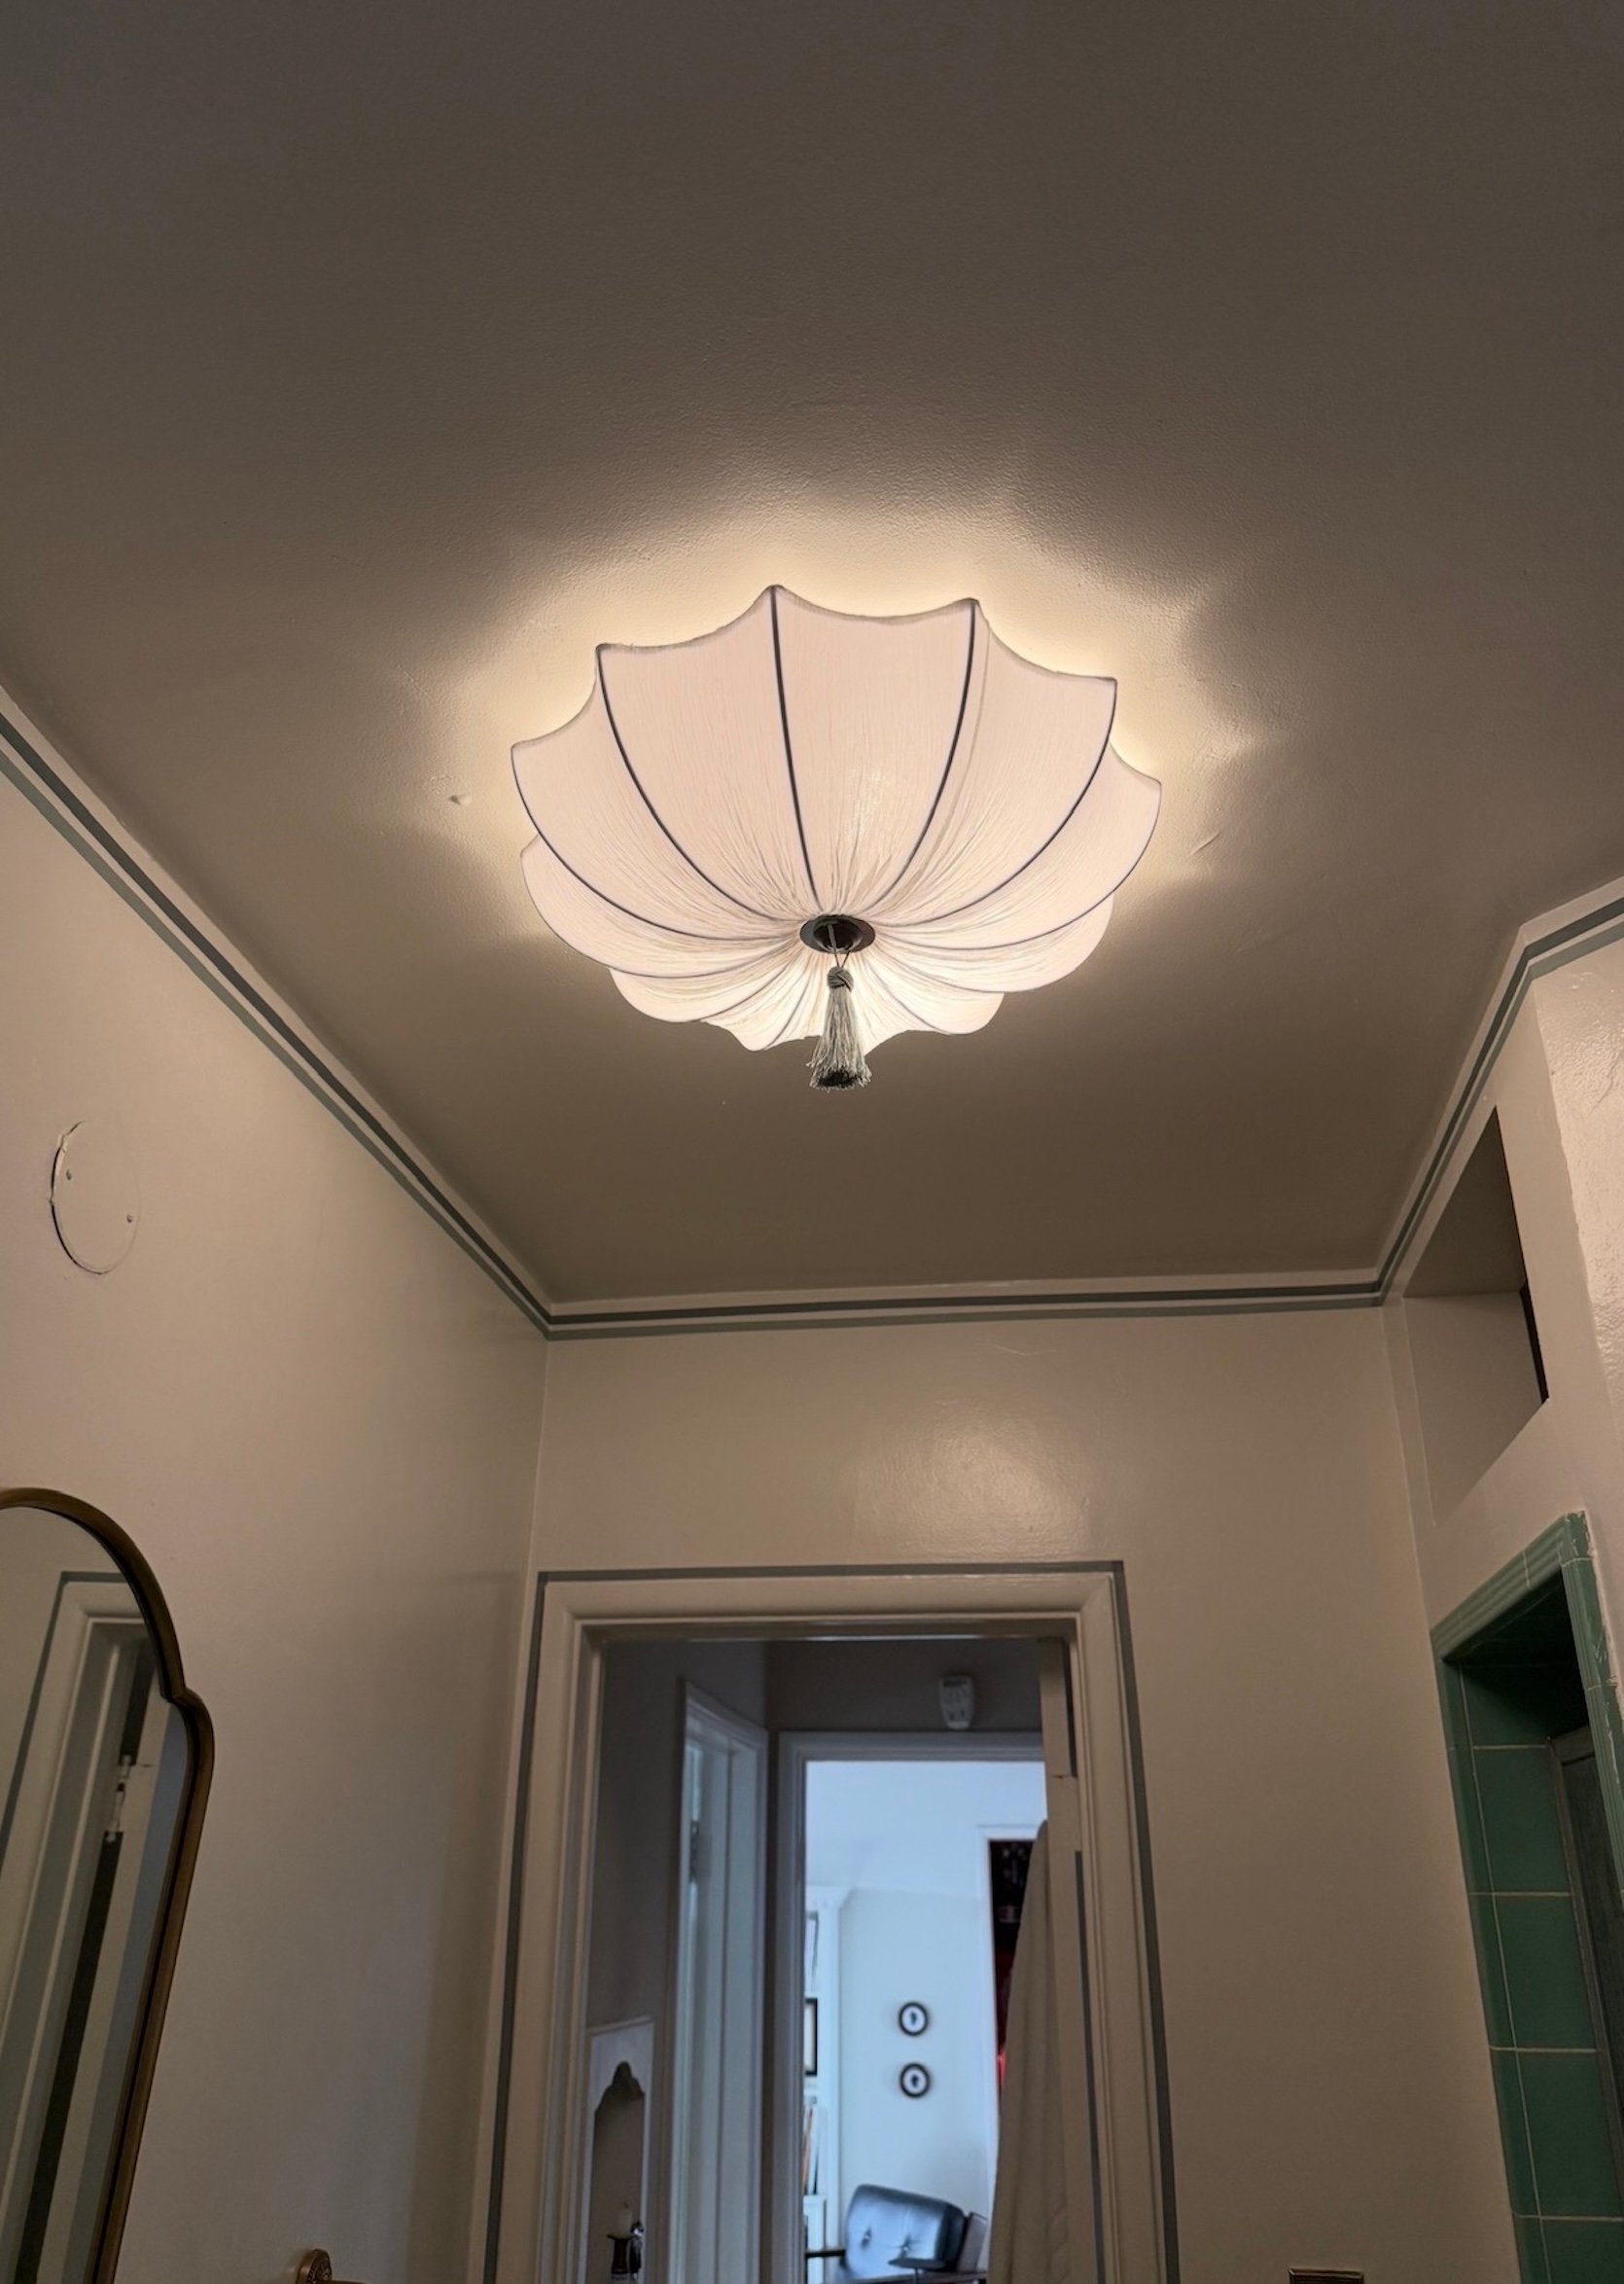
We didn’t get a good photo of the no-electrical-required light fixture swap (this bathroom is pretty small and hard to shoot, so shoutout to Lyle for doing an amazing job with the photos regardless!!) But I wanted to chat about this boob light upgrade that required NO ELECTRICAL! It was super easy – I just took off the boob light shade, then put the light fixture through the long screw from the original boob light, then secured the same hardware back on and covered it with a tassel. I made a video on it here, so it’ll make a bit more sense, but it was the easiest DIY ever. Someone joked that it went from boob light to nipple tassel, and I’ve never laughed harder. But yes, I highly encourage you to add a nipple tassel to your boob light!! It looks so much better.

This will always be our girly little apartment that helped us heal and grow, and I’ll forever be grateful for this space. I hope whoever moves in next loves every bit of it the way we did. Thank you for reading and checking out all of these makeovers – it means the world!!
*Design by Mallory Wackerman
**Photography by Lyle Nelson
This is just gorgeous. And also gave me a chance to look back at your also-gorgeous studio. I can’t wait to see how you make your next place gorgeous too!
ah thank you so much!! That studio was such a blast to design
You brought out the hip in this charming bathroom… and the full rental, really! I love the renter/non-demo upgrade posts Mallory. Wishing you a smooth move, and more projects in the future!
thank you so very much!! That’s so kind 🙂
I love the small tweaks in your bathroom and kitchen [although some of the kitchen tweaks seem dangerous, but you’re moving out, so I guess it doesn’t matter]. I notice a peachy-pink cast to these images, which I assume is the photographer’s intention. Almost a flesh tone? It’s pleasant, but it seems really different from how our eyes would experience the spaces in person, and I wonder how much this effect is skewing our perception of your work. Obviously, professional photos are lit and tweaked, but I believe that’s typically done to get us closer to how the spaces look in real life, not transforming the colors for effect.
You can see the sink and tub are clearly bright white. The walls are a creamier/warmer white as reflected in the photos.
Yes, I see that right alongside the cast to which I’m referring. You can see the same general effect in the photos of the bathroom and kitchen, versus the the before and process photos of both spaces. I assume this is something the photographer did to enhance these photos, either while shooting or in post.
I also admired the slight pinkish tone of the walls and was wondering what paint color it is.
So cute, Mal! I love soaking in a hot bath, and I love dirty martinis…why have I never combined these things before?! Back to the design – I’m particularly inspired by the washi tape idea. Also, a question about the hook for your bath towel – is this a Command hook? I love the look of it!
it’s a hook that was already installed in the wall when I moved in!!
Your landlord must have rocks in his or her head if they want you to reverse all the changes you made. Maybe not everyone wants an awesome speakeasy (big maybe) but the property is vastly improved.
And – wait, what? What the hell is fairy smut genre? How long has this been a thing? Sometimes I really feel the generation gap…
It’s official. I’m hiring Mal to design my whole house. I’ve loved every single reveal. Such stylish taste! Thank you so much for sharing with us. I love your description of this being a healing place for you. I can so relate to that. Best of luck with the move. On to new adventures!
so kind thank you!!
Love this! So cute and fresh but honors the original vibe of the bathroom!
Eeek thanks Orlando!
I would love to see a post about the process you will follow to move OUT of here. What are you undoing, what are you leaving, etc… Is the media center you built going with you to your next apartment, staying here or being sold? What about the speakeasy? That would be fascinating to read about.
I’m in the trenches of it – will definitely write about it if I can!!
Yes to this! I would love to see the reversal. Were any changes deemed OK to stay? That dining room wallpaper could be a huge upgrade to the right prospective tenant.
Your bathroom has such a vibe! Well done and I’m really enjoying this type of content, lately. I love how the space has a distinct personality while honoring and playing off of the original features. Please, more of this type of content!
Thank you!
Very cute! I’m curious, is there no shower option? I didn’t see a shower curtain or fixture.
The shower is it’s own “room” to the left of the tub
Yes, you can see it reflected in the mirror.
that would be wild if you could only take a bath!! The shower is a little room to the left – you can kinda see it through the mirror and you can see the corner of the tile in some shots! It’s a small room so it was hard to shoot 🙂
Love the towels, but unfortunately, I can’t do $40 for a single towel, esp given how my family of 5 goes through them. But I’m genuinely curious: is a $40 towel *really* so much better than a $10 one? Do I need to totally change my towel budgeting mindset? Like, I get that it’s maybe softer at the start, but don’t they all just eventually become the same year-old, not-so-soft towels eventually? Or am I really missing out by not spending more?
I think that the pattern is what makes these last so long!! I used to buy all white towels and those always get gross – but I had a similar towel from CB2 that had a pattern that was just like this one and it lasted YEARS
Better quality towels usually have more cotton loops per square inch, so they remain thicker and more absorbent for a long time. I buy “better” towels when they’re on sale and they do hold up very well. It’s also important not to use fabric softener or dryer sheets, because they coat the fabric, making it less absorbent and harder to keep clean. That being said, if your household is in a wild season of life, sometimes the cheap stuff is the better choice until things settle down lol.
Love it! The Washi tape, looooove looove……brilliant! Can’t wait to see your next place also. Thanks for sharing.
Such a fun idea with the Washi tape. Mind blown! TY
These changes made a big impact – especially the towel holder and mirror! Just ordered the towels – thank you.
Throne of Glass – read the series over two years ago and still think about it all the time. Manon forever.
Why not leave the tape for the new renters?
Also what will happen to the closet??