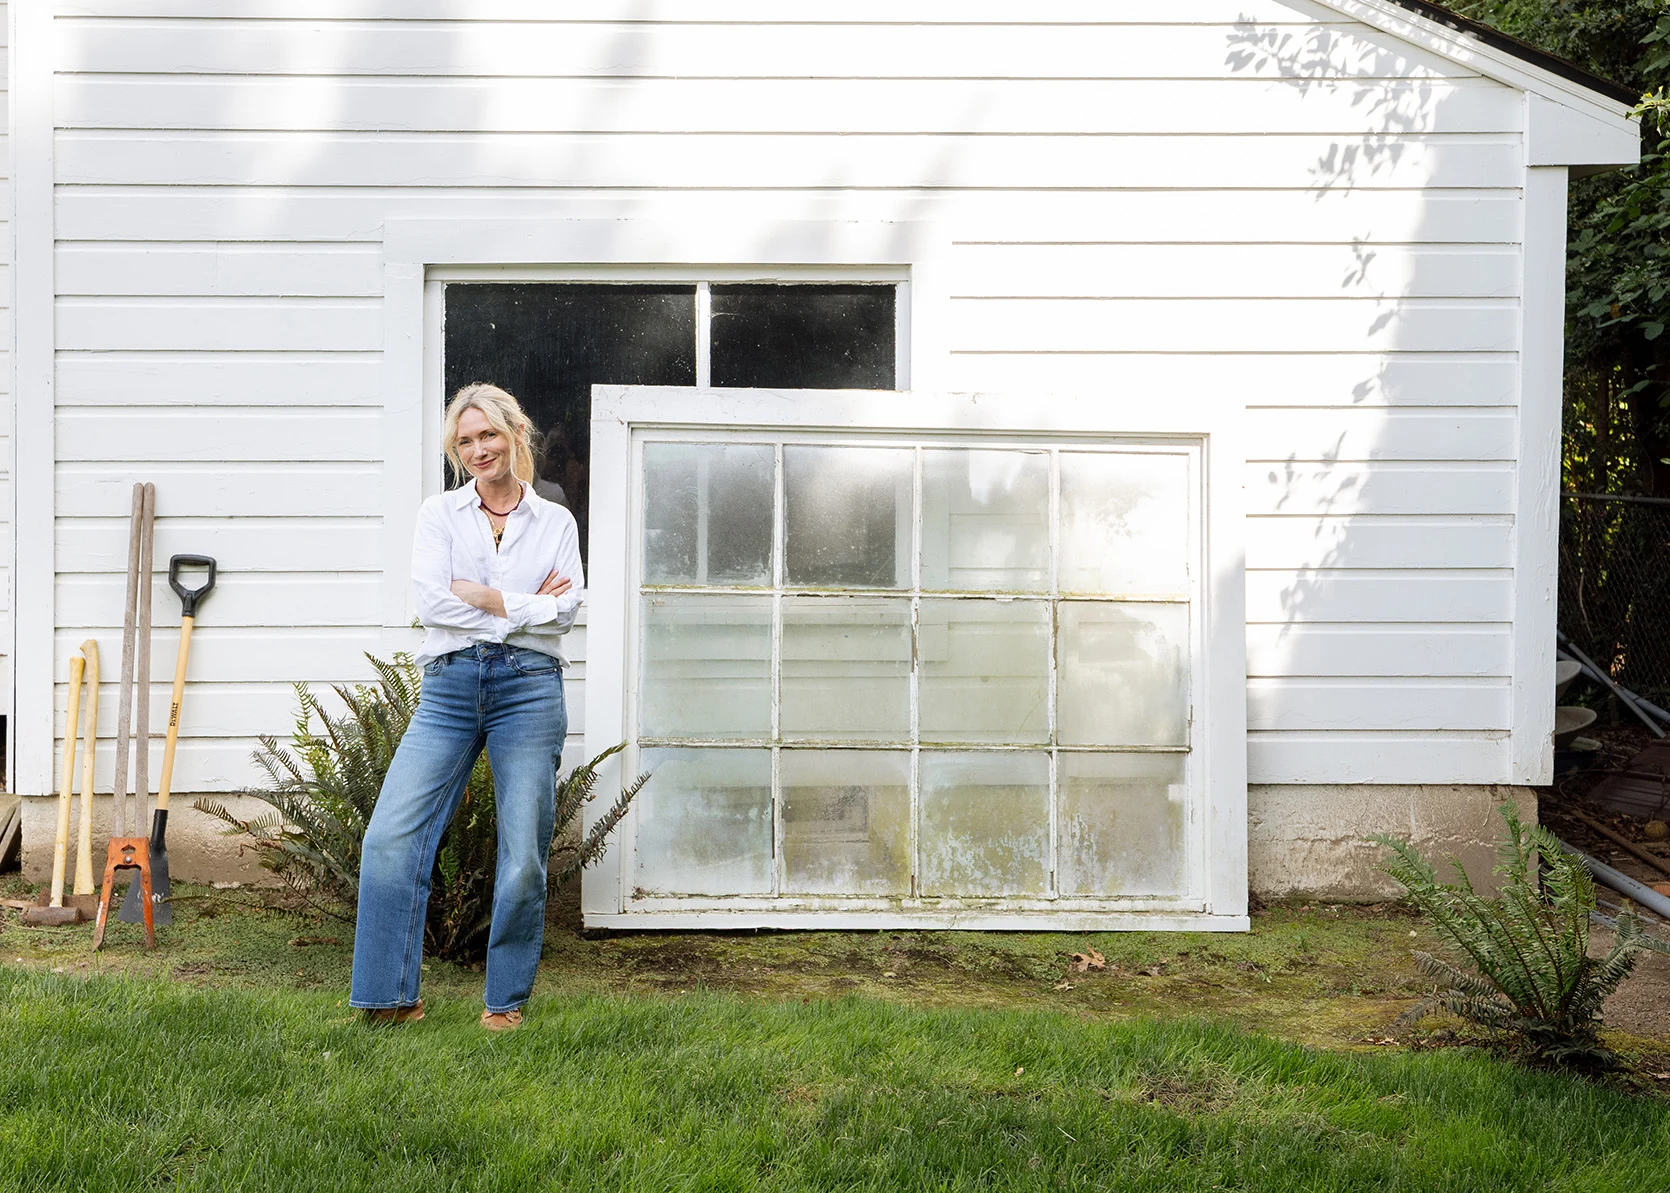
Design
Guest Cottage: What Are Doing With The Broken Vintage Windows And Doors??
Here’s what I know: Windows, doors, flooring, and tile are the things that I take pretty seriously. They are very important architectural elements, what makes or breaks a home long term (and are the most expensive to change or replace). This isn’t where I’ve ever taken big risks or gone cheap (well, maybe ’til now?), and the vintage windows and doors of the guest cottage are all busted, but charming as hell. They are original wood, single pane, from varying decades in the 1800s and early 1900s (depending on the room, it was added on to many times). So my plan was to take it case by case, to keep what we could, fix what we could, and replace what we needed. It would be an investment for sure. Fine. But as I started getting quotes, my “only high-quality doors and windows” mantra loosened. So here is what the plan is, room by room, door by door, window by window, and dollar by dollar.
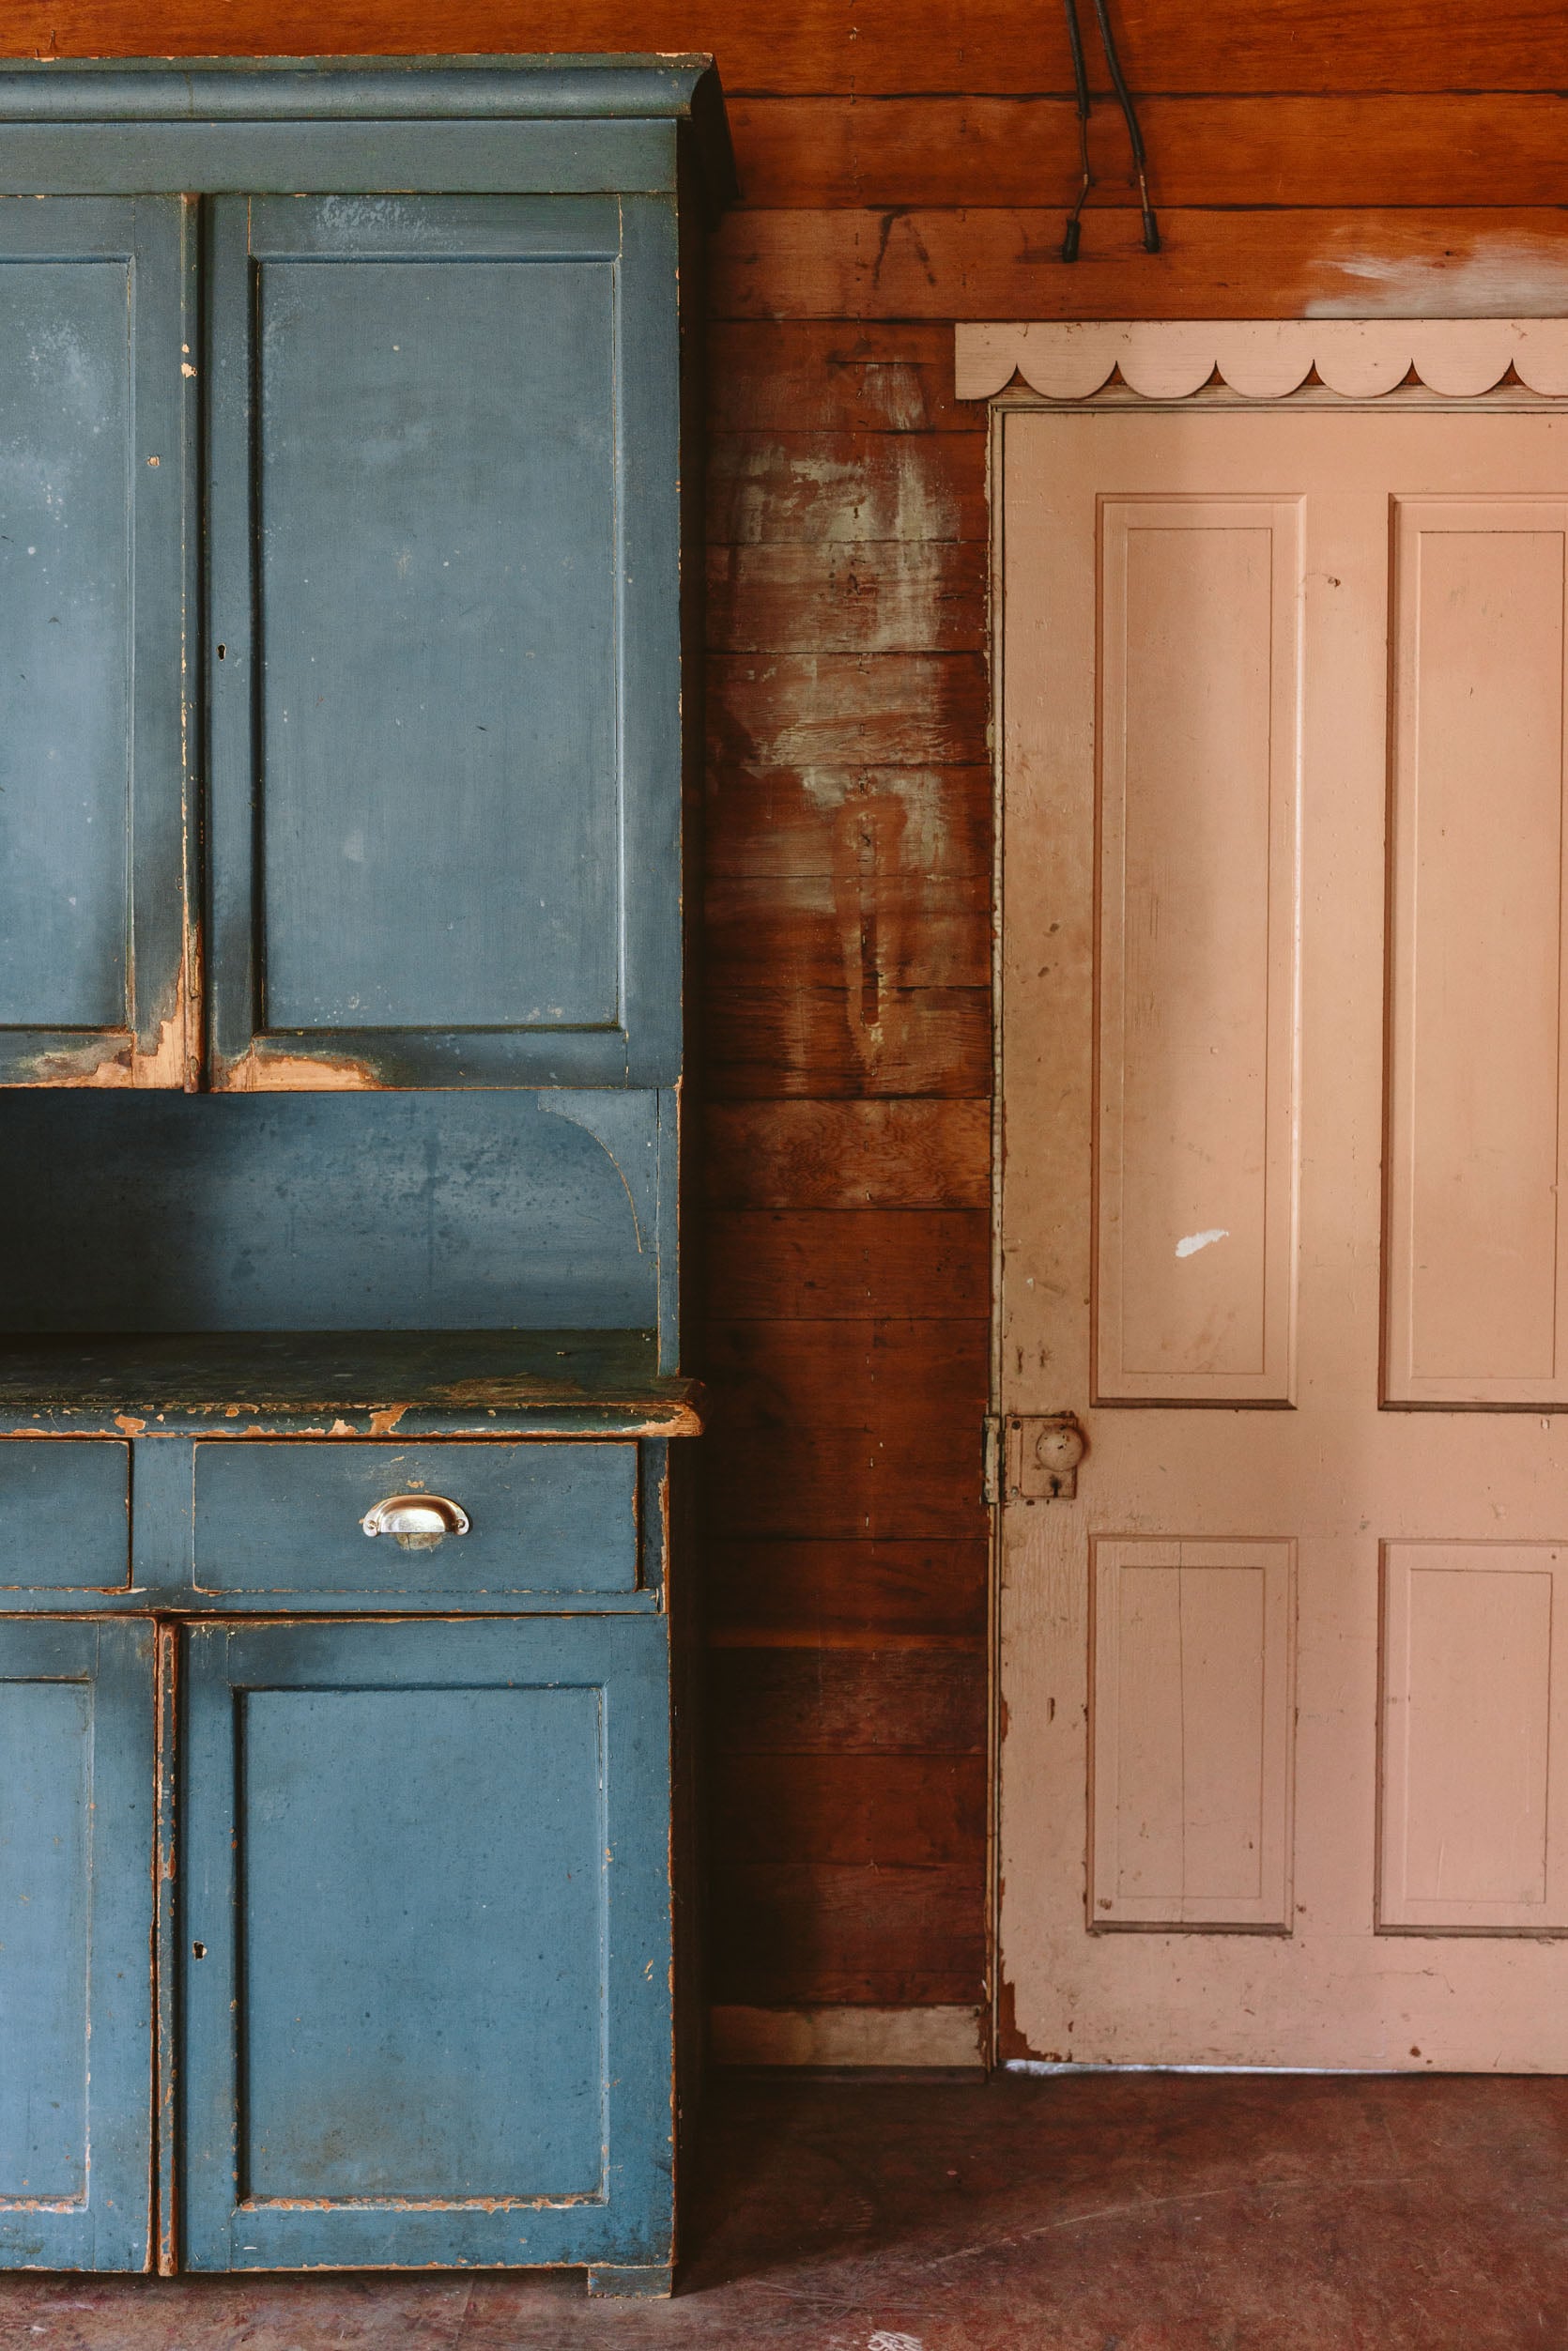
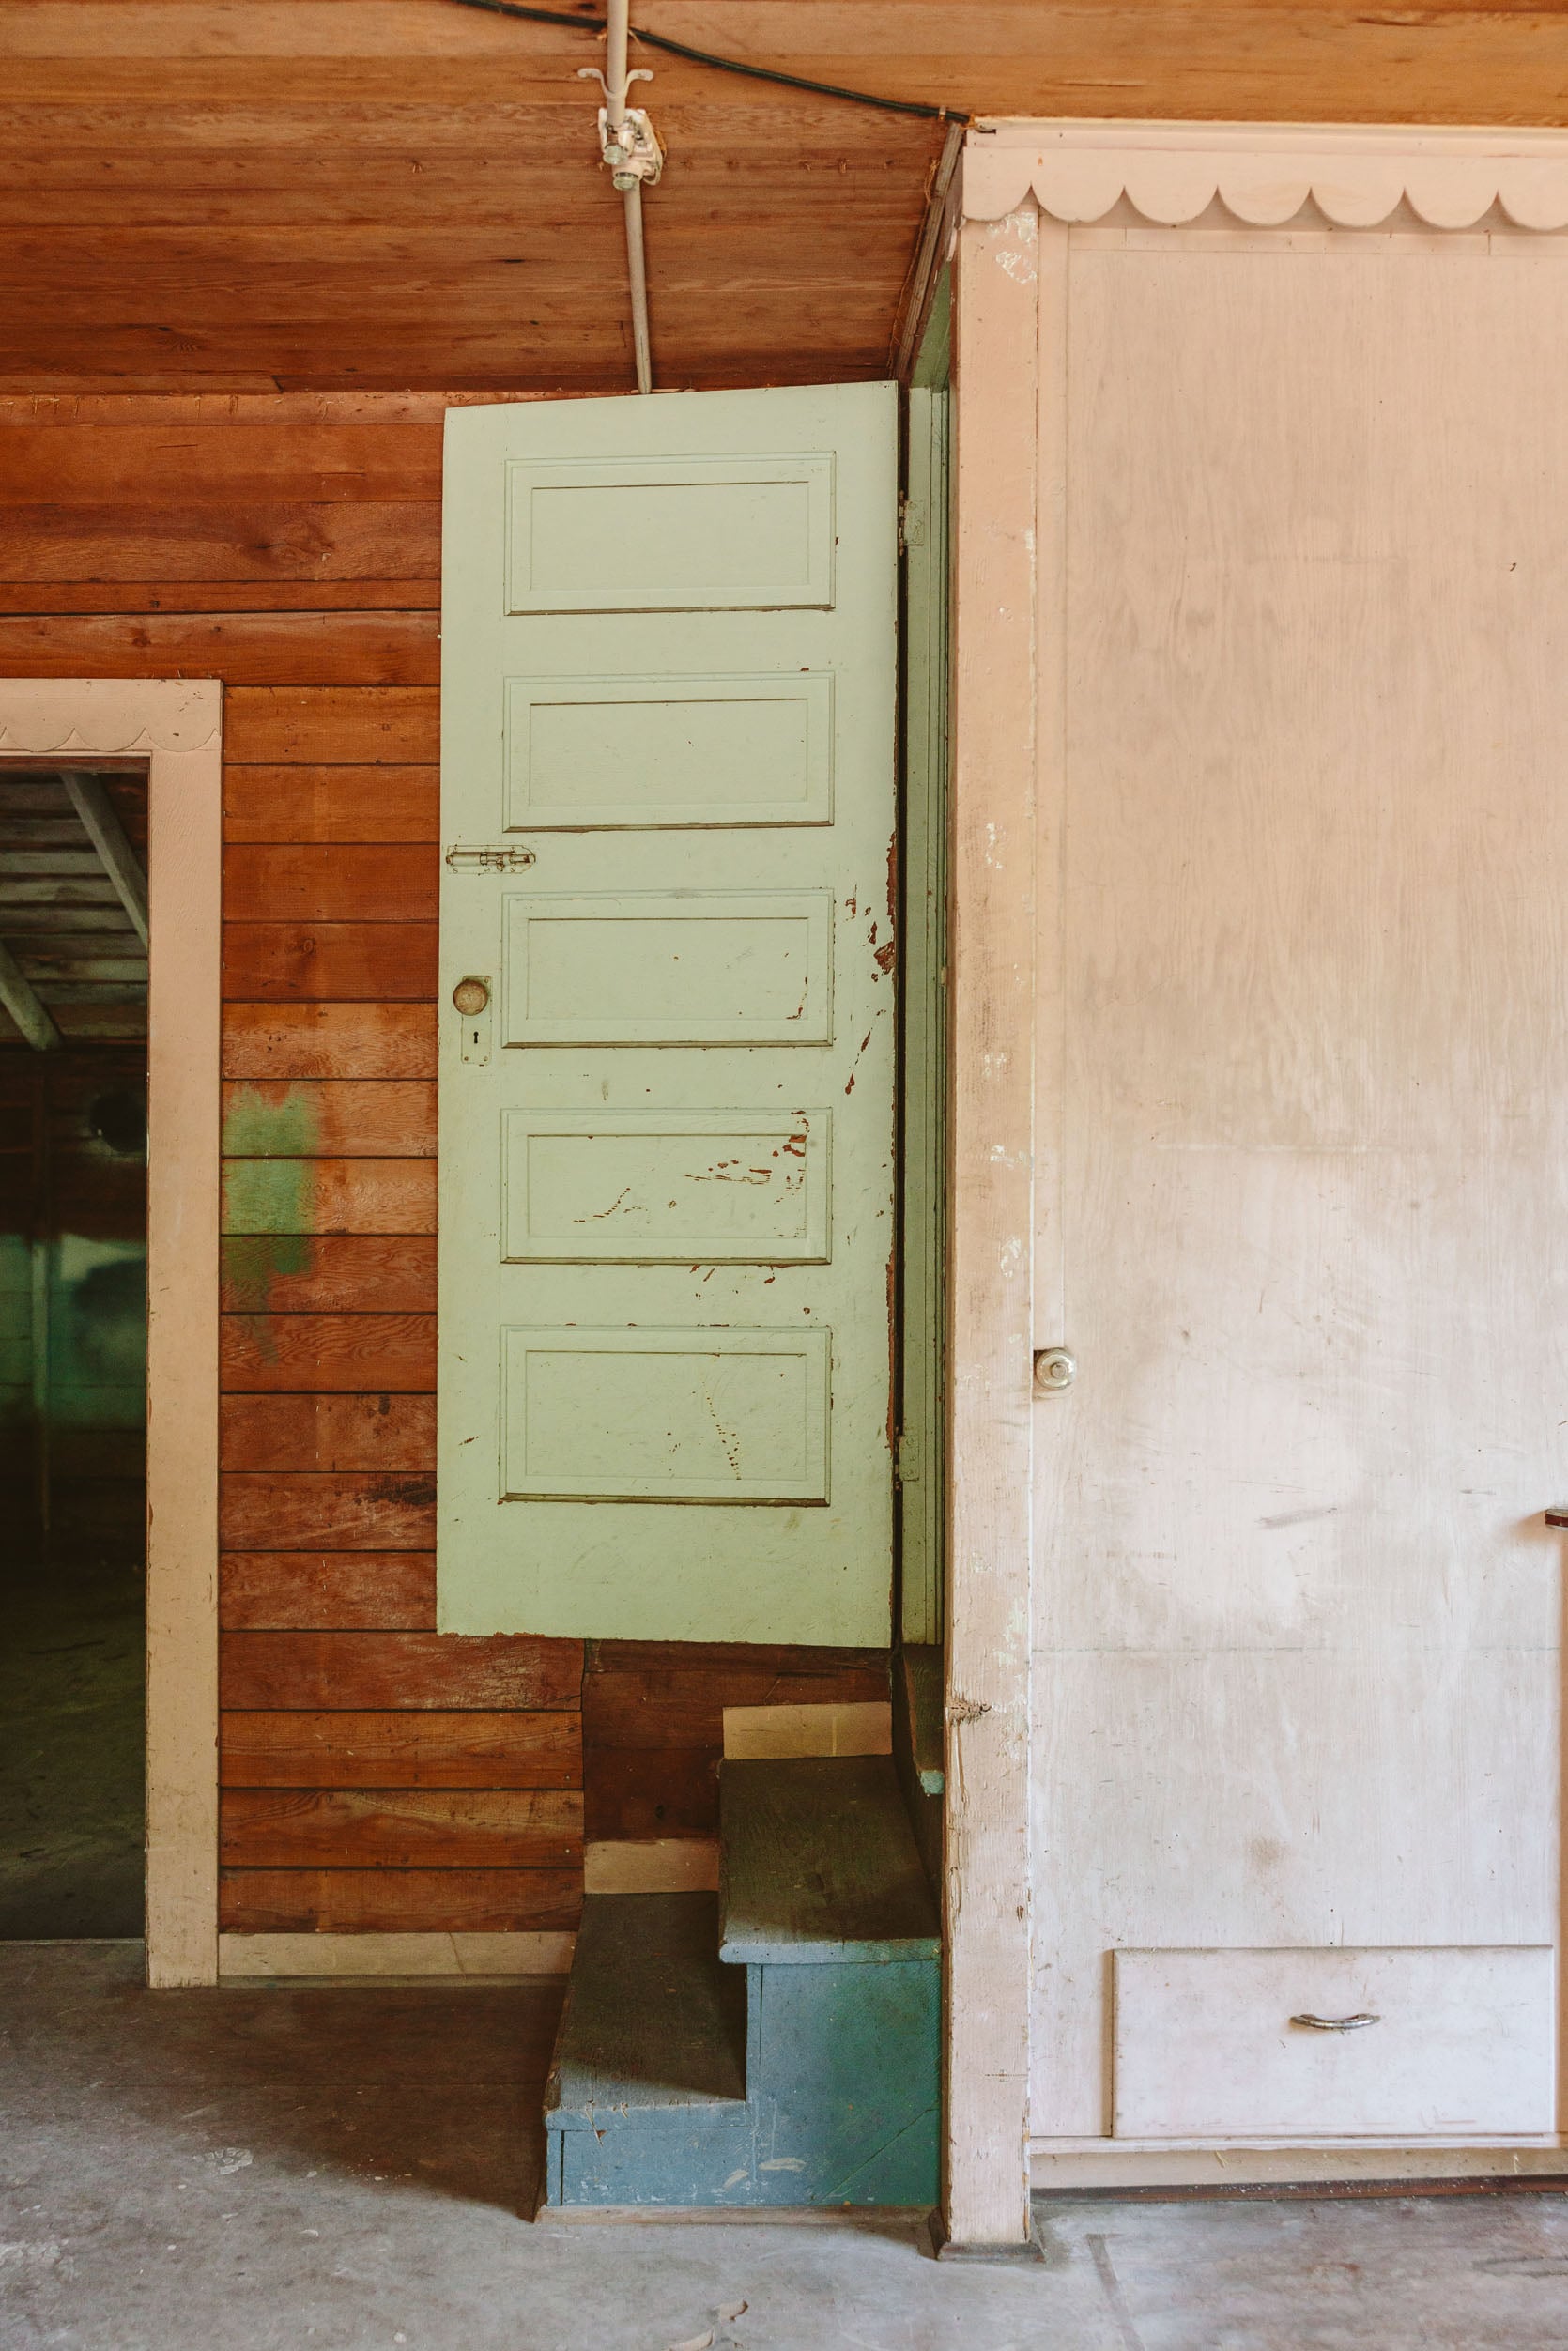
Now, real quick: while this is super aesthetically important to me, Brian is more focused on not having janky doors and windows and keeping the warm air in and the hot air out. I get that, but I don’t want to spend $50k on new doors and windows when I love what they look like right now.
The Big Kitchen Window
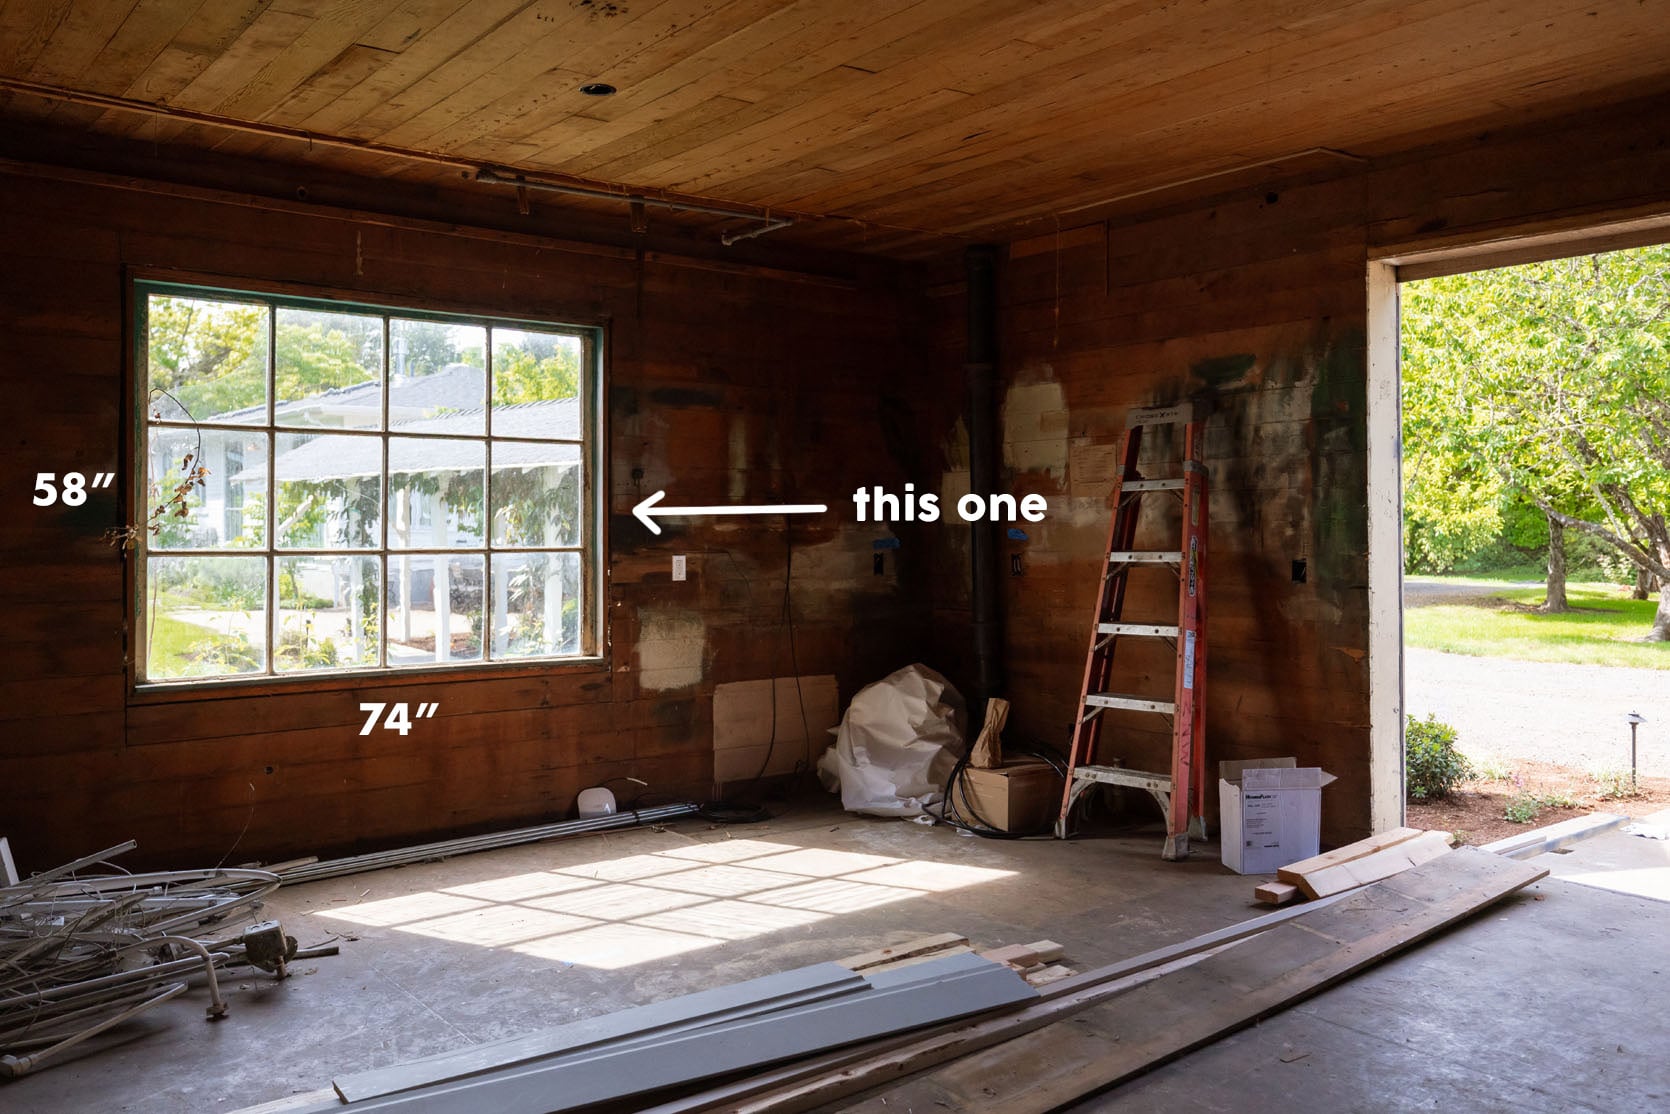
The main kitchen window is huge, almost 74″ wide by 58″ tall. It’s a 4 over 3 grid pattern, fixed (does not open), single pane, true divided lite (meaning the glass is only between the wood and not like SDL – simulated divided lites – that is more common for contemporary, double paned, gridded patterns). It’s so pretty, but…
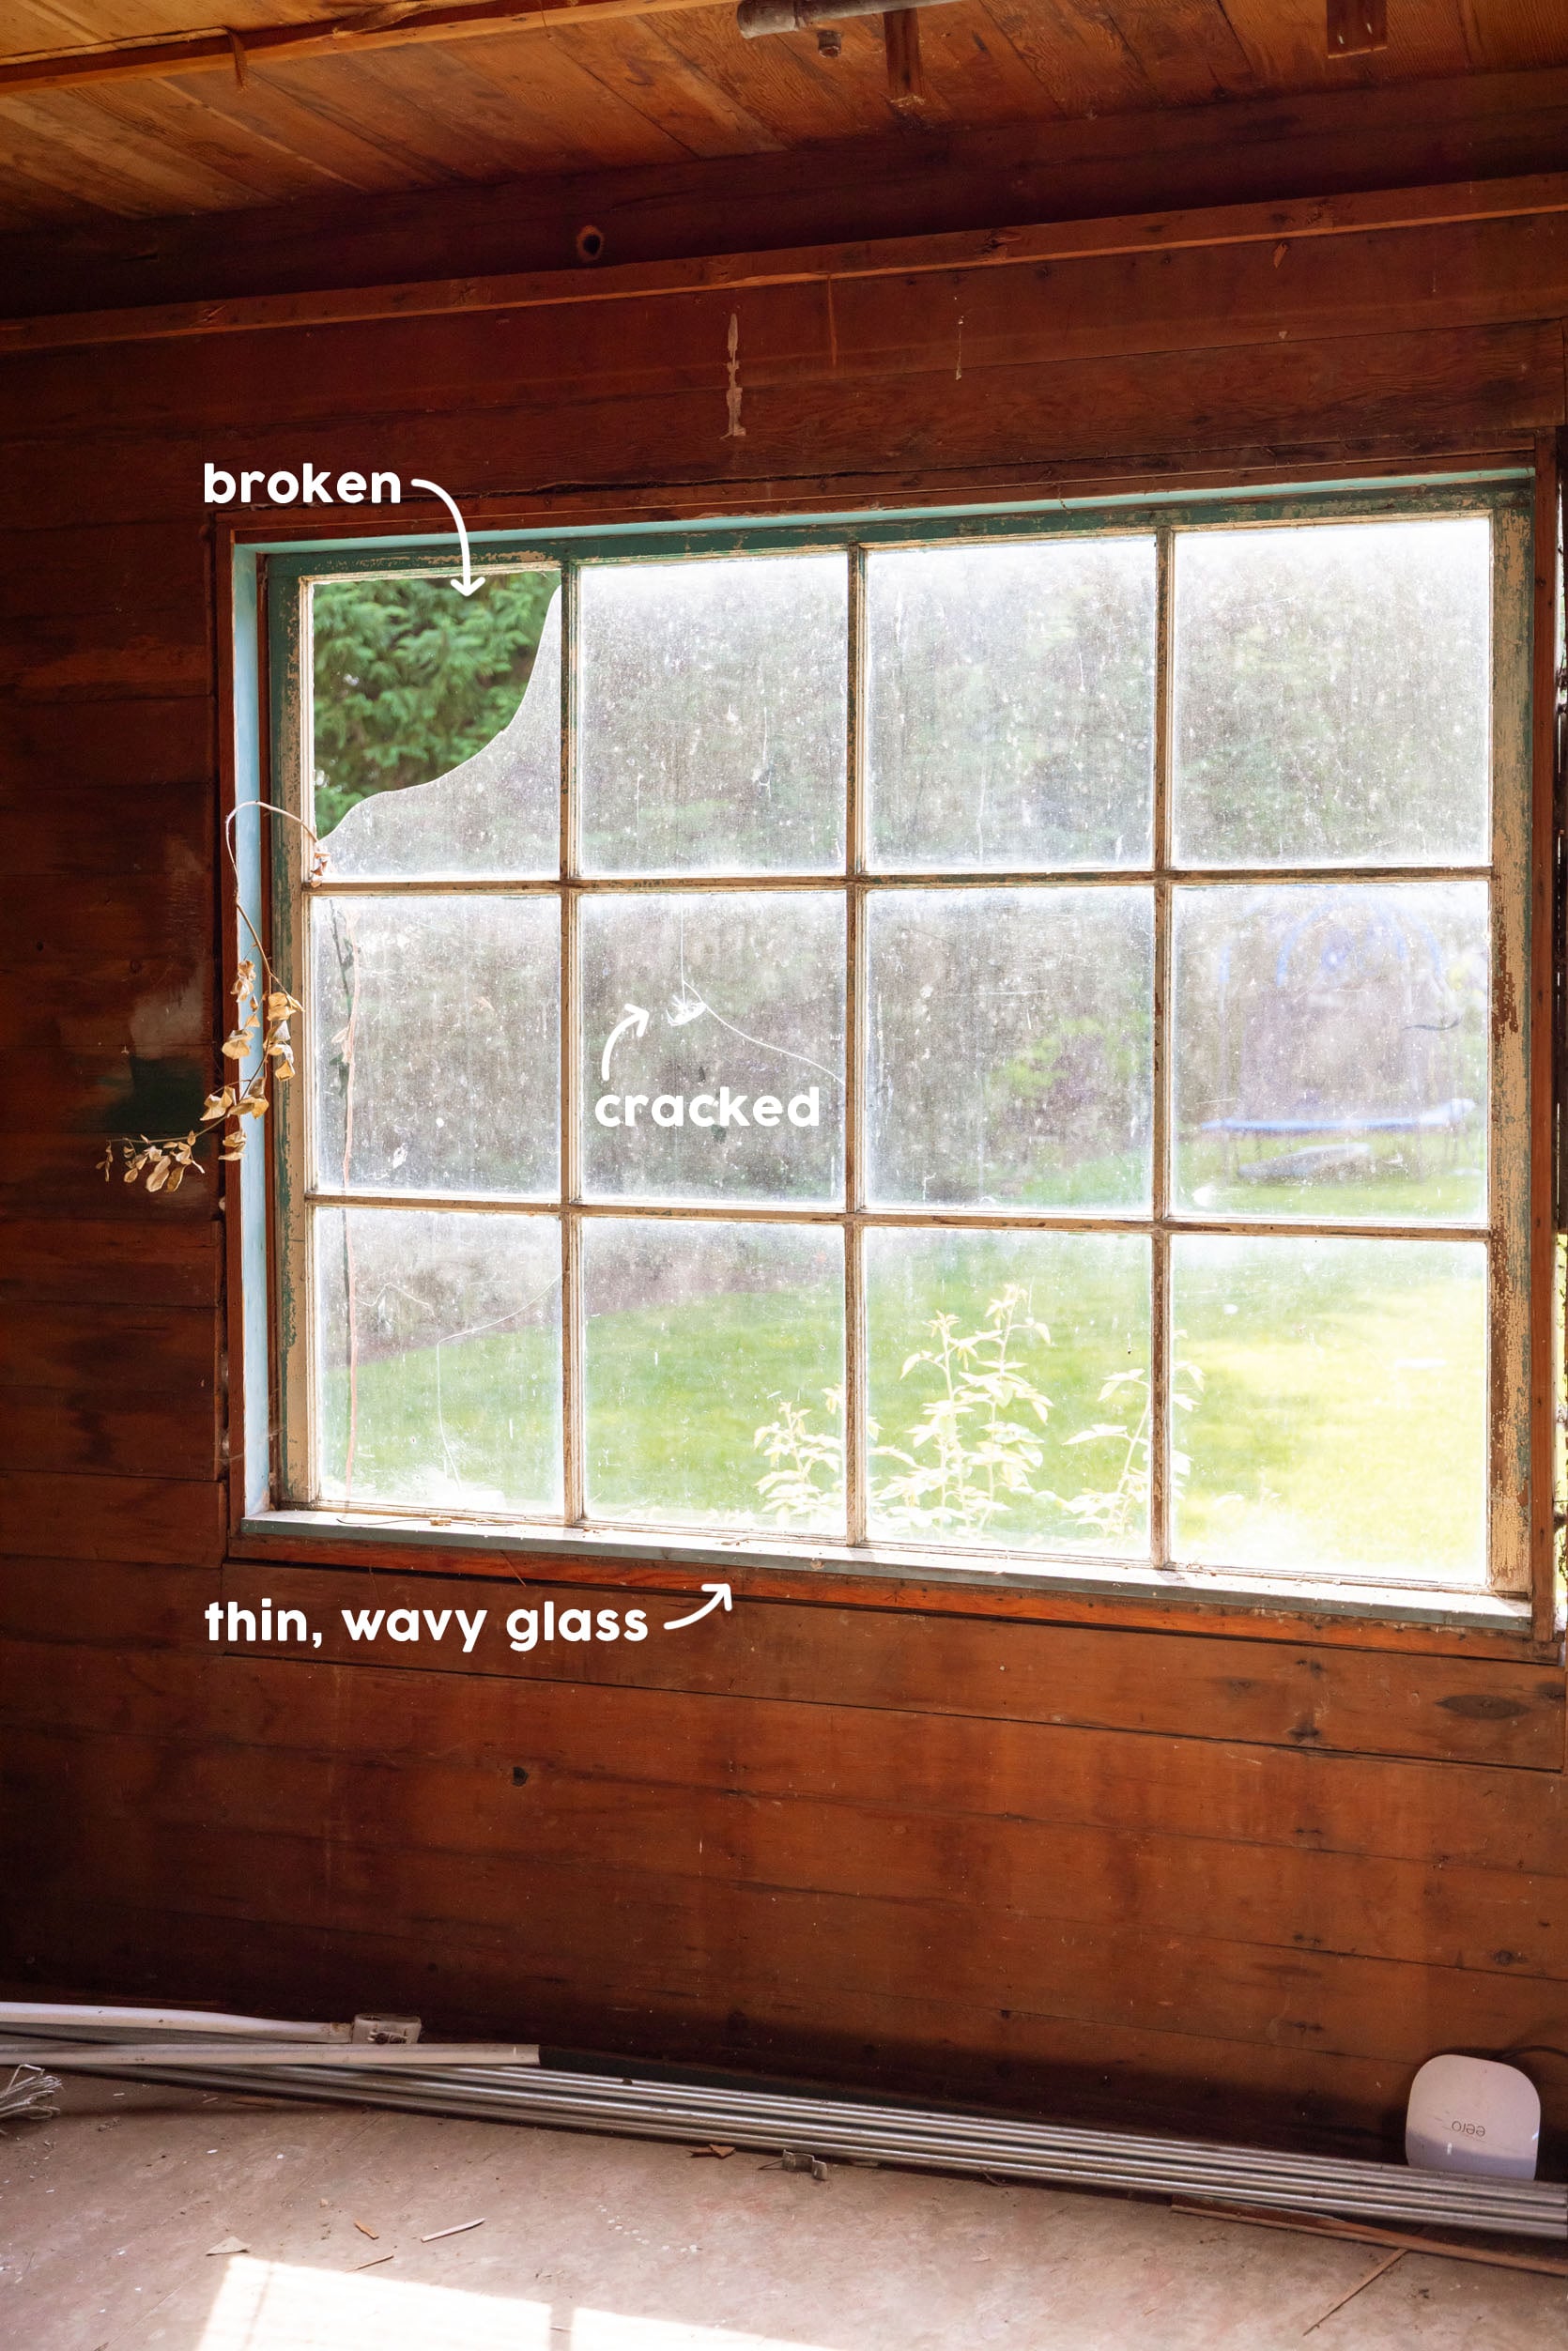
The glass is in bad shape with one broken pane, one cracked pane, and the rest so thin (and wavy) that they feel like they could be broken by a stray ping pong ball.
Here’s what happened: we first had the restoration company quote to fix the frame, replace the broken glass, and then add the storm window for added energy efficiency during the winters. That quote came in at $2,700 for just this one window, and we were really scared that we were going to spend almost $3k on something that would be so thin and be so cold in the winter. So this compelled us to get the quote to completely rebuild a brand new custom window (Marvin), hoping that it would be around the same cost, but for a brand new, likely better product.
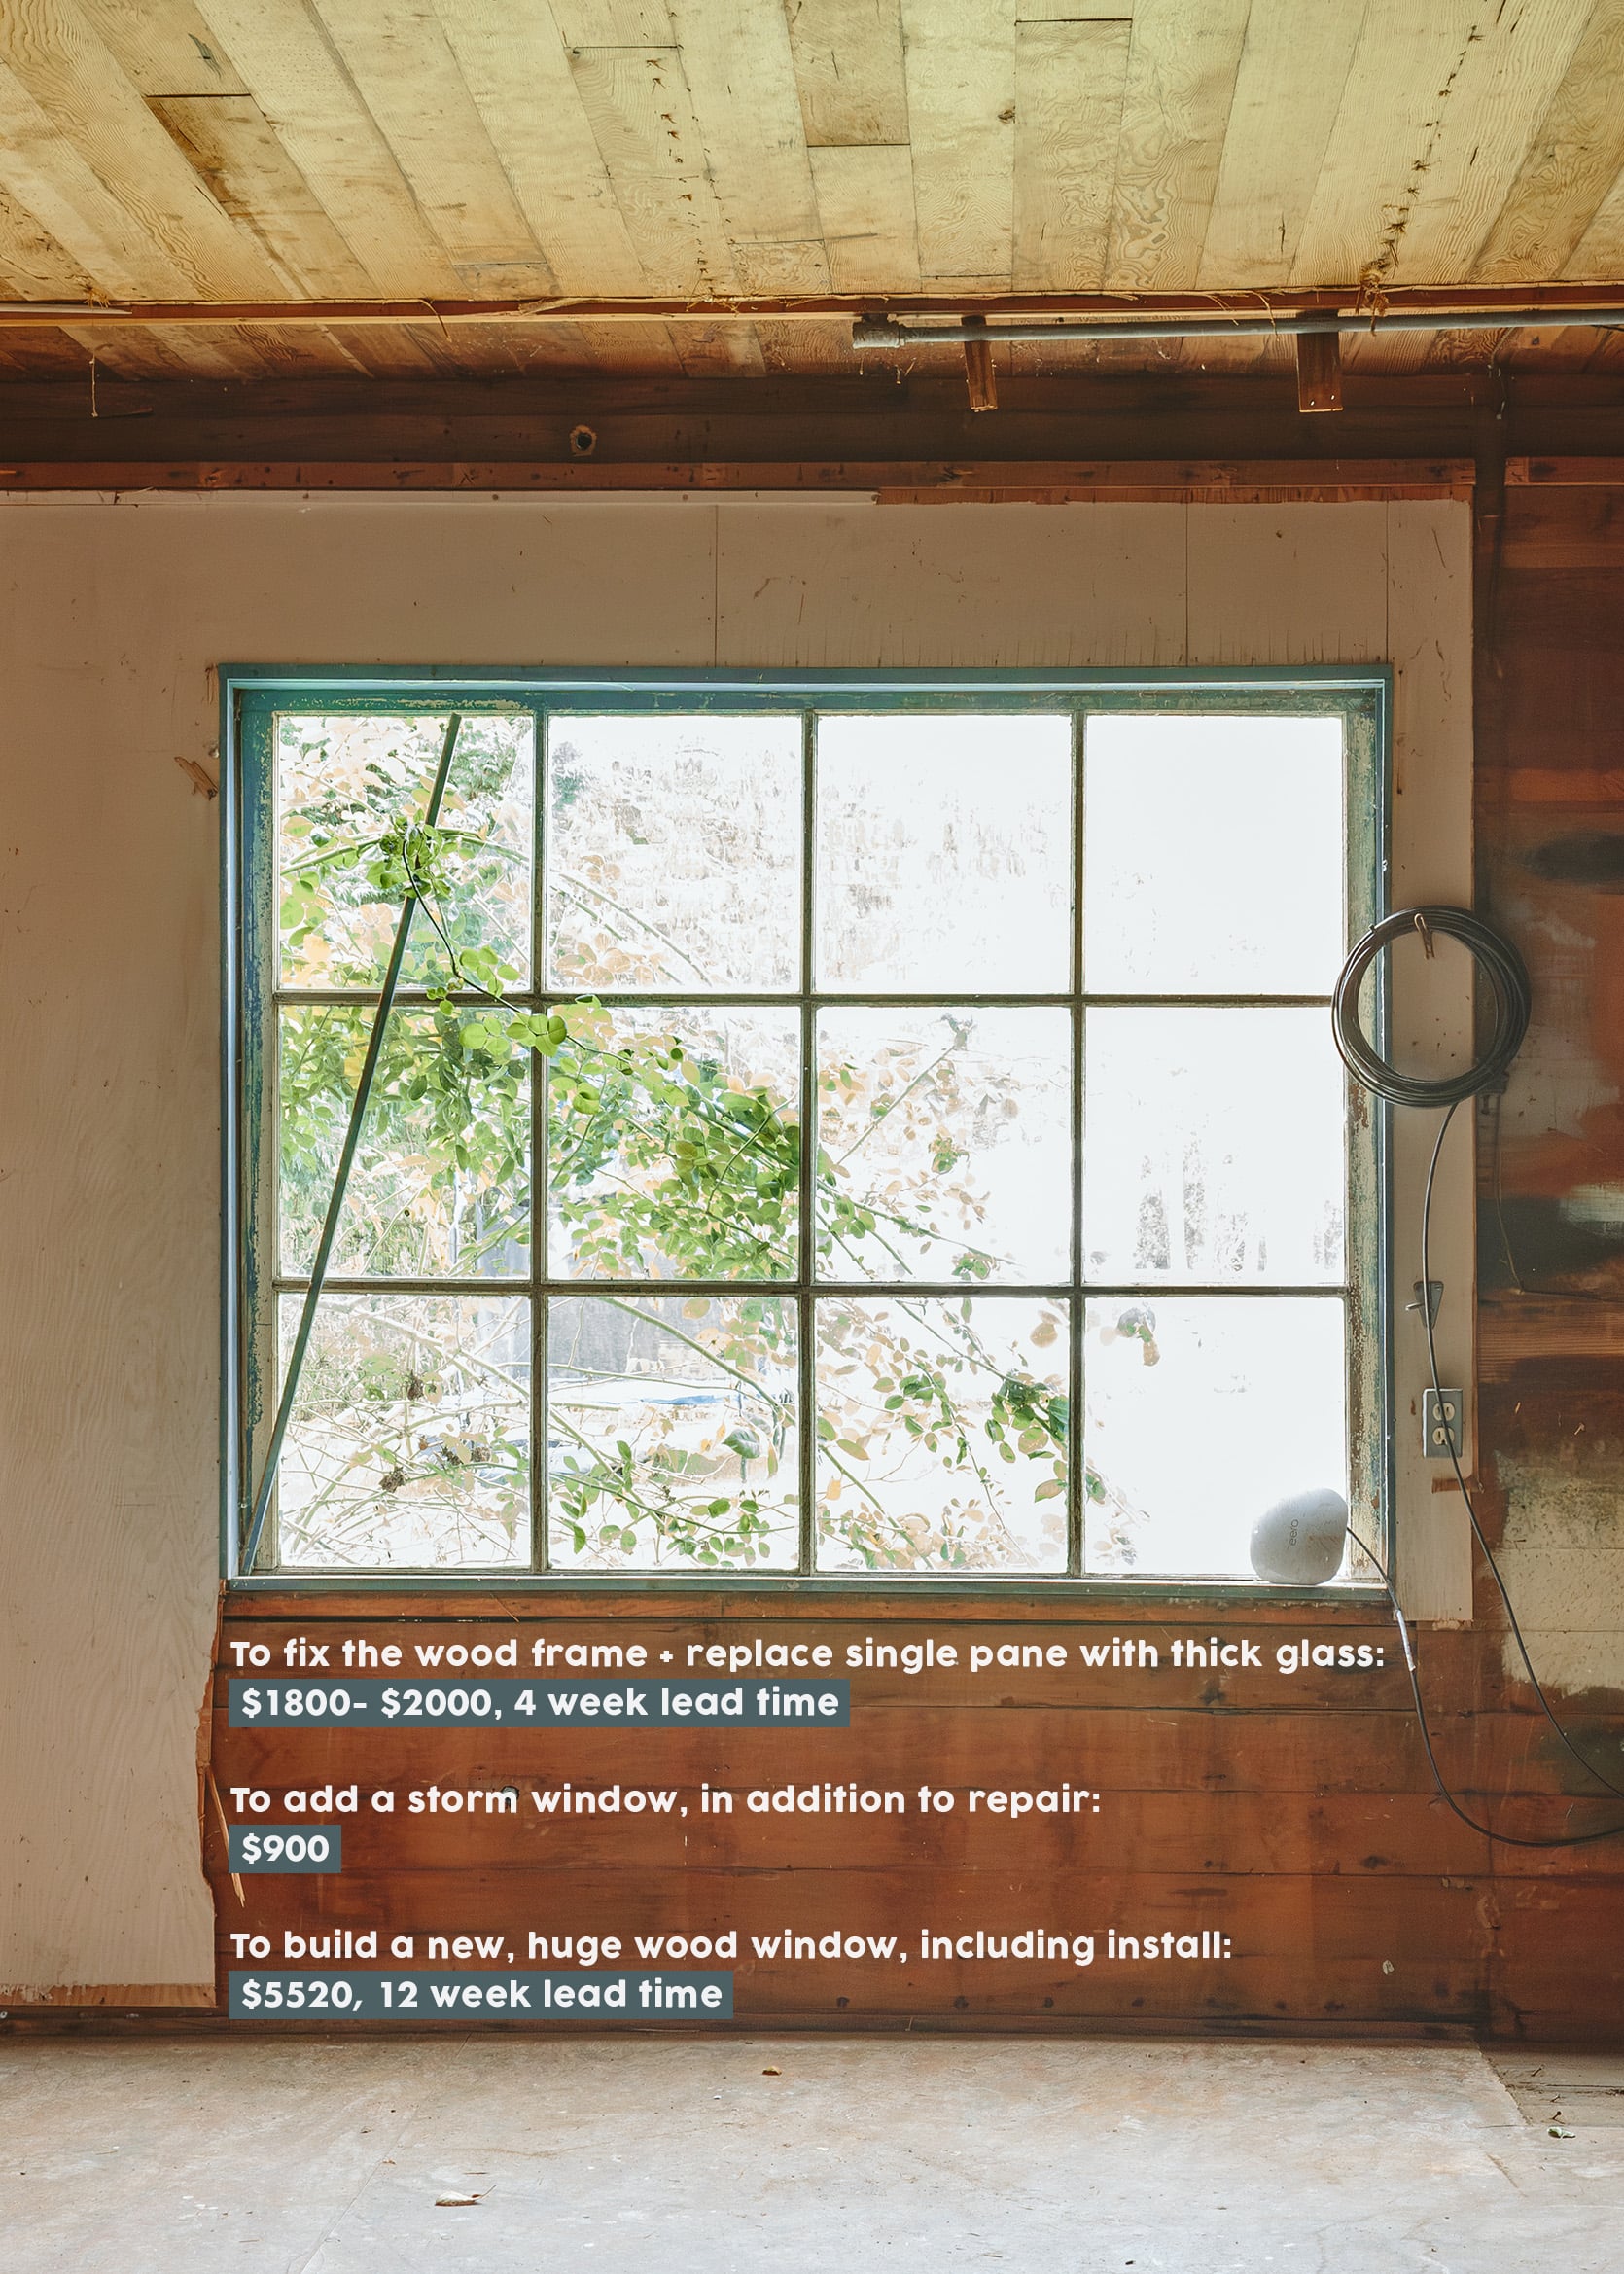
So when the $5,520 quote for the new wood window came in, we responded with an immediate, “oof”. While I don’t think that it is overpriced, it is too much to spend on one window.
We then decided to fix the window, add thicker glass than it has now, and not do the storm window. I’m pushing for this more than Brian; he’s scared that it’s going to be super cold in the winter. But I have to remind him of the following:
- The new glass, even though it’s single pane, will be much thicker than the vintage, thin single pane.
- We had single pane glass in LA in our English Tudor house, and with the right temperature control, window treatments, and with our Quilt system, we’ll be fine. Single pane doesn’t always mean super drafty if it’s high quality and thicker glass.
- Portland isn’t crazy hot or cold. We will have heat/ac in each room, and even on the hottest days, this room doesn’t get hot because by the time the sun hits this room, it’s behind trees. Some rooms are natural saunas (like the upstairs bedroom); this one isn’t.
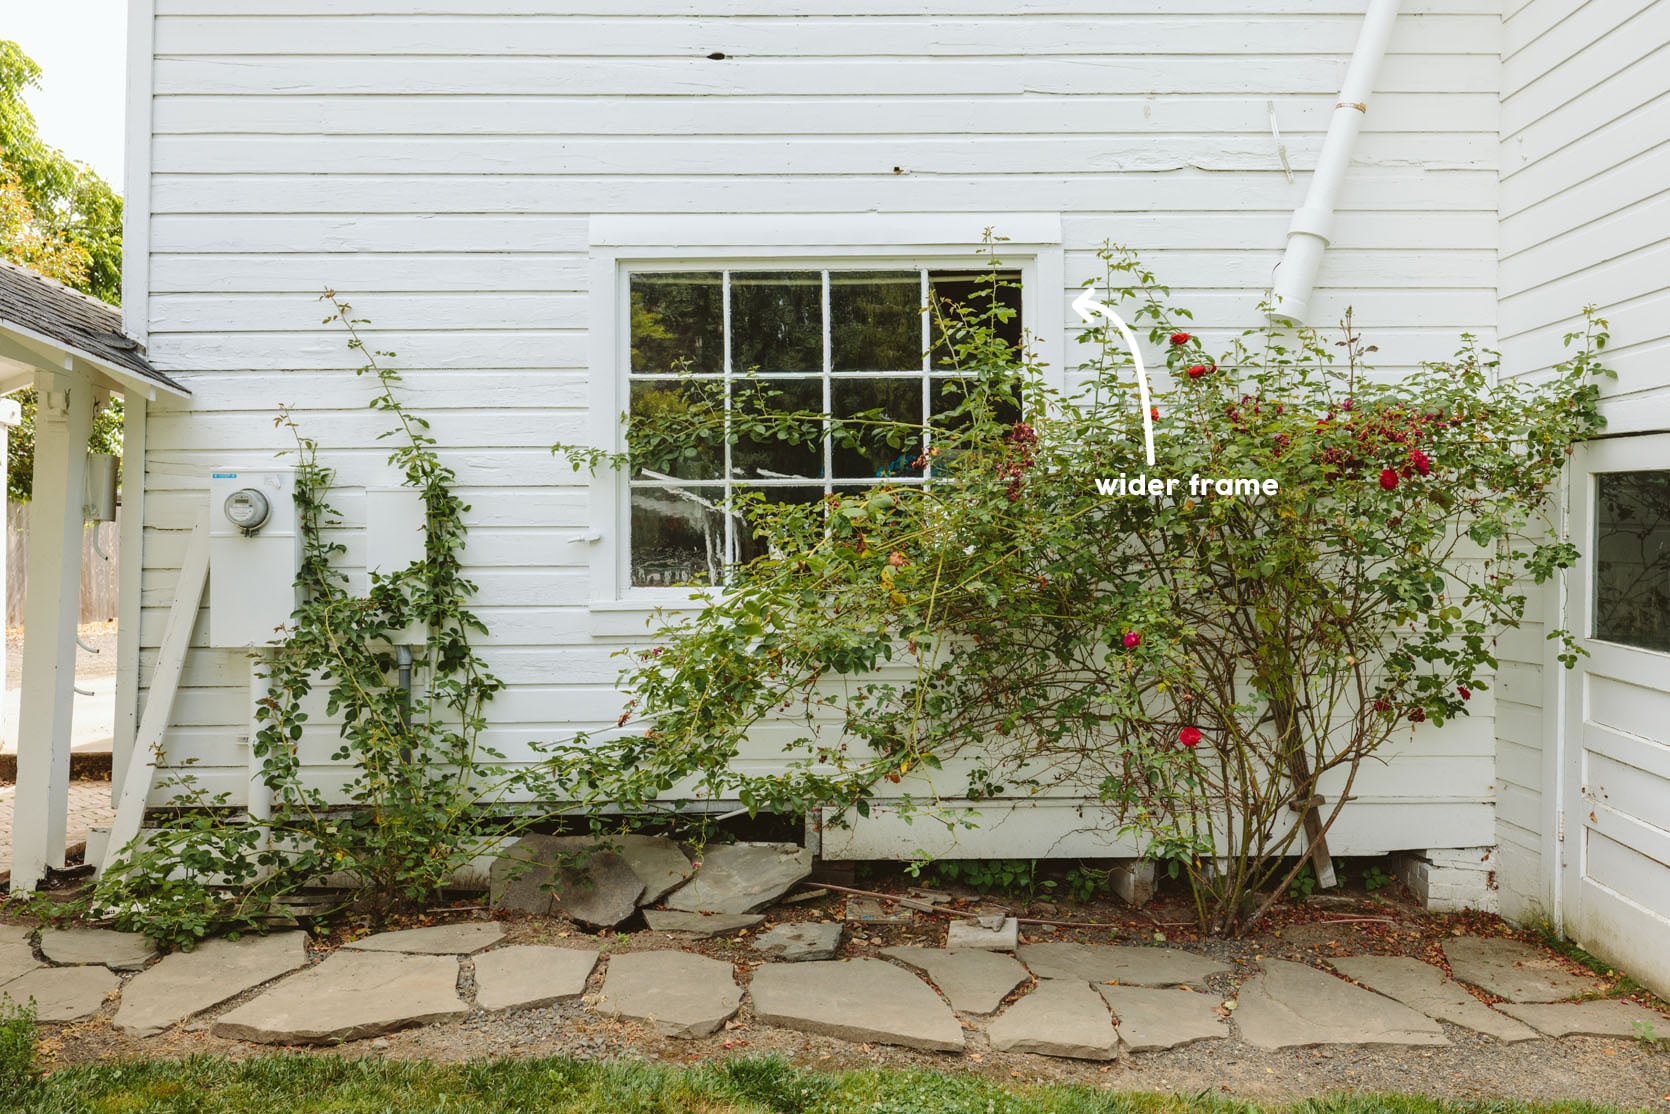
FUN FACT: It’s actually a vertical window that they installed horizontally, which I guess was not atypical for the 1800s and is actually really charming (we didn’t know this until we were told by one of the restoration companies that pointed out the wider frame on one of the sides).
Decision: completely restore the original window, with new, thicker glass for $1800 – $2k.
The Living Room Interior Window
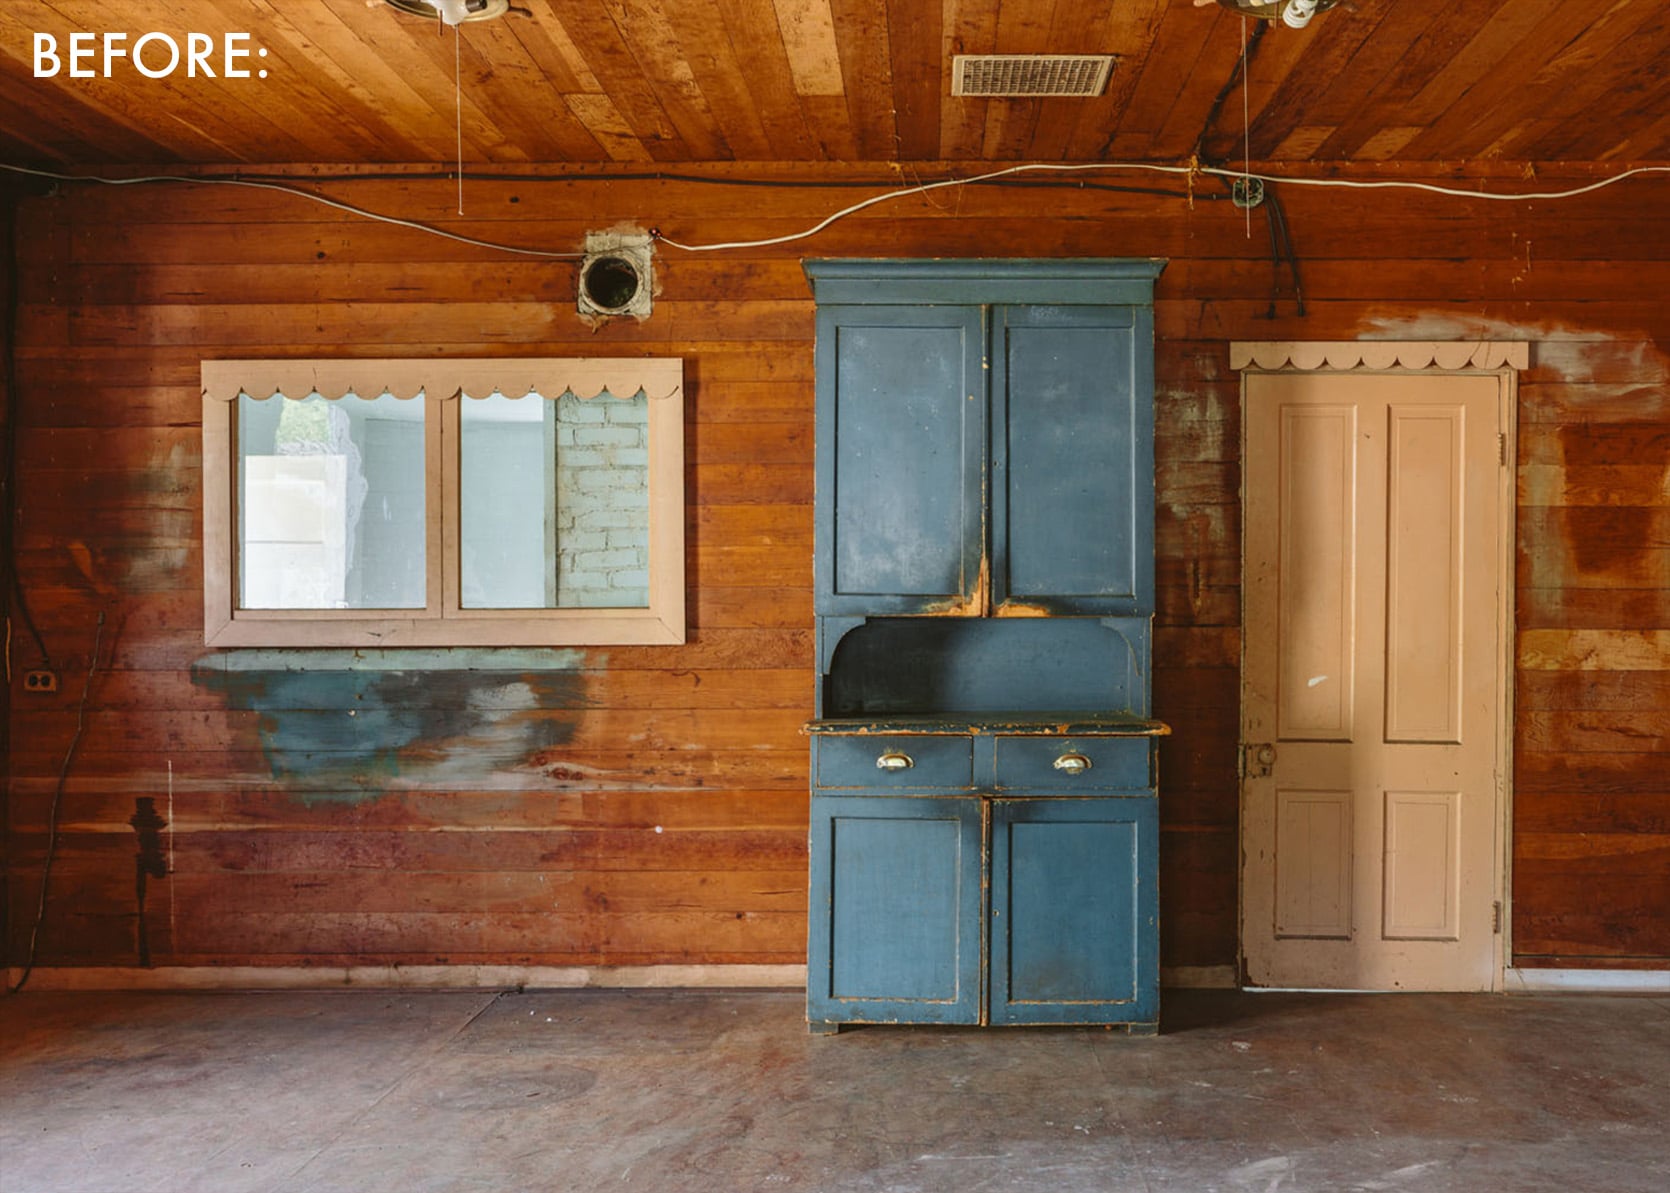
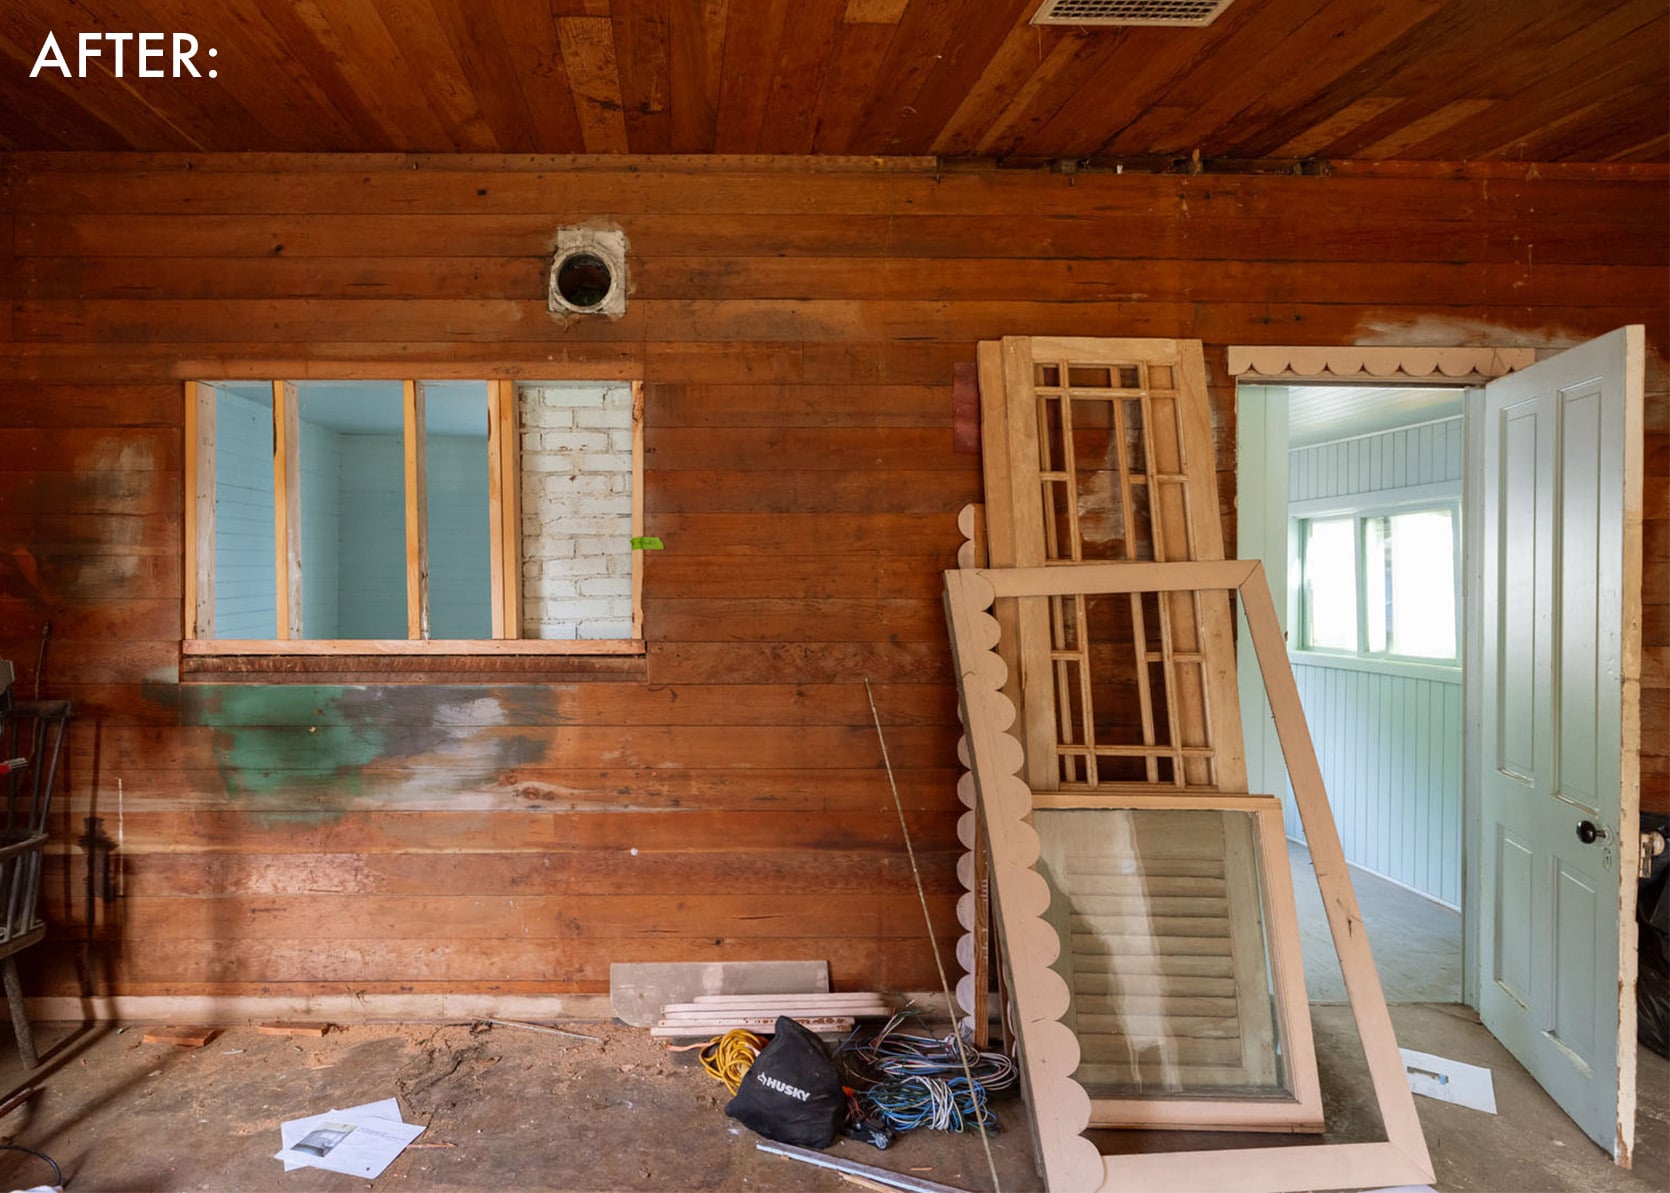
This was a harder decision. This window was charming in theory. They clearly added on to the room behind it later. It’s blocked by a chimney that we might remove at some point, but aren’t just yet, because it sets off a domino effect of problems to solve that we would like to put off. Once we found the reclaimed wood that matched the walls, we decided to salvage the window, frame out the hole, and clad it to match the walls. It will be a bit patchy, but there are patchy parts all over the walls, so we are just accepting the quirks. We think this wall might be good for a larger TV, so having the window gone is a good thing (and no, that hutch isn’t there anymore, it’s still in the living room where I debate every day whether I want it to stay or go, lol).
The Interior Doors
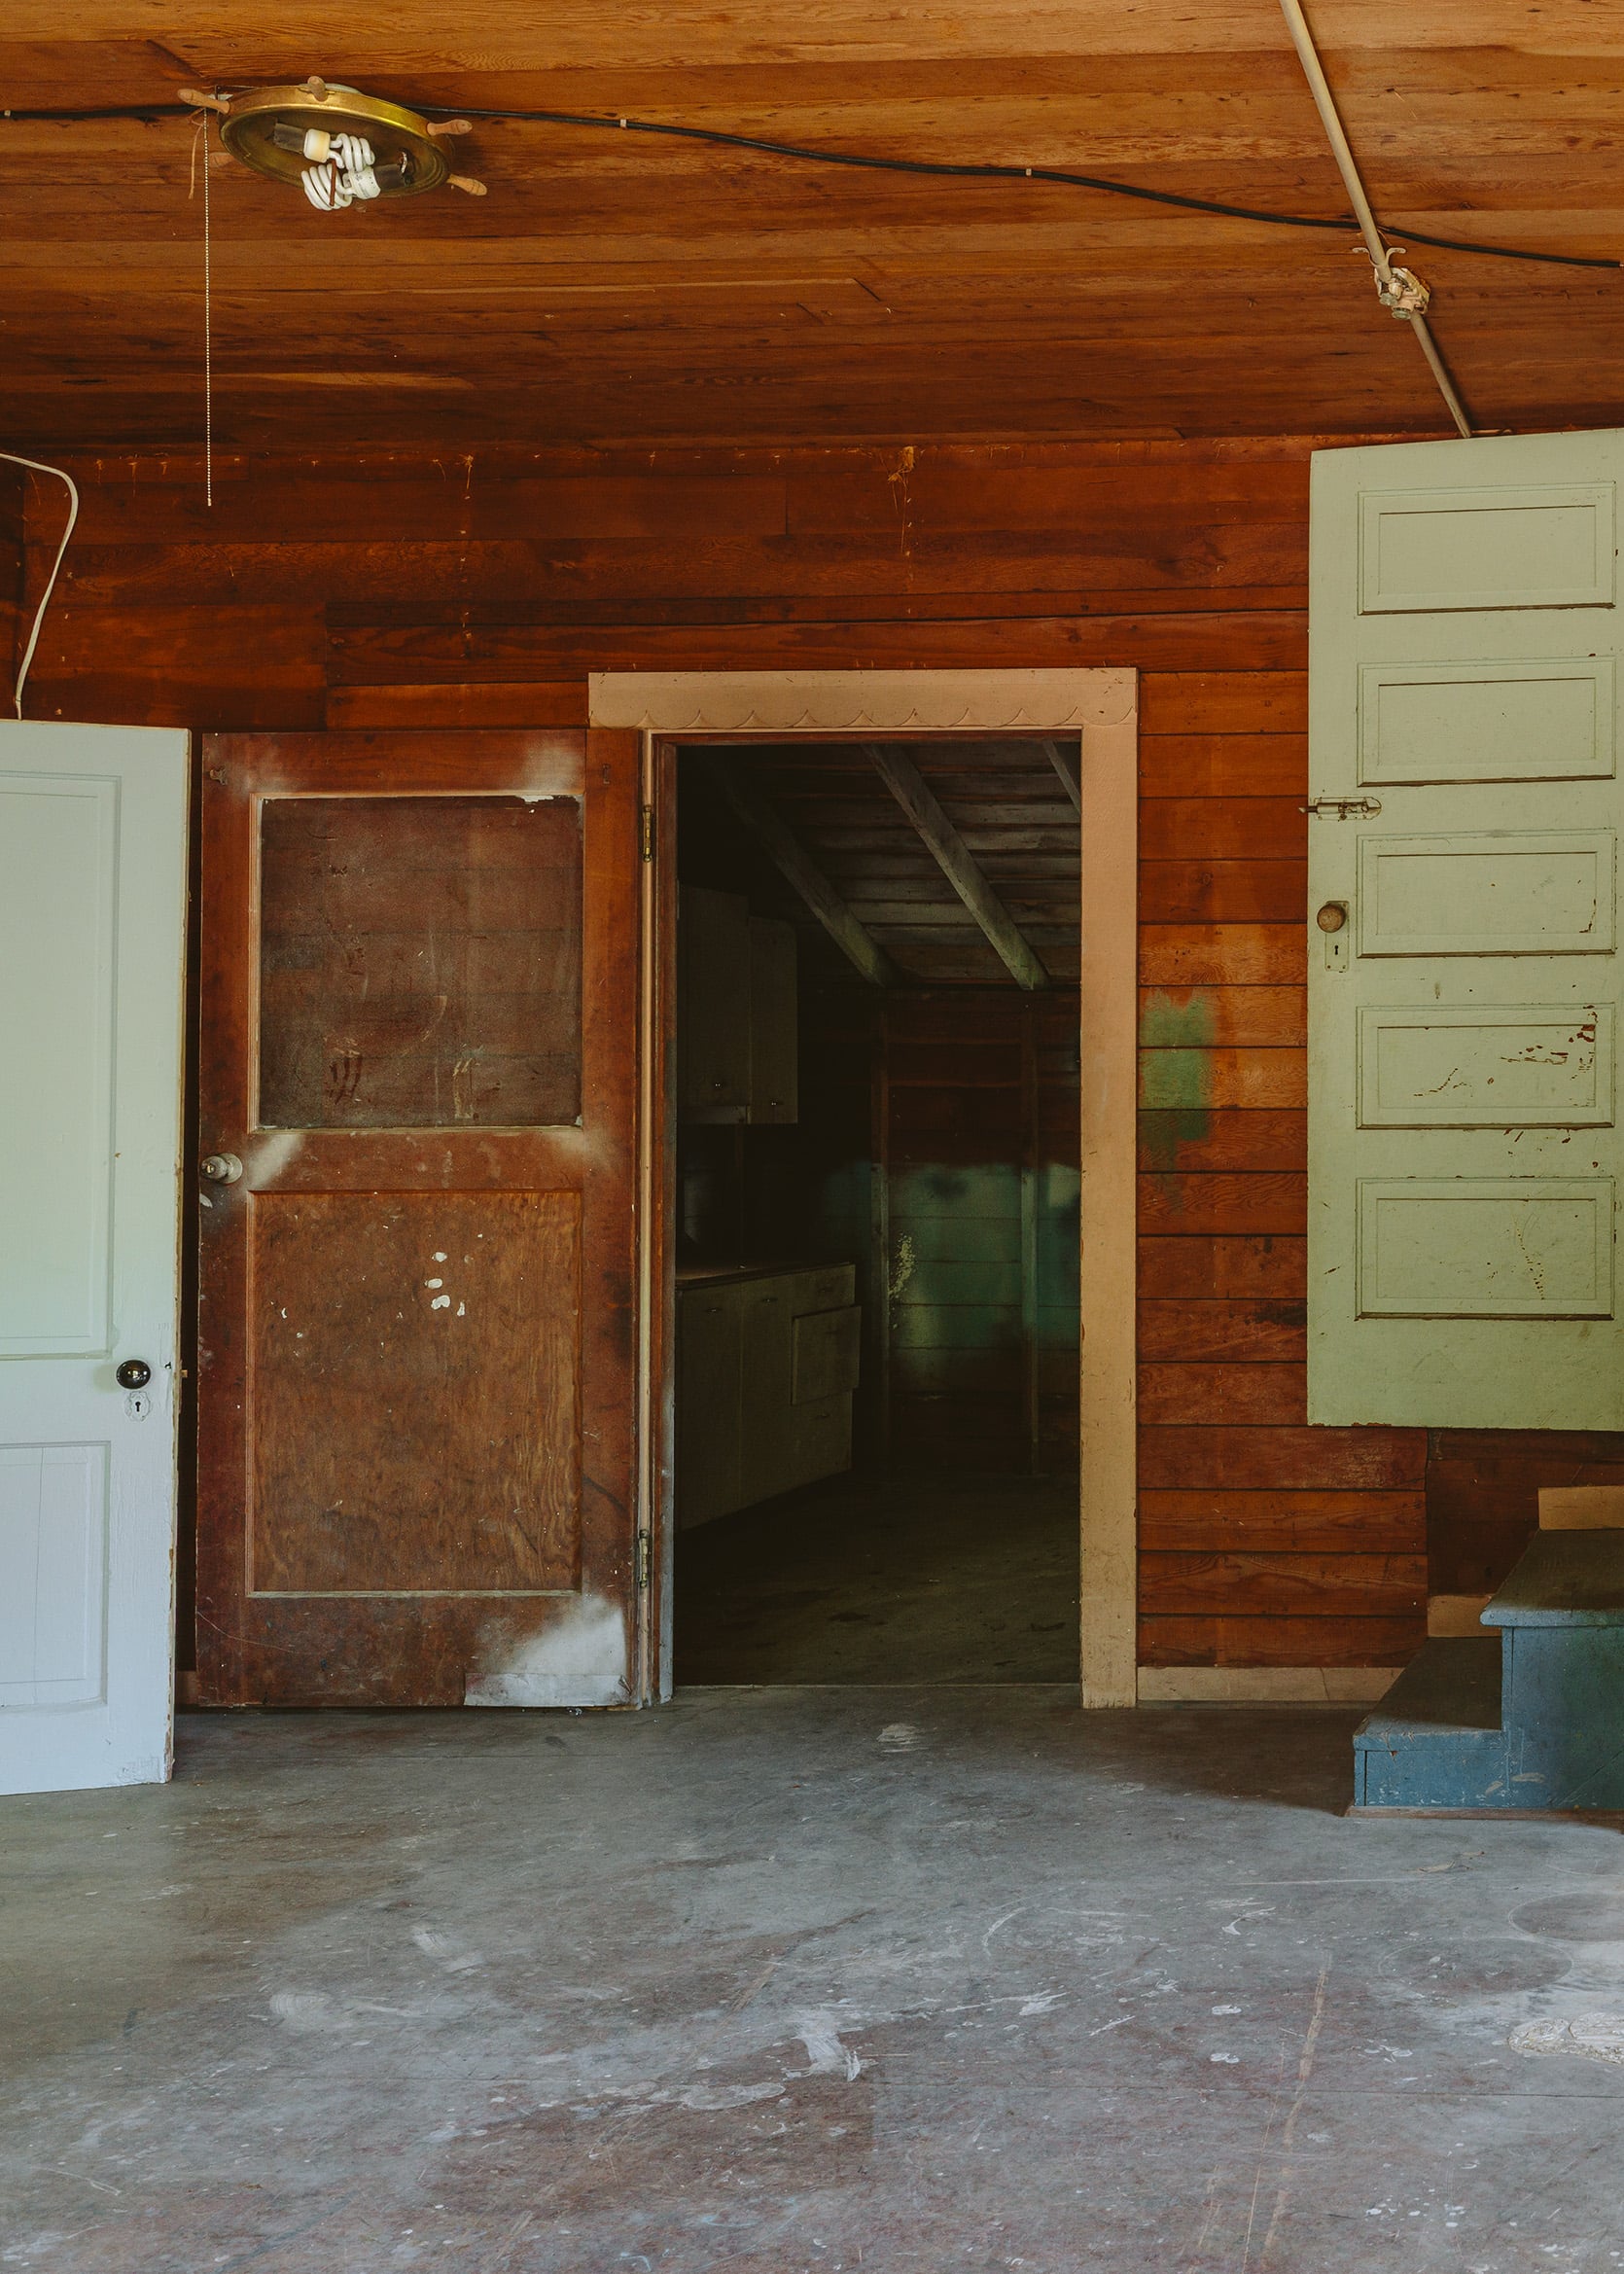
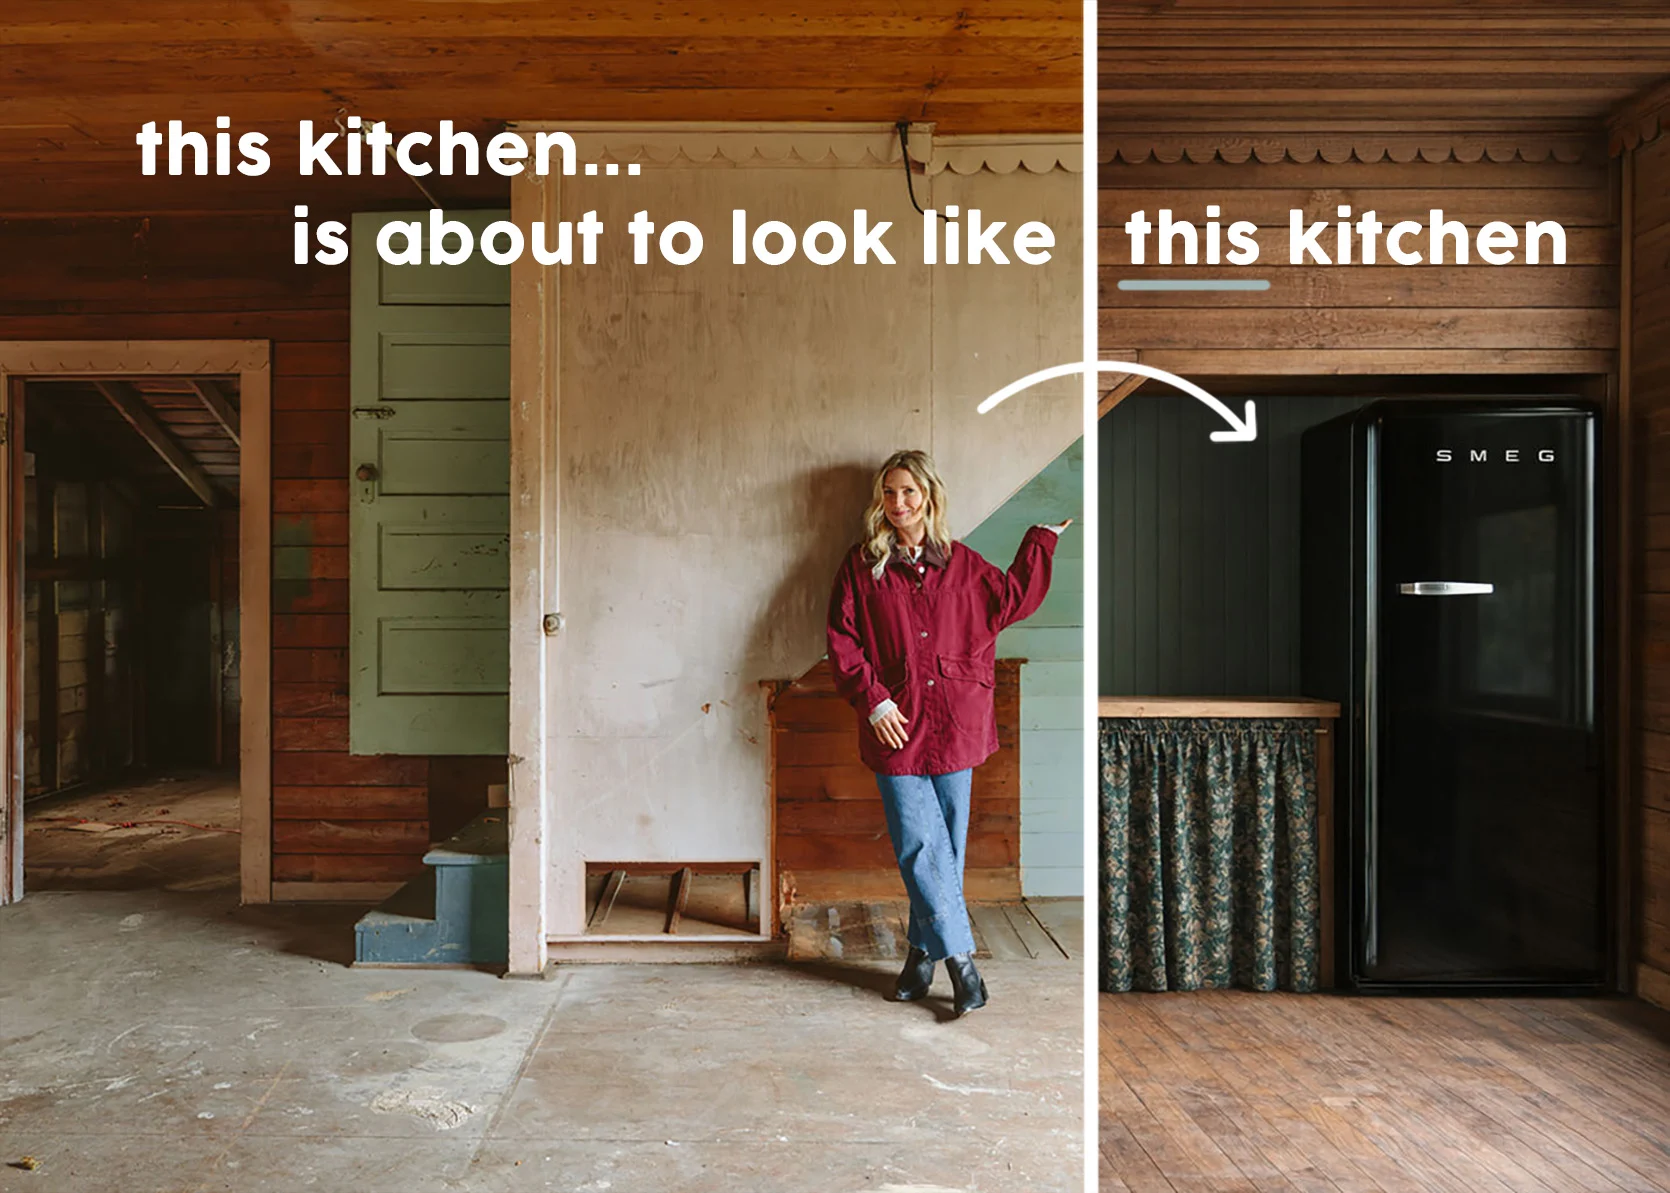
All the interior doors are so charming, if not a bit janky. Some of our subs will immediately say they need to be replaced, while others understand the charm. Here you can see a little bit of the door to the prop room (left), the speakeasy (center), and the door to upstairs (right). There is also the door from the speakeasy to the bathroom and various doors upstairs. They are all different in style – some paneled, some with windows, some with knobs really high, and some with knobs really low.
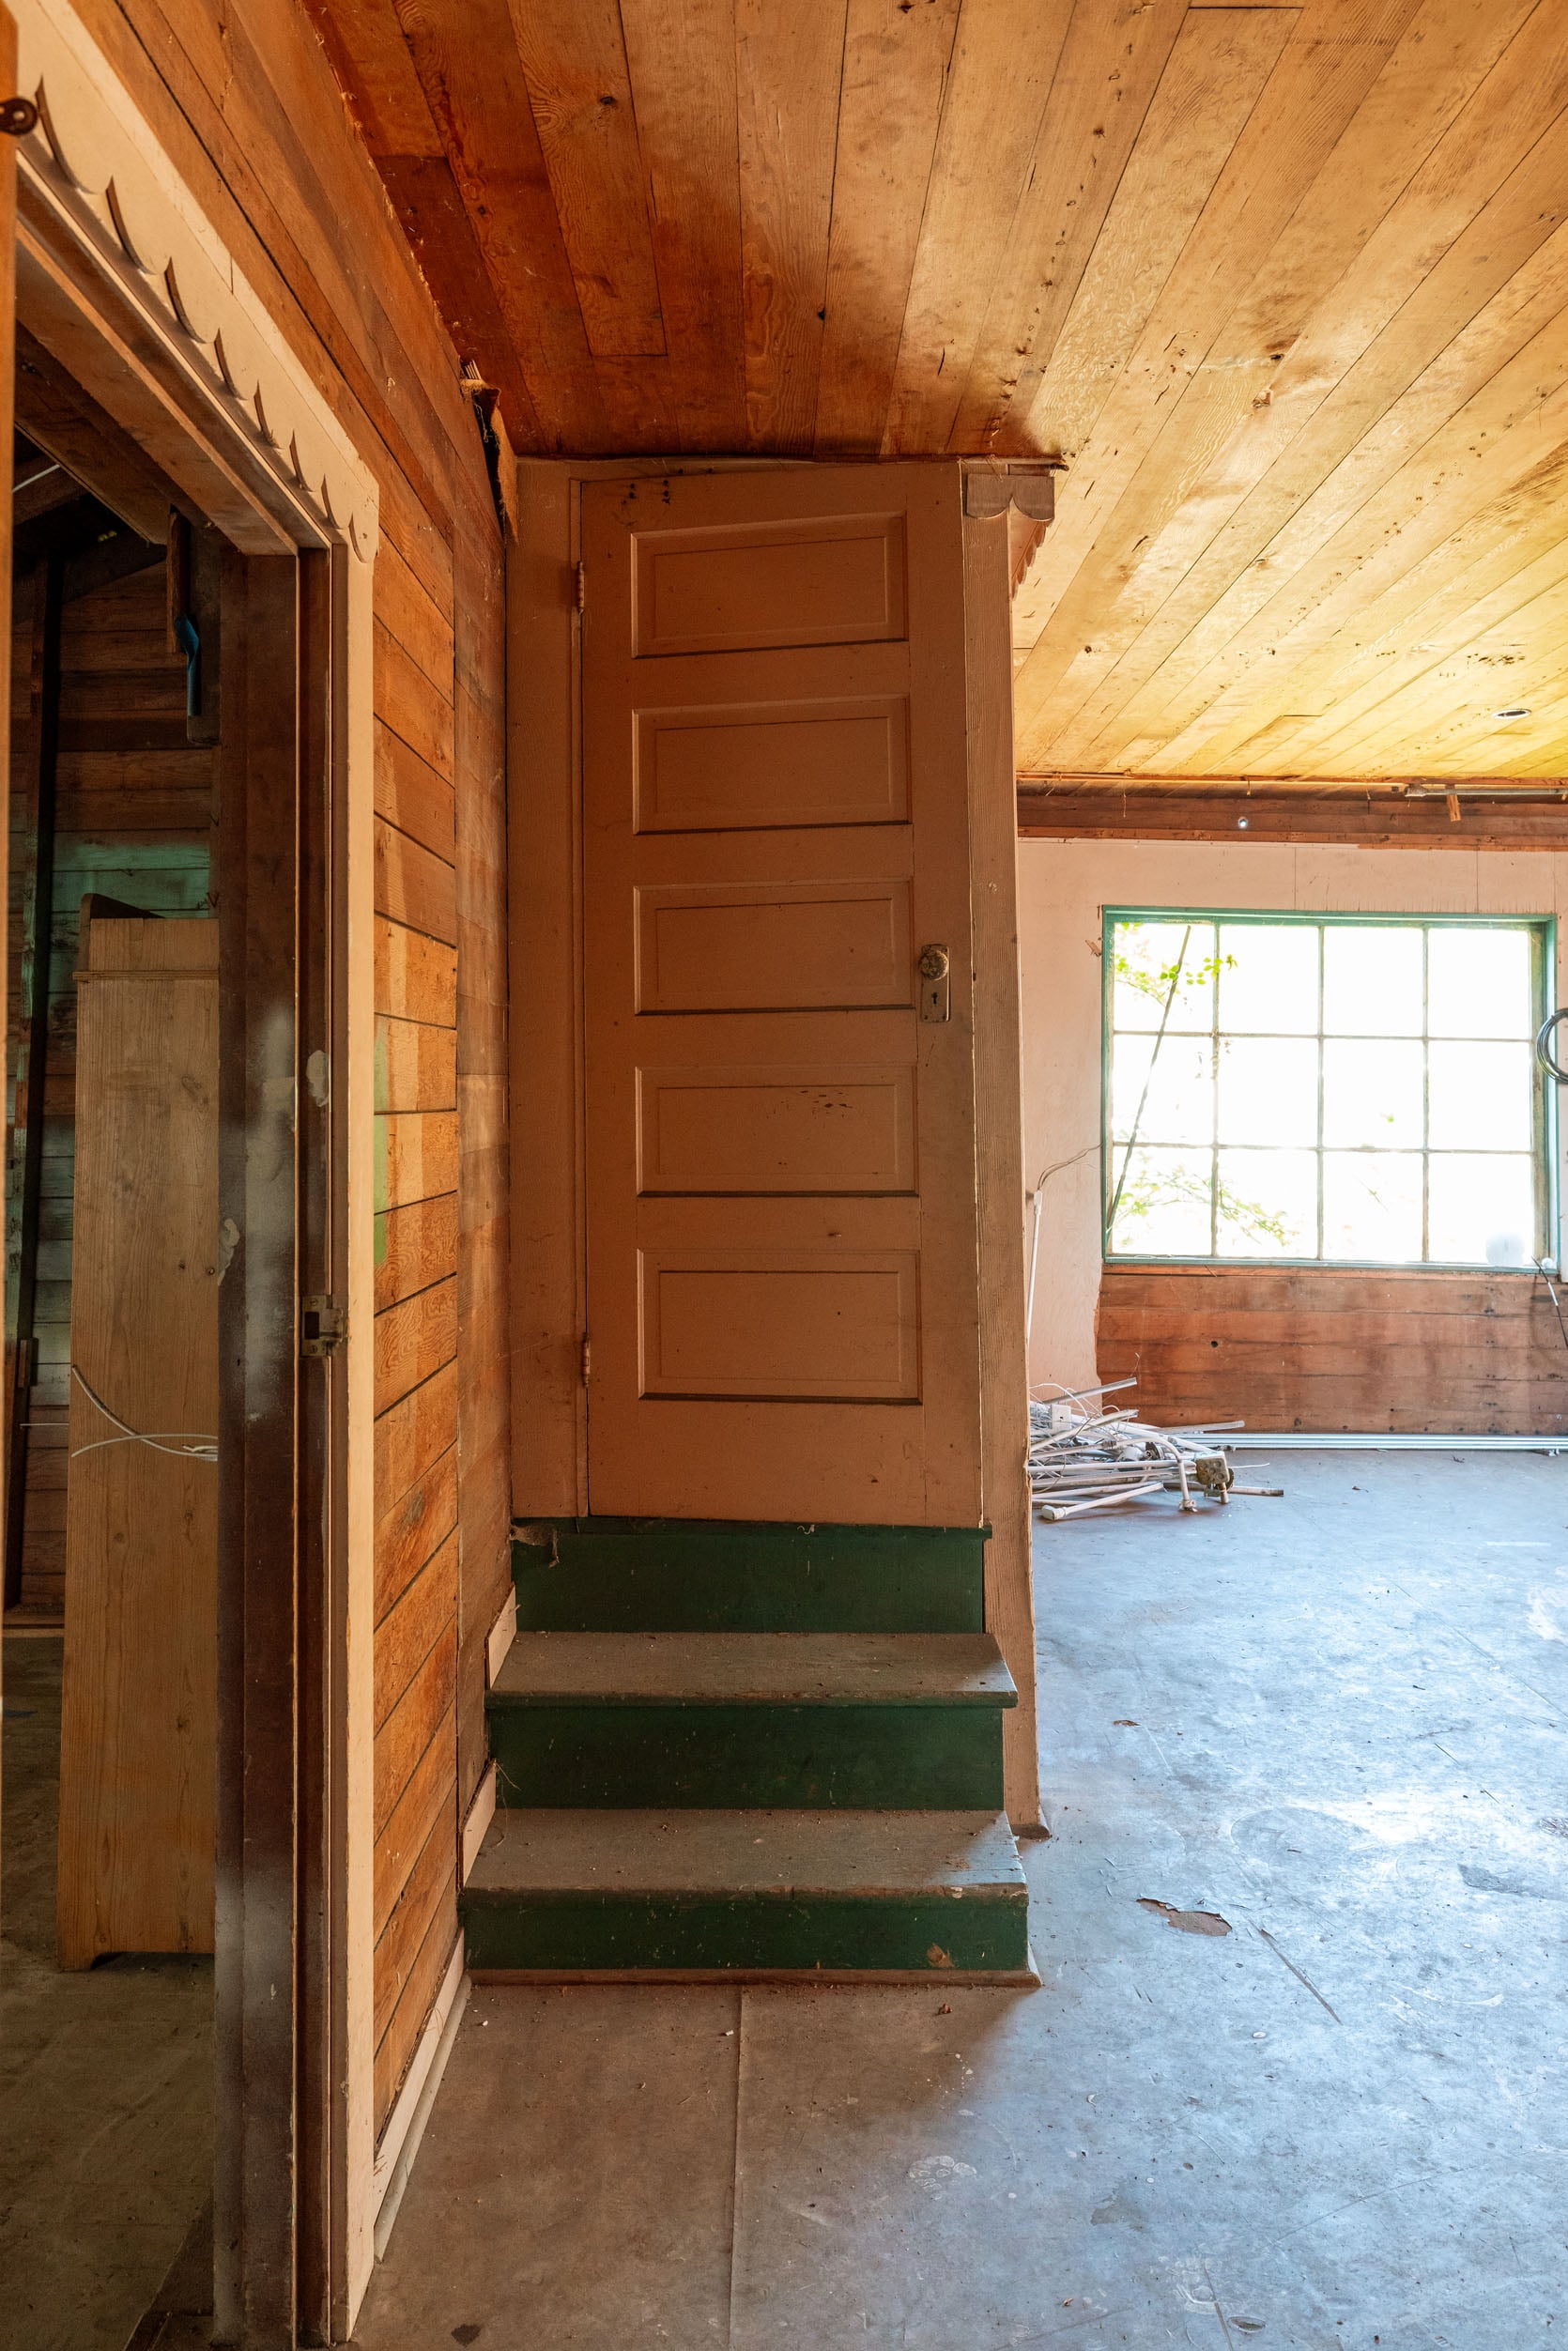
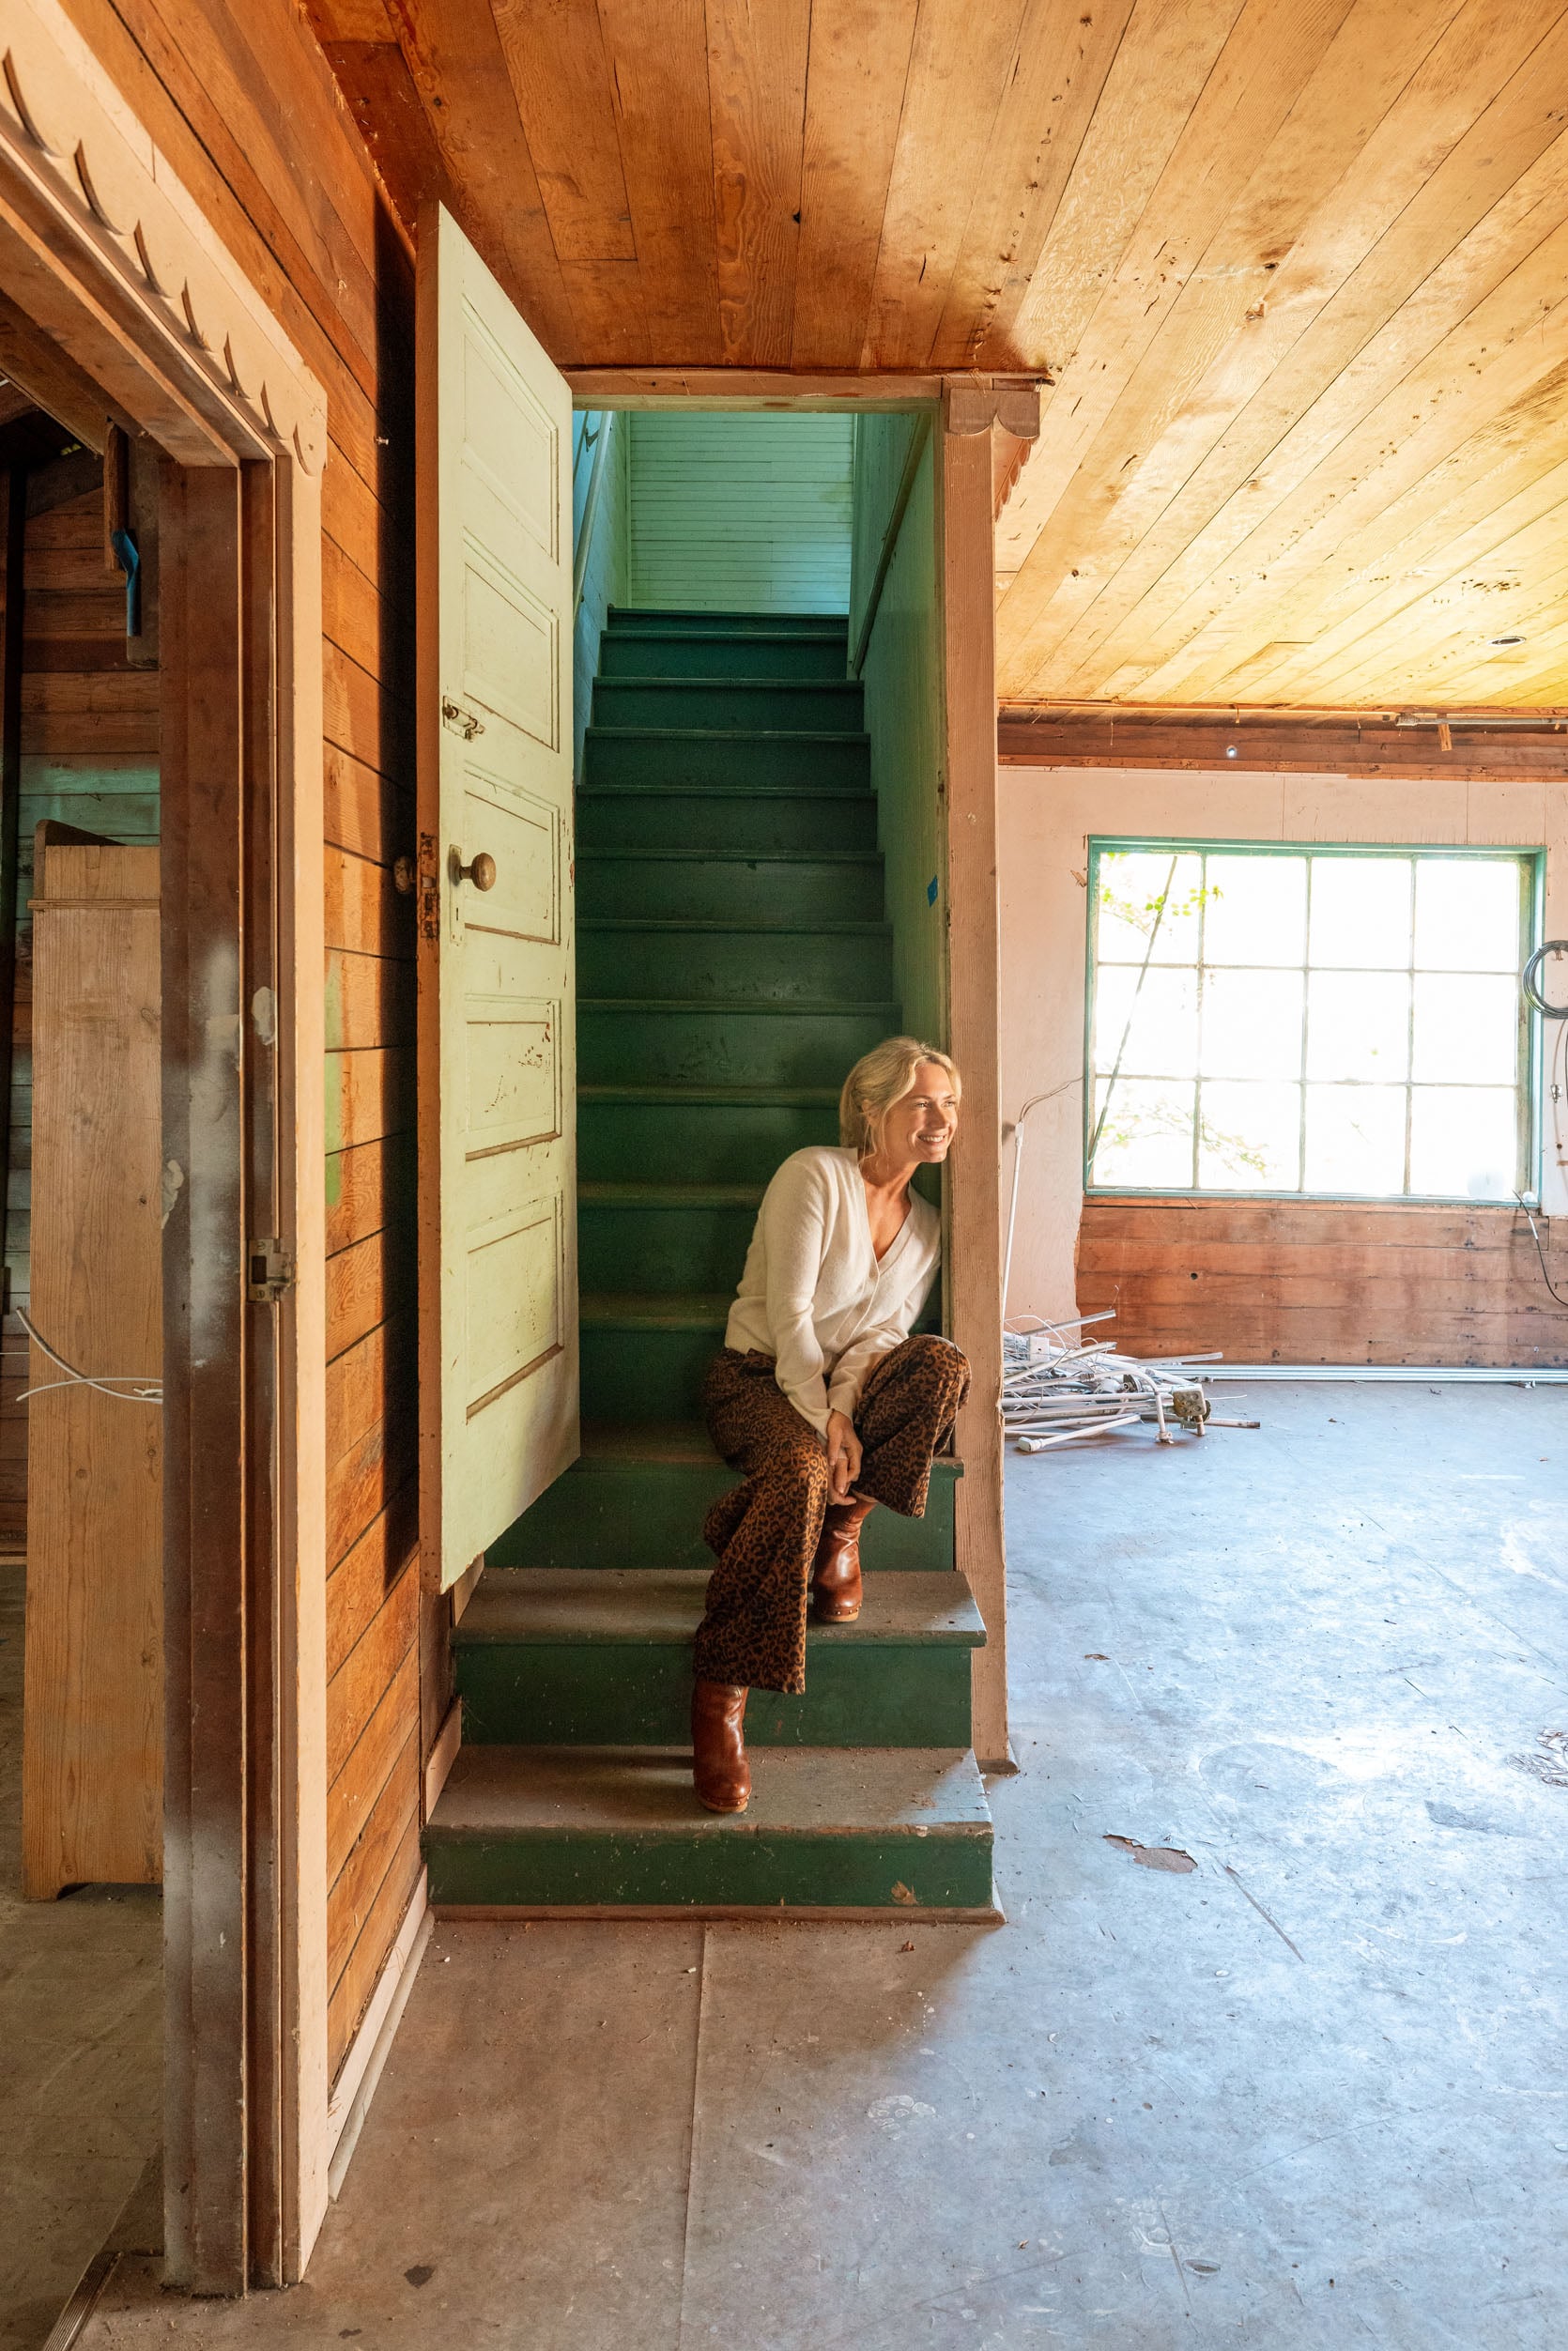
None of them really shut, close, and lock perfectly right now, and if we lived here full-time with our kids, I could see that being annoying, but for our purposes, these are pretty great. I could see us stripping, painting, fixing as needed, but right now it’s not something I’m even thinking about.
The Prop Room
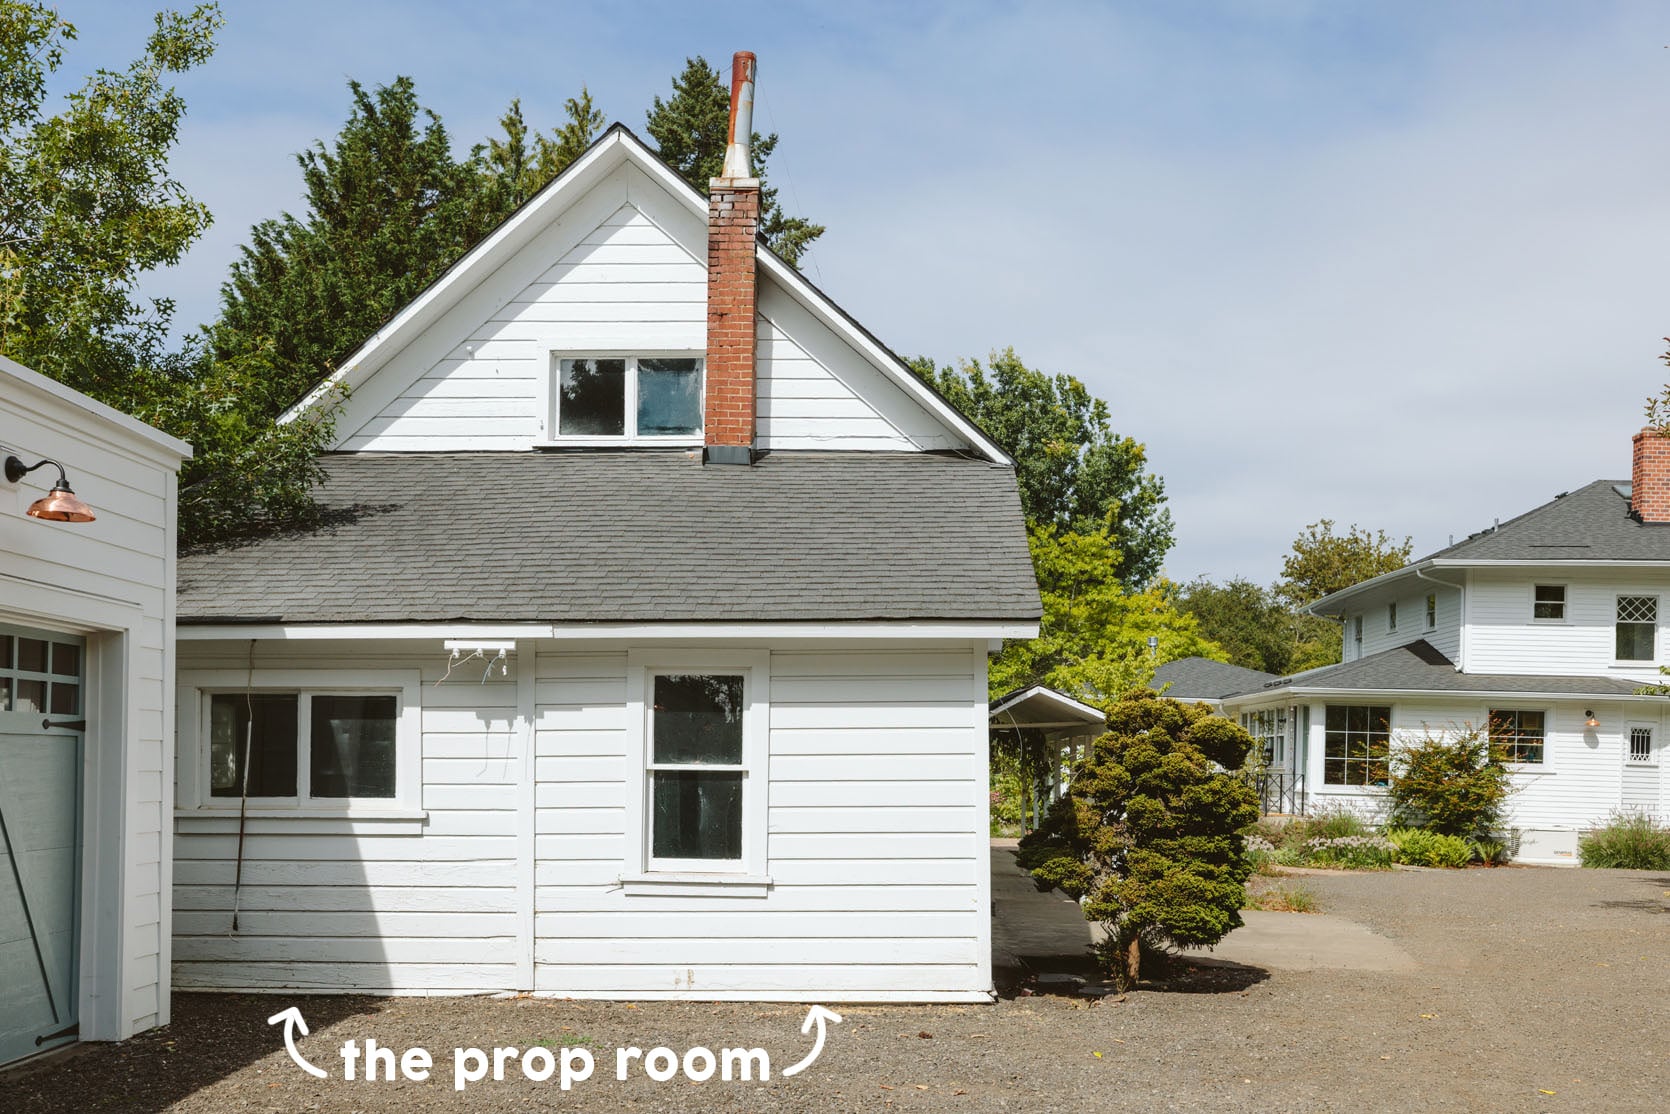
This room has three windows, all wood-framed and all different. Two of them (seen here from the outside) are fine (not great, but fine). But the third one is so busted and off kilter that it is beyond repair (said even the restoration folks). So we are looking for a vintage fixed (or operable) window that would need to be bigger, so we don’t have to deal with more re-siding or matching the beadboard.
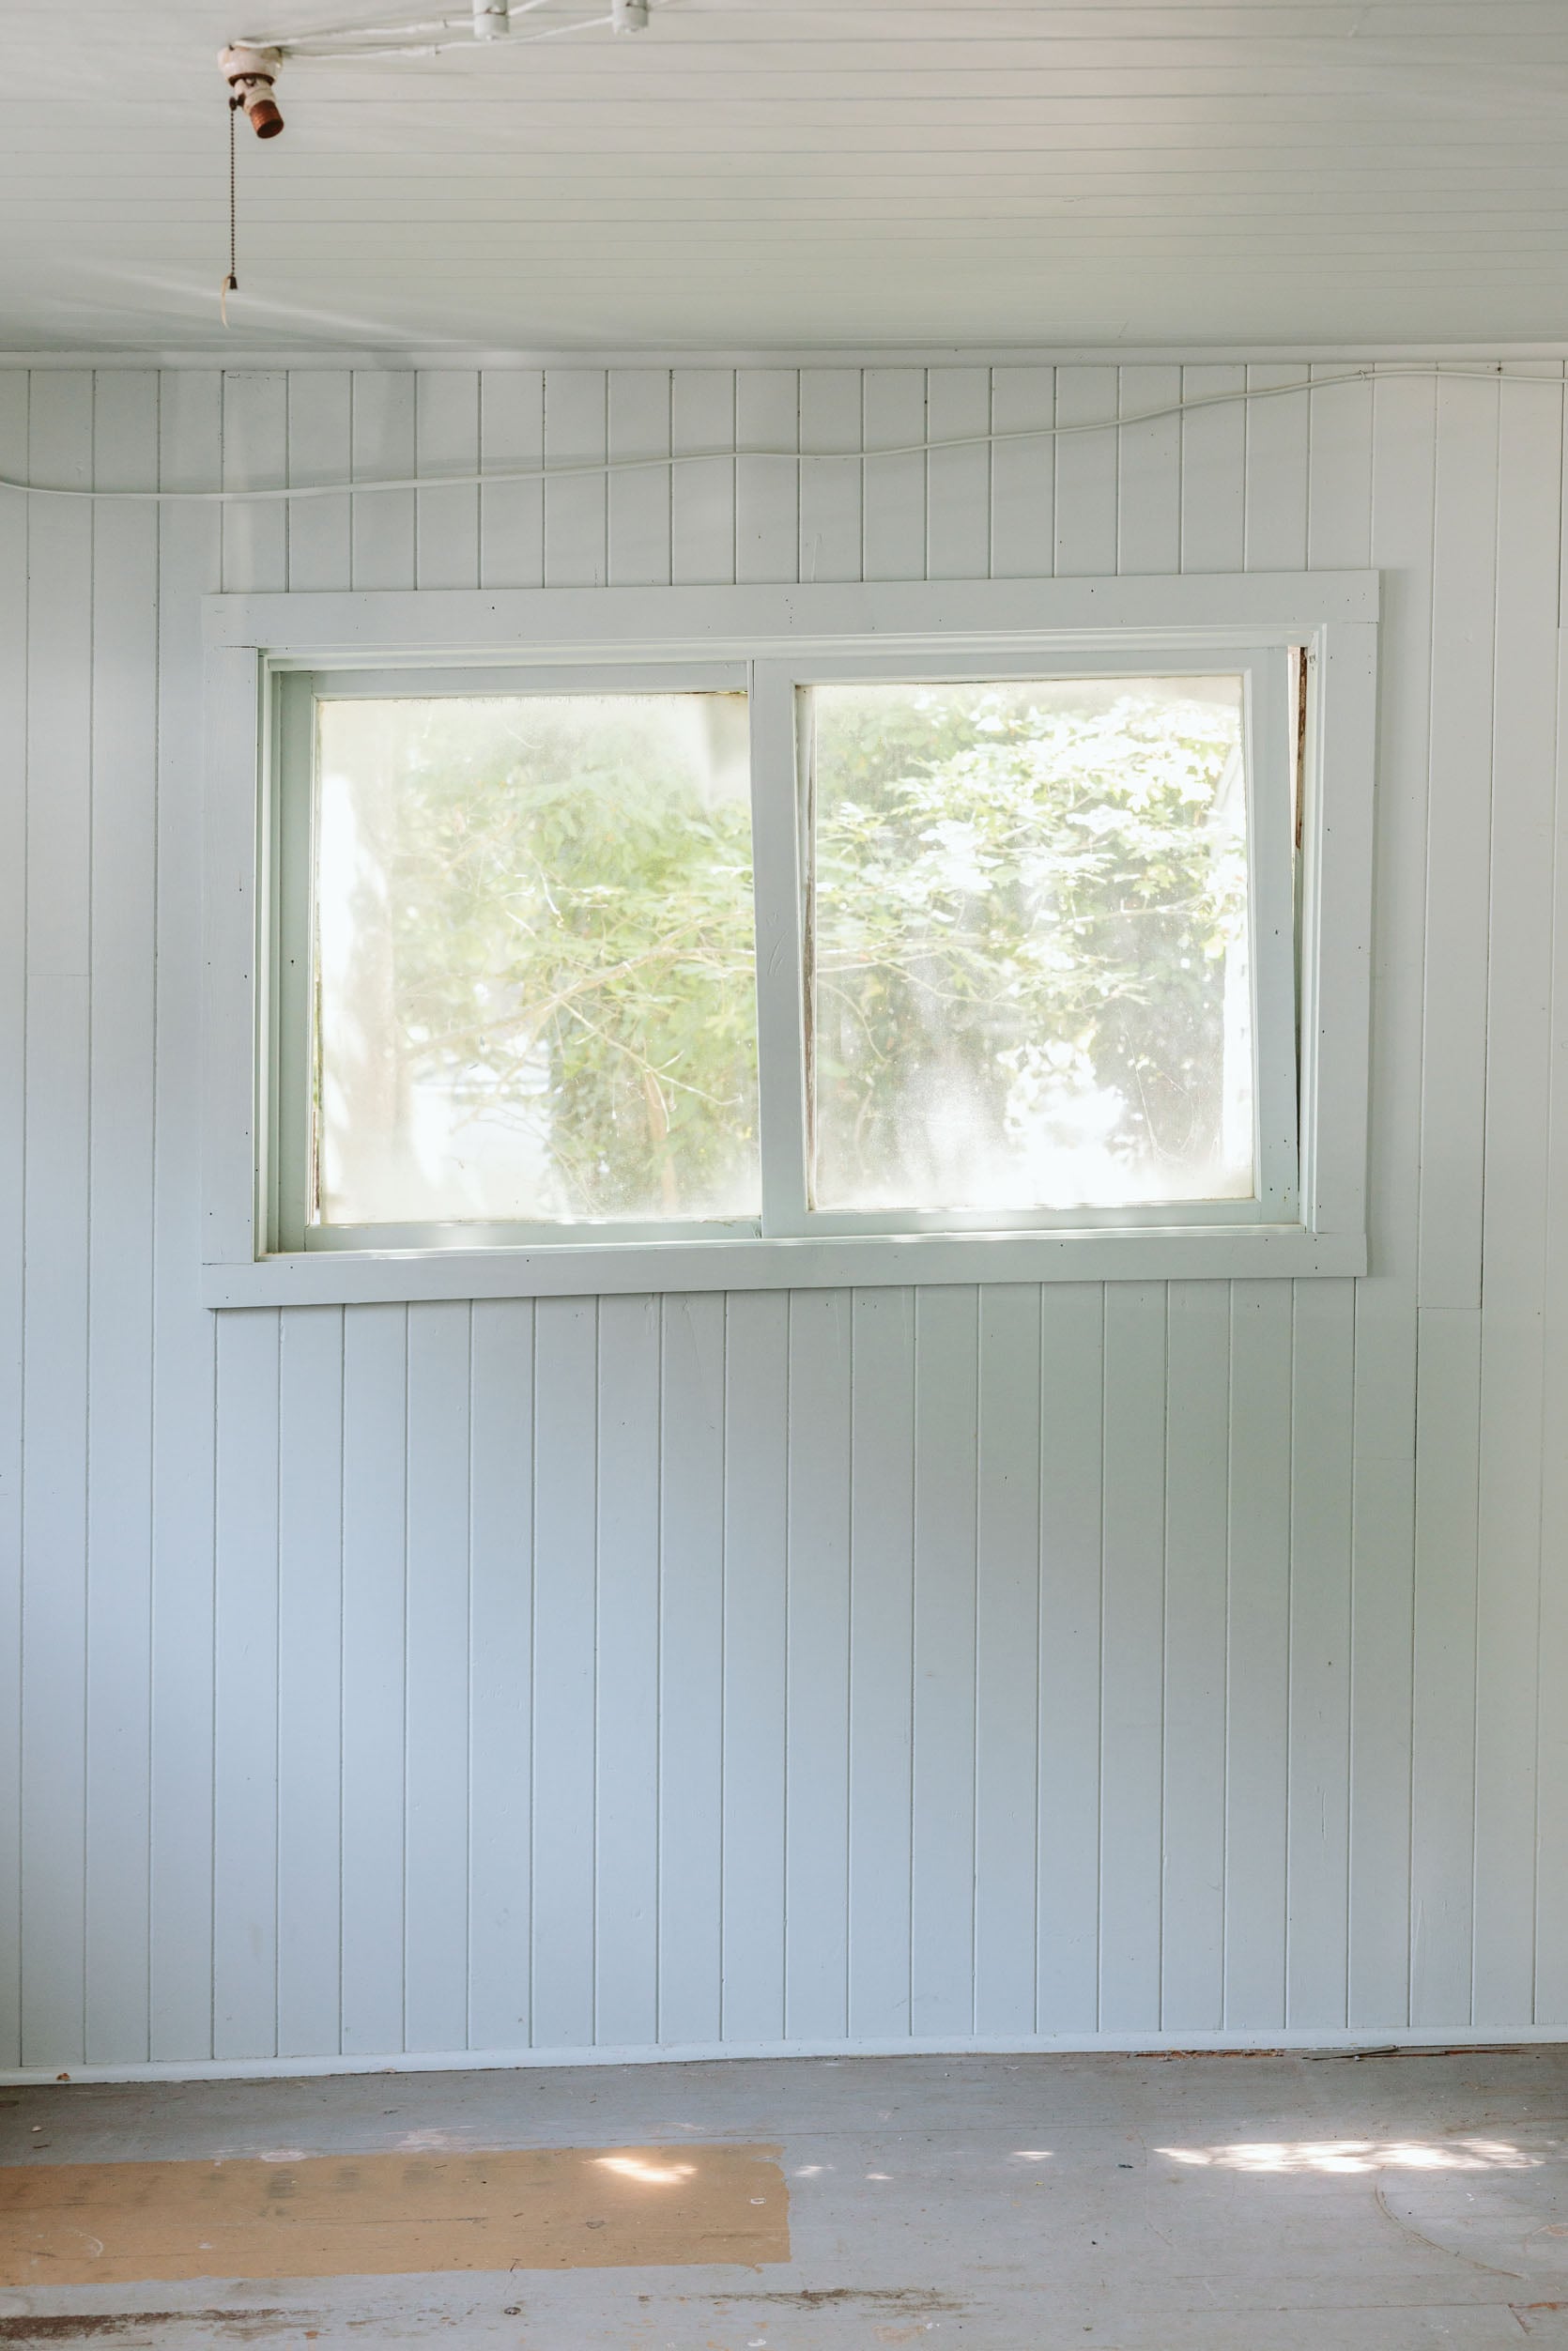
Here’s the jankiest one in question. I got a quote to build a new wood window for here, which the window guy suggested as an awning, as the other two are a slider and a double hung, so it would be a picture window that would open from the top. The quote for this was $3,270. That felt like too much to us, so I’ve been on the hunt for a vintage one to put here instead, with the hope that it would be under $500 (not including install).
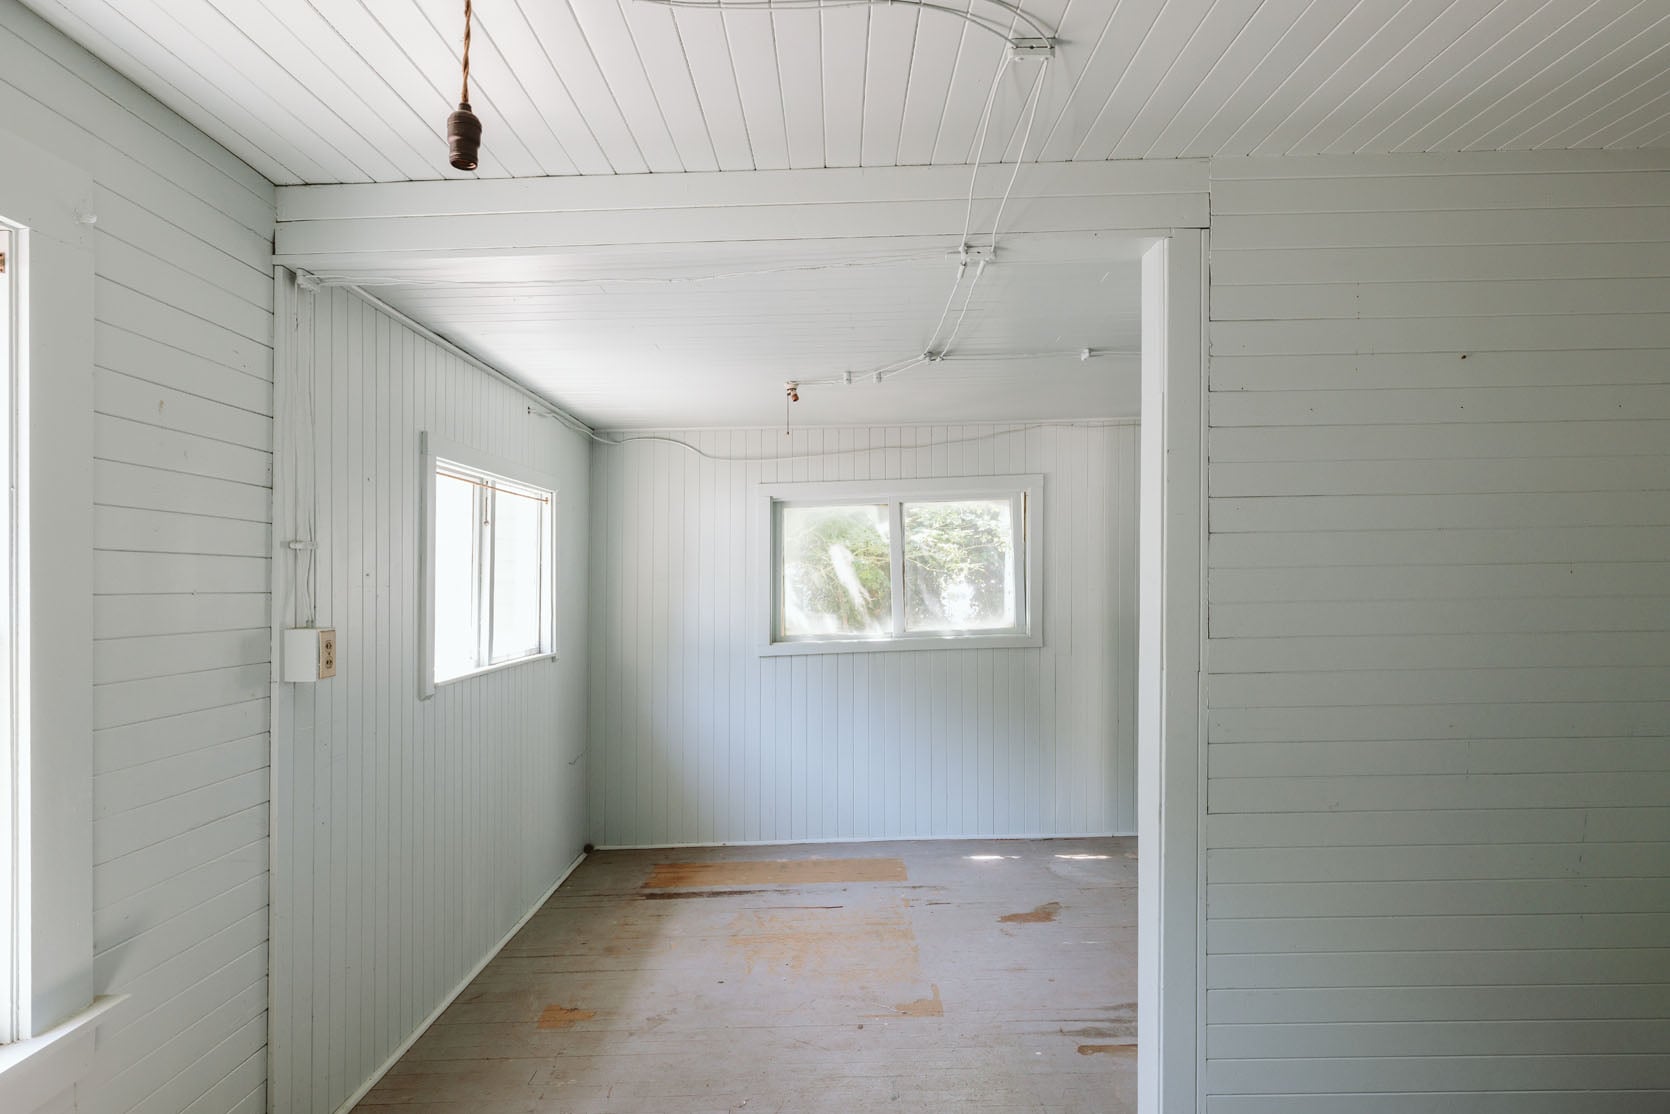
As I’m writing this, I’m realizing that the interior window from the living room could likely fit here! They just salvaged it, and I’m not sure what shape it’s in (and to be fair, it’s just a picture window, so it’s so simple), but in the name of keeping anything original, I’m going to explore just putting it here. I was planning on going to Aurora next weekend to see if they have anything special (which they tend to). So we’ll see.
The Speakeasy
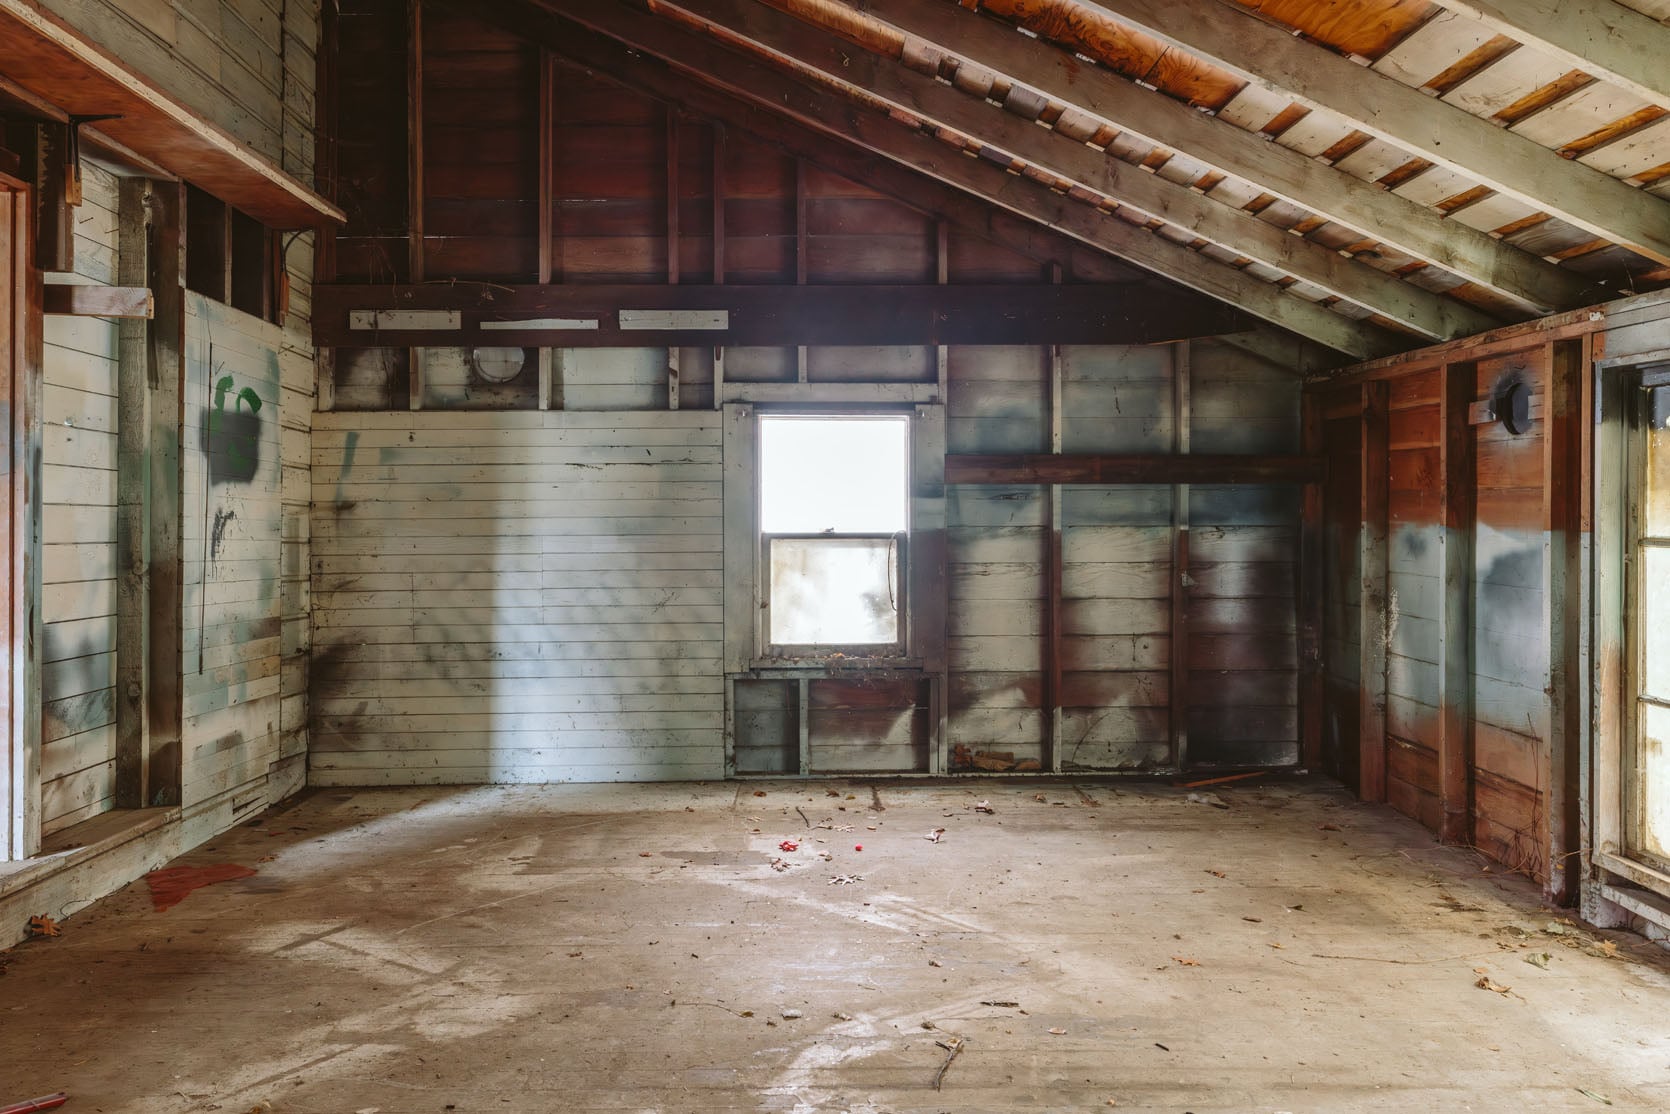
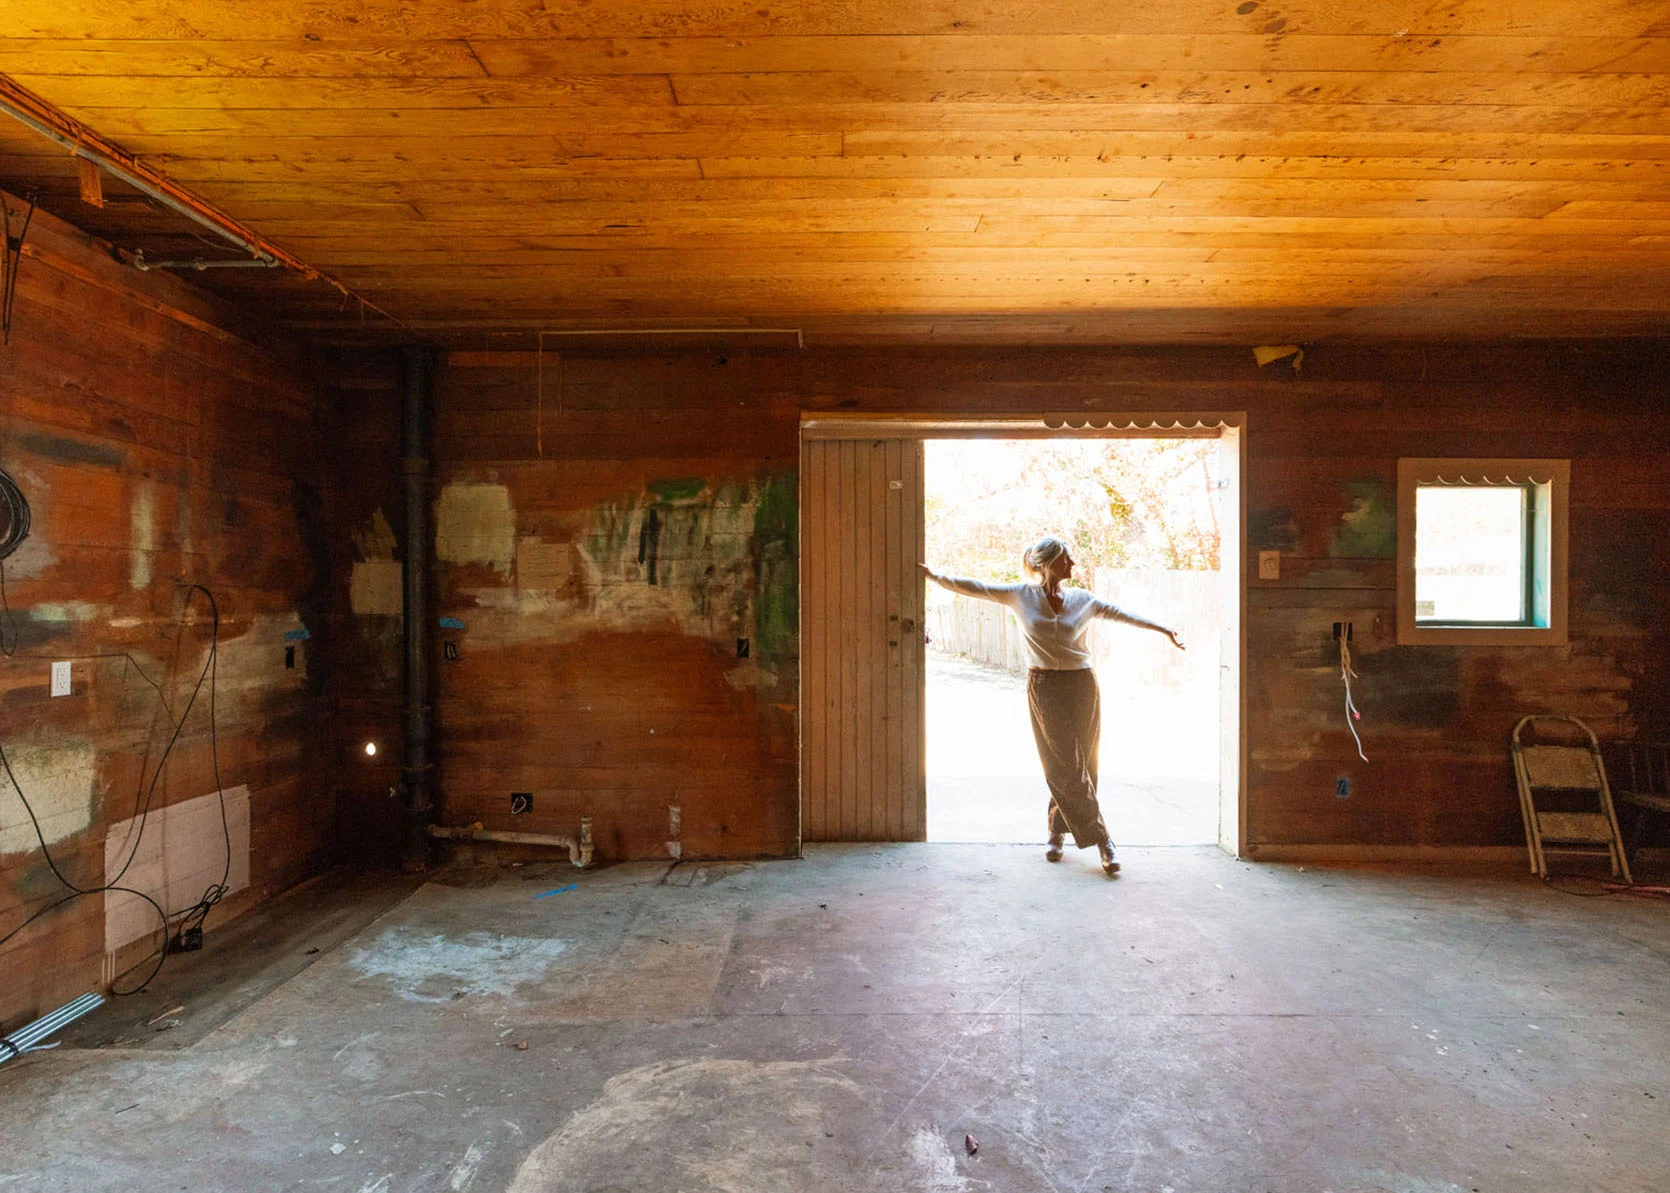
The speakeasy had two windows – a double hung on the east wall and a big non-operable grid window on the south wall. The double-hung one was broken. Now the function of this room is still TBD, but it’s leaning rec room. Charlie’s drum set, our ping pong table that is in the garage, and maybe where the tweens/teens can hang. We call it the speakeasy because it’s fun and dark. So we took out that broken window and decided to put in a door instead, which connects directly to our prop garage. The door will have a panel and then six lites (so mostly glass).
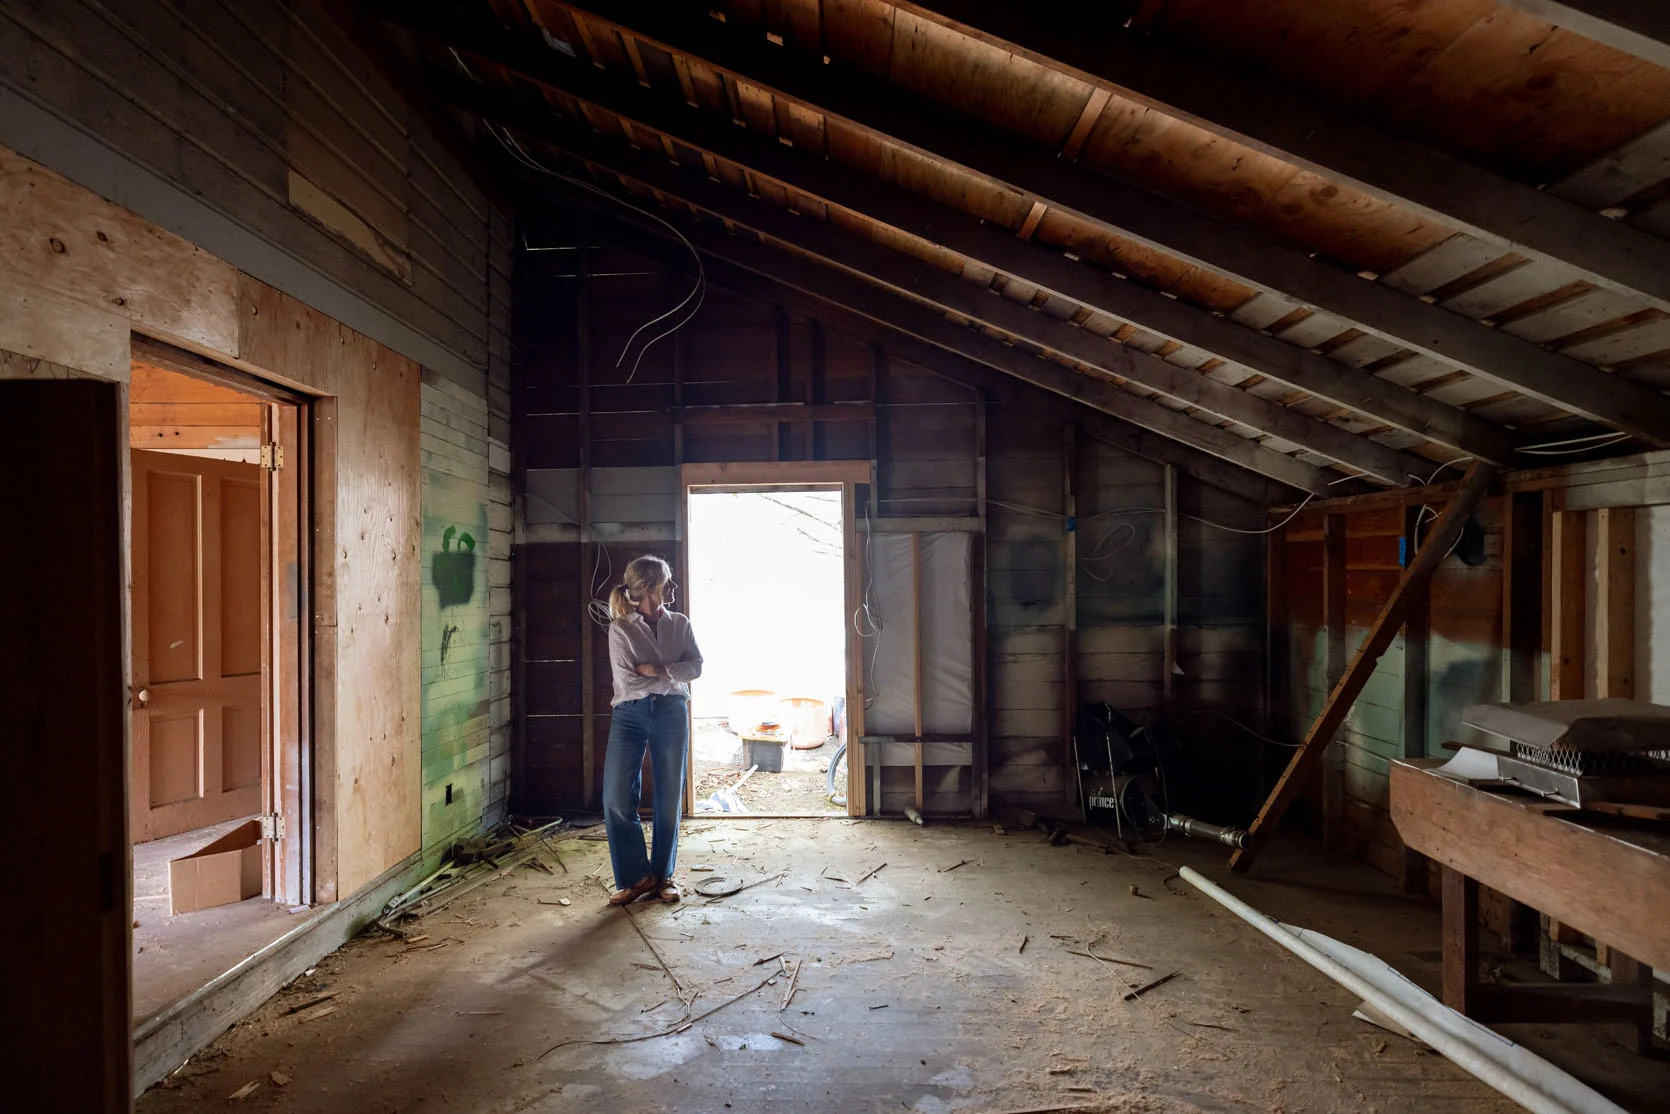
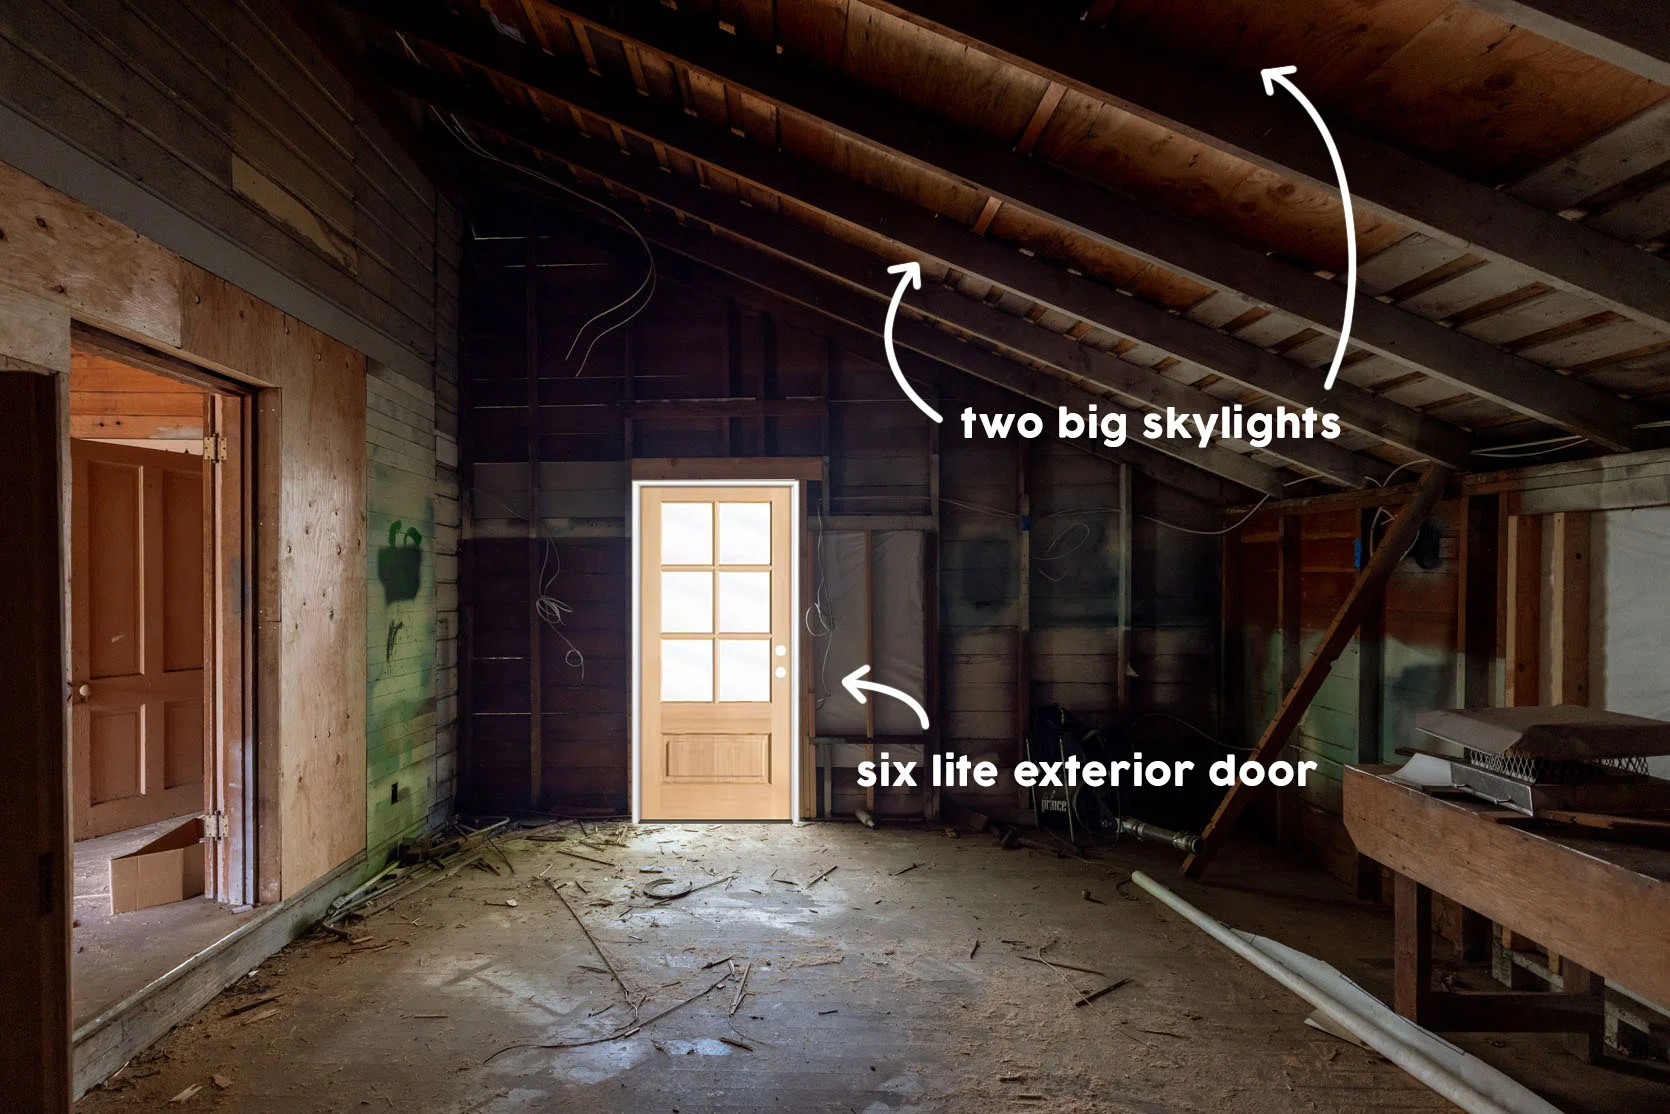
They already framed it out, and it actually brings a lot of natural light in. We didn’t want to add more windows because we want to have wall space for now for games (and to not spend money), but I was nervous about not having any light, so the door was our compromise and gives great access. This room will also have two huge skylights with blackout shades, BTW.
But What About The Big Window?
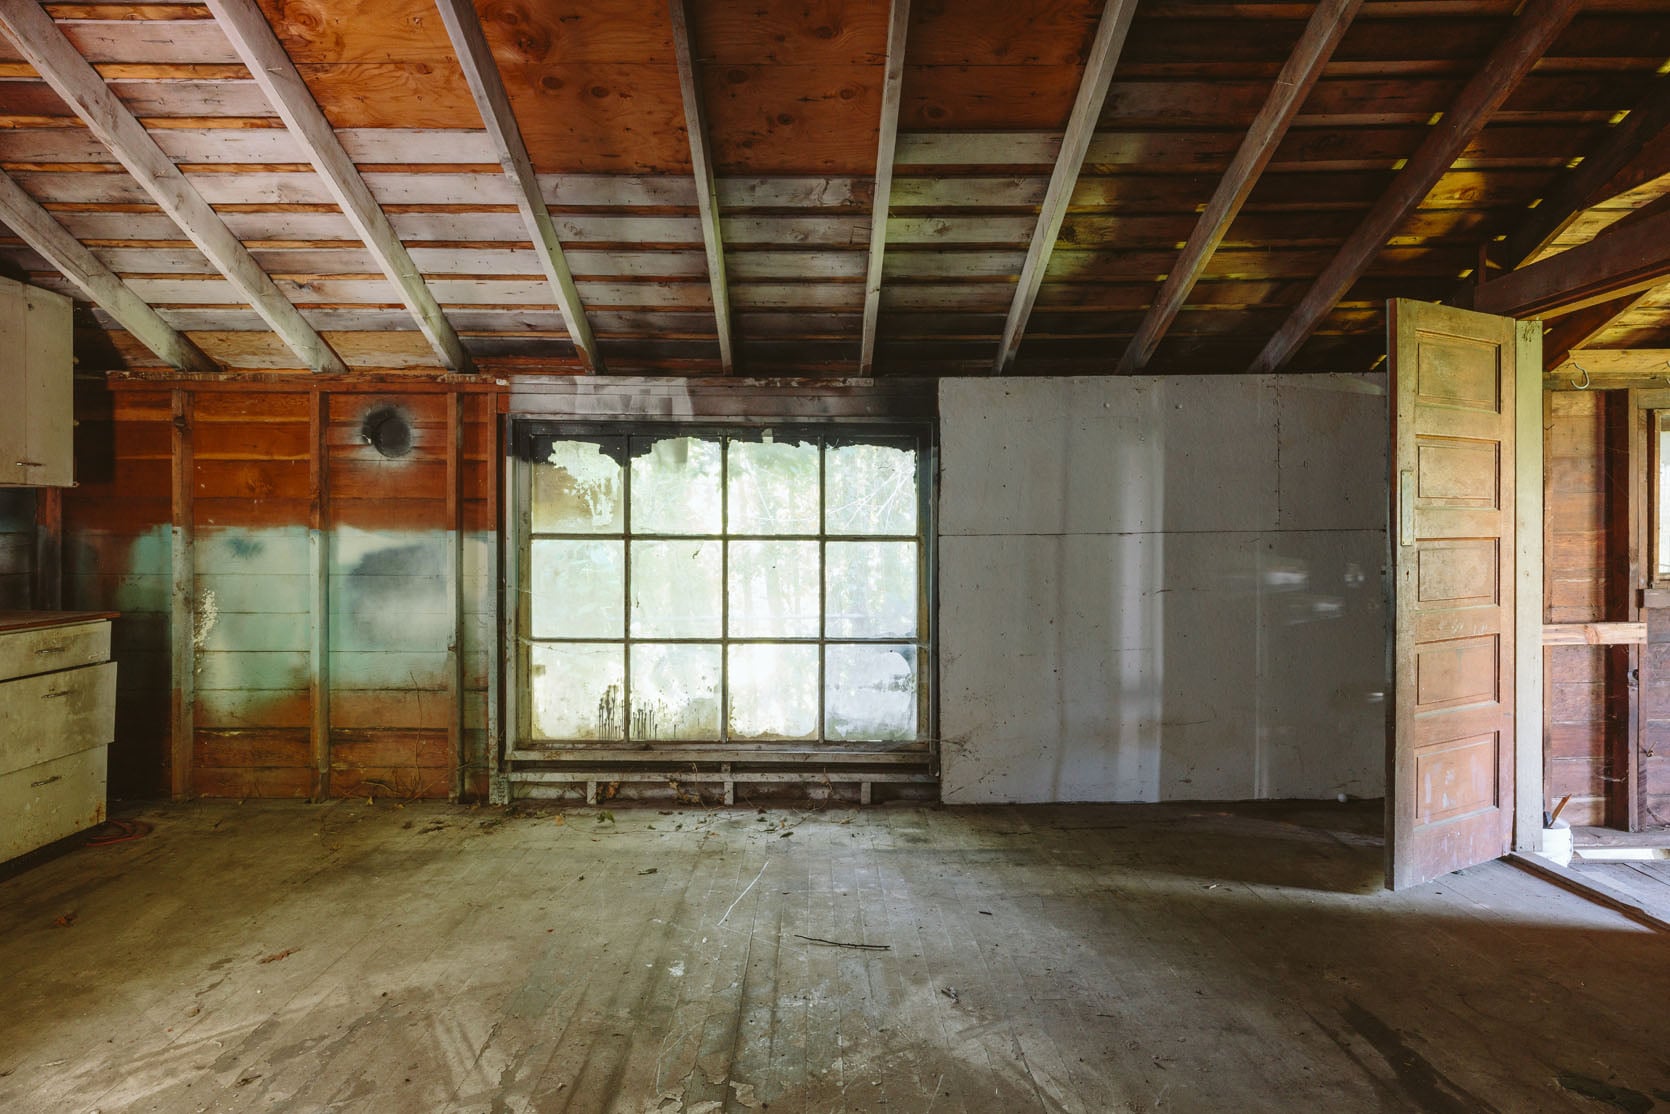
Here’s where you might be shocked…
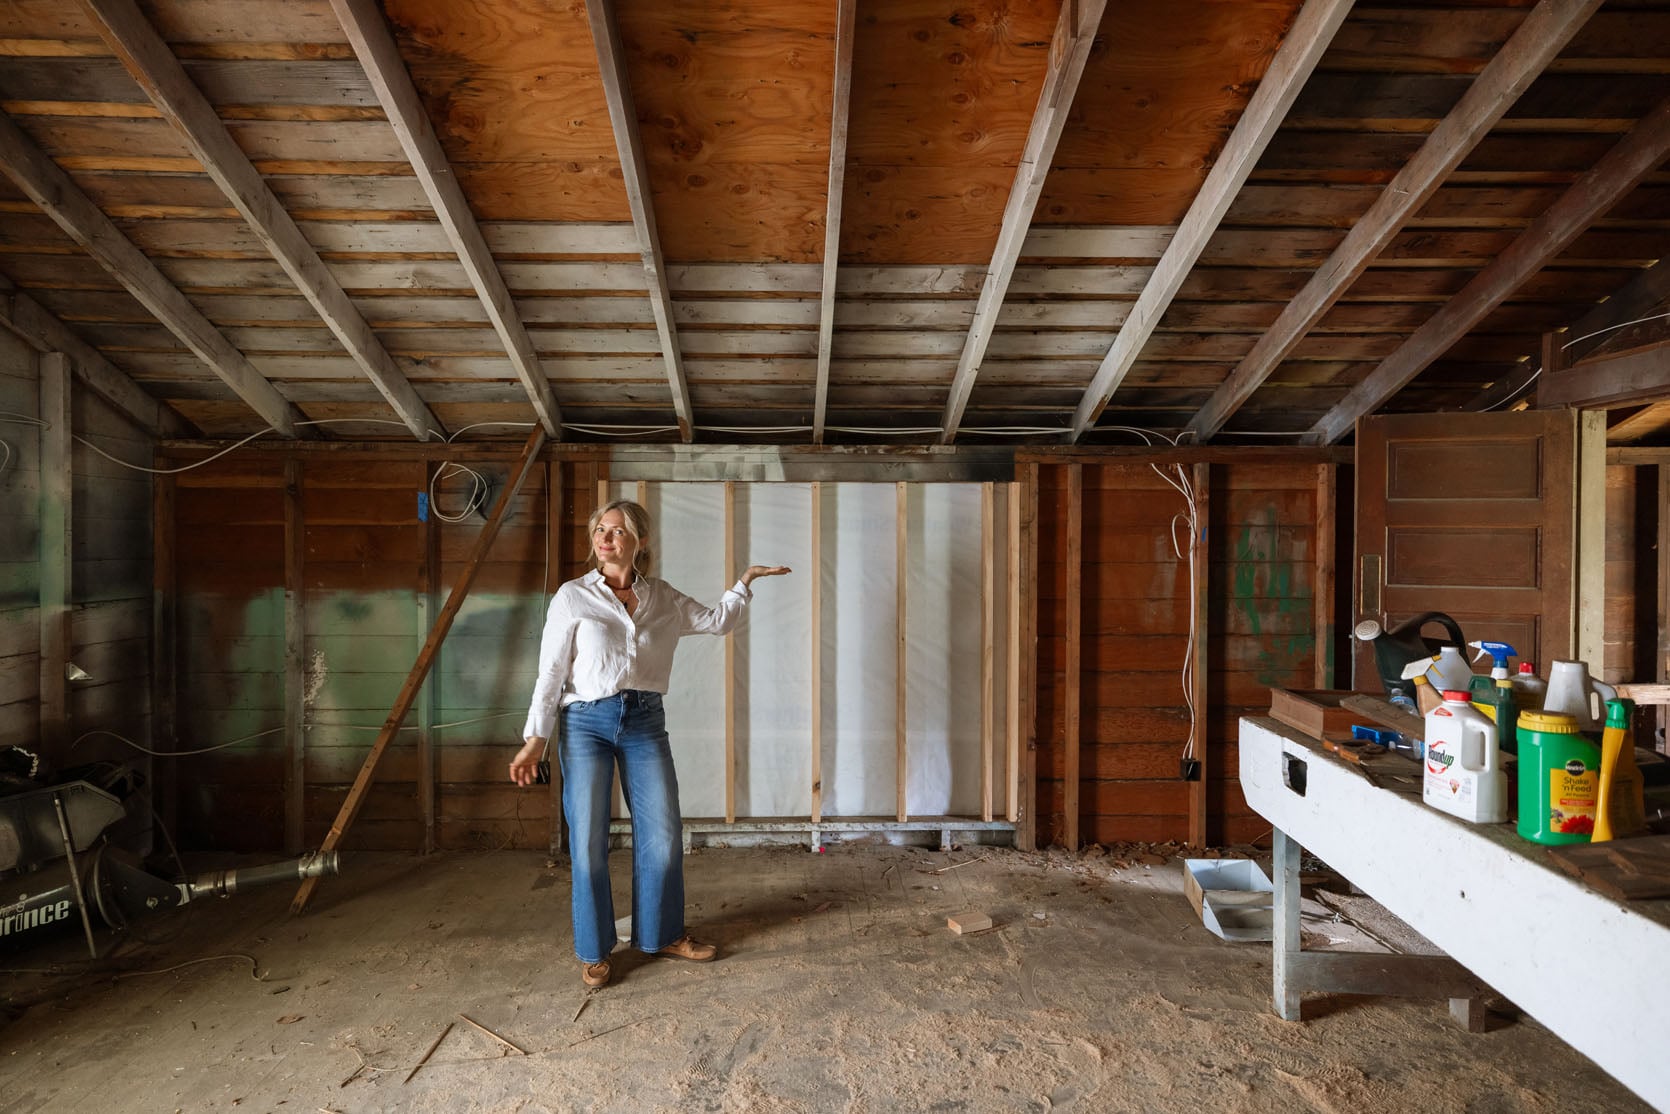
We got rid of that window. Now, before you cry or yell, you should know that it looked out to a chain link fence, 3′ away, that was covered in shrubs with really tall trees, all on our neighbors’ property. So it was a fence view and didn’t bring in very much natural light. We figured skylights would help. Besides… we had plans for that window (keep reading).
The New Bathroom
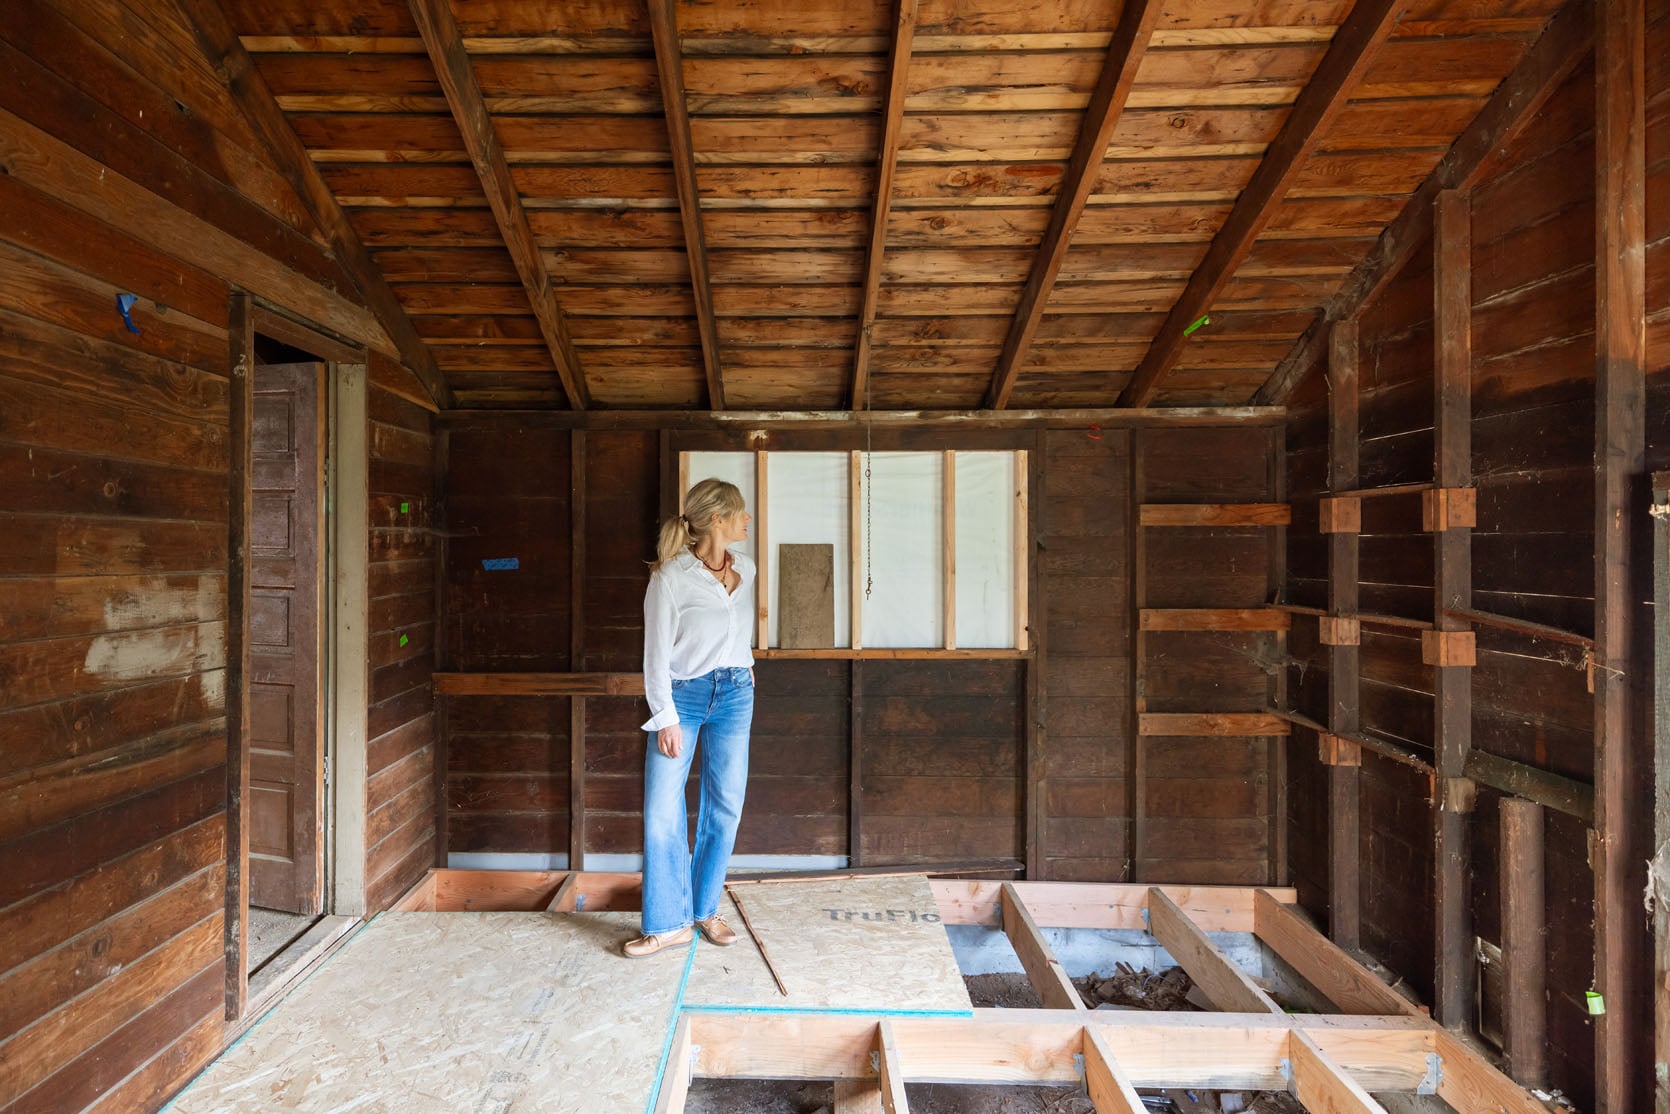
On to the bathroom, where we got rid of this window as well. It also had a terrible view that we couldn’t control (dark, chain link fence covered in shrubs), but getting rid of it also allowed us to put the shower and vanity over here, so it opens up the function of the room more. This room will also get two skylights to bring in a ton of natural light and to highlight the awesome, vaulted ceilings.
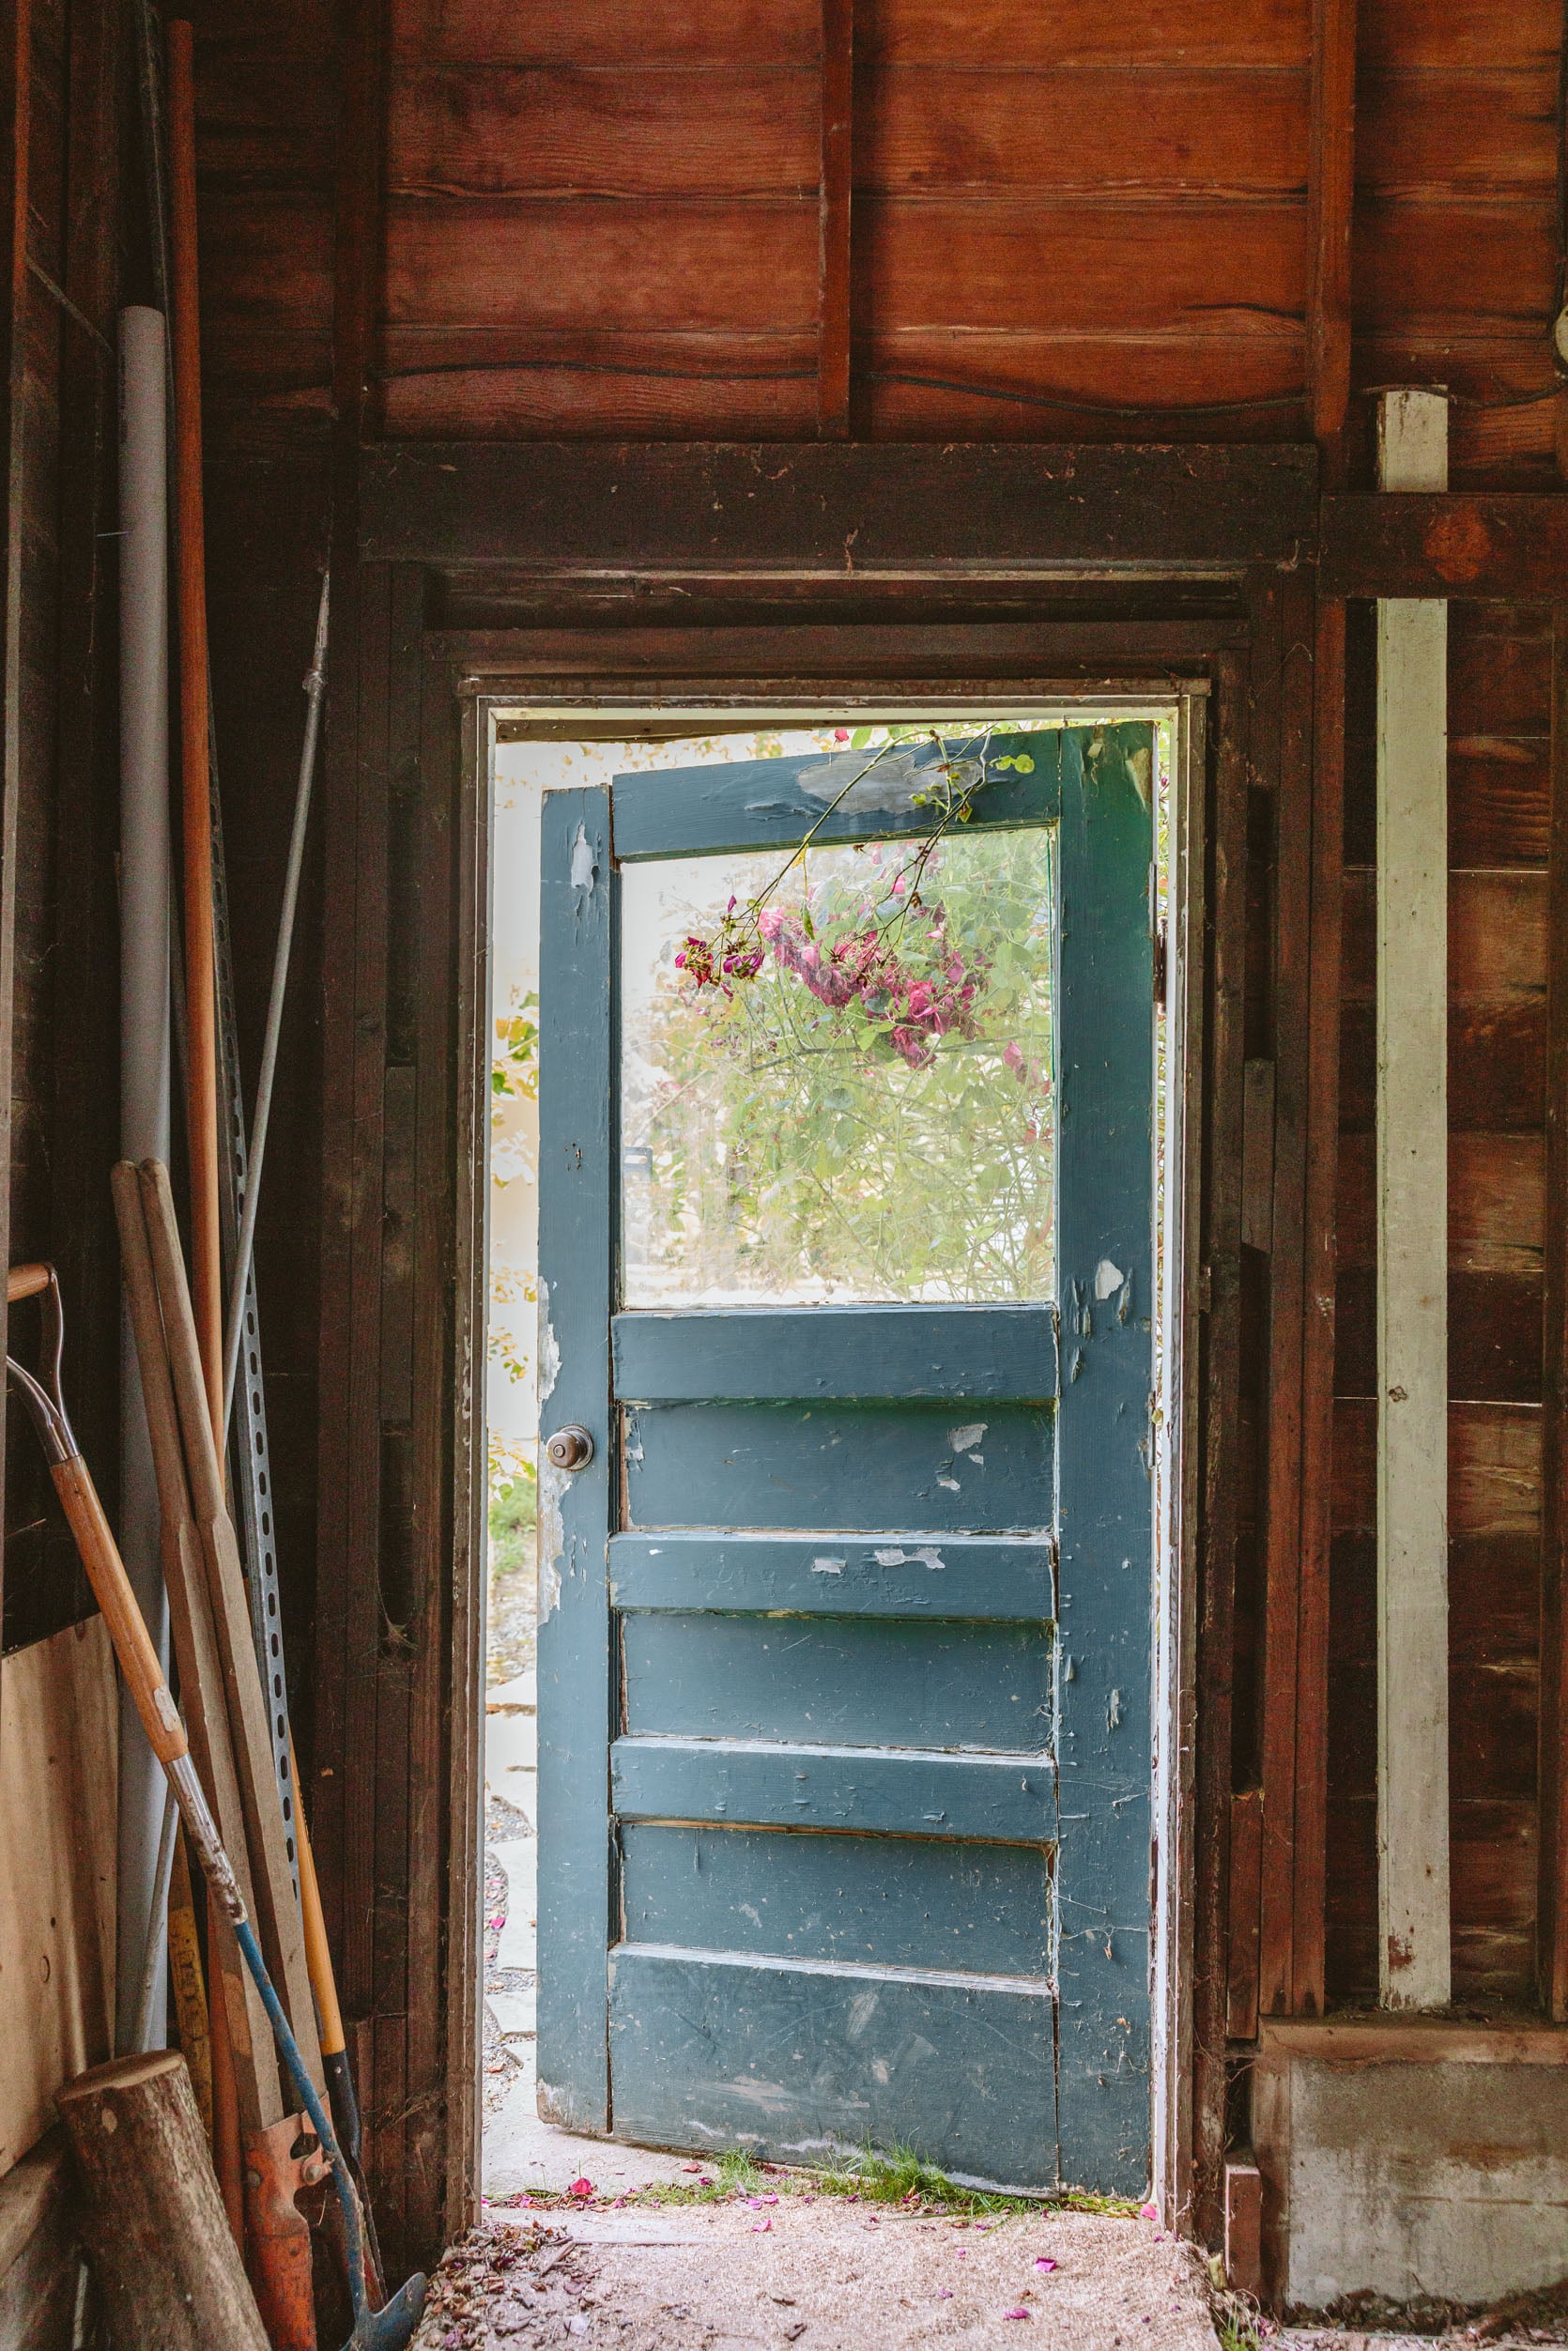
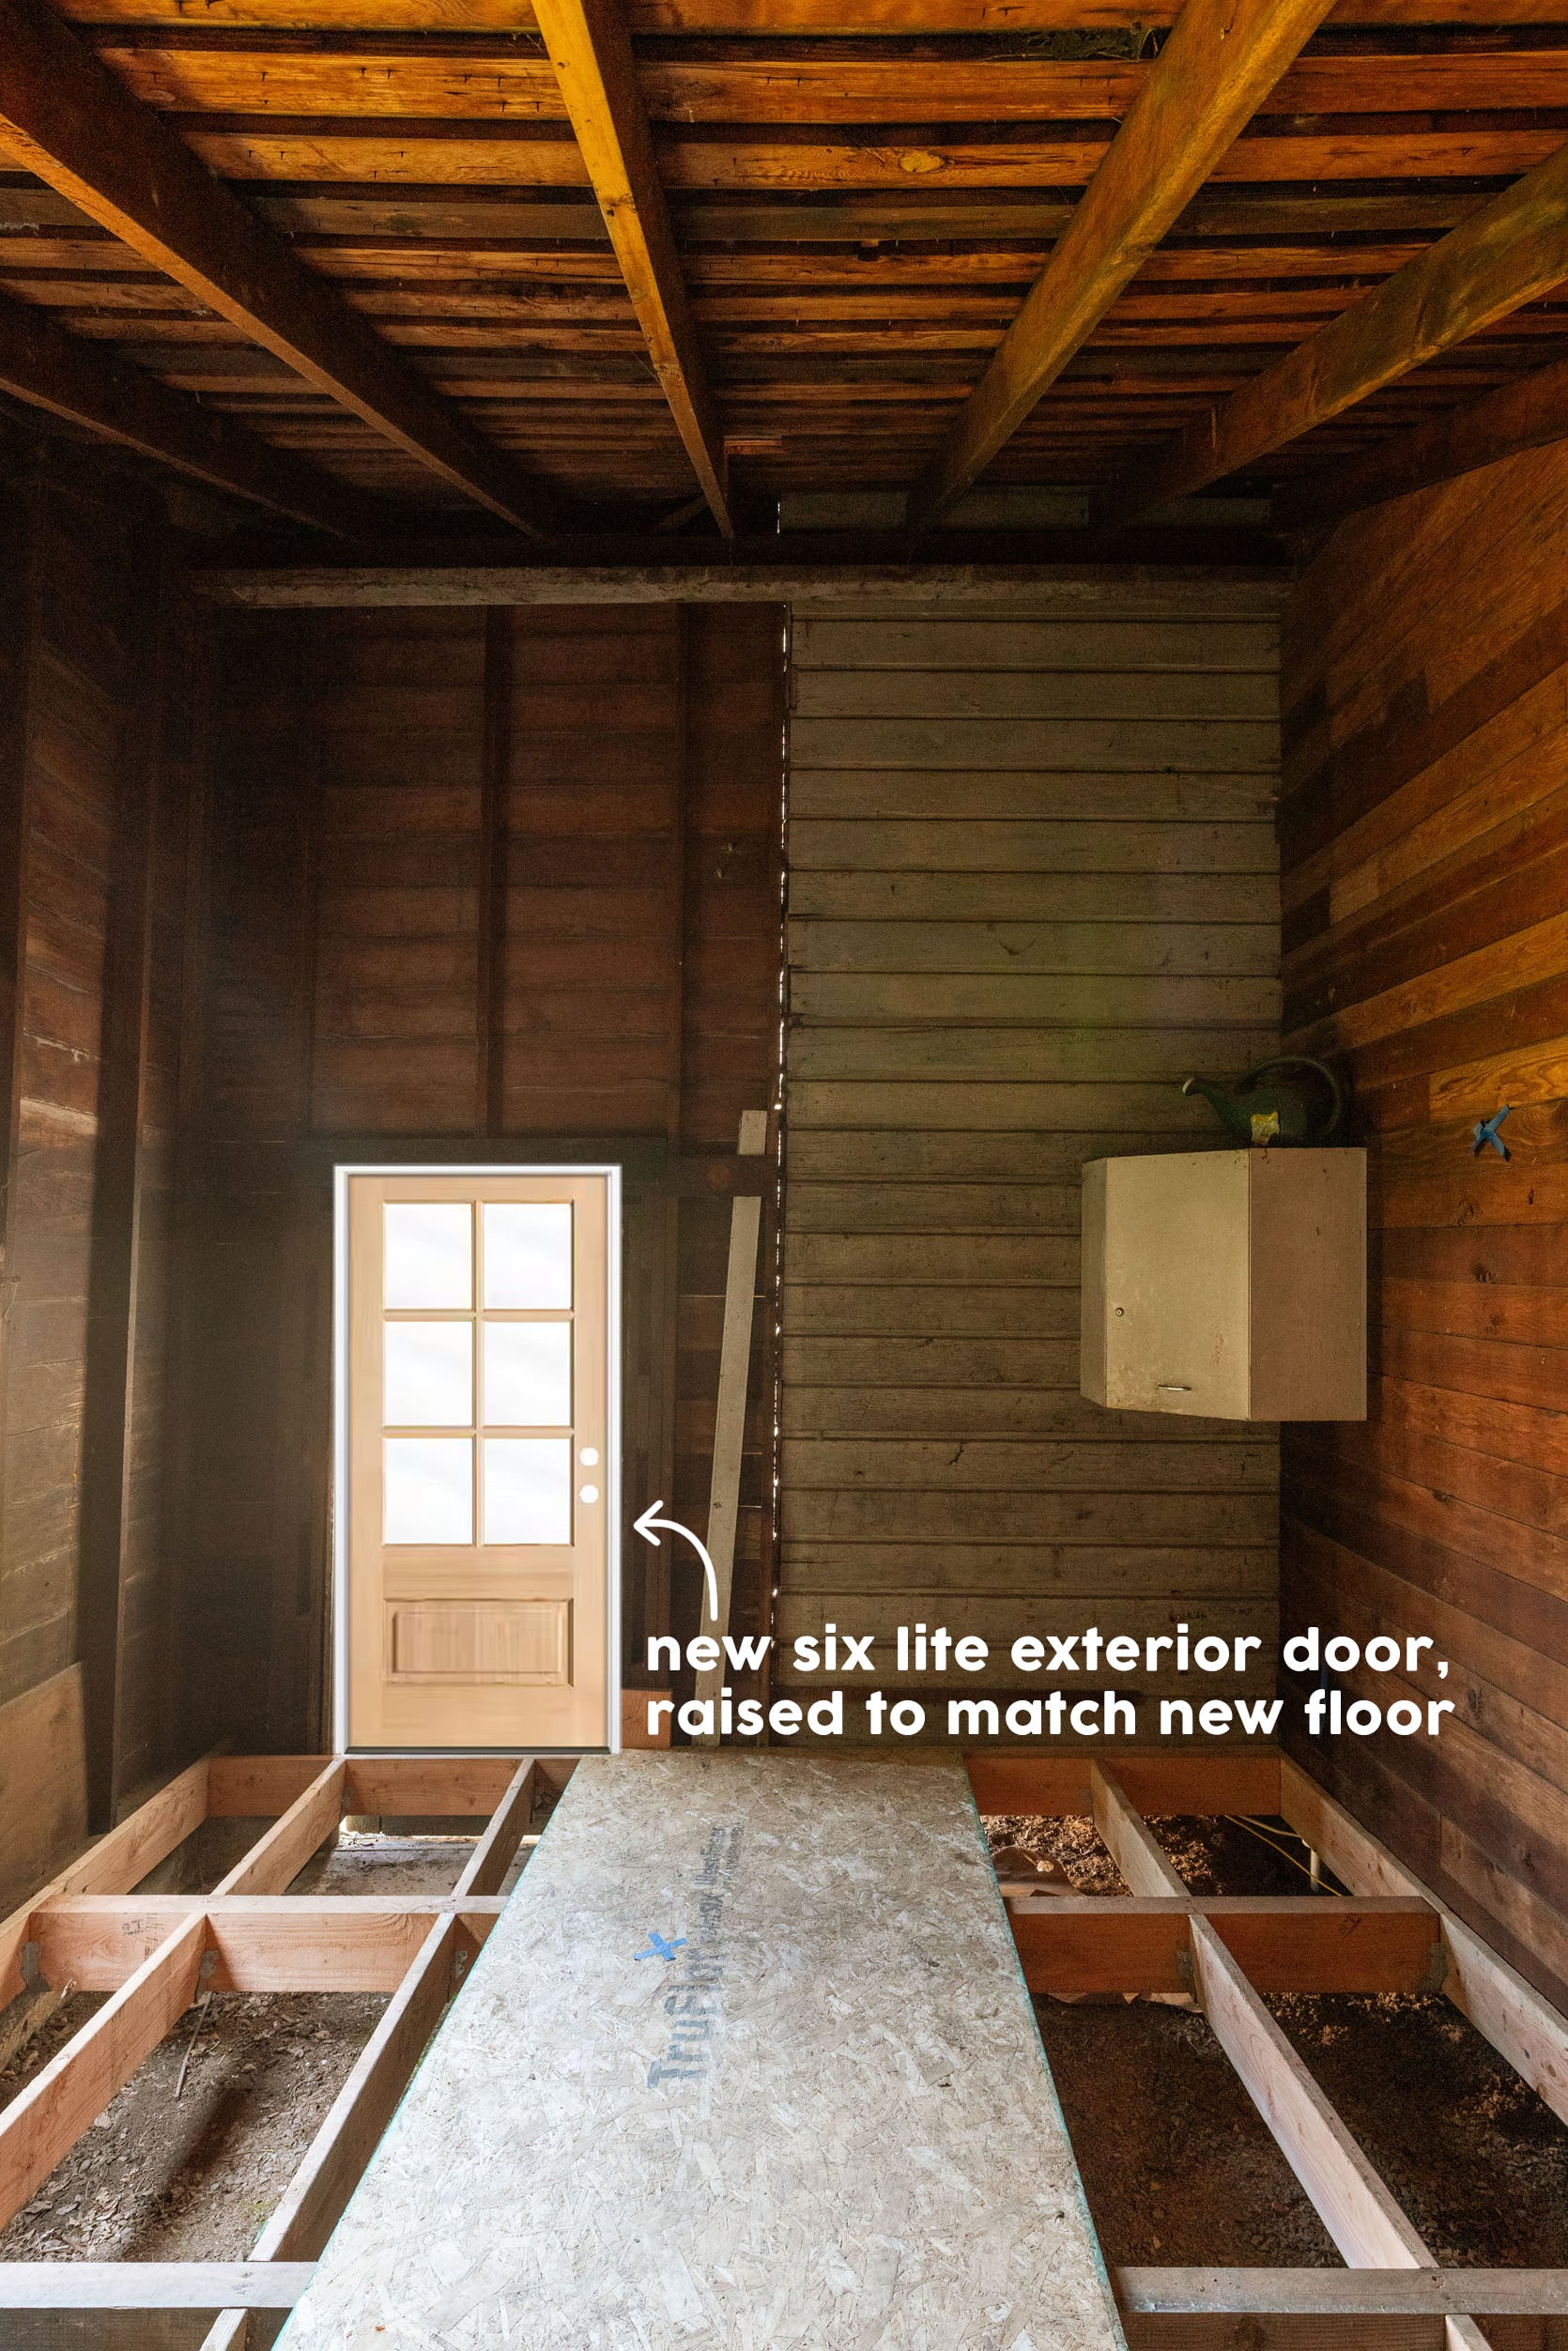
When we framed the floor of the bathroom, we had to build it up 18″ (unless we wanted to pour a concrete slab, which we didn’t do for a myriad of reasons). Doing this actually raised the height of the bathroom floor to that of the speakeasy (win), but it also required us to fix a few things, like the exterior door. The original door was rough and just didn’t make sense to salvage. Instead, we are putting in the same six-lite exterior door as we are in the speakeasy and reframing it to sit level with the new floor. We’ll have to add some sort of step-up outside, too.
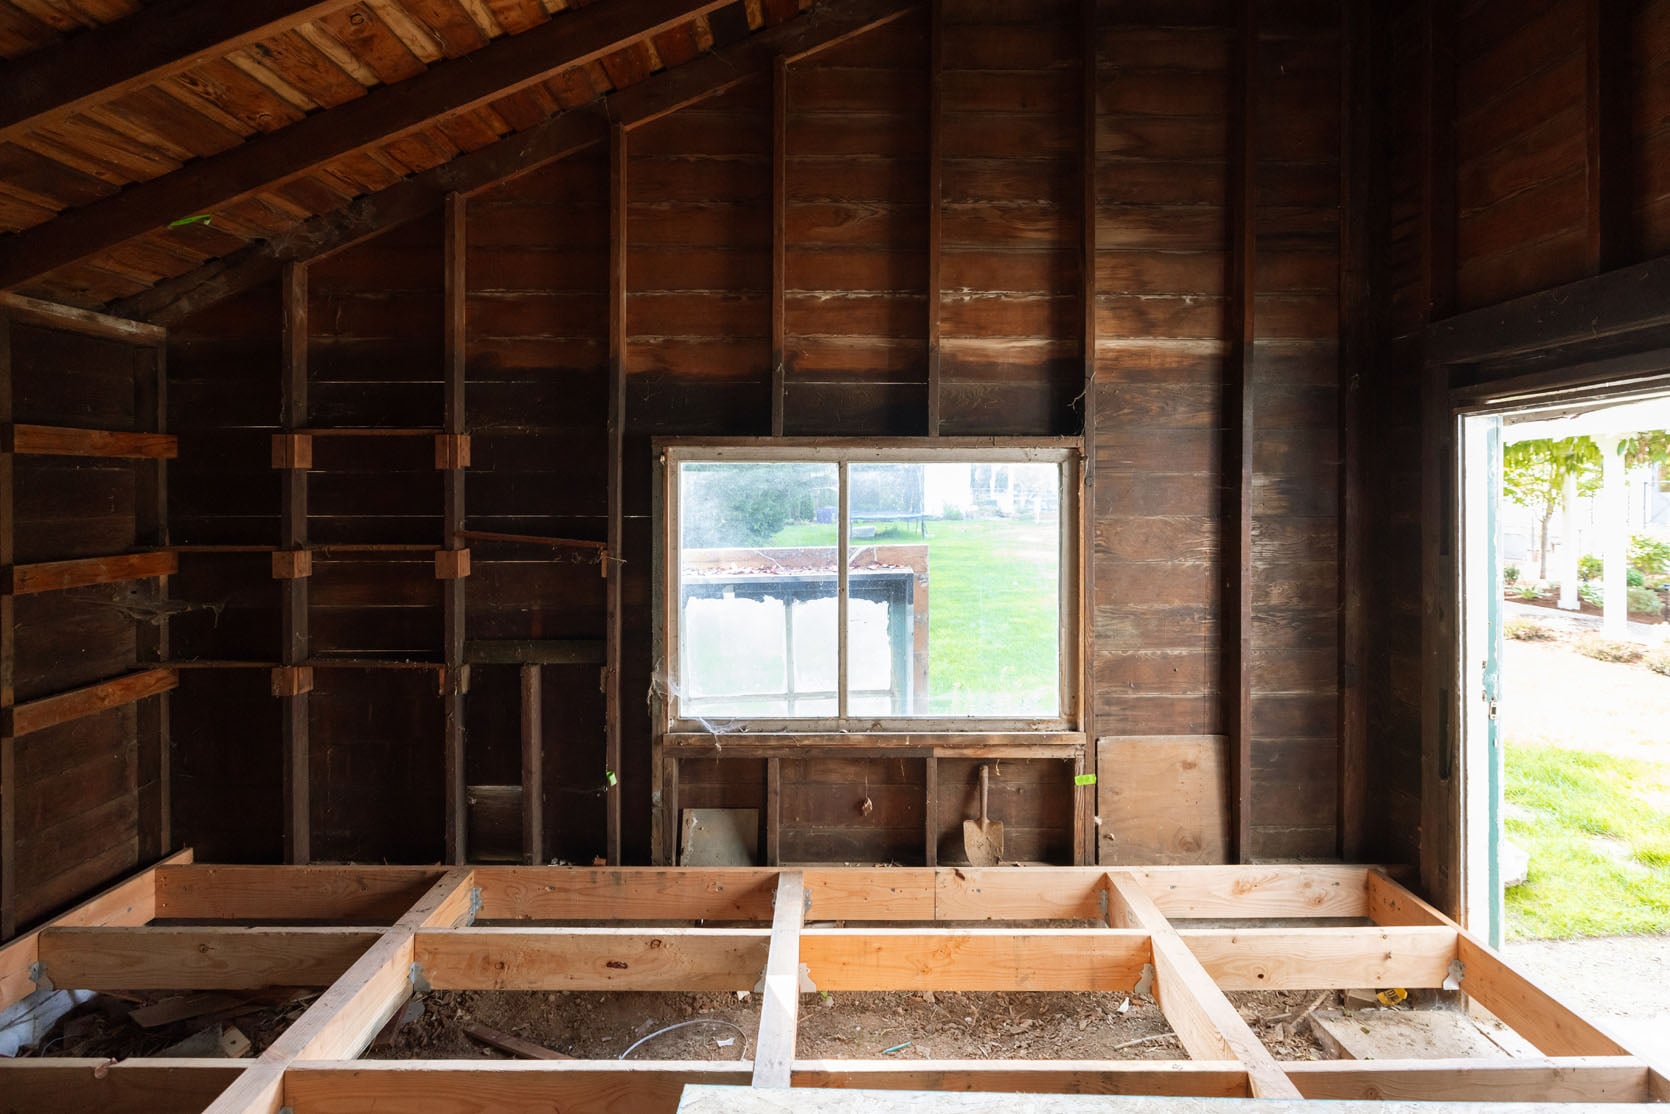
Those extra 18″ also made it so the window was oddly low (starting at my knees with the view below my eyeline). So we were just going to raise it, which at first I thought would be expensive, but y’all, re-framing is pretty affordable (a day’s work for two dudes). But THEN I HAD THE BEST IDEA…
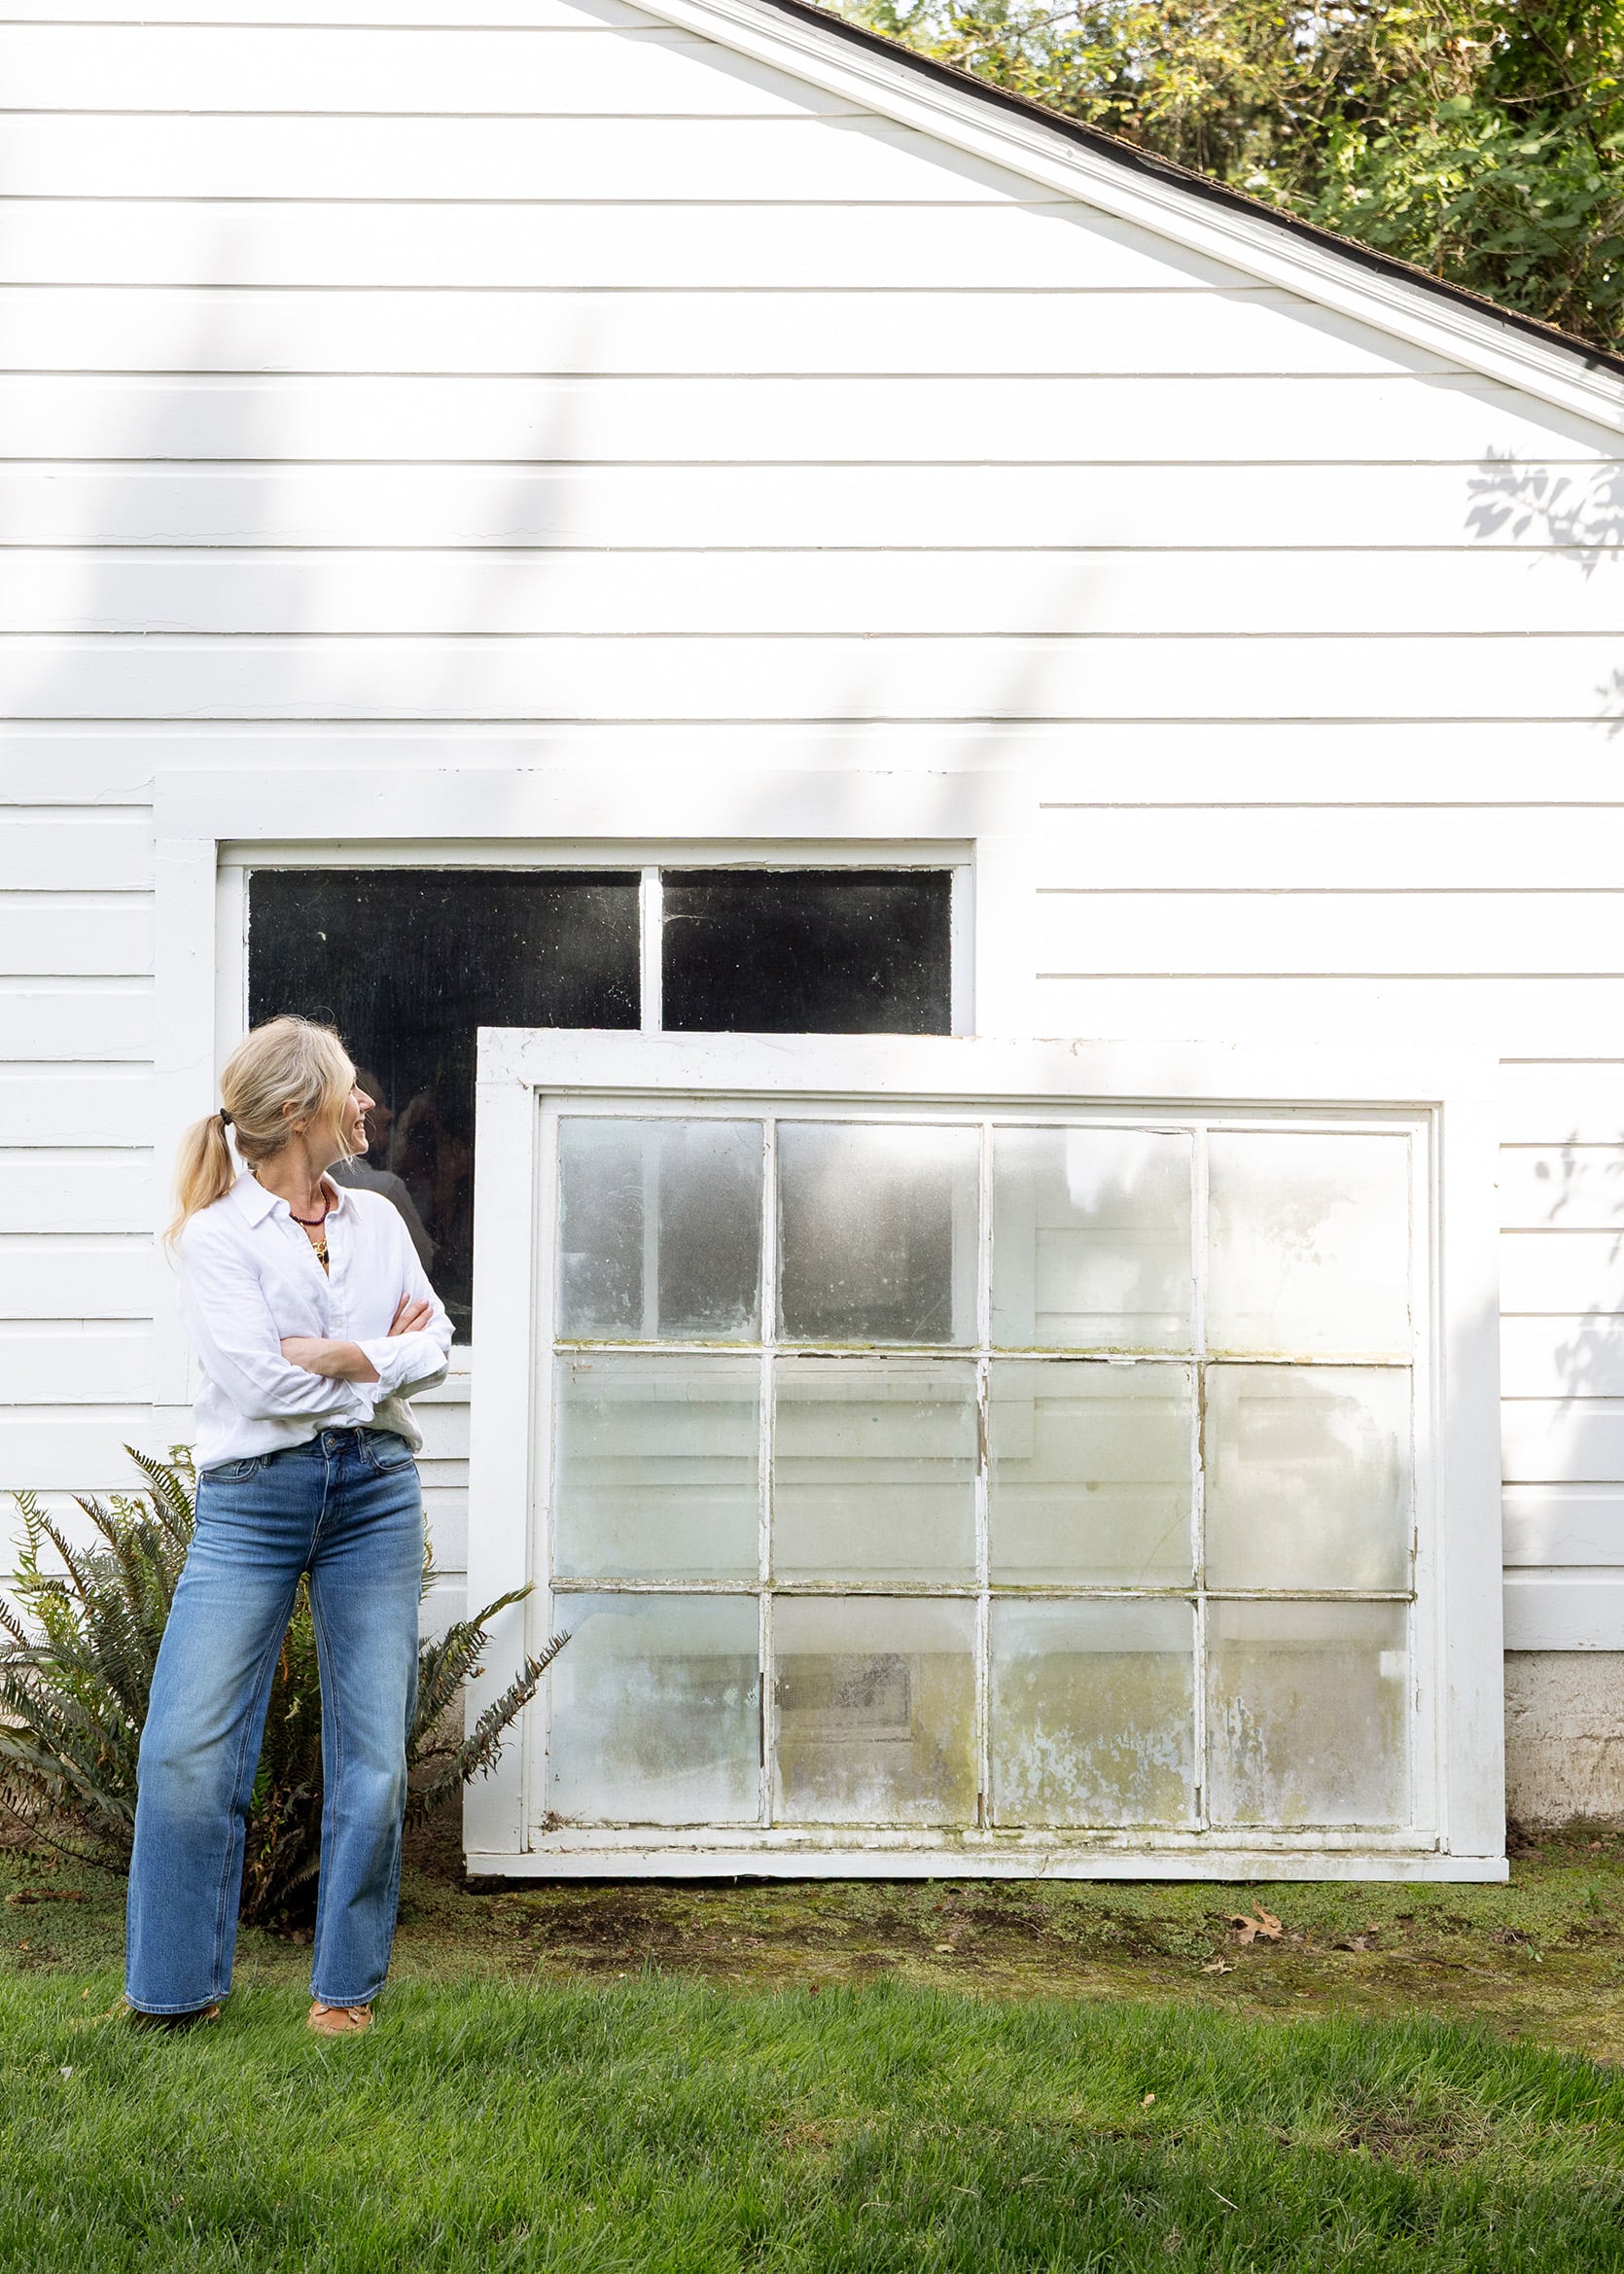
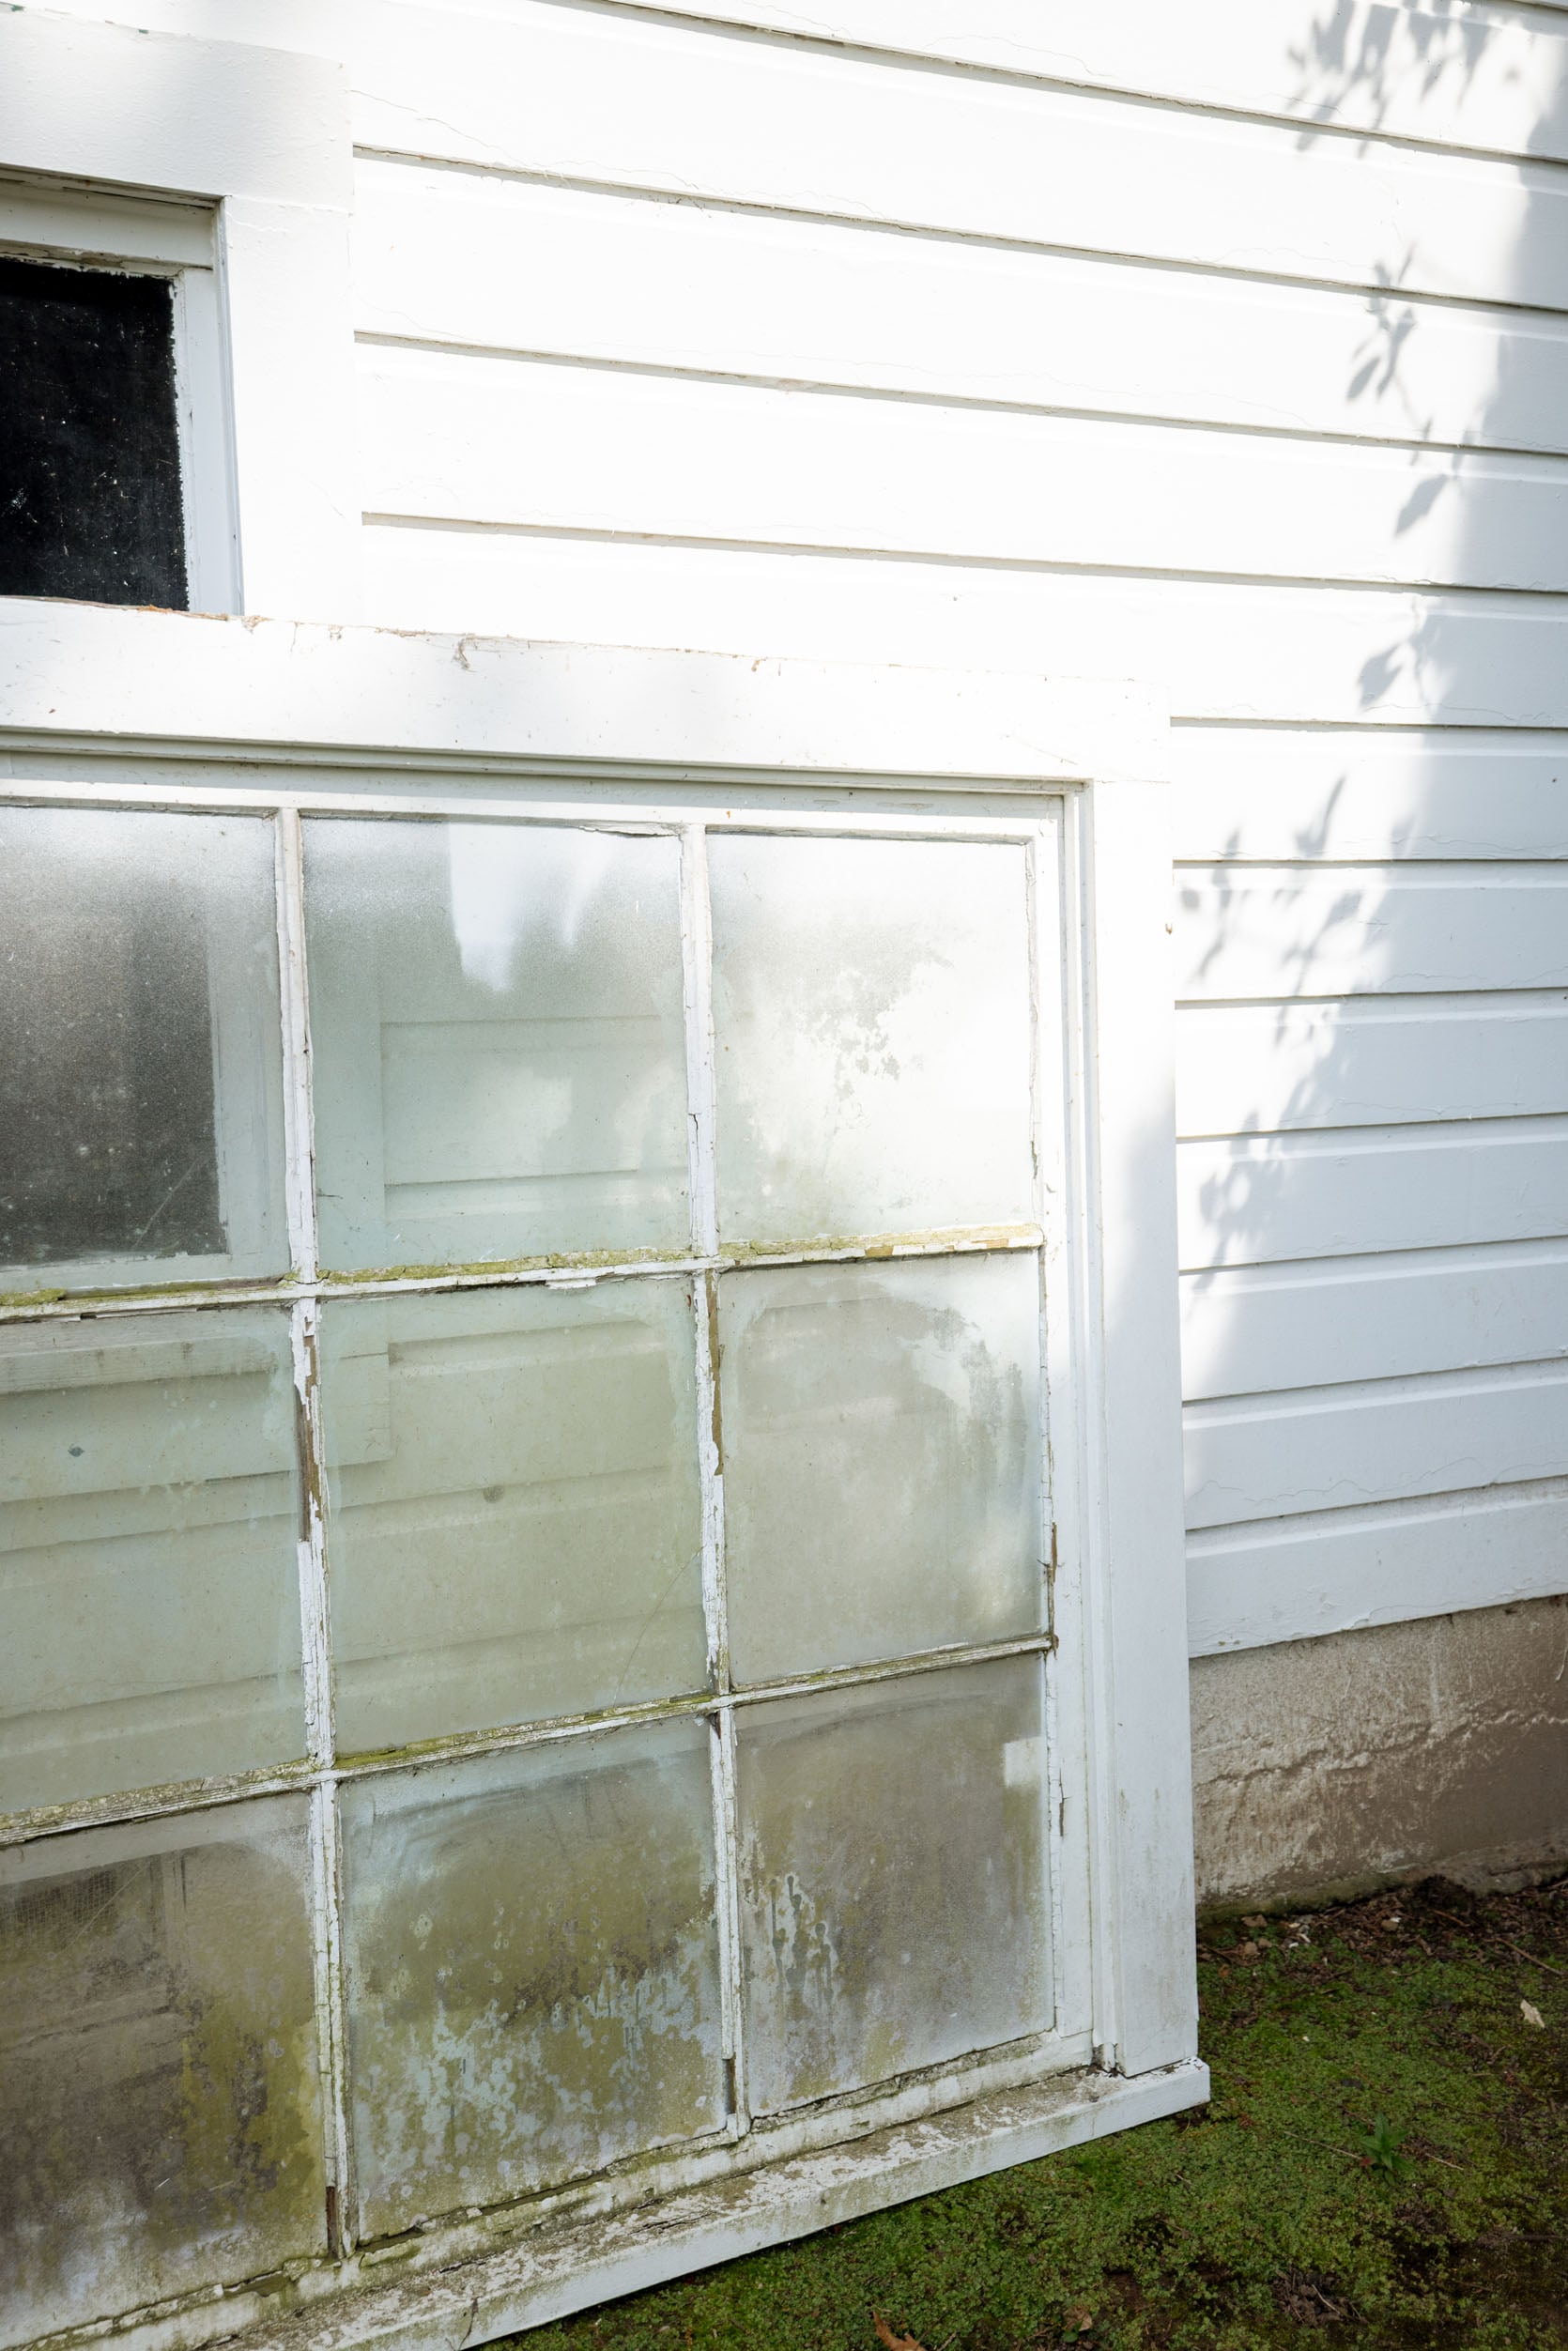
That’s right. We are taking the big, old speakeasy window, restoring it, and installing it in the bathroom. It will be bigger, prettier, and make the exterior of the house look prettier, too!
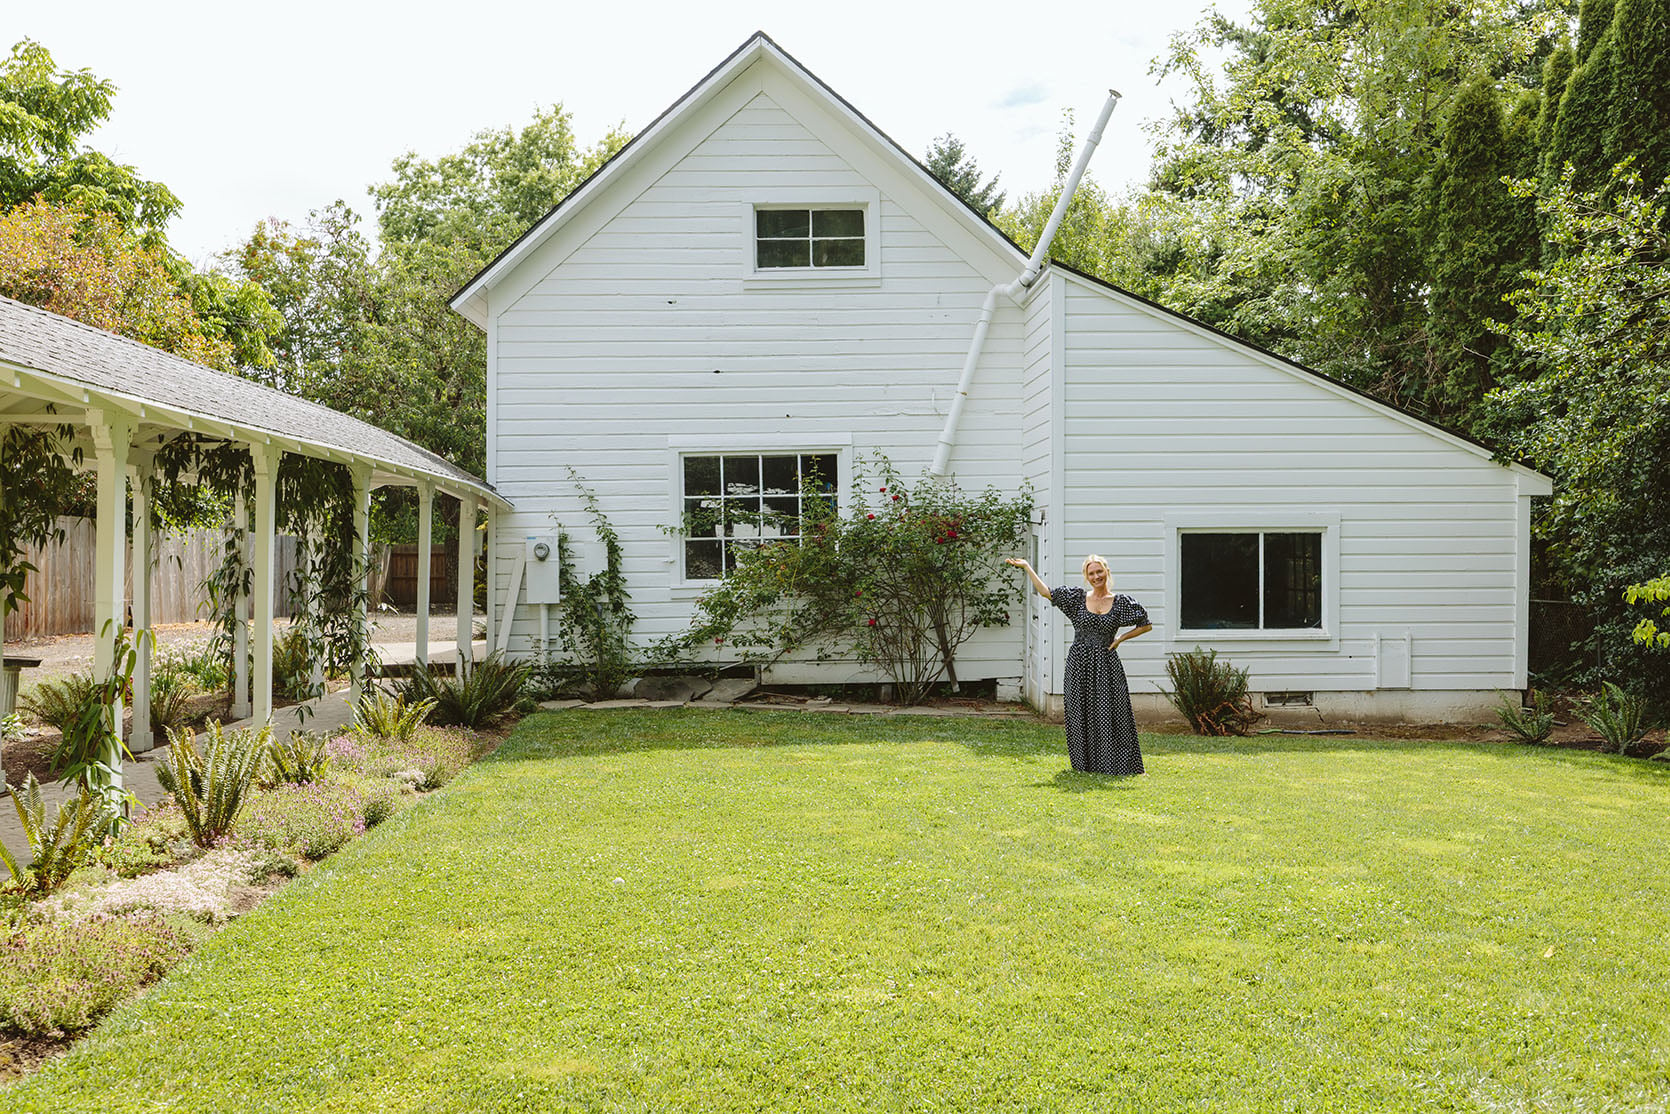
While I have you on the topic of exterior…what do you think I should do about that upstairs window?
The Upstairs Windows
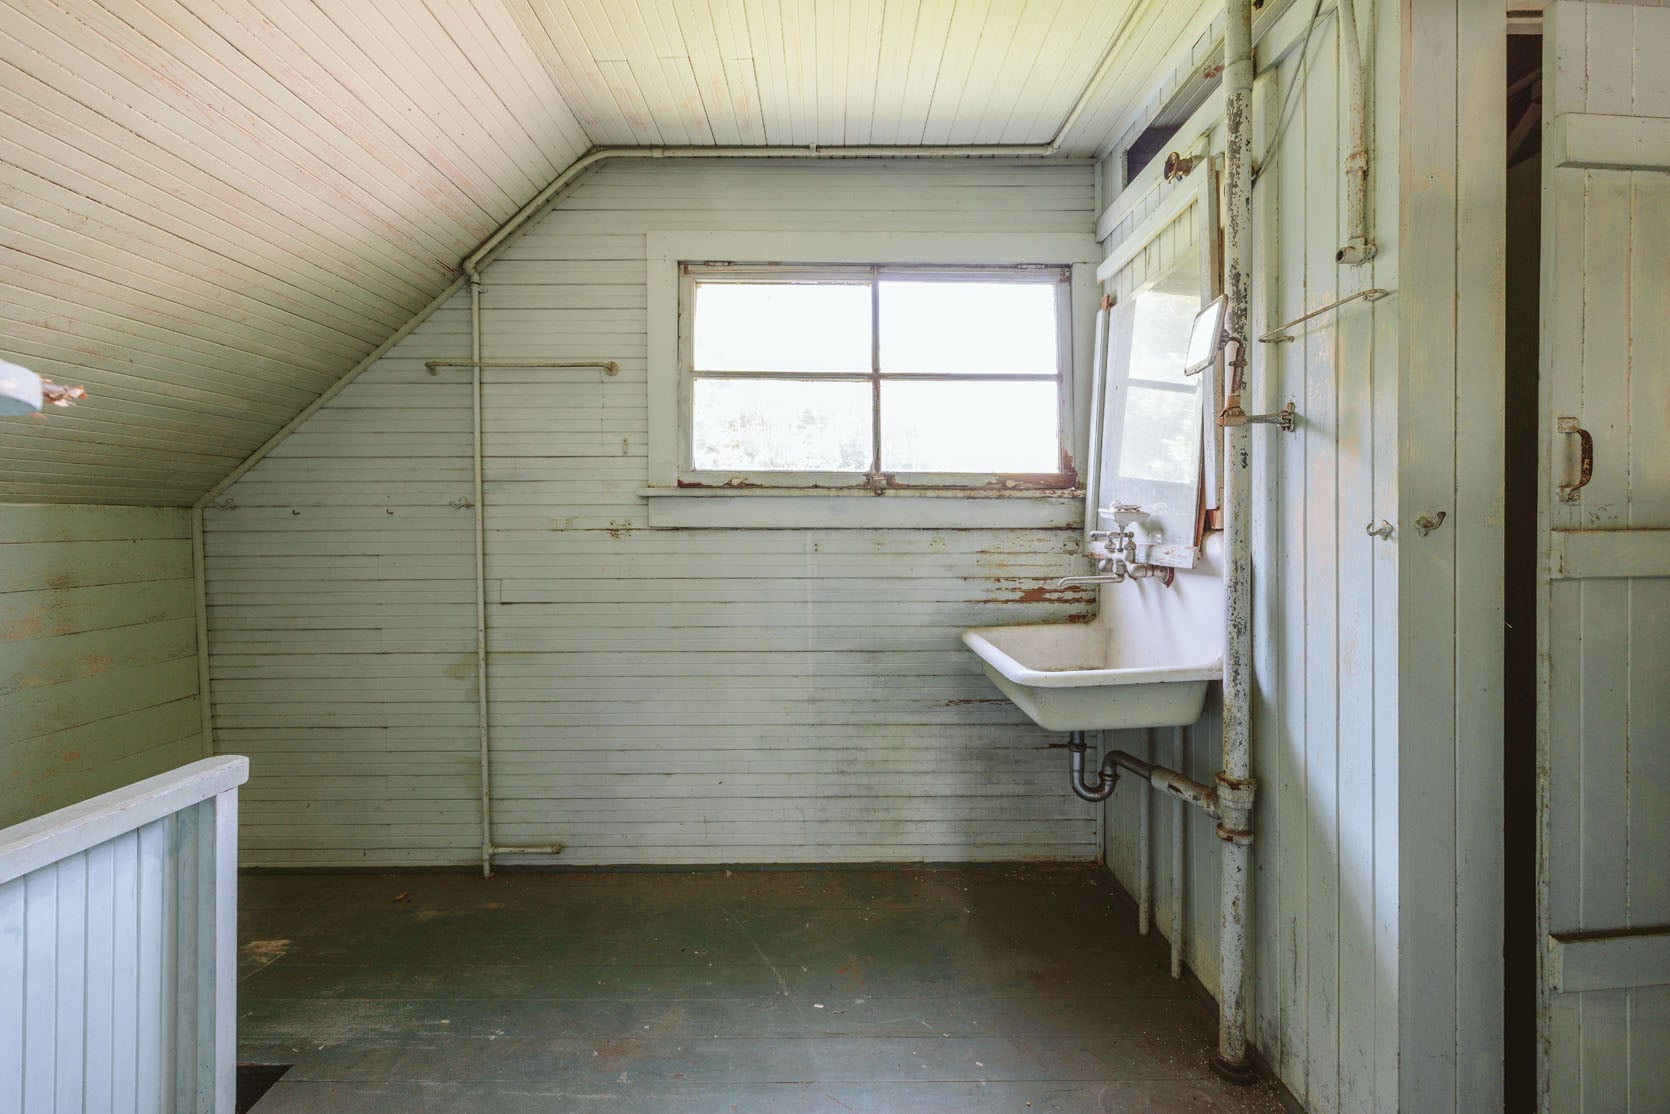
Right now, it’s shoved a bit awkwardly to the right because the bathroom and shower stall forced it to be there. But since we don’t need the bathroom up there, we could demo those stalls out and easily move the window over so it’s centered in the peak of the roof.
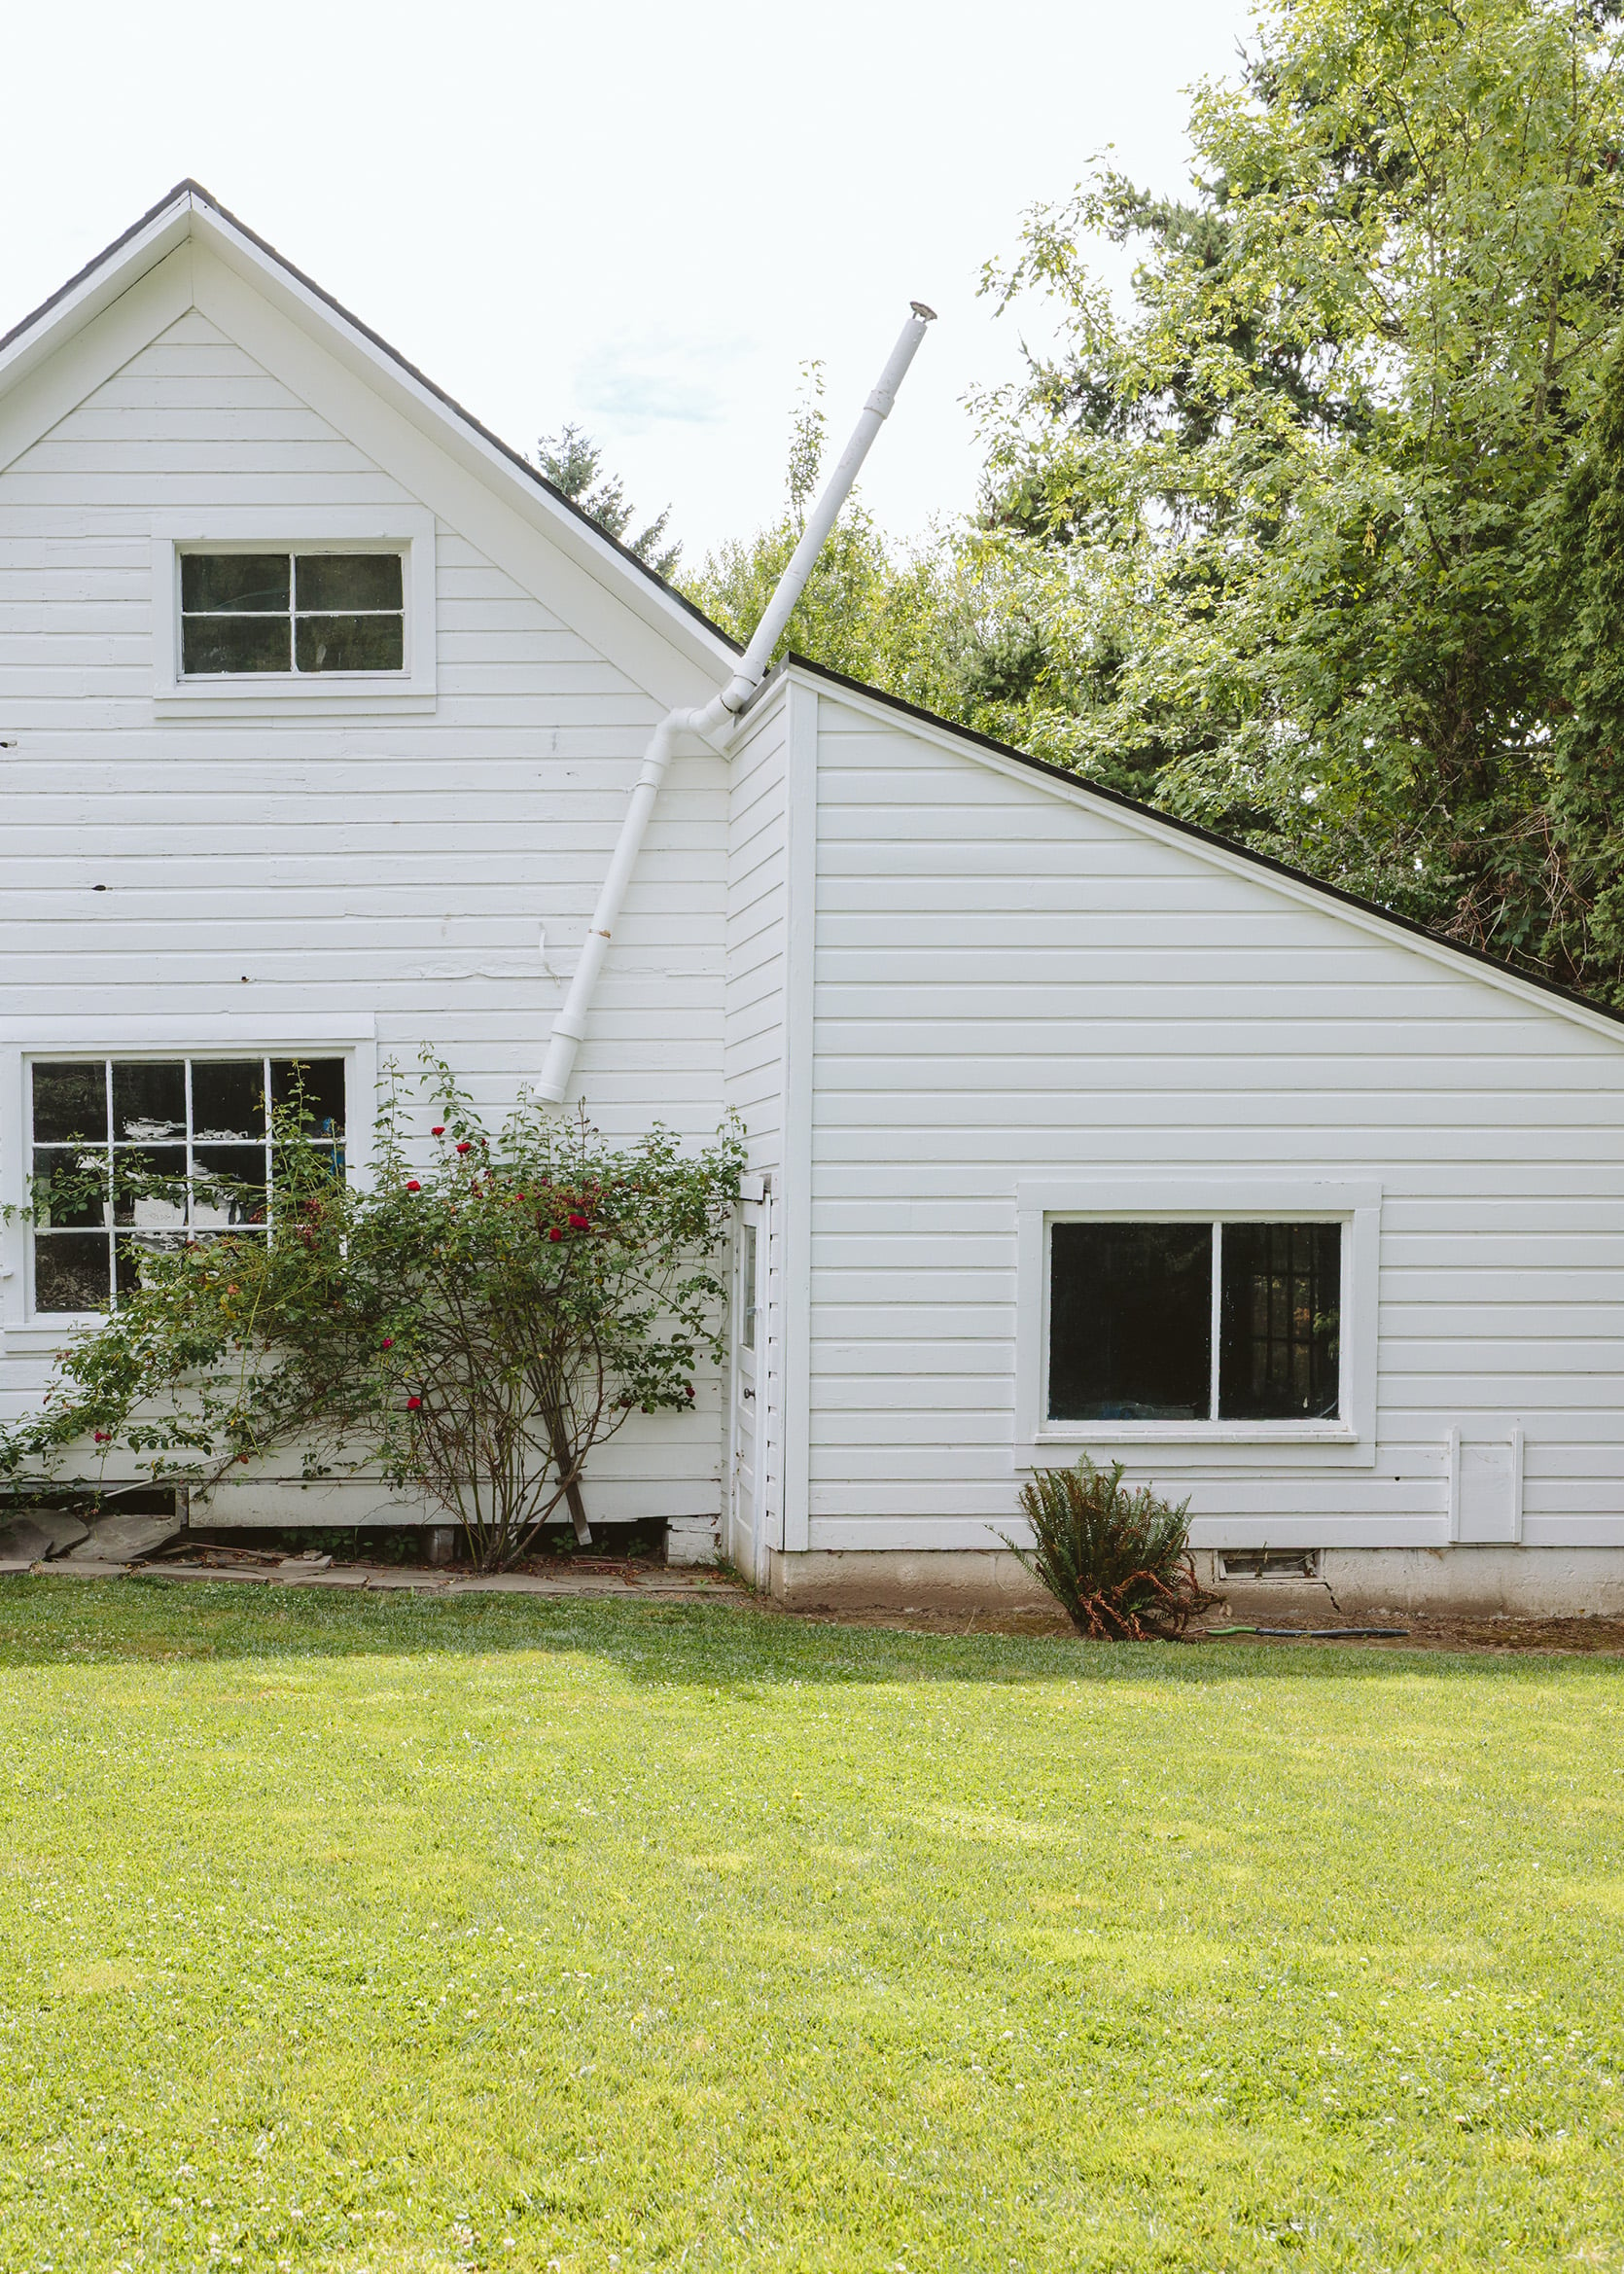
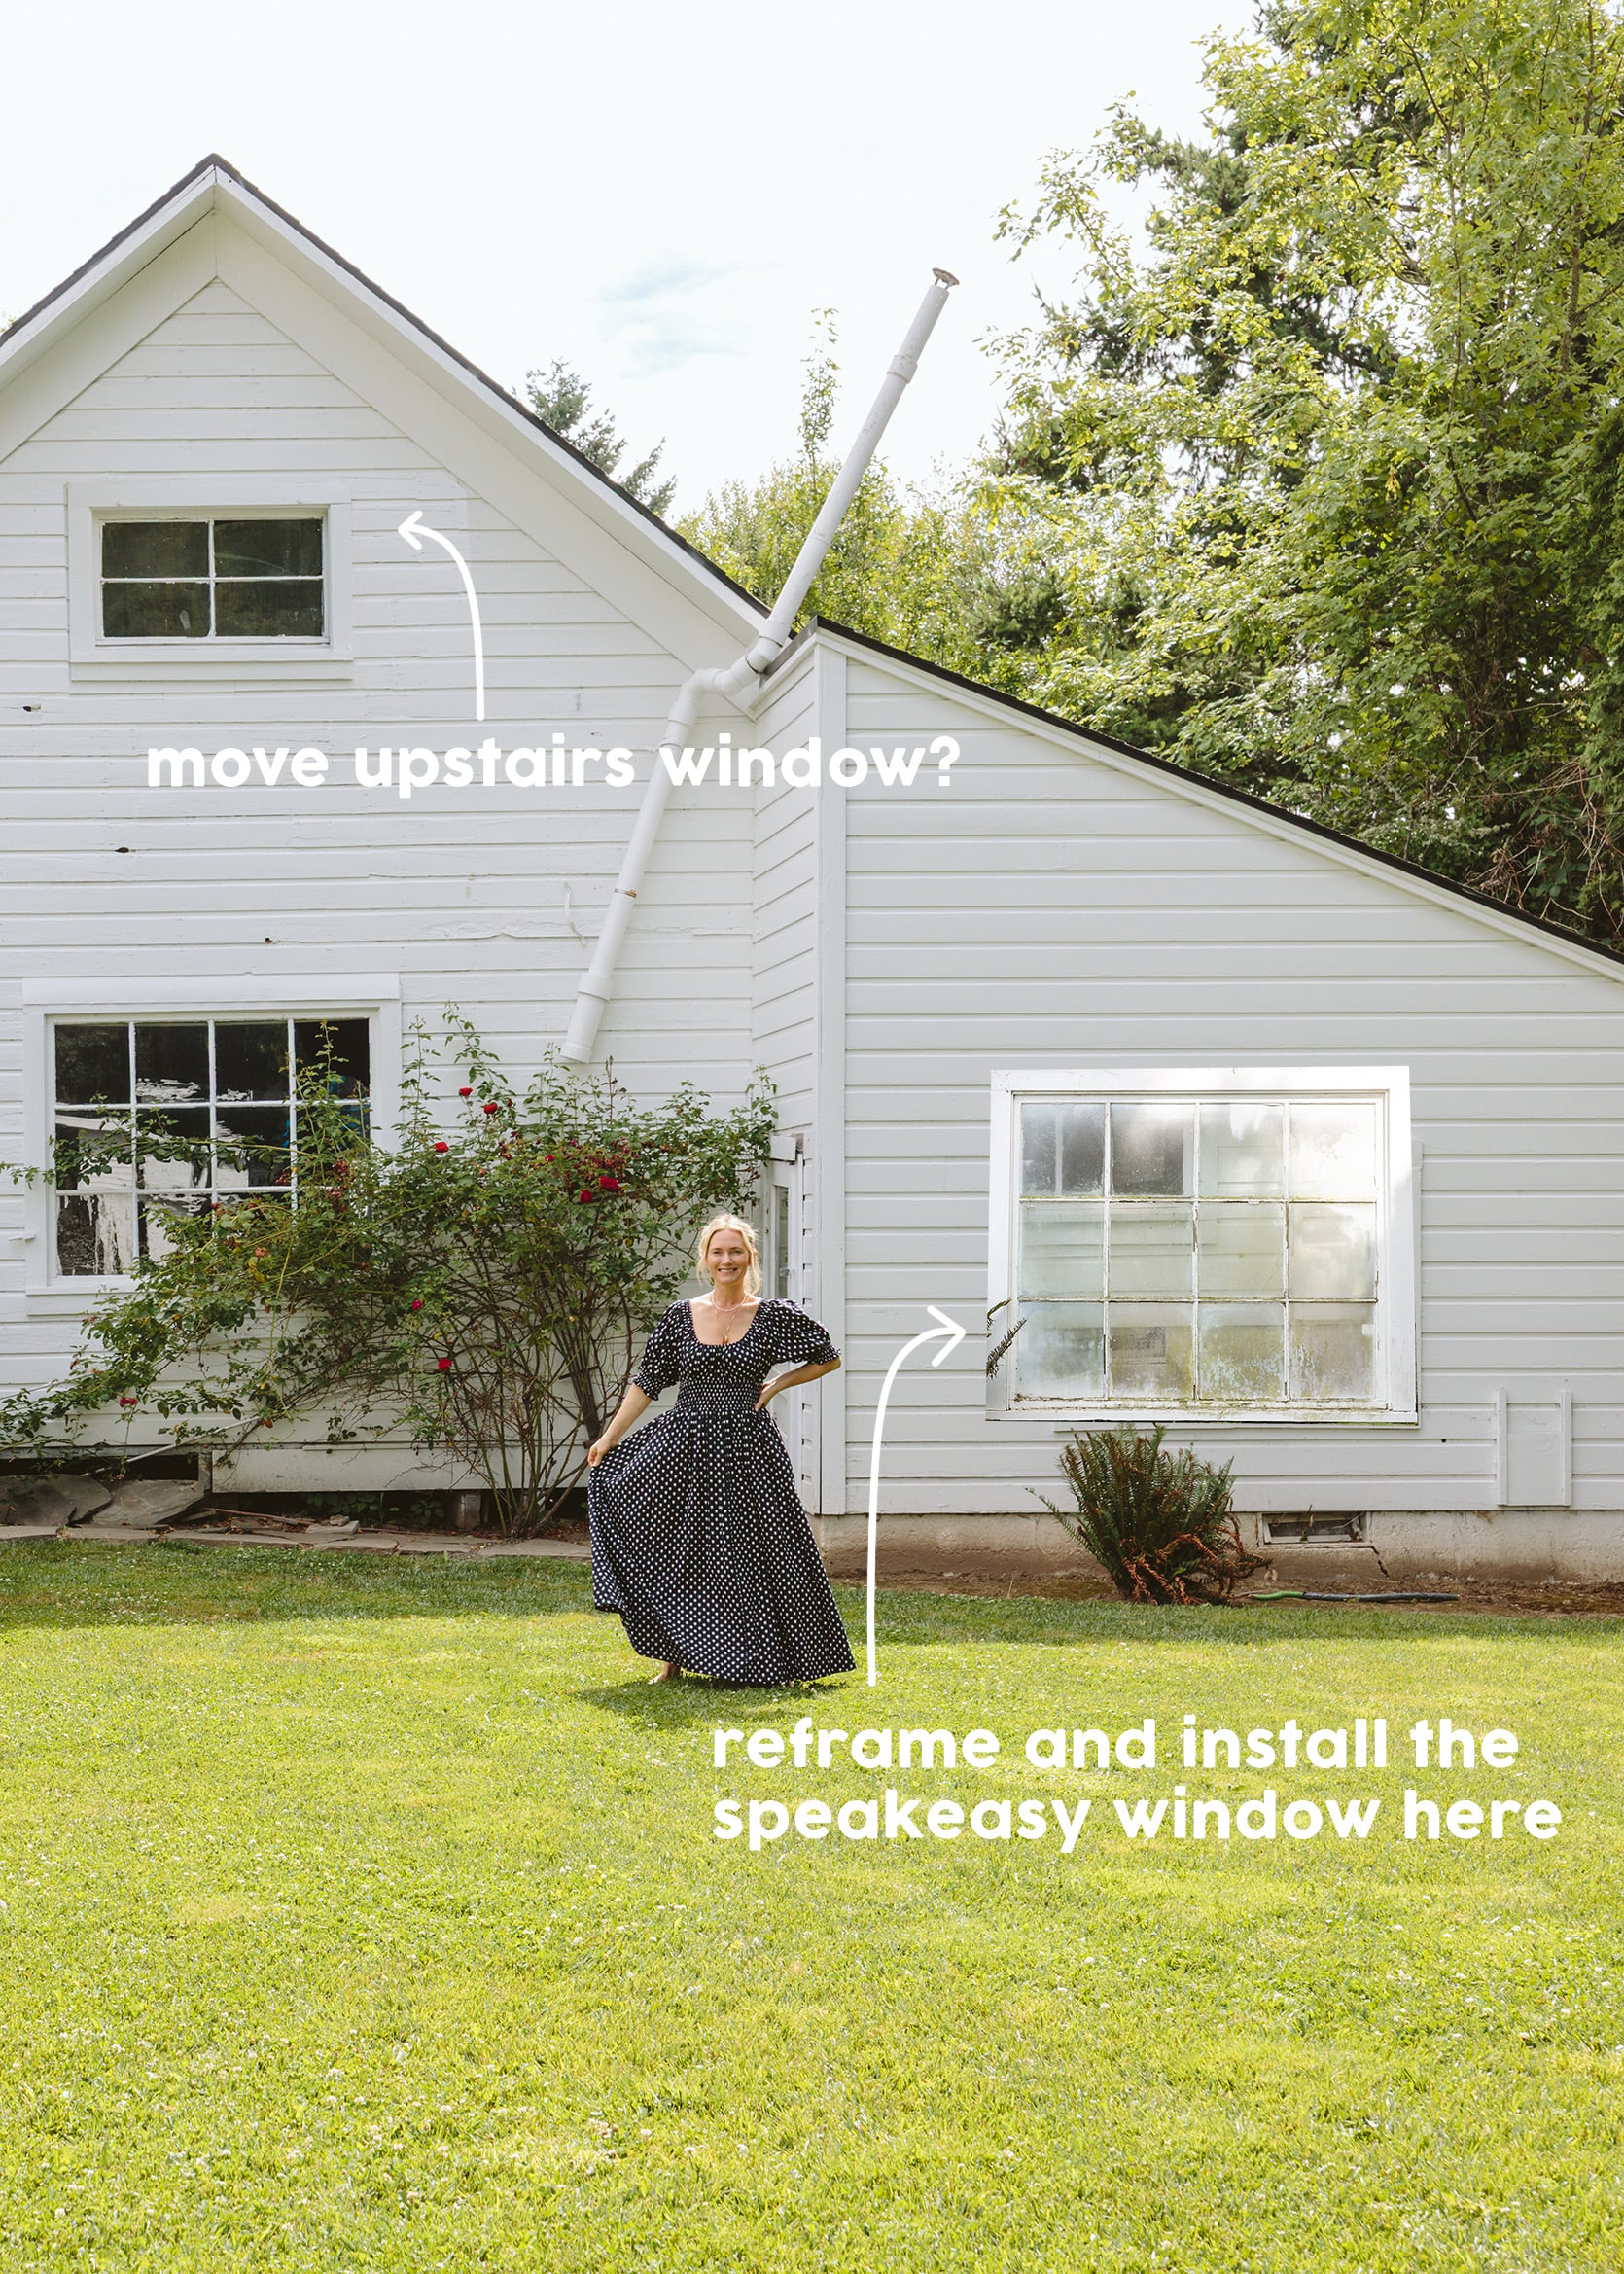
The case for moving it is clear – it would look better, more balanced, be almost centered over the kitchen window, and not be so shoved. The case for keeping it where it was originally placed is just that – sometimes vintage charm is awkward and odd, but it keeps a house from looking cookie-cutter or basic.
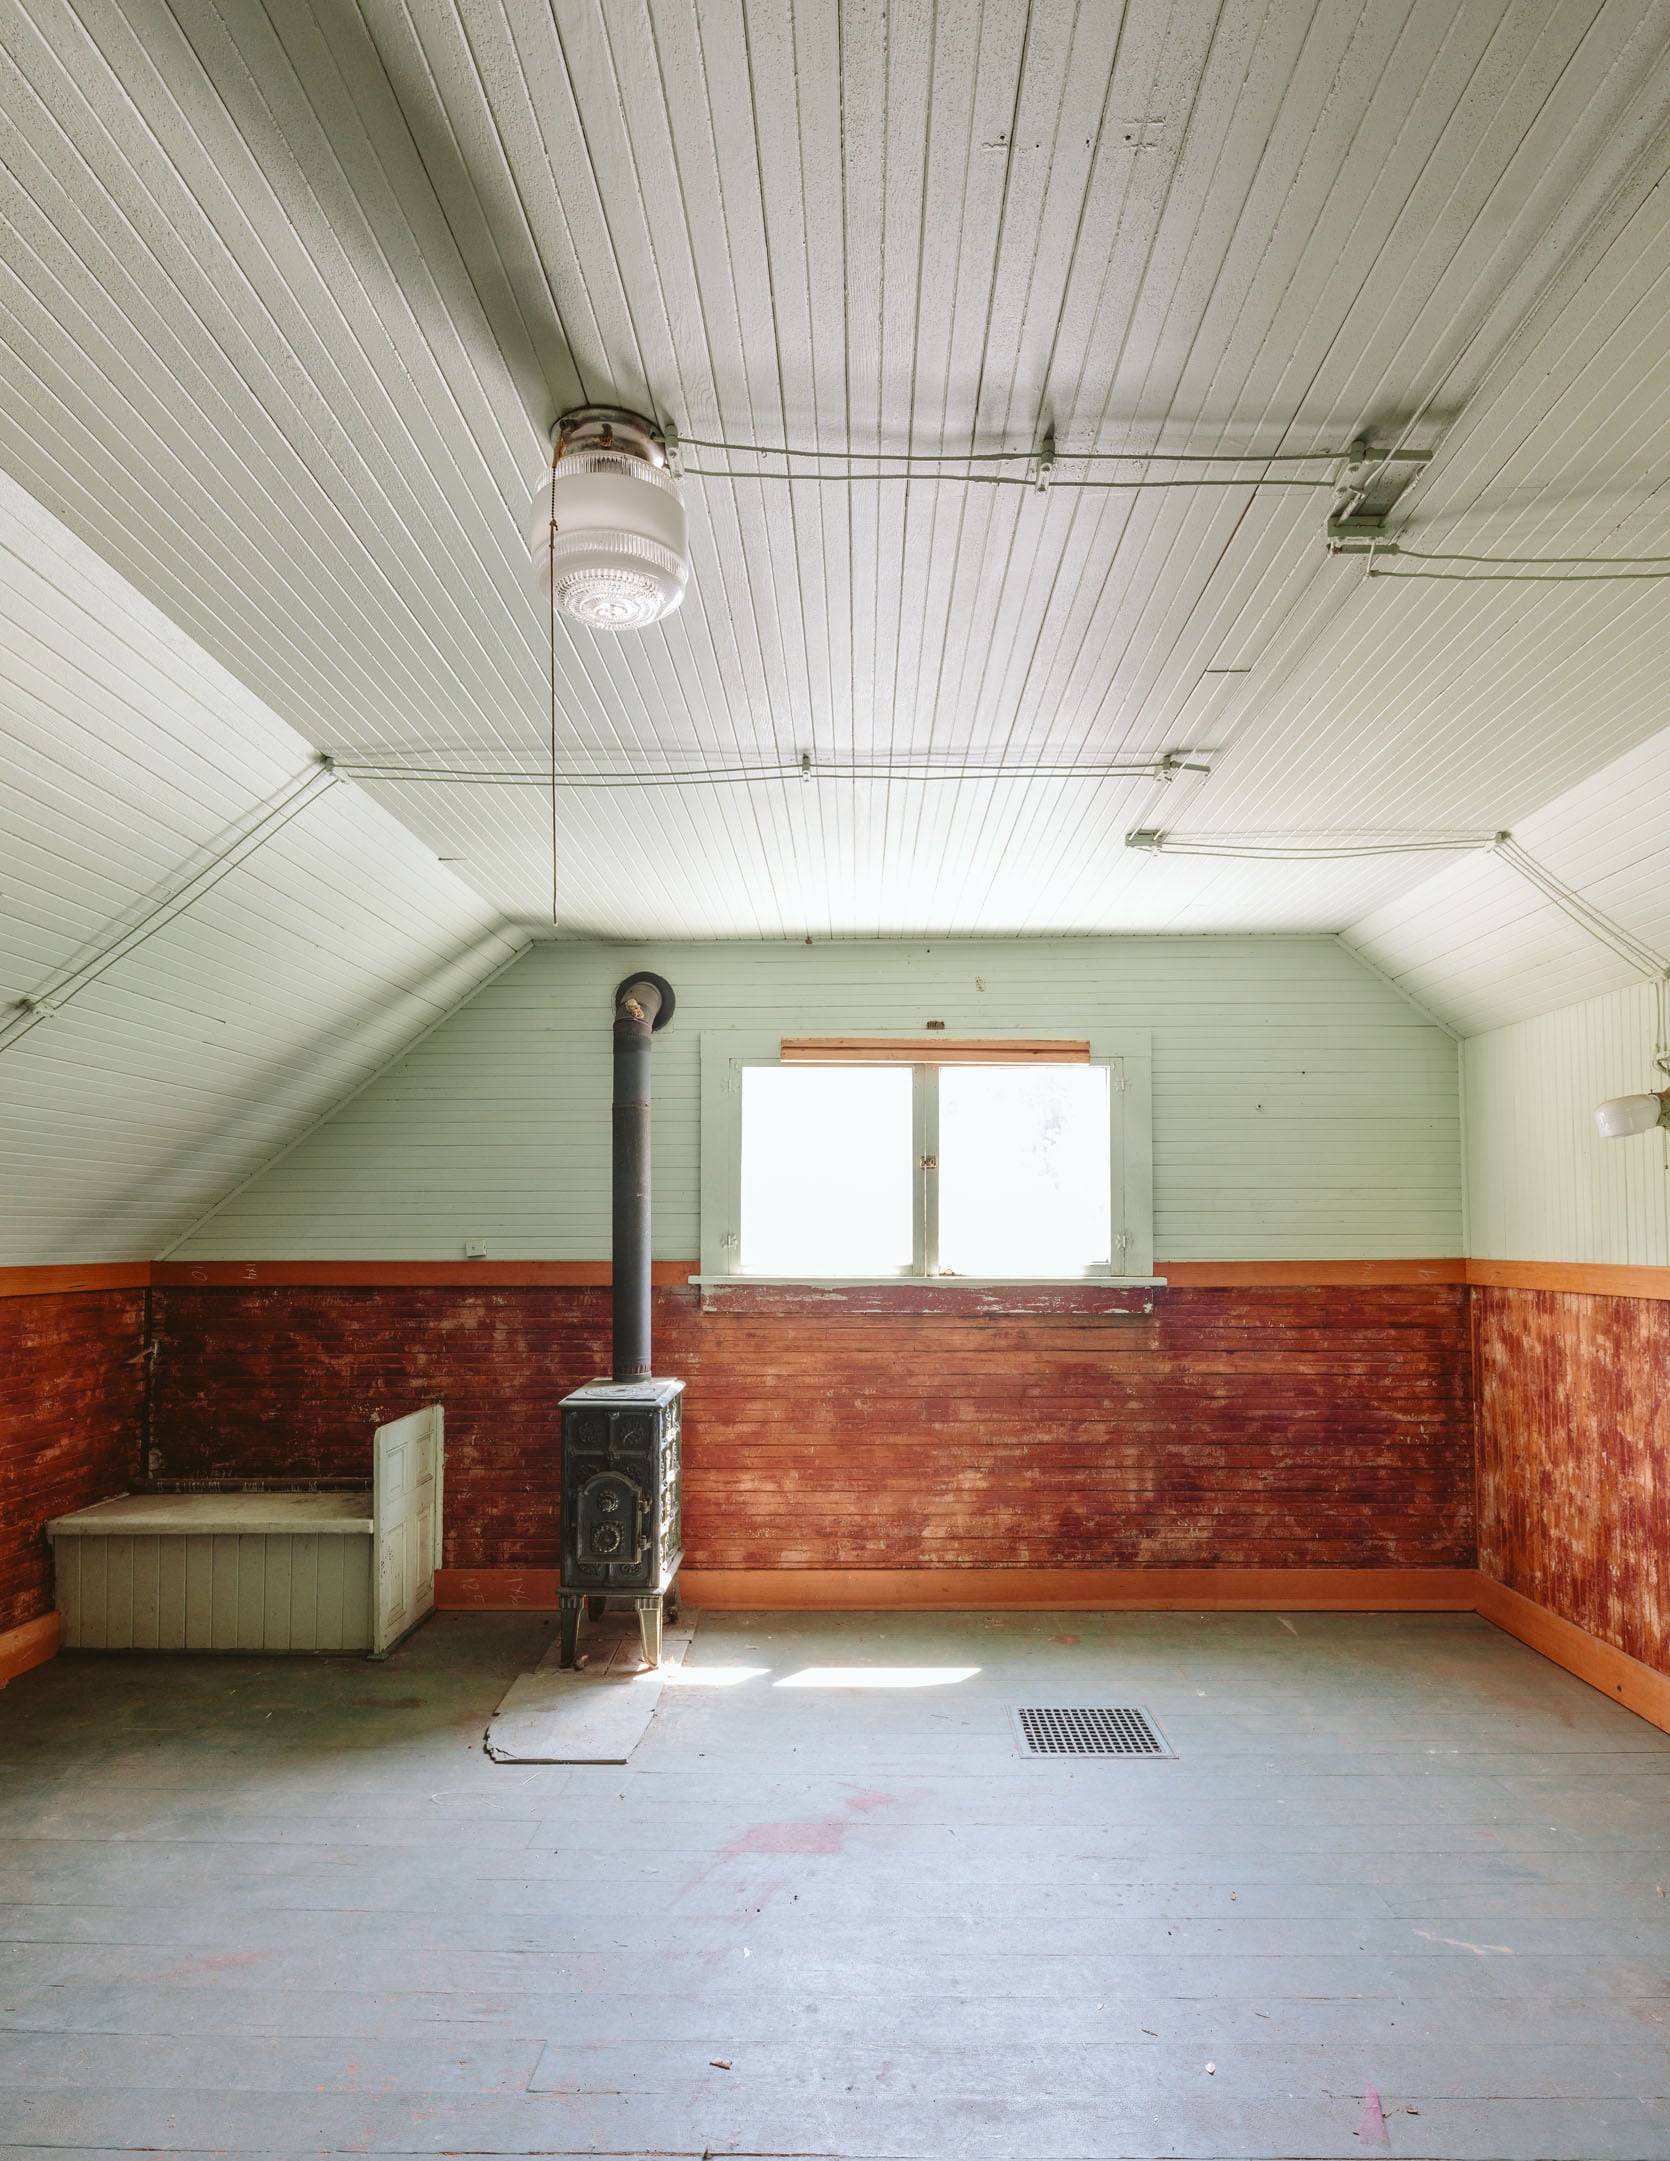
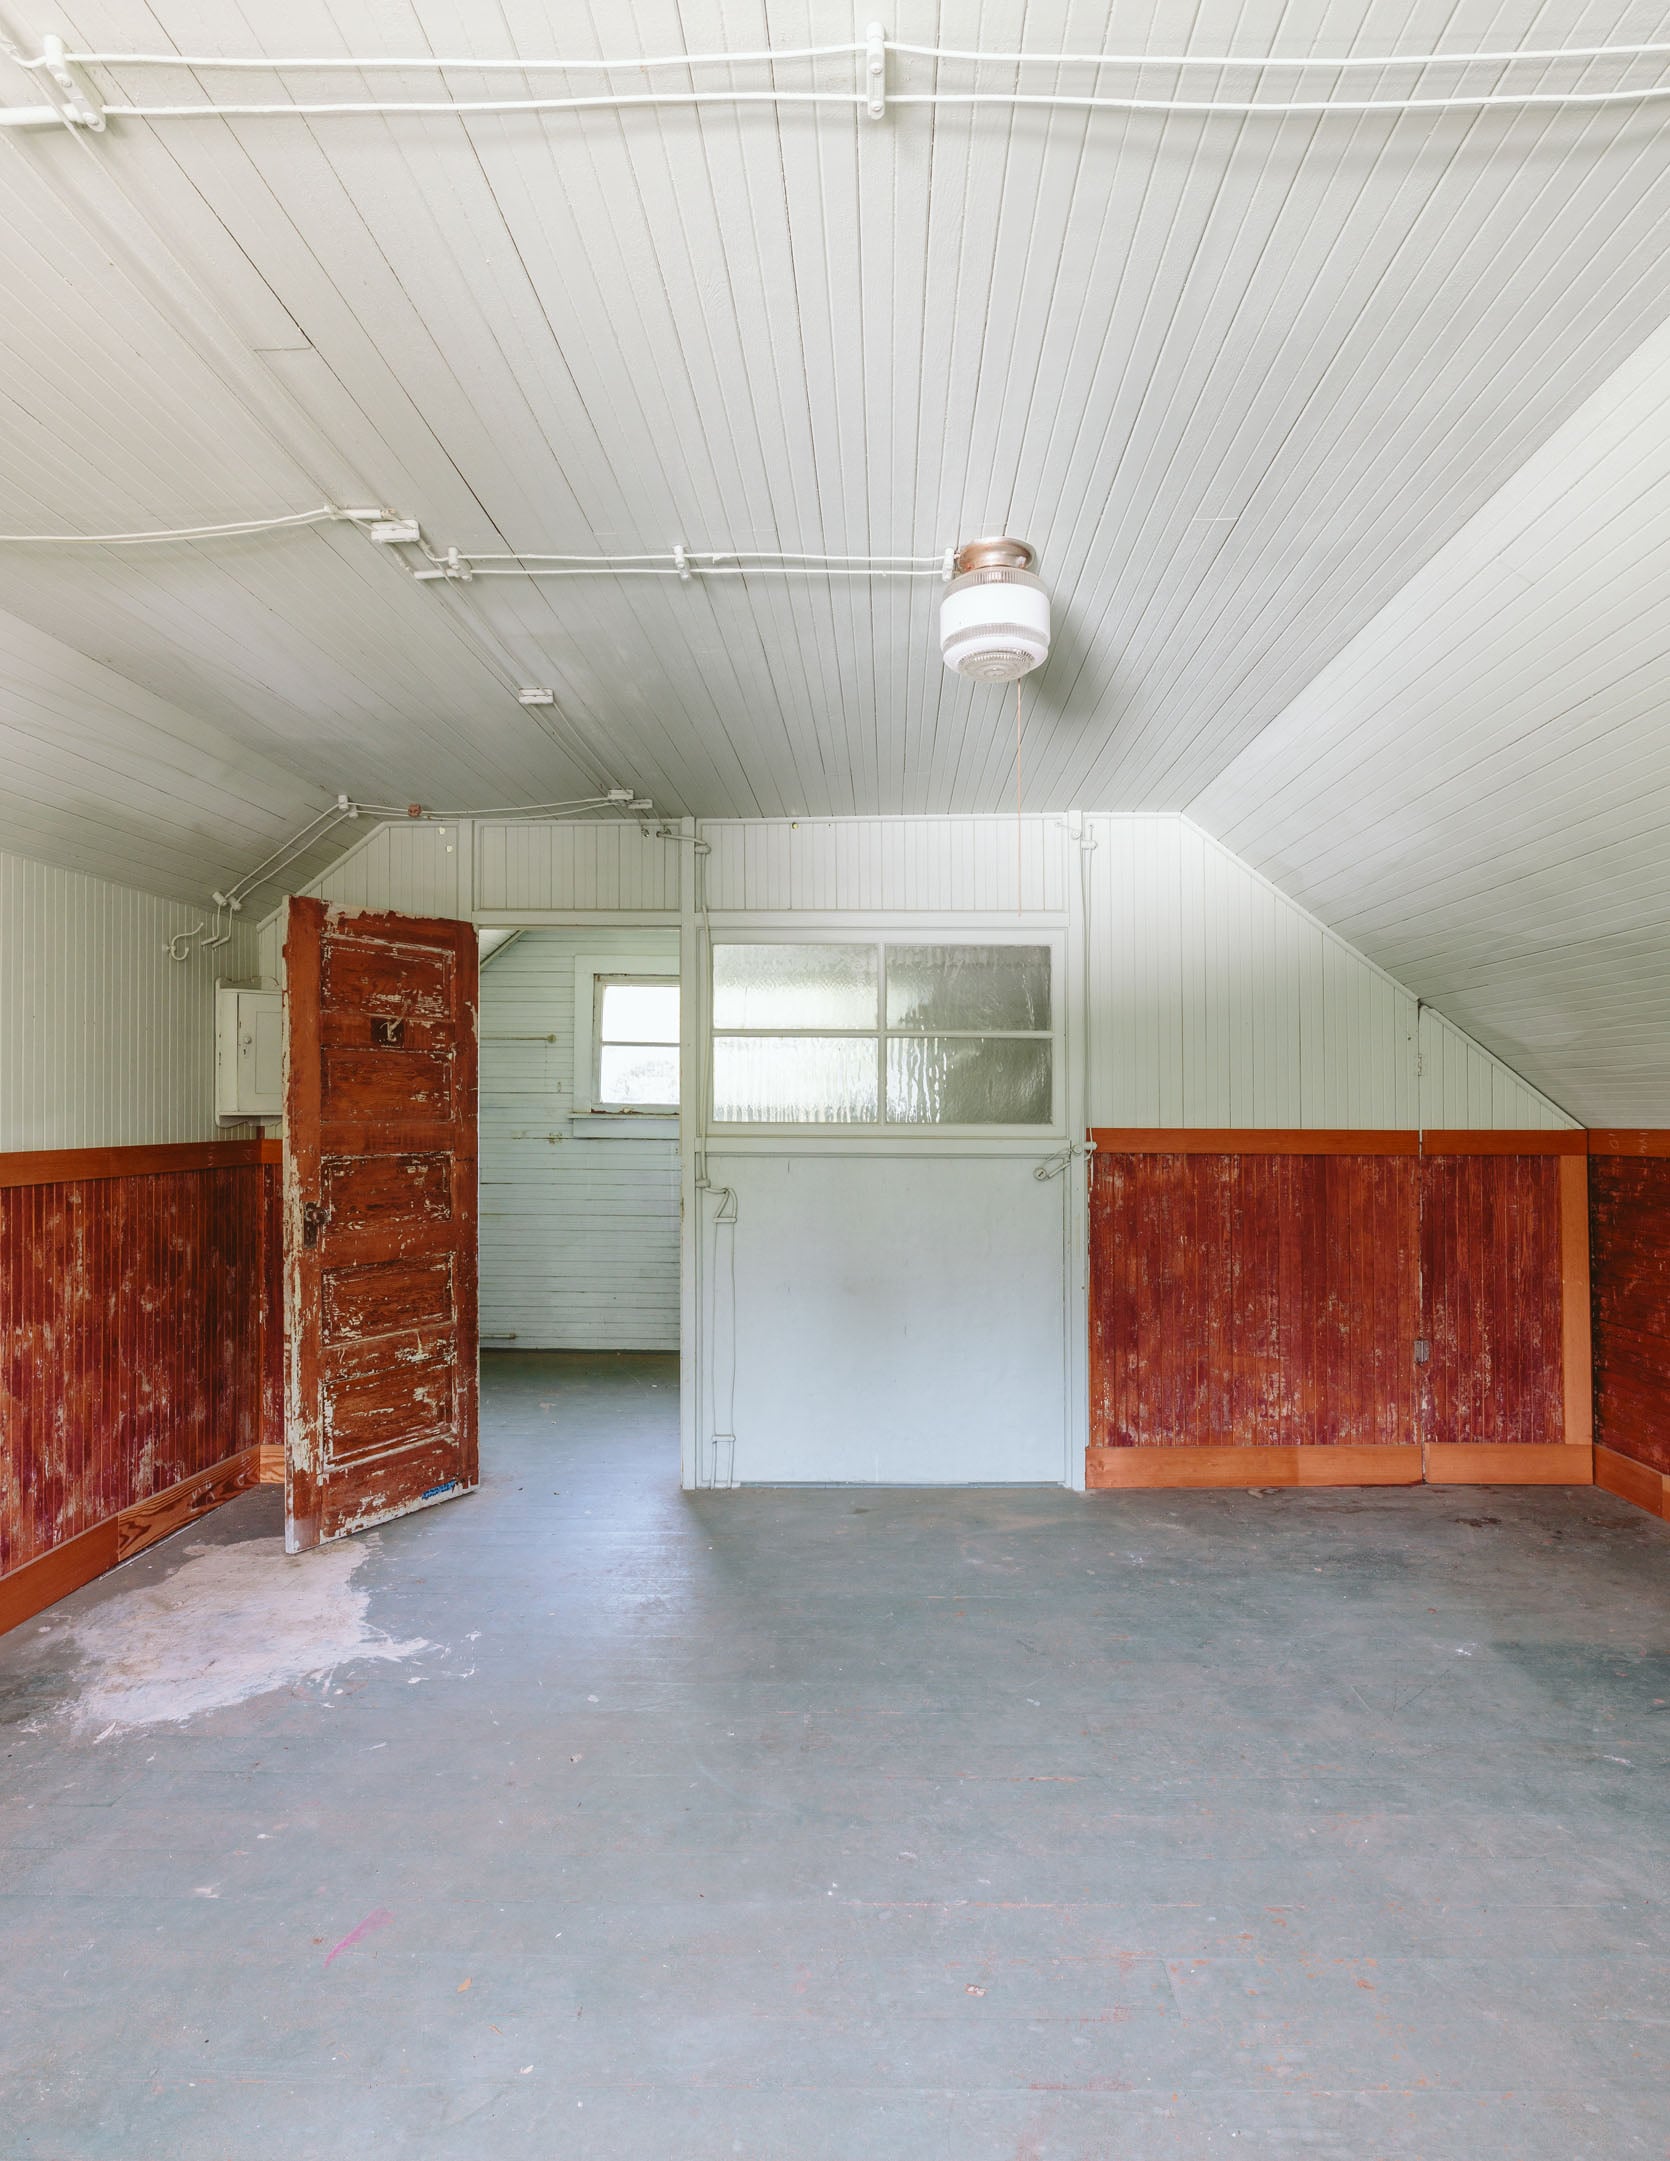
Now upstairs is pretty simple otherwise. We are repairing any panes that are broken or cracked, but keeping all windows the same. They are in good enough shape and don’t need to move, plus we like the vintage wood vibes.
Wait… But What About The Huge Sliding Barn Door???
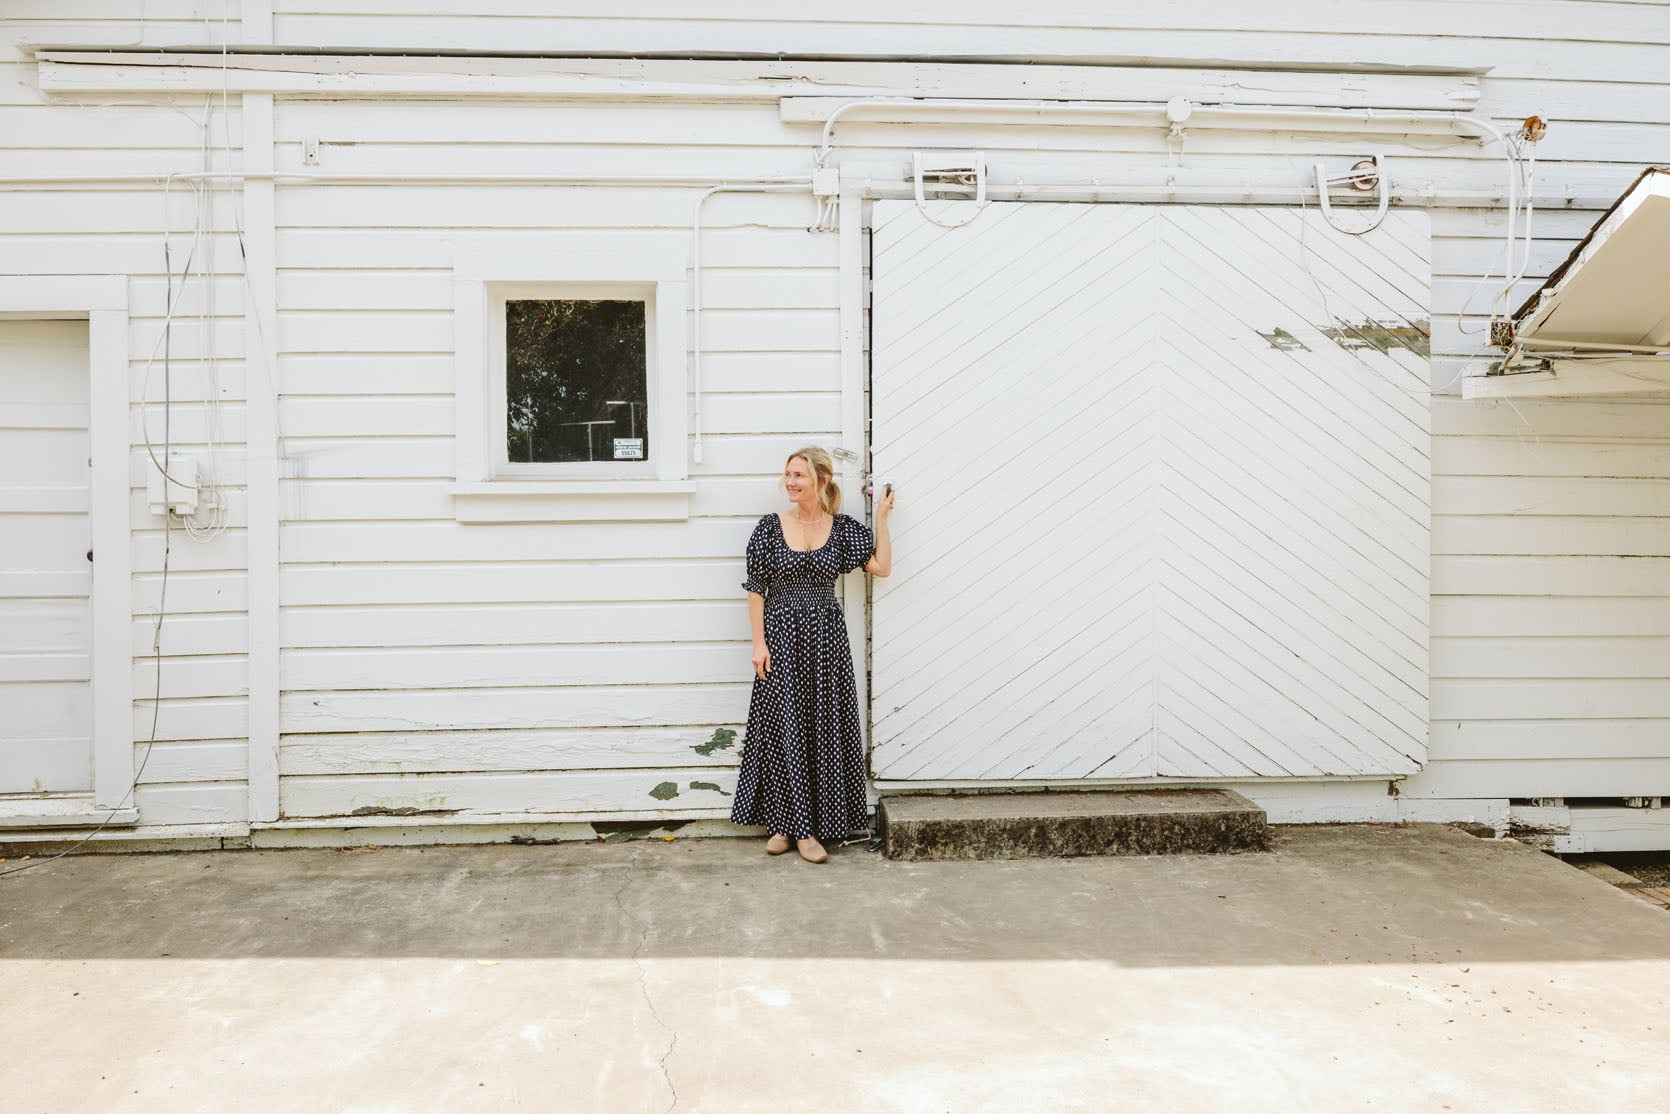
Ok, a huge thanks to you. Some of you suggested that we do a door within a door so that the sliding door becomes almost a bit like a shutter. The rolling door will still function, but when you open it, you’ll see a separate door/window situation that you can access to get inside.
The current opening is 90″ by 90″. I got two quotes. The first quote was for a 36″ door with two side lites, like this:
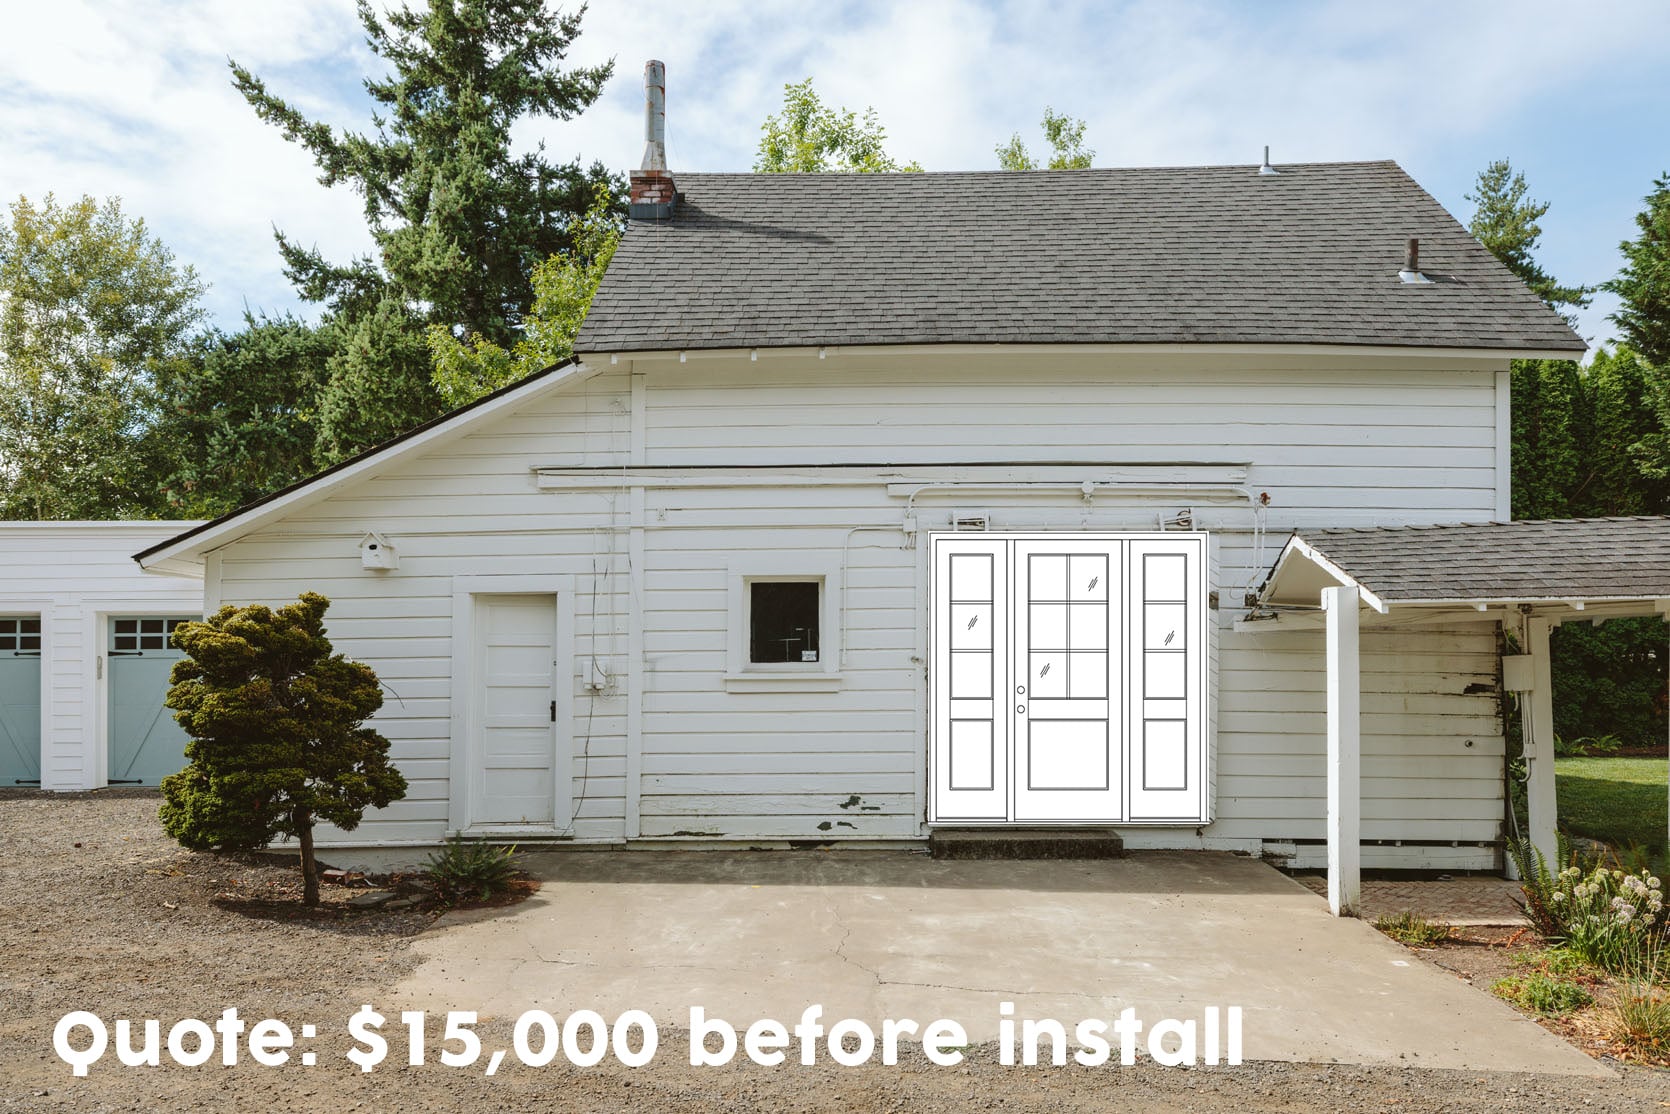
I had asked for a dutch door for general adorableness, and wanted as much natural light as possible. The quote came back around $15k with the dutch door being $2,300 of that (so could be less without it). But that didn’t include install.
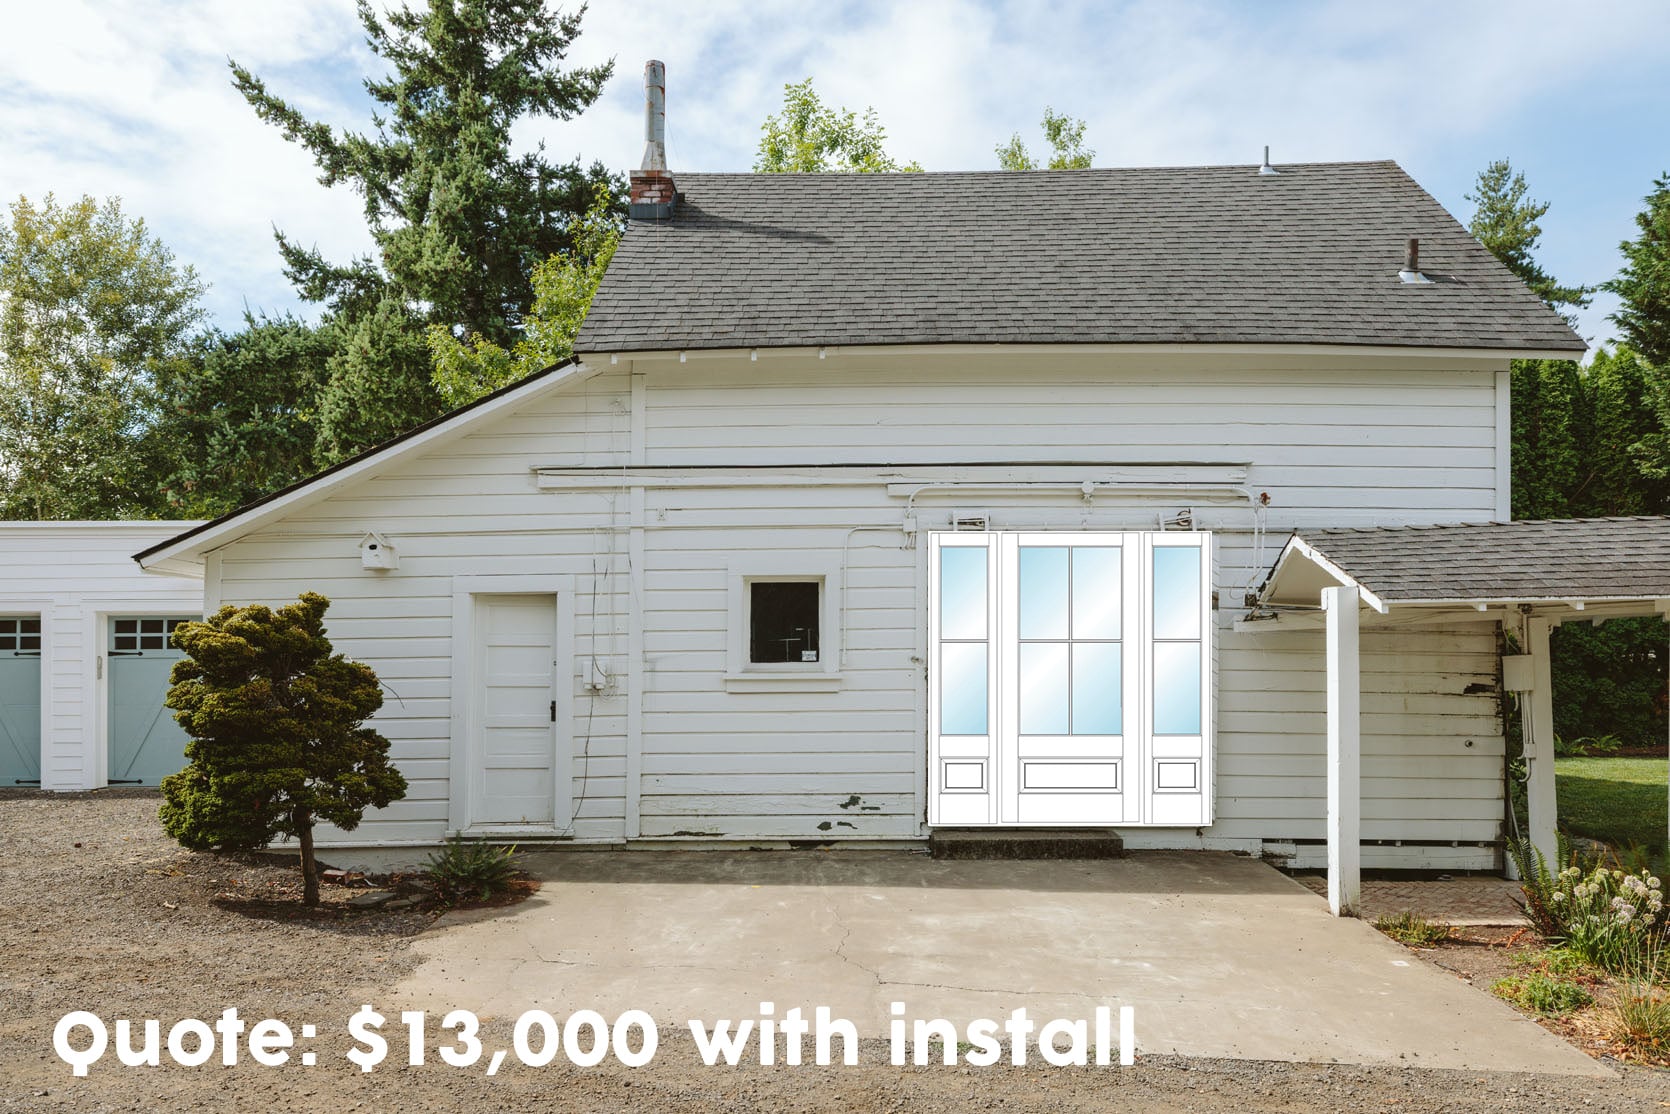
The second quote we tweaked to add more light (so less panel on the bottom, more of a 3/4 light door rather than a 1/2 light). This one came back at $13k, including install. Neither of them included painting or staining.
This is the benefit of getting more than one quote – you can get a clearer picture of what something really costs in today’s market, rather than thinking that one company is just really expensive. So then the question becomes, what are our options, and what do they cost?
- Custom 90″ by 90″ wood door with side lites. 12 -16 week lead time. Between $13 to $15k.
- Readymade doors, but smaller, 72″ wide by 80″ tall, French doors. I found a few different options ranging from $700 to $5k.
The only things that aren’t an option are that we want it paintable (or stainable), ideally to look like wood (or at least not look cheap), and with a lot of glass (not a solid door). We also want the reviews to be good. Oh, and ideally pre-hung because framers hate when you just order a door (framing doors is famously hard).
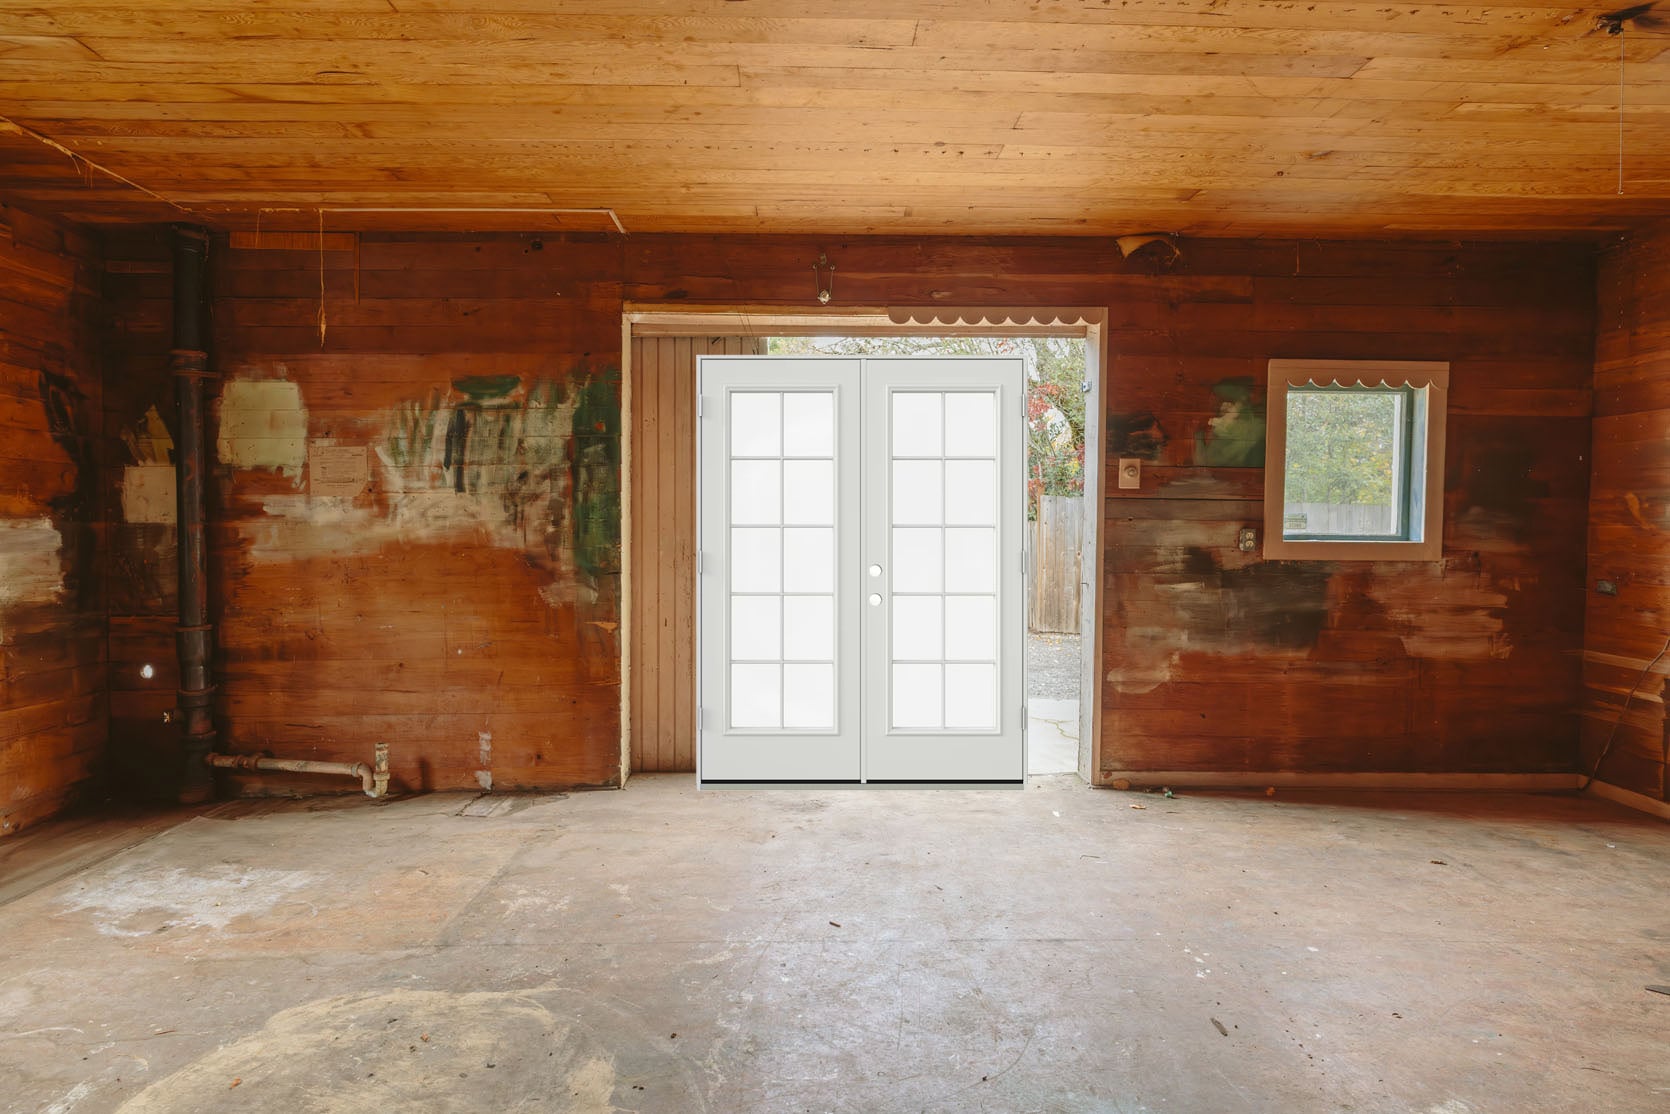
So we are taking a risk and going with this one. I read the reviews, and we think and hope that once it’s all painted out and styled, it will look good enough. Our framers are going to center it and build around it with some nice-looking trim work so that it looks like a more fully milled French door system. The inside surround will be covered with the matching wood paneling. It should be noted that doing this will ALSO cost money. Retrofitting something readymade might cause its own costs and create its own problems. But we are willing to take the risk to save that much money and time.
WISH US LUCK :))
*Photos by Kaitlin Green

I love these process and planning posts and appreciate you including details like quotes and budgets. Please keep doing them. 🙂
Me too!
Thank you!!! That keeps me going, honestly 🙂
Yes thank you for all the details – so fascinating and really appreciated!
Oh, Sweetie, the decision fatigue must be real. I like the idea of keeping original items, but misfitting “jankieness” would make me a little crazy.
HAHA. We’ll see 🙂 I think a level of ‘jank’ in an old house can be part of the charm (??) I think keeping priorities clear has helped some of the decision making and spending that kind of money on rooms that we don’t know that we’ll get the enjoyment out of is what drove the decisions.
SO enjoy the thought process and the ideas and options
These posts are great, keep them coming. It is so fun to follow along on your thought process.
Thanks for all the details!! So glad to hear you are planning to keep so many original windows and doors. Can’t wait to see it come together 🙂
I did not vote on the upstairs window placement, but had an idea to add some sort of “applique” on the left side, probably painted to match, but in keeping with the corbels on the walkway posts. You could remove it later. Or would that addition call more attention to the window being off-center?
I wondered about just some nice trailing vines/greenery going up the left side?
By any chance is that upstairs window on its side? If you center it, could you rotate the window 90 degrees?
oh interesting!!!! its an awning window now that I think of it. it opens from the bottom, but it could open from the side. thats an interesting idea!!!
Did you know that:
Wavy antique glass is highly prized for its perfectly imperfect character, refractive sparkle, and authentic historic charm. It is prized by preservationists who value the unique look of vintage, hand-blown or cylinder-made panes over the sterile perfection of modern, machine-made float glass.
Because this vintage material is no longer produced using the same historical methods, genuine salvaged or mouth-blown replica glass is an expensive specialty item.
For new windows, I’m assuming given the cost you quoted, that you were looking at full wood windows? In this case, if you wanted to replace, I suggest (to others at least since your mind is made up), at looking at fiberglass windows. Certain very good window brands make either full fiberglass or fiberglass outside, wood inside. They are a very good choice – very stable, energy efficient and economical. Probably 1/2 the cost of a full wood window.
HIya, yes I love wavy glass (we kept it in the original upstairs window of our home, and just put a film on it for safety). For here there are enough broken (and more to break, since they are so close to a yard with a lot of balls being thrown) so we feel ok replacing with glass. And since we are restoring, not replacing most of our windows, all of which are wood we want to match them with wood (also because we want to paint). We almost bought a fiberglass french door set but it was not paintable and it was another $1200 so we chose this paintable steel instead. But I didn’t explore fiberglass exterior windows (and now i’m really excited to restore and have the original windows in the house).
Surprised to hear the fiberglass door you were looking at could not be painted. One of the selling points of fiberglass windows is that they can be painted. Great choice for anyone looking for a highly stable, energy efficient and economical window.
Ooh I hope you see this! BIG point that I hope your window teams told you: the thickness of the glass will not affect the cold in any real way. A pocket of air is the insulator! That is why storms are great: they are vastly more insulating than even a double pane window, because the air pocket is so much larger. Single pane will leak cold like crazy, but a single pane window with a tight-fitting storm is better insulation than a modern window, plus it is much easier to repair. Not to say you need to make that choice (the huge size of that window is the cost factor, and budgets are real!), but I stress about the idea that thicker glass will somehow help. It will not. But a storm really really would!
Just curious, why call it a speakeasy when you all are not big drinkers and this will primarily be a spot for families/kids to hang out? You all provide such a wonderful community hub for the neighborhood kids — would hate for a local parent to be nervous about continuing to send their kids over because of the “speakeasy”! I get that the word appeals since Mallory’s speakeasy went viral, but I’d love to see you do something 100% your own!
I agree that calling a non-speakeasy space a speakeasy is strange. Call it a rec room or a lounge maybe??? “Speakeasy” is so highly specific.
Yes. Maybe just call it a rec room or a lounge maybe??? “Speakeasy” is so highly specific.
I vote lean into the whole speakeasy concept and add a vintage, copper still! You could distill your own essential oils or say -absinthe 😉
I suggested this a while ago. “Easy to fix the upstairs bathroom window exterior awkwardness with an extra-wide shutter.”
From this post DIYing The OG “Homestead” – The Carriage House Exterior “Before” Tour
Please keep the quirky off center upper window. I’m all for proportion, but honestly, I think a little nod to the originality of the window ads charm and character. Save that money for something that will really be important to the function of the guest cottage. Not everything has to be “perfect”. Perfect is boring….
Agree!
Curious about Portland – do you not need to bring this structure up to meet Energy Code standards? In places I’ve worked, once you are doing major renovations (which this would meet), you are required by the town to now meet the energy code – insulation, windows, etc. Is this something you haven’t come across? I would assume you are pulling permits for the work. So I’m just wondering what would trigger it in your city?
Oh good question! We ran into the same thing with a renovation a few years ago. Once an area was touched, it all needed to be brought to current code. With permits, for sure.
Would love a post about the nitty-gritty bureaucracy of bringing homes up to code and pulling permits! Would be soooooo useful, not to mention unique since not many DIYers go for that kind of “unsexy” thing.
We are across the river in Vancouver, WA. We are doing an addition on our 1915 house, and windows in the addition have to be up to new codes but existing windows on the original structure don’t have to be updated. Not sure if it’s the same in Portland…
Yeah, that makes sense. This is a weird one though, where they are removing some windows and re-using them elsewhere on the house – which I don’t think would qualify? But yeah, that’s why I was asking the question. I think it would be really useful info for readers to understand that it’s not just a whimsical project, but there are rules and regulations, permits, inspections, etc. that go along with renovating a house…but Emily hasn’t answered any of my questions regarding this…so I’ll keep wondering
Yeah, that makes sense. This is a unique one though, where they are removing some windows and re-using them elsewhere on the house – which I don’t think would qualify? But yeah, that’s why I was asking the question. I think it would be really useful info for readers to understand the rules, regulations (which do they have to meet?), permits, inspection process, etc.
One more question/comment, but it is important.
Any rooms where people will be sleeping NEED to have windows that meet egress requirements per code! So make sure that your windows do. I understand that you might not yet know which rooms will be bedrooms, but keep it in mind as you’re figuring out the windows. We have found that once you’re doing a renovation like this, the building inspector will want egress sized windows in the sleeping rooms.
I like the idea of centering the upstairs window. If you don’t you might regret it. It would bother me to have it offset. It doesn’t look right. The only other way to fix it is to add another salvaged window just like it to balance it. Balance is especially important to me, even with an asymmetrical design
The way they kept windows energy efficient back in the 1800s was to put on storm windows. Although they were mostly concerned with keeping heat in in the winter, since they didn’t have AC. But a storm window would also help protect the window from stray balls.
The way they kept windows energy efficient back in the 1800s was to put on storm windows. Although they were mostly concerned with keeping heat in in the winter, since they didn’t have AC. But a storm window would also help protect the window from stray bouncing toys hitting it.
I live in Portland (Multnomah county, which I think Emily is in?) and they LOVE red tape. Everything has to have a permit pulled. It drives me a little nuts at times but, especially in the case of using old windows, or window positioning, permits come in handy, just from a safety aspect vs aesthetics. The downside of all this is once the new improvements have had a final inspection, your property taxes usually increase.
Maybe they don’t have permits for this work? I’m really curious. If they do, how can they not meet current codes? And if they don’t have a permit, well, that’s not legal.
Maybe they don’t have permits for this work? I’m really curious. If they do, how can they not meet current codes? And if they don’t have a permit, well, that’s not legal.
I’m so surprised that my comments wasn’t accepted. It was a respectful post about permits in our county (I think Emily lives in the same one as mine).
I think certain words are auto flagged. I posted a comment that included a word that starts with ba and ends with lls and it popped up a message that it was unnacceptable (although it has since posted). I changed it to bouncing toys and it went through.
I love the charm of vintage windows but my friends kiddo put his arm through a vintage glass window and ended up in the ER in a super scary situation because vintage glass does not break safely. We put safety film over all our 1920’s glass windows but new glass around kids seems like a much safer choice. We had someone tune up the locks and handles on all our vintage doors and they’re working perfectly now — a much easier fix!
Wait! Why are you getting rid of the upstairs bathroom? It seems so practical to have one on the same floor as the sleeping space.
Otherwise: love the reuse/repair/upcycling/cheap windows. Obviously we all want beautiful, hand crafted windows that are custom built to the space, but it’s going to be really cool to see how you pull together some cheaper architectural elements.
Glad to see you are restoring some windows. DIY is an option if you are looking to save some money and can make time to work on it. I’m in the middle of doing this myself for one window in our 1840s house. The quote you have seems reasonable. We’ve had a few of our windows restored by a professional and the cost was similar.
Thanks for letting us in on the process! The single pane will end up increasing energy use. For one time only 😉 I agree with Brian. You’re throwing energy and money literally out the window. First costs v operational long term costs. Look at the payback. Could be fun.
Leave the upstairs window! Find (or make) a hinged shutter that swings to one side and use those iron holders for it. Make it a quirky statement and the shutter could also have some insulation purposes as well as attractive factor. Go for quirky. (That’s my vote). Thos old shutters were for wind and for weather to protect the glass. Check out some of them online.
Just so you’re aware, the phrasing “x over x” for windows is for single or double hung windows, like this image illustrates, so the large window you’re moving would not be identified in this way. Love these progress posts, thank you for sharing!