Design
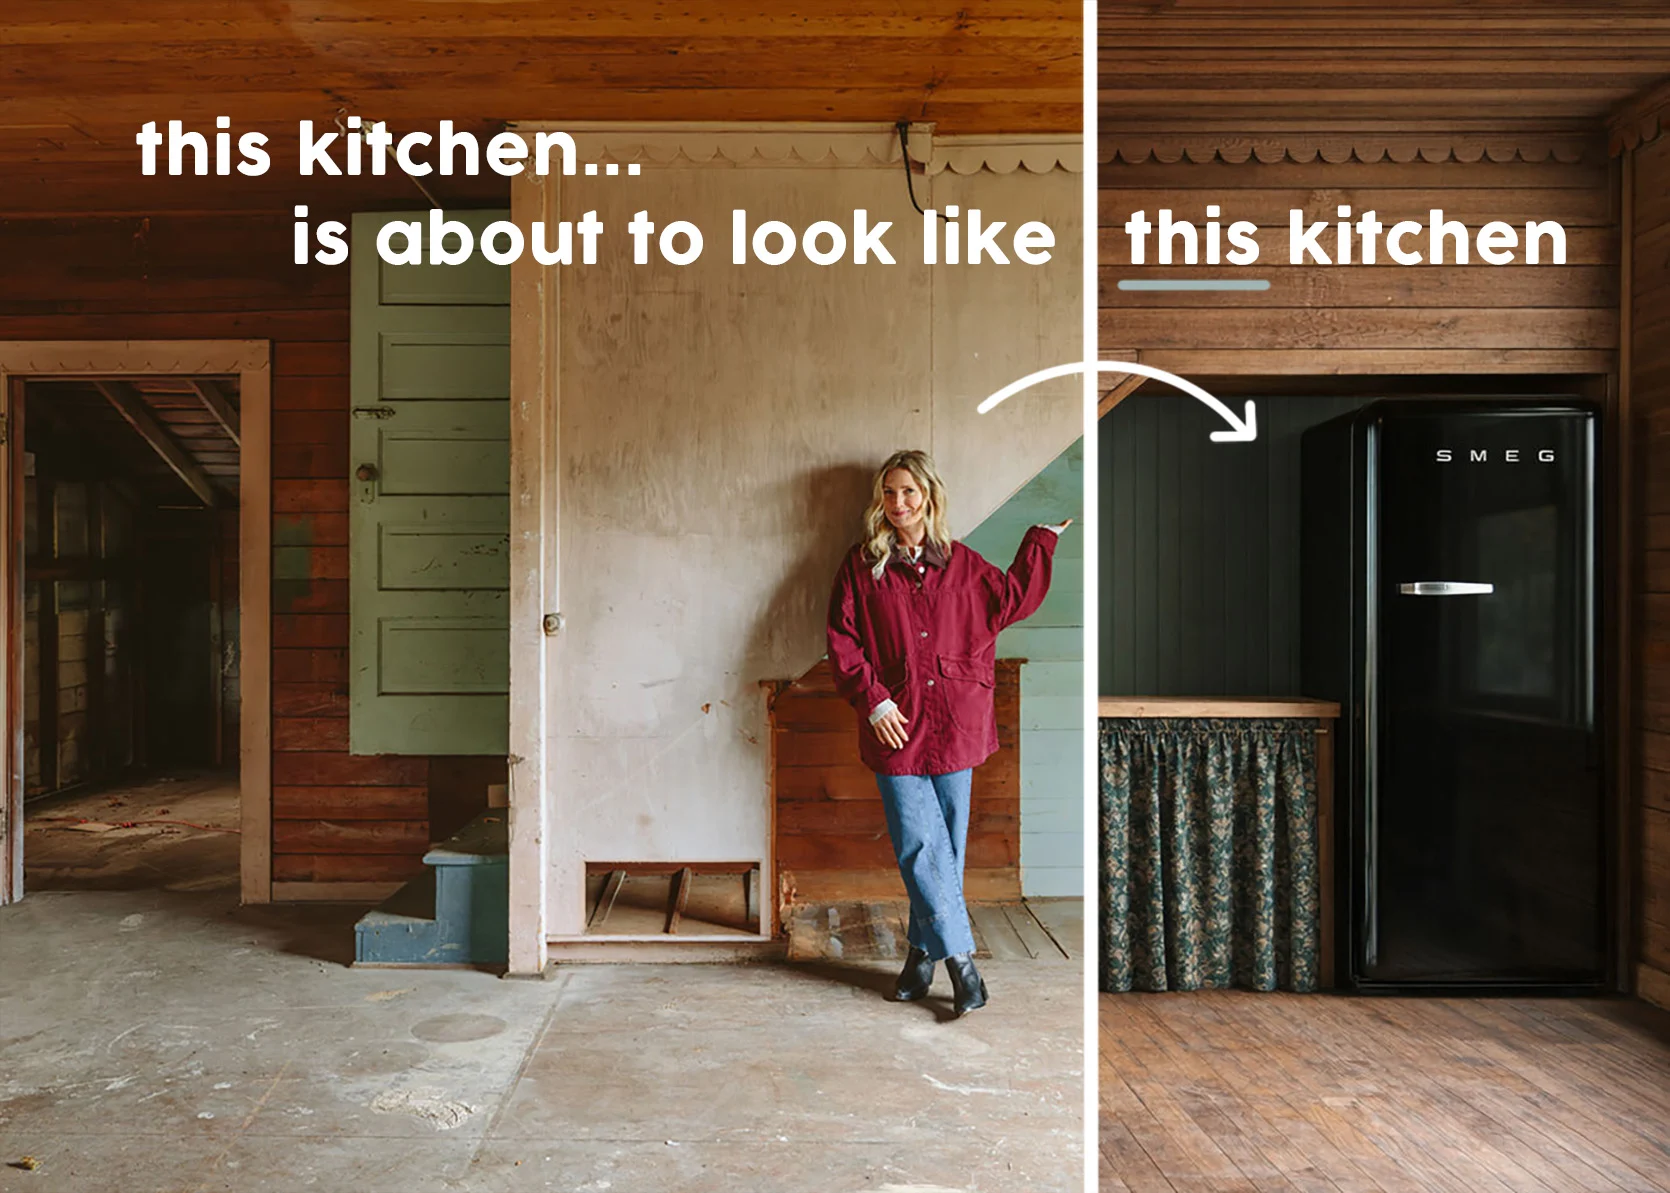
The Guest Cottage Kitchen Design (With Magic Renders!)
I’m so excited about this sweet little cottage kitchen design. This one is more for those of you who are into small spaces, DIY, and leaning into the sweet cobbled-together nature of a vintage cottage, rather than an Amber Interiors style luxury farmhouse kitchen (which I love, obviously). While a lot of things are up in the air, the layout is pretty firm (and feels so good). Y’all, it needs to be very basic. Yes, it needs to function well enough for our team to make lunch, shoot some food posts, bake pizzas and popcorn for my tween kids when they hang out here, and be good enough for a possible long-term family guest in the future, but we aren’t putting in double ovens, ice machines, or even a dishwasher. It’s pared back, but I think it’s perfect for what we need.
If you think it’s odd that we are doing such a large, fun bathroom but keeping this tiny kitchen as-is, you are not alone. We also think it’s funny, and yet it makes sense to us. We are keeping the footprint of the house the same (the OG garden room is big, therefore big bathroom, the OG kitchen is small, therefore small kitchen). And yes, we could have broken up the bathroom into two different rooms, but I’m too excited about the design to do that (and we don’t really need to). We don’t want to re-engineer the house. Nor do we want to spend what it would cost to move the kitchen into the speakeasy (current renovation costs are so astronomical in America). From day one, we’ve said to make this house “work” and be “livable.” I want to design it to be exciting, creatively driven, and fun, but I don’t want to invest too far into the bells and whistles that we just don’t need here (i.e., bar sinks or big dishwashers) and instead invest in what we are super excited about (i.e., stained glass doors). I wish I could properly express what’s in my head and how we are making these decisions, but let’s just say the design of this house is driven by my creative excitement, less about making it a perfect 2026 show home.
P.S. Is anyone else reading Yesteryear right now?? It’s a fictional book that is skyrocketing the best-selling charts about a trad wife influencer who wakes up back in time to be forced to live as an actual pioneer woman trad wife in the 1800s, likely in a house just like this one. Turns out a life before laundry machines, fridges, grocery stores, or ice machines (LOL) was a hard life for women (review in-coming – I’m almost done). It’s reminding me so much of how family likely lived here in this home, which is making me excited to keep it mostly the same, just more functional.

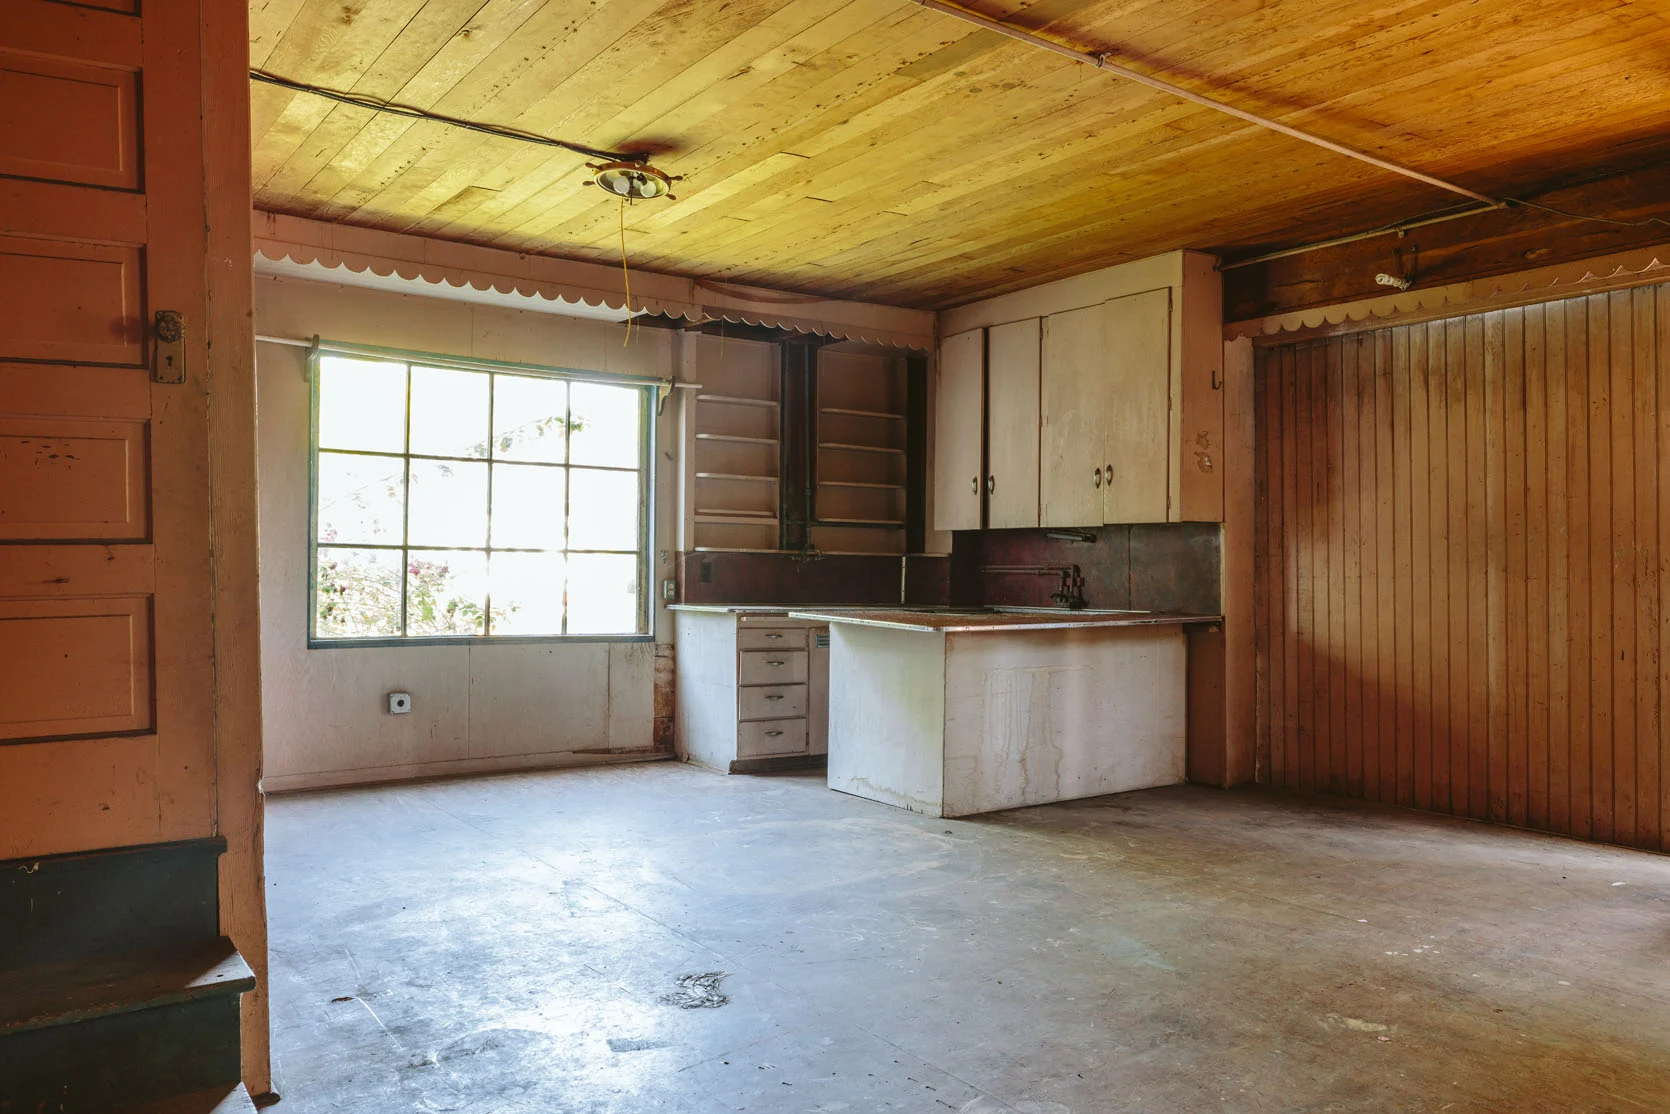
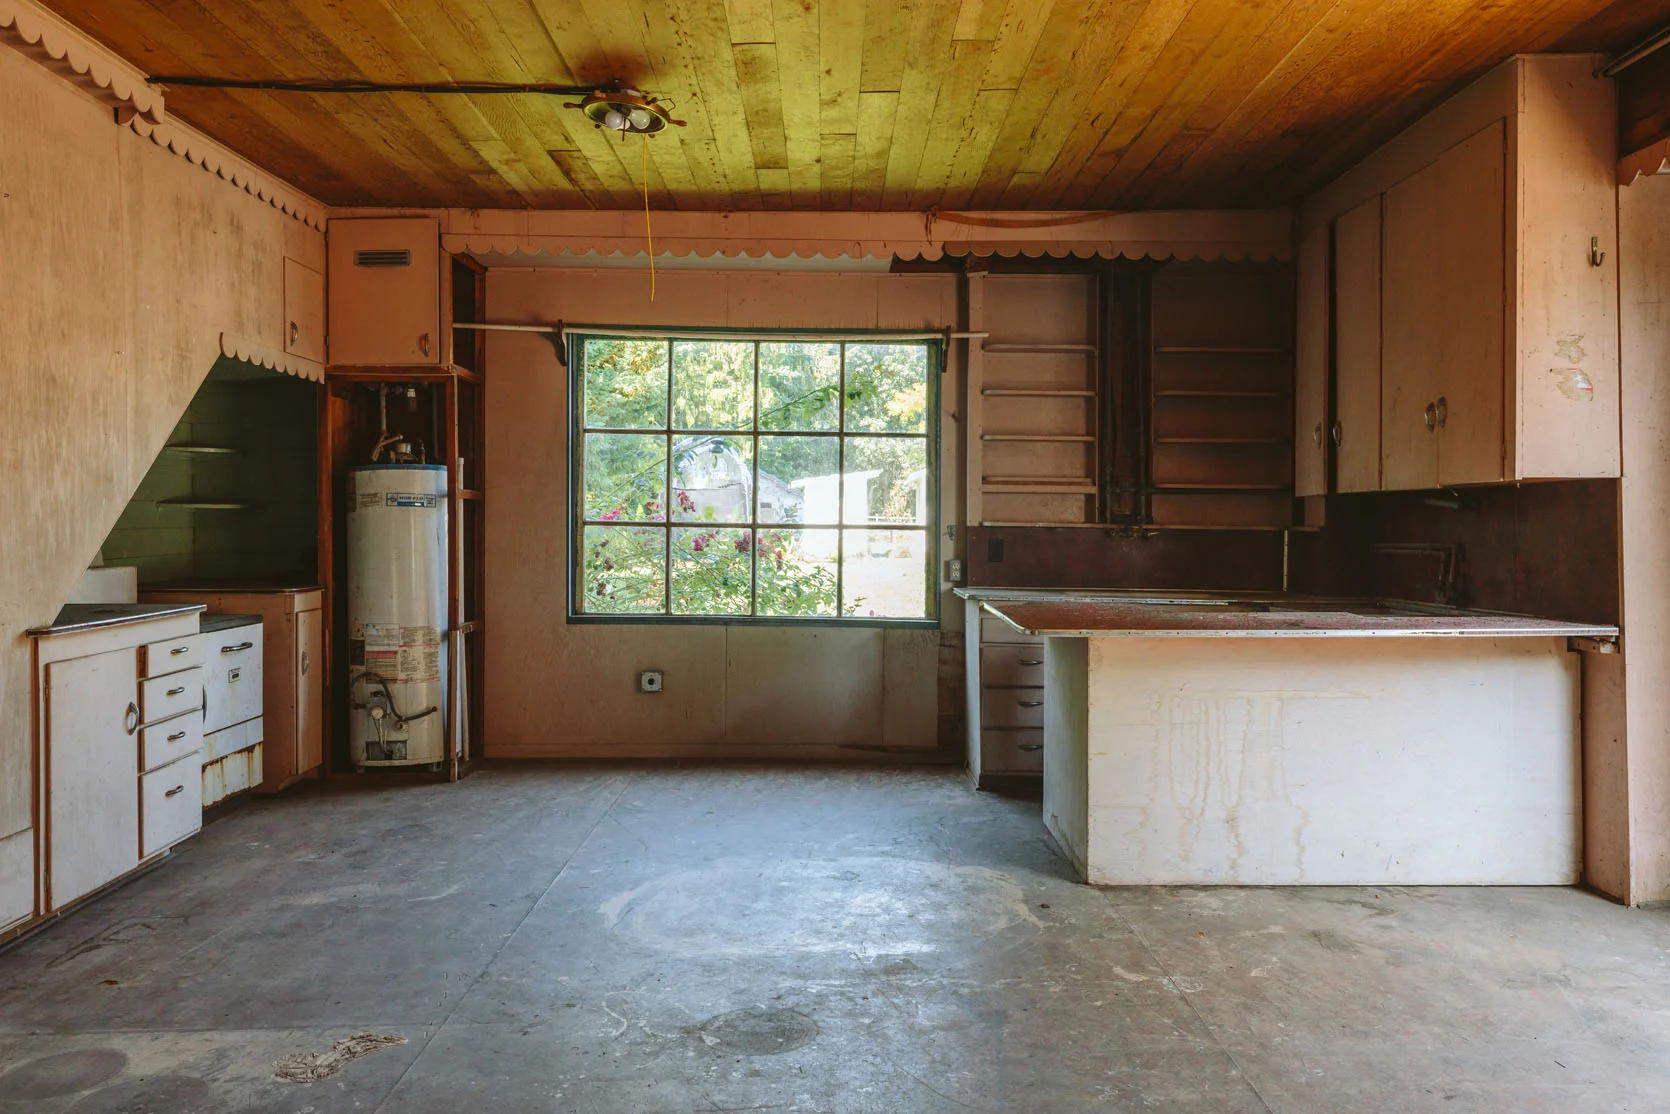
When we first bought the house, the kitchen was spread out on two walls, with a kitchen table likely serving as a food prep surface in the middle. See the original floorplan here:
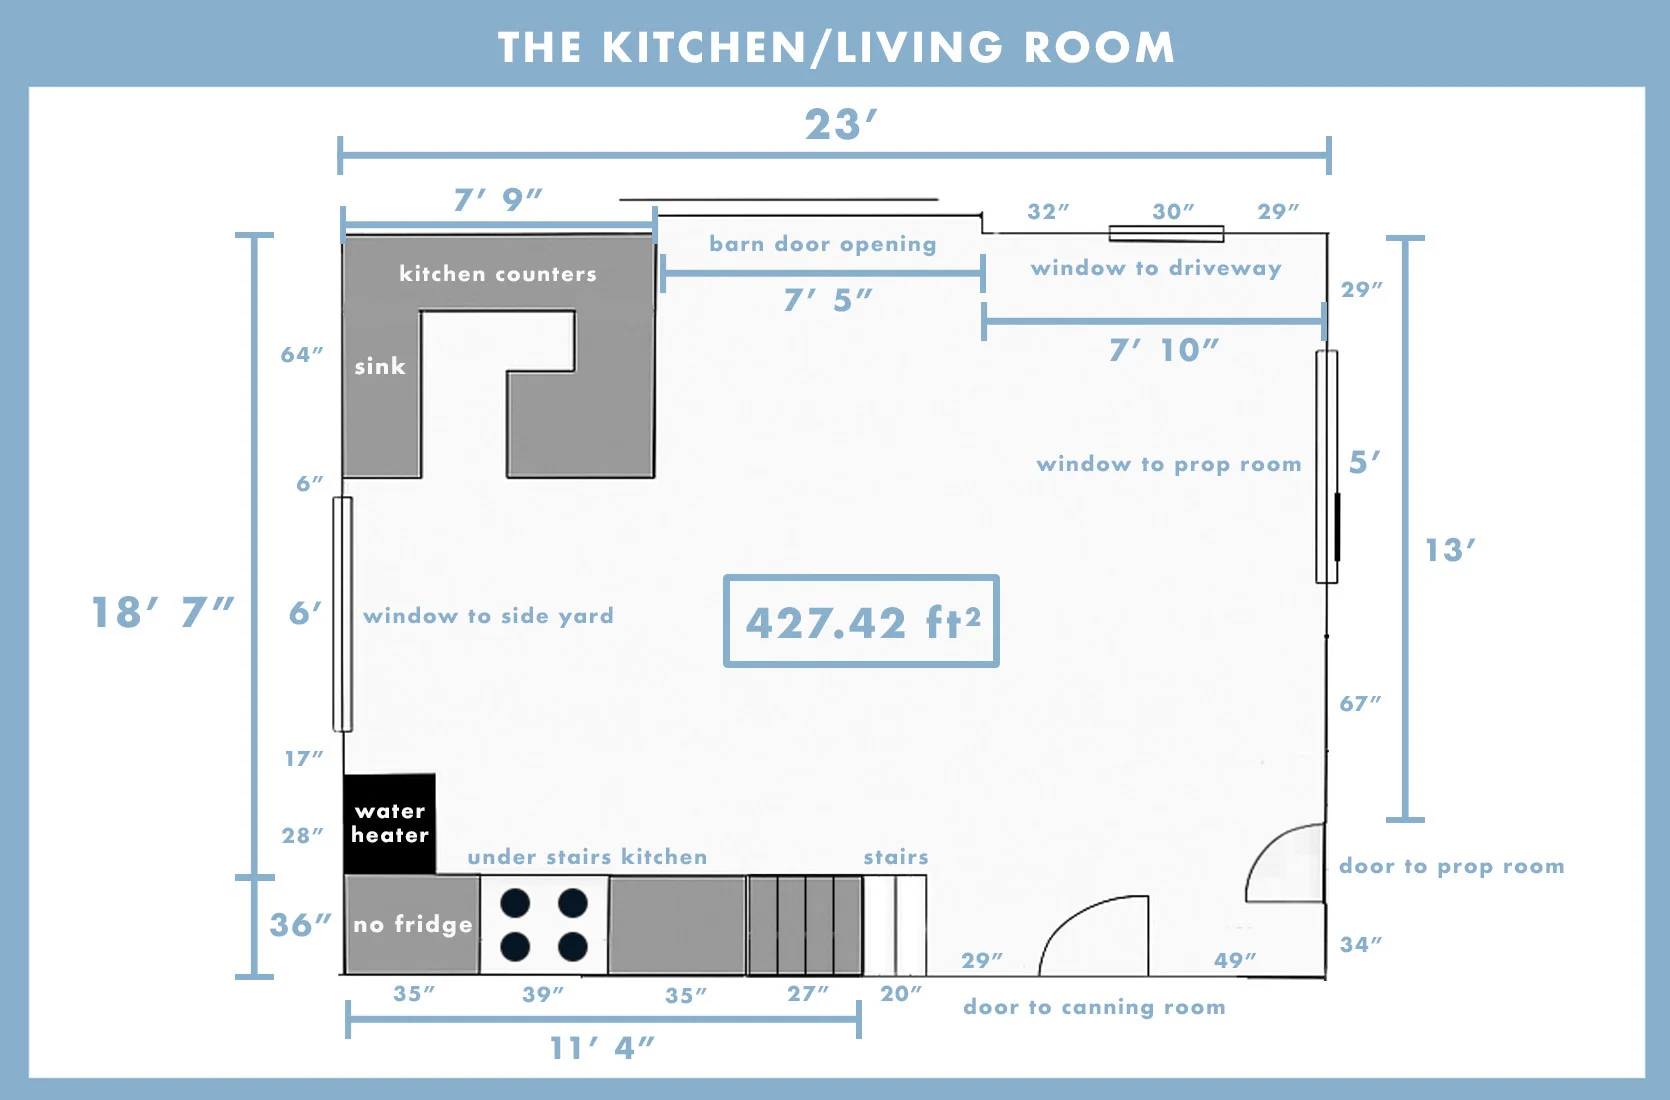
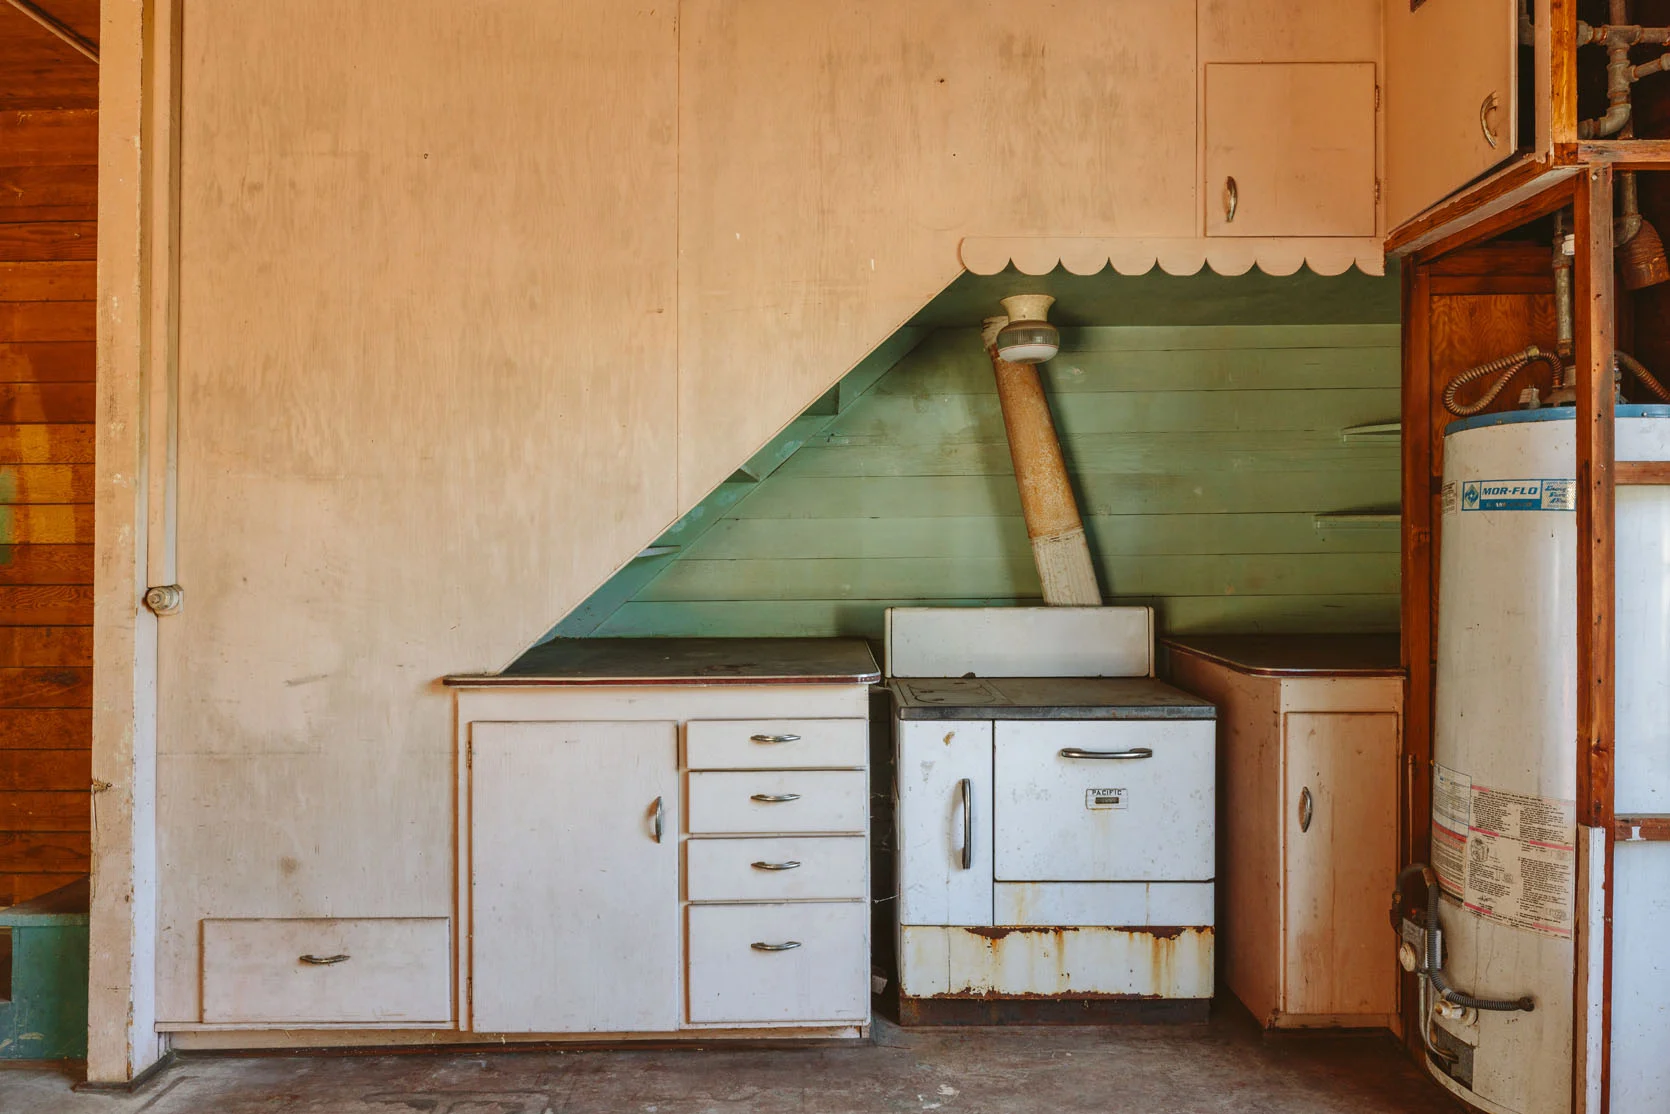
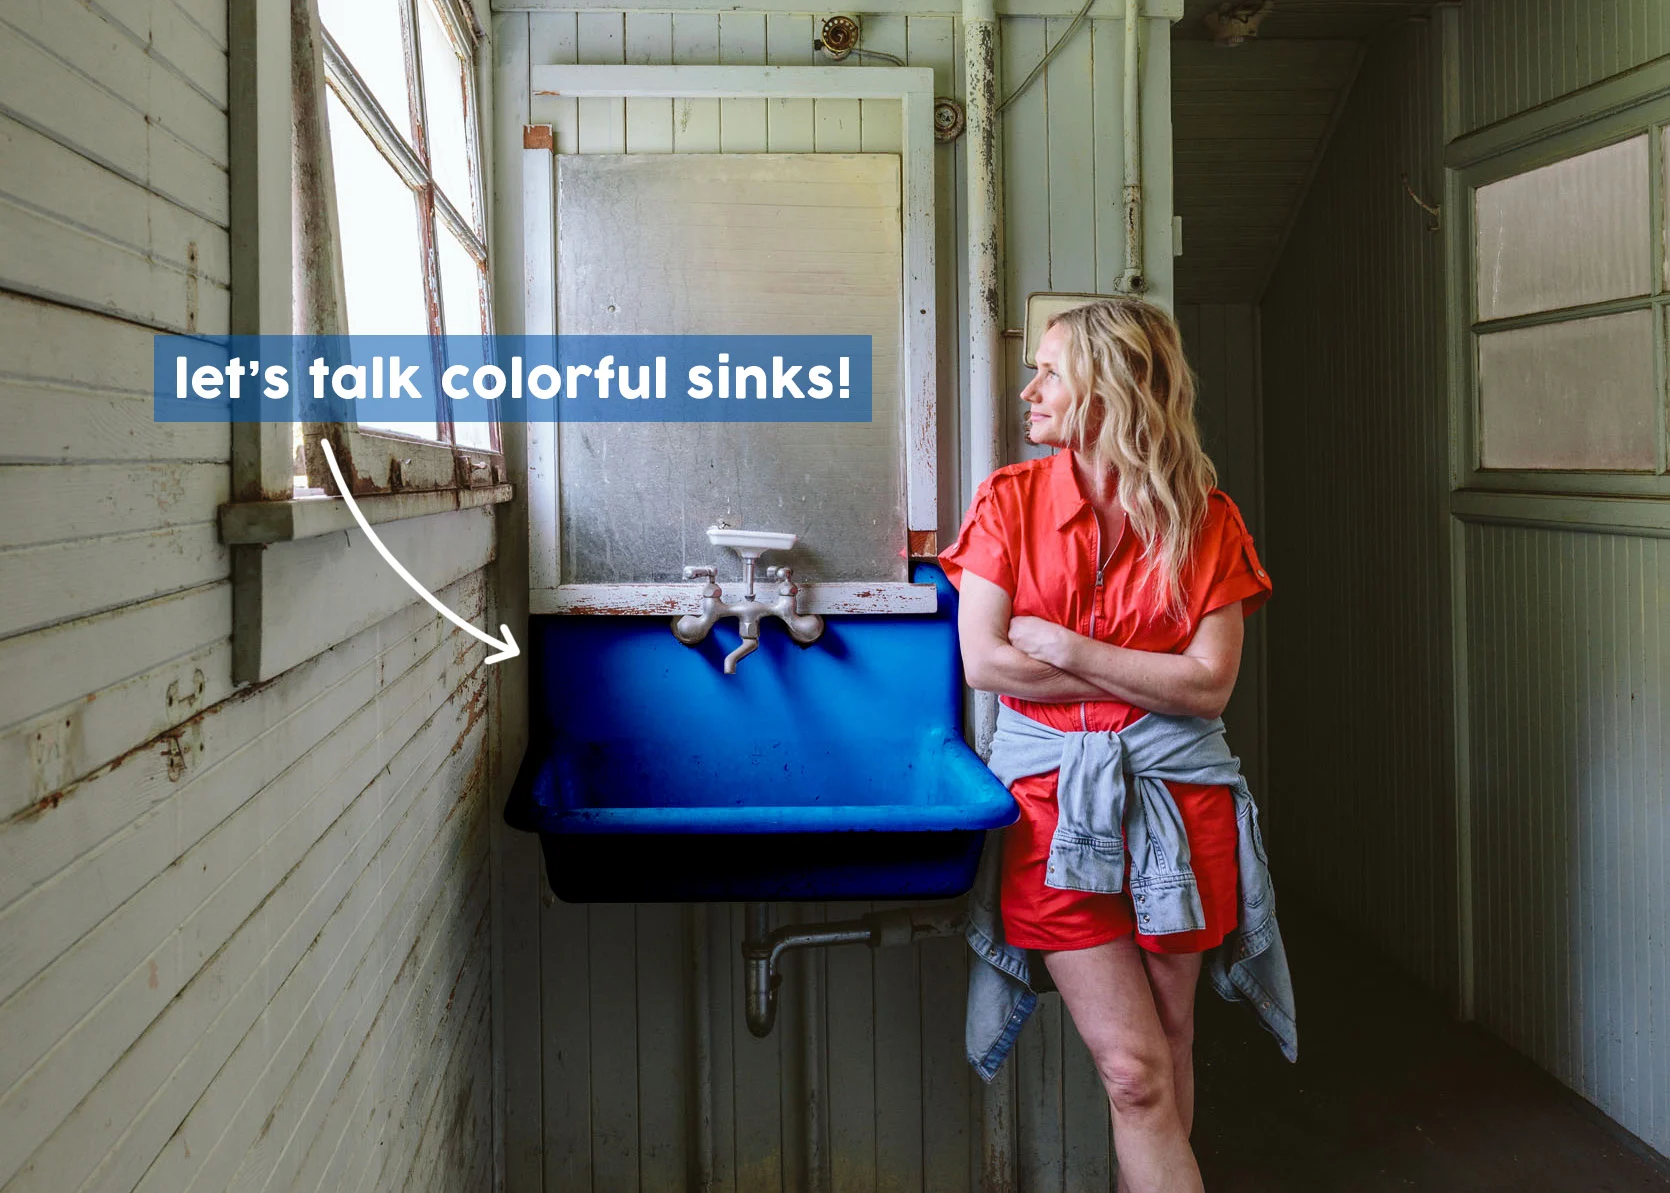
The little kitchen area was tiny but also adorable (in theory). It’s a shared space with the future small living room, divided by the huge sliding barn door, and we honestly just liked the layout enough to keep it the same. It had two sinks and a wood-fueled oven (that likely heated the house).
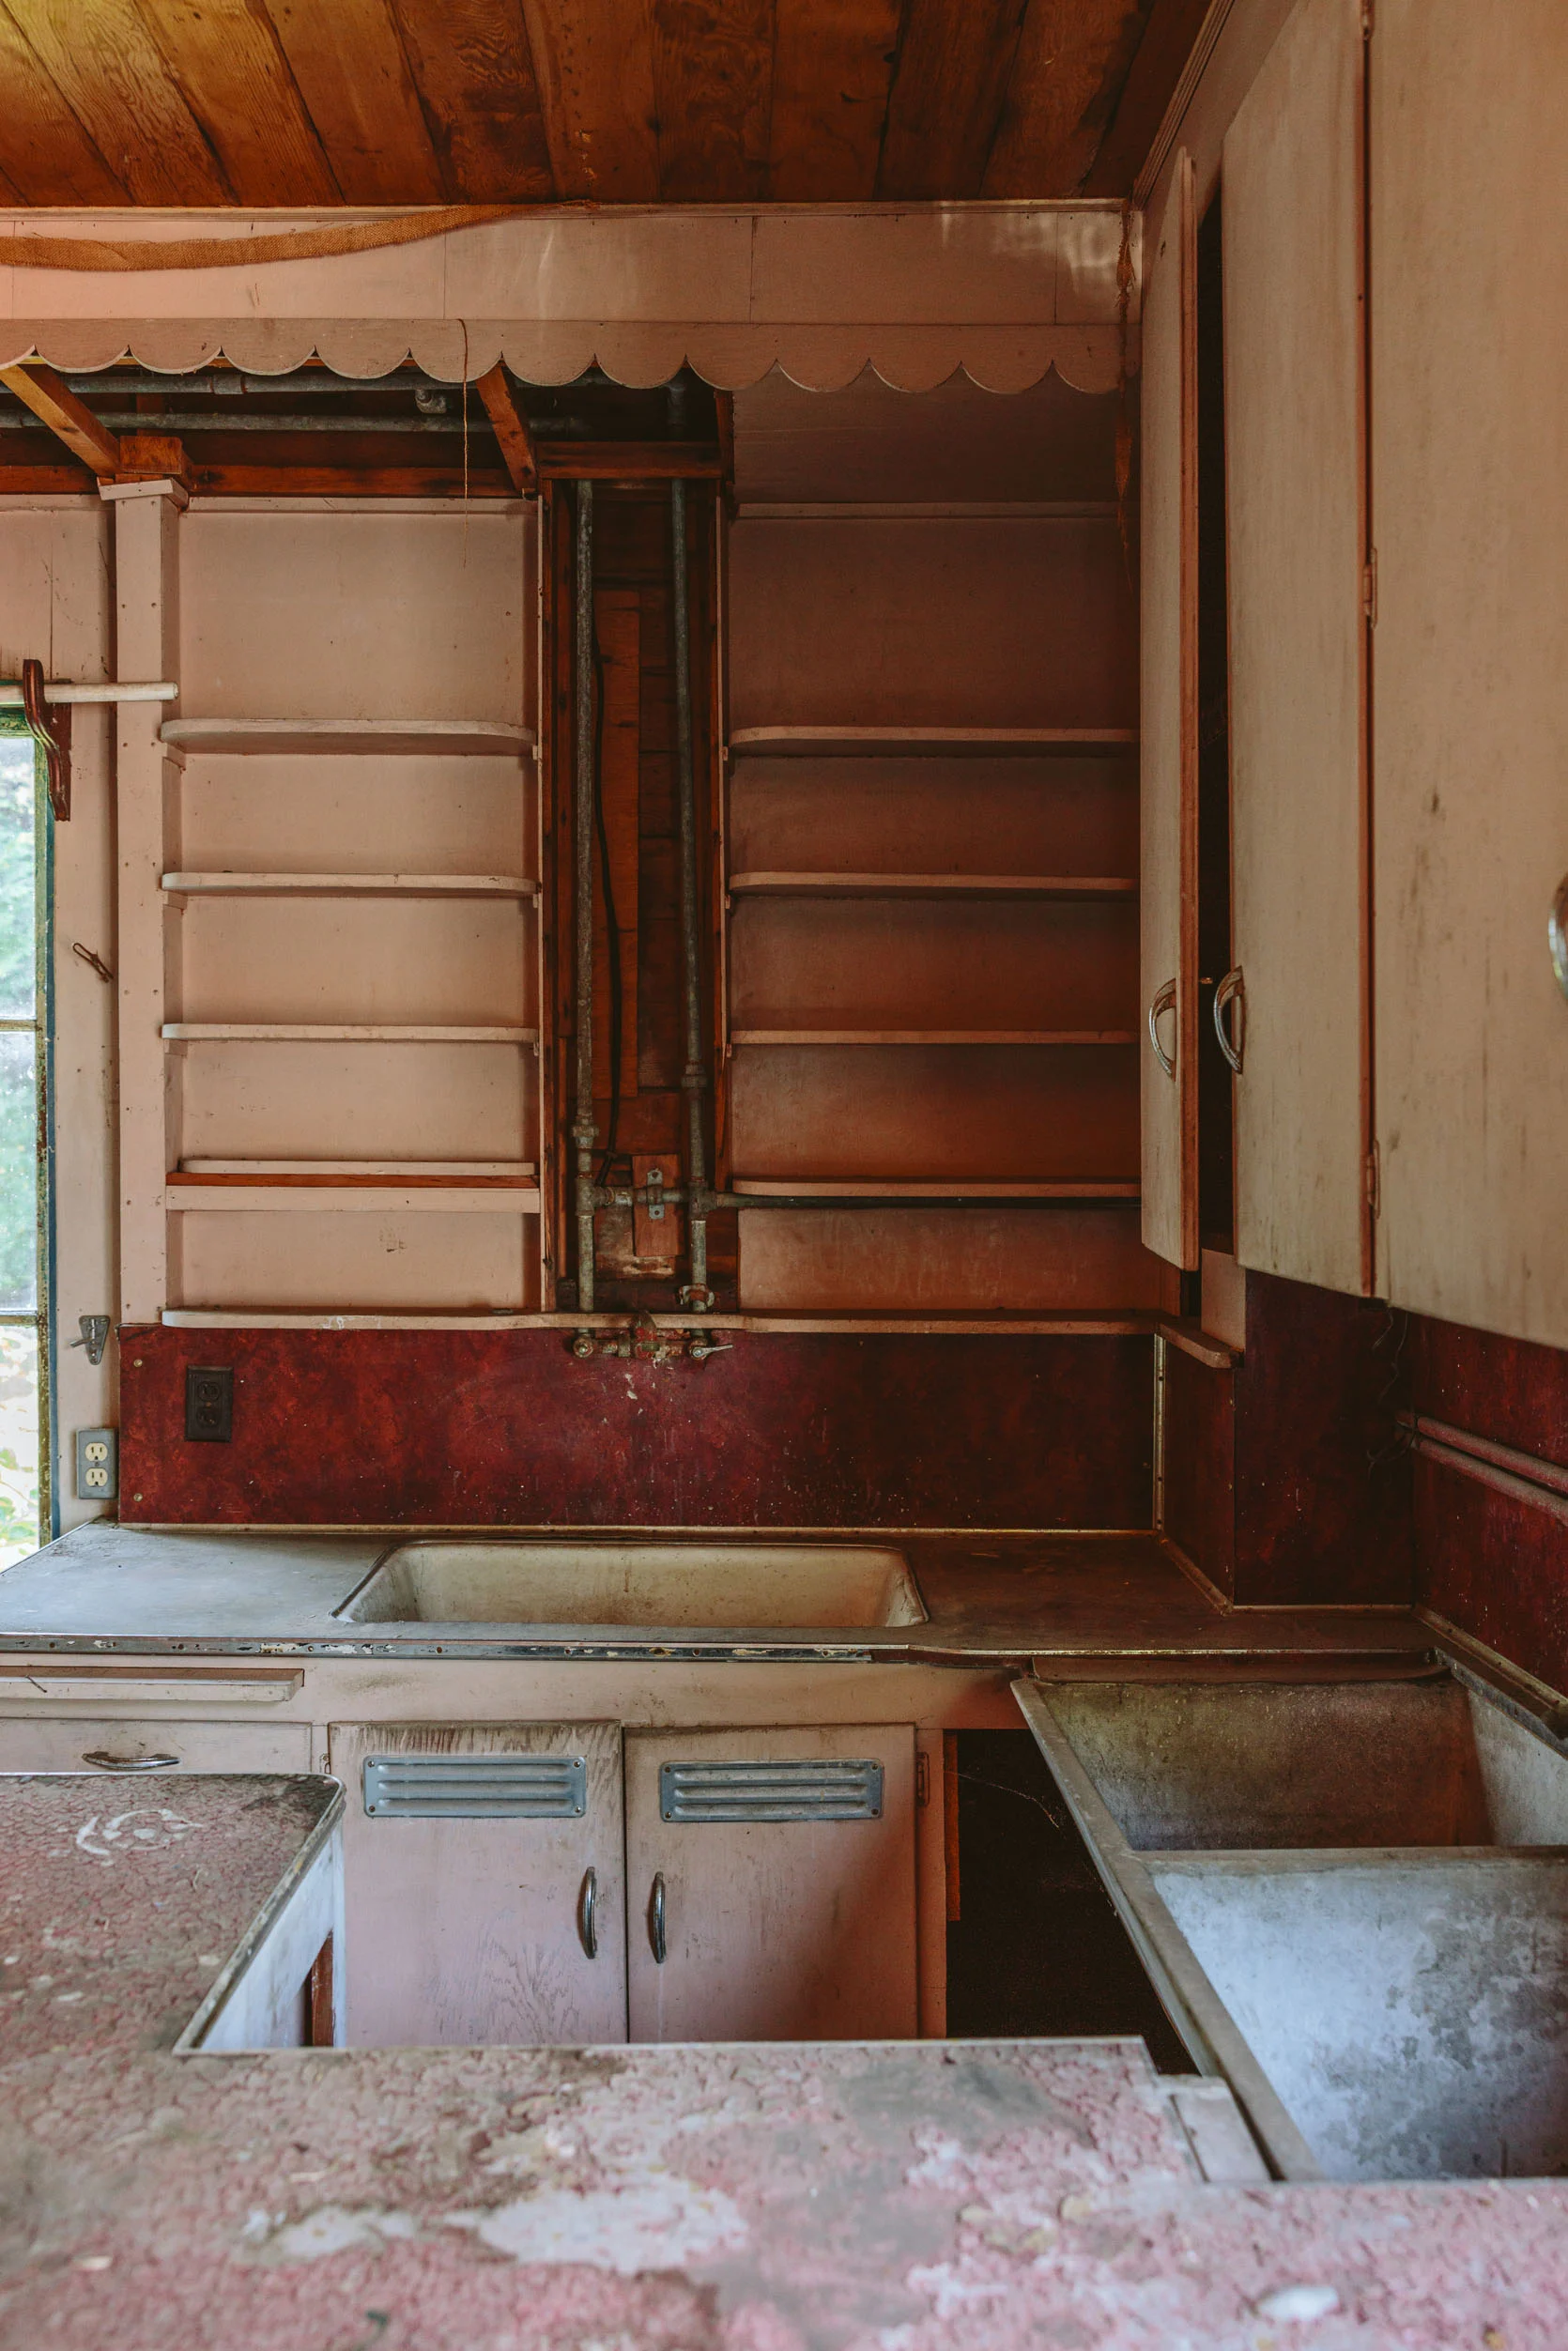
The countertops were disintegrating, and there were two sinks, with one being massive and concrete (more of a utility sink, clearly?) Most of it had to go, but we did salvage those shelves and all of the scallop details.
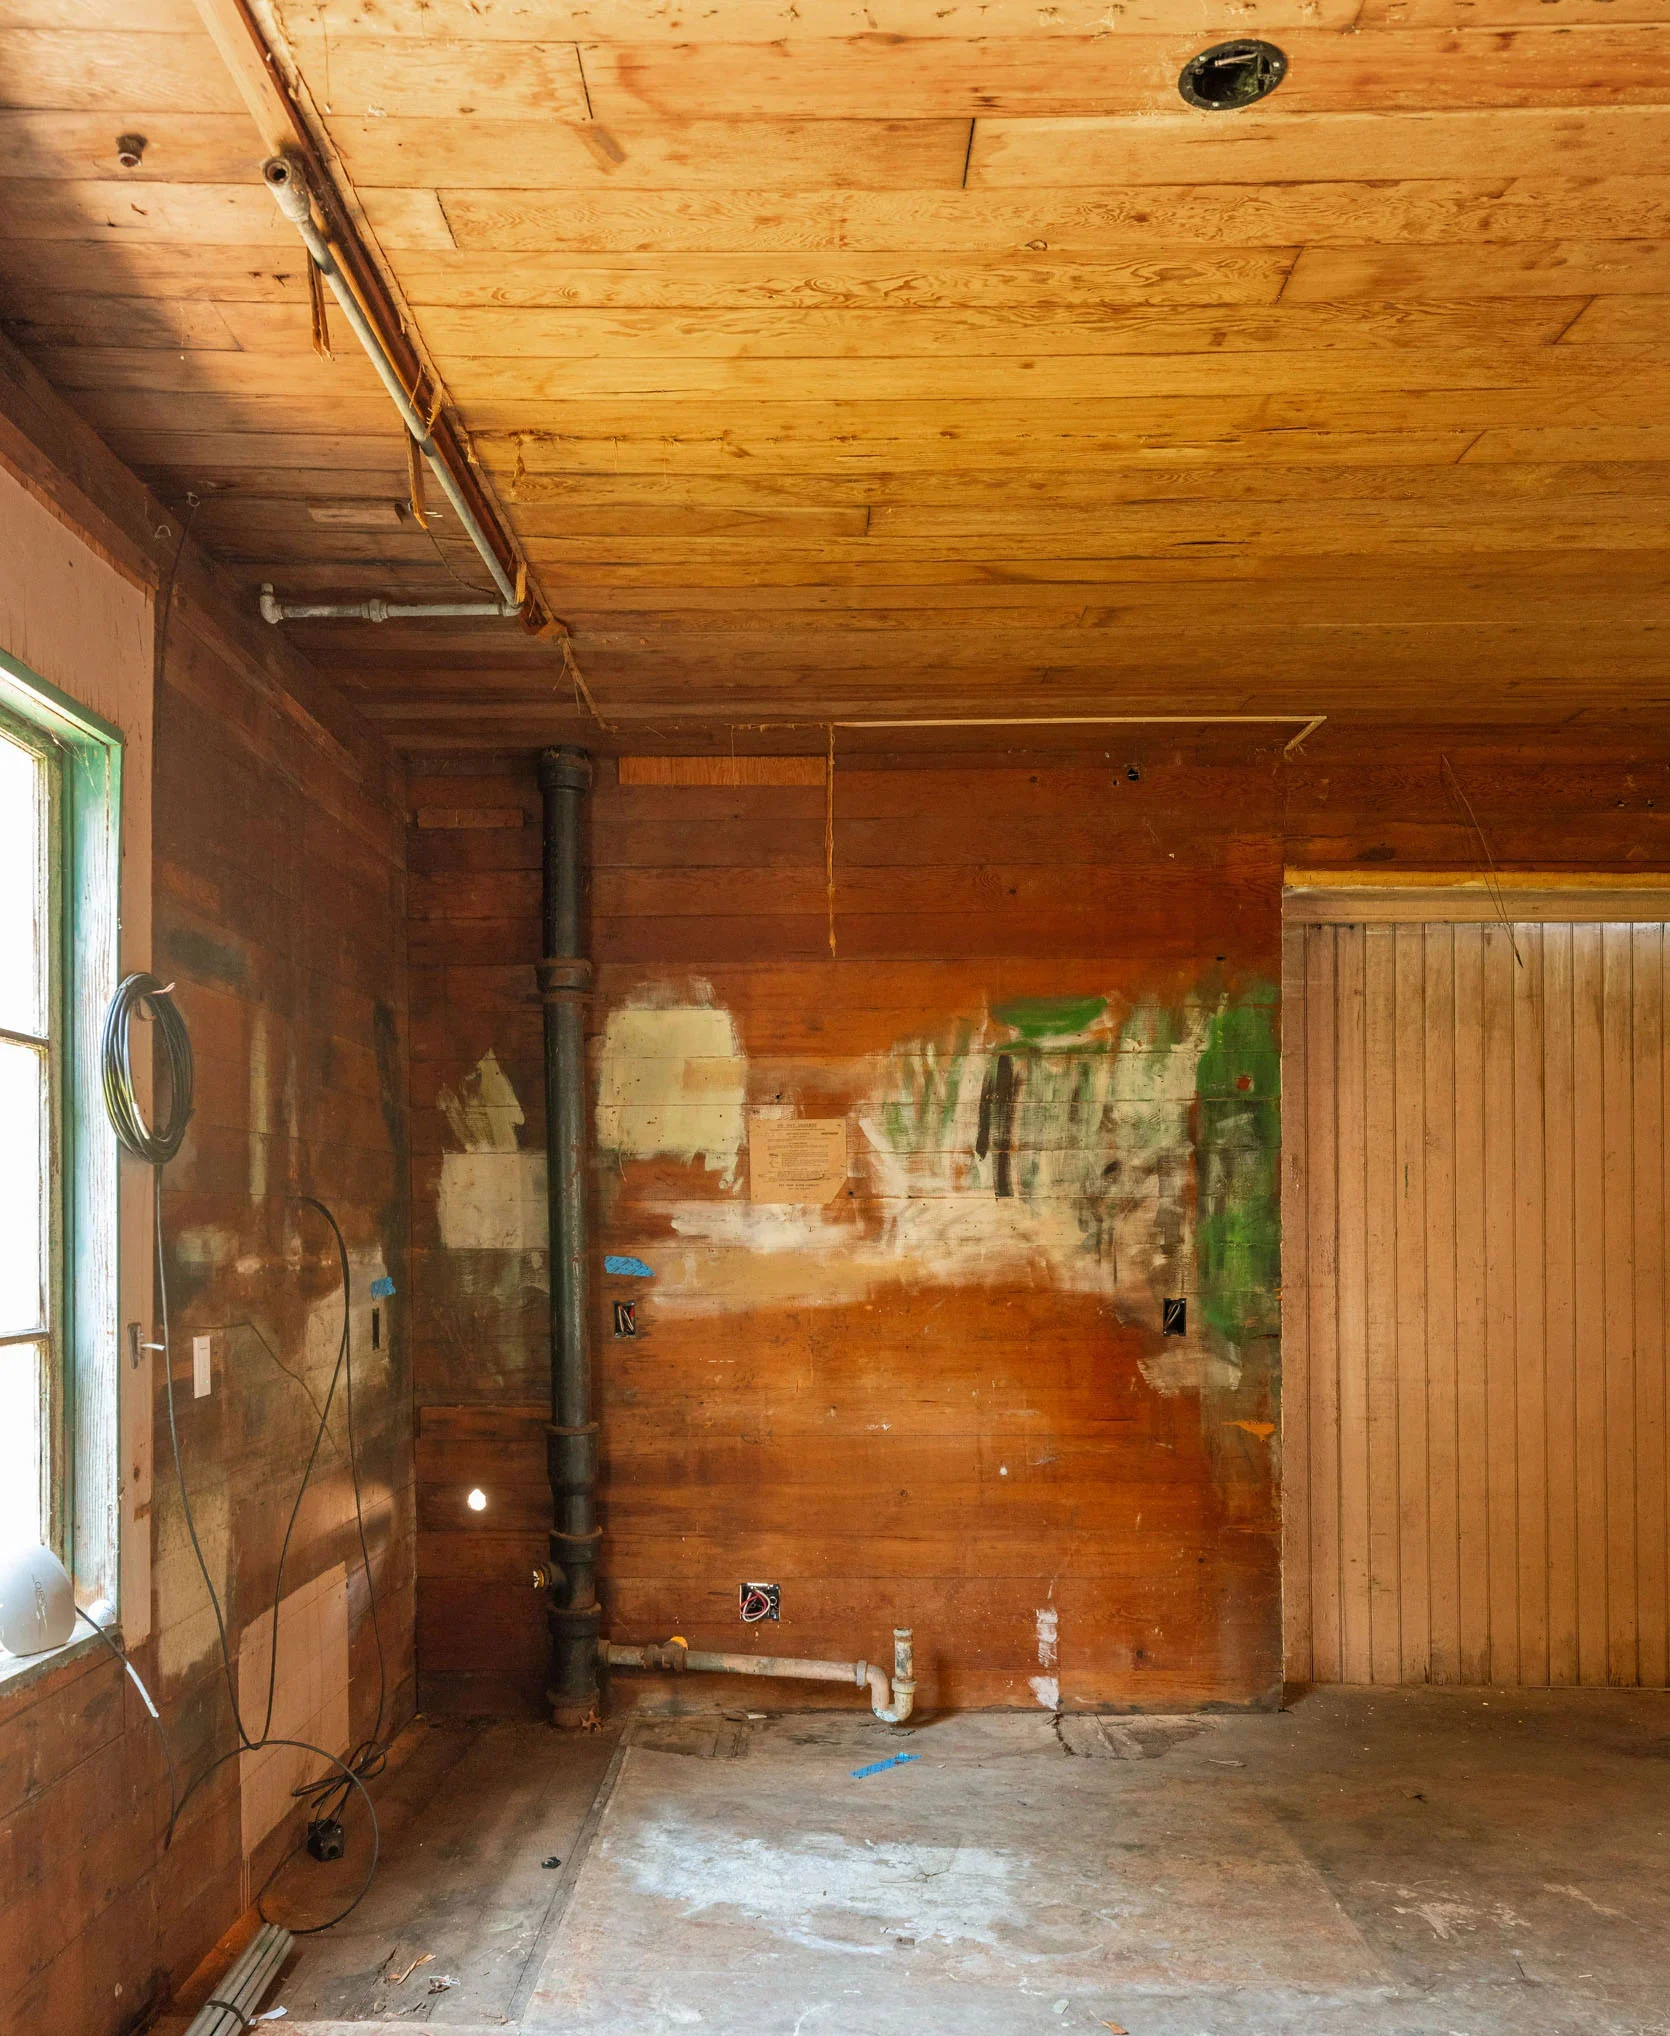
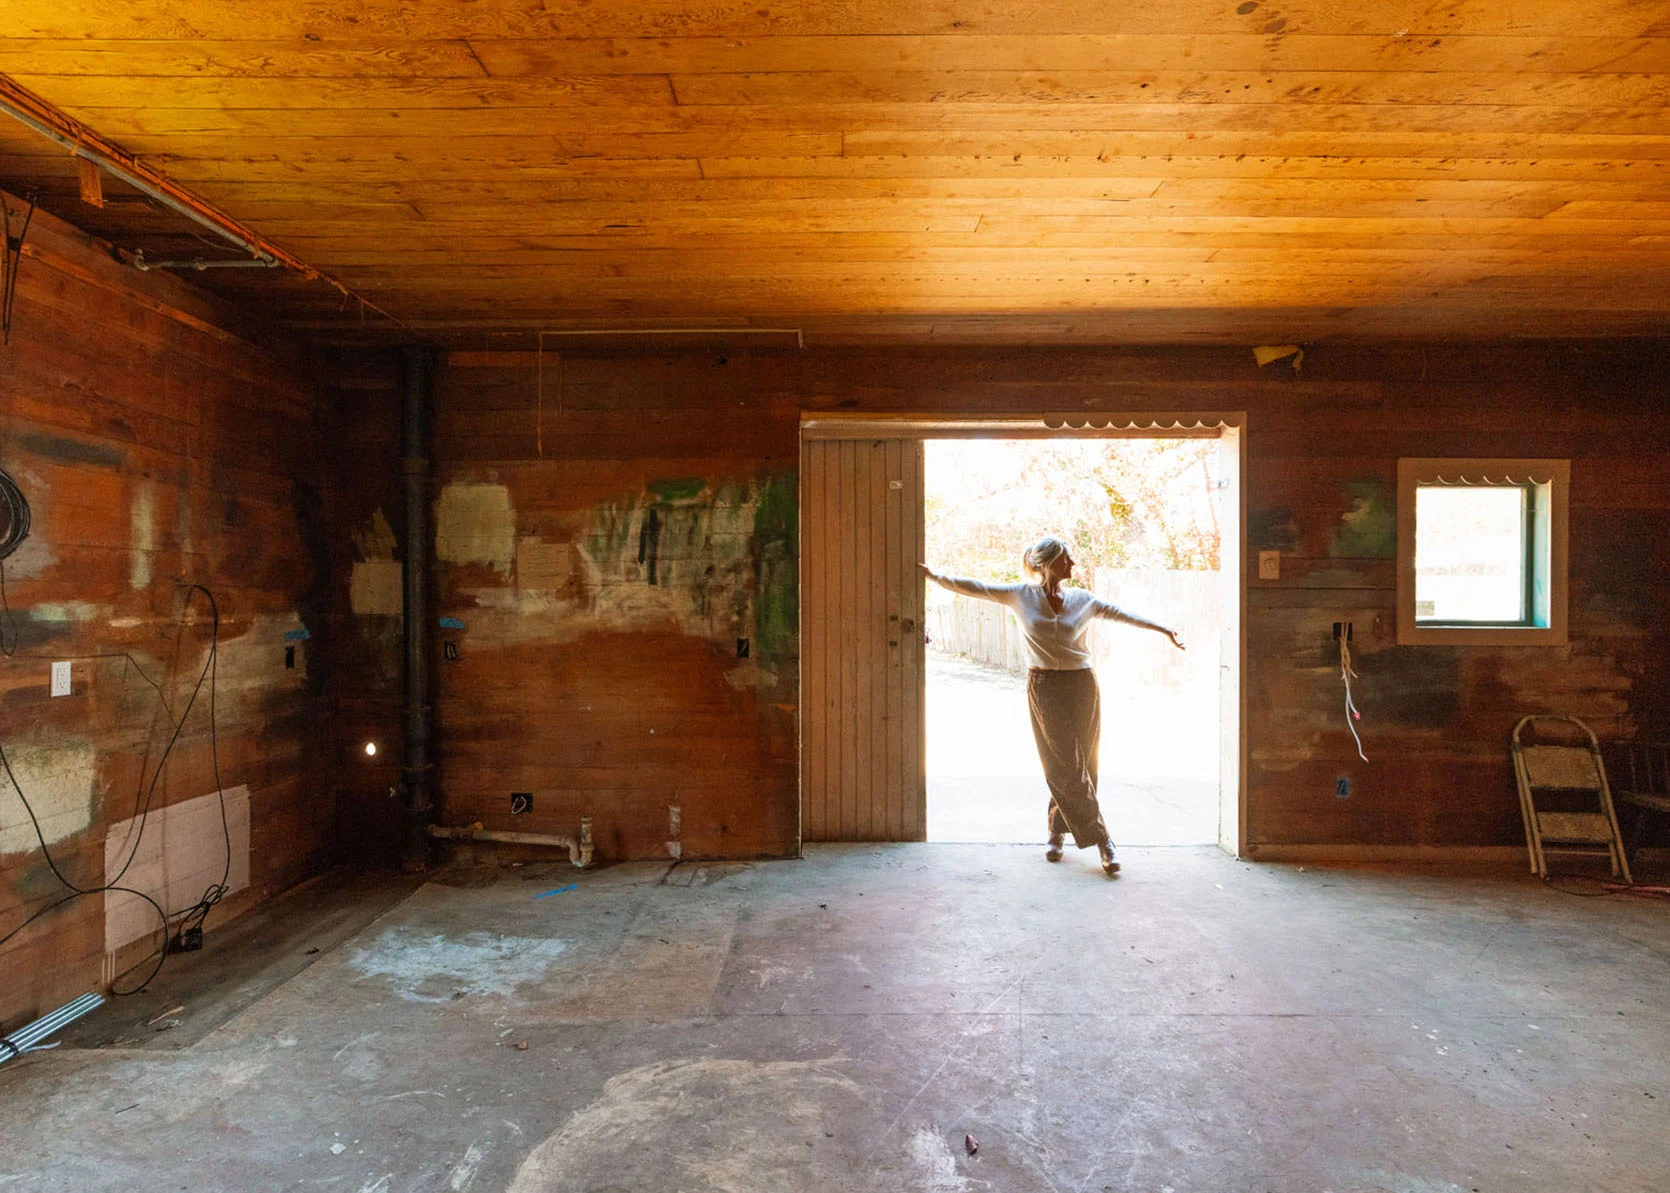
After Demo
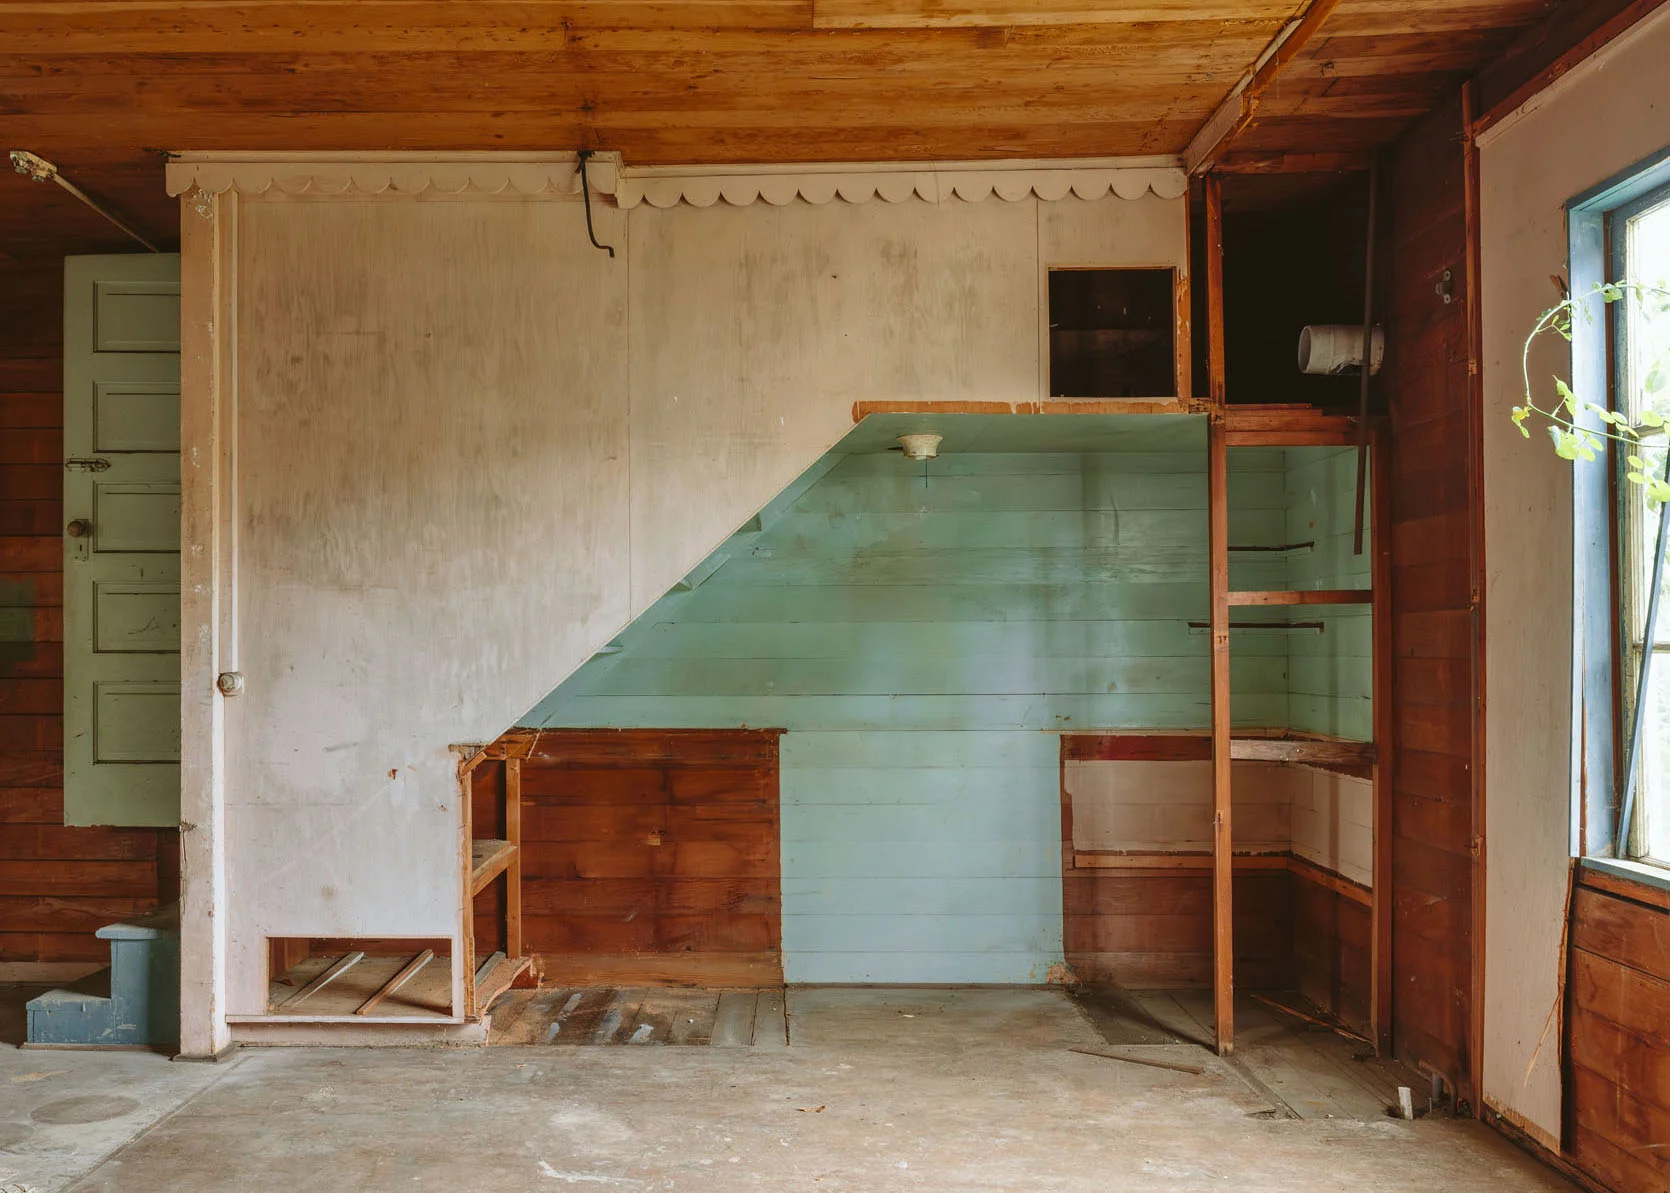
The demo took just a few hours, and we did it ourselves (by “ourselves” I mean my brother Ken and Brian did the whole thing, I’m oddly terrified to swing a sledgehammer!).
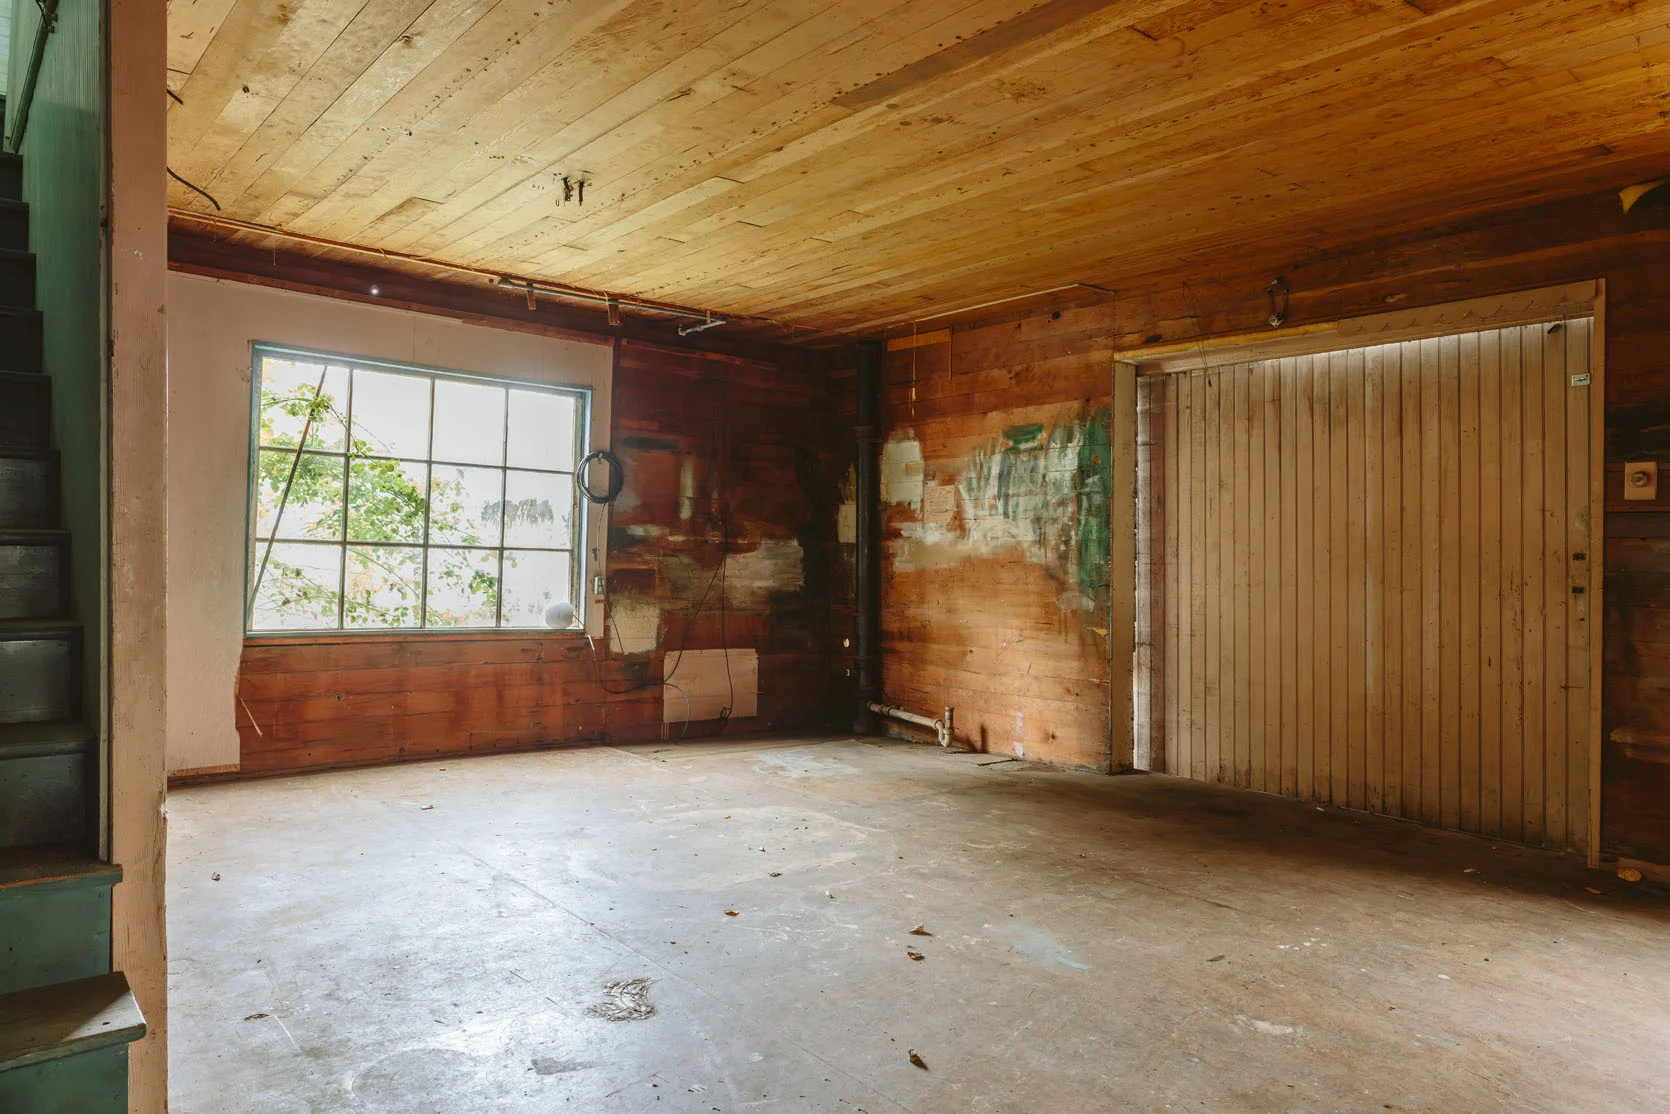
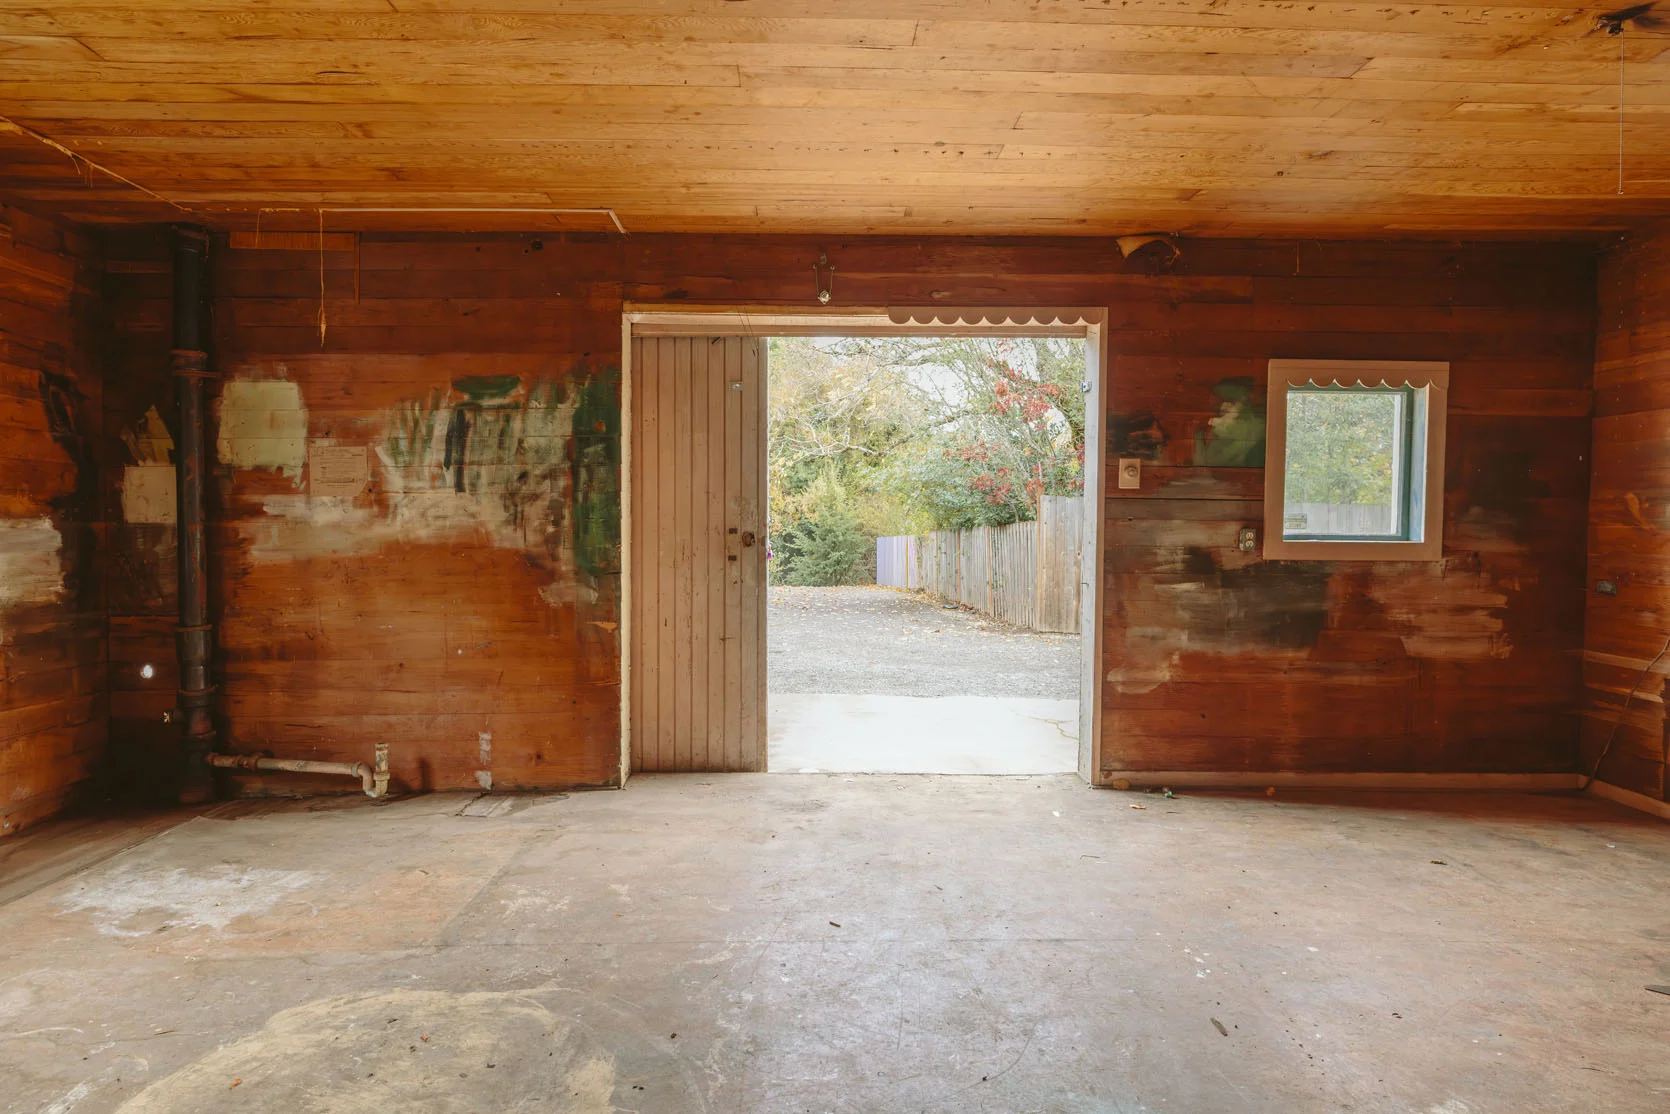
Once gone, you could see the potential for the footprint, and it’s tight, but very doable. We thought about making the kitchen bigger by making the sliding door opening smaller or bringing it into the living room. We thought about relocating the kitchen altogether, but ultimately we want to stick to the original footprint, which is good enough for whoever cooks here and flows nicely with our work needs and the tweens that might use the speakeasy (the huge, old canning room).
New Layout … The Same, But With Appliances
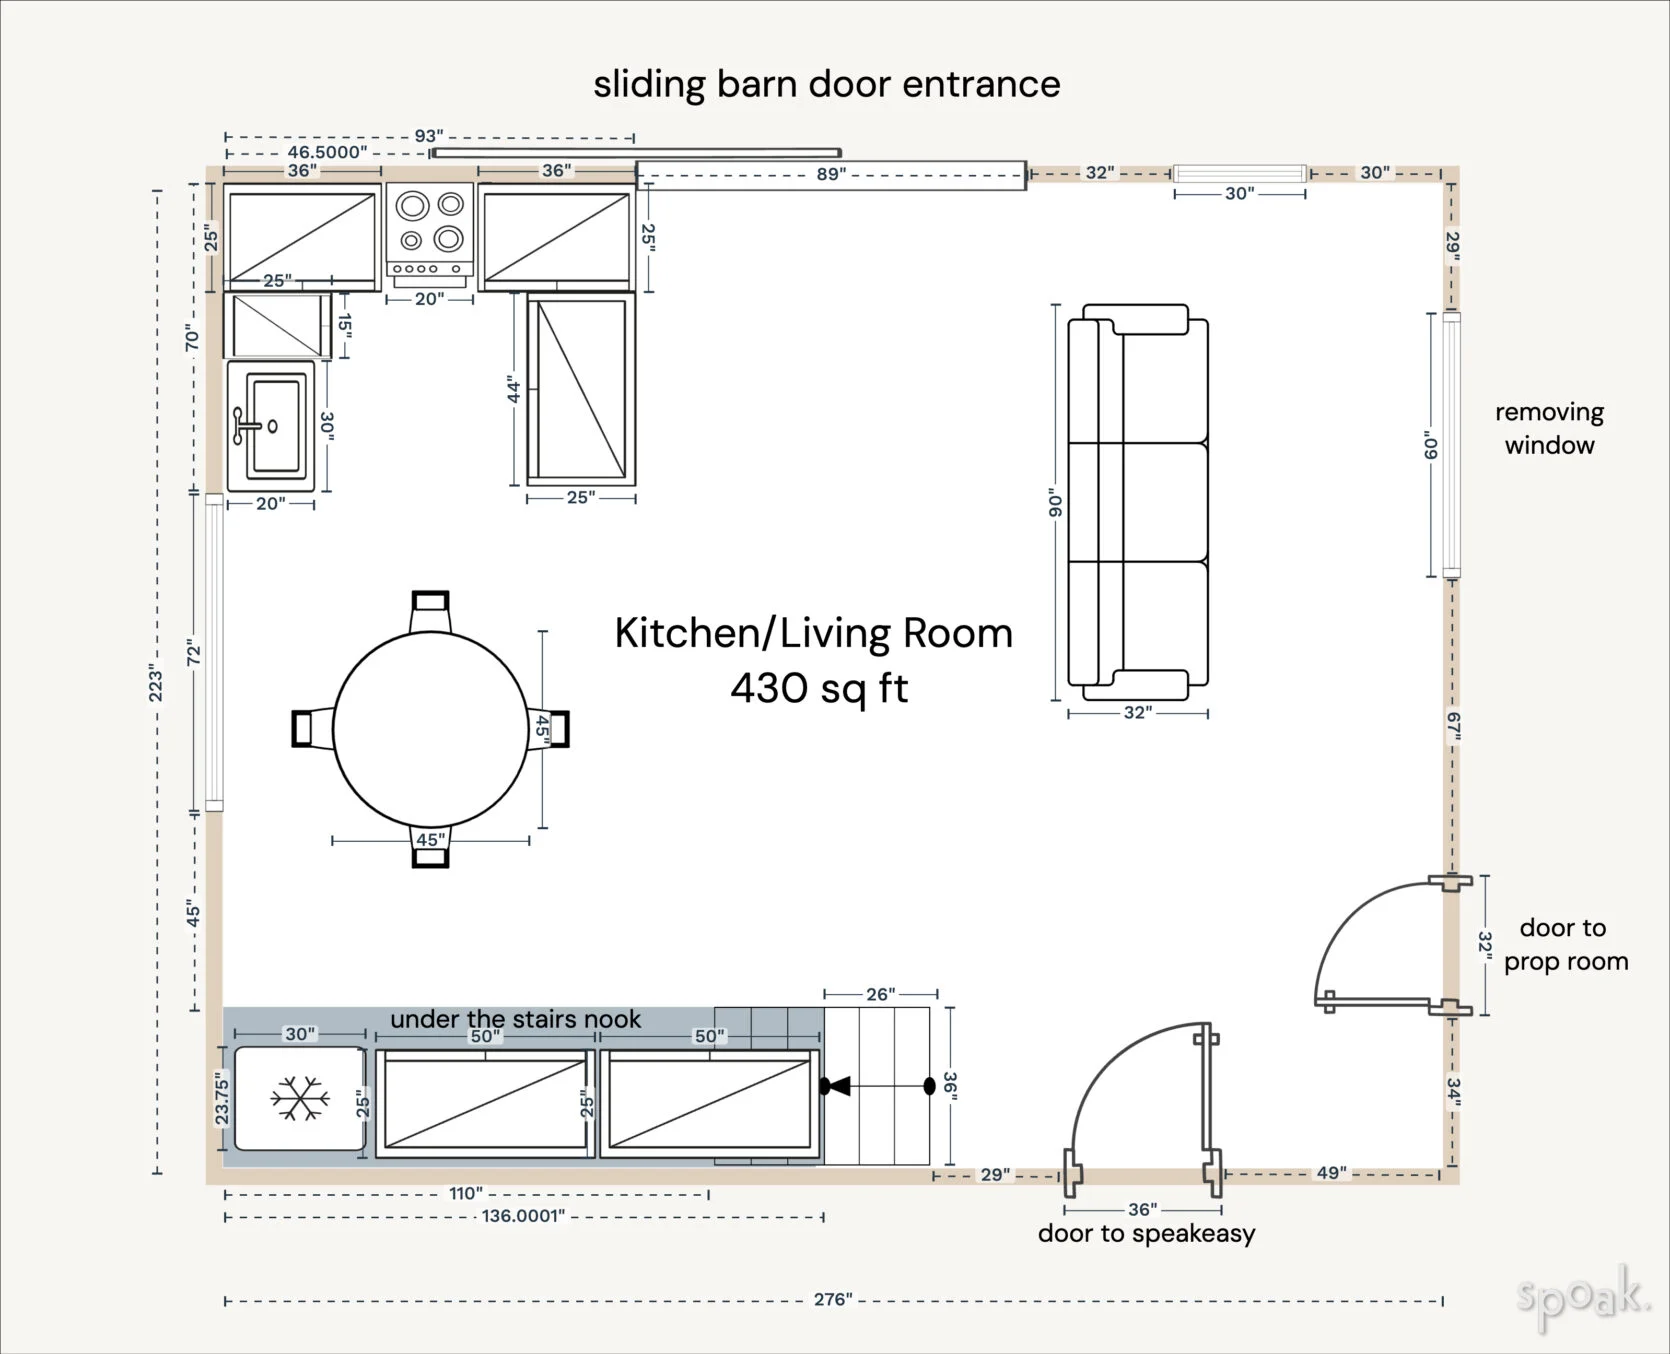
As you can see, the layout is similar, but now with a fridge tucked under the stair nook and the range where the large utility sink once was on the opposite wall. Traditional kitchen designers are not going to like this vision, but that’s ok. There is no “kitchen work triangle” (or maybe a very odd triangle?) and not even a dishwasher. My MO with appliances is to keep it easy and almost like first-apartment style amenities. No 48″ range, if you know what I mean. The footprint just doesn’t allow for it, and the function of the house doesn’t warrant it, plus we are trying to DIY a lot of this, so the cabinetry has to be basic. So for now we have room for a 20″-24″ slide-in electric range, a 24 – 30″ wall-hung sink, and a fridge on the opposite wall (roughly where the range was). It’s sweet and good enough for me.
I need this kitchen to be efficient for a small space, but still really charming, and contemporary appliances can really pull you into a new era. Also, in case you missed the post, we are likely building our own shelf-style cabinets (at least for one wall of them) so while getting a speed oven and cooktop would be efficient (remember Velinda’s ADU kitchen here – still so genius), I couldn’t make the vibe work (nor would I know how to build the cabinetry to house either of those things). So after months of debating, I’m settling on either a 20″ or 24″ slide-in electric range, most likely black, that will be slightly obscured by the U-shaped kitchen cabinetry. We’ll build the DIY cabinets around it and play with curtains and beadboard to dress them up.
Wait, No Dishwasher?
Nope. Not as of right now. I just don’t think we’ll need it, and I want to save money on the things that I really don’t think we’ll need. There is definitely a chance this might be naive, but my team will be in here for coffee and lunch 2-3 days a week (four of us), and it wouldn’t warrant a daily load. Then my kids will for sure eat pizzas in here (likely on napkins). If someone ends up living here, they would probably want one, but I didn’t have a dishwasher until I was 32, so it will be fine.
Exposed Appliances
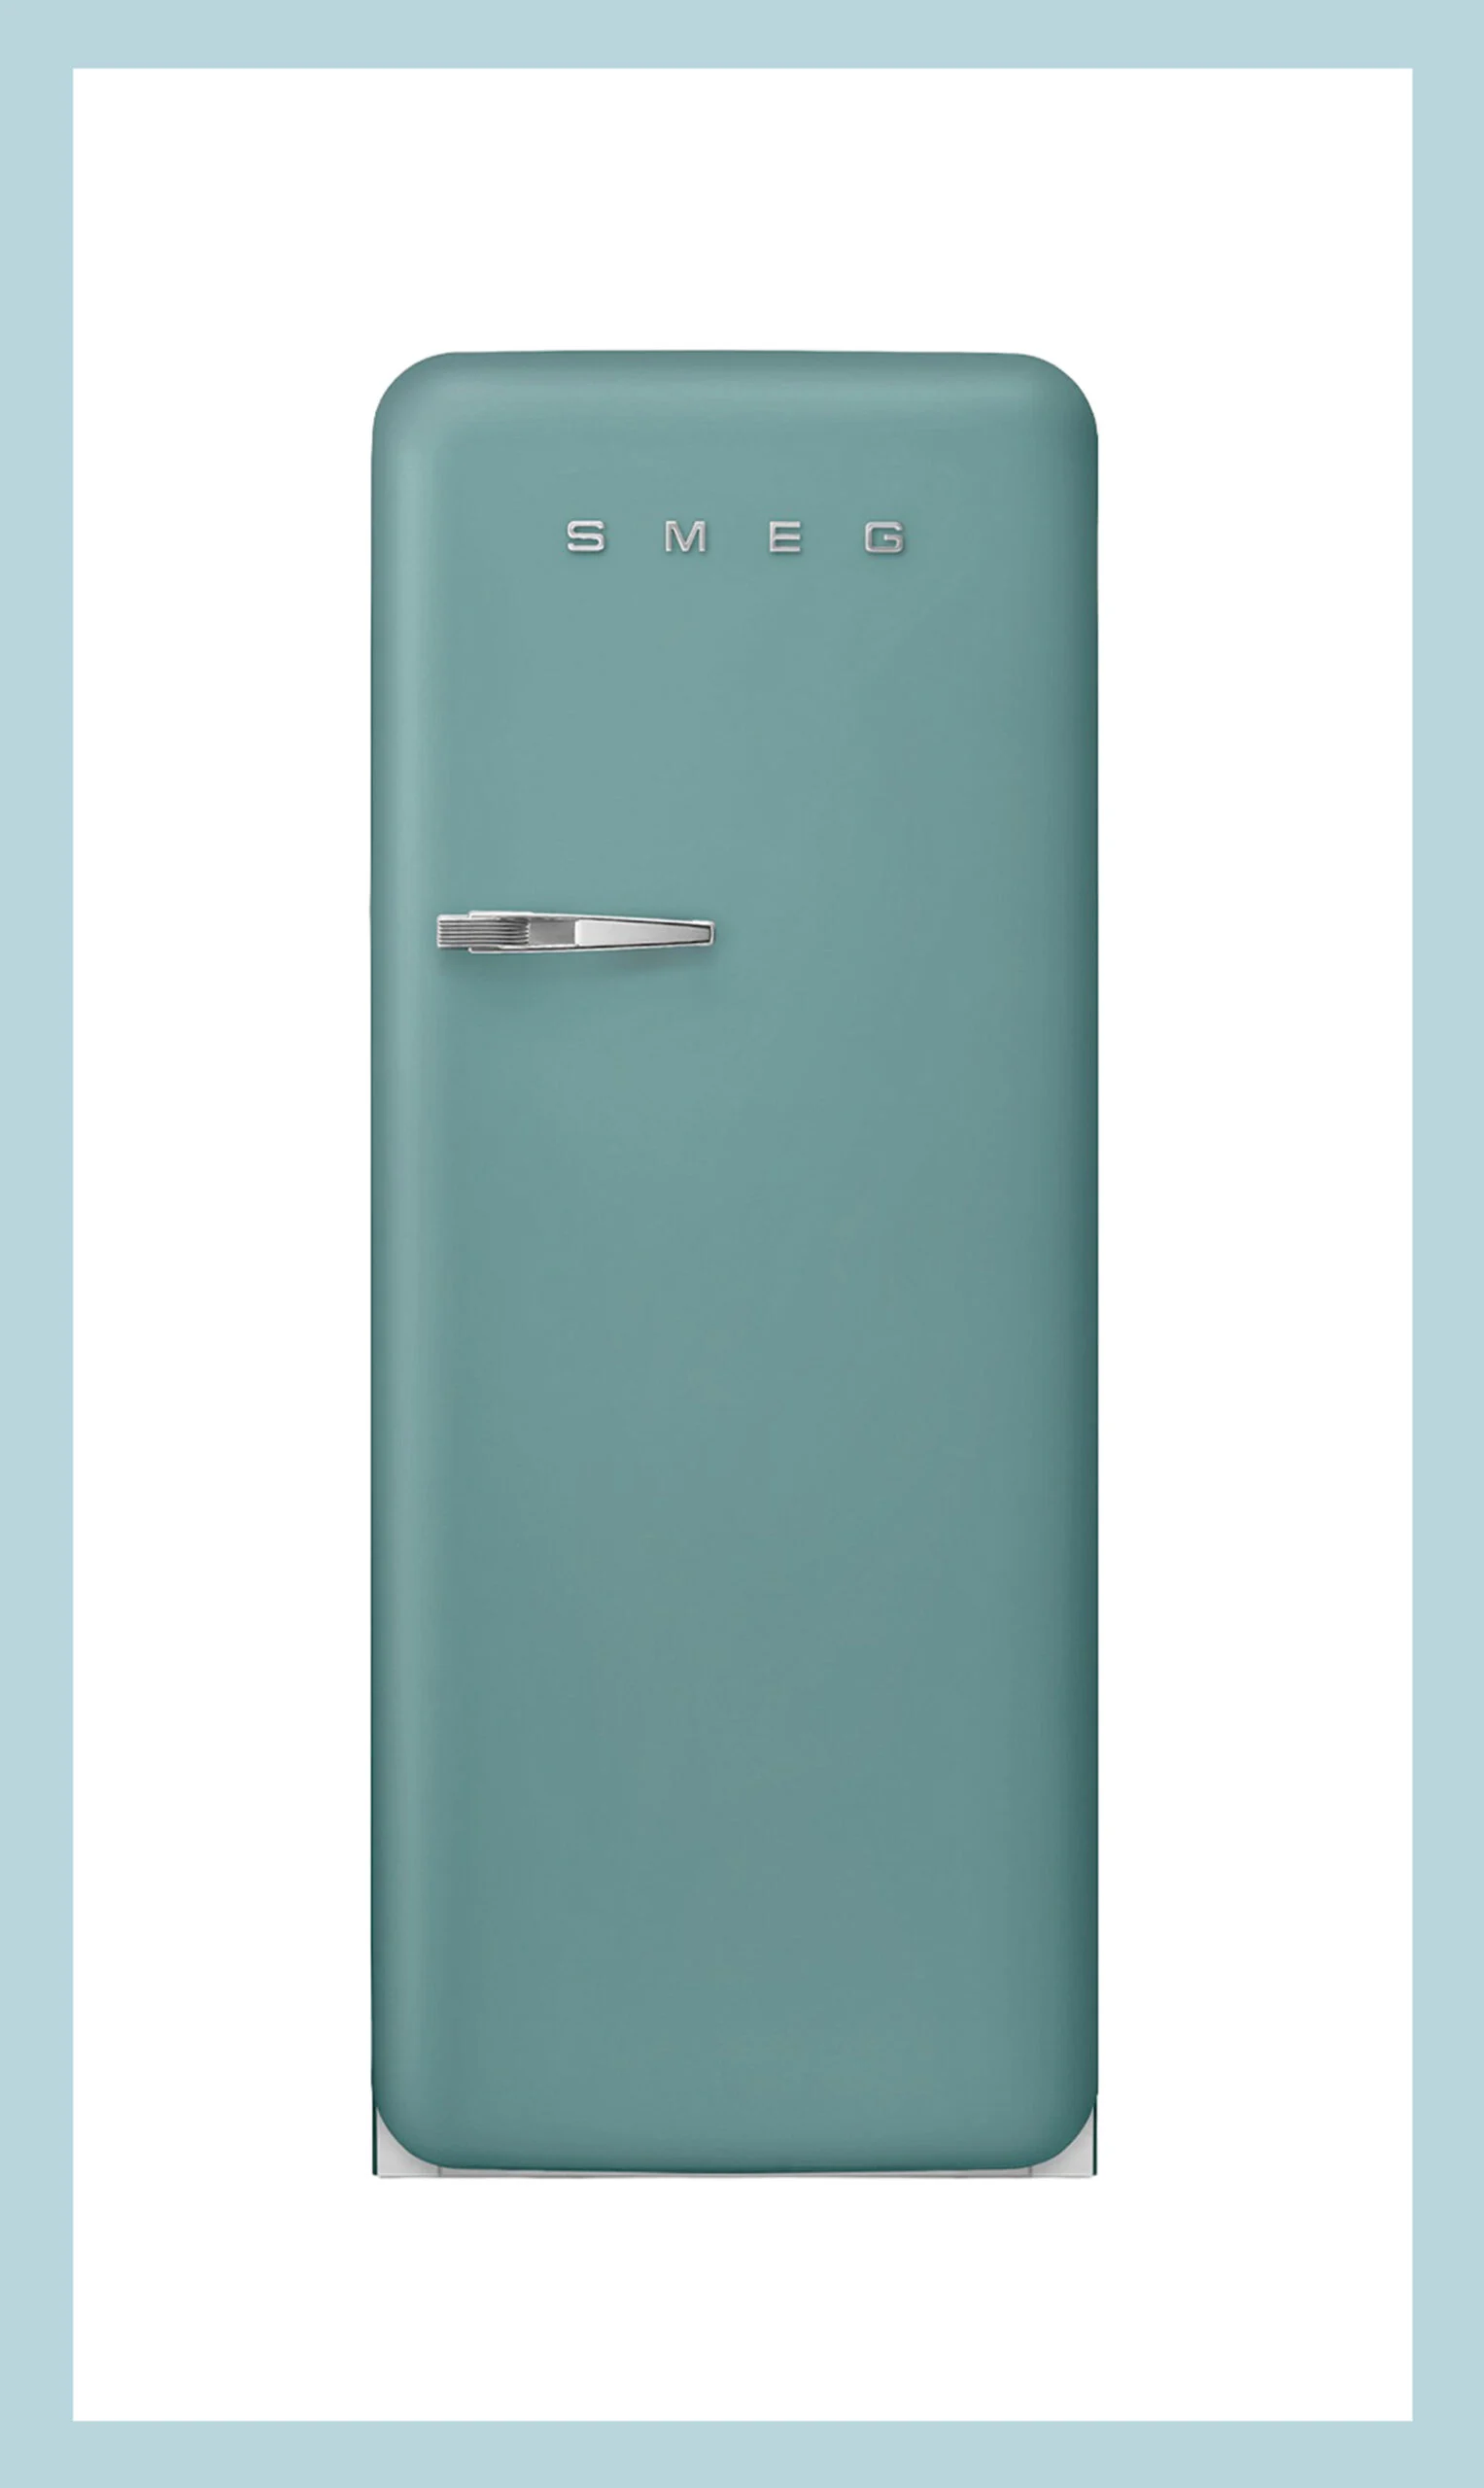

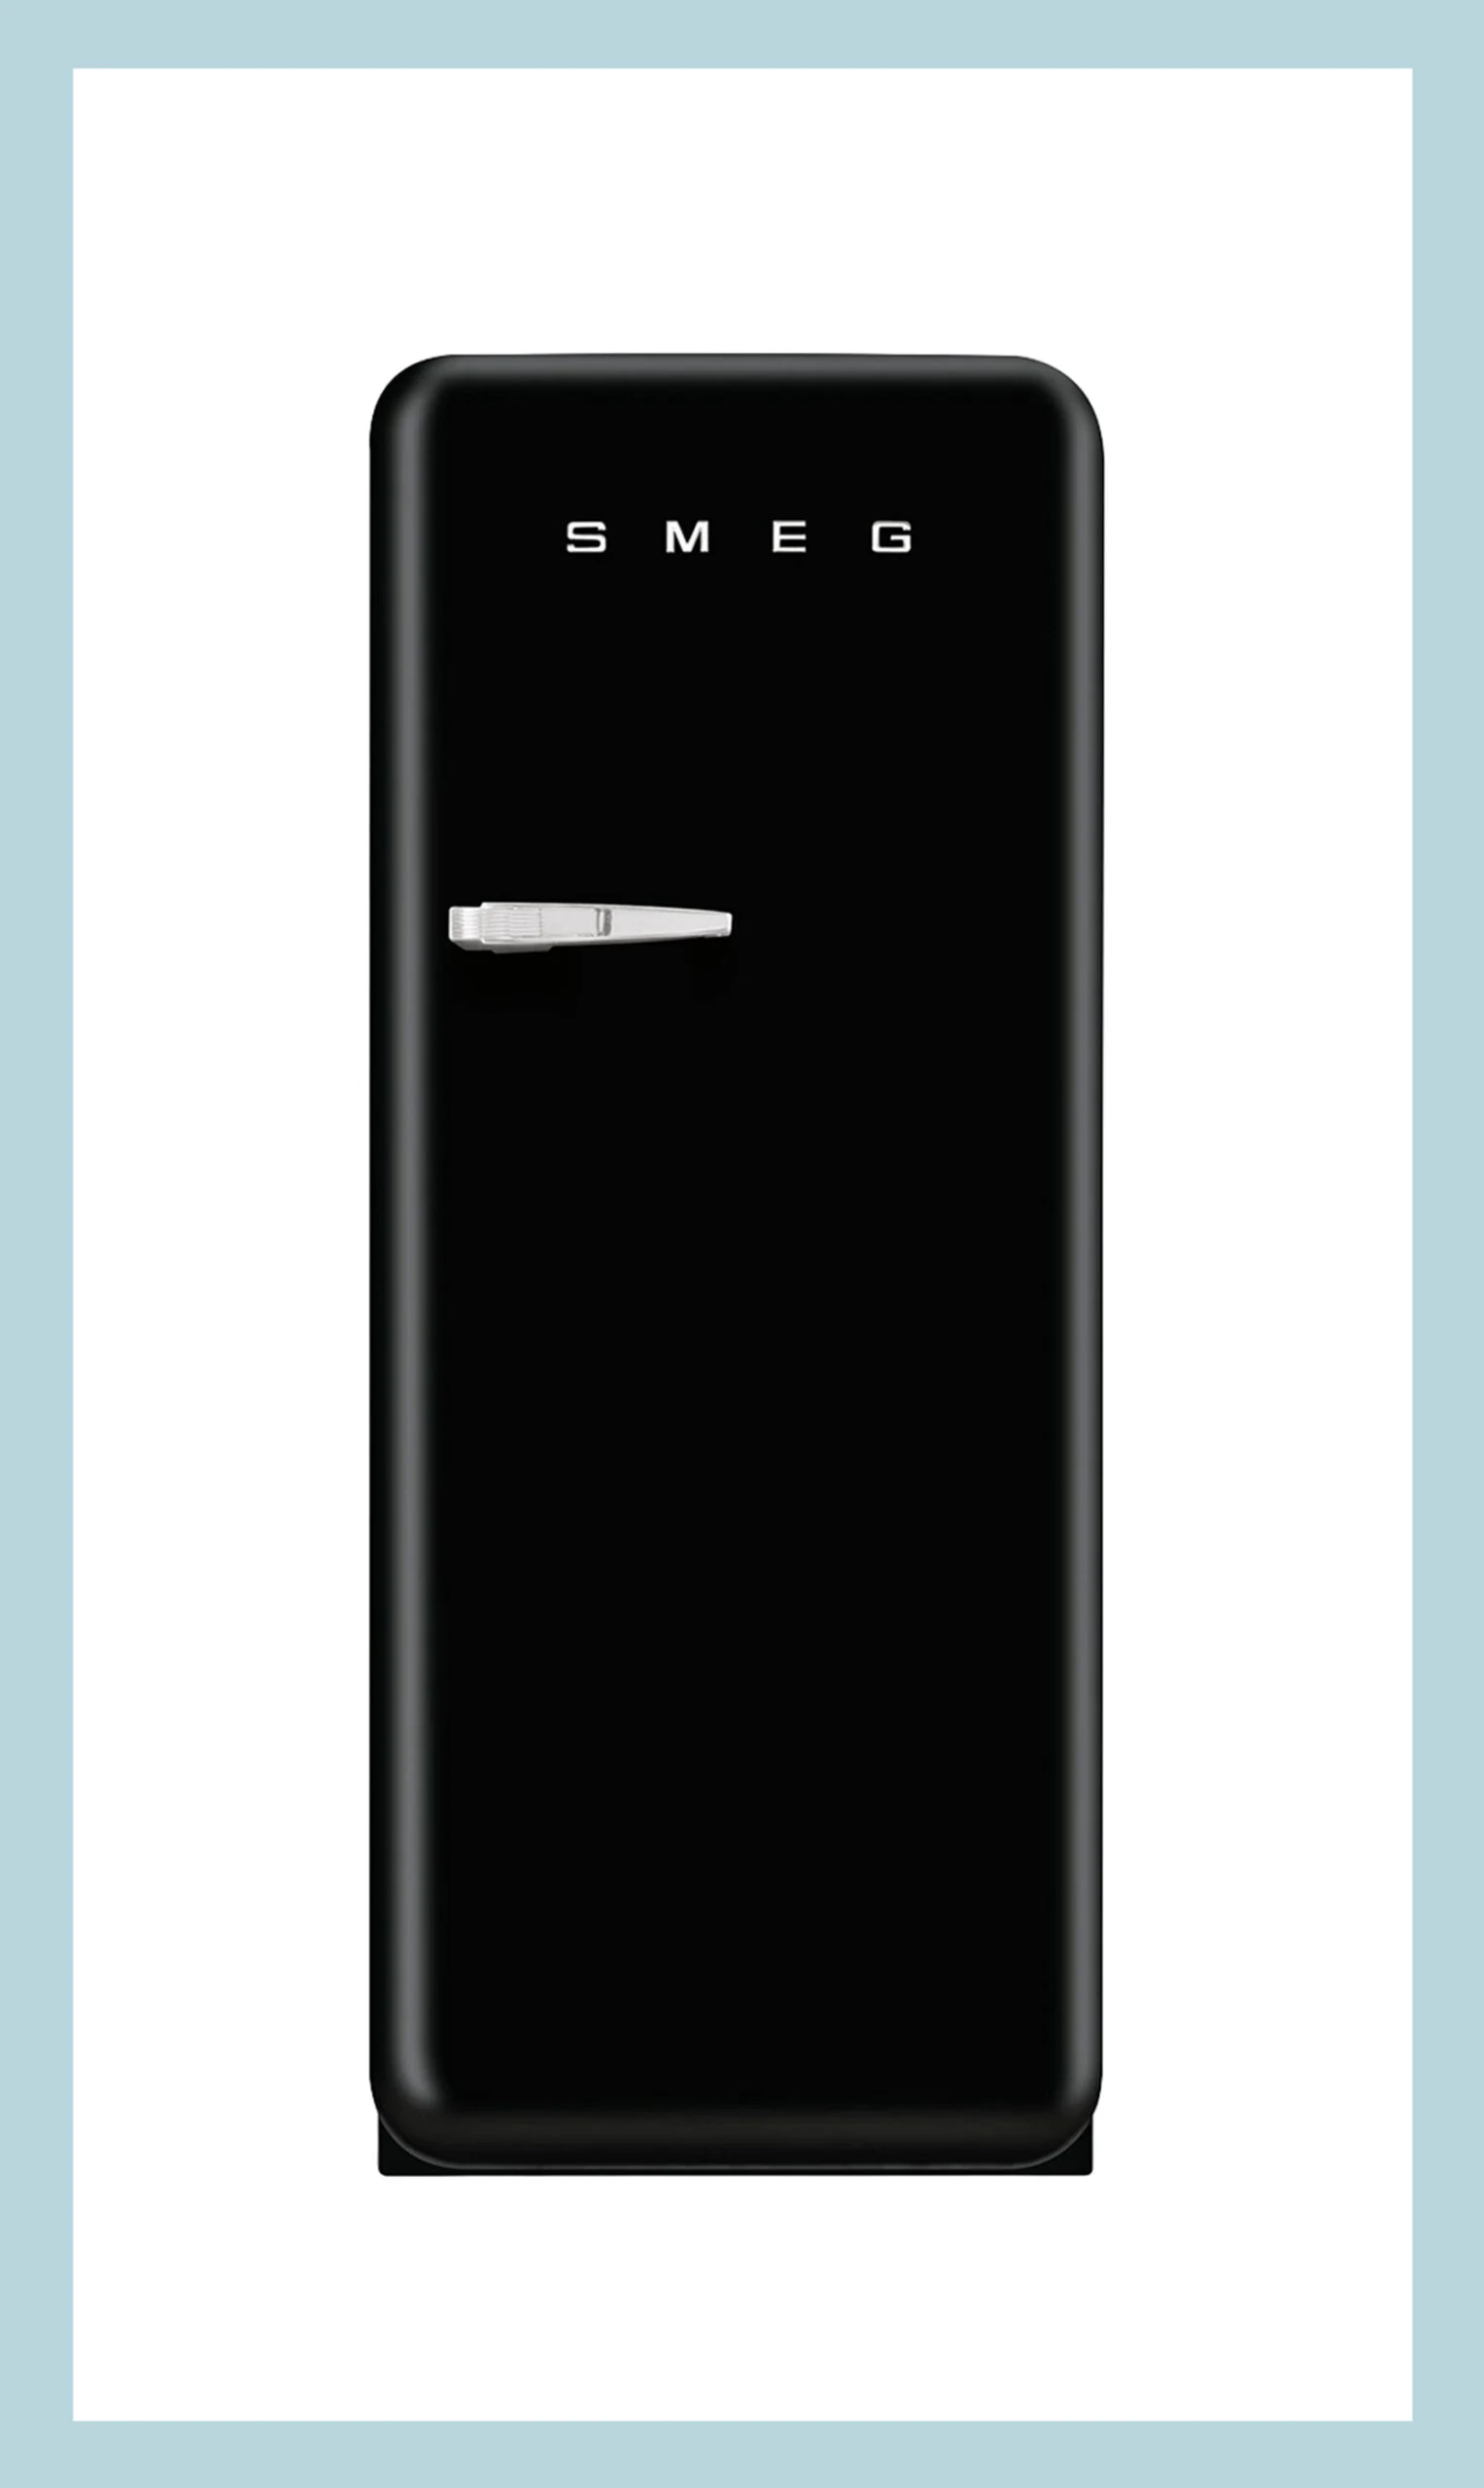
As we all know, doing panel-ready anything is very expensive, and since we are doing our own cabinets, we don’t really have that option anyway (way above my low skill level). For the fridge, I’m going to order a plug-in, slide-in Smeg (with no plumbing for water or ice maker). We are still working on the color palette, but those are the three I’m very serious about ordering. It fits so snuggly under the stairs in such a cute way (see renders at the end).
New Old Flooring
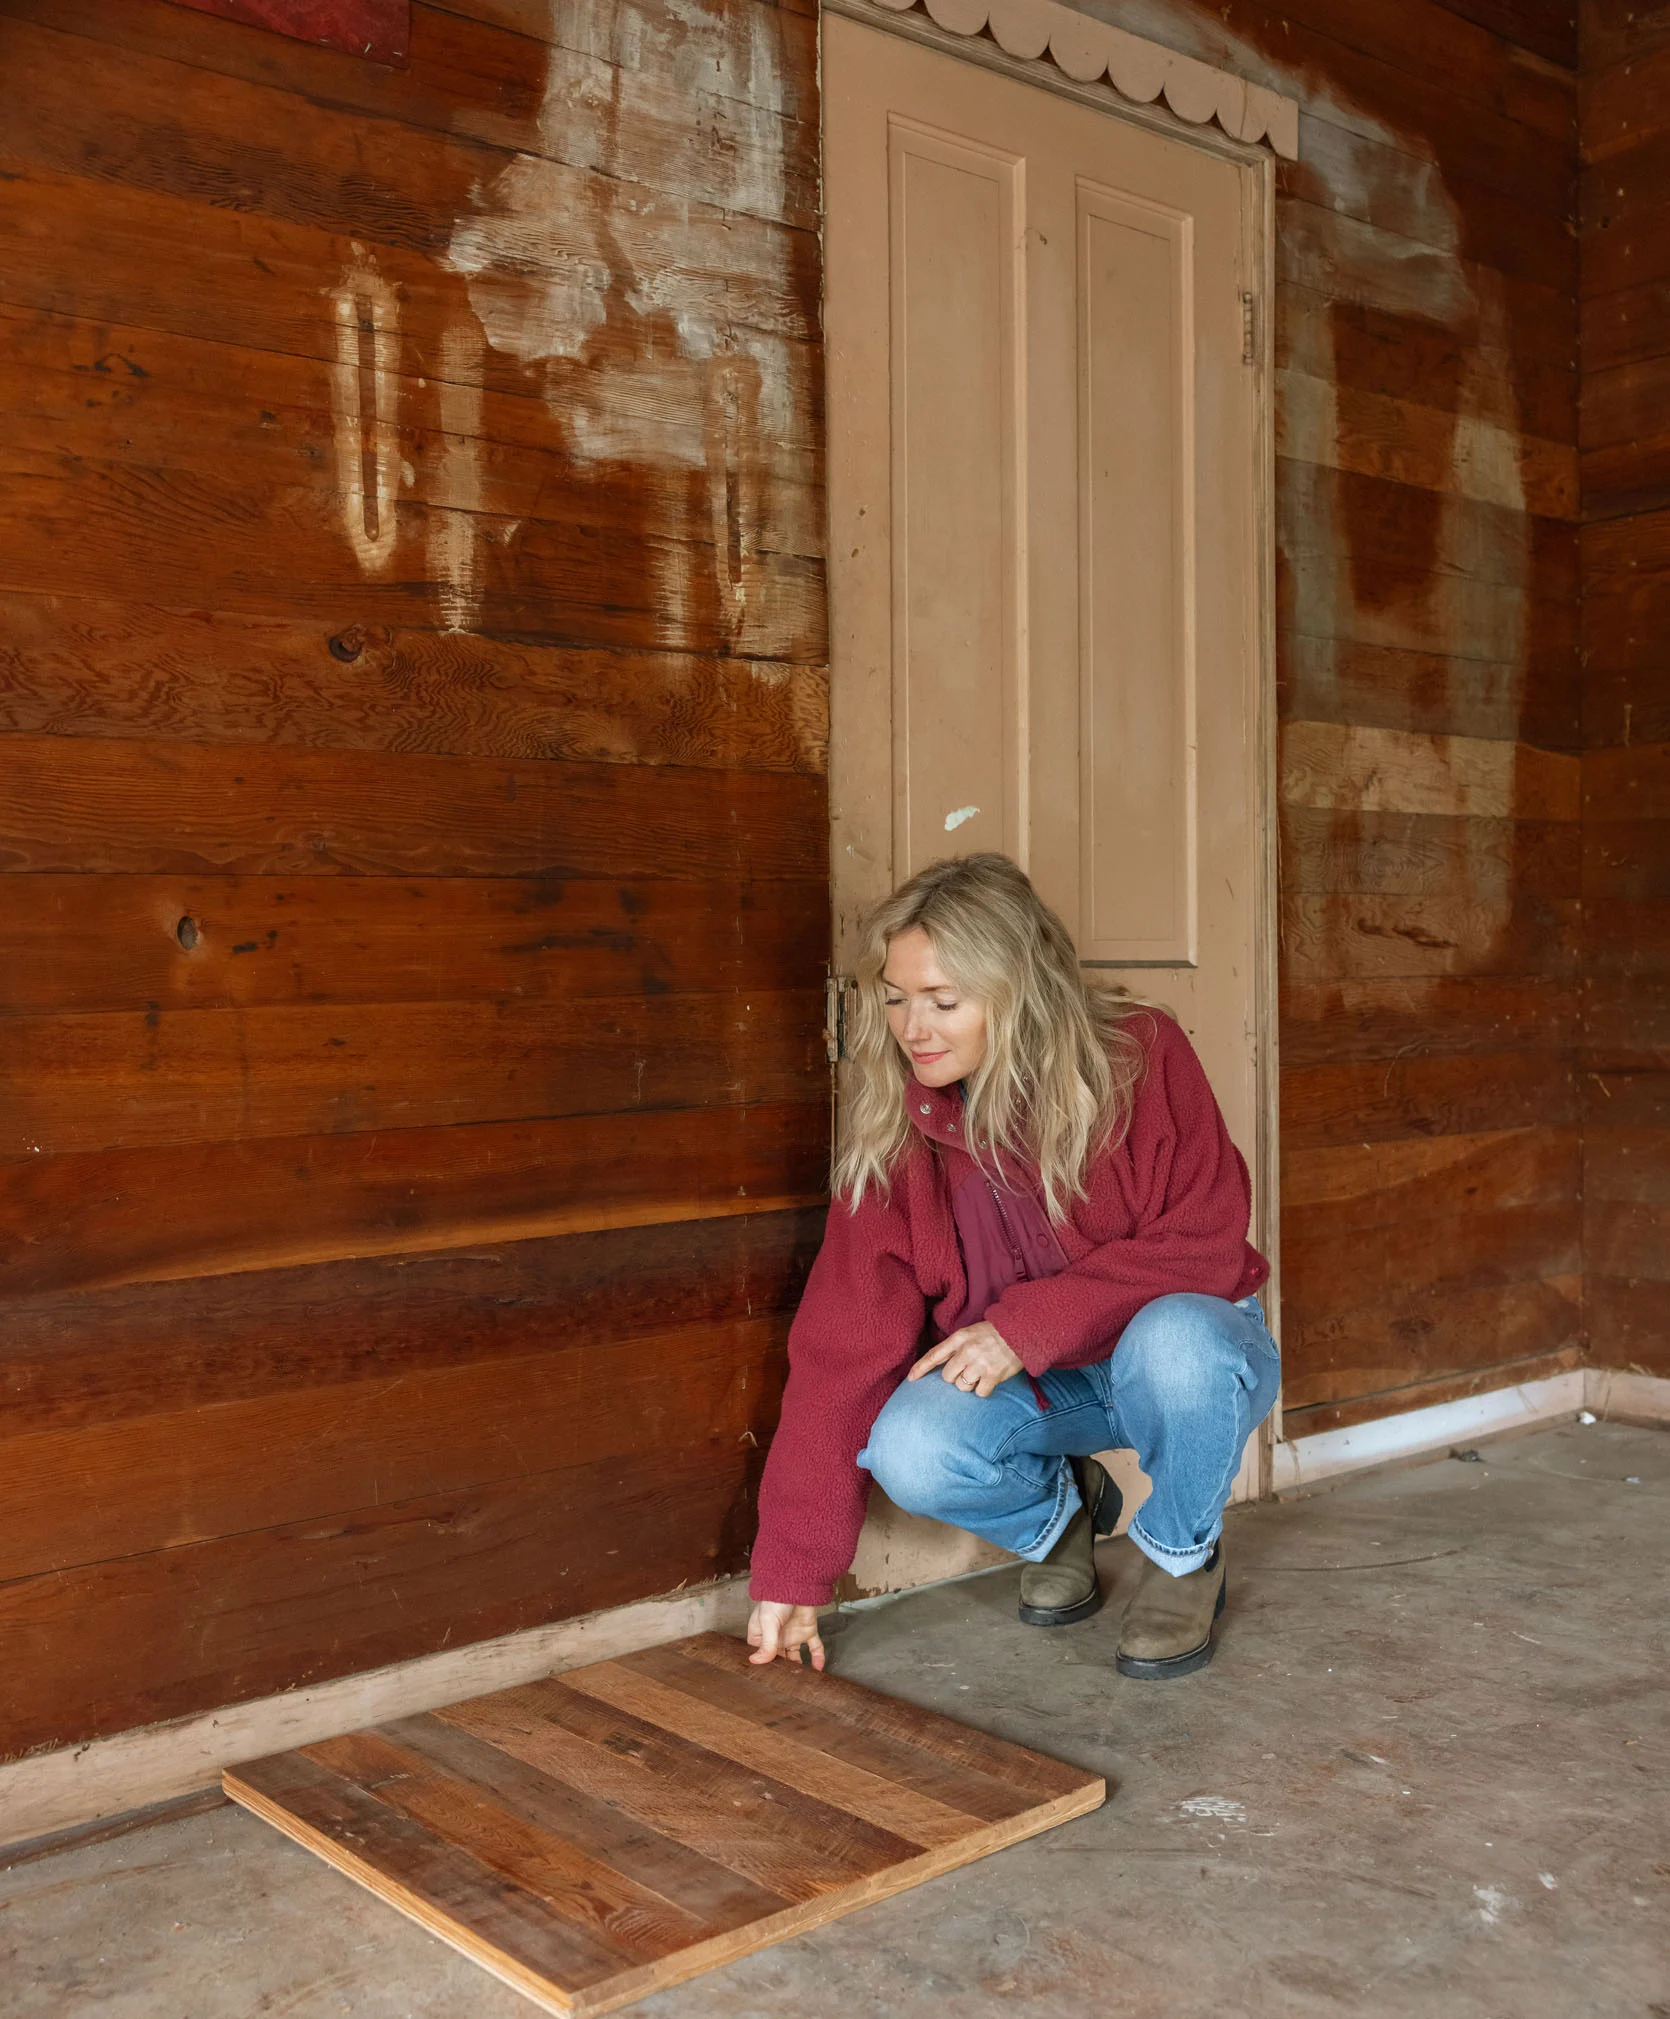
We have found and ordered reclaimed wood flooring that matches the walls to put over the old laminate flooring. Why not just take off the laminate and refinish the original wood flooring underneath? Well, the laminate is proving very difficult to get off and leaving so much black icky-ness (we thought it had asbestos, but we got it tested and it doesn’t). But even if that could be taken off (which I’m sure it could with enough elbow grease), the wood flooring is just sitting on the foundation – no subfloor. So it has gaps between the boards and is very irregular and would feel so cold, drafty, and yes, lots of critters could come in. It makes more sense to us to use the original wood flooring as our subfloor and put the reclaimed wood flooring on top (TBH, this might just be the easier but more expensive option, I’m not sure).
Backup… for those who want inside the whole process. For the last 8 months, I had planned on putting down inexpensive unfinished wood flooring and painting a bold pattern on top. But putting down wood flooring just to paint it didn’t make the most sense (but I do lots of things that don’t make sense – see “outhouse” in bathroom, lol). Knowing that this area would get a lot of traffic made me nervous about the long-term success of the painted floor (our painted landing in our house is super chippy and beat up). To seal the deal, we really want to paint patterns on the floor of two rooms that actually have decent original painted wood flooring (the old prop room, the stairs, and the entire upstairs), and having pattern after pattern on the floor felt like a bad, not-so-fun house.
But everything is a domino effect, and once we decided to NOT paint the floor a color and to do the wood flooring instead, having the entire 6 surfaces (including ceiling) be clad in 100% reclaimed/salvaged wood would potentially, maybe be too dark (and boring?). So… that changed what we had planned to do on the walls.
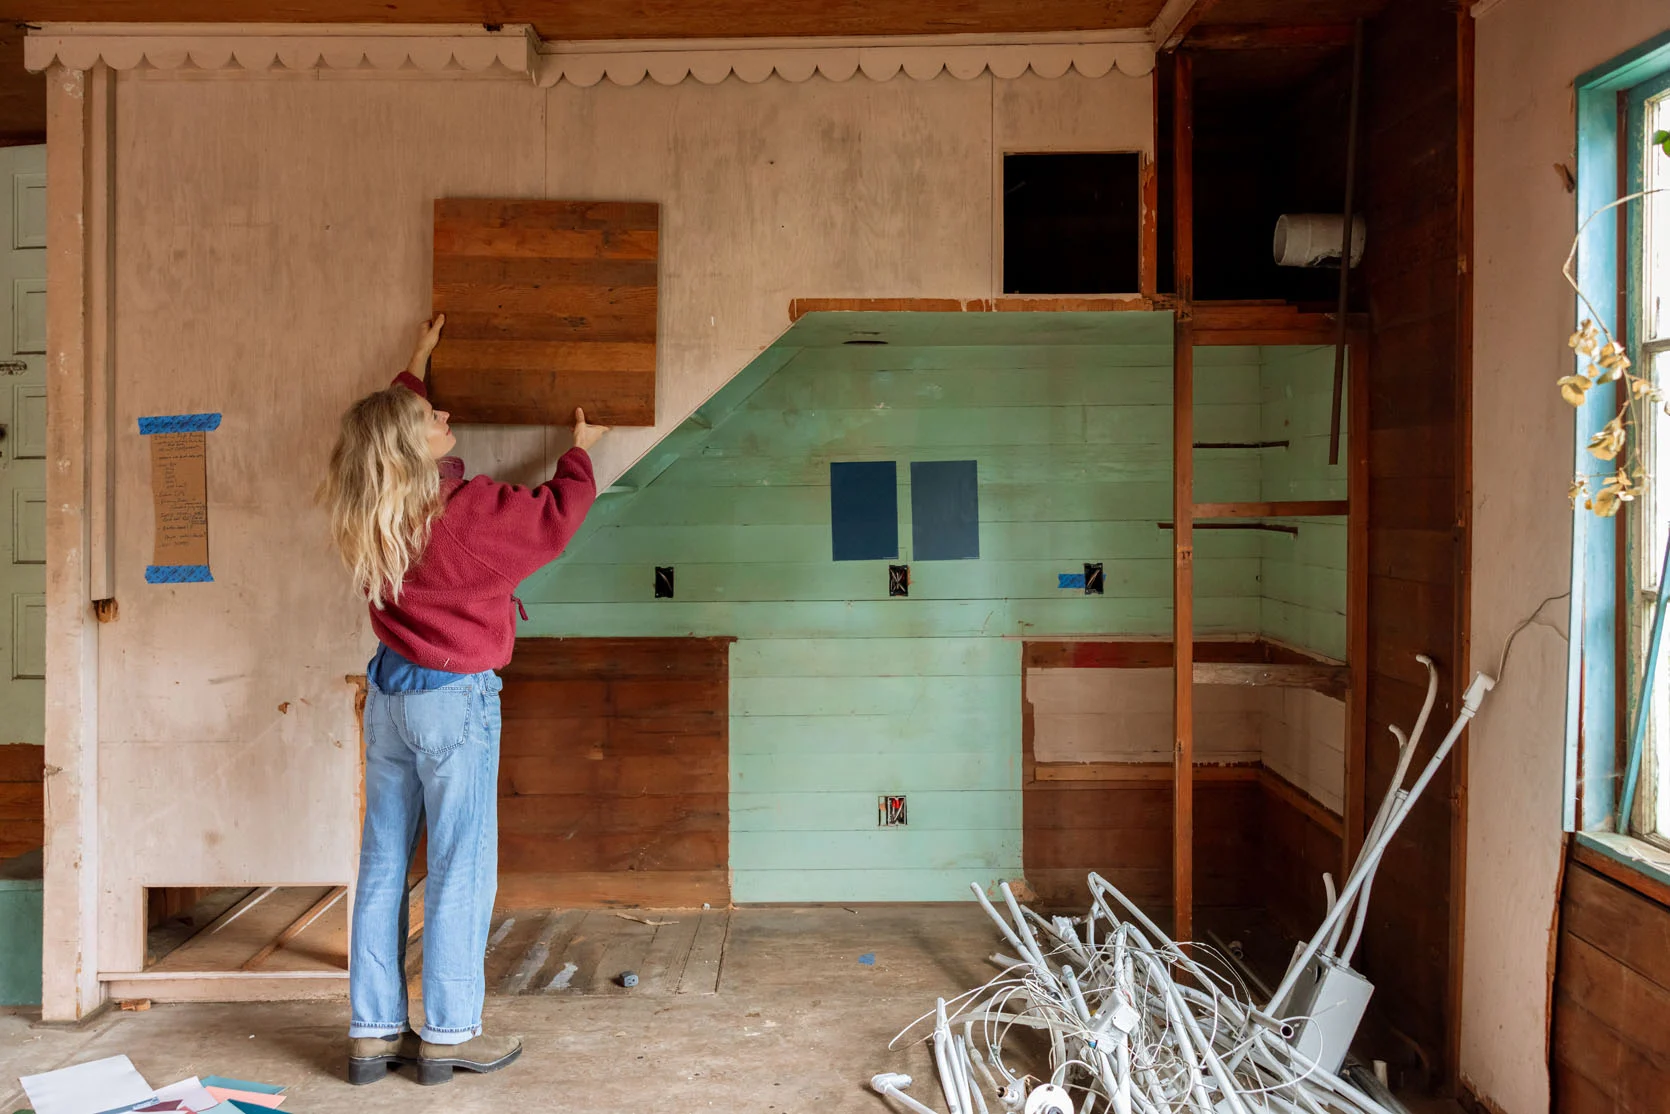
Original Wood Wall Finish
Ok, one of the best things about this cottage is the original fir walls. They need refinishing, sure, and maybe some boards replaced, but we love them. Our plan is to keep them, but to layer beadboard (which is also all over the house) in the fridge nook and take it along the same height line throughout the kitchen. So it’s not covering up too much of the original wood, but it will add a nice color contrast and texture. I wanted it more cottage than cabin, if that makes any sense, and wood on all 6 walls felt like a missed opportunity.
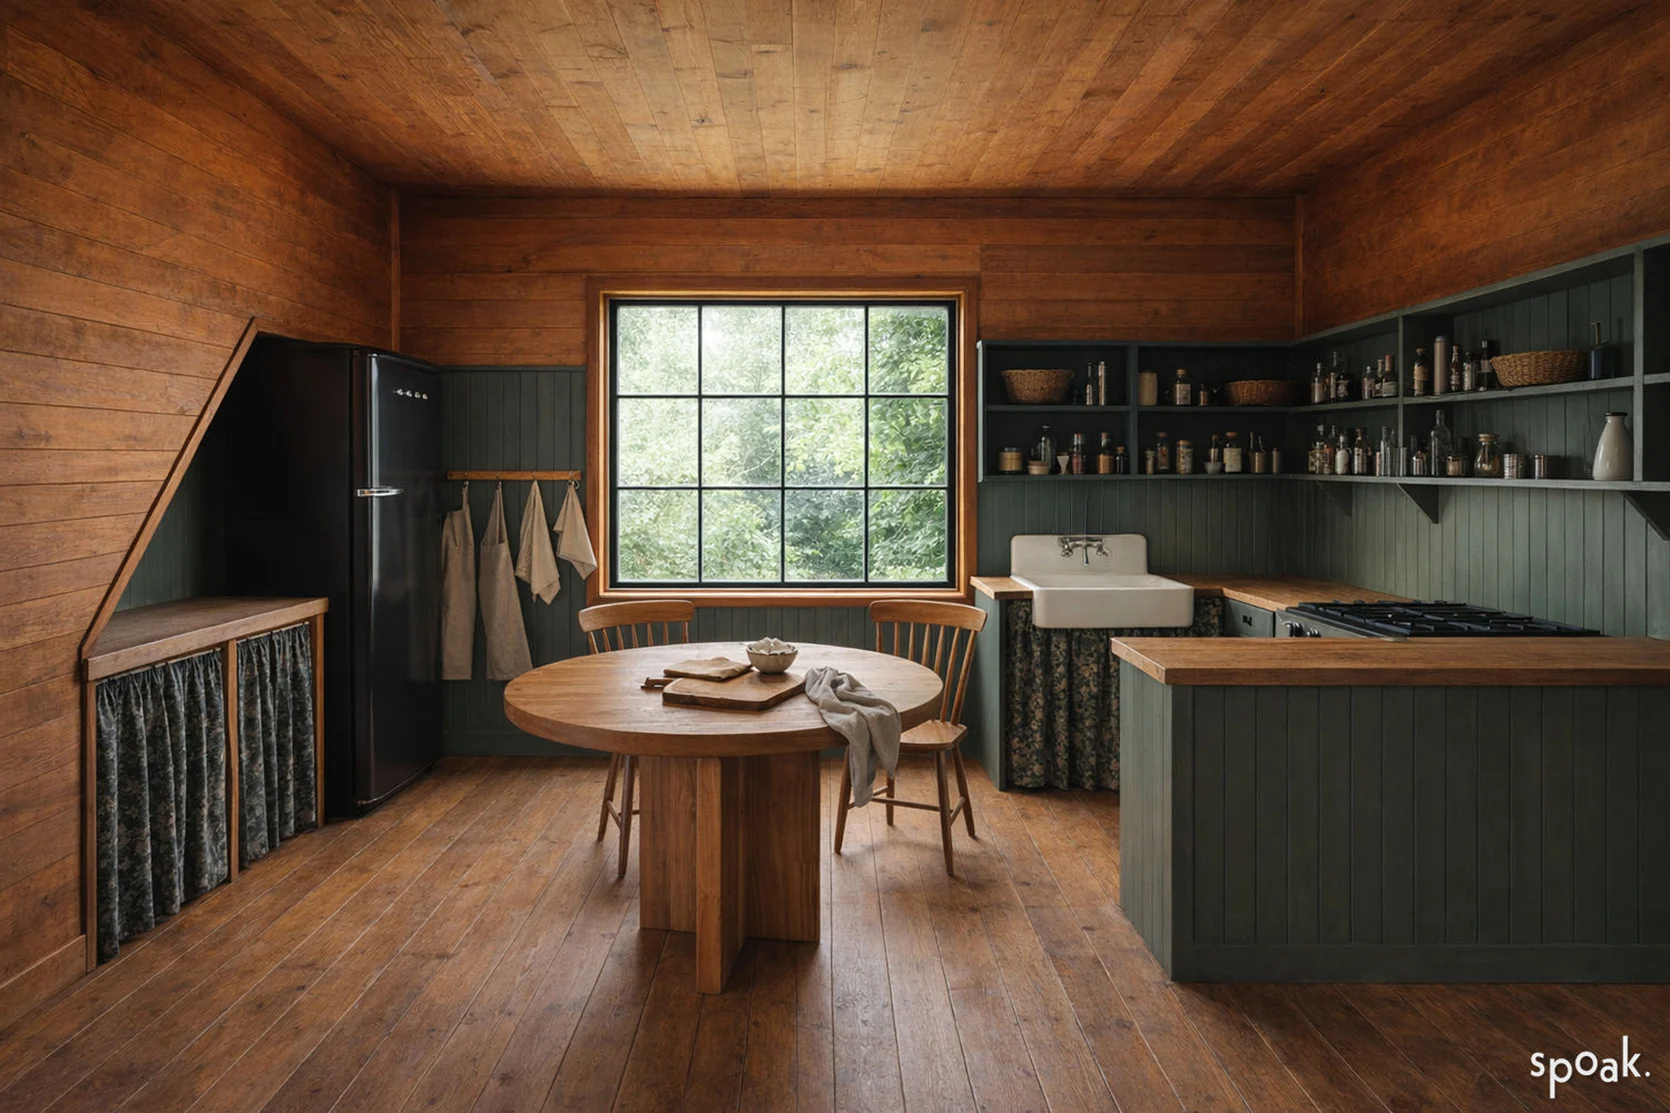
Where We Are Headed!!

HOW FUN IS THAT!!!??? Now, none of these finishes are for sure, but these are the ideas that we are playing with, and we were able to mock them all up in Spoak. I am thinking green, but I’m thinking the upper shelves might be a burgundy (less monochrome). I love the beadboard continuing across and connecting the two spaces to turn it into one room, and then a round table in the middle acting as an additional “kitchen table”. We might have room for an overhang on the little peninsula, but also maybe not. We tweaked the overhead layout to give some space to the sink on the left side, but the size of the sink (and range) is still TBD, so all of that is up in the air. We still need a light fixture, maybe window treatments, etc, but Spoak makes it so incredibly easy to visualize (it’s their Magic Render tool that does most of the heavy lifting – no design school required).
The Fridge Side
We are going to clad over the pink plywood with the reclaimed wood and just have our accent wall be inside the nook (and then continue the beadboard to the other side of the kitchen). How fun is this?
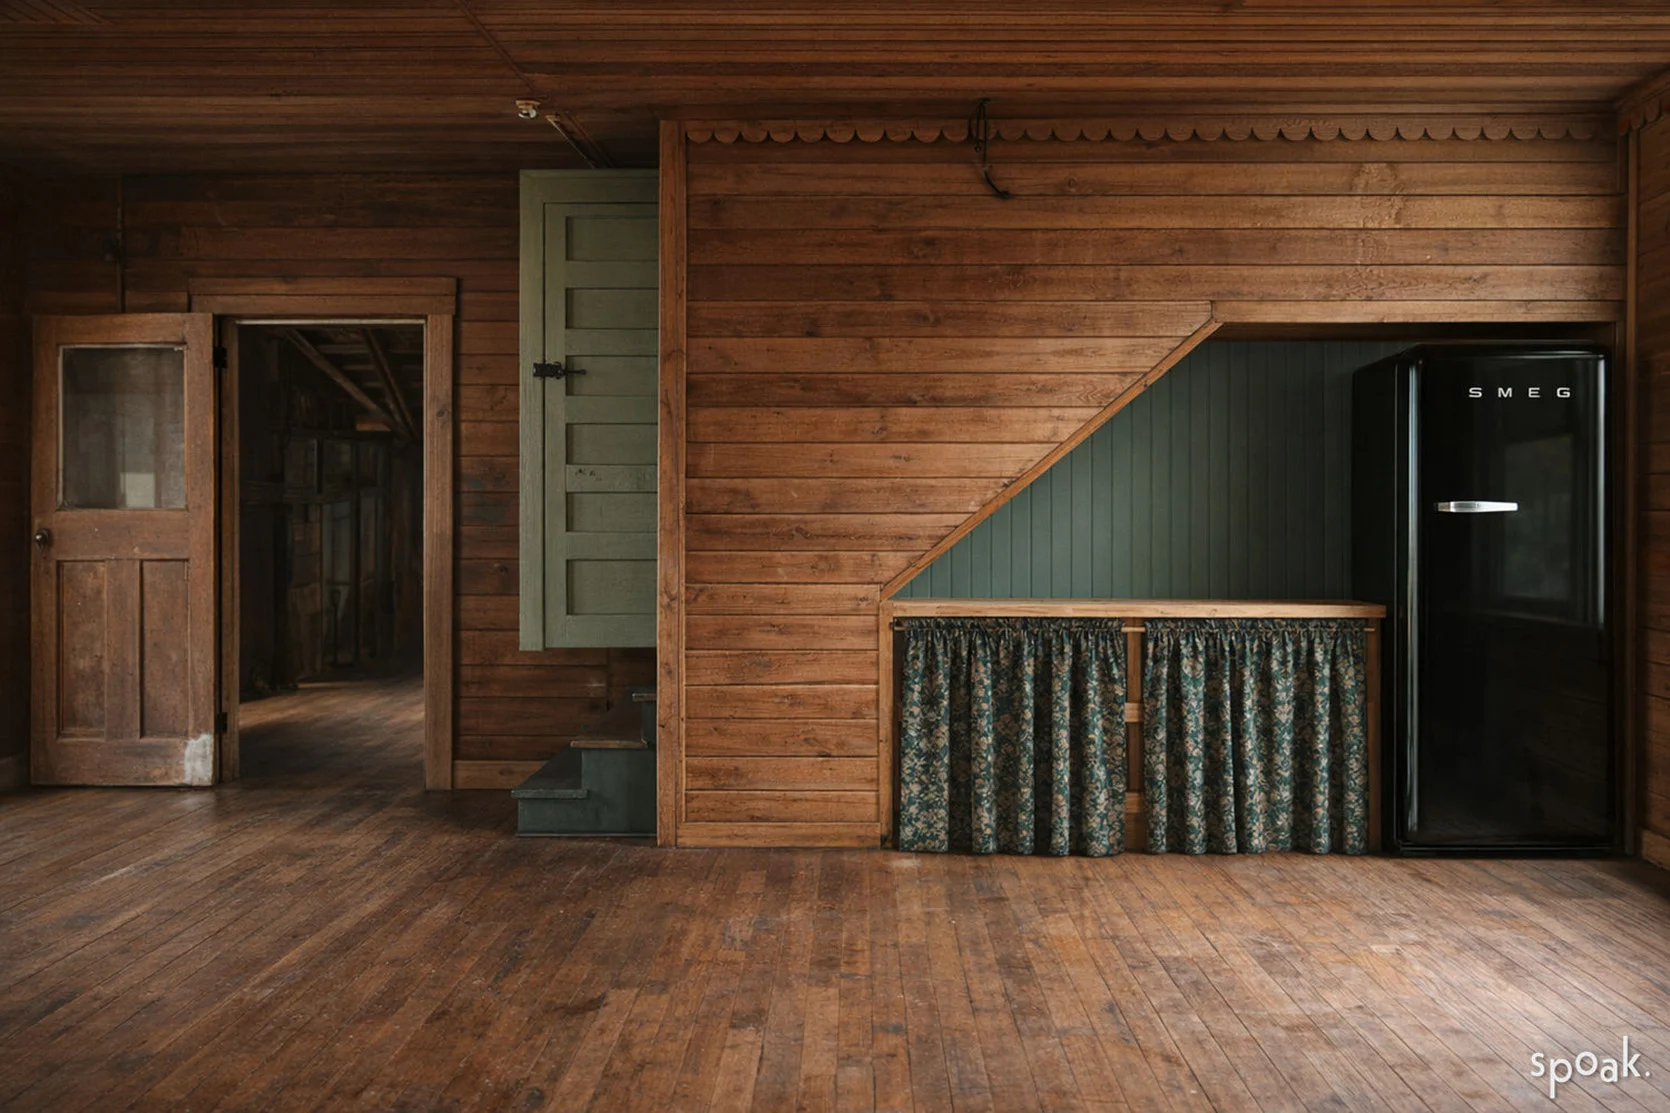
It’s so stinking cute. It’s not even a massive transformation, but these Magic Renders can really make me see it. I’m not sure if I want bright vintage florals for the skirt, or dark and moodier like this. This area will likely be where the coffee maker/bar is, with shelving and underneath for the microwave, etc. We also wanted to see it with the blue Smeg fridge:
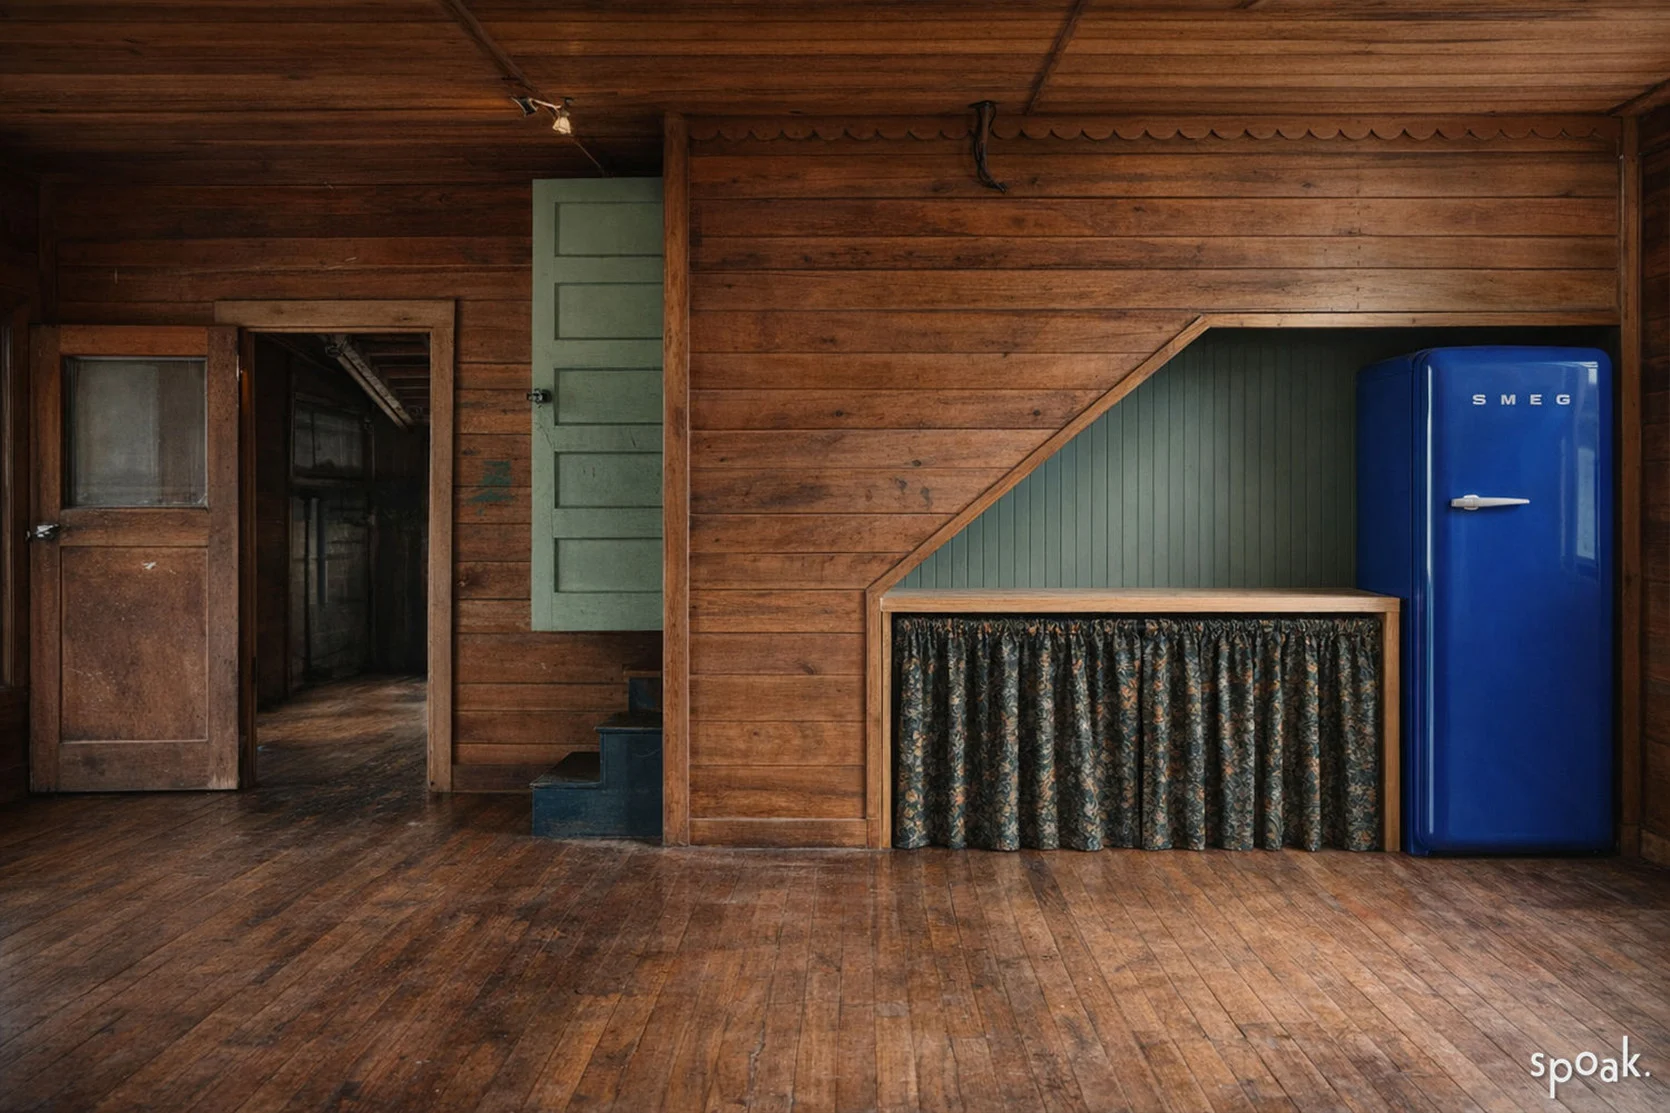
I’m not sure this cobalt is right for the space, but it sure is cute. Spoak makes it so easy to swap out different colors to imagine it in your space before taking the plunge. But all of these elements seem pretty easy to execute, honestly. Here are all my debates:
- Countertops – stone, wood, or some sort of DIY tiled situation? Stone would be the most expensive, but I’d go for it. I found something dark that really sang in here. Wood would be easy, but we sure have a lot of wood. And the only reason I’m considering tile is because there is no tile in here right now, and I LOVE tile. I know that the world gets super angry at tiled countertops, but a gloss and texture/pattern could be fun in here. It’s lowest on my list, though.
- Do I keep it more monochromatic like this, or add in another color (like a burgundy) to add interest (especially on the shelving wall above the range)?
- How many skirted countertops are too many? Should I do one run of cabinets more readymade (IKEA or Lowe’s?) and then only have one run of the skirted? That changes a lot if we do that. Less color control, more expensive, etc. But I do fear that this many skirted cabinets might just be too try-hard and messy.
- I had planned on more brackets with shelving, but I actually really like how Gretch rendered out the below.
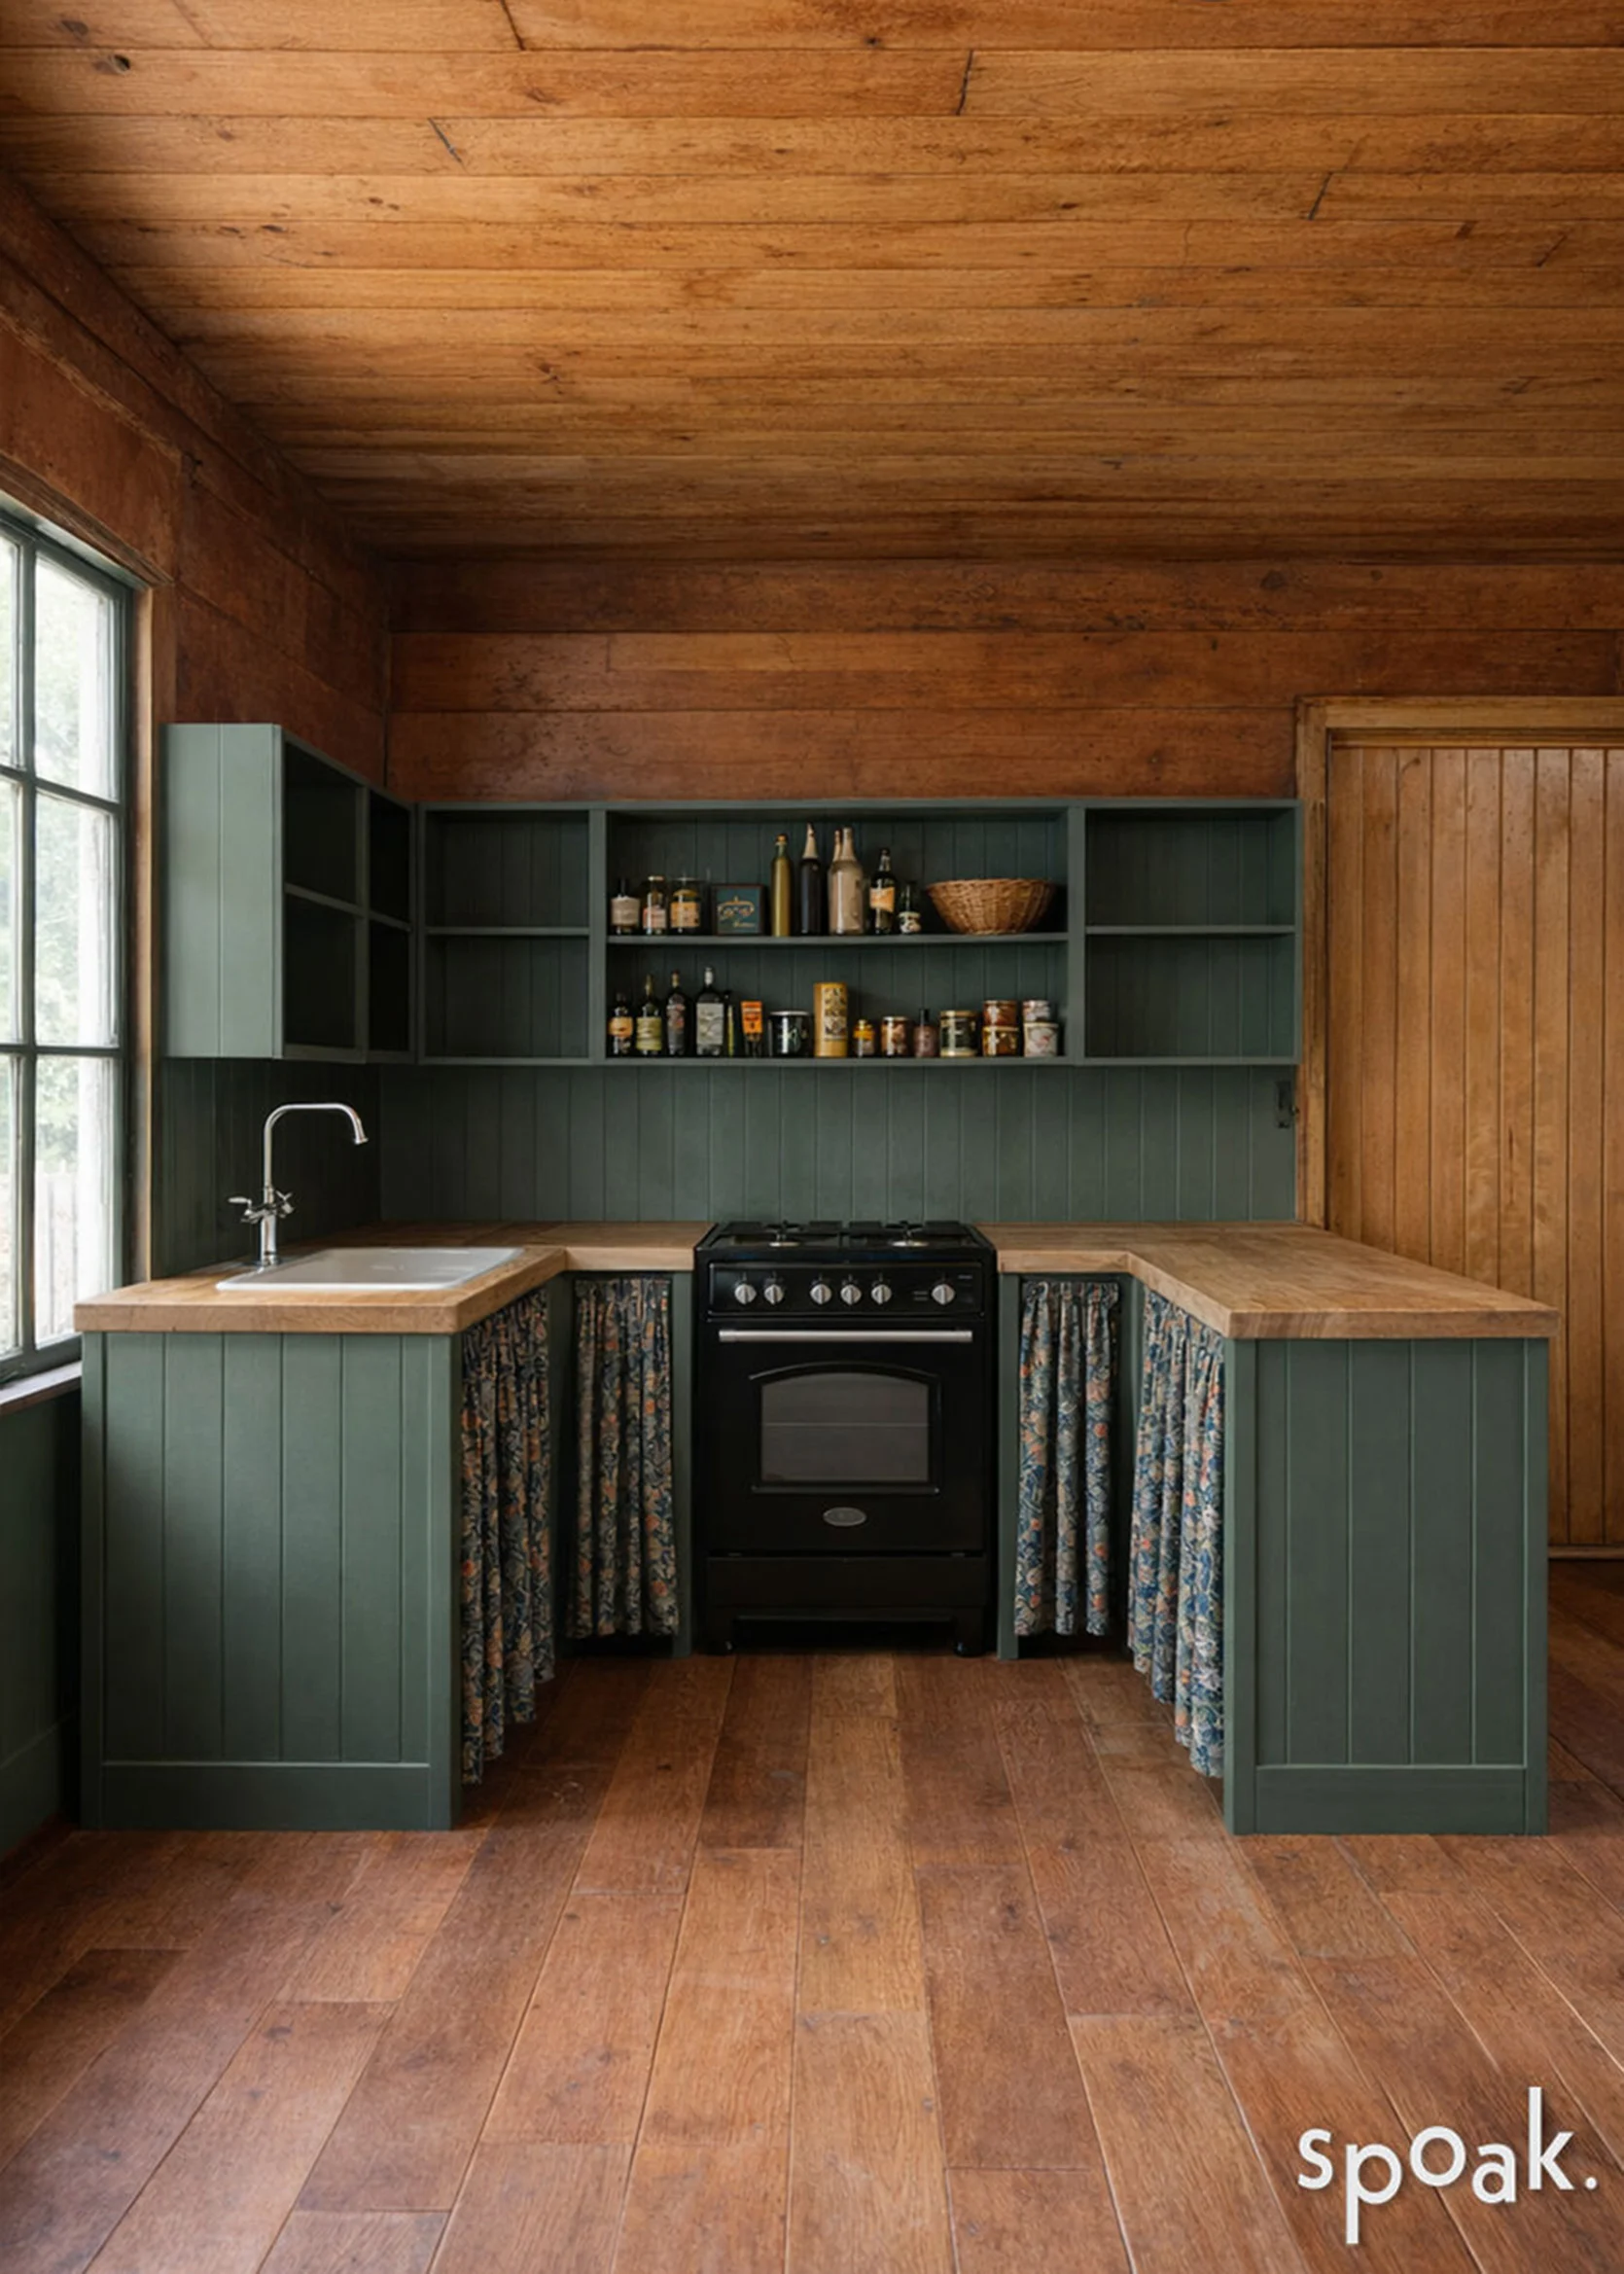
We added the beadboard on the front and sides of the peninsula, which helped break up all the fabric and should still really be DIY-able. Maybe we’ll do the peninsula more shallow to allow an overhang for a couple of stools, or maybe not.
What do you think? These Spoak renders are helping the vision so much and getting us all so excited. As of now, I’ve engaged one carpenter to help teach us how to do the cabinets, but if anyone knows anyone in Portland who wants to do this on camera with us, please reach out. We need someone with more skills than us (and ideally all the tools), but not a professional cabinet maker necessarily. I’ve ordered all the wall and flooring wood (from Good Wood, a local, reclaimed wood company in Portland that sells all over the states and has the most beautiful showroom, BTW). And we have lots of moving parts.
Here’s what can happen next:
- Door and window plan – what we are able to salvage and repair, and what we are replacing. With lots of fun quotes on how much it costs to restore old windows.
- Full electrical plan – It’s minimal TBH, but still might be interesting?
- Do you even want to know the final layout of the bathroom? Even I’m sick of debating about this dumb urinal, but happy to tell you where we landed, or if you are the type that likes to wait to find out the sex of a baby til the birth day, we could just wait til the reveal (in hopefully, August). It’s a ….????????
*Photos by Kaitlin Green

Kitchen looks so cute.
Ugh Yesteryear. Yes, I read it. Finish it and let’s discuss.
Strongly recommend the Yesteryear audiobook, the narrator is amazing. If you don’t know anything about the book, don’t even read the blurb. It gives the trick away in the first sentence. Loved it!
I’ve been going back and forth between audio and reading. I MUST finish this weekend. I do have a big beef with it, but waiting to see if it works itself out.
Please, pretty please keep every scallop! So precious!!! My house has scallops above the kitchen sink and it is my most favorite part of the house. It just oozes charm and transports you to a simpler, sweet place. Cannot wait for this project!! Less is certainly more! Thanks for sharing!!
its so sweet. we kept them all. i’m not sure they are in fantastic condition but we’ll replicate if not. crazy how trendy scallops are right now but they are original!
Super cute! Maybe just because I am in NYC, but I thought you were going to fit the entire kitchen under the stairs 🙂
I’d consider loosing the shelves above the sink. It would make it less tight feeling when your standing at the sink & more symmetrical if the left and right sides of the larger window both had bead board running up to the same height. I also think you don’t need the peninsula… might just open up the space more, especially for group meetings. Right now it looks like only one person could be in that u-shaped space and those corners don’t offer a lot of storage. It seems like an open space that fit a table with 4 chairs could be more useful.
Or consider putting a Finnish dish cabinet (not sure of their official name) over the sink…
and I absolutely agree about the peninsula, based on every beach house I’ve ever stayed in. It makes it a one person kitchen. You wouldn’t actually lose that much counter/storage space because you wouldn’t render the corners unusable.
Yah, the shelving is TBD and i’m looking for hanging cabinets, hanging plate shelves, both vintage and on etsy, etc. this shelving was just an easy thing to mockup in the Spoak program to give you an idea on the layout. Oh and no I was going to put the whole bathroom under the stairs, not the kitchen (I think, lord knows i’ve been all over the place) 🙂 And we tried the layout without the peninsula and it just wasn’t as sweet. It was fine and worked (but even tinier), but you saw the range a lot more, and it felt way less inviting and warm. I think that little kitchen nook is what makes it so sweet so when we put it back in we were like, ‘oh yes thats better’. But everything is still up in the air and I could change my mind back 🙂
Is a oven/range strictly necessary? What are you cooking in there that a nice microwave/oven couldn’t handle (that also isn’t covered by your 2 other kitchens?)
Plan to have one if you move in later, but if it’s an office/kid kitchen “break room” why not save space, skip a range you’re not into (a plug in hot plate or crock pot could work if you were hosting in there), and hide/build in a nice microwave oven that can heat up any lunch or pizza and won’t require anything more than a plug under the countertop?
Then you have room for a dishwasher! Which, as a person who’s had to clean up a office kitchen behind others, is very nice to have!
For that corner space of the peninsula that is hard to access from within the “U”, consider accessing it from the side facing out into the room, by installing a “jib” door. A hidden, flush-mounted door. It would really disappear with the bead-board. Have this in our awesome vintage mid-century house and it is a great design! Storage solution for less frequently used items. Or it could even be open shelves.
We have a dish rack cabinet over our sink. Love it!
I like the idea of loosing the shelves above he sink! You could then continue the rail to hang things to connect to the left
I say this with so much love: it is cracking me up that when you describe this project as not having an ice maker, a 48″ range, or a panel-ready fridge, you are describing … a normal house. 🙂 I realize you’re intentionally differentiating this from a luxury or high-end renovation. And I’m excited that the internet will have a beautiful example of a kitchen created under very common constraints, with all the creativity and beauty you bring to it!
Haha I thought the same thing!
Yes she is describing my actual kitchen which I have used since 2012 while raising 3 kids. We DO have a dishwasher but we have a basic fridge and a basic slide in range. Ive never once felt like we were missing something. My clients have the bells and whistles kitchens but they dont seem any happier or any less stressed. They DO have to pay much heftier repair bills when their appliances malfunction (I am always giving out my repair guy’s number) while my 2003 fridge keeps chugging along…
I totally agree 🙂 I’m just trying to temper expectations early on because the internet has them for people like me 🙂 at least that’s the perception I feel. I think the kitchen, specifically is where designers are expected to go all out you know? And while my kitchen is super hard working (and i love it so very much), I think that’s what i’m dancing around – that you don’t neeeeeeeed a lot of that stuff, they are fantastic ‘good to haves’ that i’m so grateful for, so designing with the ‘haves to have’ is just a different goal that is equally good/fun and can allow for more creativity (not to mention save so much on budget).
HAHA. no i’m just tempering expectations on me as a designer (which I feel often) – just making sure people know that this project will not have a lot of things that most kitchen designers in 2026 would put in. There are ‘have to haves’ and ‘good to haves’ and this is more the ‘have to haves’ which is honestly all you need 🙂 its like the kids bed in the corner thing covering up a window – nothing is wrong with it and its what most people do, but its not what typical internet designers would do so I guess i feel the need to set expectations 🙂
That makes a lot of sense! You have a super wide range in your audience — people who can implement the high-end designer stuff, and people who don’t have that lifestyle. It makes sense that you’d be extra clear since aaaalllllll those folks are reading what you put on the internet. I’m excited to see what you do with this space!
Adorable! I love the layout in the final picture. Interesting that you were comparing cabin v. cottage, because the darker color scheme you have shown reads more cabin to me. I picture cottage to be lighter. But so cute nonetheless!
yah the original wood that we are working with is darker and this room specifically will never been light and cottagy, so trying to bring it in (and not lean even more into ‘cabin’).
I couldn’t see it before, but these Spoak renderings are so helpful and look great! I was already invested, but now that I can see the vision, I’m more excited. I actually like the monochrome coloring of the upper/lower cabinets. And given the U-shape of the kitchen, I vote for all curtain cabinets since visually you won’t see them all at once unless you’re facing the U. You could even leave the cabinets to the left and right of the stove open, but I think the curtains and open shelving capture the sweetness of this “restoration” without being overwrought. Can’t wait to see the next steps you outlined!
thank you! and I agree re the skirts/cabinets. Gretch finished that rendering of the U with the cabinets after I wrote about my cabinet skirt hesitation but once I saw it I had the exact same thought – its going to be fine 😉
I also think skirts on cabinets provide the easiest access in tight spaces, because you can slide them to the side. I recently designed a very tight butlers pantry with skirts for this reason – there wasn’t room to stand and also have a drawer pull out or a door swing.
This is such a good point!! The hardest part about working in a tight kitchen is playing Tetris with your body and the cabinet doors etc.
I also agree with the commenters further up who suggest a Finnish dish rack over the sink or else getting rid of the lowest shelf over the sink (or at least keeping them even shallower than normal!). I’m sure you lived in NYC apartments where you bonked your forehead into the cabinets while washing dishes; truly the worst feeling! I do think the dish rack would be so smart, since with no dishwasher you will nearly always have some dishes to wash and dry, and that way you won’t have to have a dish drainer on the counter.
I know you’ve written about your concerns for the impact of AI on creative fields, and the unfairness of your writing being scraped for AI models without your permission, so I am a little surprised to see a post promoting an AI design tool. I’m curious how you and the team have navigated this question—do AI visualizers diminish or take away from the work of human workers? Obviously a complex issue, and one we all are confronted by in so many ways!
100% agree
I think simply put that AI can be useful for productivity but not creativity. Its a larger conversation and one I’m happy to have. We were going to do renders regardless it just saved me and my team hours and its not like AI did the design, just helped the vision come to life in a way thats easier to envision. It will never ever, ever substitute creativity. 🙂
Having spent hours working on renderings to make ideas come to life, while also working as a designer, I would say there is a real craft to the creation of the images, and to say that executing the vision is not a creative act feels a bit off. Finding the right image map to make the countertop look just right, or tweaking the lighting settings to make the effect of late afternoon sun streaming through the windows, are just two small examples of the creativity required to make those images. But! AI is an incredible tool, AND it is replacing some creative acts. Who knows–maybe if you had just fed it a “design a farm cottage kitchen with skirted sinks” prompt, it may have come up with something very similar. Your ability to curate using your own lens and present it from you point of view still can make it “yours”? I don’t know! But it’s interesting to think about. what a time!
Super cute but I think fabric next to an oven is an obvious fire hazard maybe consider open shelves next to the oven
Agree. Actually, I think fabric in a wet and grease generating room is icky. Looks cute, gets gross fast.
I was just coming to say the same thing. Fire hazard and mess magnet.
Agreed – I was thinking to just have open front (no door, no curtain) cabinets on the range side and even peninsula sides. You don’t see the STUFF unless you are in the kitchen, and strangers/guests can find things so very easily. Keep the sink and coffee bar skirts!
The Spoak renderings are really helpful! (And yet I also share the comment/question of another poster regarding wrestling with AI. I think all of us are wrestling with this in our daily work so I’d welcome some additional discussion and friendly debate on this topic here.) I like skirting all the cabinets like you have shown and if you stay with moody fabric I think it works. If you go brighter, then I think skirts all around would be too busy. Stone or quartz for the countertops will be the most low-maintenance vs wood…or maybe the kitchen table could have a stone top instead of wood and you stay with wood counters on the perimeter? Doing stone on one or the other (counters or table) will bring in another texture. And to satisfy your urge for tile, maybe you could DIY a tile mosaic art or source something vintage? It would be a cute way to bring in that element without having to commit the additional cost to a more permanent surface.
Maybe a tiled table would be interesting and less of a cleaning issue like counters would be?
You know, almost every day I think ‘what are my pain points and could AI fix them’? and the answer is never ‘yes’. But I think thats because most of my job is creative and the parts of it that are admin, I have decent systems (or ousourcing) already in place (like accounting, quick books, payroll, etc) But these visual renders are extremely helpful and a good way to use it for good. As I said above, I think the best way to look at it is it can help with productivity but not creativity. we didn’t say ‘design a farm cottage kitchen with skirted sinks’ it took a million prompts and tweaks and still took a lot of time. But the visual at the end is more helpful than my dumb keynotes that I used to use. I get at times feeling stuck and wanting prompts or unlocking a different perspective, but for now I don’t use it at all outside of Spoak (and filtering out mean spirited comments here which is honestly problematic because its often wrong and filters out nice comments!!). We might start using it to help us research our own archives (like show me all… Read more »
I’ve been reflexively VERY anti-AI, especially in any semblance of a creative context (AI slop art etc. makes me so furious because it’s so wasteful!). But I’ve been trying to think about it with more nuance after a conversation with my brother about how he (an industrial designer) is integrating the tools to save tons of time on the tedious parts of his work, like calculating the angles for seams in a tent, while still doing all the creative work himself. A lot of our friends work in biotech, and they’ve also talked about the parts of pharma research that can be sped up immeasurably with AI. Similarly, lawyer friends are using it to save MANY hours writing slightly-different versions of legal docs; instead they can start with an AI draft and then carefully edit it. I think the thing that is out of control is how it’s being pushed into every app, every Google search, etc. (for profit) instead of used thoughtfully as a labor-saving tool for specific (tedious) tasks. I’m furious, though not surprised, at how irresponsible the tech companies are being, but I’m trying to expand my thinking beyond a reflexive NO and instead question why it’s… Read more »
Wow, this looks beautiful and functional. I would vote for the kitchen to stick with the monochrome green. It’s so lovely! And I wonder if adding burgundy would make things look less streamlined. I also think that the fabric you’ve chosen is just gorgeous but i would limit the fabric to the shelves near the fridge and under the sink. Feels like you’d regret not having closed door cabinets for the rest.
I don’t think you’ll regret skipping the dishwasher. Love the black Smeg in here. Funny how that one modern piece brings the whole thing into 2026. Can’t wait to see how this comes together.
Echo the skirt placement to sink and refrigerator area. I have seen skirts by stoves in a couple of homes and they get messy.
What a fun project!
Really love the monochromatic kitchen. I’m sure there will be lots of visual stimulus elsewhere…and vote to keep the kitchen monochromatic to minimize visual clutter.
I understand that this is not likely to be anyone’s primary kitchen, but the curtain cabinets give me the ick. I wipe the cabinet faces below my sink and where we make coffee at least daily to keep them clean, and curtains are also dust and pet-hair magnets. I agree with others that they add a ton of visual charm and I’m sure the price-point vs. cabinets is very appealing, but this seems like one of those choices where you will end up paying more via your own future time with the increased maintenance needed to take curtains down regularly, launder them, and then rehang them. (Also I know for a fact that my teenager would think nothing of wiping his pizza hands on those curtains if that meant he didn’t have to walk four extra steps to get a tea towel!)
You could totally be right 🙂 only time will tell! I think if it were a primary kitchen it could be a problem, but we’ll see. the fabric will be busy if that helps 🙂 (or is that just grosser, lol).
My sink cabinet is curtained. I clean 5 gallon buckets of home brew and wine and it’s such a mess. The trick is to inset your curtains a bit so crud doesn’t run down the front. I swap them out spring /fall and wash them then. They are usually spotless. So much easier to keep clean than my shaker cabinets particularly the corner crud. I wish I could keep my throw rugs and walls as clean.
Everything looks so charming as rendered! Based on previous posts you have shared, I think you will hate not having a dishwasher and having to look at dirty dishes in your sweet little kitchen. I would plan a place to keep a countertop dishwasher. They are compact cost about $300 and do not even require a water hook up to the sink because they have a reservoir. Think about it!
Yes-I understand the sentiment-we wjb’t have a full load, but if your team has lunch in there then are you adding “wash dishes” to someone’s job description? Are you wanting to wash dishes? Of course it’s not a big deal once or twice, but those minutes add up. My take is with no dishwasher then there will always be a small pile of dirty dishes. There are apartment size dish washers that are narrow & cheap. The efficiency is so impressive these days that running it with just 1/3 or 1/2 a load uses less water than hand washing.
you might be right. this isn’t something I feel strongly about so i’m interested in all the perspectives. if we worked here every day it would be different, but its just 2, 3 days max and only 3, 4 people max (we always get take out on photo shoot days, and only make food when its the three of us). But your point is well received. i’ll keep thinking about it!
I had a small countertop dishwasher and it worked well.. until it completely pooped out. I would highly recommend putting a dishwasher in. If the kids want to bake and cook, if you want overflow cooking space for holidays and special events, if you plan to rent this space out as a venue as you mentioned,if a work meeting/ day gets long and exhausting , if you have a problem with your kitchen in the big house.., it makes the space much more flexible.My thinking is since you’re doing the kitchen you might as well pop one in.
i’ve thought about this! i’ve also thought about doing a 24″ sink and leaving enough of a future gap to add a tiny dishwasher just in case, so we could add it easily and pop out the tiny cabinet next to the sink.
I’m 51 and have never used a dishwasher as an adult. The two times I rented places with a dishwasher, I used it for dish storage. My husband’s the same way – we actually prefer washing dishes by hand. Where we live currently, in rural Thailand, dishwashers are uncommon, and I imagine everyone does just fine without them.
It’s looking good. But just like more cowbell, I want more scallop! More interest. Keep more of the cutesy vibe. A little less perfectly done looking. Even if you aren’t spending the money on expensive fixtures or modernization, it still looks a little bit too put together, not enough charm. It does look fine, just thought you were going in a different direction. I love everything you do so I’m sure I’ll see the vision at some point!
I can’t stress this enough – this is just the easy render to show you where we are headed with the layout:) of course there will a lot of quirk, vintage, fun, pattern and whimsy added 🙂 I promise!!
I love that color palette. It reminds me of your chaise lounge (which if you ever have the impulse to sell, lmk lol). I’ve had multiple apartments without a dishwasher, so I don’t think it would be that big of a deal….. Might be a good way to incorporate that above sink dish drying rack from Jess’s post the other day. Since you can super customize the dimensions, I vote that you should make the peninsula cabinets shallower to accommodate an overhang for stools. I’m guessing you won’t be needing to store much in the cabinets anyways
YES! we were thinking that (re the plate dryer above the sink). I just think at most we make salads out there or put take out on plates, but i could absolutely be wrong, too 🙂
This kitchen contradicts everything you have said about kitchens and use of this cottage. Your future older family members would have to squat down and push back dusty curtains to get dishes/pots far back when you said it is important to use drawers. Your shelves are too high and inaccessible for daily use. Why deny your visitors and family the convenience of a dishwasher when you would not go without? Who exactly is going to clean this kitchen with high open shelves? Why design thinking kids will just forever eat on napkins or do you think they will want to wash dishes when hanging out? Or bring dishes and glassware to the house? Same for staff.
Woah, Cindy! It doesn’t contradict anything, its always been the plan, and will be easy to use/navigate for one person should anyone live here full time (I was more concerned about not putting the only bedroom and bathroom upstairs for navigating those crazy stairs if you are elderly which would be totally impossible) Its the layout we are talking about today, not the height of the shelving or where things will go. if we ever do in fact need to move in an older parent, we’ll figure it out pretty easily, I promise.
Super cute! I would also ditch the peninsula portion as corners are awkward in a tight space. I would want some closed storage in the lowers. The curtains so close to the oven are a fire hazard.
If this is every going to be used for large groups I’d want a dishwasher, if not then you won’t miss it.
Just a thought on the windows! If the quotes are looking a little too “fun” ($$$), definitely look into doing the work yourself if you haven’t already! It can be time consuming depending on the scope of work (eg, are there 4 layers of lead paint to remove??), but definitely doable and SO rewarding to keep windows that were designed to last 100 years, and with proper upkeep will last 100 more! I’ve done a few in my own home and am helping a friend get started on theirs this summer. The Craftsman Blog has great resources, or I imagine in the Portland area there may be programs that teach classes on window restoration.
I’m currently on class two of four on window restoration (just for fun, since I have aluminum windows in my house! But I work in historic preservation 🙂 ) I’m in Ohio, so that doesn’t help Emily, but I would be shocked if there wasn’t someone in Portland that did something similar.
Very cool!! Fellow old window lover! Are you a student at Belmont College by chance?? I’m actually starting a similar historic preservation trade program at Savannah Technical College this fall!
*:wildly raises and flaps hands:* Old house window restoration lover here! Went to the Craftsman Blog’s weekend tutorial (highly recommend) and am now knee-deep in restoring our 1872 original-wood windows. Most fun hobby I’ve ever had and am trying to figure out how to keep doing it once I complete my own project.
Emily, I also have a curtain skirt at my kitchen sink, as well as 4 linen covers for upper cabinets in my restored kitchen. SO EASY to throw in the wash – I like it much more than scrubbing the wood and trying to hide the water marks left behind.
Needless to say, this post makes me so happy. Your huge bathroom, eh, on the fence. But this is going to be a CUTE room!
haha. I appreciate your sentiment about the bathroom (you are not alone). And now I am curious about restoring the windows. The guy gets here in 4 minutes!!! Oh and for the record we are only restoring 2 (the two huge ones with grids where 1/2 the glass is brokeN. keeping the rest almost as-is and maybe replacing one. i’ll write about it next week but good on you for doing it. thats awesome.
Love this!!! All the old window lovers coming out of the woodwork (pun intended!) I bet your house is gorgeous!
*:wildly raises and flaps hands:* Old house window restoration lover here! Went to the Craftsman Blog’s weekend tutorial (highly recommend) and am now knee-deep in restoring our 1872 original-wood windows. Most fun hobby I’ve ever had and am trying to figure out how to keep doing it once I complete my own project.
Emily, I also have a curtain skirt at my kitchen sink, as well as 4 linen covers for upper cabinets in my restored kitchen. SO EASY to throw in the wash – I like it much more than scrubbing the wood and trying to hide the water marks left behind.
Needless to say, this post makes me so happy. Your huge bathroom, eh, on the fence. But this is going to be a CUTE room!
ooh impressive! Did you reglaze them on your own? the window restorer that I think i’m hiring is pulling up in 10 minutes for his final quote 🙂 We are replacing every pane of glass (which isn’t the expensive part, actually). Its expensive (i’ll write about it next week) but its also a lot of work and I want to support the craftspeople who dedicate their time to restoring houses so i’d rather do that then replace. You’ll see the extent of wear next week. like maybe I could do it DIY but not with my schedule these days so i’ll stick to the things that I really want to learn (stained glass doors?) and I think hire these guys who are so passionate about window restoration.
That makes sense!! I’m so happy to hear you are planning to keep them and look forward to reading about it on the blog!
And yes– honestly, the reglazing takes a little bit to get the hang of but not too tricky and *relatively* quick… it’s the stripping lead paint that takes FOREVER!
I have started restoring the windows on my house – also inspired by the Craftsman Blog and their forum on Skool – and agree with Claire that the glazing is fiddly but not hard. One thing I’ve noticed is that most people (me included) are nervous about removing the sashes, but it’s easy and it makes the other restoration work SO SO much easier.
And tbh, I don’t find it to be that time consuming to strip paint, but I did invest in an infrared paint stripper. Getting hard glazing off takes me a lot more time.
As with most things, it all comes down to the tools that make the process so much easier. If you invest in the correct ones, you can restore a window in a matter of days (excluding the drying times). But you’re right – it’s not worth it if you only have a couple to restore or your heart is in learning something else. It’s like clothes – if you buy a $1000 pair of jeans and only wear them once, it’s dumb. But wear them 3x week for years, totally worth it. Once I complete all of the windows in my house, I’ll have saved thousands from having them restored by someone else (also: FUN FOR ME YAY).
Honestly, the toughest thing is finding wavy glass at salvage stores – it’s hard to find now!
When you write the post, please look up the advantages of restoring vs replacing – old house lovers like me cringe seeing vinyl windows when the old-growth wood would last another 100 years and can be more energy efficient with storm windows added.
I love this and I love the keeping it simple vibe. I don’t have an ice machine and don’t feel like I need one. I also do a ton of handwashing, even though I have a dishwasher.
Also, could we have some Velinda guest posts? I loved those and think her team does great work.
I lived without a dishwasher for 25 years. The answer to dishwasher is always “yes” IMO. There are small ones.
I’ve lived in my house for 17 years with no dishwasher. I live alone and cook often. The only thing I wish I had was a drying rack over the sink that could drain in to the sink and look nice or a drying rack in a cabinet… that could be left open when I’m not in there so no mold, but could be closed for less visual chaos. I also kind of wish I just had a single drying drawer built in. I wouldn’t have to run it much but it could be a place where dishes could be out of sight. I’ve seen a cool metal one online that hangs. As is I have a drying rack on the counter next to the sink which is fine, but kind of annoys me to always see dishes drying and takes up a portion of my small amount of counter space.
What’s wrong with tiled bench tops? I know this isn’t at all the vibe you’re going for but I think the tiles look awesome.
PS you don’t have to justify big bathroom/small kitchen. It’s your house and you can have what you want. It looks great.
Sorry just adding another tiled surface, island bench top this time.
I think they are super cool, but i think generally people hate cleaning the grout lines. I really think you can seal the grout better these days and I also think most of my prep is on huge cutting boards, but in the past people have really really hated tiled countertops which I totally get.
Love the moody green renders! Not sure I like the cobalt unless everything changed to shades of blue, but I like colors to coordinate, especially when you’re using it as contrast to wood. Personal taste.
For the kitchen table, I would suggest getting an extendable table. The round top four-seater might work great for your team, and maybe the kids with a friend or two, but the minute you have more kids, you are going to want to put those extra leaves in and have the extra space. Especially in the teen years. Teens need a lot more space at a table.
Since all the countertop areas are so small, ask your stone yard if they have enough in leftovers. I was able to put granite in a small kitchen by doing that, it was a fraction of the price of single slab. If they piece it together correctly, it still looks really nice.
Love where you’re going with this. Can’t wait to see how it all ends up.
Yah i was thinking the same re the extendable table AND the leftover slabs. a table for four will likely feel small even for my team of 4 if we want to work with our laptops while eating. So we’ll see. I look on FBMP most mornings but I think its premature and I want to see how the kitchen comes together before I hoard more furniture 🙂
It’s beautiful!
Also, I’m pretty sure my kitchen is smaller than this… and I live with a Smeg fridge, one tall moody floral curtain covering a built-in cupboard, reclaimed cabinets that I hung myself (not as hard as I expected), a slide-in induction range, and a proud-mounted apron sink. My color palette is different (pale blue with very dark gray and pops of mustard yellow), but I share the details to reinforce that I obviously love all this… and can report that it’s pretty easy and pleasing to live with. The only thing I have that you’re not including here is a small drawer dishwasher (very useful in our three-adult, cook-most-meals-at-home household).
I did my own counters in a charcoal Paperstone. Reporting from 6 years of use, and with the caveat that I finished them as recommended, they’re practical and remain persistently beautiful. The diy on that was harder but it not awful.
ooh i don’t know what paperstone is but i’ll look it up!! and listen i’m so on the fence about the dishwasher drawer – that one is so tempting. I’m still thinking about it for sure … your kitchen sounds lovely 🙂
Rockler Woodworking offers 1-on-1 private instruction at their Beaverton store. Maybe that would work? Also, for anyone else interested, they have tons of classes at their stores all across the US. eventbrite.com/cc/beaverton-or-2306839
Oh interesting! thank you! we are hoping for someone we can pay to come here and kinda coach us through it so we can then document it here. But i’m open to all ideas. thank you!
i love the deep green paint with the moody fabric and bright blue fridge. I am hoping to do a similar idea in my new den/library.
Oh my, the renderings are really pretty. 10/10 no notes from me. 🙂
Thank you Holly!!!! Your comment gets 10/10 🙂
Super duper cute, love the layout and rustic wood, but also it’s pretty dark, considering how gloomy it can get in Portland winters. I think wood front cabinets below will be more useful than the curtains, which will get spills, kids will wipe their hands on them, and you will be laundering/ironing/re-hanging them quite a bit (my mom learned this the hard way years ago). Also they don’t keep out bugs or mice, which considering the rural location and age of the building, that would be a concern.
yah cabinets are always more practical than curtains. Its really a cost/budget thing and this idea excited us more than just ordering more expensive cabinets 🙂 I’m taking the less practical, more laborious, less expensive route so we’ll see how it goes!
Good point, keeping mice and spiders out is a very important consideration !
So cute!!
Have you considered running the cabinets along the window wall instead of having a peninsula? You’d have an “L” shape instead of a “U”, and in doing so you’d open up space for a larger table in the middle. If you have thought of this alternative and decided against it, I’d love to hear the thought process.
I had the same thought. It’s the same length of cabinets, just much more useful and could be used by multiple people at once. The windowsill would be below the counter height, but plenty of vintage homes have this detail. I bet it would be easier to construct as well.
you know, i hadn’t thought about that! i think i thought it was too low, but i honestly love the current footprint and it feels appropriate for our needs and this house. But now i’m curious …
I was thinking you could run a bookshelf under the window, so then you wouldn’t block it. Or it could be a bench for the table.
I have a window that is below counter height, and it looks fine imho, but you do have to think about finishing the back of the cabinet, so it doesn’t look unfinished from outside.
This is a great idea. We have a section of countertop in our long galley kitchen that is slightly lower than the rest. We purposely made it that way because it has stools versus cabinetry underneath and a little lower seems more comfortable when sitting on a stool. It is still totally useful as extra work surface when we’re cooking or baking a bunch of stuff. Ours is wood (because we were able to get the rest of the counters out of one big slab), and the different material also makes it look intentional. You could do the same: keep it free of cabinetry and get a couple stools that tuck all the way under, so you can still use it as working counter space.
I agree with this. Then could have a bigger kitchen table as well. We did a u kitchen in our house but after living here I wish we had done an L shape and put the table in the middle rather than off to the side!
but maybe it doesn’t matter as much given it’s not a space to be used everyday… still, I think it would actually work better in the long run. And since the window goes lower than the countertops, I also think a lower counter there with an open shelf or stools underneath would look lovely!
Adorable! This is my dream space. I love a cottage-cabin look so much. I am finishing up Yesteryear. Yikes. It’s bumming me out in so many ways and may be affecting my mood (?), but I HAVE to know where it is going.
same!!!! re Yesteryear. Everyone is so unlikeable! I’m waiting for the transformative journey, or I wanted past husband (I forget his name) to be you know, better. i’m 65% done so i’m holding out hope but ugh.
This is so frickin cute. Don’t change anything. It is the appropriate amount of skirted cabinets and the appropriate amount of moodiness. Adding in another color would be too much. This is perfect.
thank you 🙂
This feels very Daniel Kanter, which is very exciting.
I’ll take that 🙂 love him
The renders look great! I wouldn’t change anything. Perfect amount of skirted cabinets-the consistency of approach is working without ruining the feel of the space. And, please share all the updates. It’s all fascinating!
ALSO, make sure you can open that fridge door. The clearance requirement when you put one in a corner is something to plan for, especially with the shaker rail.
I’d recommend reaching out to Andrew at Young & Son Woodworks.
He’s a true professional, but also collaborative and generous with his knowledge. Even though this project is probably more DIY-friendly, he could likely point you toward the right person, offer guidance, or potentially be a good contact for future collaboration if you take on more custom work down the line.
He actually worked on one of your favorite Jessica Helgerson kitchens, so he’s definitely worth keeping in your contacts beyond this project.
Very cute.
In random order….Don’t paint the upper cabinets a different color. You will be using lots of other colors in the furnishings, and the painted cabinets would be like wearing too much jewelry. You want sweet details like the scallop trim to be noticed.
Puh-lease don’t use skirts on the lower kitchen cabinets. They would be a pain (not to mention dark) when one actually needs to find something in the kitchen. Use drawers. And find a way to use those interior corners under the cabinets! There are decent “roundy-roos” available on the market, and they will be well-used.
Skirts on the refrigerator wall would be very cute.
I LOVE it – just remember you need clearance on the hinge side of the SMEG for the door to open.
Emily I love everything about this design but please, PLEASE, put a dishwasher in next to the fridge. You are being shortsighted about the many uses of this kitchen and your compound. What about catering? You’ve been renting the house out, hosting parties, you’re basically building a party barn! life evolves and needs change. A dishwasher isn’t a luxury. It saves water and saves your back. You don’t even have to see it and your fridge will have an ice maker so the plumbing is already there. Just do it and cover it with one of those gorgeous curtains and no, it’s not too much fabric. Also I vote for stone counters (leathered black) and put at least some doors on the upper cupboards or everything will get dusty.
I didn’t see the vision for this room before but now I do! So adorable and period appropriate for a PNW cottage but still feeling somewhat modernized. It reminds me of the (even more tiny) kitchen in a handbuilt in 1929 lake cottage we once lived in for a few months. Down to the beadboard, U-shape, and all! I’m not usually a fan of curtains instead of doors, but I think they work charmingly here. The black Smeg and the moodier green/curtain fabric is all perfect. Looking forward to seeing this come to life!
Are laminate countertops just not an option? And definitely do a normal-person, inexpensive dishwasher.
The kitchen is very sweet, and it looks really pretty all green. I think with the single color paint the skirting doesn’t feel like too much, but if you are thinking it is too much can you just put shelves in the one opposite the sink and have them be open? I did that in my kitchen for the pots and pans, and I love it. Also, as an almost luddite, and small kitchen person, but also the parent of similar aged kids, can you put in a single dishwasher drawer somewhere? I think future you will appreciate it.
Just a thought on the dishwasher – they are much more eco-friendly than washing by hand using way less water and energy.
Such pretty renditions, it really makes the space come alive. One thing, put an overhang on the peninsuls for sure! It’s only an overhang, but will make the space more usable.
First: I think you found a use for AI that doesn’t immediately give me the ick. I’m still grouchy about the water/power use, but the render really helps clarify your vision, and it looks very cute.
I notice you don’t have a vent/hood over the stove- I wonder if you could swap the range and the sink so you could use the window as a vent for the rare occasions someone is cooking? That way you get all the ventilation, with none of the modern vent action. (I don’t have a vent on my stove, and I don’t miss it, but I understand a lot of people have FEELINGS about this).
A few other people have mentioned a plate drying cabinet, and again, it seems like a perfect solution for a small cabin-style kitchen, that doesn’t need a full dishwasher. Put it over the sink! Enjoy the whimsy!
I think this is just perfect. It reminds me so much of the beloved 1800’s beach cottage I grew up in.
This is gorgeous! Wanted to add that the green you’ve chosen pairs well with so many gorgeous fabrics. The curtains will be a really affordable way to change the feel of the space should you get the urge.
Here to make a case for a dishwasher. Doing dishes by hand is a drag-for guests, employees, anyone! Even a half filled dishwasher is more eco than hand washing. And…Not everyone washes dishes well–why not have them really clean and sanitized?
Agree. An 18″ dishwasher is not expensive and would be perfect for this small kitchen.
I think it looks really great! Maybe a few too many skirts? Could you just do open shelving on the bottoms next to the fridge? With some fun dishes exposed? That wouldn’t be too hard to diy.
So cute, and fun! Make sure you check the specs on the Smeg fridge. As I recall on a mini kitchen project, they have deep doors and require a larger than normal clearance to the wall on the hinge side, if you want it to open 90 (or more) degrees!
It looks wonderfully cozy!
Cozy and sweet! Love the green paint and black fridge. Will you move your chaise lounge out here?