Makeovers
Mal’s Basic, Builder-Grade Closet Got A Major Upgrade (And Doubled Its Storage!)
Kitchens are commonly referred to as “the heart of the home,” bedrooms and bathrooms are often called “sanctuaries,” but a closet? It’s never put on a pedestal in the same way, but I’d argue that a well-functioning closet is one of the most important rooms in a home. Justice for good closets, please!! People are always asking me how to get more storage in their homes, but the reality is sometimes we don’t need more storage; we just need better storage. Let me show you what I mean…
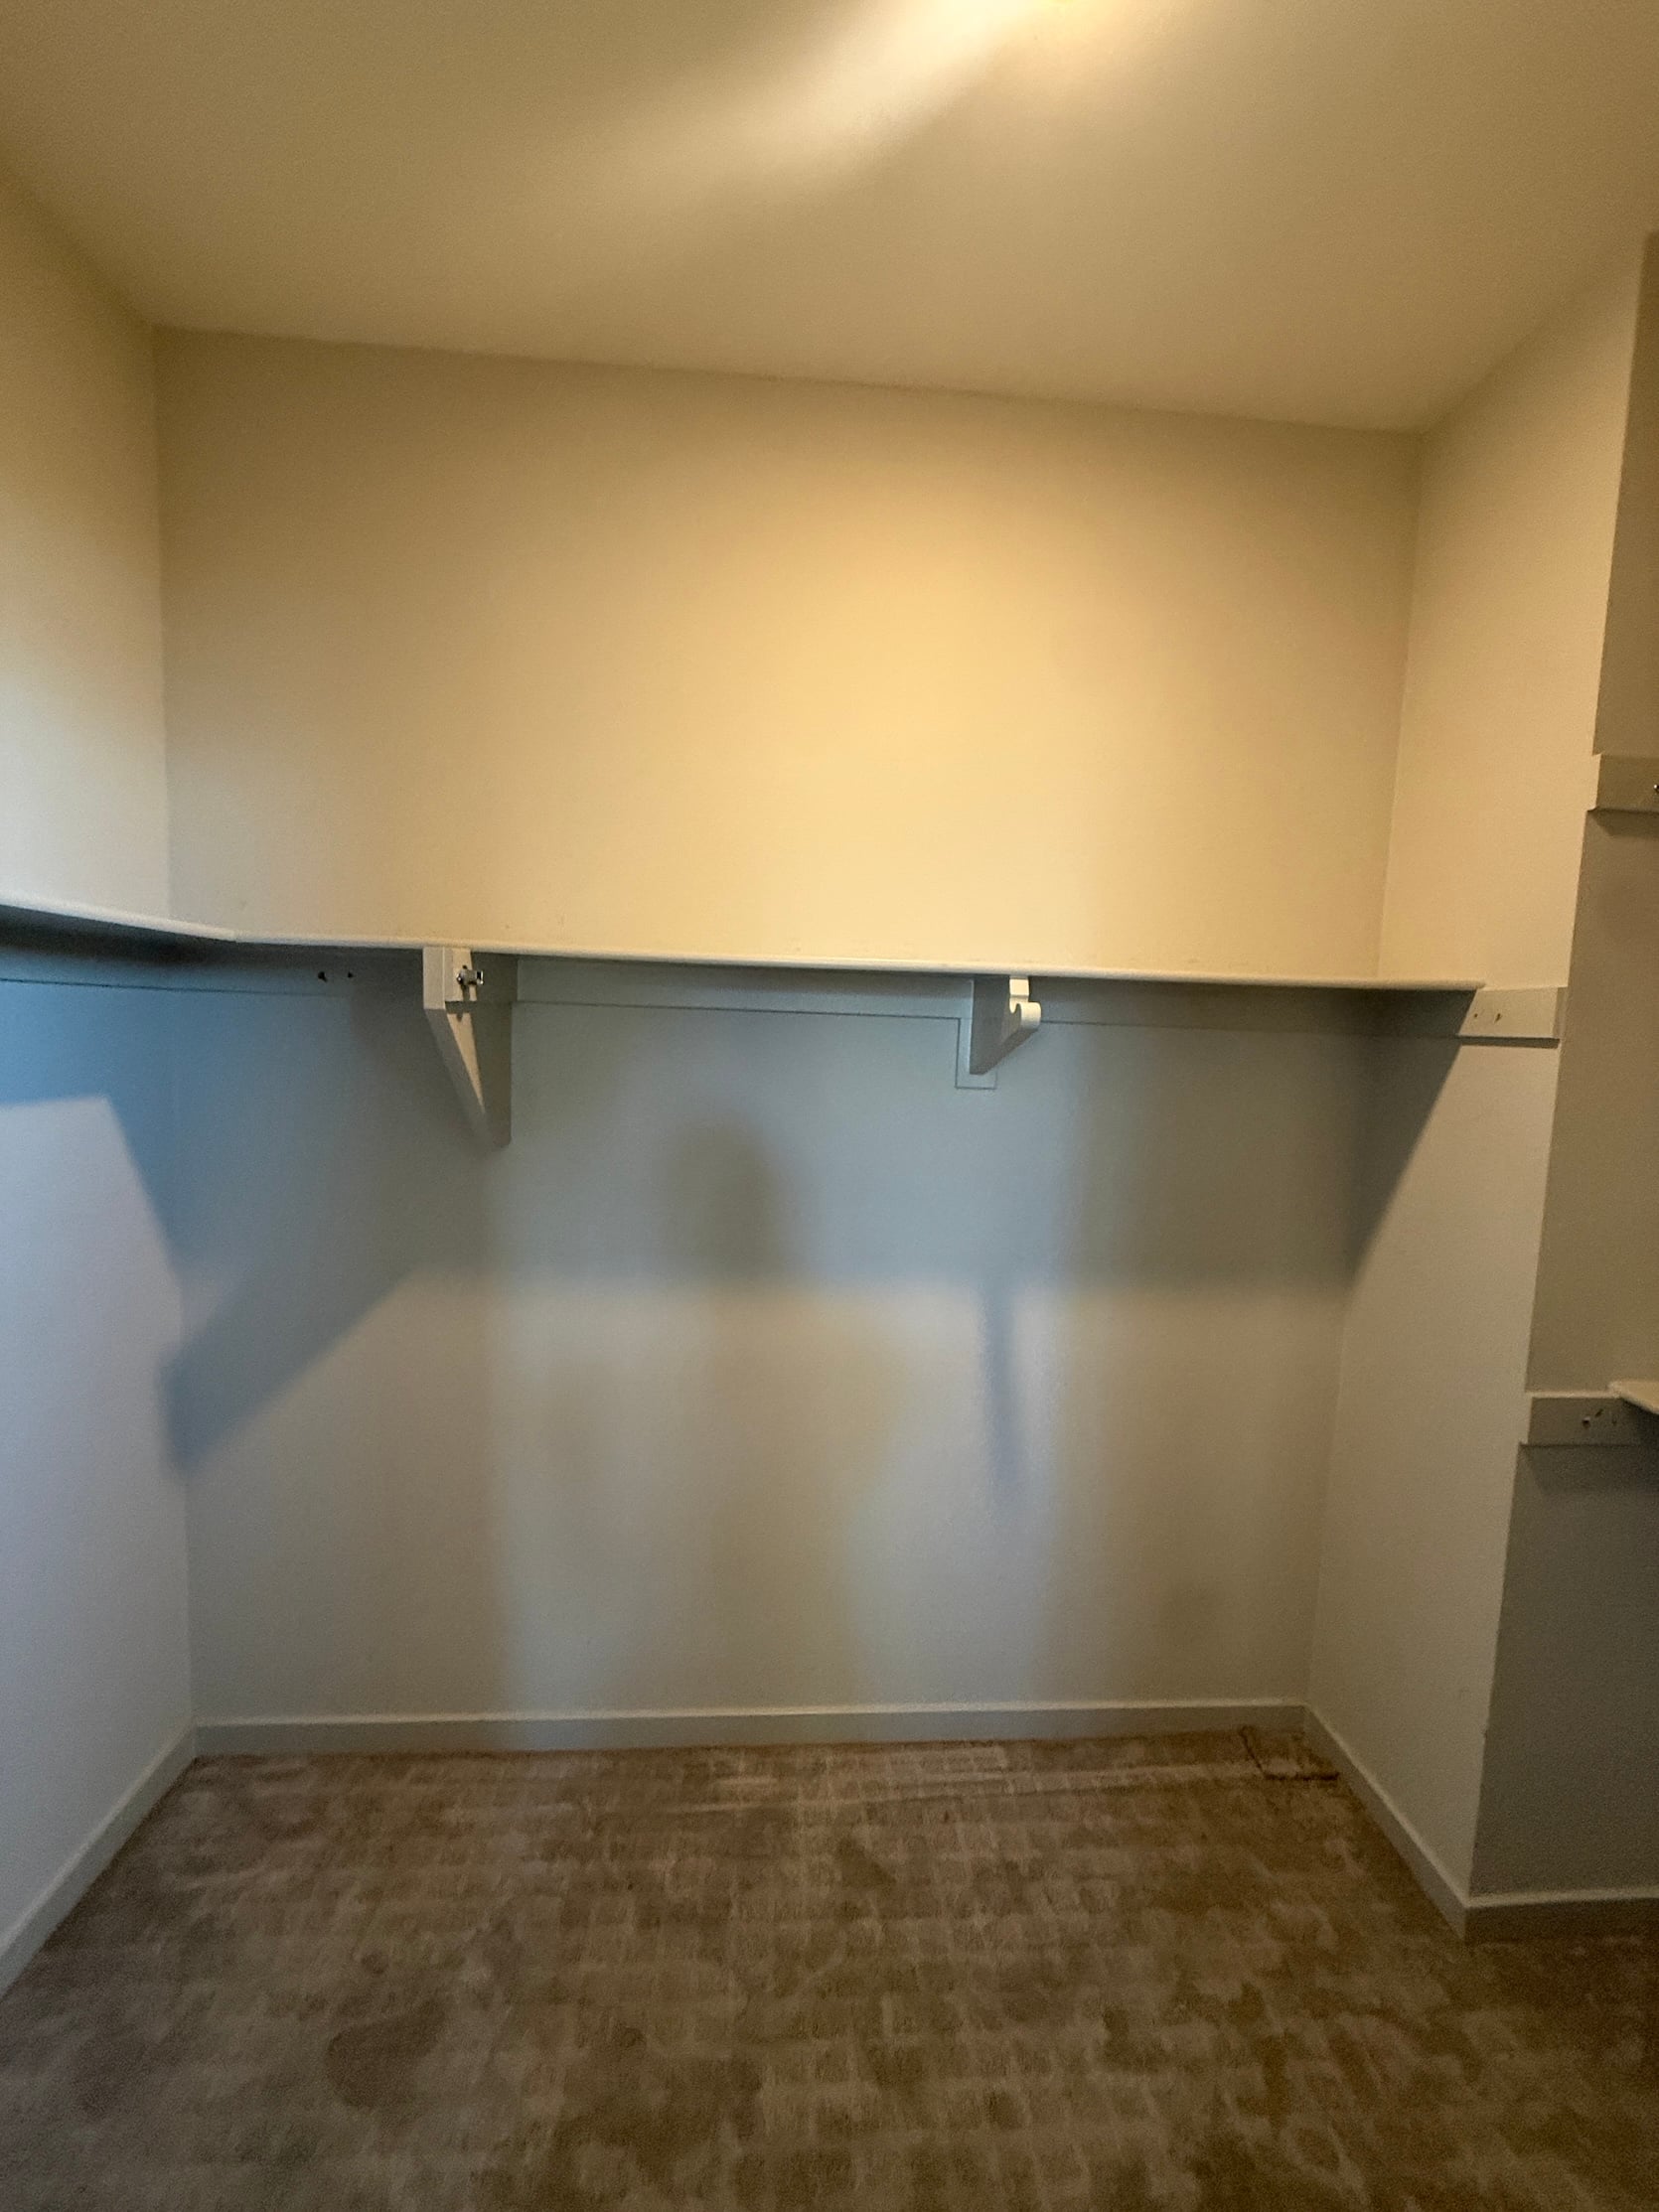
I moved in with my boyfriend, Austin, back in February and was THRILLED that his house had a decent-sized walk-in closet in the primary bedroom. It was nothing fancy: mainly just a gray, builder-grade closet with carpet and a single rod/shelf combo across the whole thing. But it did have a good amount of space, potential, and tall ceilings, so I knew we could make it work. When it was just him in this house, it functioned super well and stayed organized (he also has fewer skirts! dresses! heels! accessories!). So before I moved in, the closet looked like this:
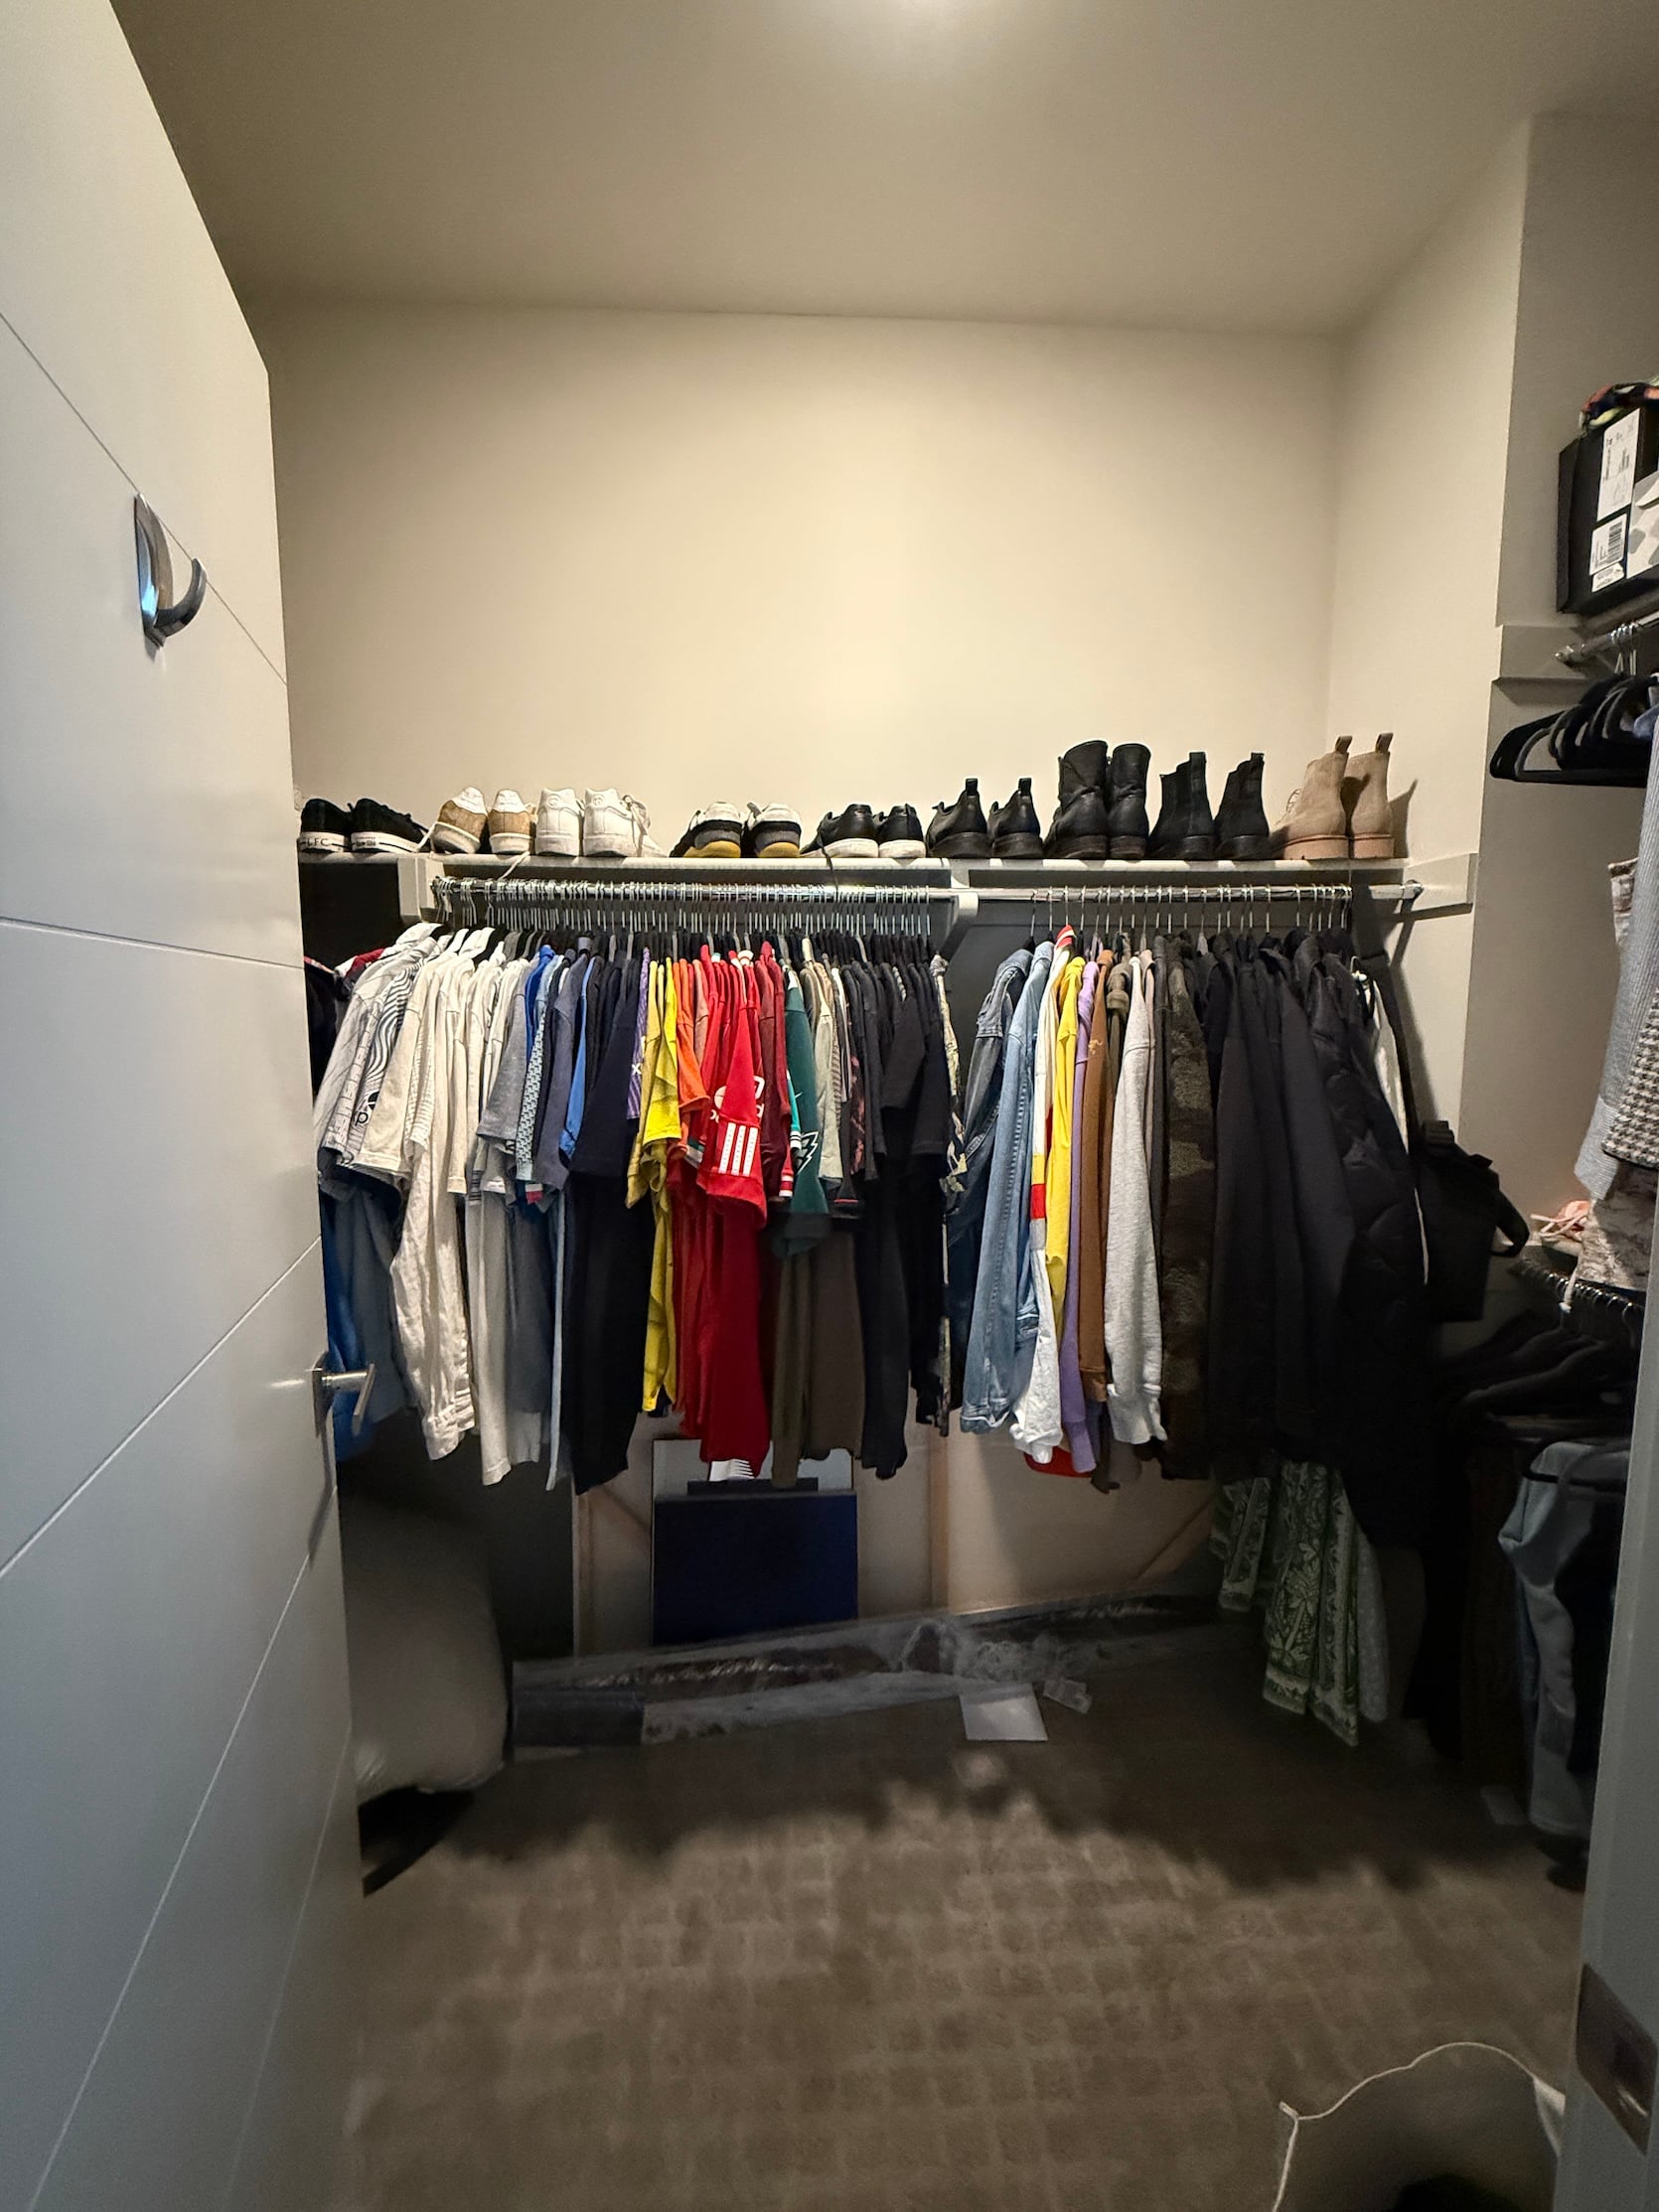
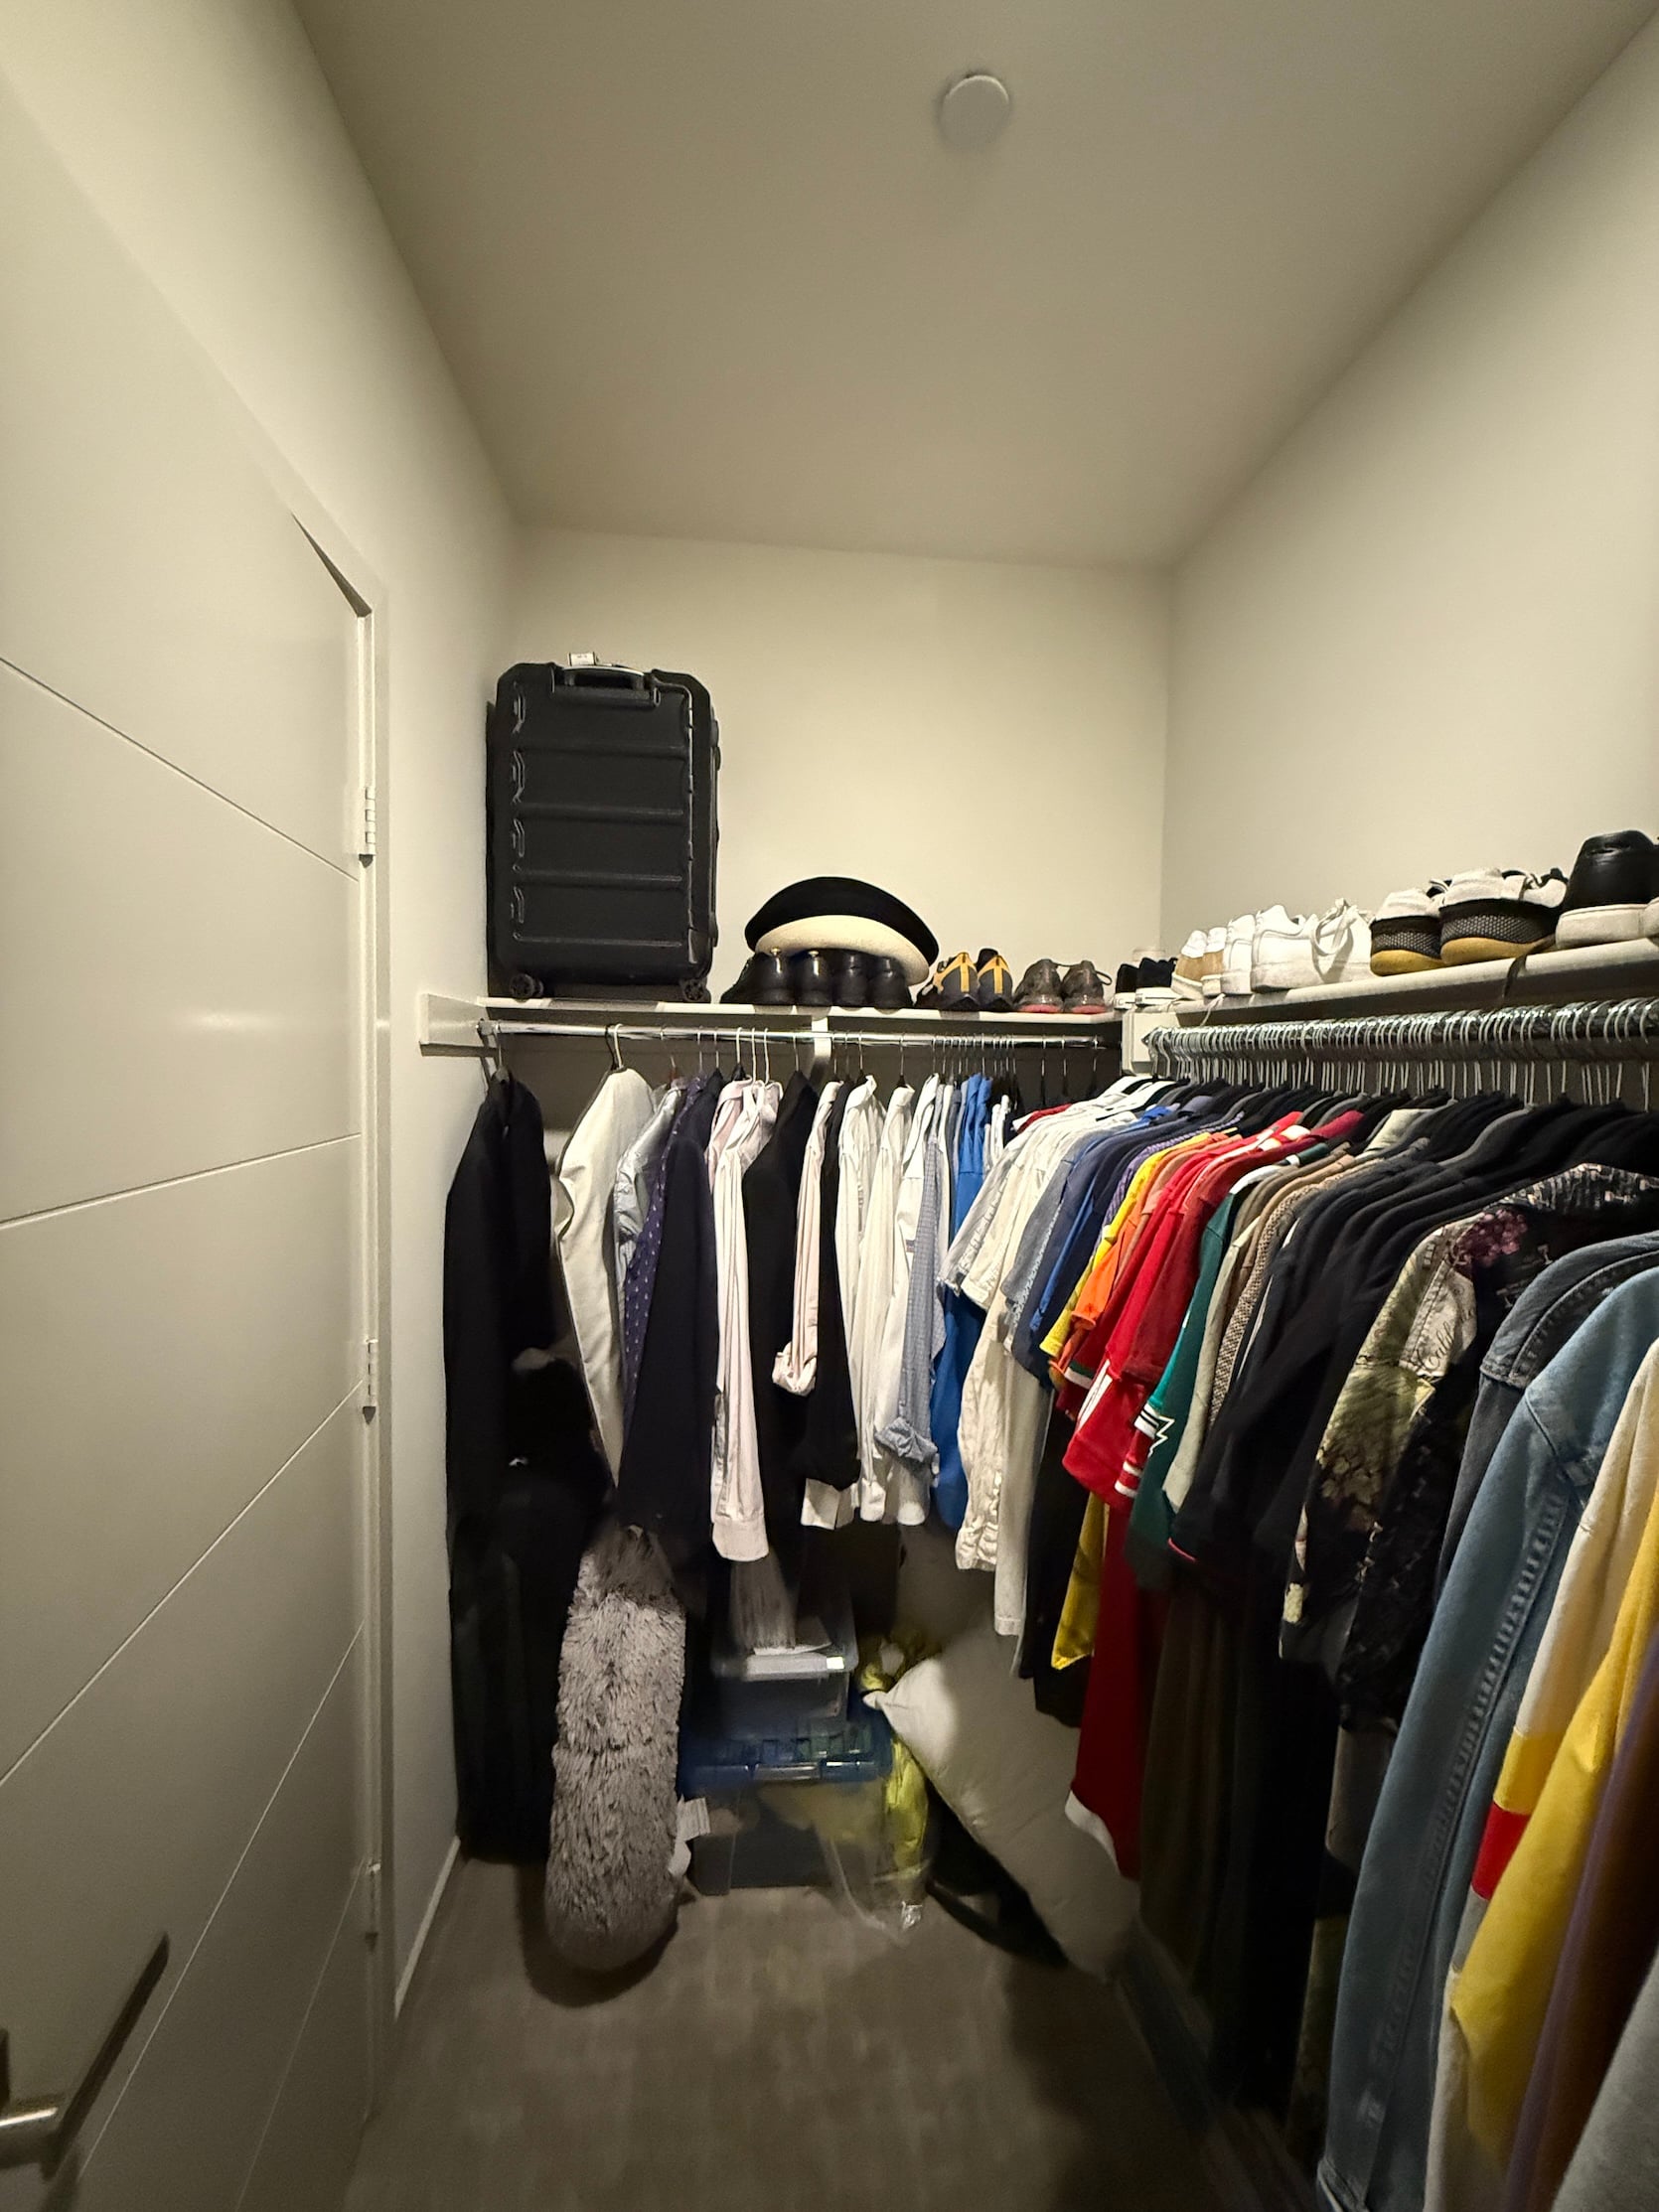
Then, everything changed. Austin tried to make room for me in the closet, but it just wasn’t cutting it. I’ve got a few more articles of clothes than Austin – which I’m sure many of you can relate to – so this space wasn’t gonna work for the two of us. Let’s just say it quickly became a bit ~chaotic~
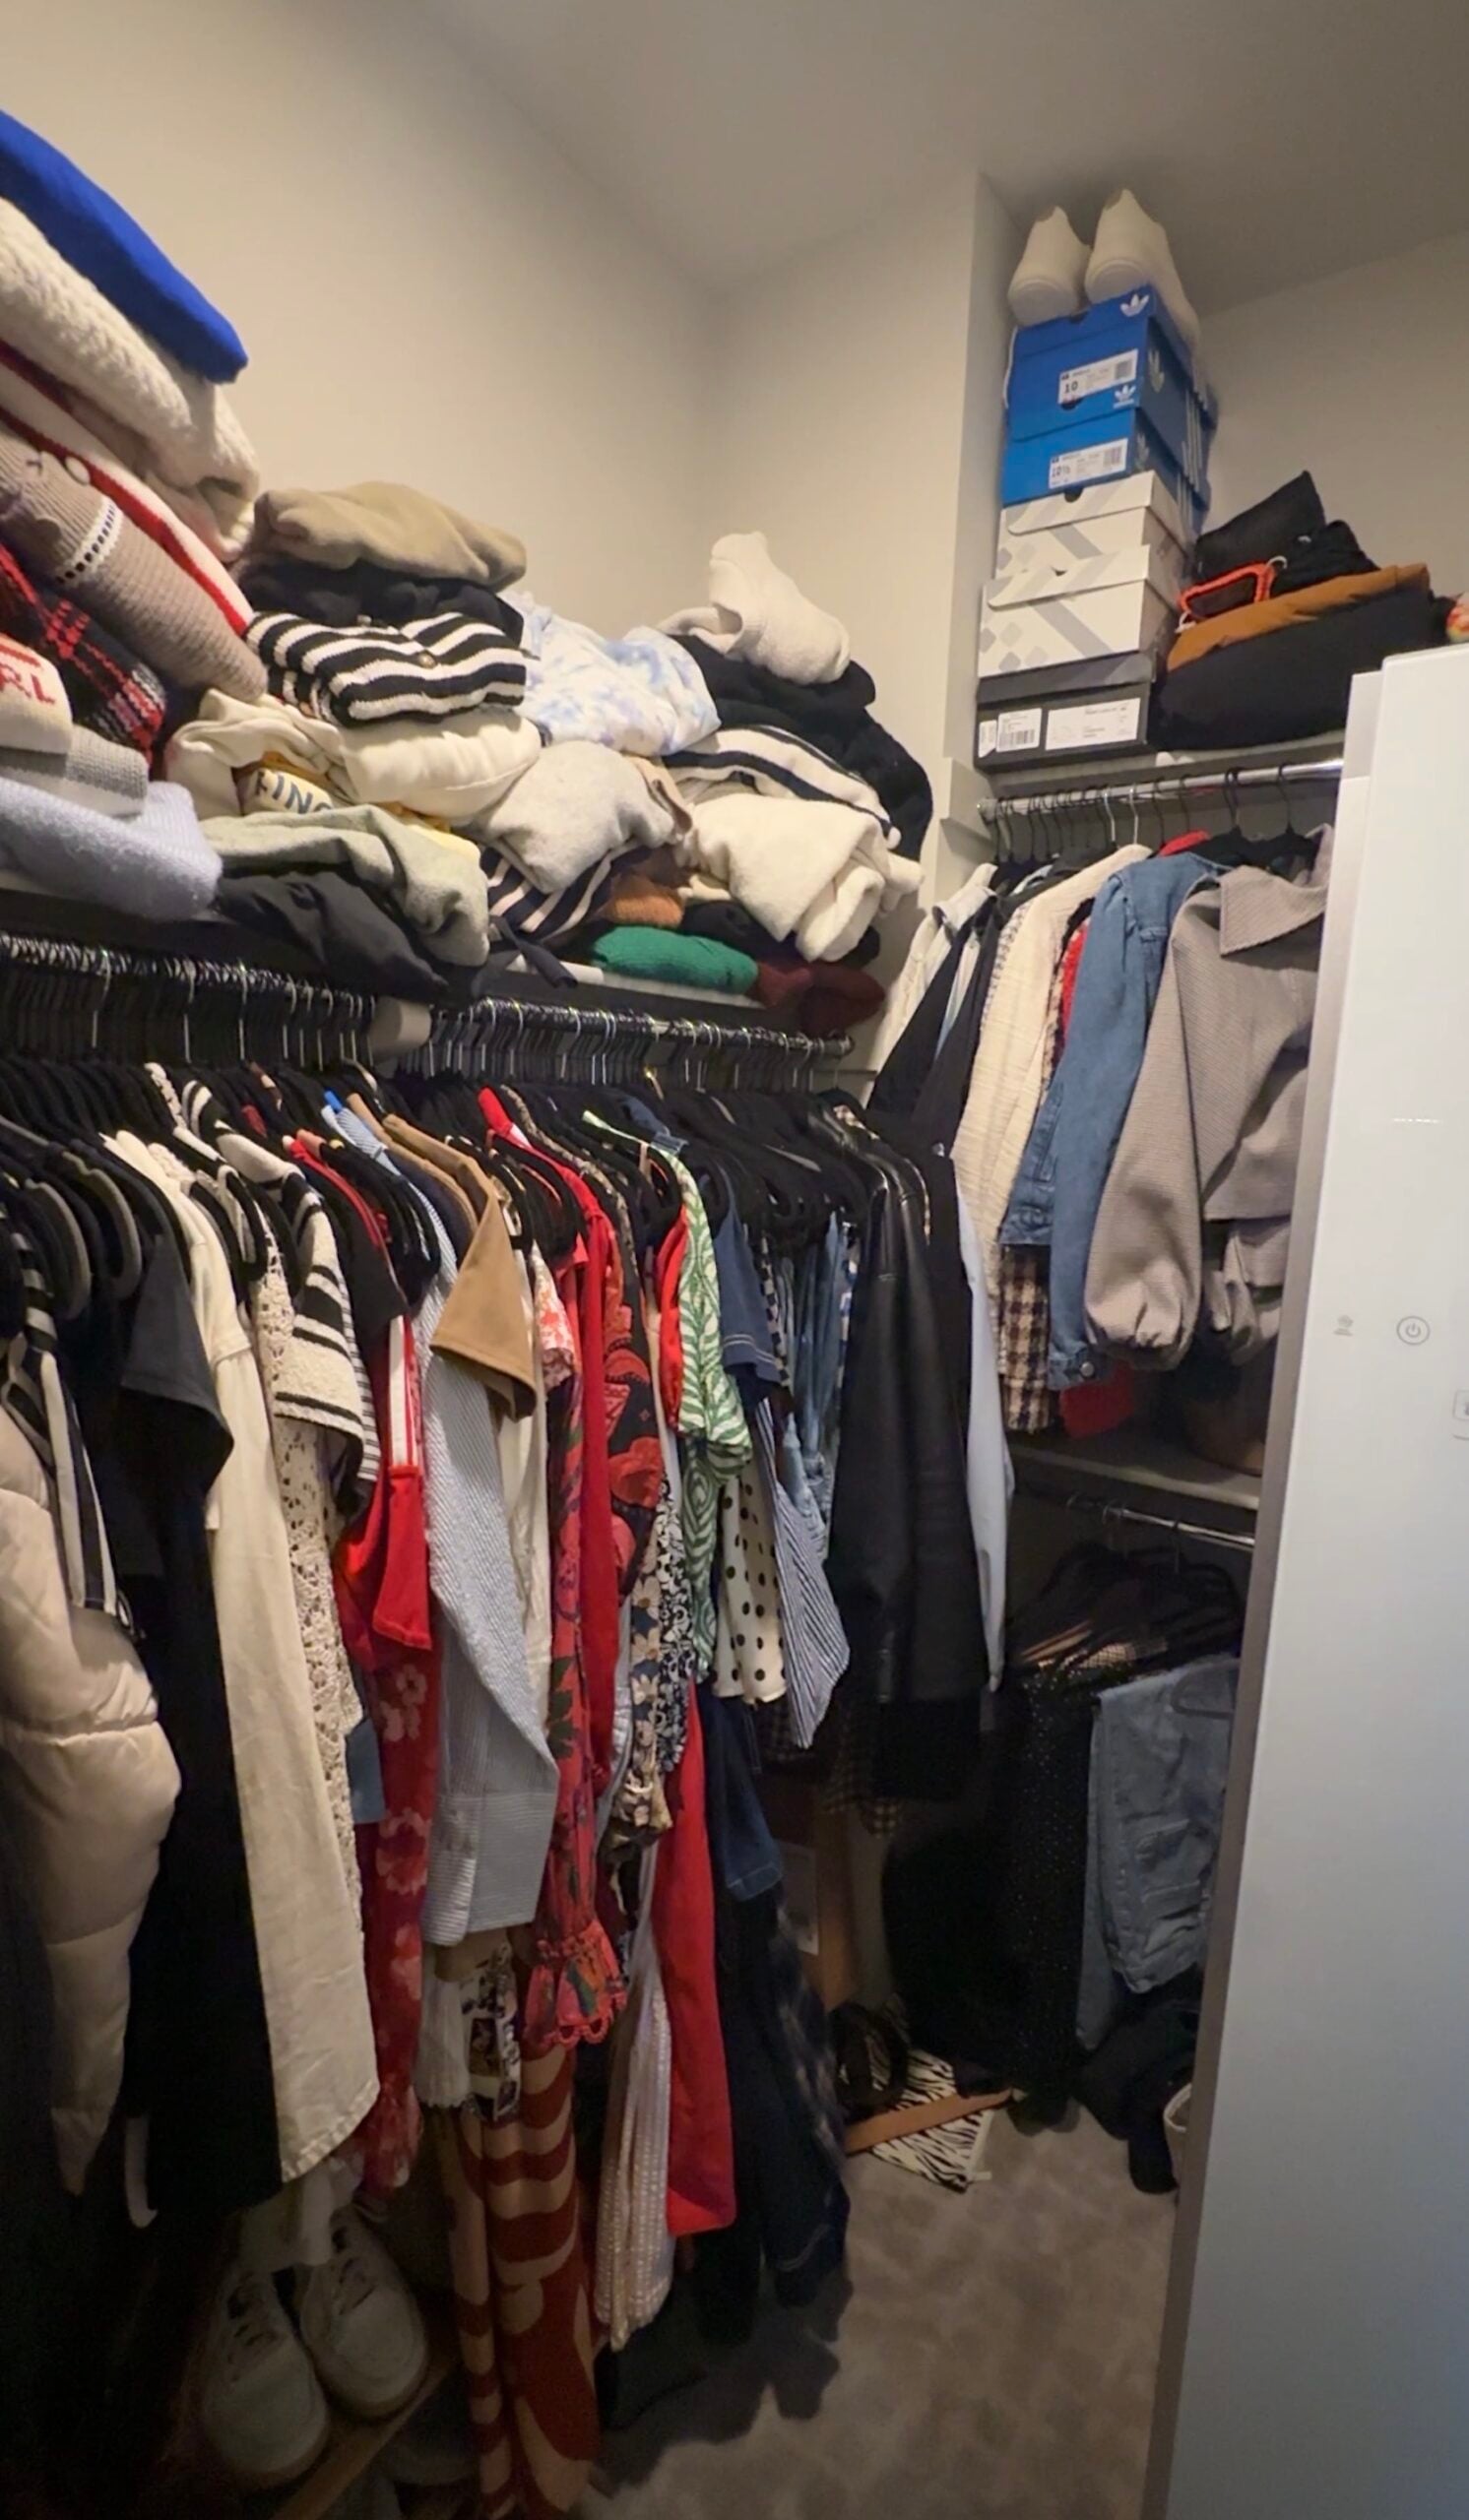
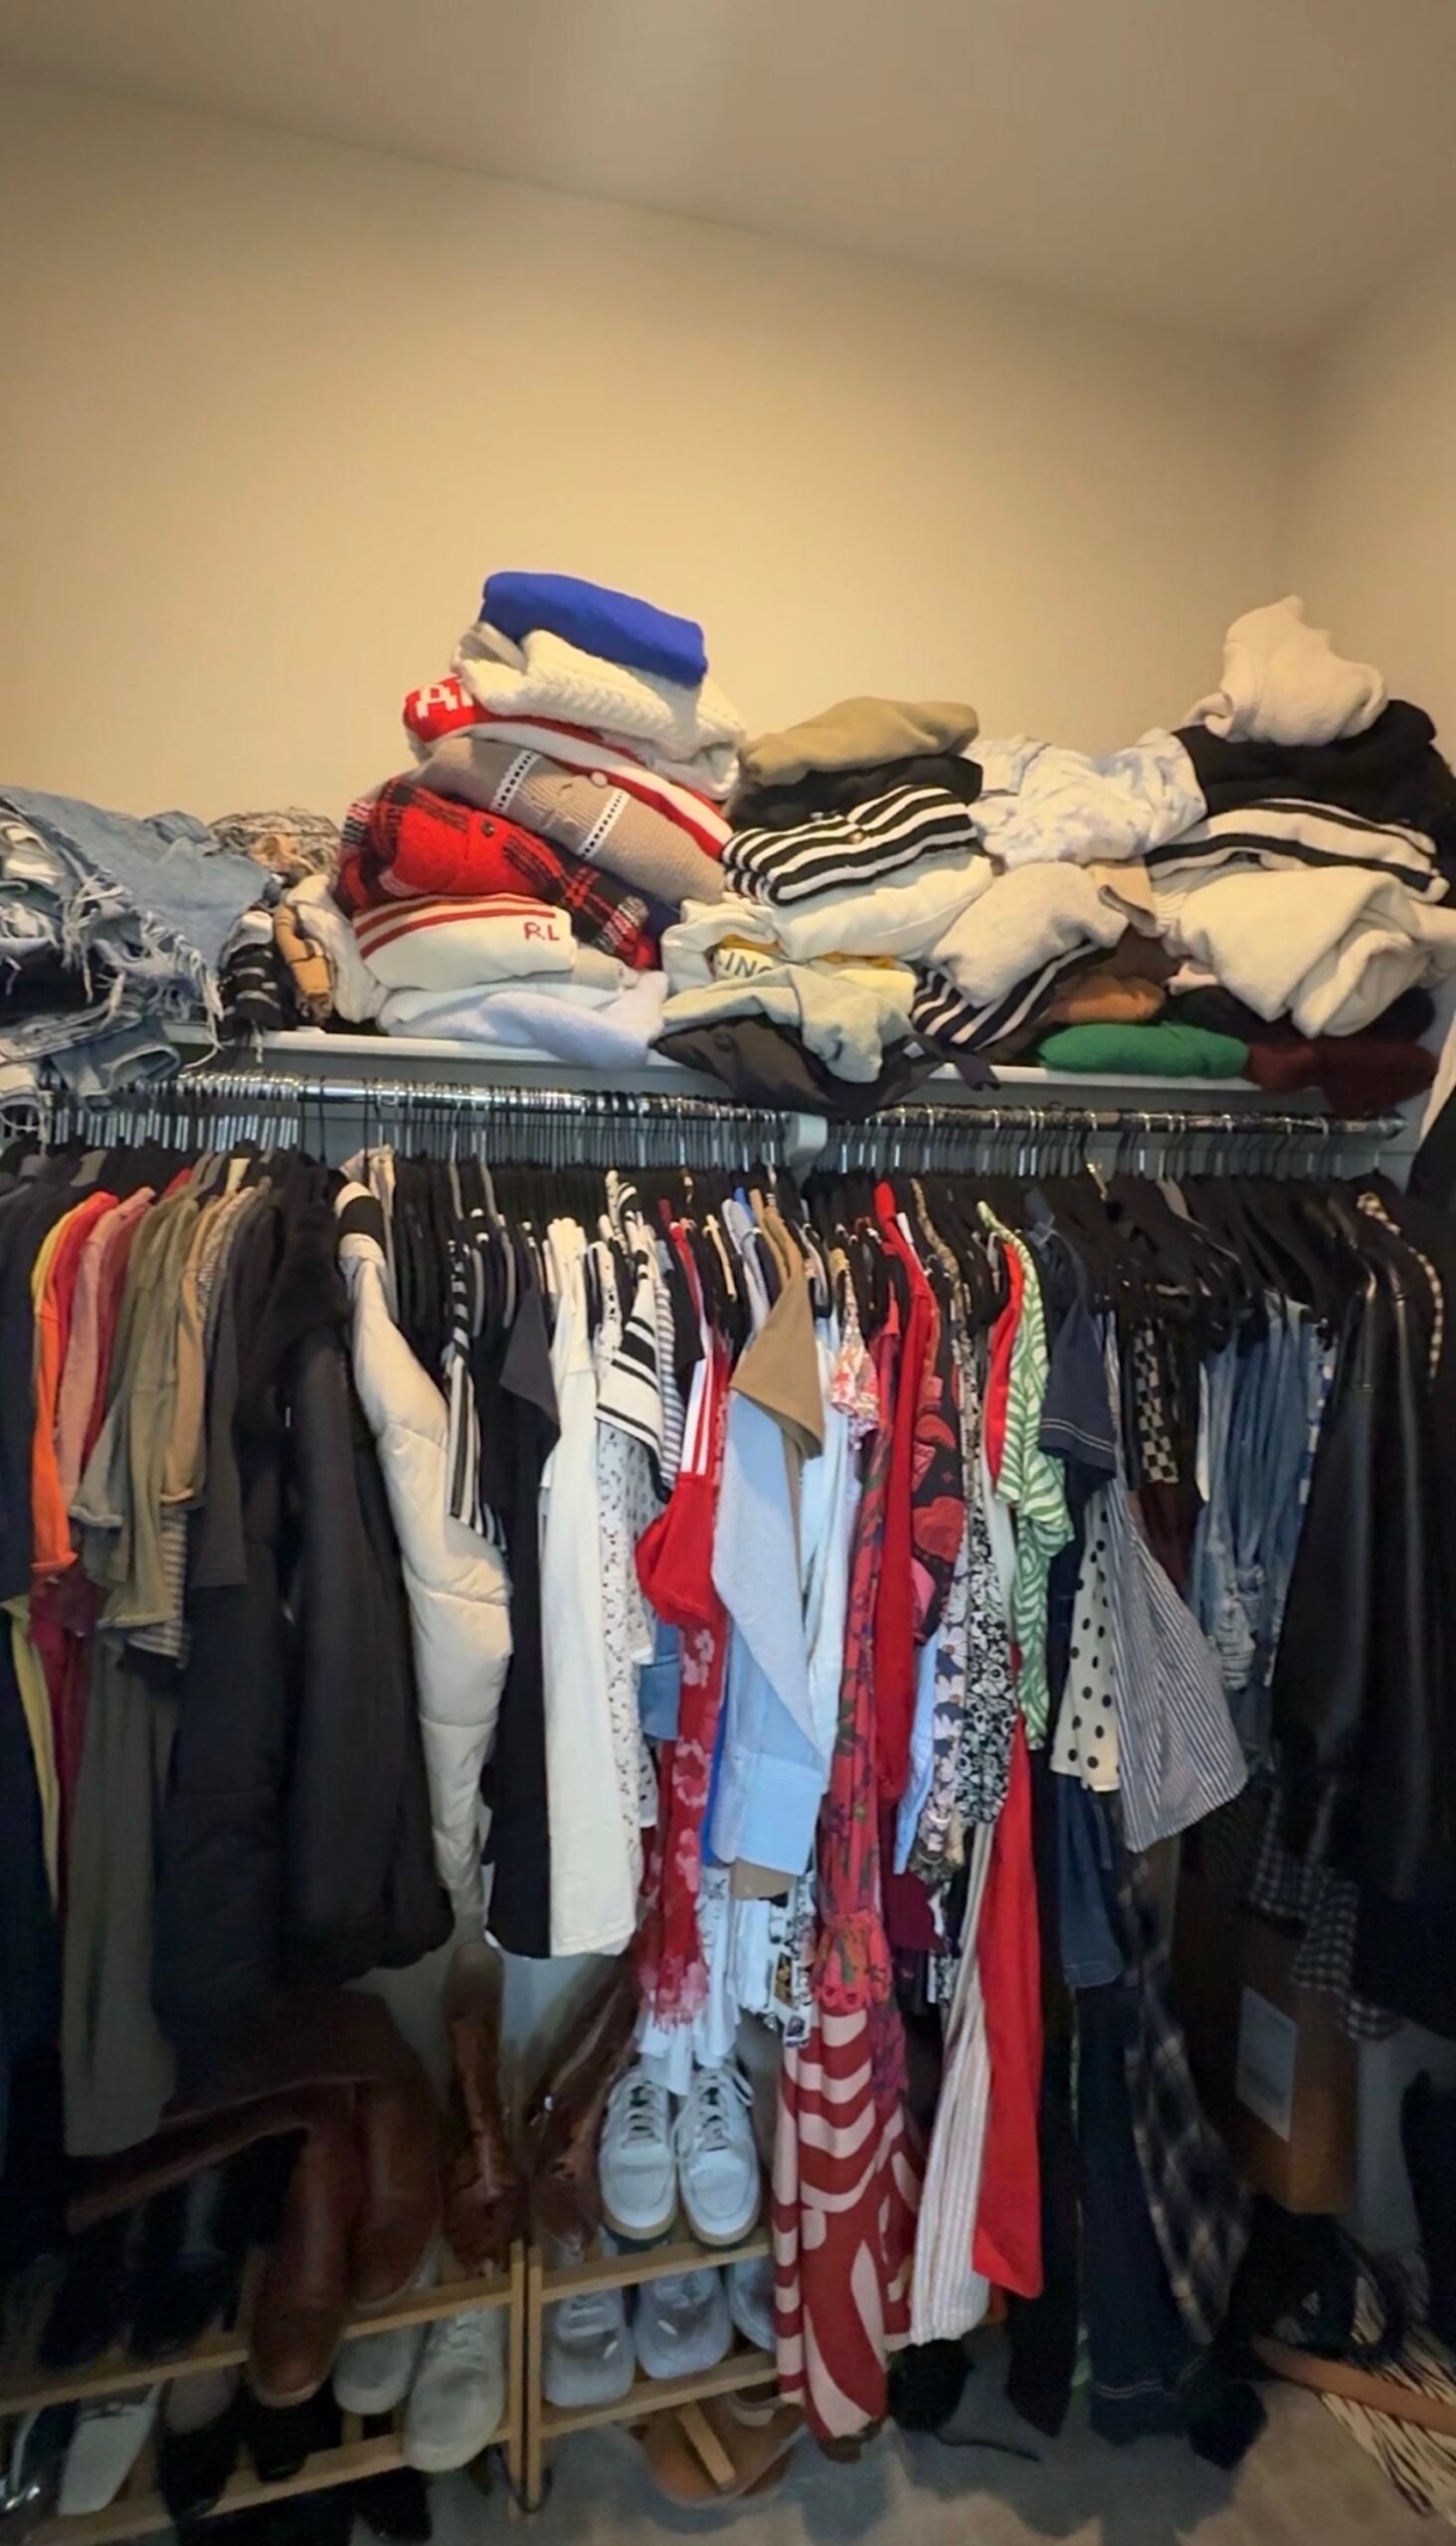
I consider myself a pretty organized person, so this stressed me the hell out. And this was with a large majority of Austin’s clothes in the guest room closet (which we are so lucky to have; otherwise it would have been even more of a nightmare). We knew we were going to have to do something…and fast. So we called up California Closets, and they sent a closet designer to come measure the space. Within a week, we had a full rendering of our closet design plan…it was incredible.
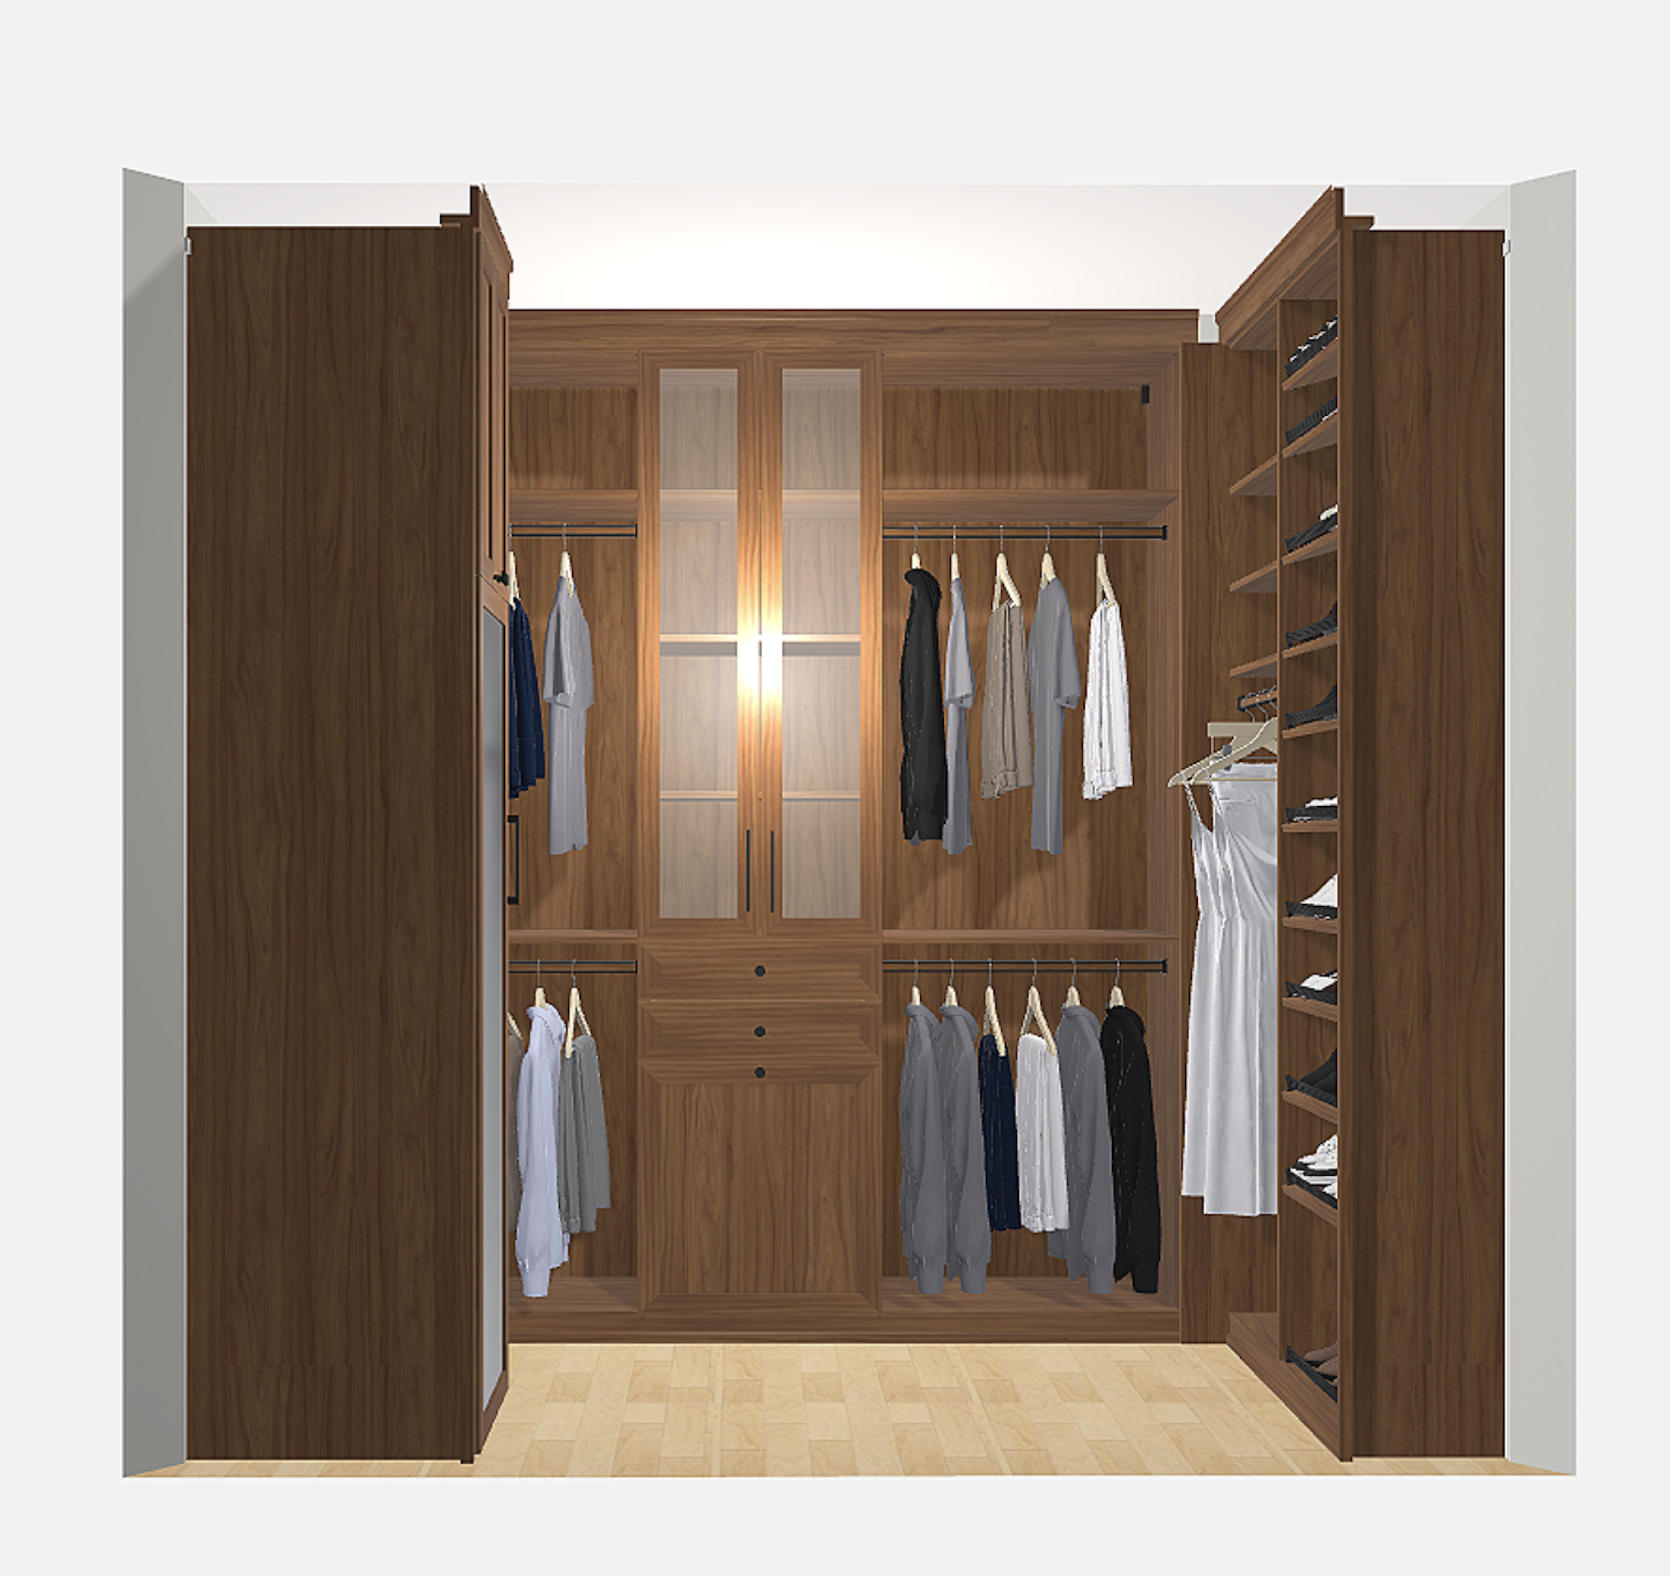
My jaw was on the FLOOR with how good and fast this design came to be! After the initial closet rendering was created, we met up and finalized the plan in the CA Closets showroom, where we got to look at finishes, hardware, and really customize the closet to our exact taste, which is important to me as a design girlie! Shoutout to Cooper, who really listened to our hopes and dreams and made them all come true! The CA Closets team really made this whole process so easy. I couldn’t believe how amazing they all were to work with.
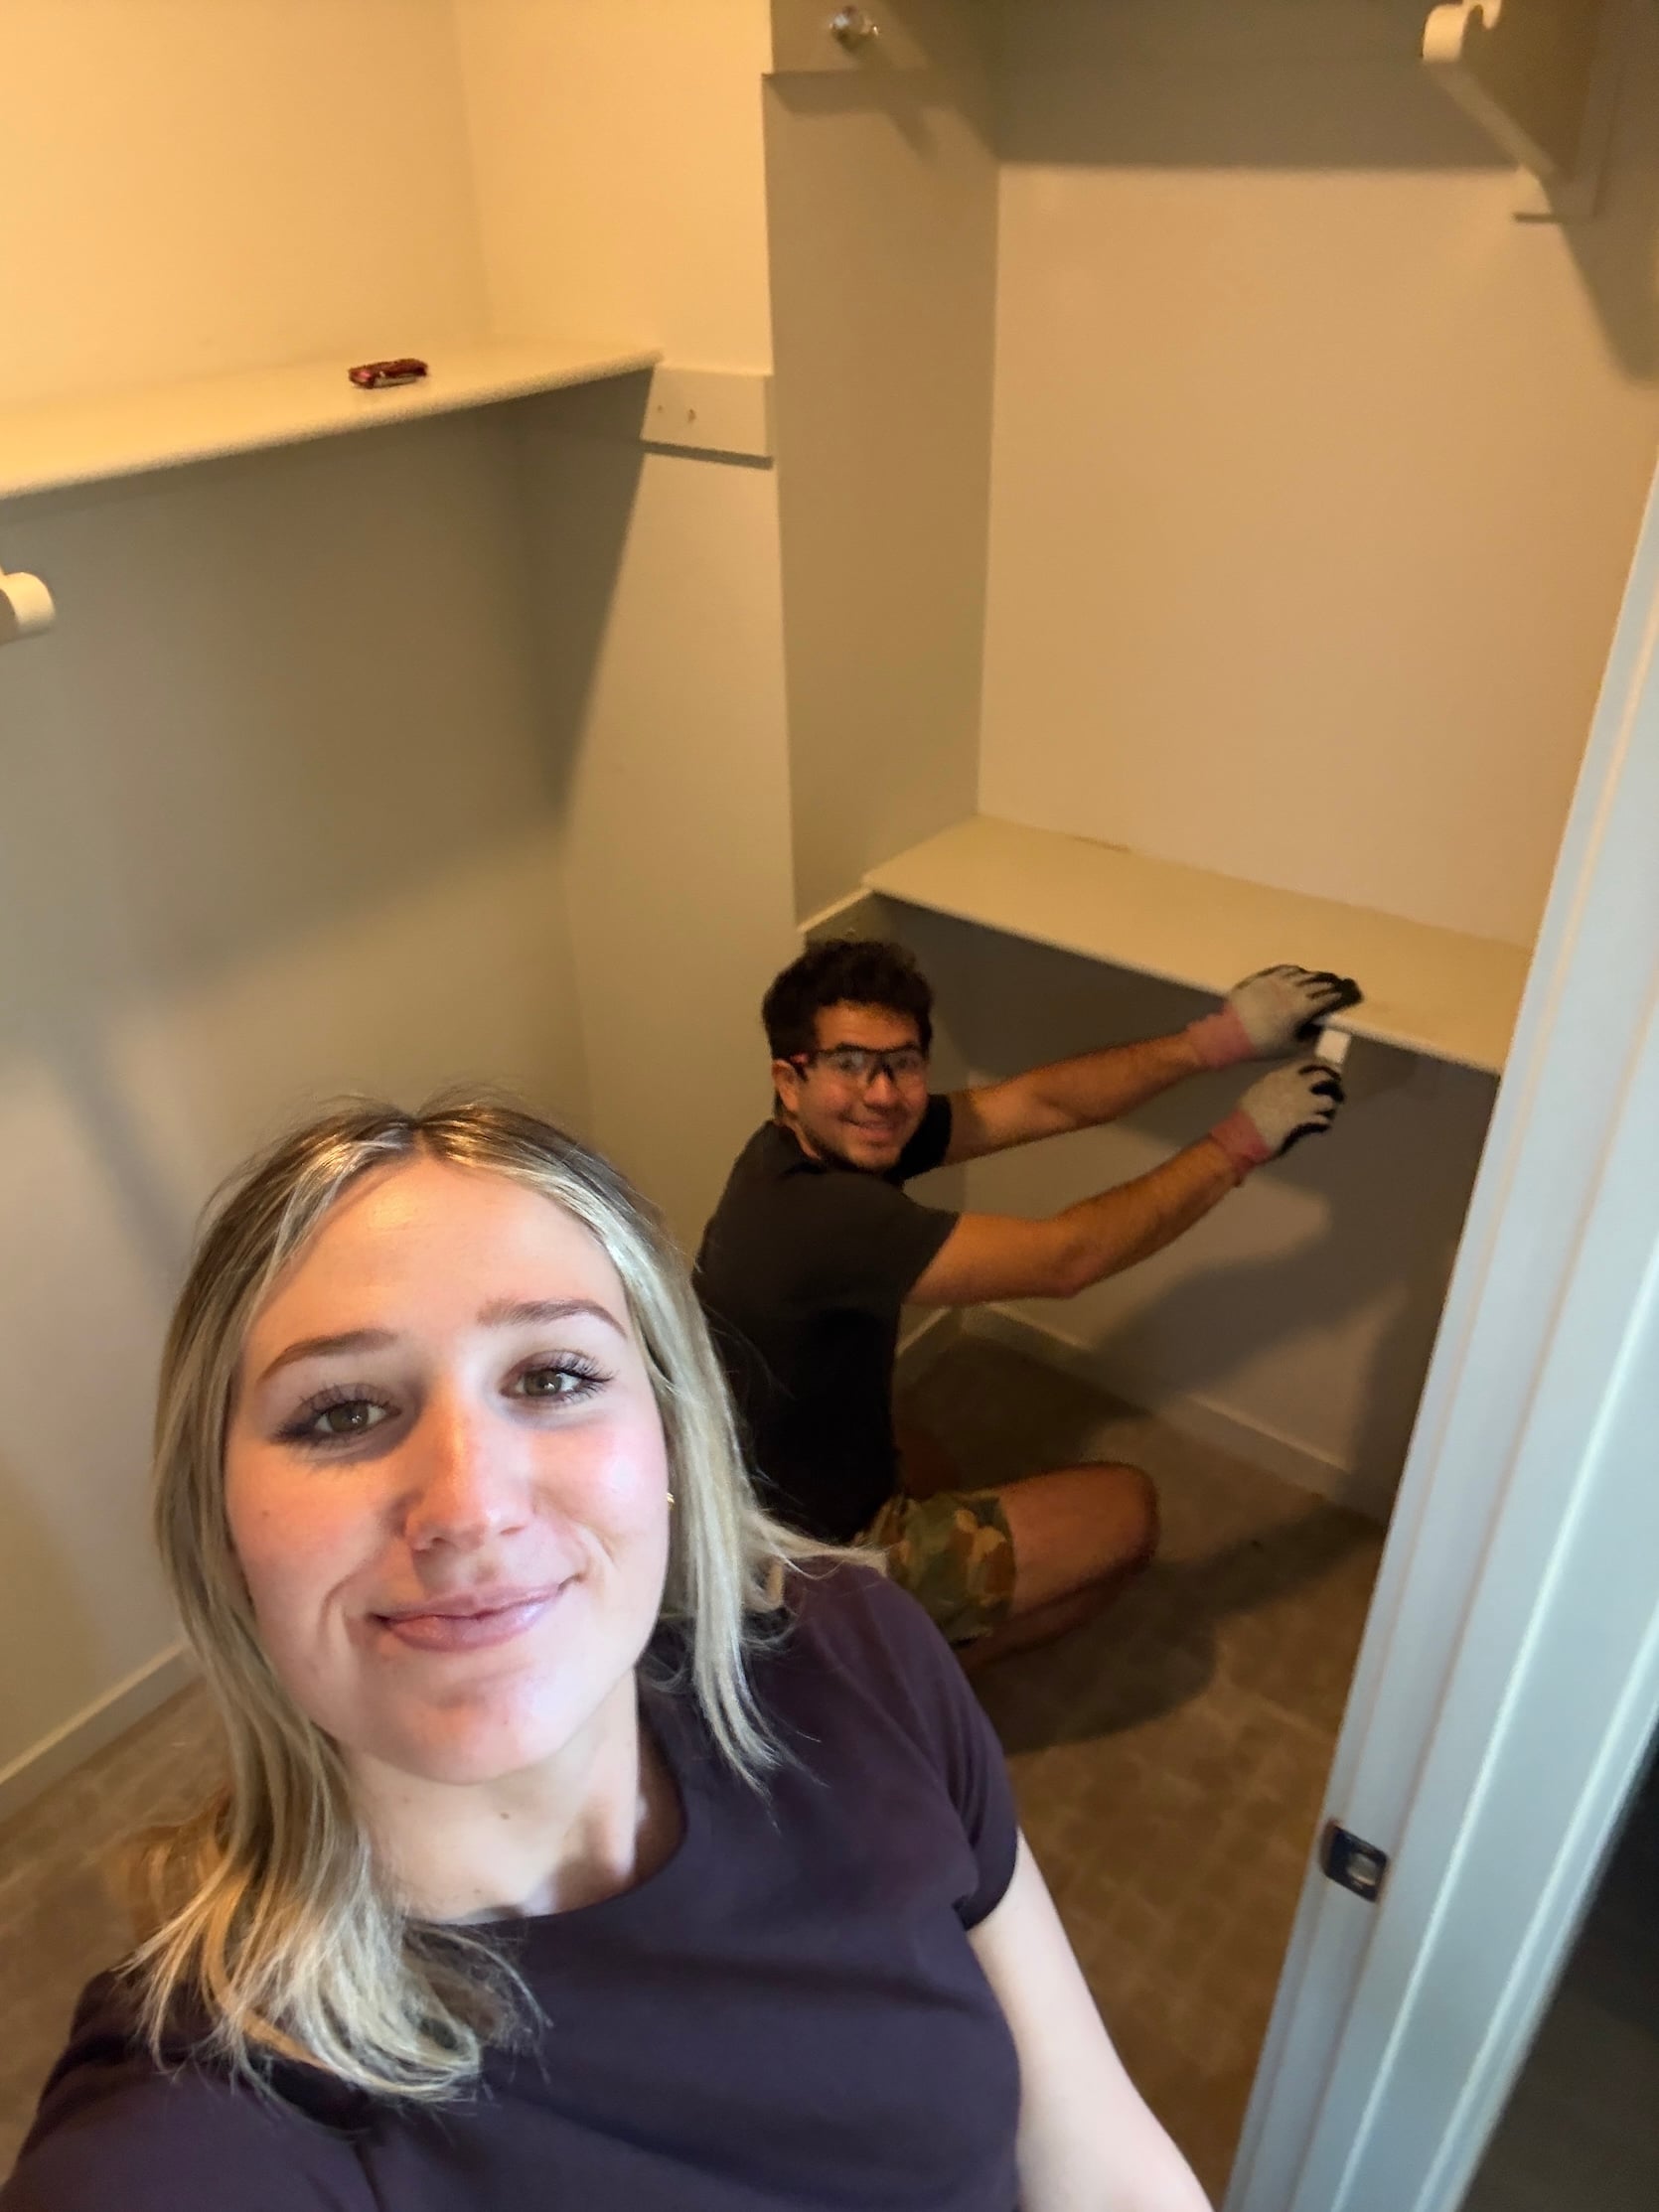
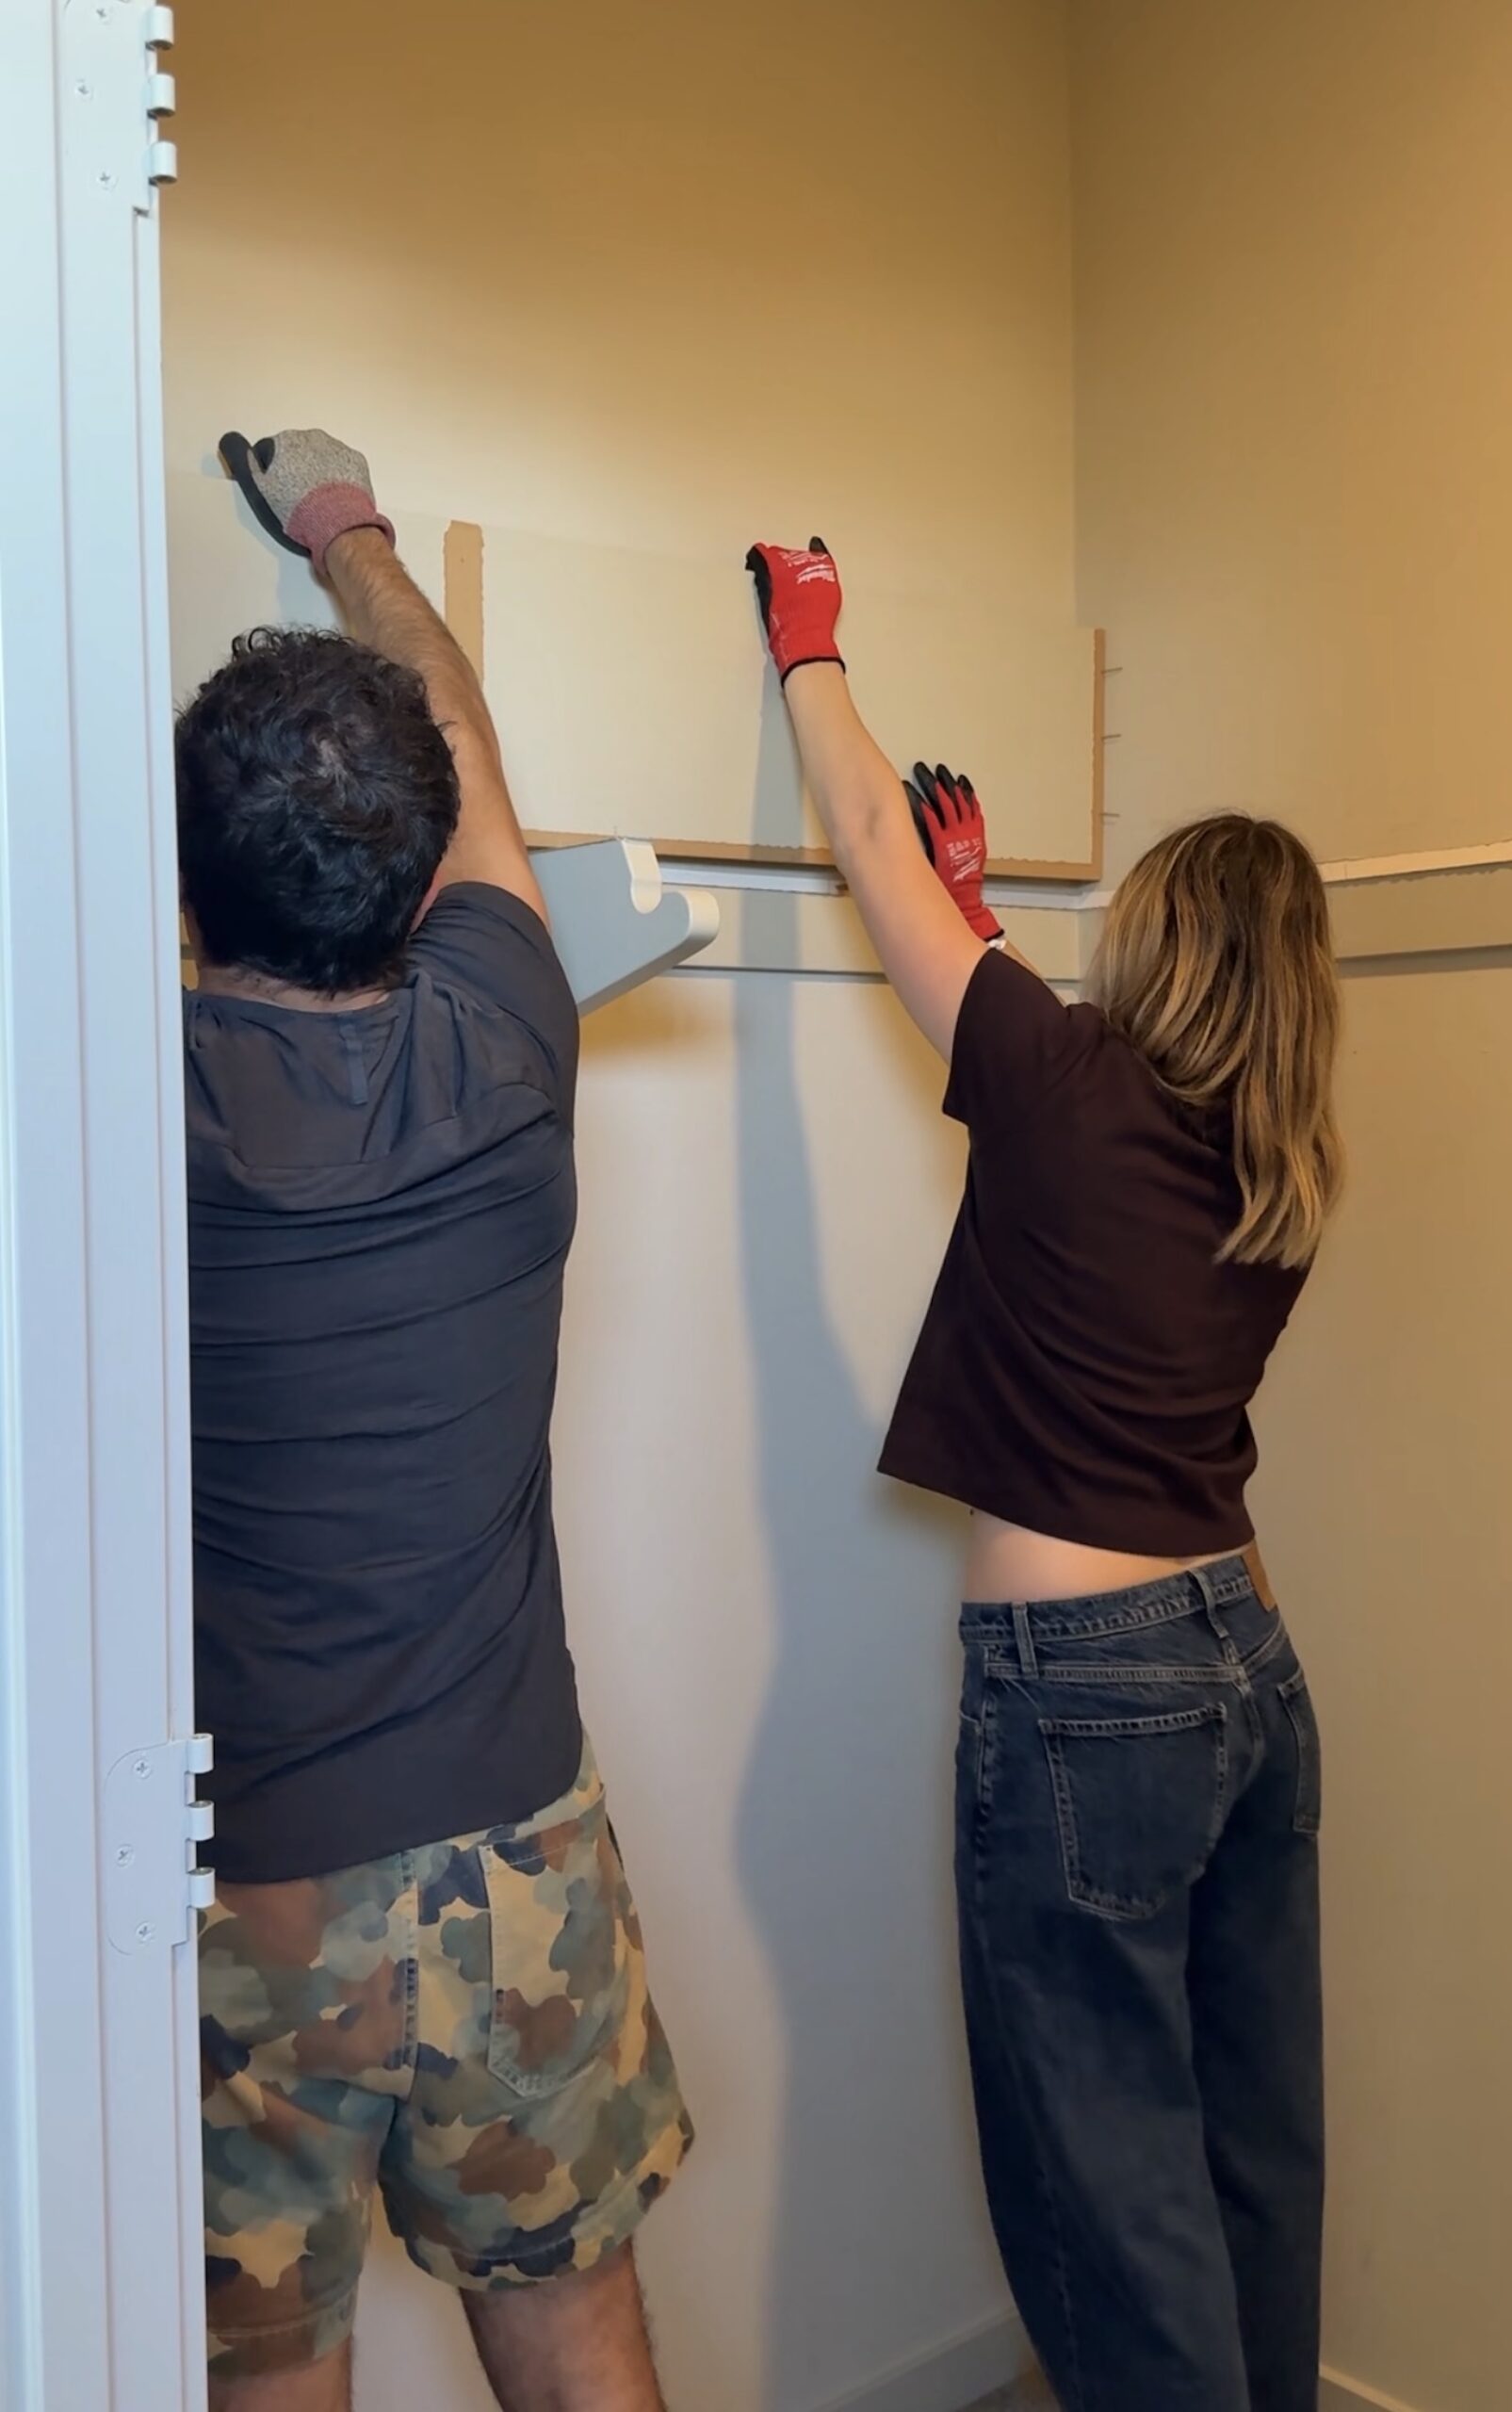
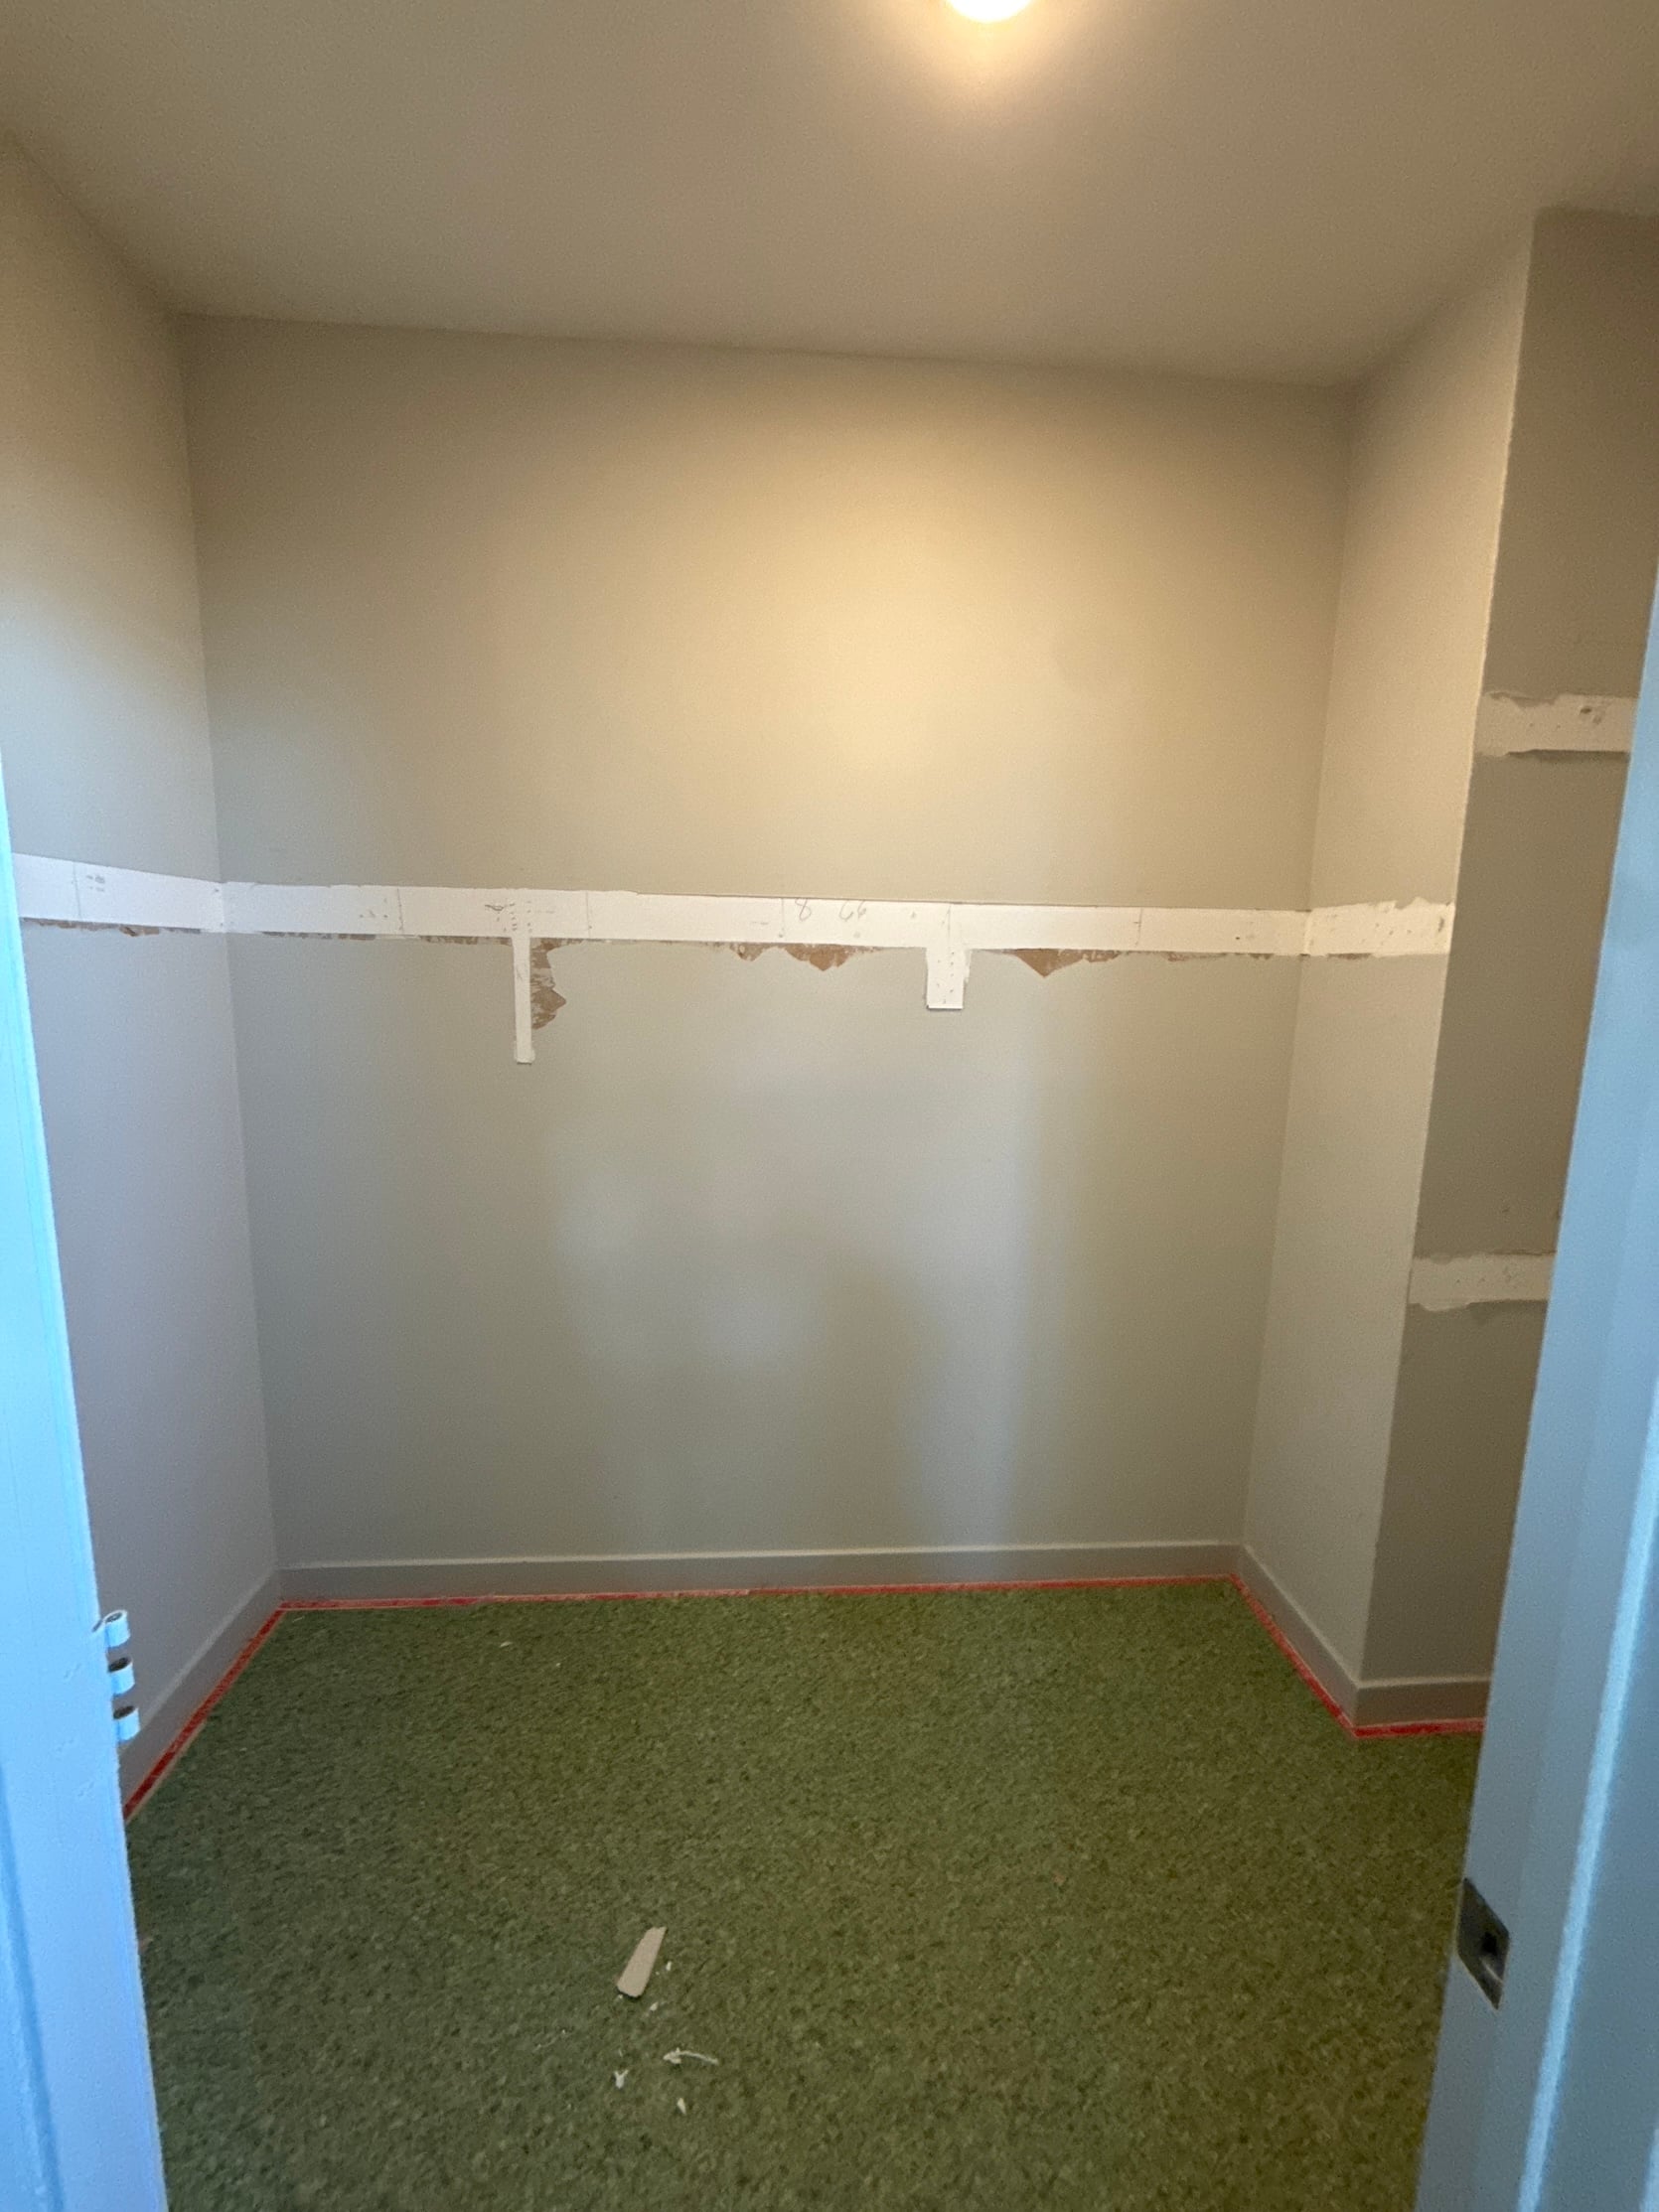
Then it was time to demo out the space, which was kind of therapeutic in a way…ripping out builder-grade grey carpet is a really cute date idea too, fyi. IT WAS SO FUN.
Then we had a whole tile saga that I could write 5,000 words on, but I’ll spare you and just give you the gist…This was THE MOST stressful part about the entire thing 🙂
So we wanted to do tile instead of carpet for 2 reasons: 1. We live by the beach and wet bathing suits and sand on carpet is gross to me, and 2. This space is small-ish, so the quotes we were getting for the pretty designer carpet we liked all had a “small cut fee,” which, after labor, made it more expensive than tile (crazy). We could have gotten more affordable carpet from State College Blvd in Anaheim, but after looking at those options I just felt like doing higher quality flooring was worth it (and I’m so glad we did). The more affordable options were also all neutral, and I knew I wanted something a bit more interesting on the floor in here.
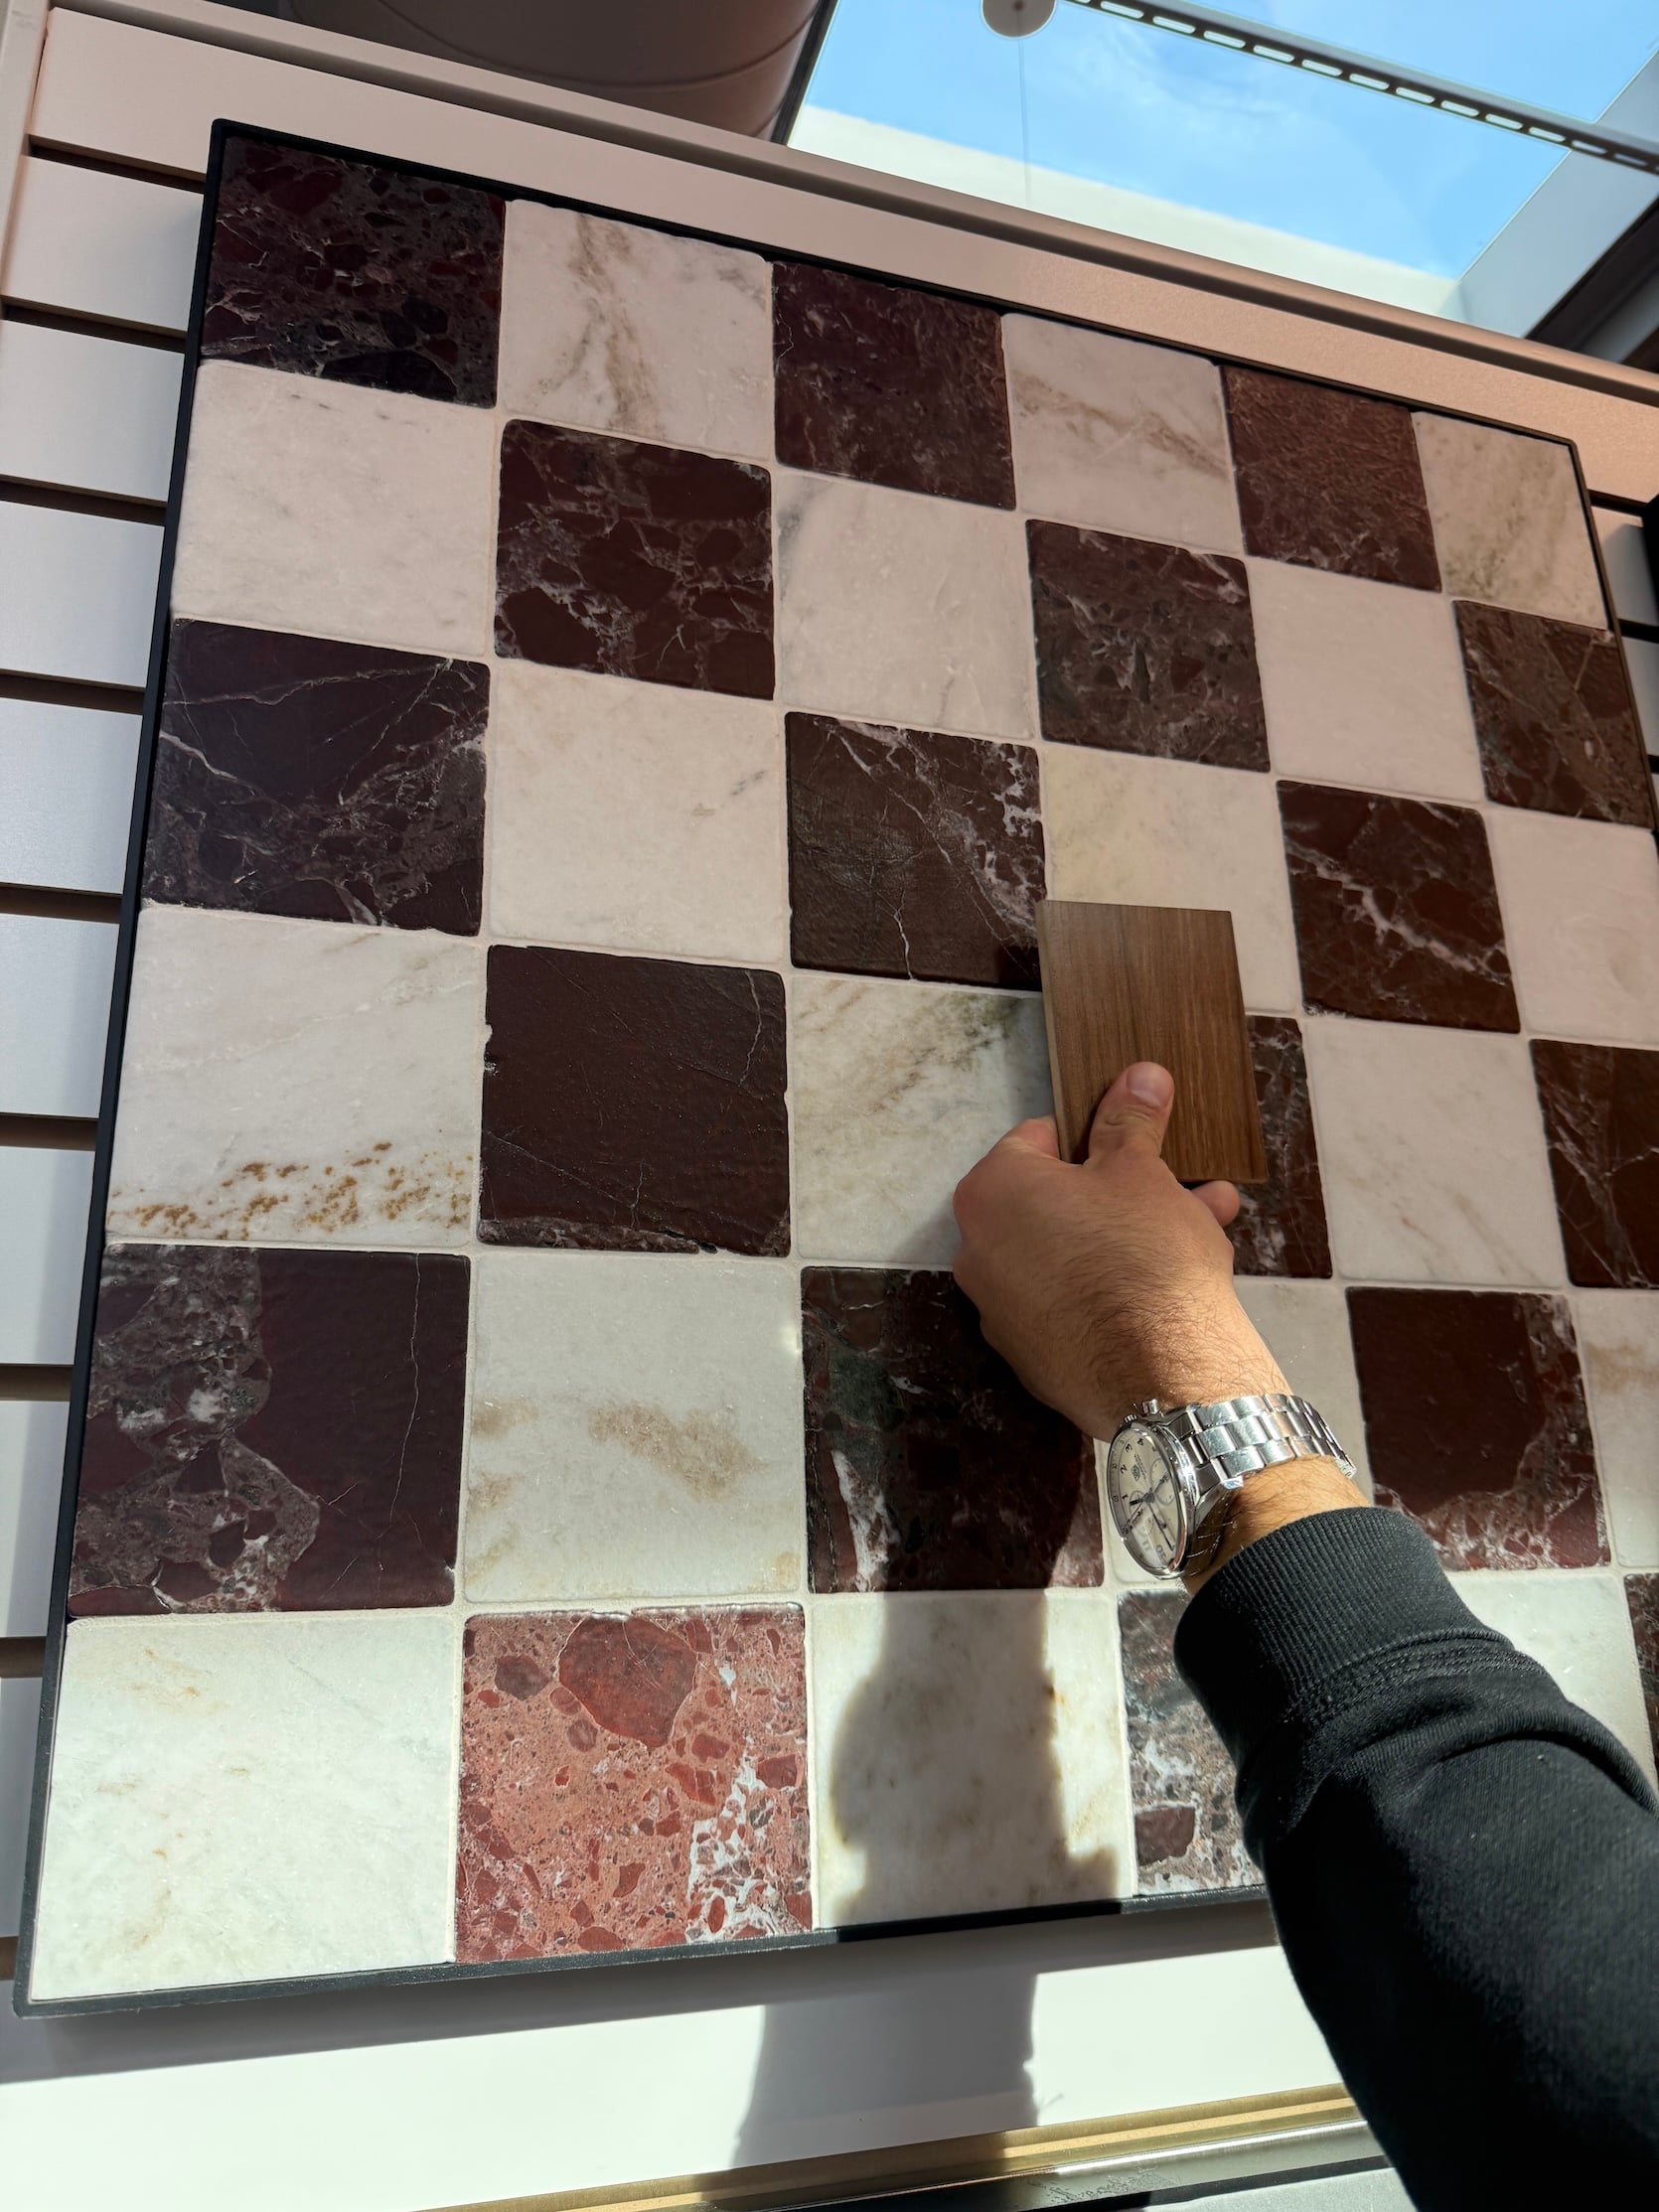
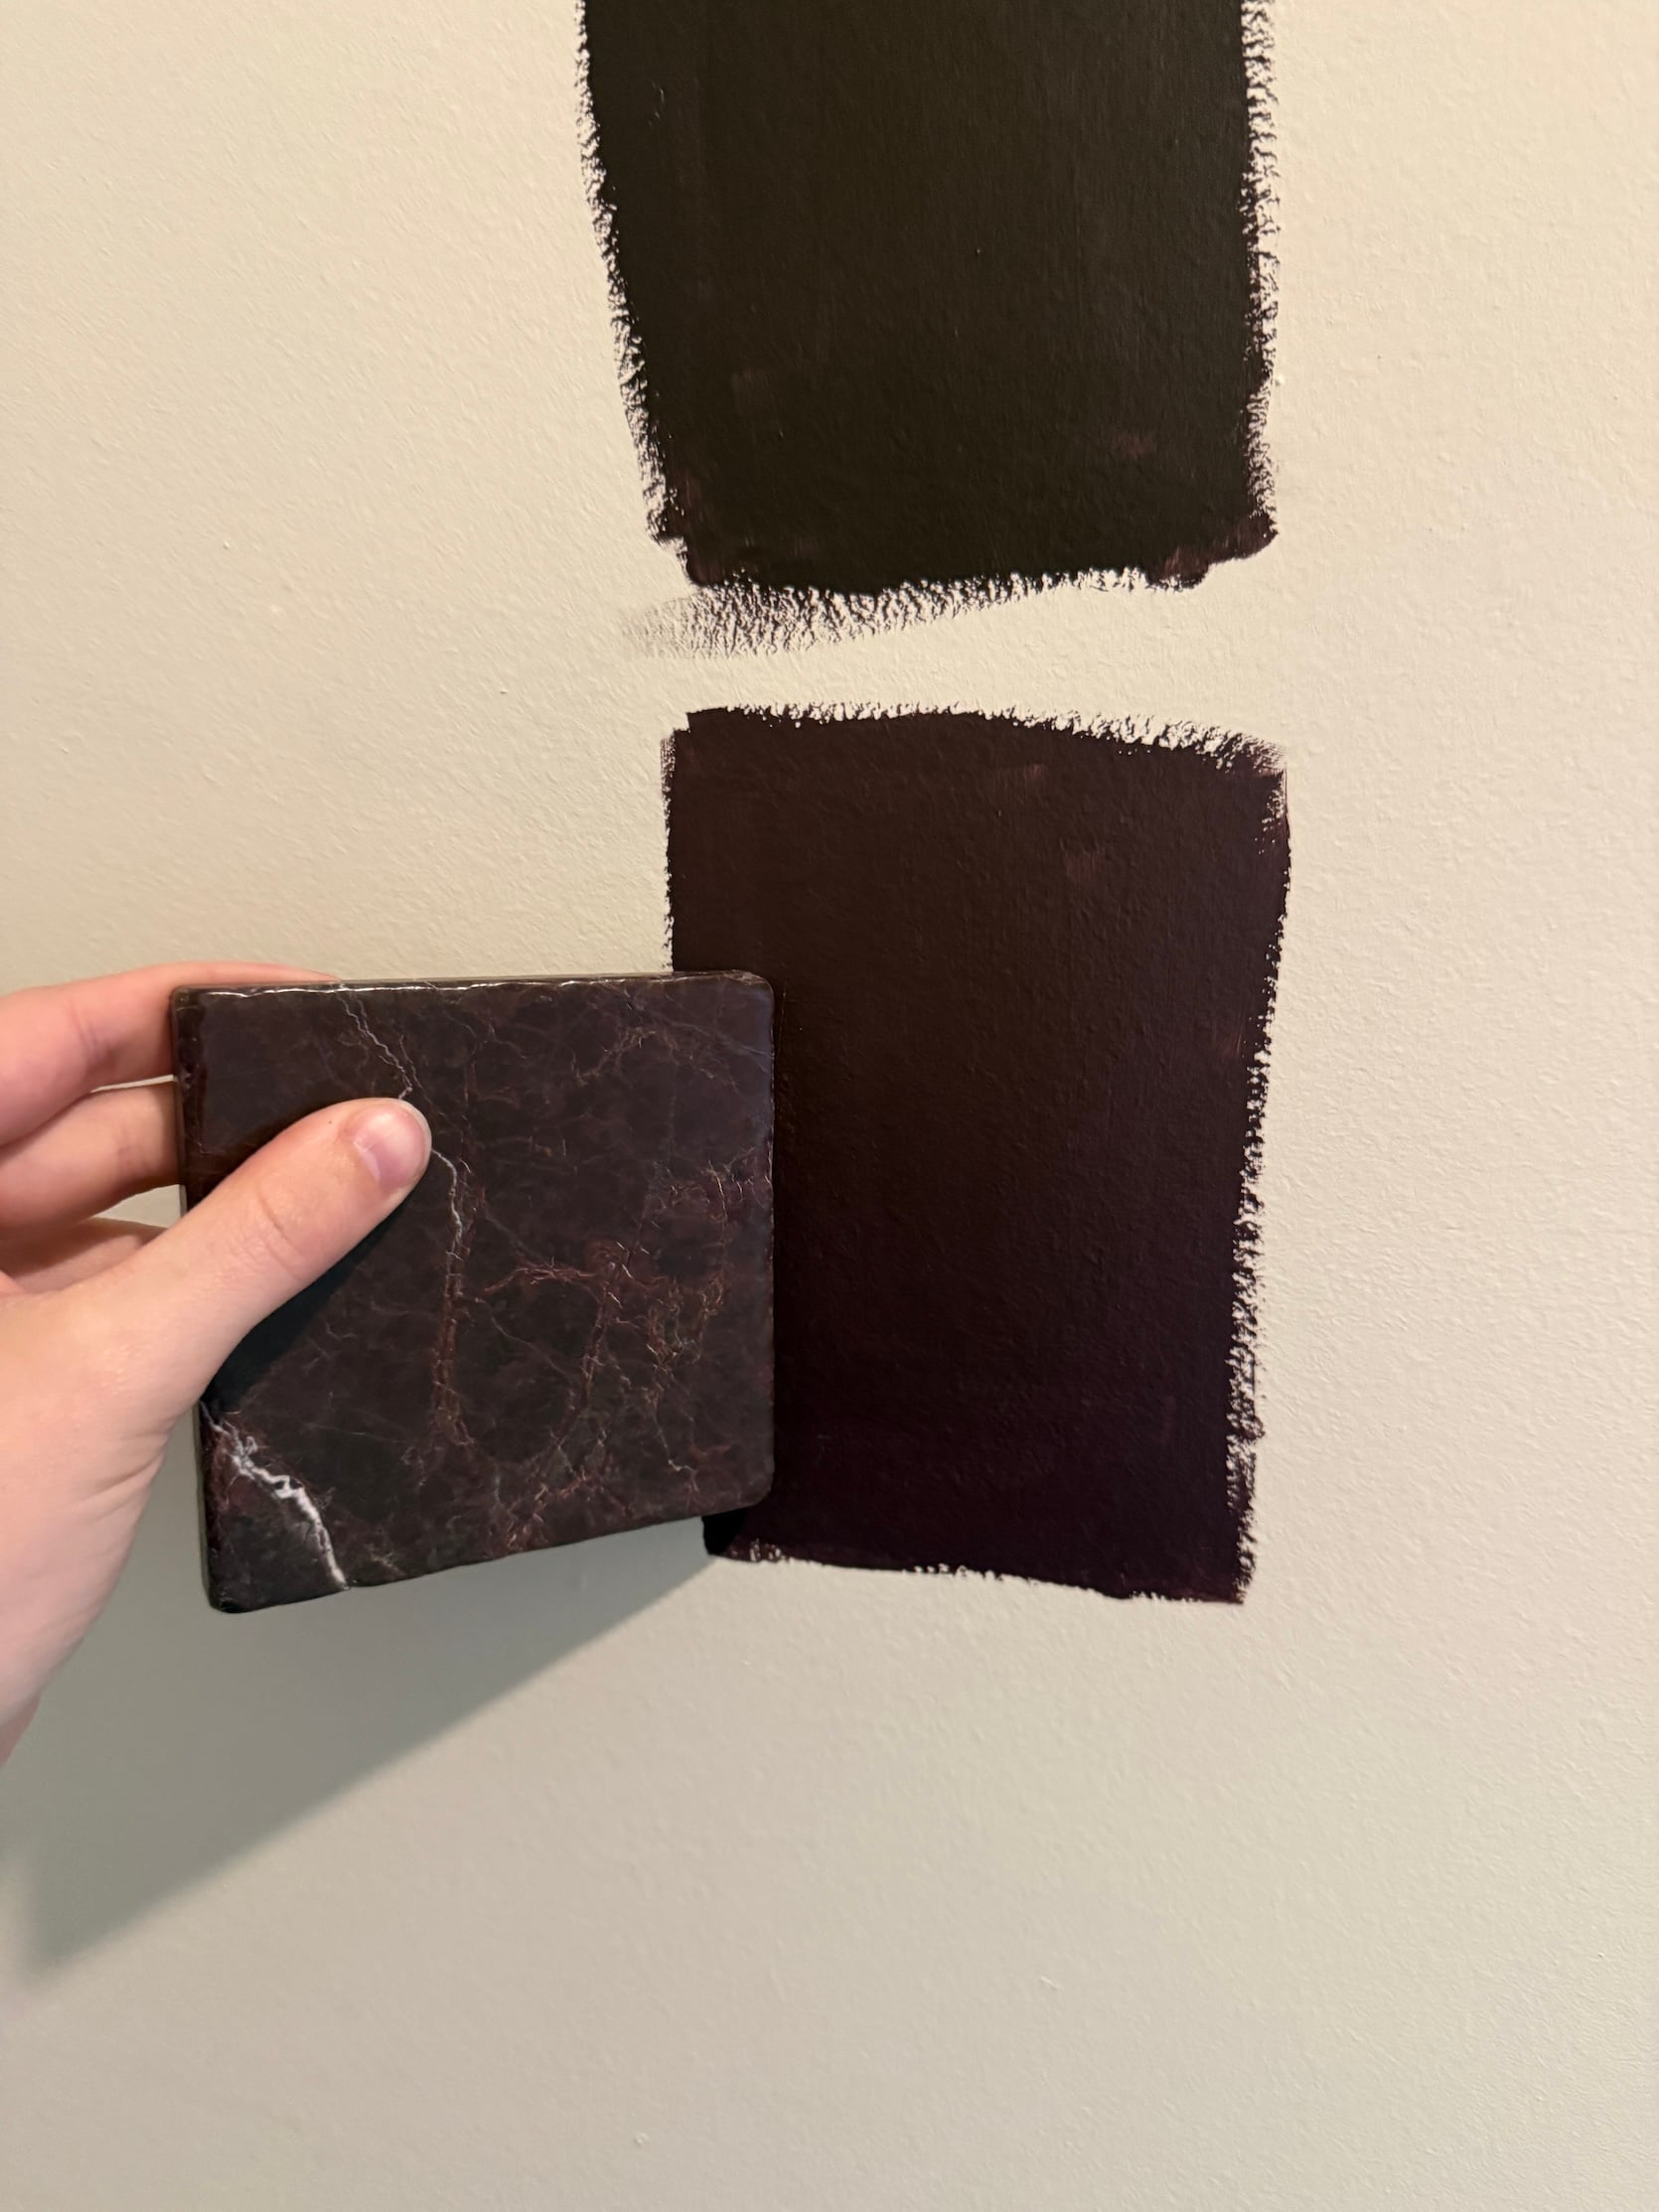
We originally ordered this gorgeous tumbled Breccia Vino 4×4 tile in a checkerboard, which really is stunning and worked so well with the burgundy paint color we chose for the walls and ceiling. The lead time was supposed to be 3 weeks, which was a tight-ish timeline because the closet cabinetry was supposed to be finished around the same time, so we pushed the closet install a bit so we could put the flooring down first. Well, I got a call the week the tile was supposed to show up saying that their initial lead time was wrong and it was going to be another 4 weeks…so we had to cancel the order and find something new and in-stock. And in 2 days! Wooo!
Side note: if you’re wondering why we didn’t install the cabinetry first, then the flooring, it’s because we were putting in a special cabinet for our LG steam styler (which is the coolest gadget…I’ll explain more later in this post). This cabinet had flooring inside of it, so it made more sense to do the flooring first so it looked seamless.
Anyway, I found out that Zia Tile has a warehouse pickup option in LA that could be ready same-day (if you called and asked really nicely and if they had it in stock), so I panic-called Gretchen and asked if I should do the color “Iconic Blue” or “Ethereal Blue” and we both agreed Ethereal Blue was the move – so I ordered 50sqft sight-unseen (we didn’t have time to wait for samples), drove to the Zia warehouse in Bell Gardens to pick up the tile same-day, and THANK GOD WE LOVED IT. It was only mildly anxiety-inducing:)
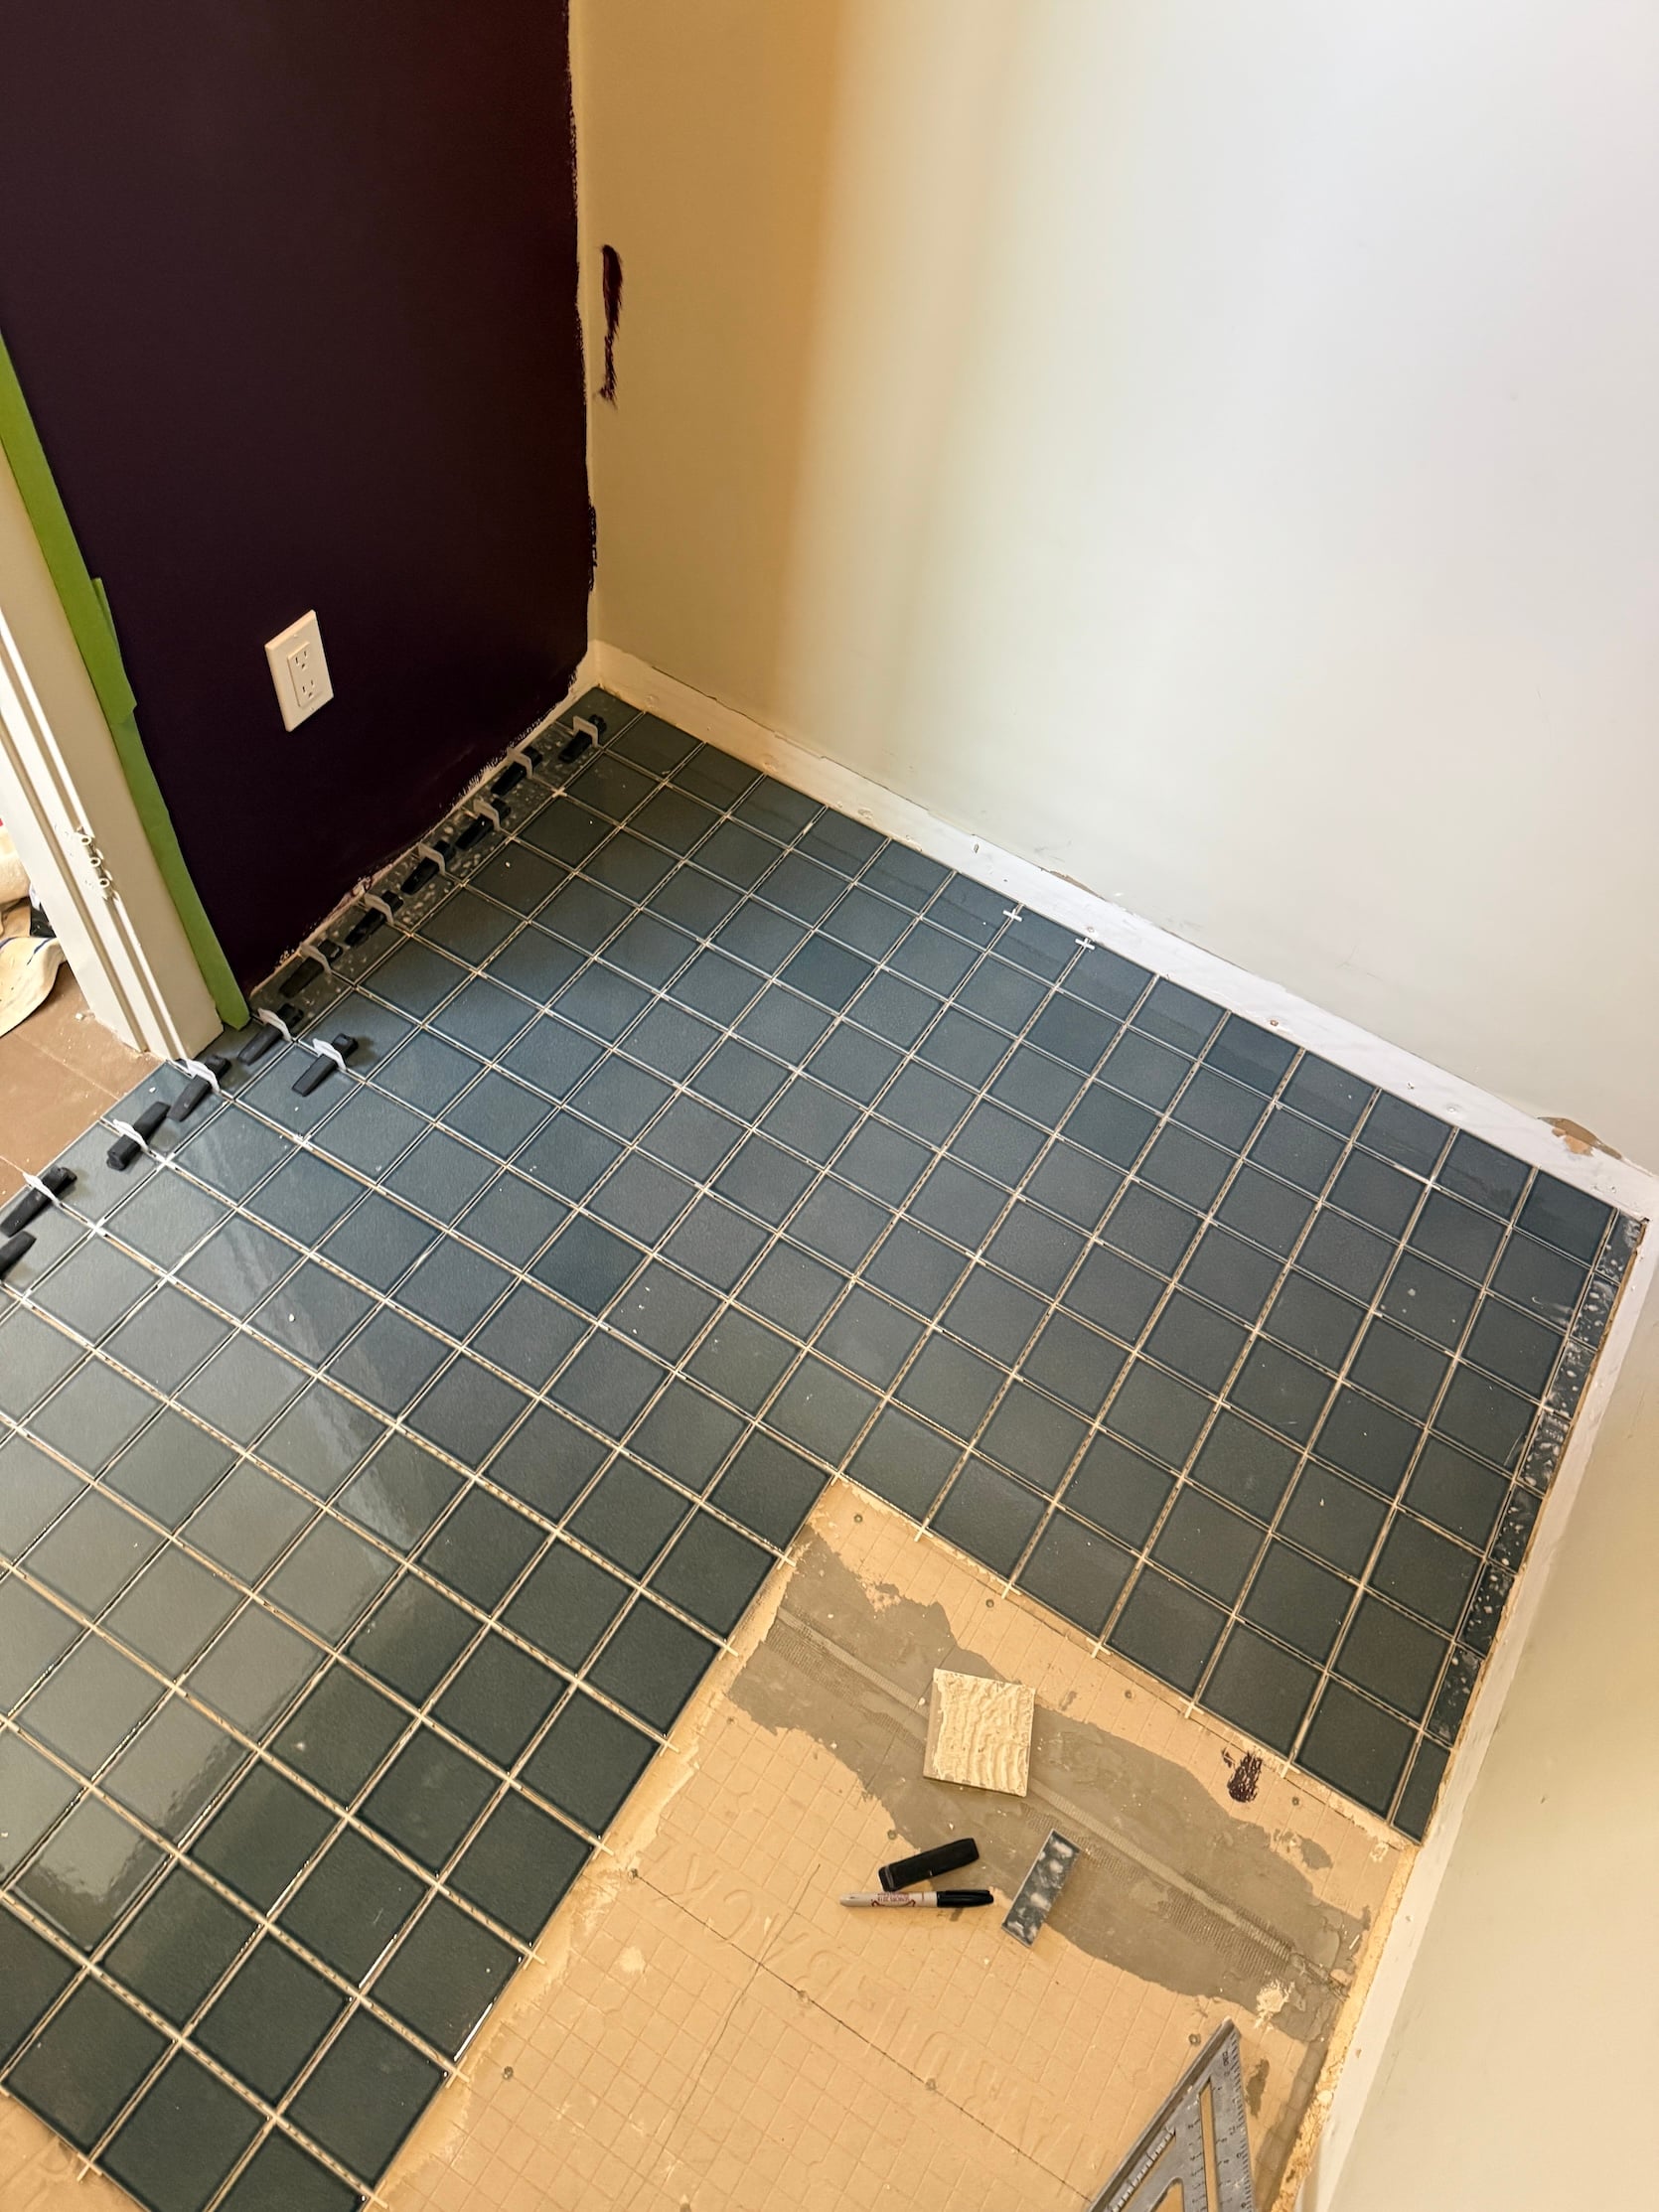
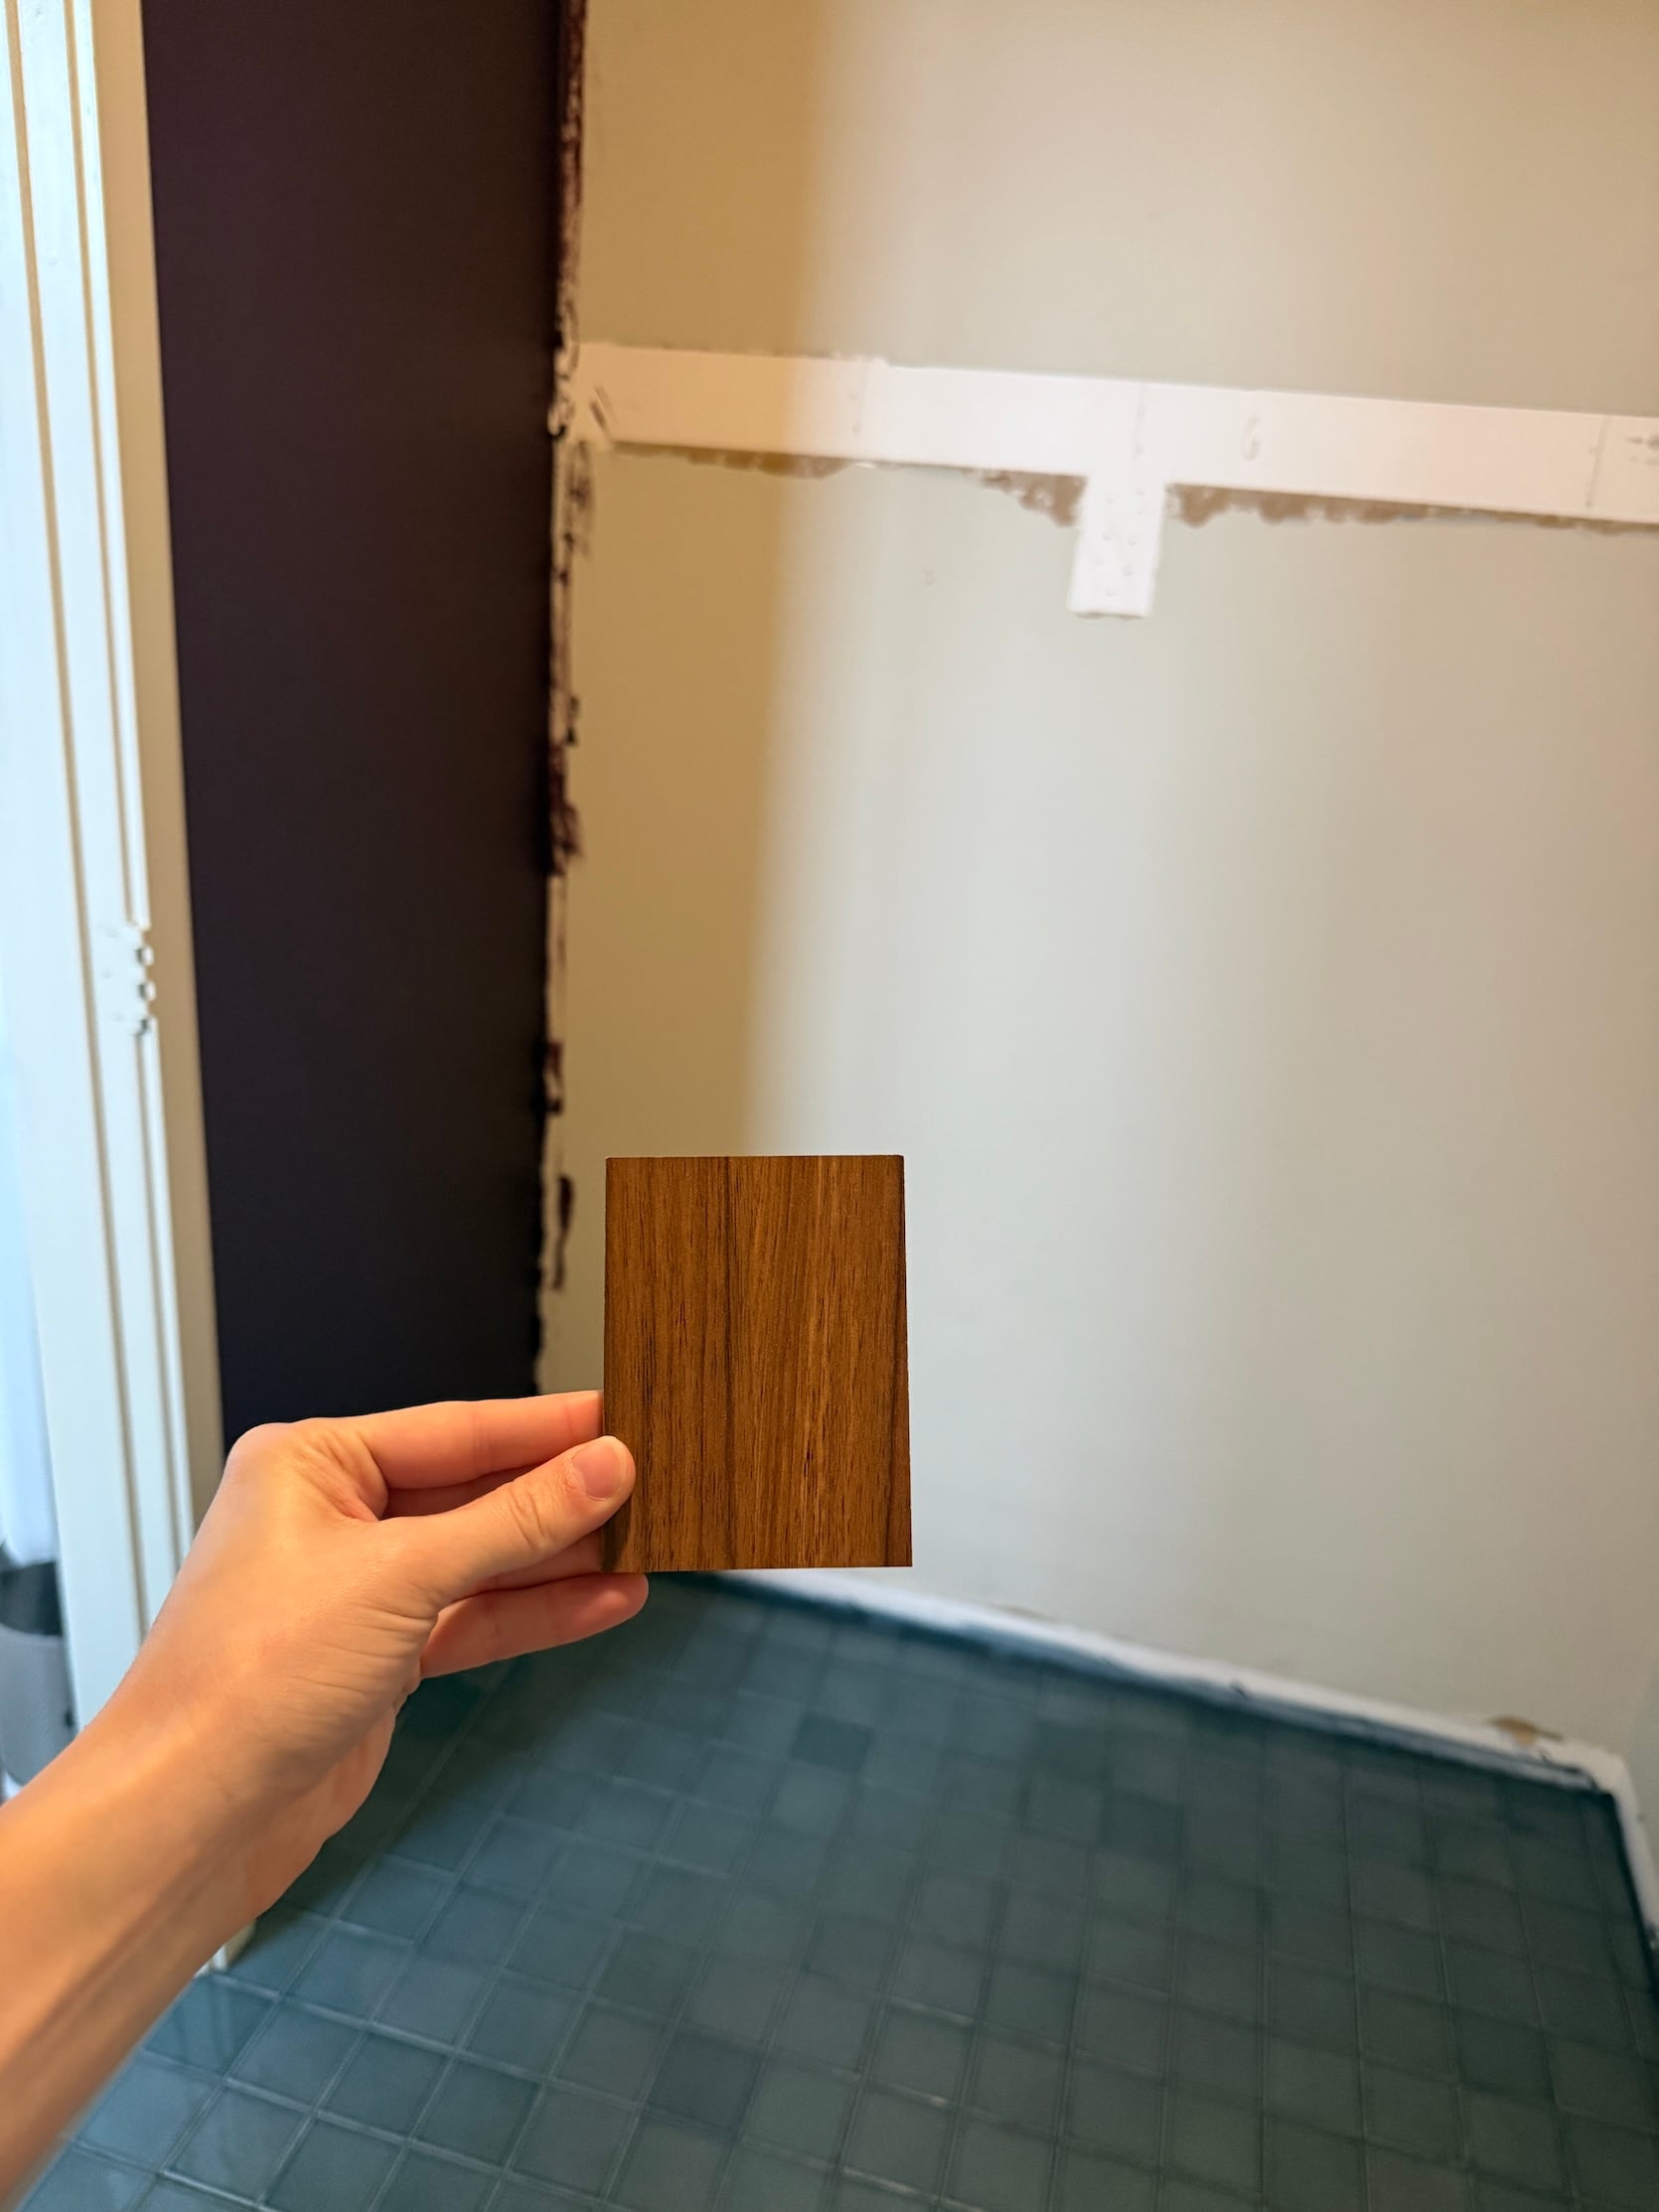
Looking back now, the checkerboard floor might have been too much with everything that’s going on in the closet, so I am SO happy we went with this tile!! Everything happens for a reason! Austin and his dad installed the tile (in case you missed the last post…they’re VERY handy). We went with a tonal grout, and I could not love it more – especially with the paint color!! I sampled a ton of burgundy paints, but ultimately went with Caponata by Benjamin Moore, and it’s PERFECT for this room. It leans more purple than red, and has a good amount of brown in it, which is why it pairs so well with walnut. I could not love it more!
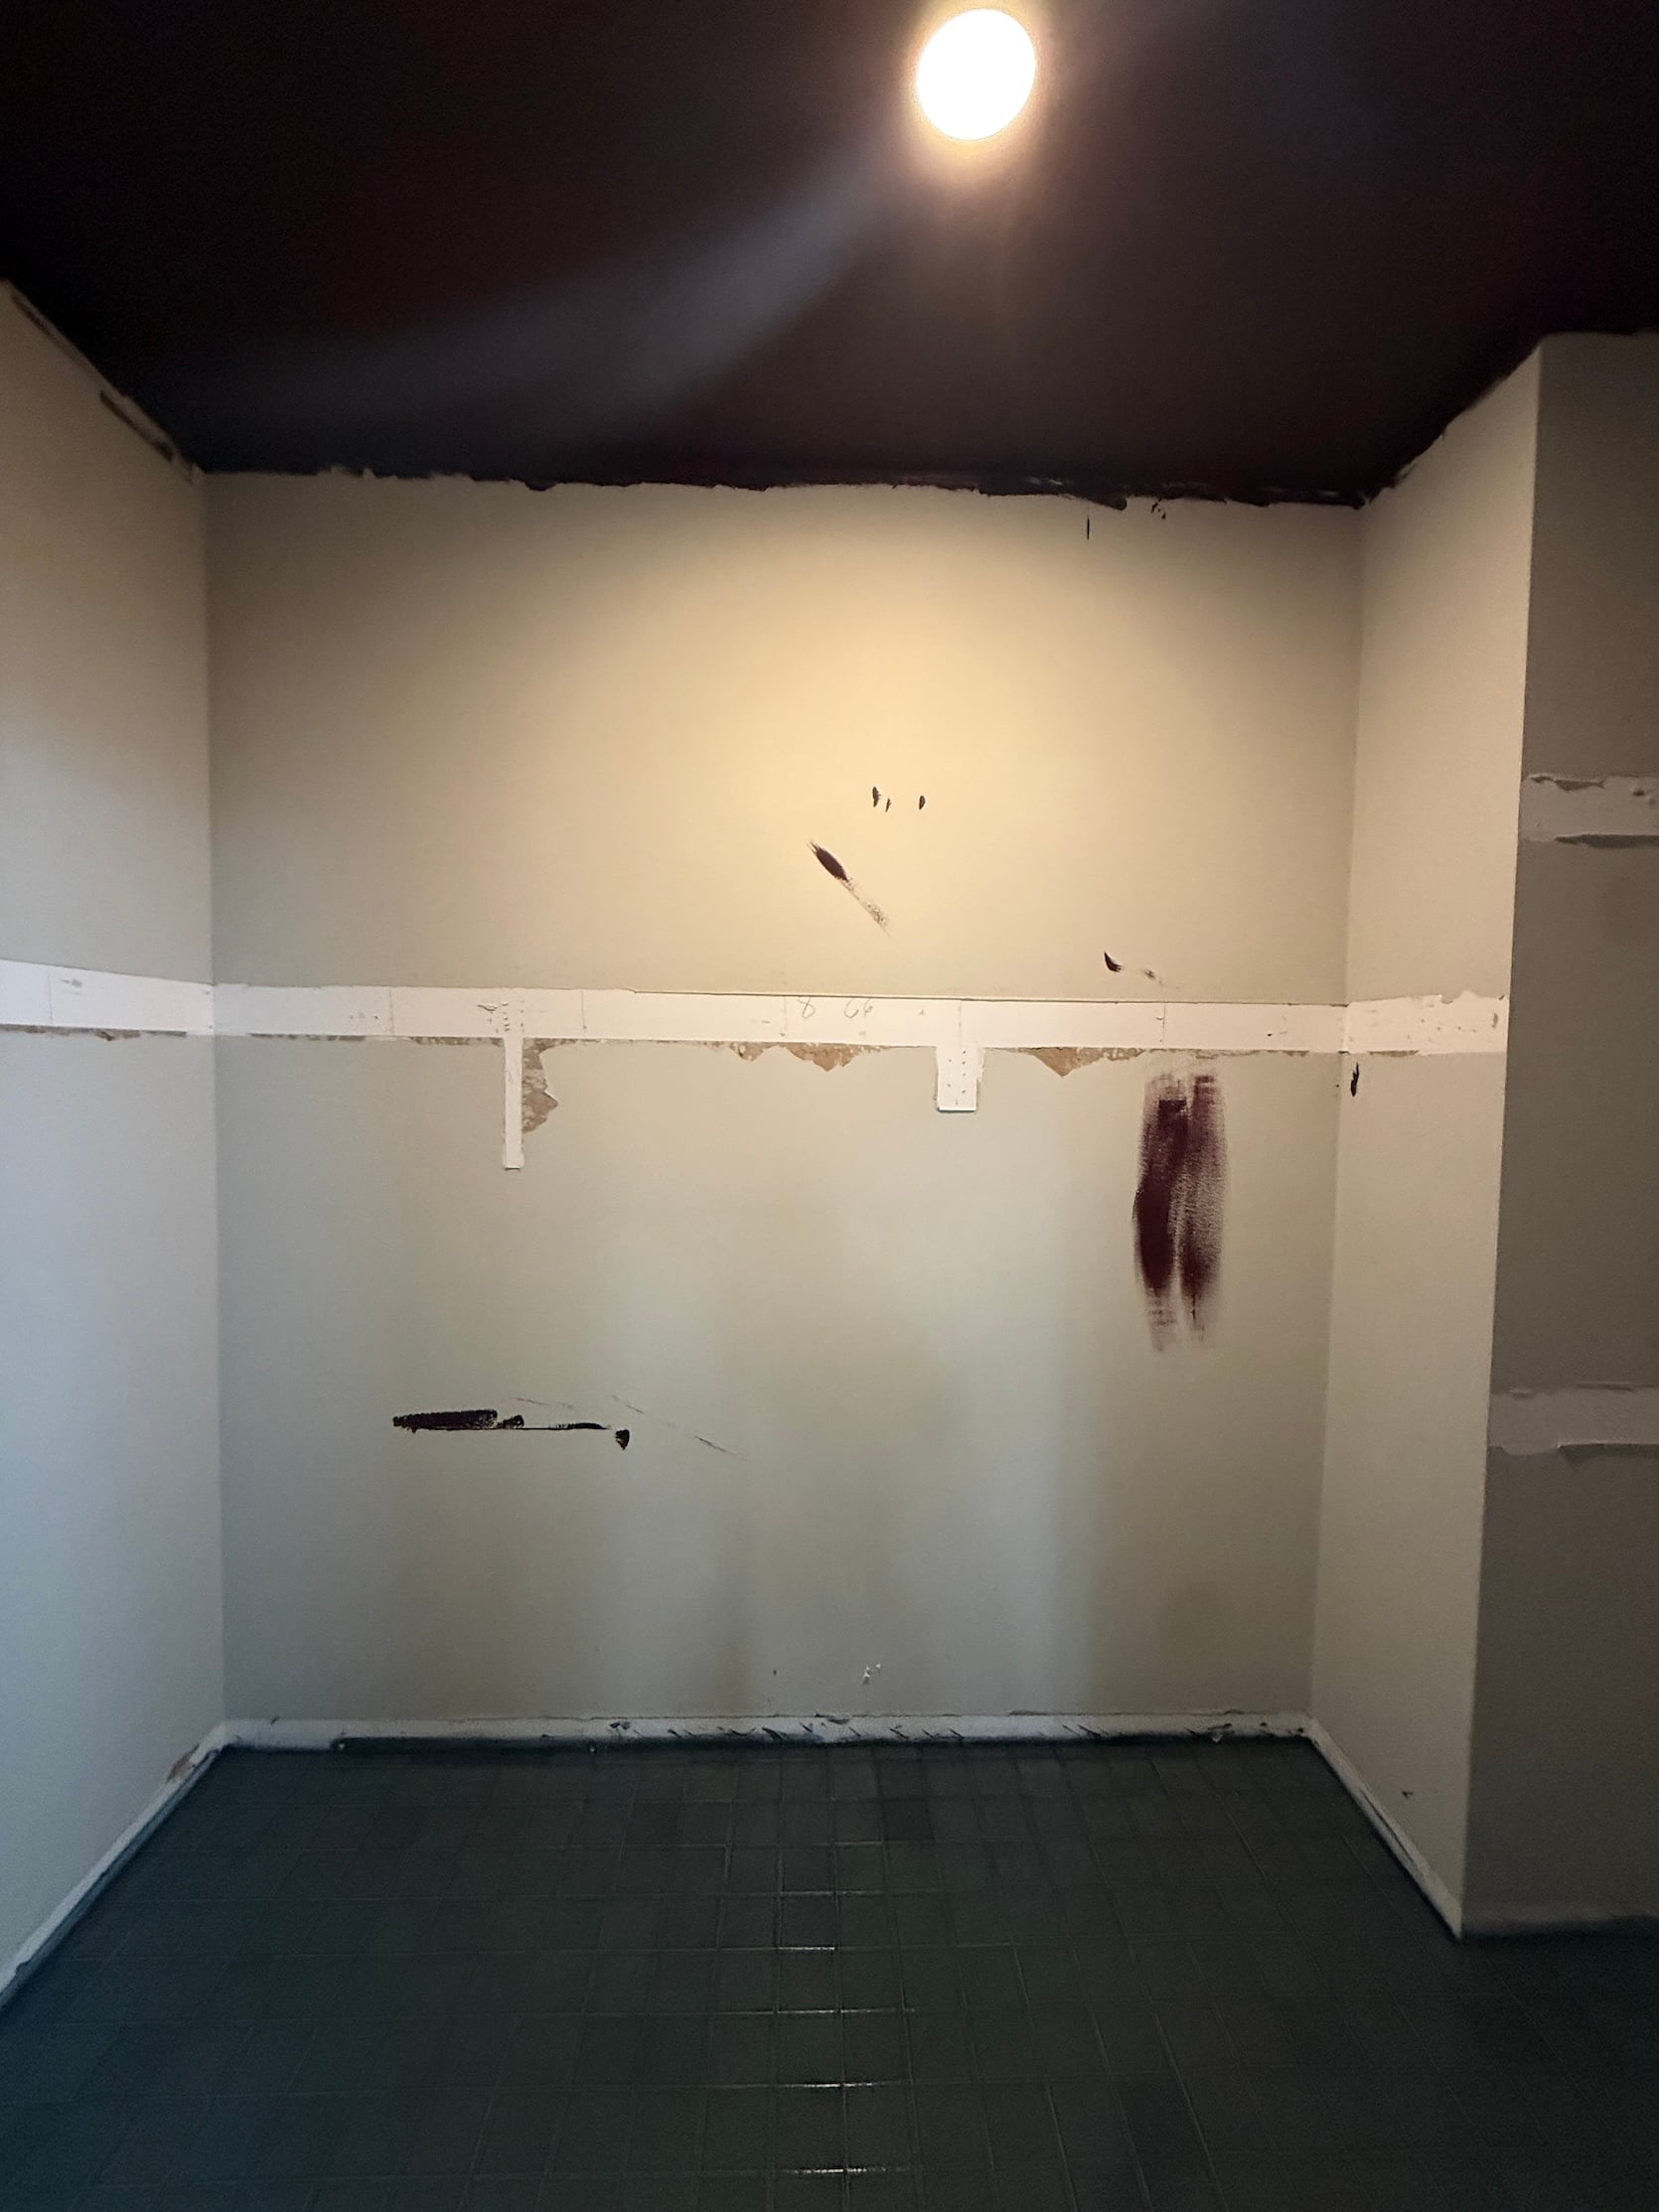
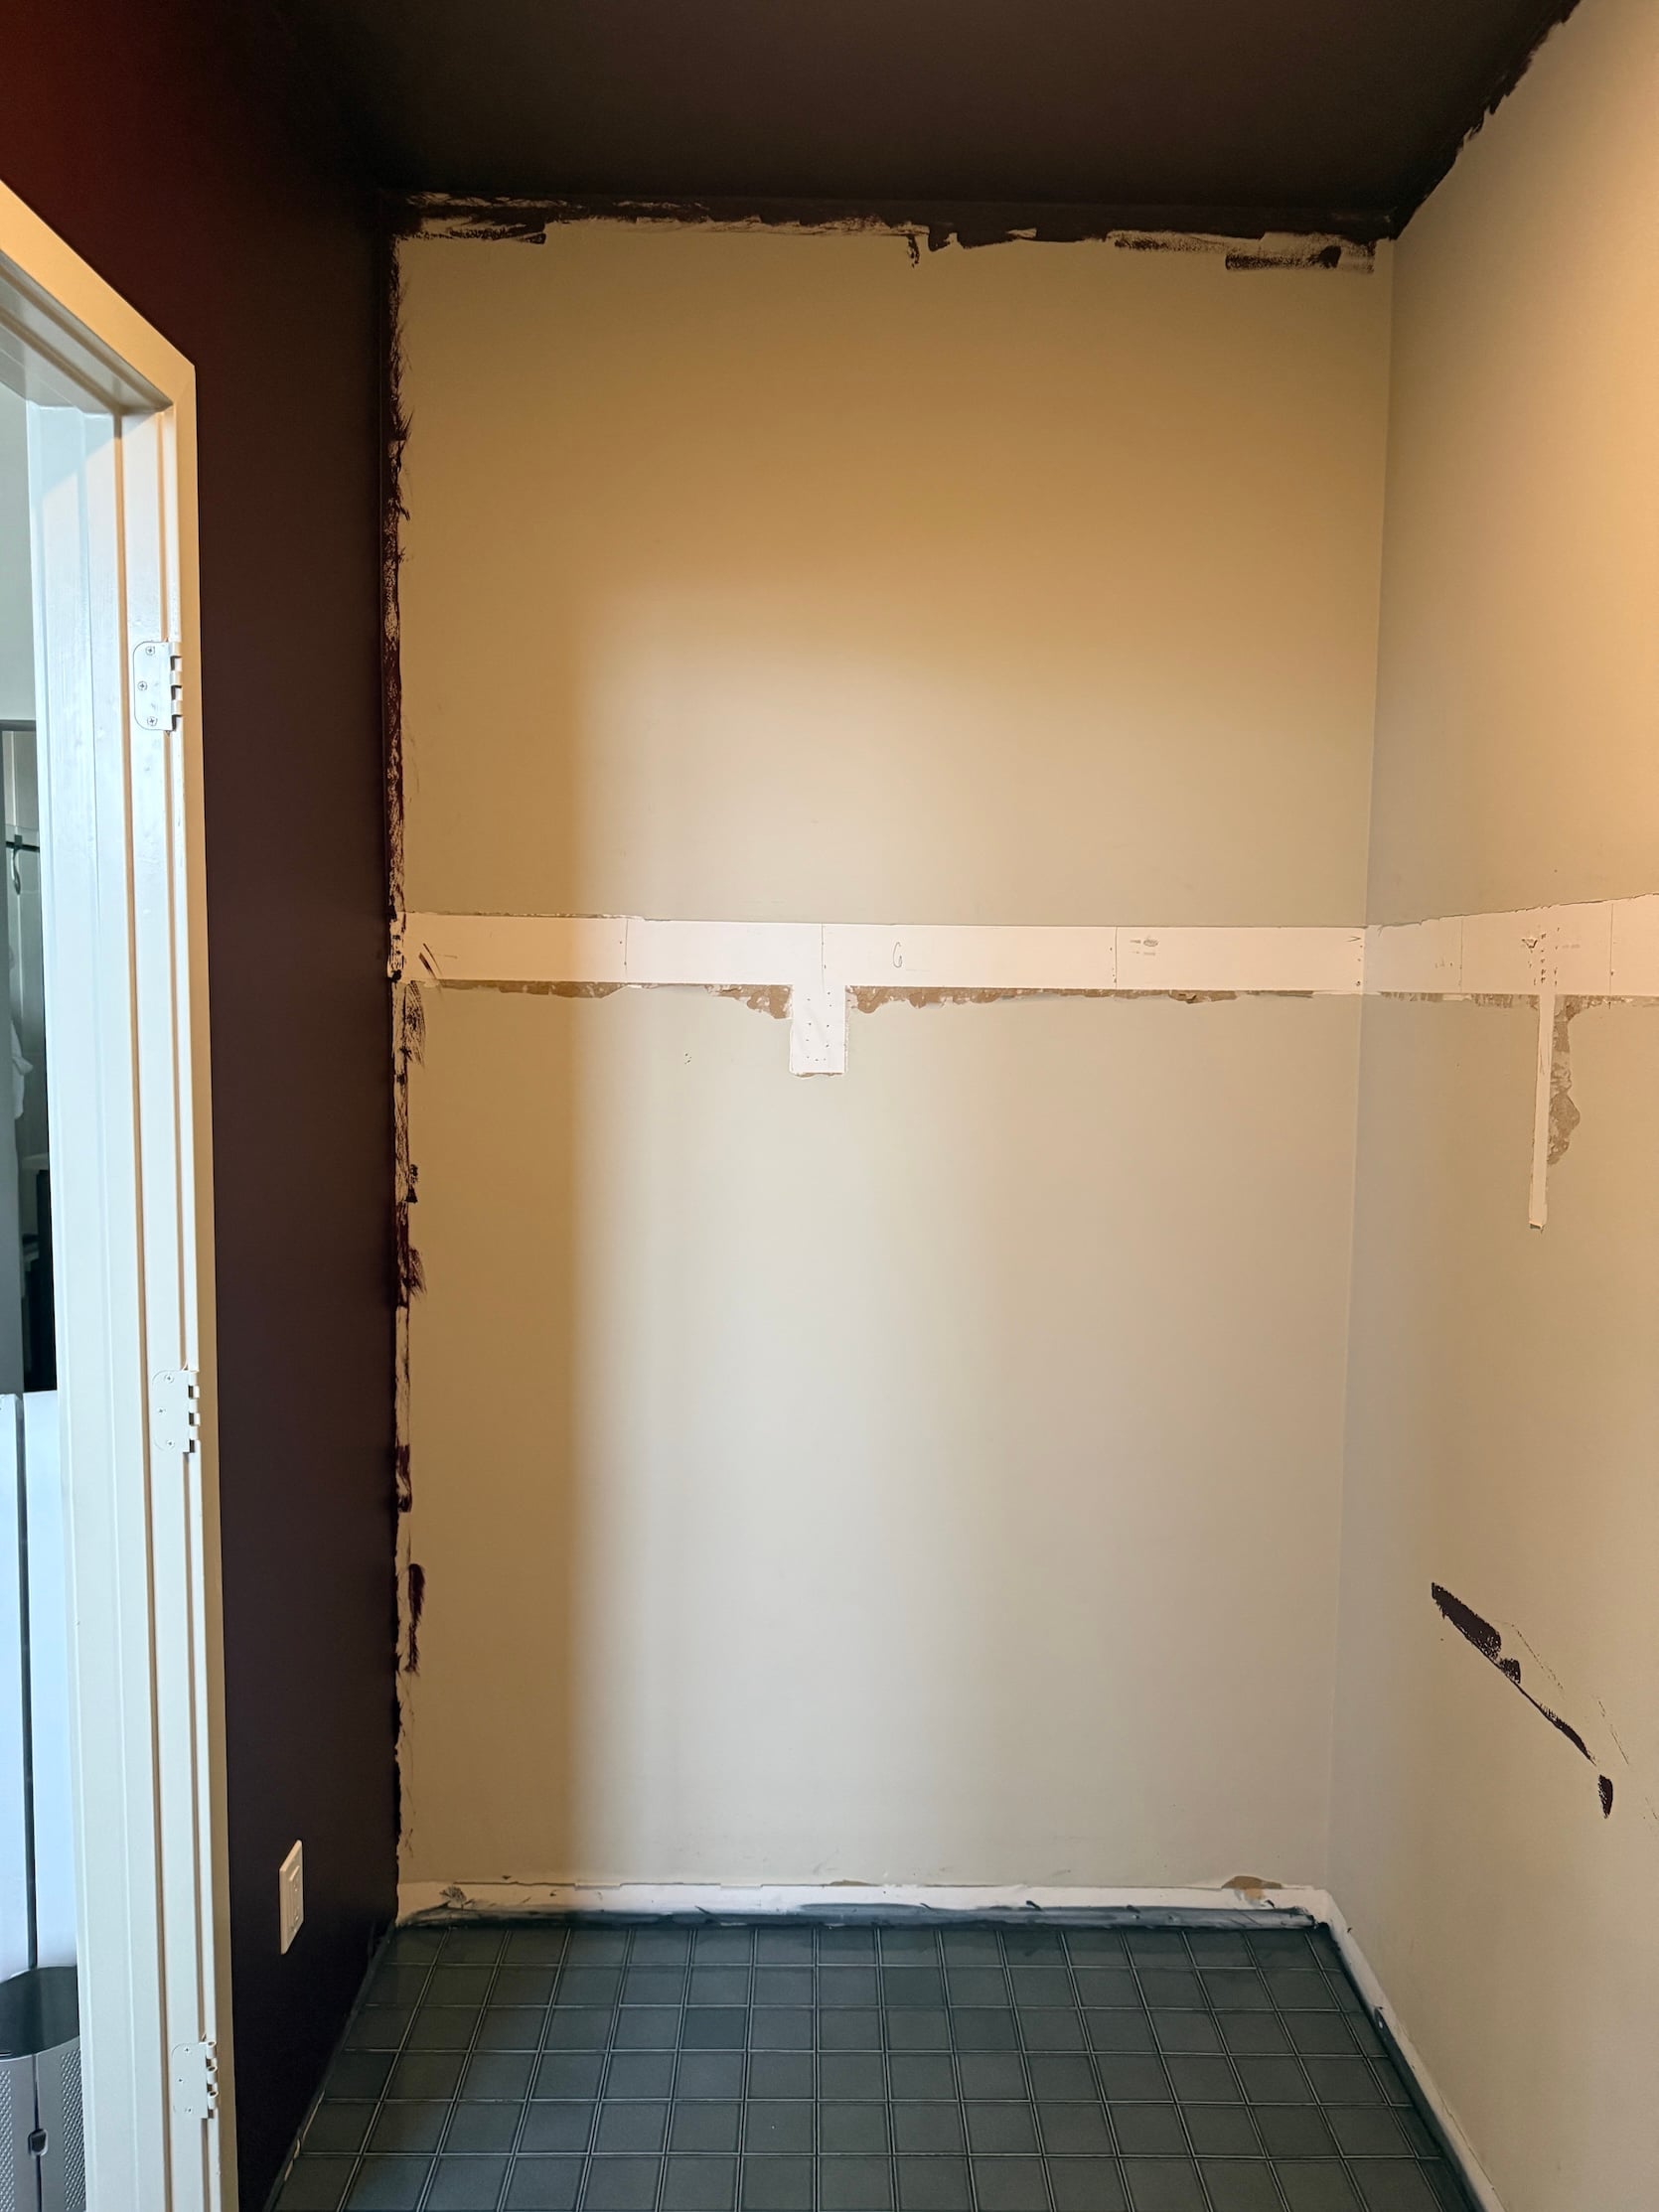
Once the flooring fiasco was over (thank the lord), the installers came and in 8 hours, our closet went from these scary photos above to…
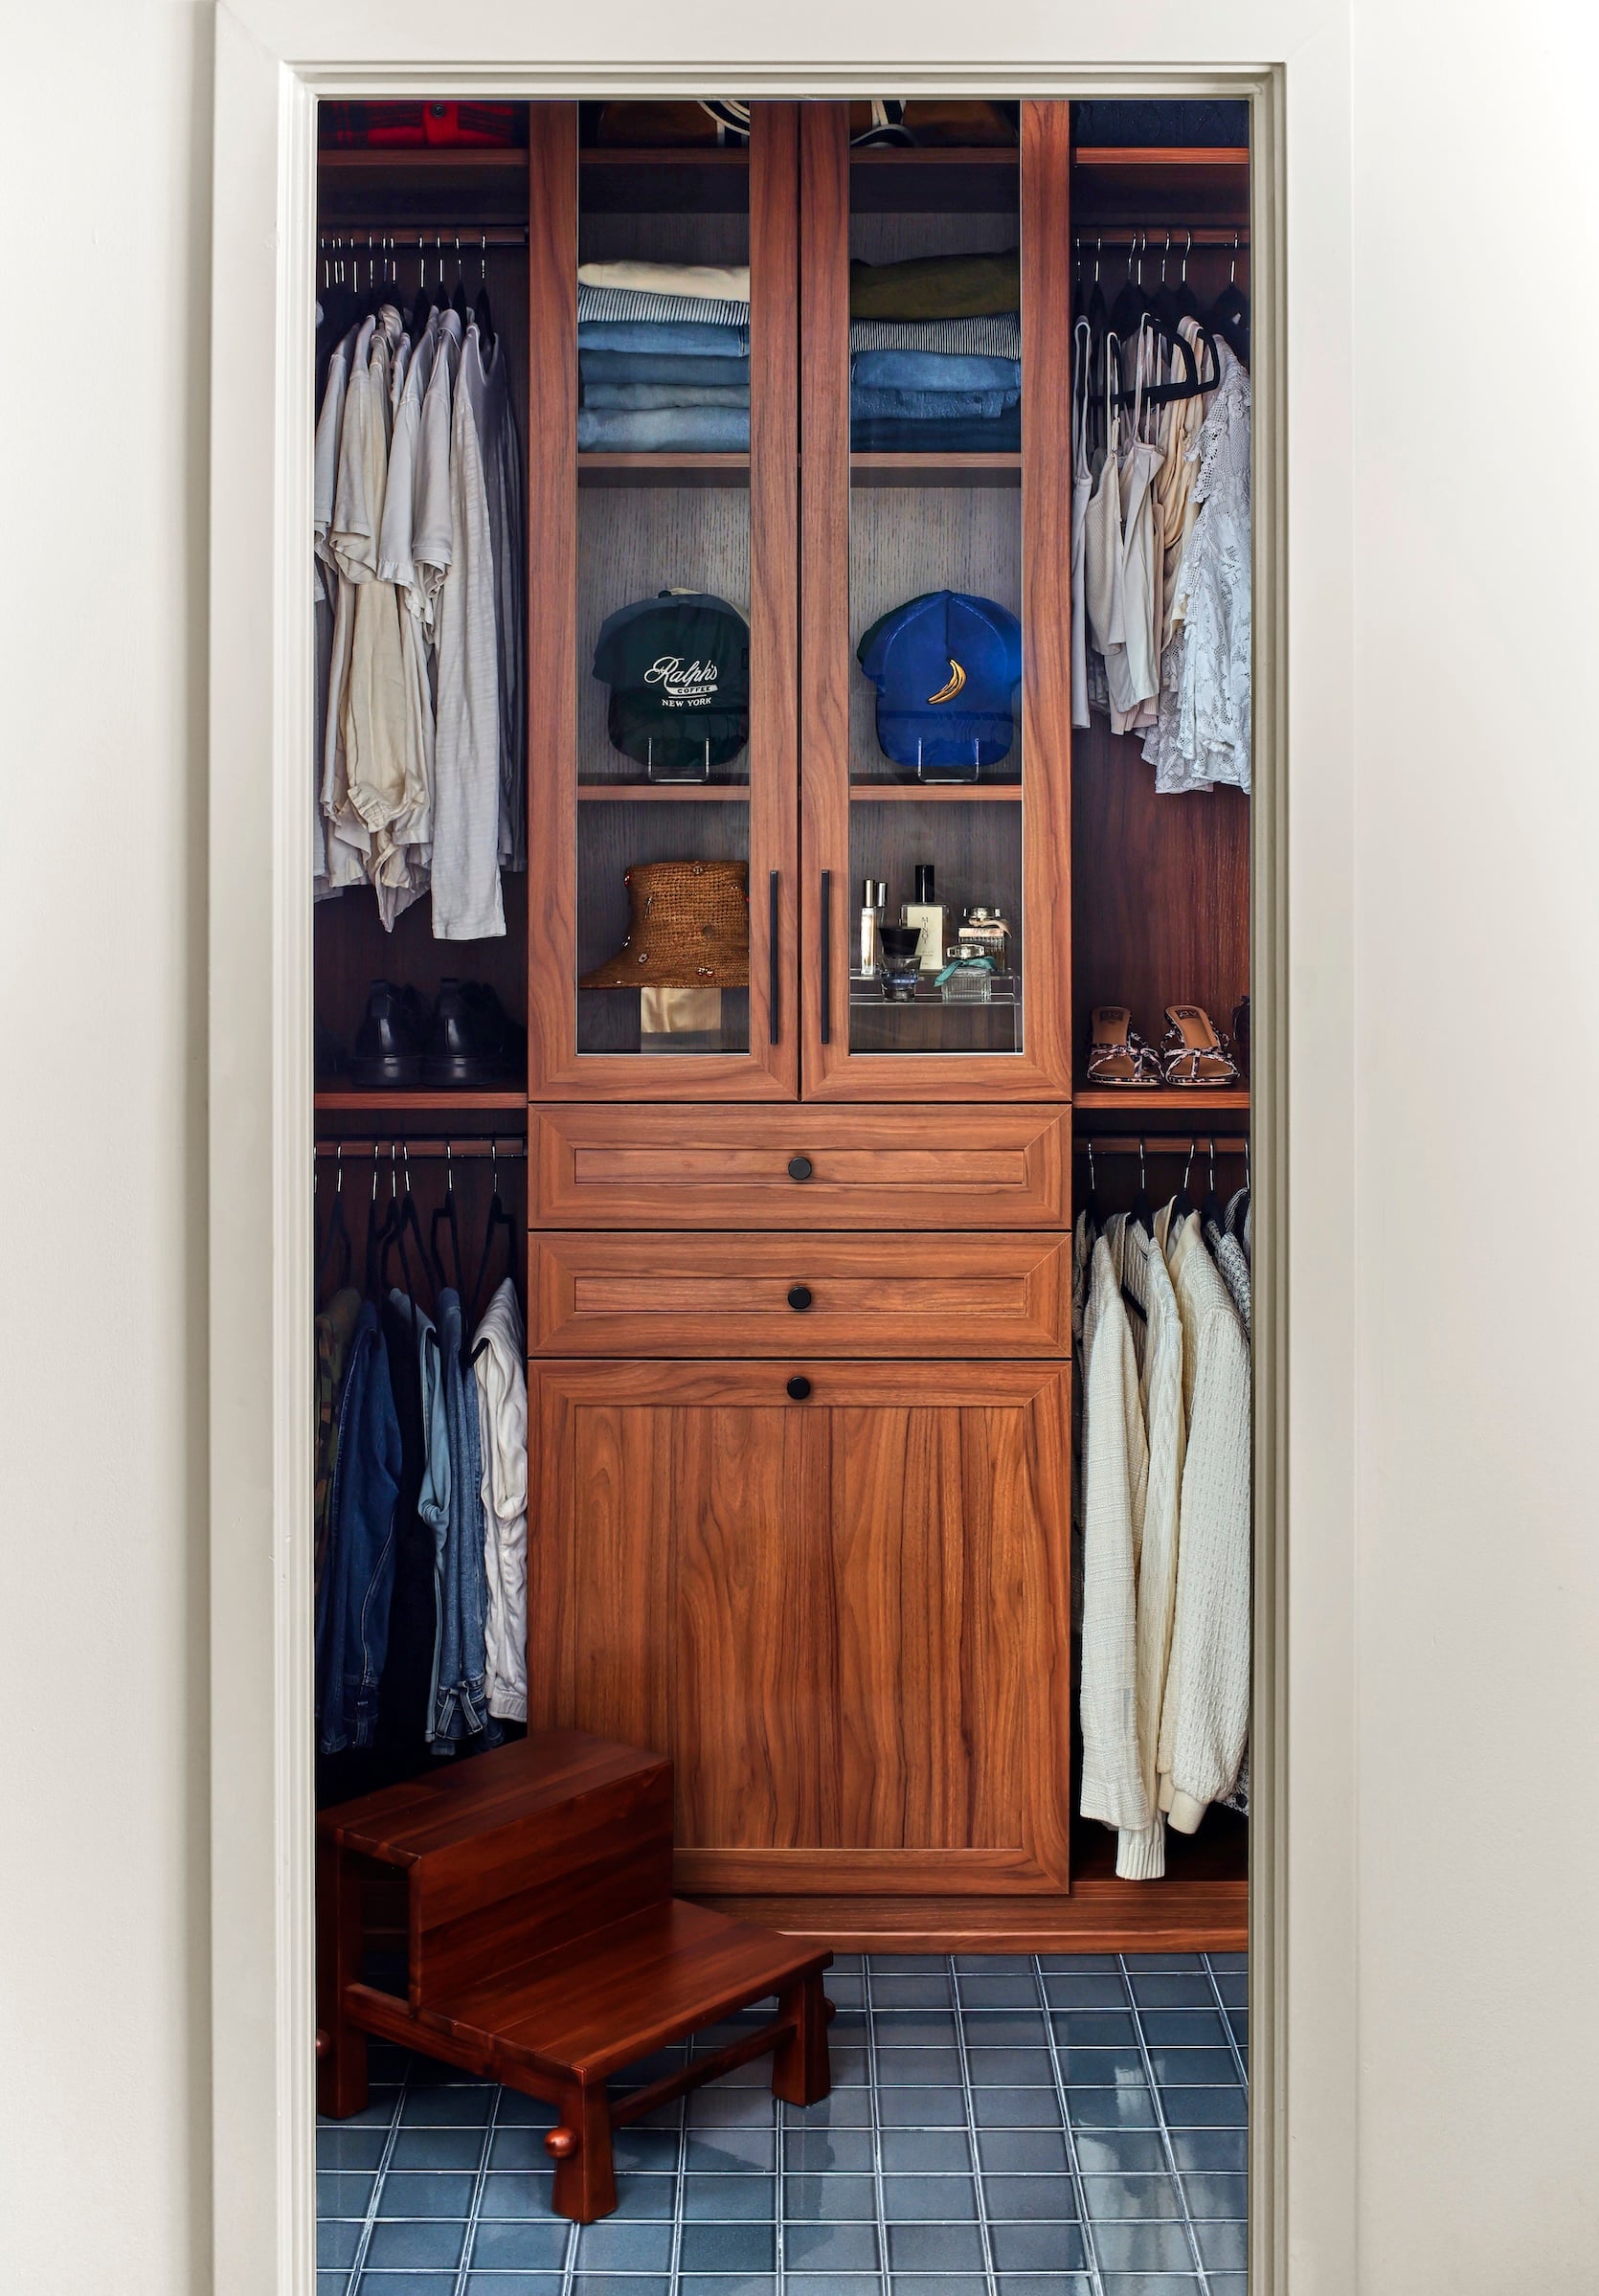
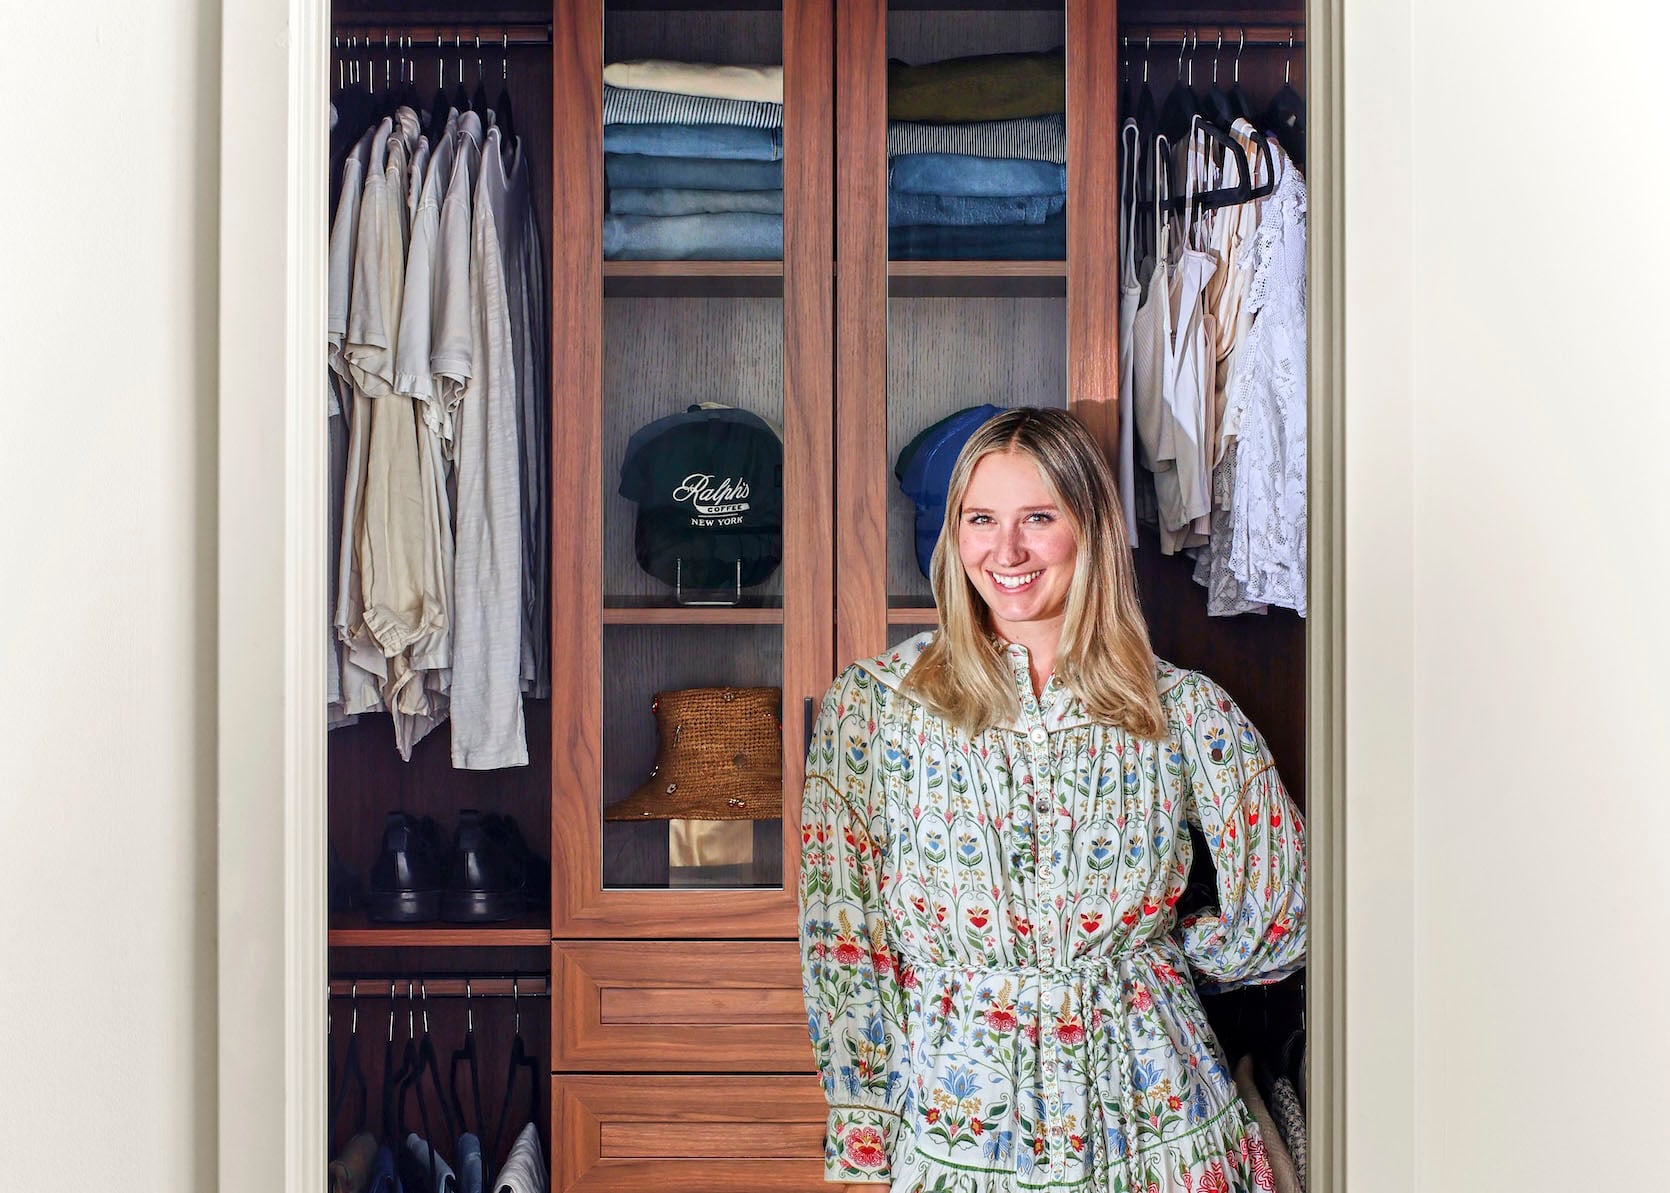
THIS!!! AH, THIS CLOSET IS MY DREAM! DREAMS DO COME TRUE! I actually cannot fathom that this is ours. It’s perfect in every. single. way. We doubled our storage space! I have a place for my sweaters and shoes! Let me walk you through some of the insanely cool features we added…
The Steam Styler
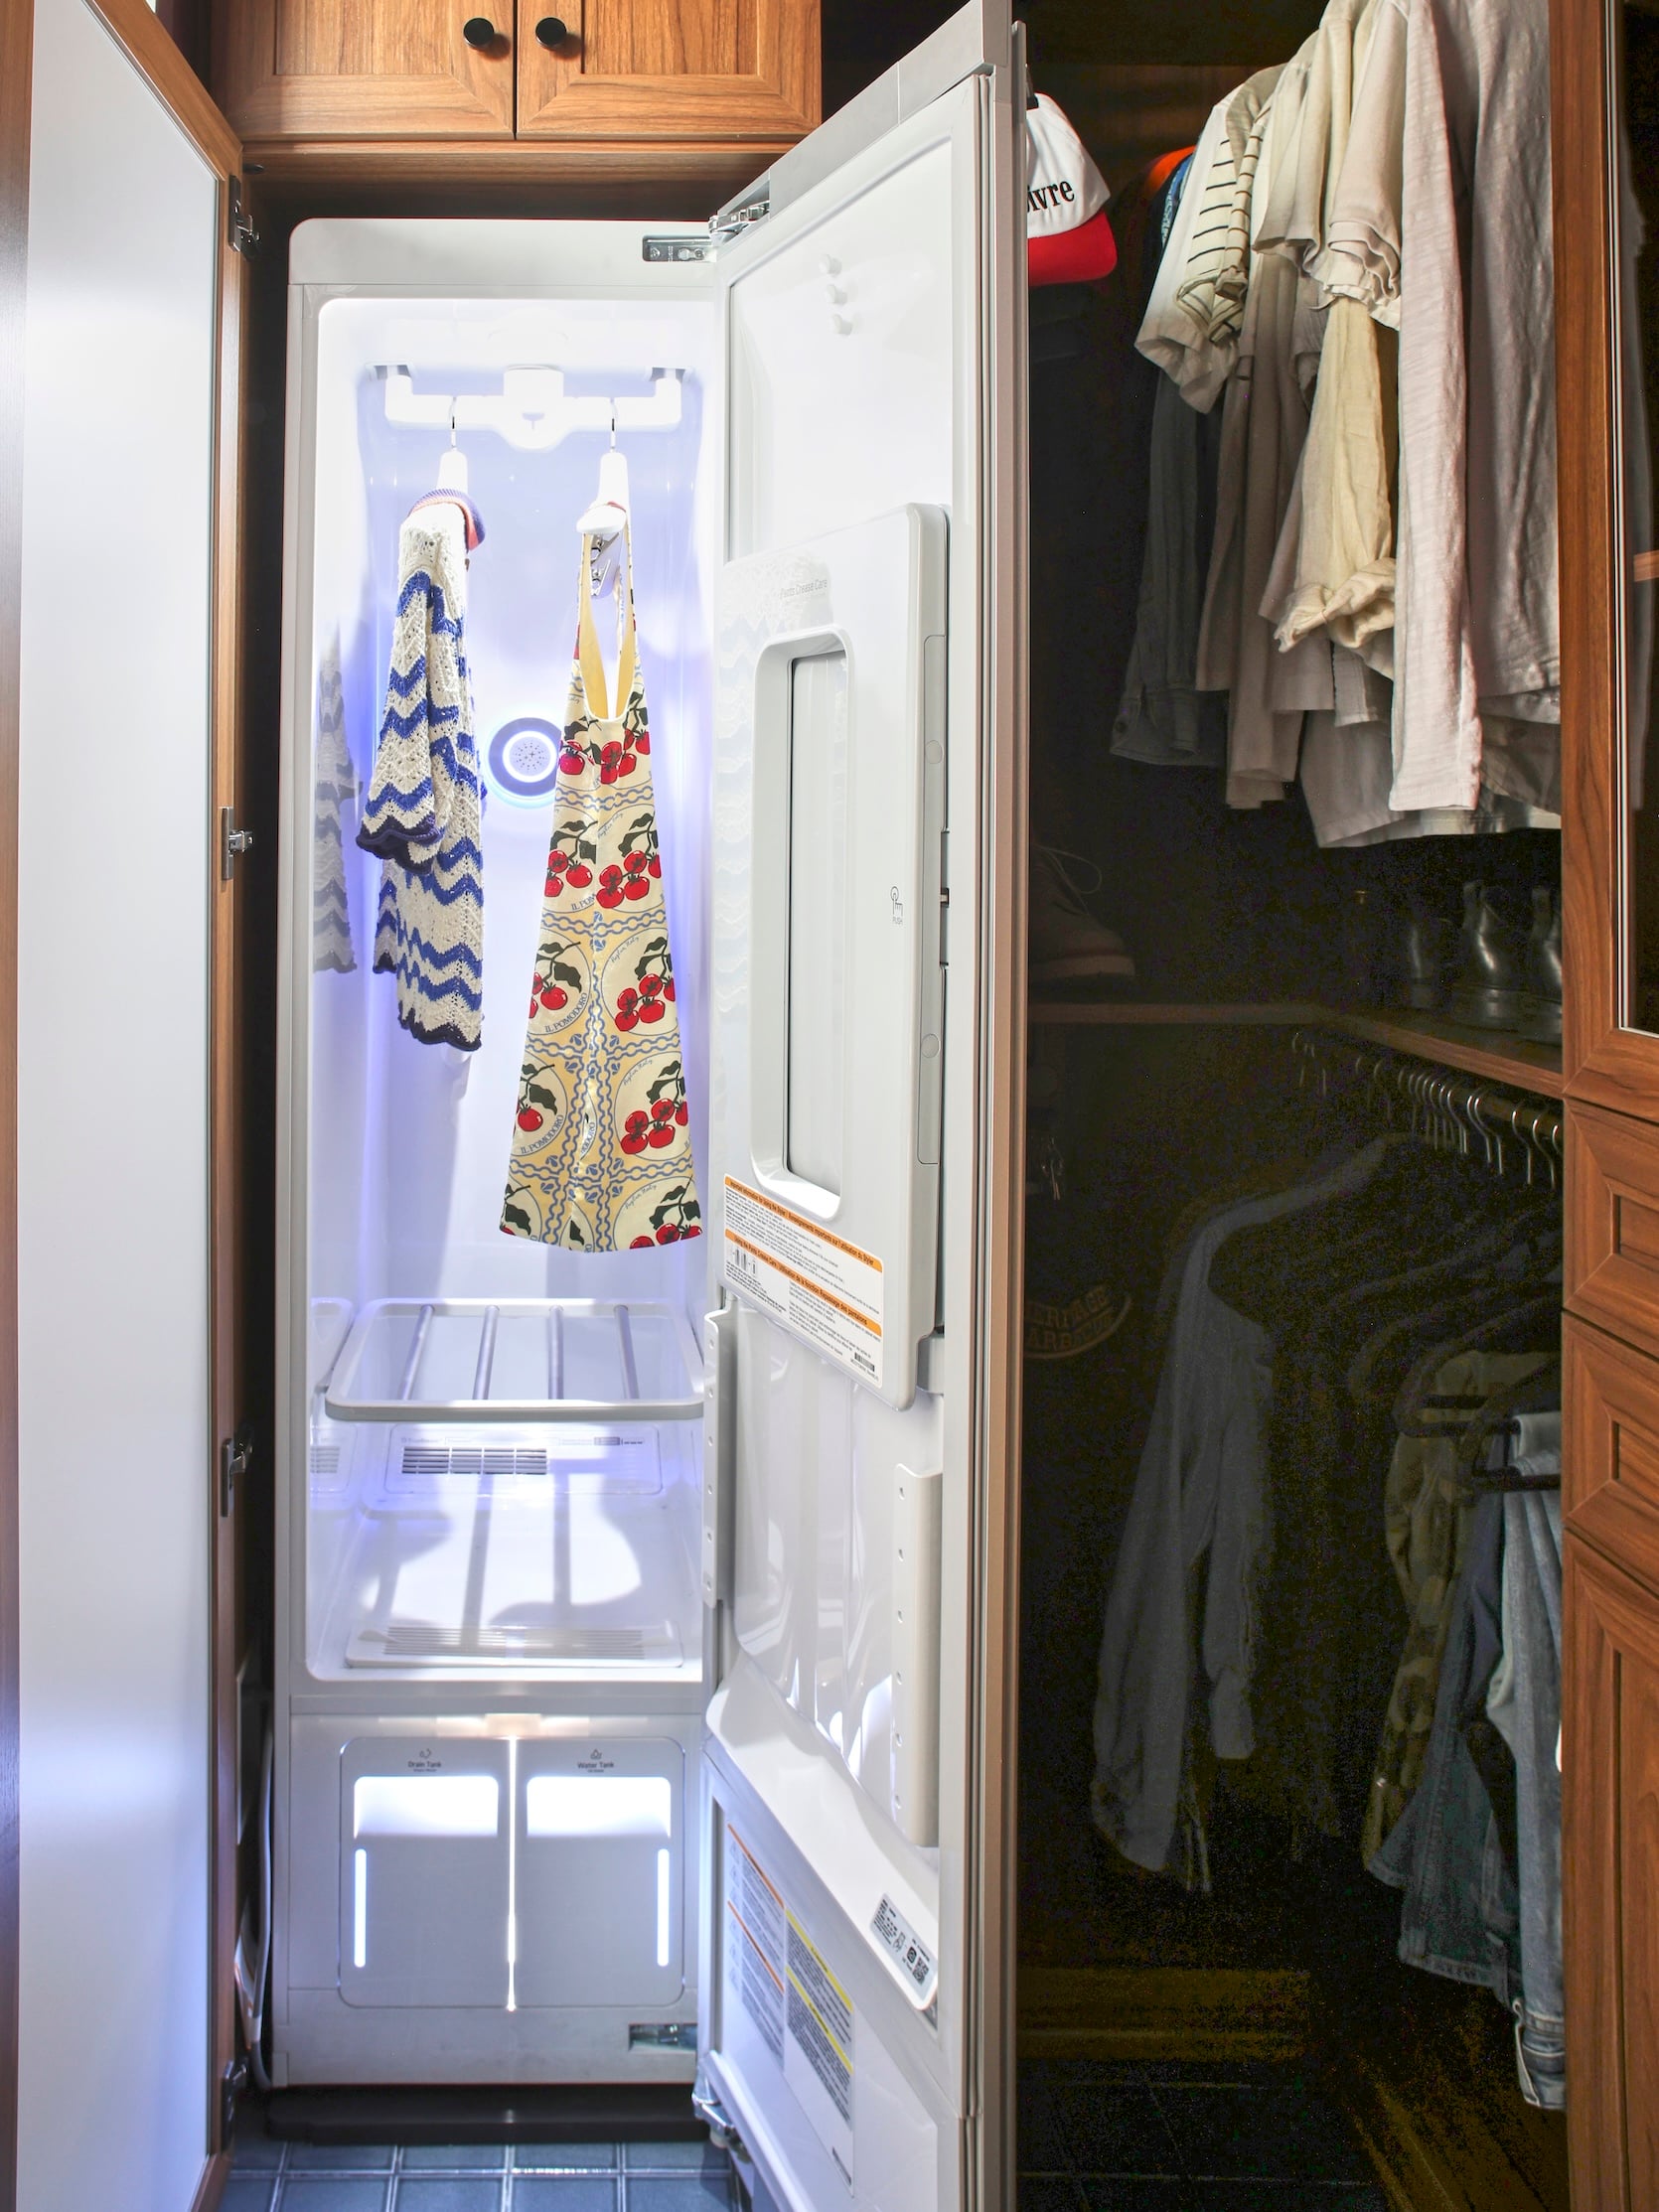
Okay, everyone wants to know more about this steam styler, so let me tell you!!! I am not getting paid to write about this product; it wasn’t gifted by the brand, we’re just obsessed with it, and I gotta tell you about it. So when we first started talking about the closet renovation, Austin was like, “Please, can we put a steam styler in?!” and I responded with, “What the heck is that…” and basically he explained that it sanitizes and cleans your clothes, sort of like a dry cleaner. At first, I was super nervous about losing a decent chunk of clothing storage space. The whole point of redoing this closet was to make our clothes fit, and we were going to put in a 6-foot…machine? Where we could hang clothing? I was baffled at first, but then he sold me with “we will never have to do dry cleaning again,” and we got the steam styler, haha.
I will say, after having it and using it for a while, you still have to bring your clothes in to get dry cleaned sometimes, but it’s MUCH LESS. Basically what the steam styler does is it sanitizes and cleans your clothing with a ton of different settings ranging from 20 minutes to 2 hours. It doesn’t use any harsh chemicals, and it can clean delicate items like silk, lace, and even leather jackets (!!!) Here’s how we use it:
- Items that are delicate, dry clean only, or just hard to wash (like jackets, etc.) go into the steam styler. It basically sanitizes and refreshes these items so you can go several more wears without taking them to the dry cleaners, which will ultimately save us money because dry cleaning is expensive!
- If there’s an article of clothing that you want clean, but you don’t want to have to do a whole load of laundry, you just pop it in the steam styler. You need to leave it in for 20 minutes, but that top you wanted to wear is dirty? Steam style refresh. It’s amazing.
- That blanket you washed that didn’t fully dry all the way in the dryer and now smells like mildew?? You don’t have to throw it back in the wash. Sanitize it in the steam styler and the mildew smell is completely gone.
- I love a silk pillowcase, but they’re kind of annoying to wash because you have to put them in a bag, find them in the washer all tangled up in your sheets, and then lay them flat to dry (a very niche problem that genuinely didn’t bother me until I didn’t have to do it anymore). Instead, now we sanitize our pillowcases in the steam styler on the 2-hour setting weekly (but once a month we’ll put them in the wash and lay them out to dry to make sure they get really clean). It just makes it so much easier.
- Austin does Jiu Jitsu twice a week and has a Gi that he wears for it – it’s so annoying to do a load entirely for the Gi, so he pops it in the steam styler on Tuesday after his class, sanitizes it, then pulls it back out on Thursday morning and it’s ready to go.
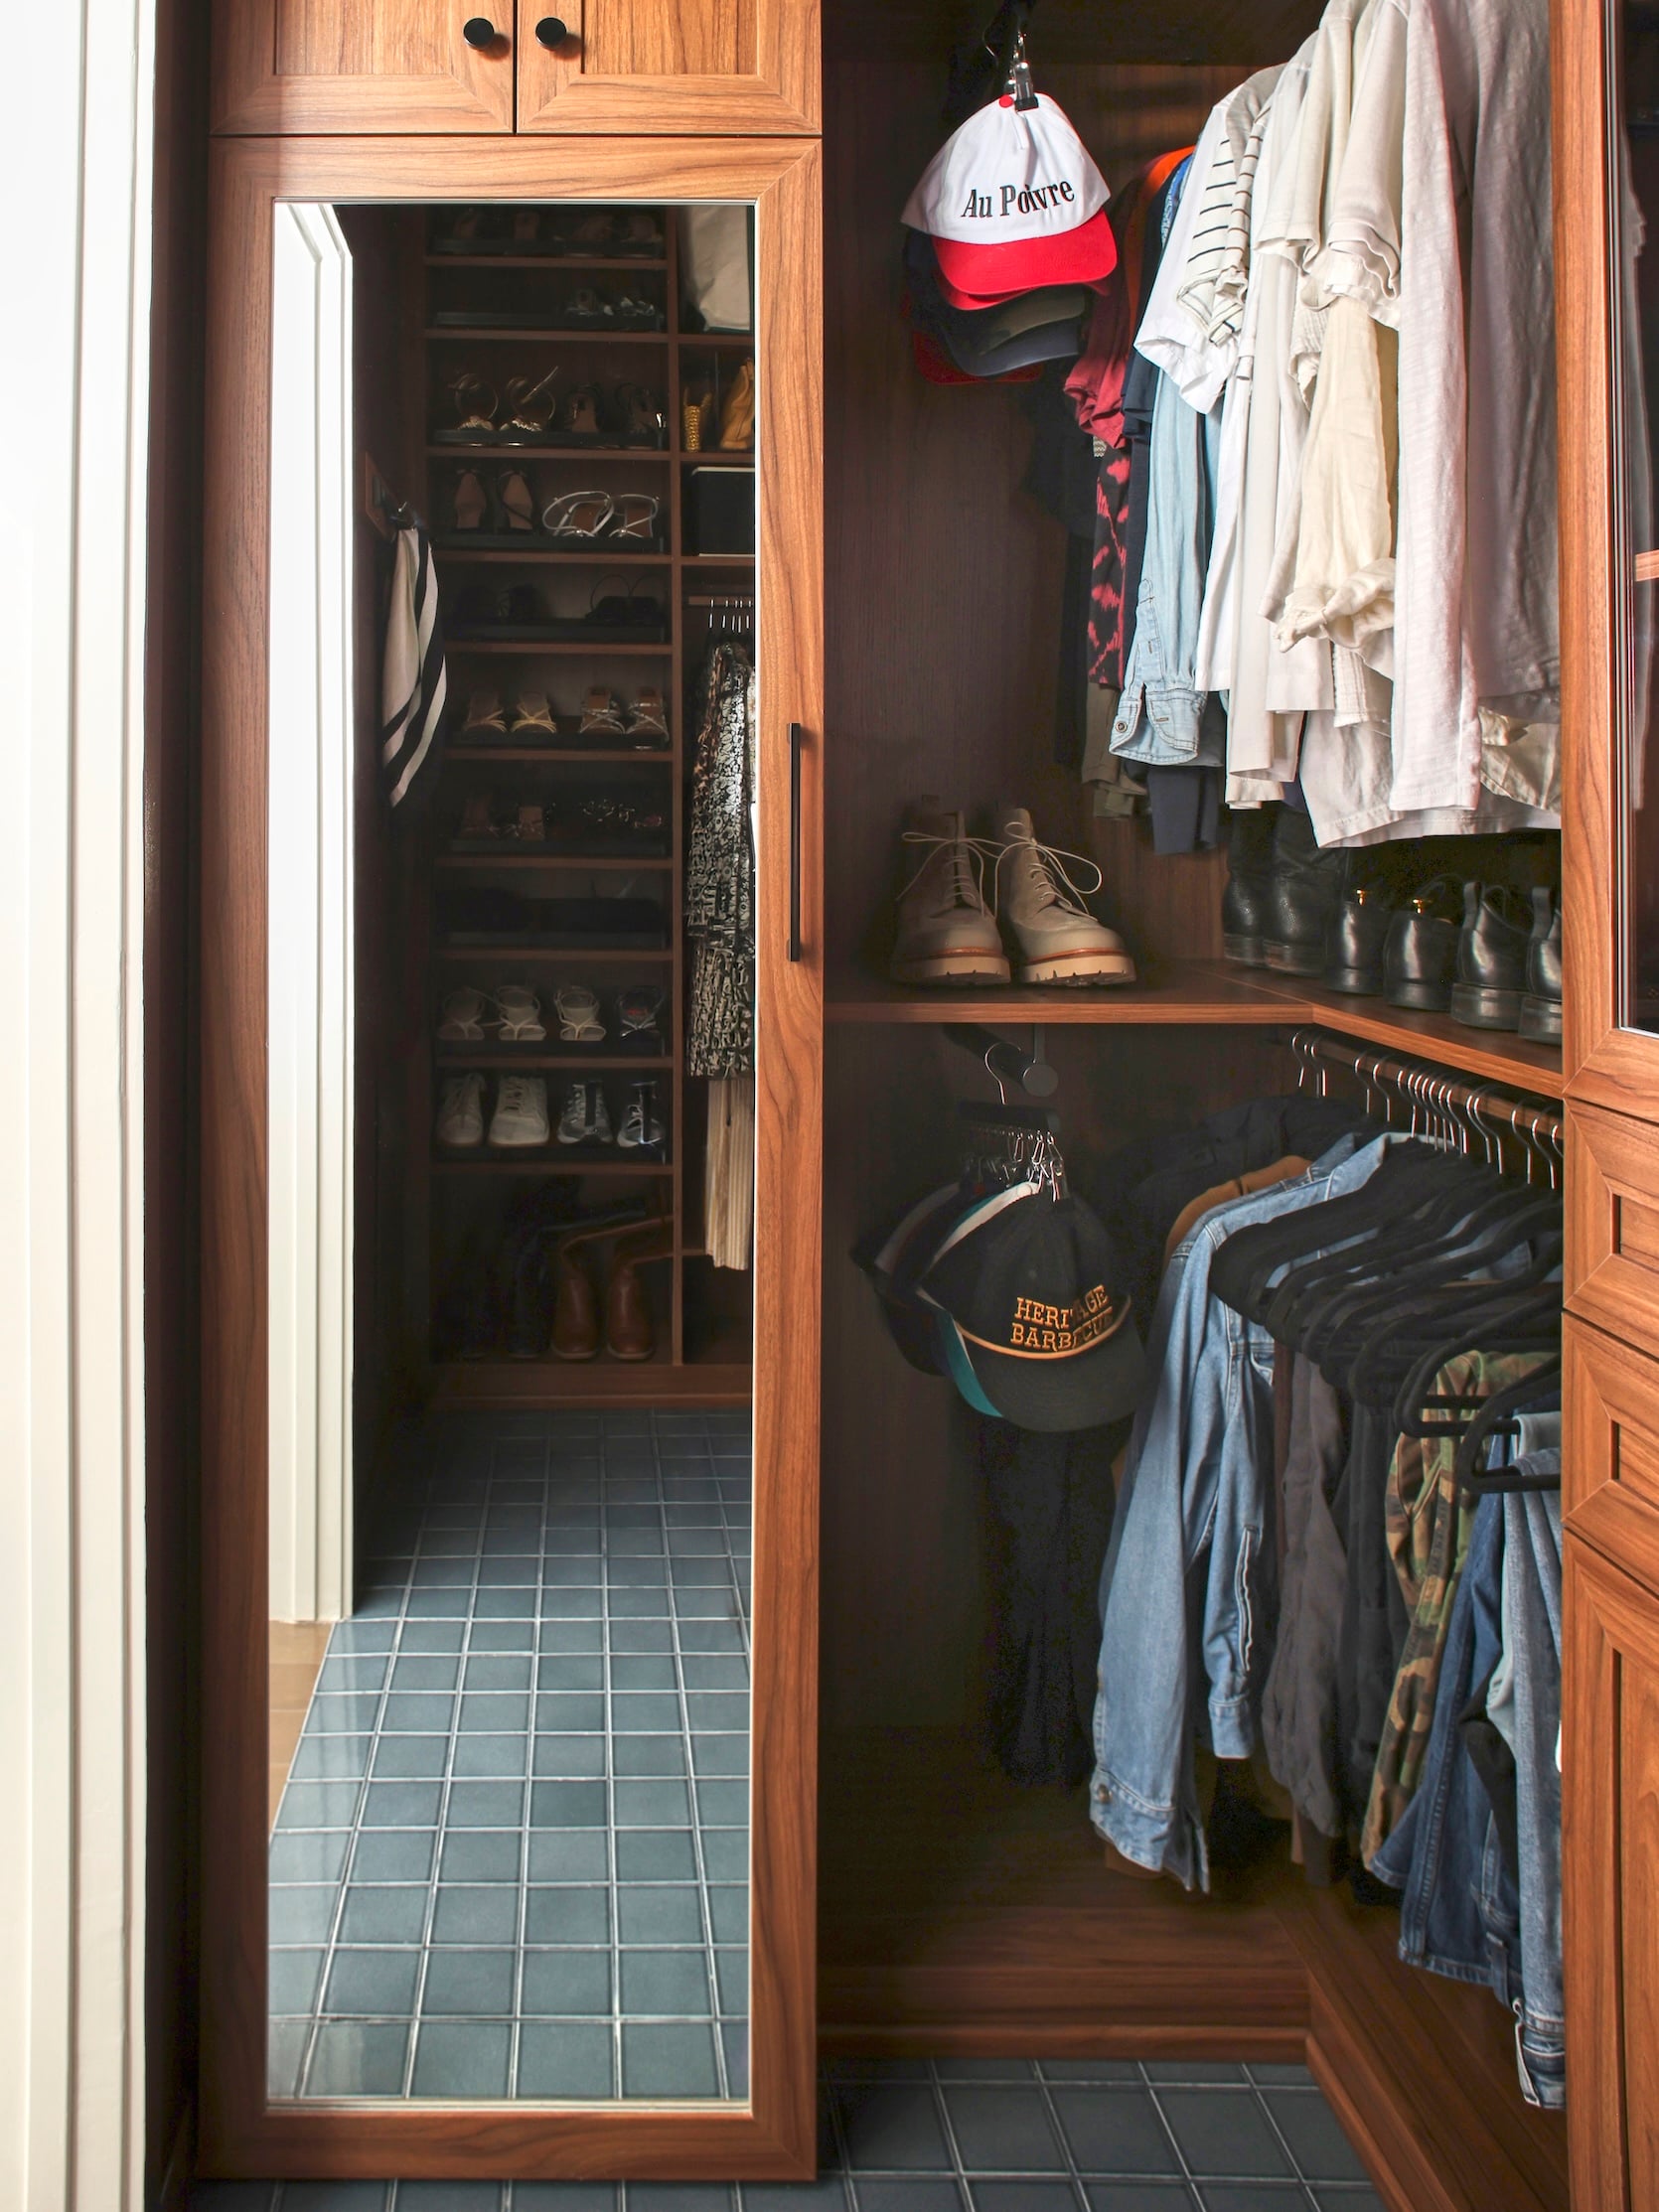
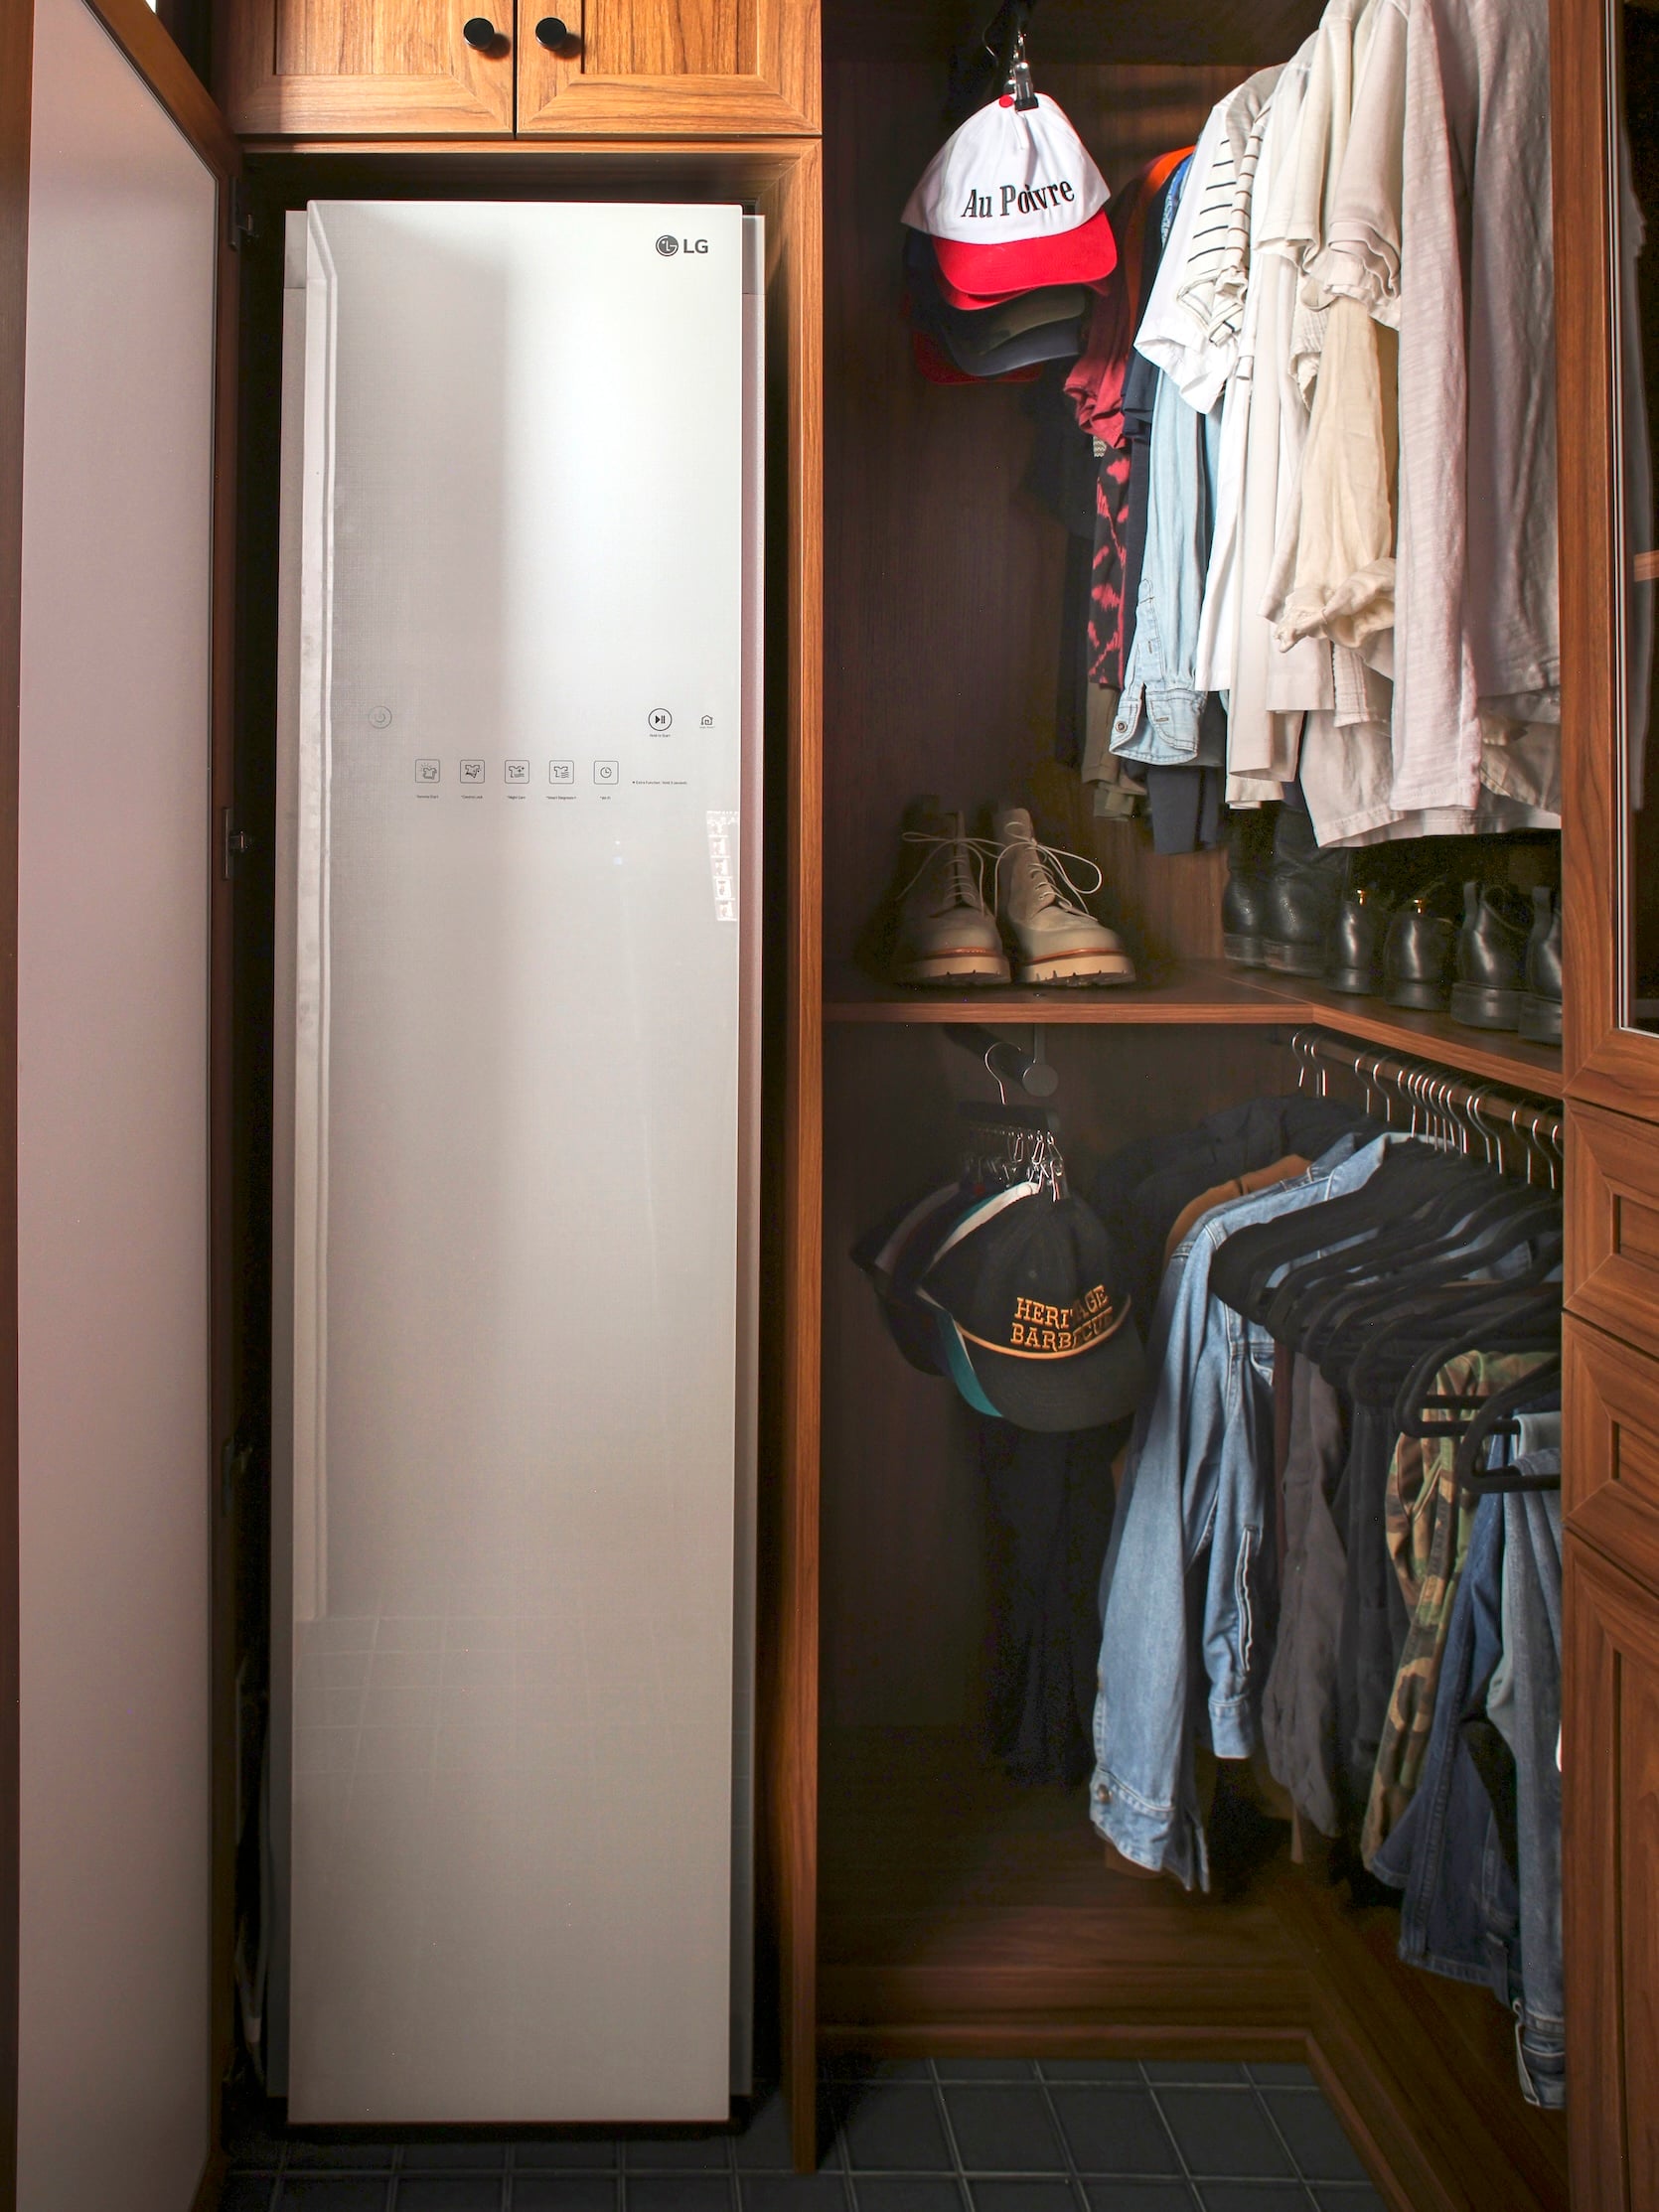
There are a lot of other things you can do with it too that we’re still learning – like the “pants crease” feature in the door that’s supposed to press your pants so they’re not wrinkled. We haven’t used that feature a ton yet. We learned that some fabrics “de-wrinkle” much better than others in here, so if you’re wanting it mostly for the steaming capabilities – nothing truly beats a handheld steamer or a classic iron and ironing board. But it will get out light wrinkles and, more importantly, it sanitizes and cleans, which is what we use it for more!
Jewelry Drawer And Pull Out Hamper
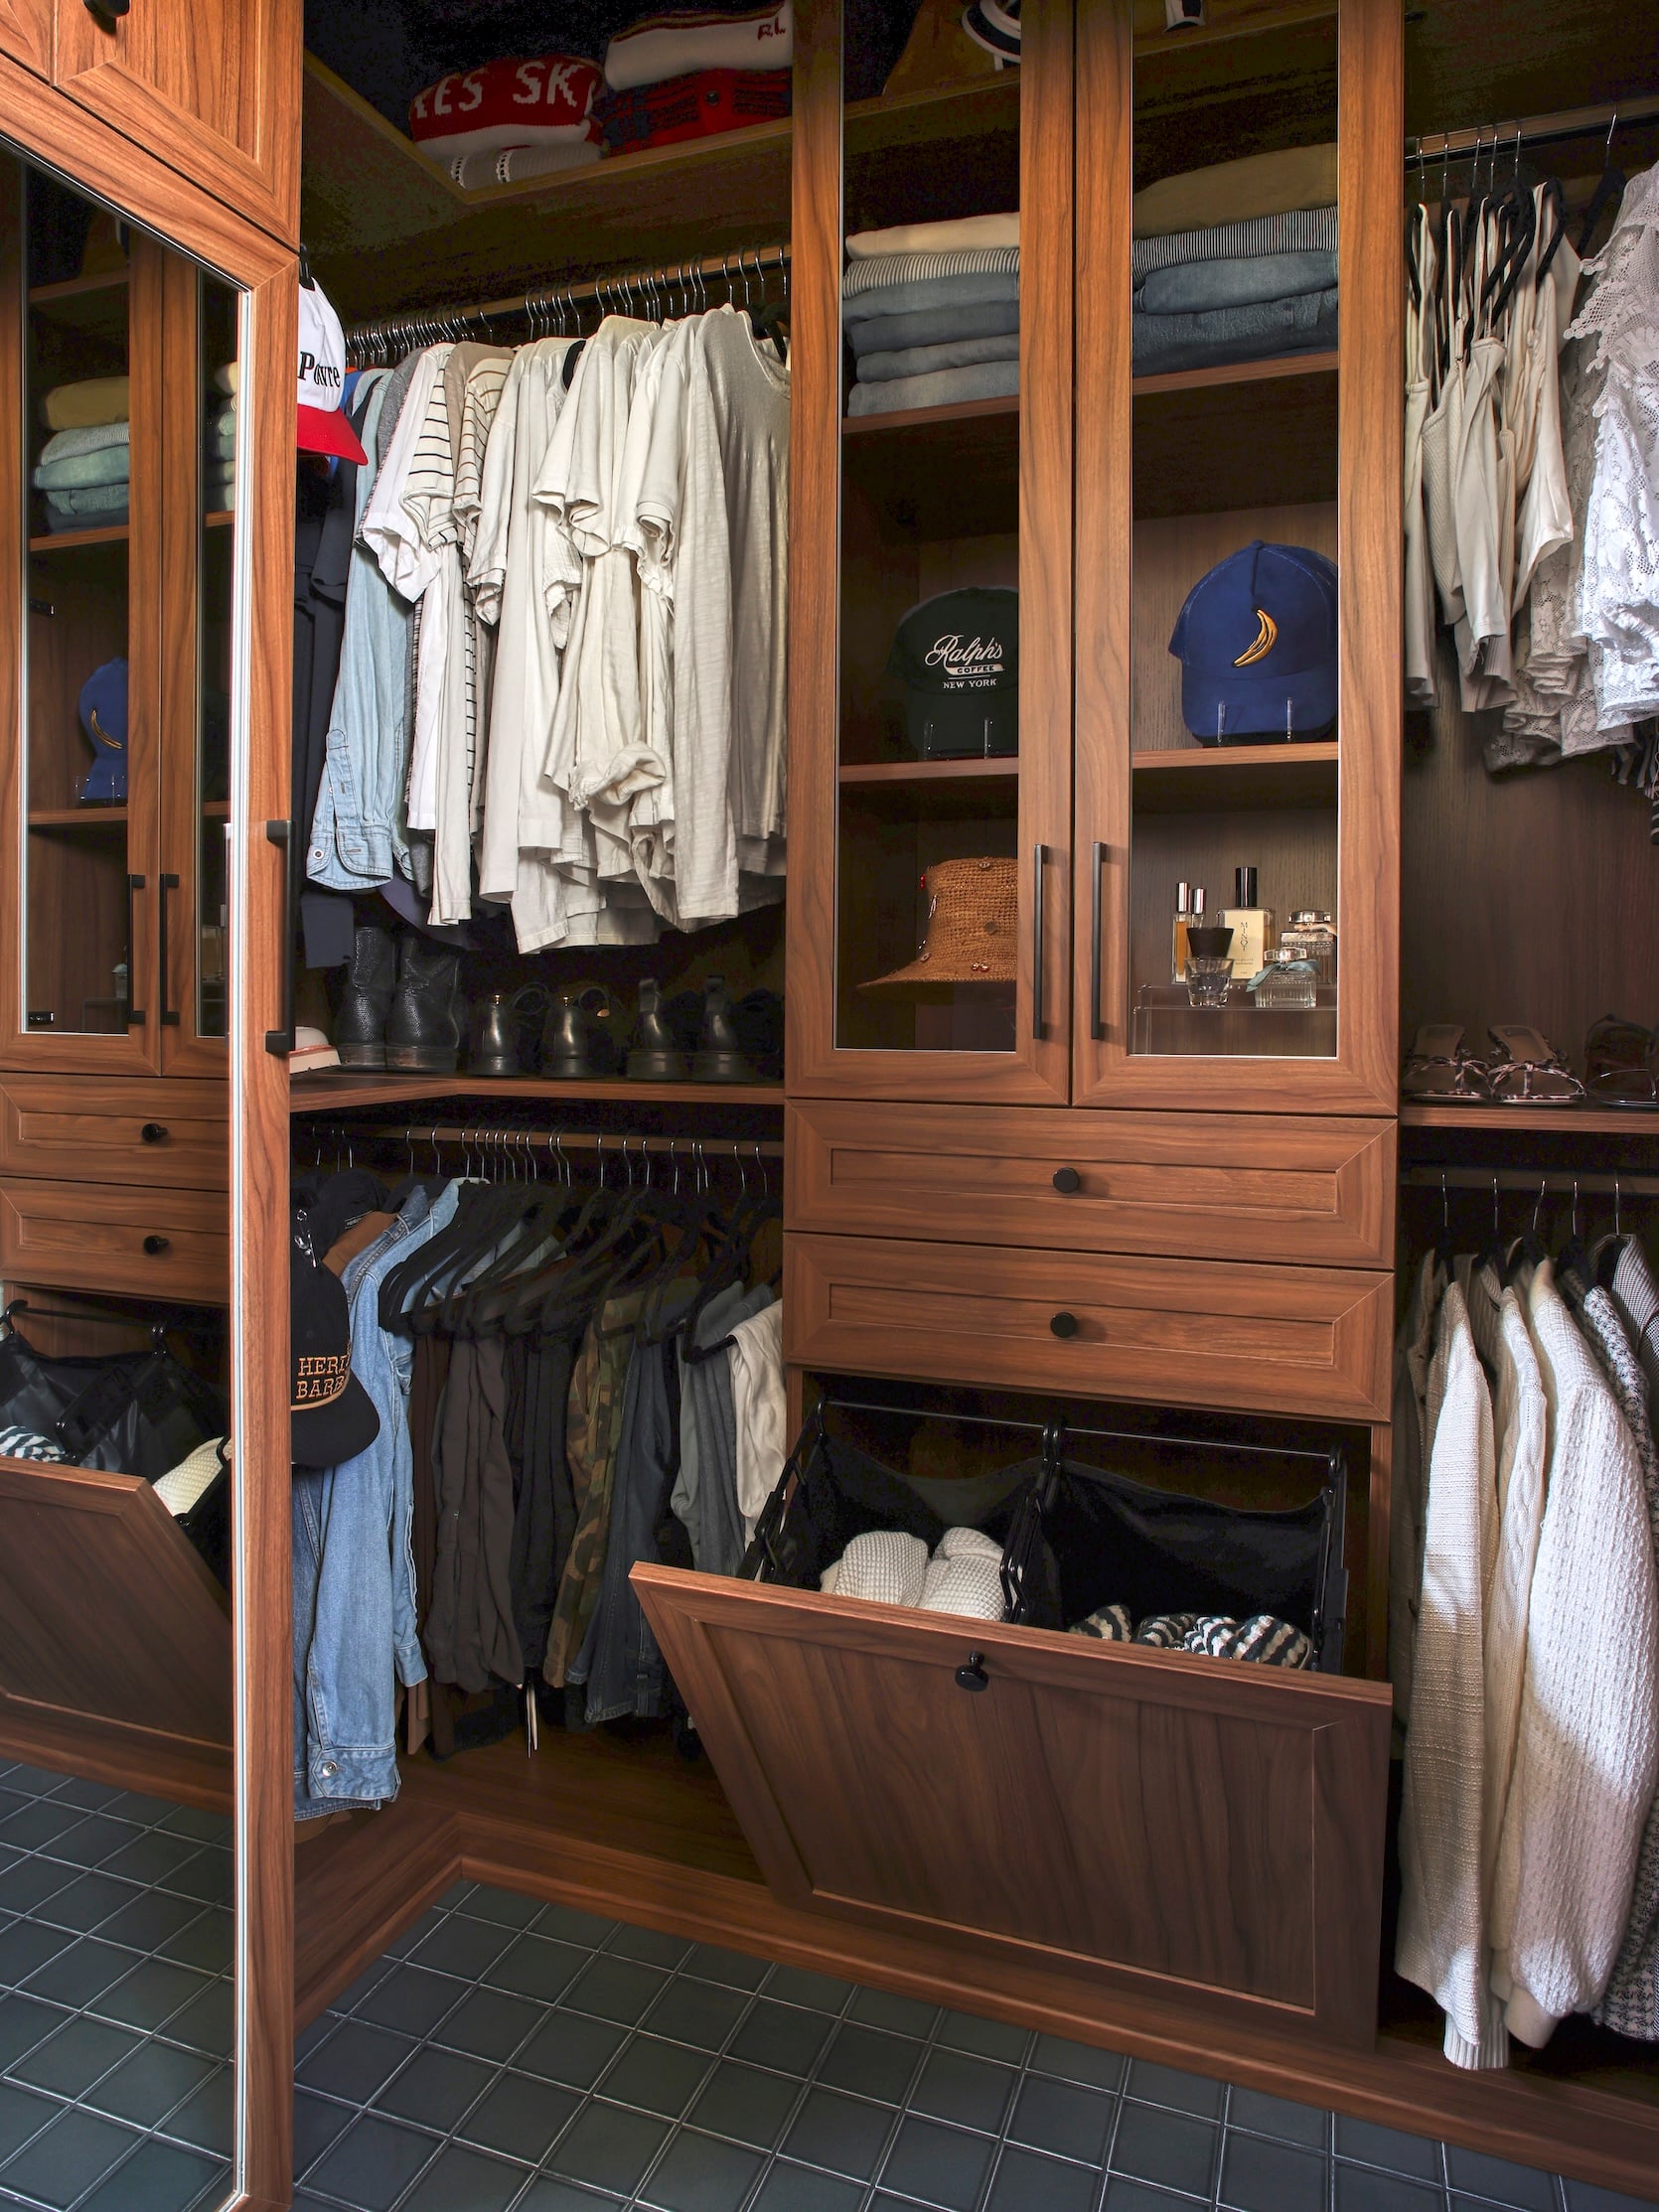
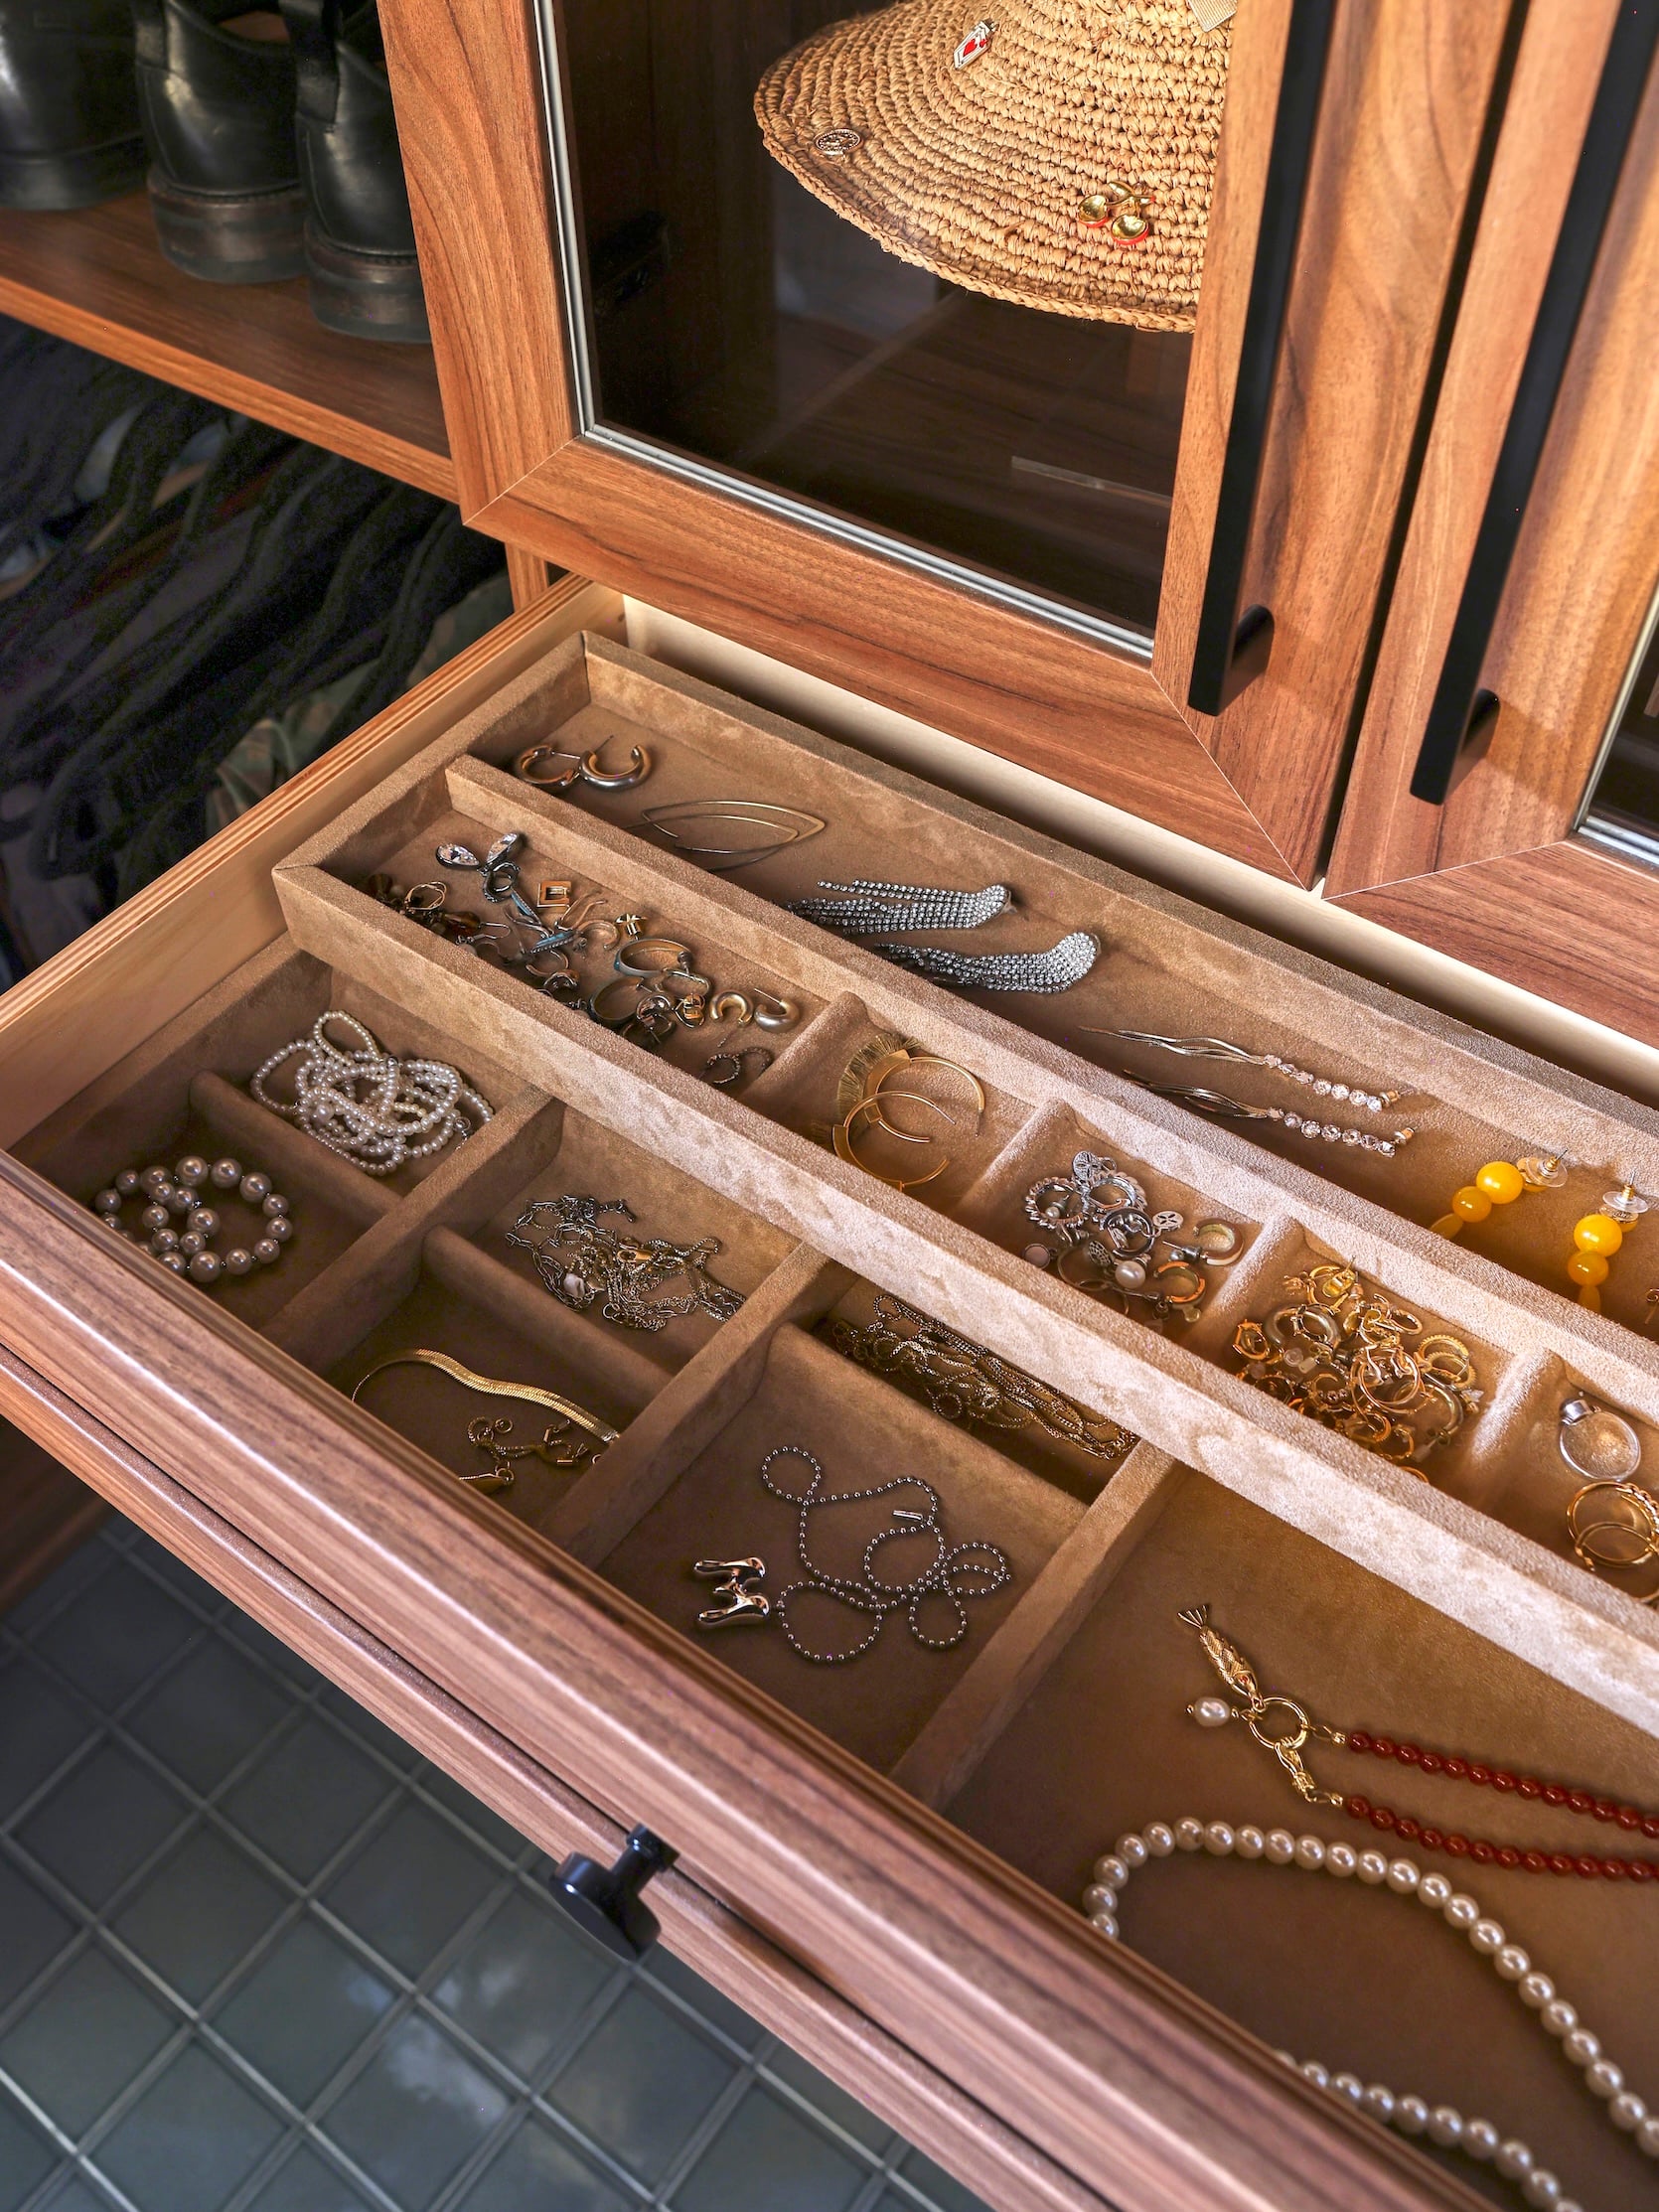
Even with the steam styler, we were able to fit this gorgeous glass cabinet that has a pull-out hamper and jewelry drawer at the bottom. The steam styler was Austin’s main request, and a jewelry drawer, shoe storage, and a full-length mirror were mine. We checked ALL THE BOXES. The pull-out hamper is incredible because the bags are obviously removable and the quality is excellent.
Shoe Wall
Now I’m going to address the elephant in the room: where are all of Austin’s shoes?! And the answer is downstairs by the front door! We have a large shoe cabinet downstairs (it’s a bigger version of this one) that almost all of his shoes and some of my shoes reside in, but it was more important to me to have shoes up here so I can plan out how my shoes will look with my outfits (and Austin didn’t care about that…at all lol). So behold! My wall of shoes:
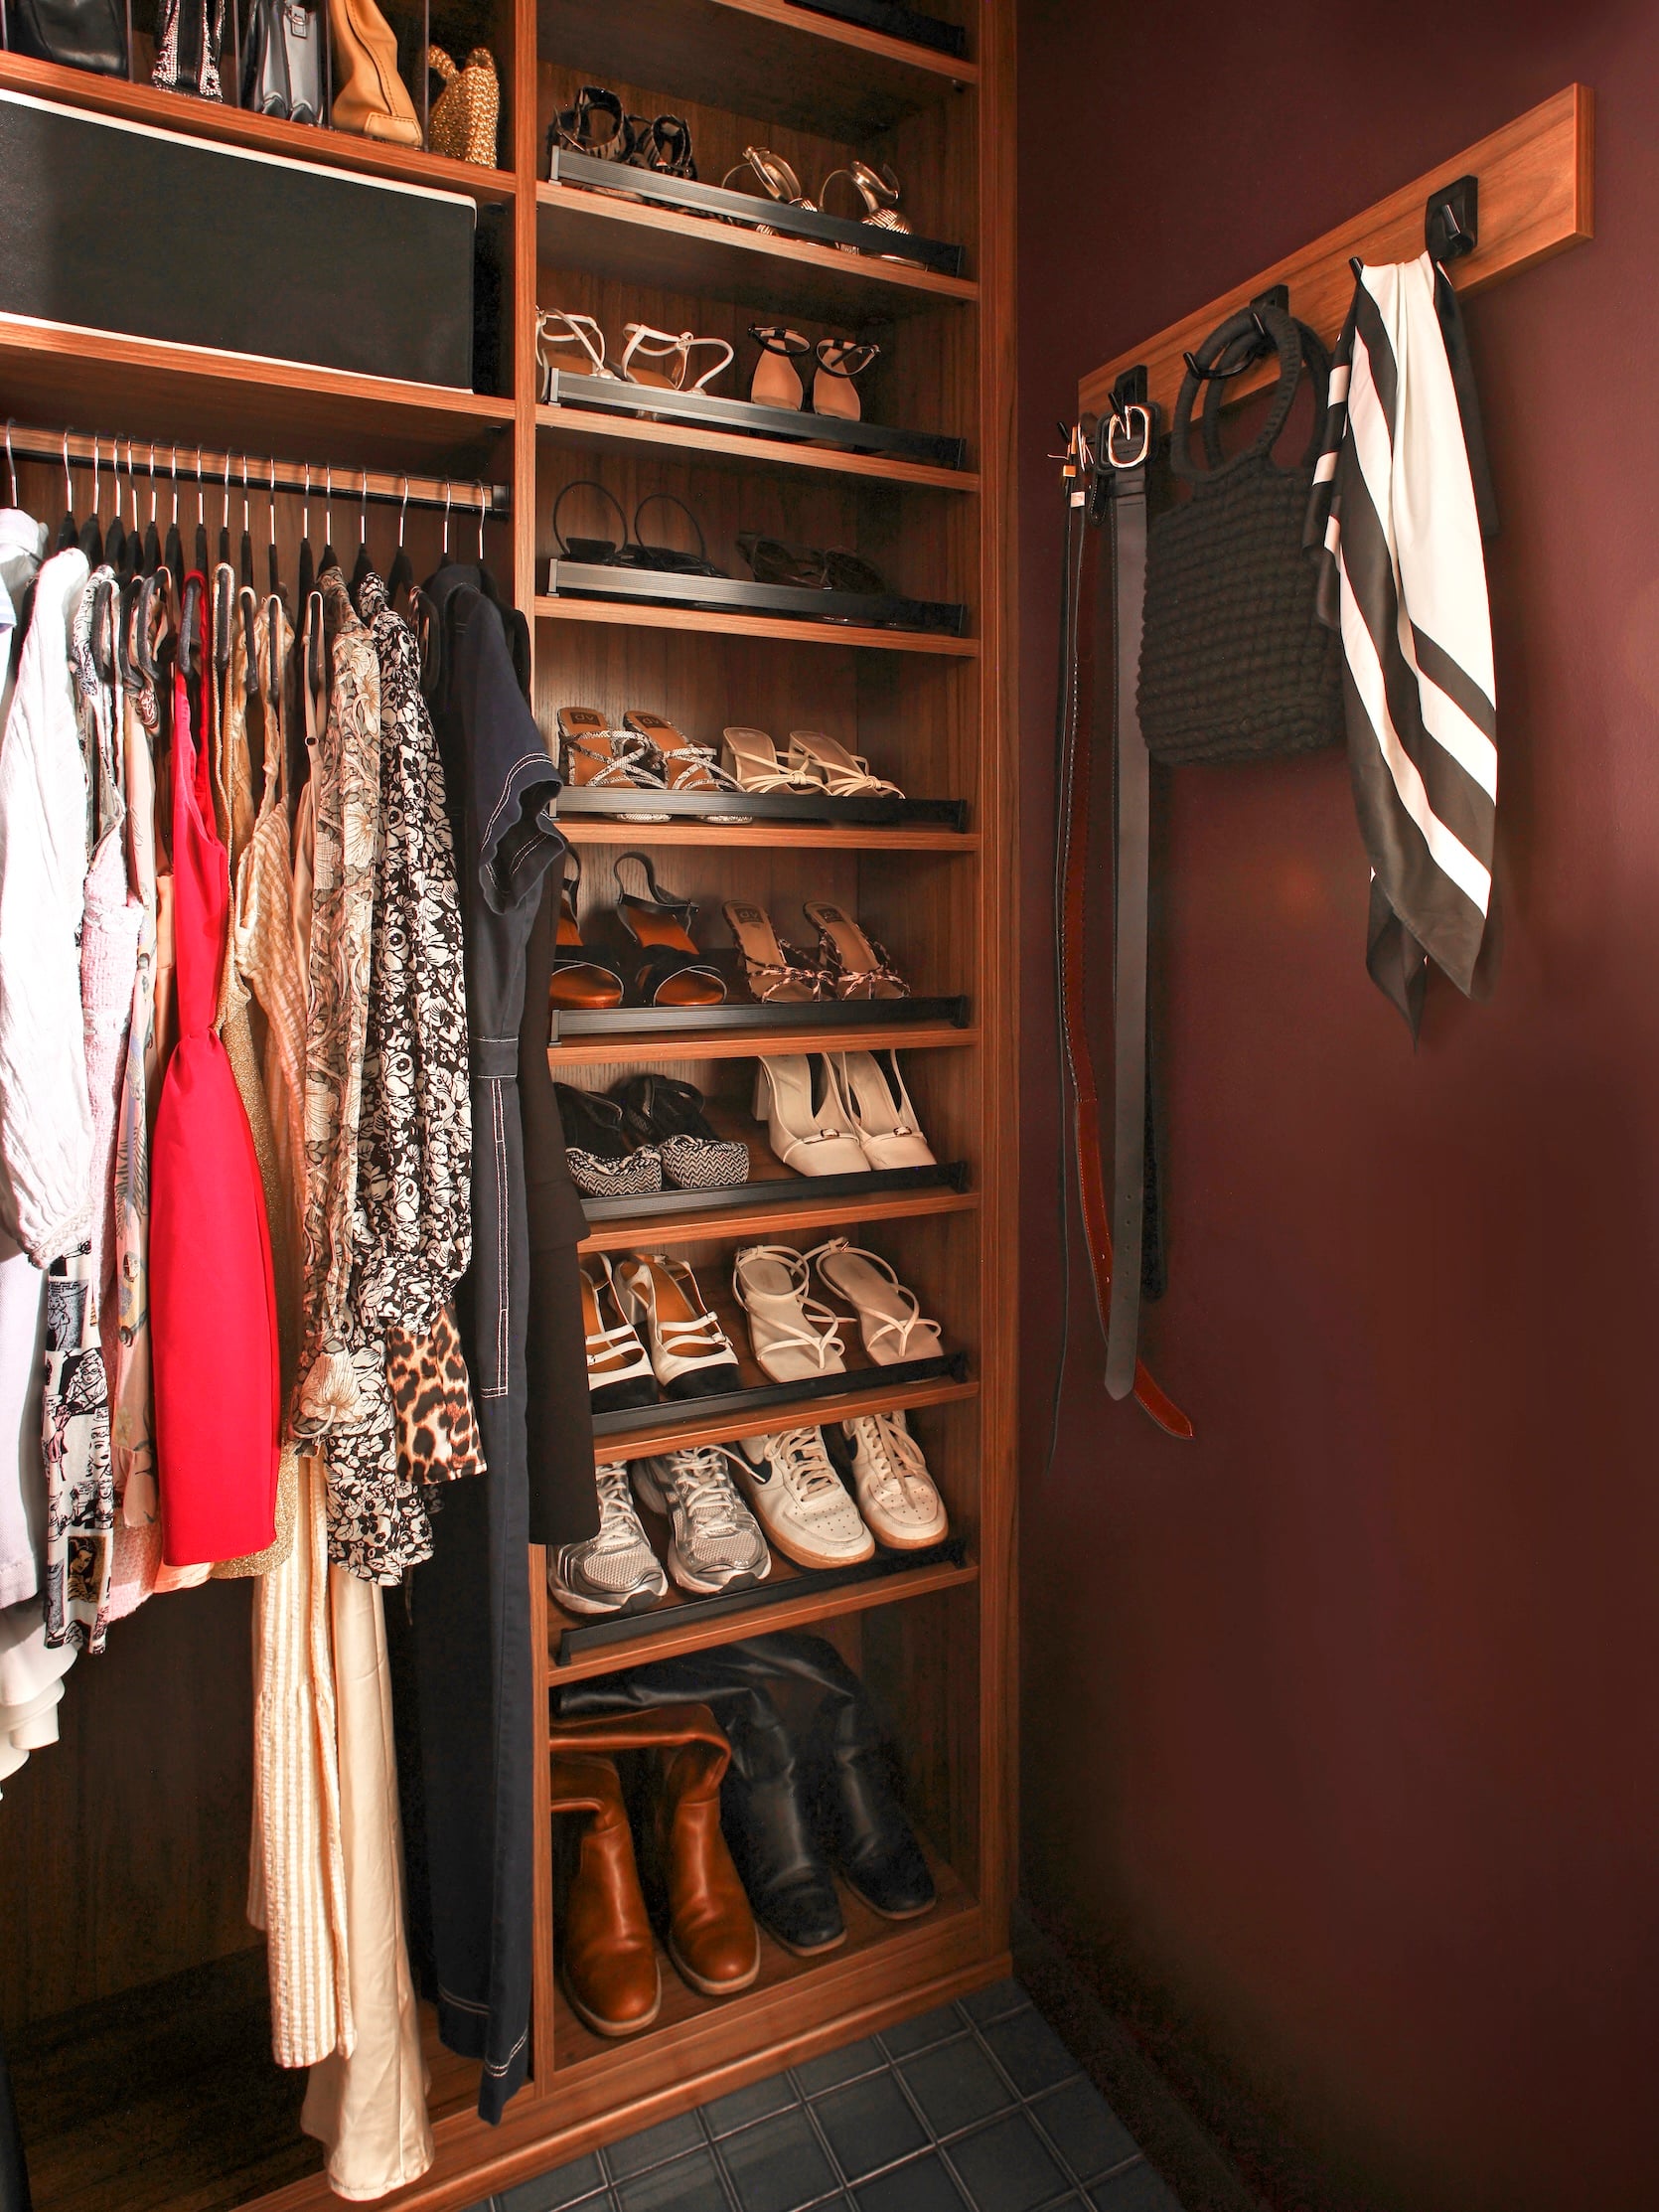
We did hooks over here for belts, bags, scarves, etc because you can’t totally tell in this photo, but there’s an electrical panel we have to access on this wall that made this side of the closet cabinetry a bit shallower.
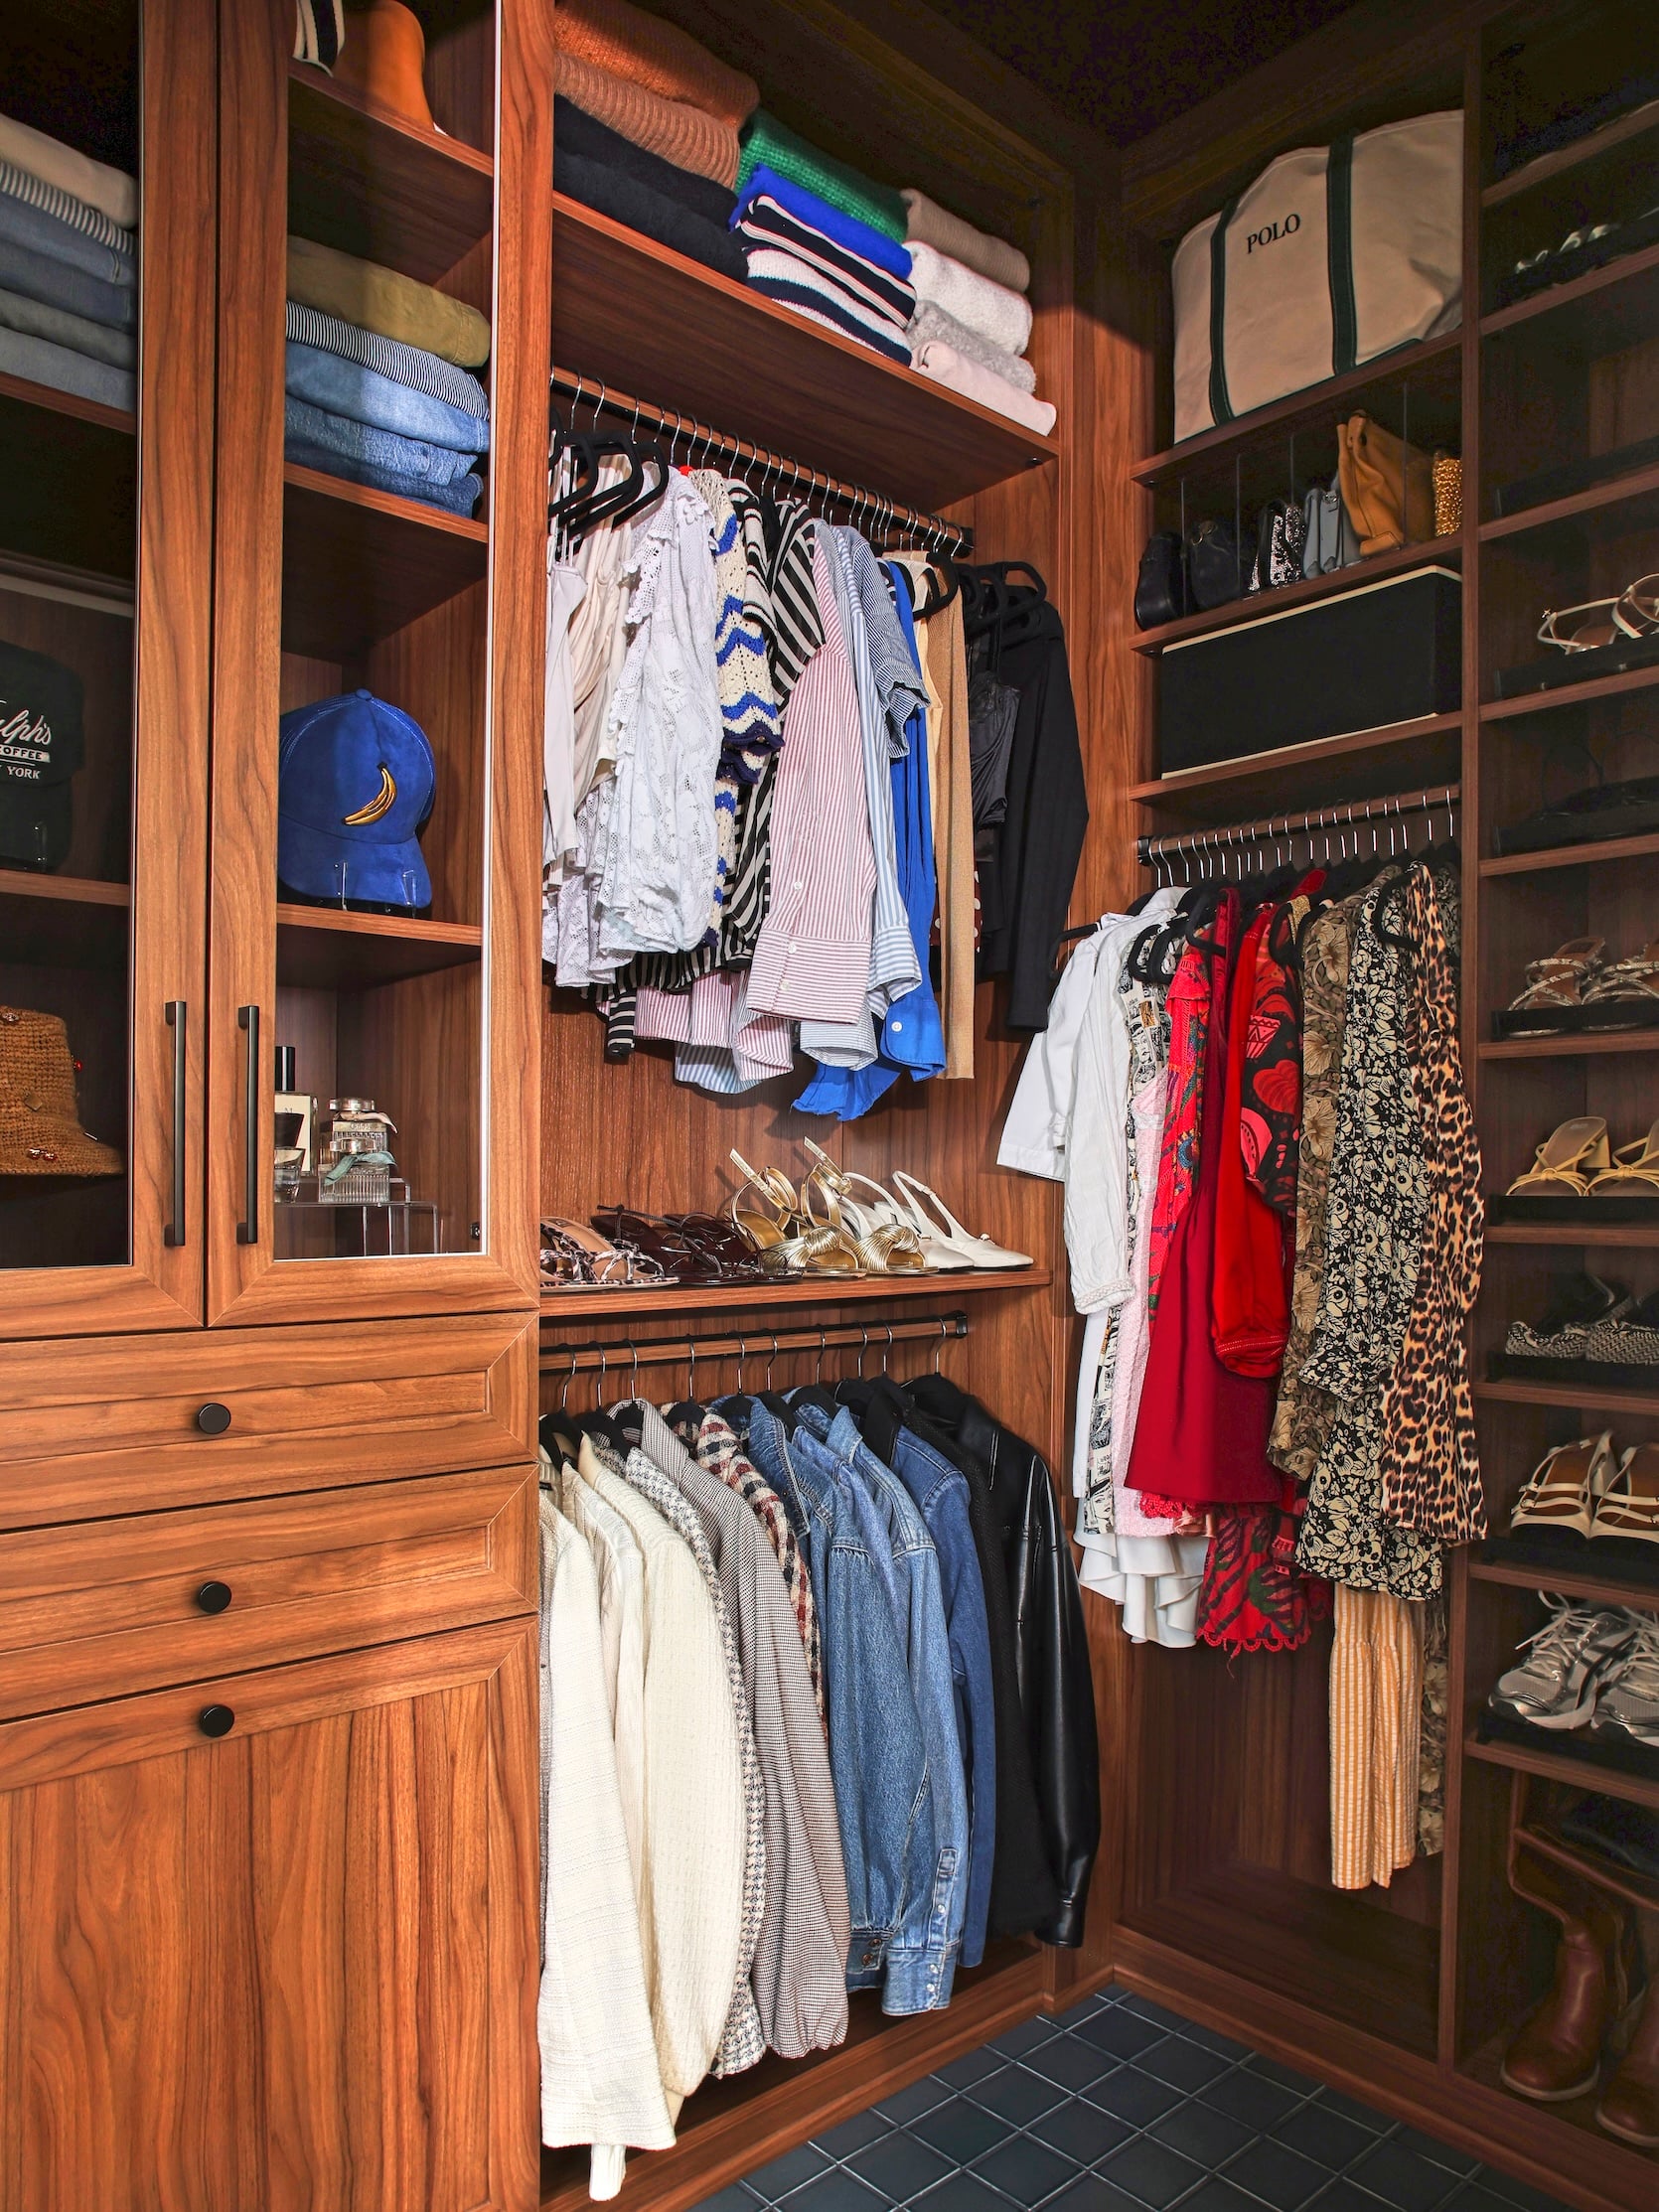
We put in double clothing racks on each side of the glass cabinet, which literally doubled our hanging storage, and then I folded all of my sweaters on the top shelf with this folding device, and they’re looking crispy!! For some reason, when I fold without this guided folding tool, it looks like a raccoon did it – so this really helps if you have folded clothing displayed! Using our vertical space was absolutely critical in maximizing our storage space, but we weren’t going to ruin this gorgeous closet with an ugly step stool, so we ordered this one, which is absolutely perfect in here.
This closet is obviously pretty dark since it doesn’t get a ton of natural light, so the black bins I actually have in real life under my hanging shirts weren’t really showing up on camera (so we put shoes there instead). But I left one up above the long dresses on the right (which is where I keep my sweatshirts) so you could see this clothing storage in action. One of the big things Marie Kondo preaches is folding clothing vertically instead of stacking it on top of each other. This way you can actually SEE what you have instead of digging through a pile. These bins make it so easy to do just that; I use them for my sweatshirts, shorts, non-denim pants, and even my bathing suits. They’re perfect. While we’re on the subject of organizers, I also got this to organize my bags and this to organize our baseball caps (we have so. many. baseball caps). Other than swapping the boxes for shoes, this is actually pretty accurate to what this closet looks like on the day-to-day. These organizers helped us have a place for everything and everything in its place!!
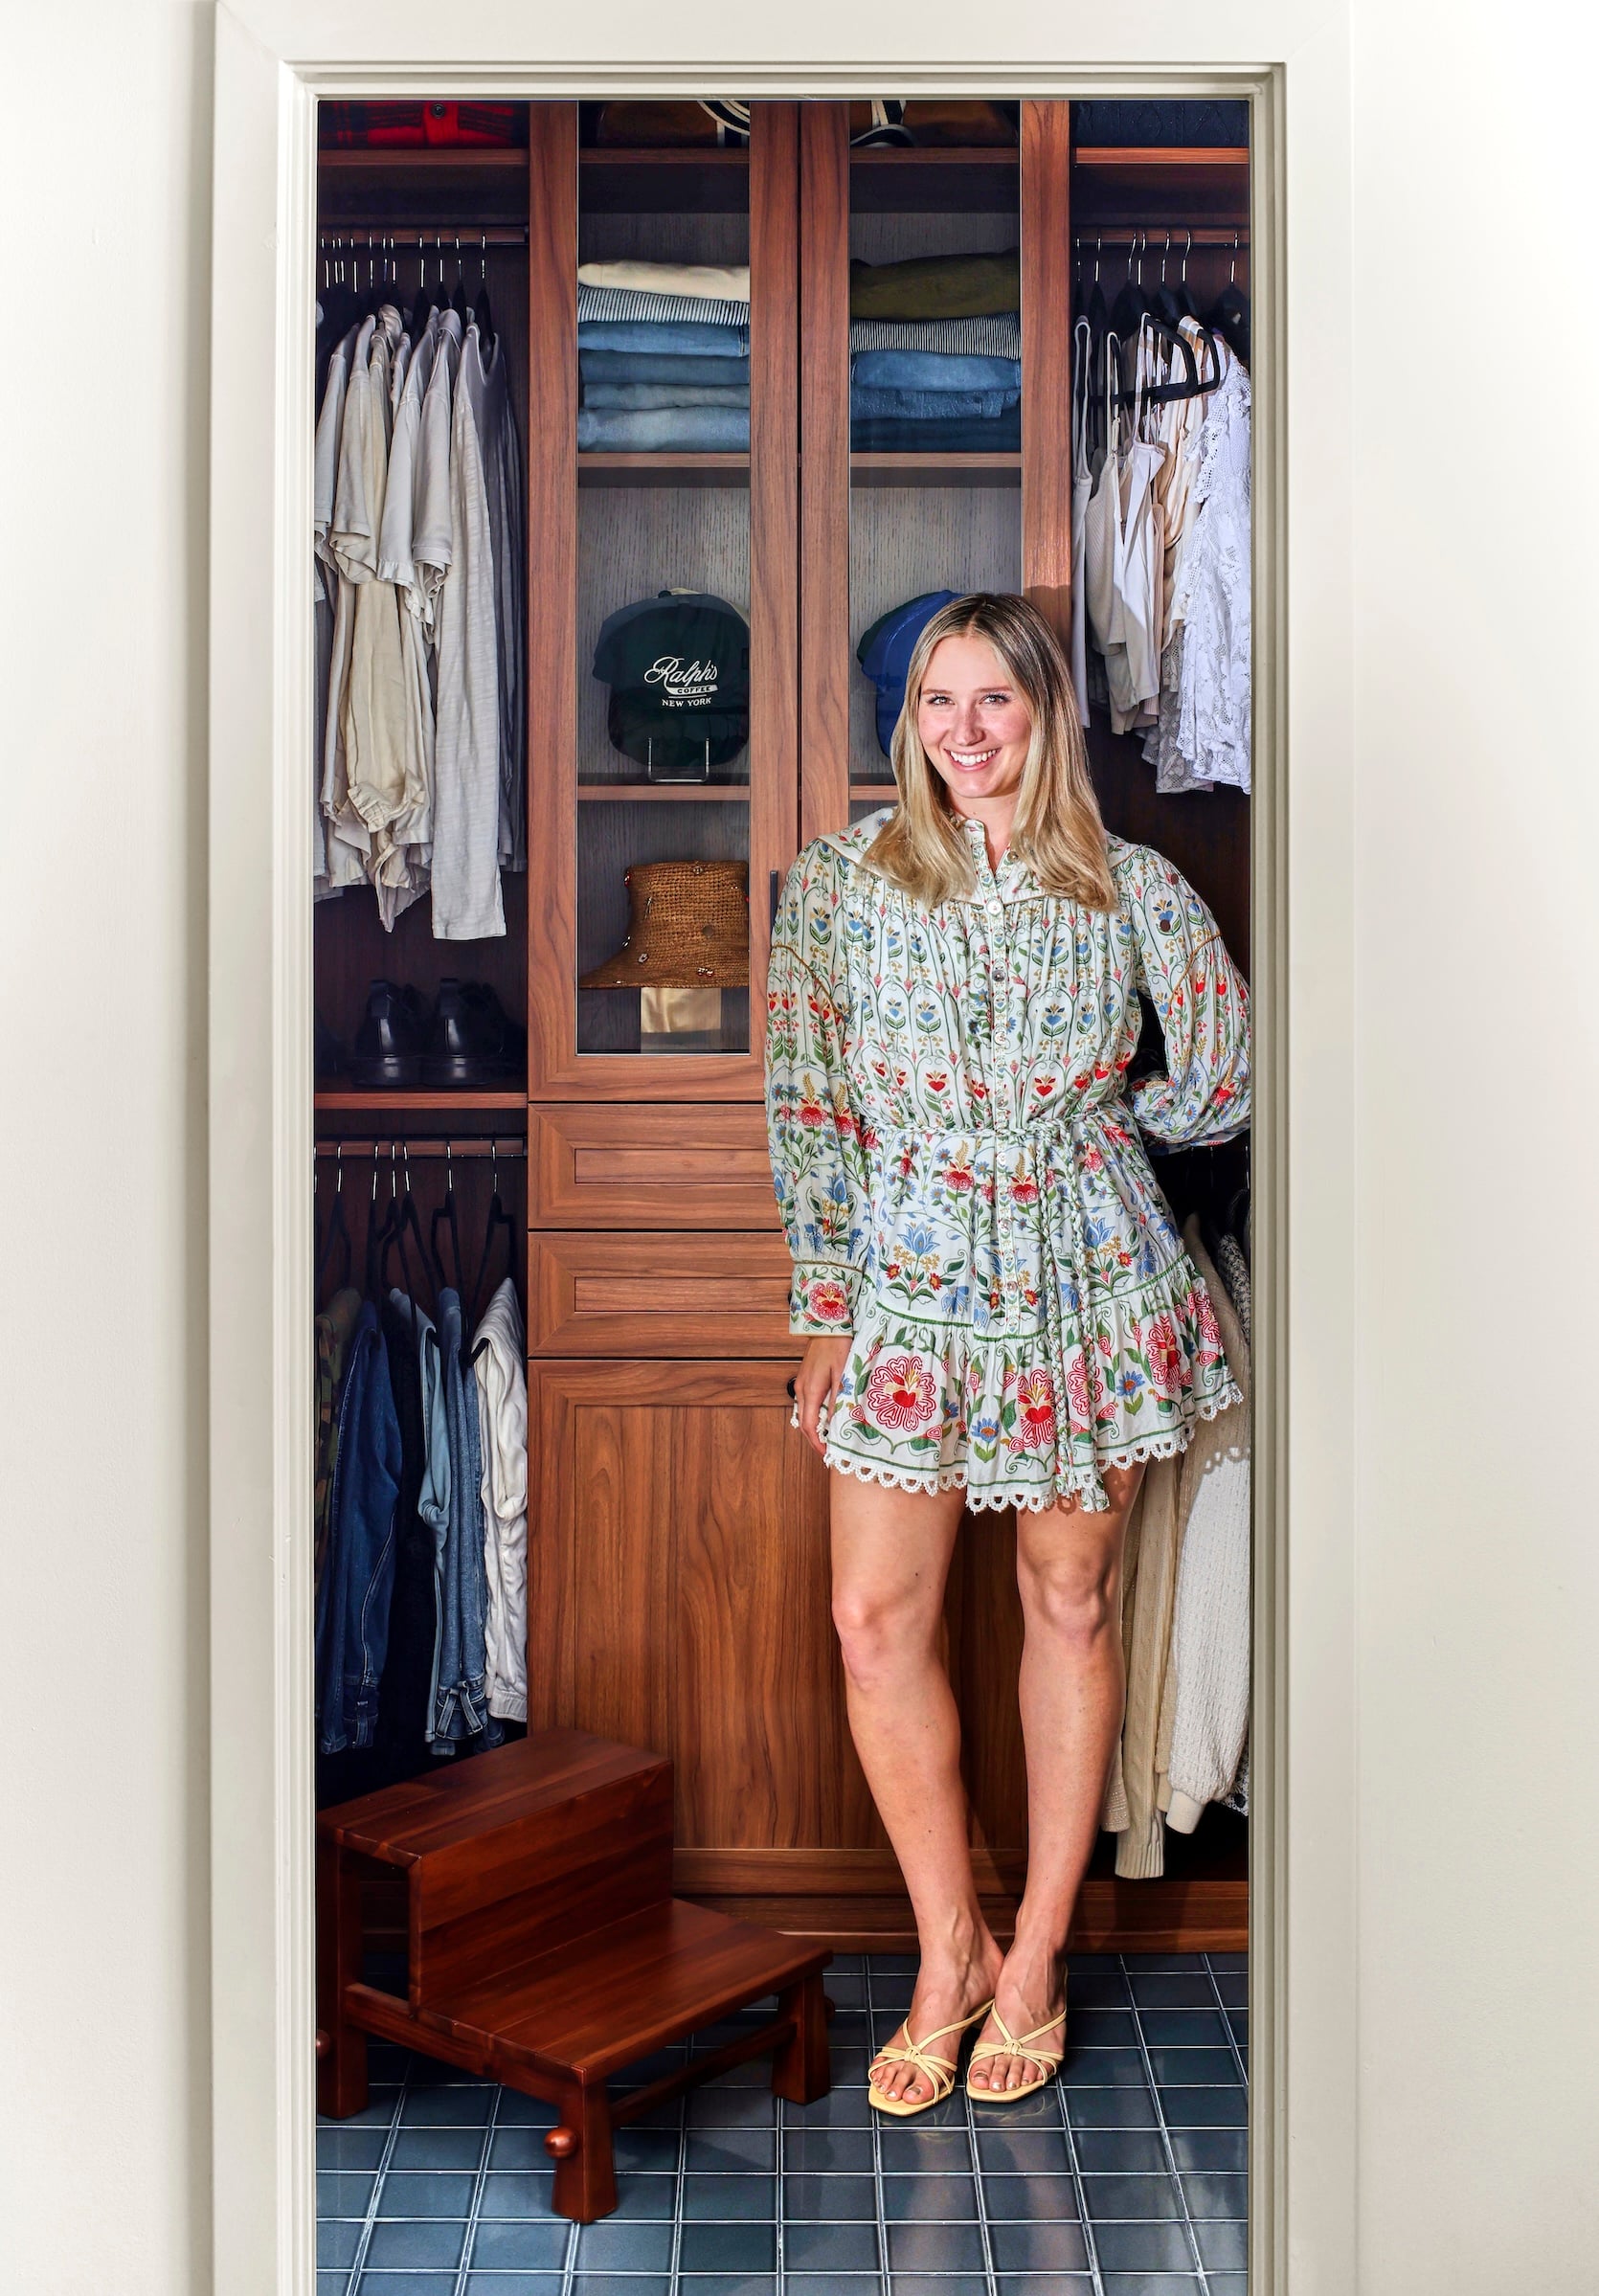
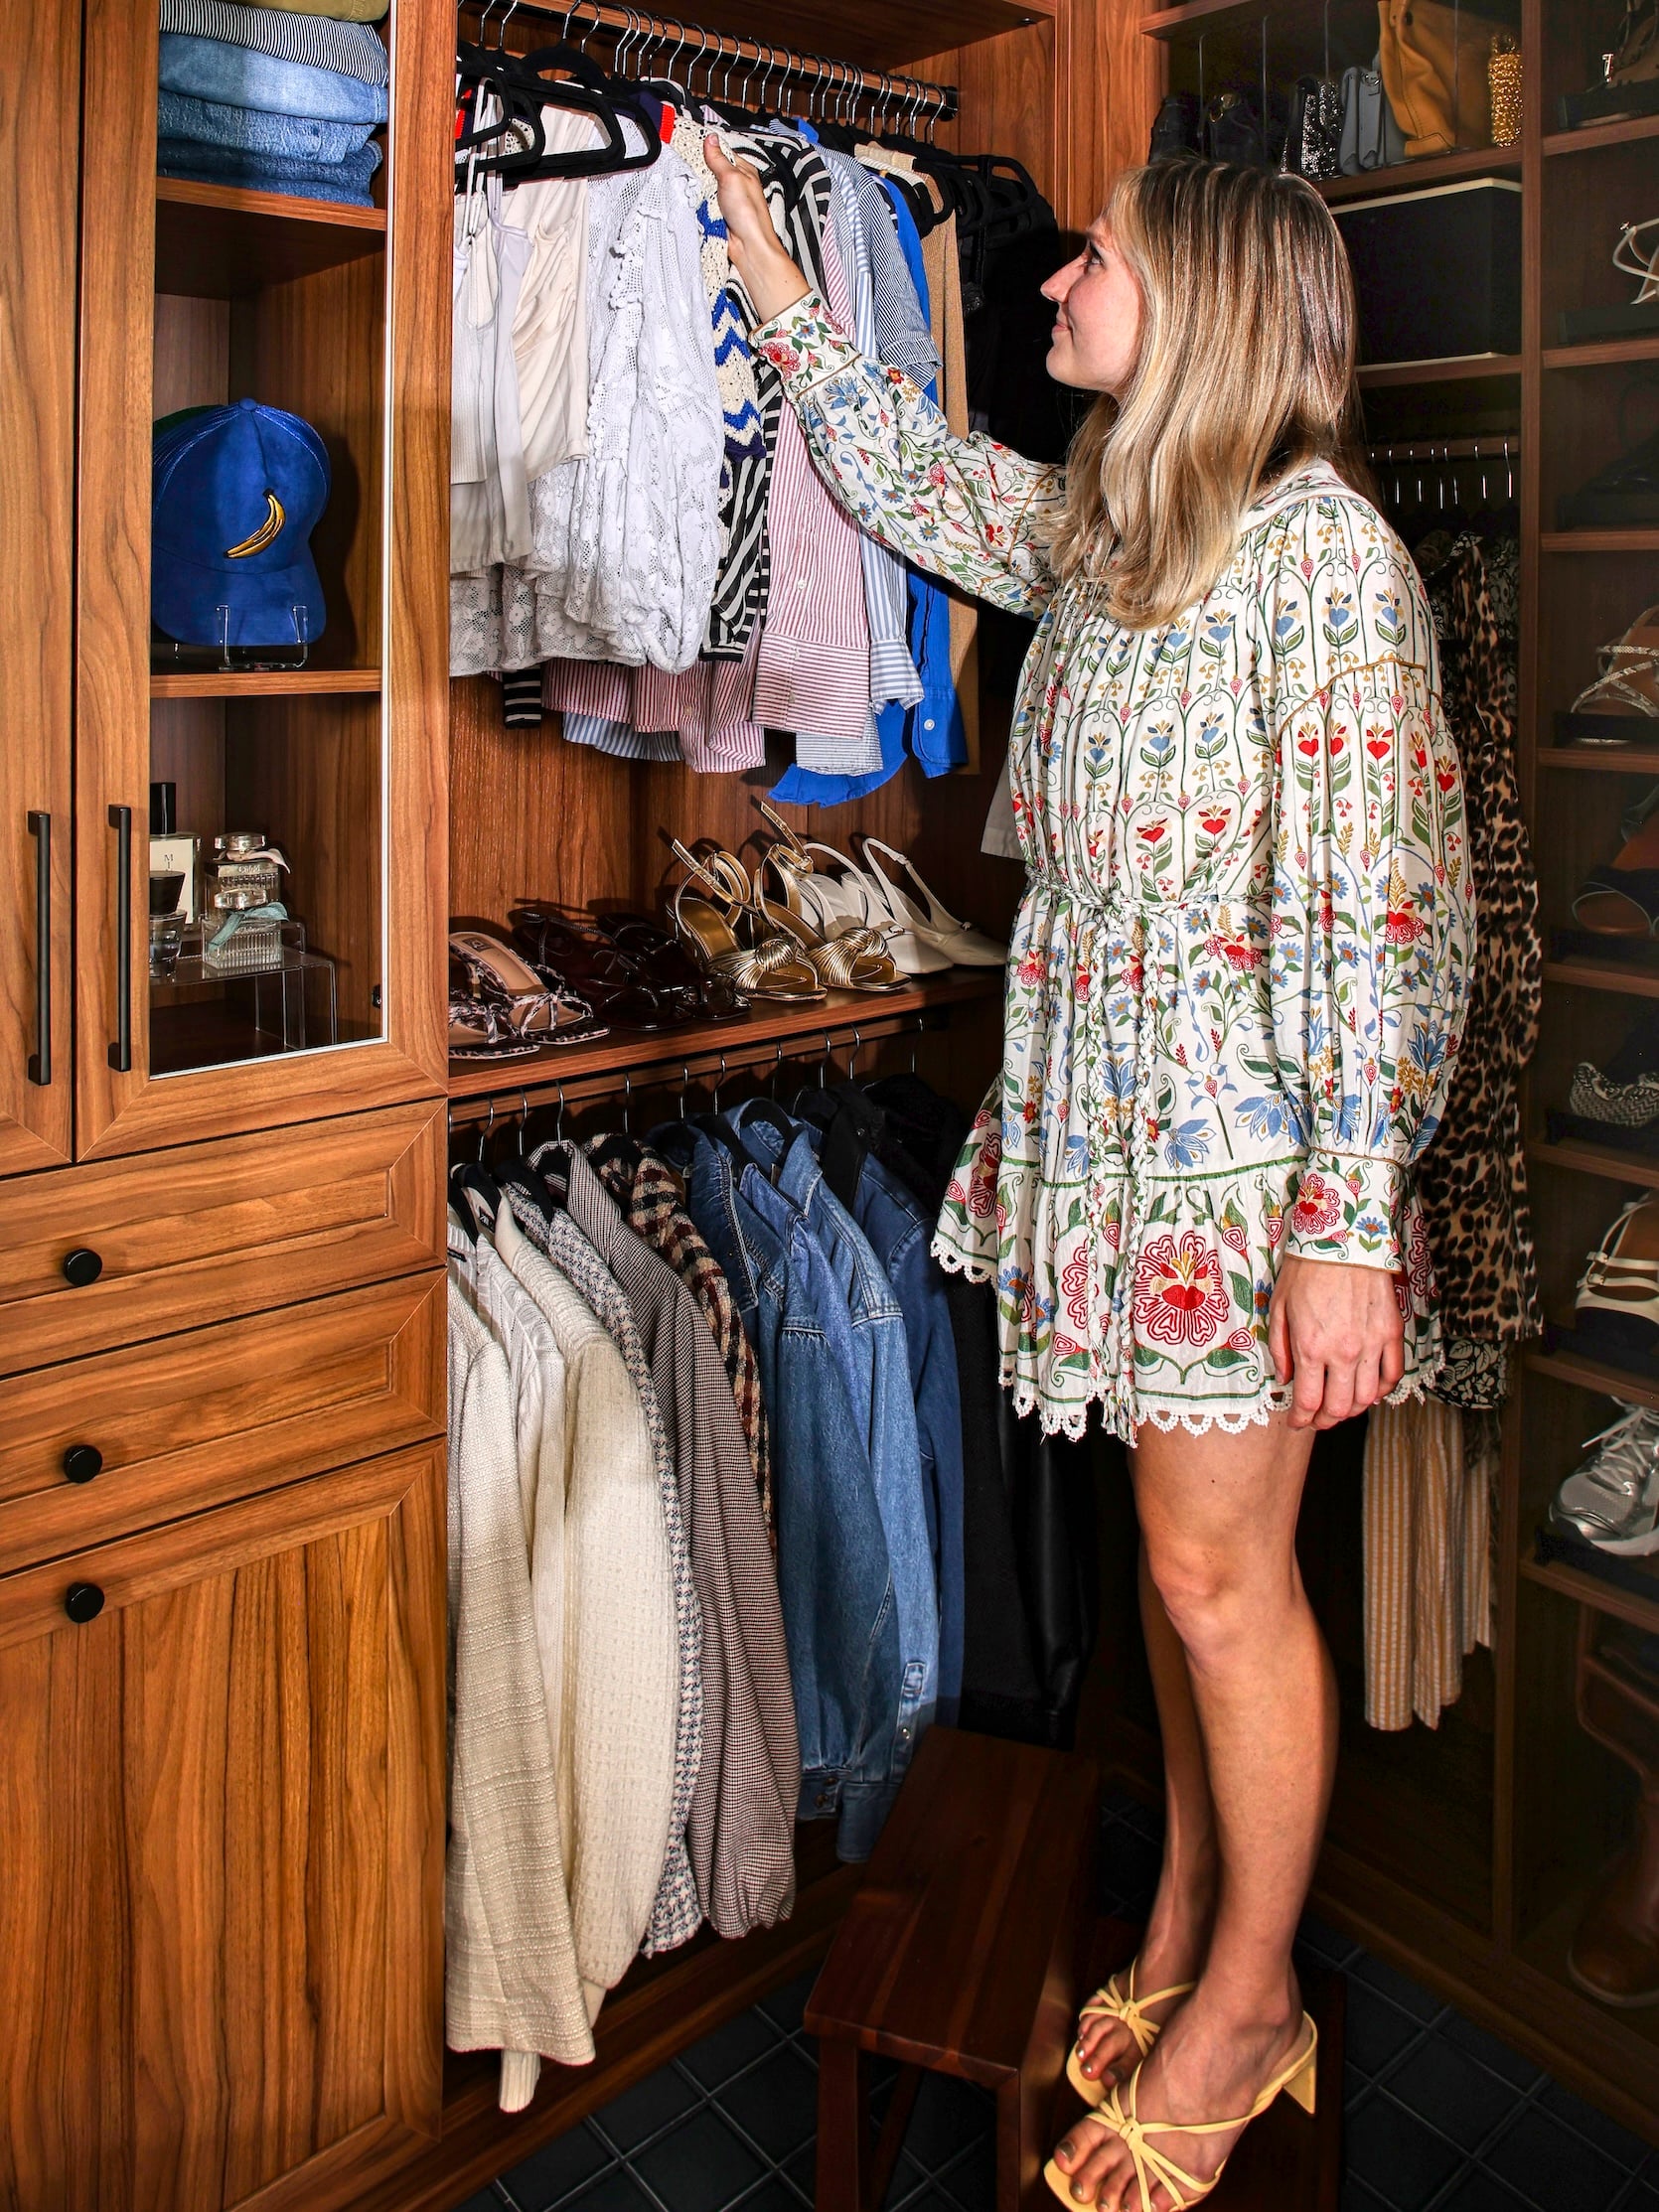
Before I go, here’s a fun before-and-after slider!
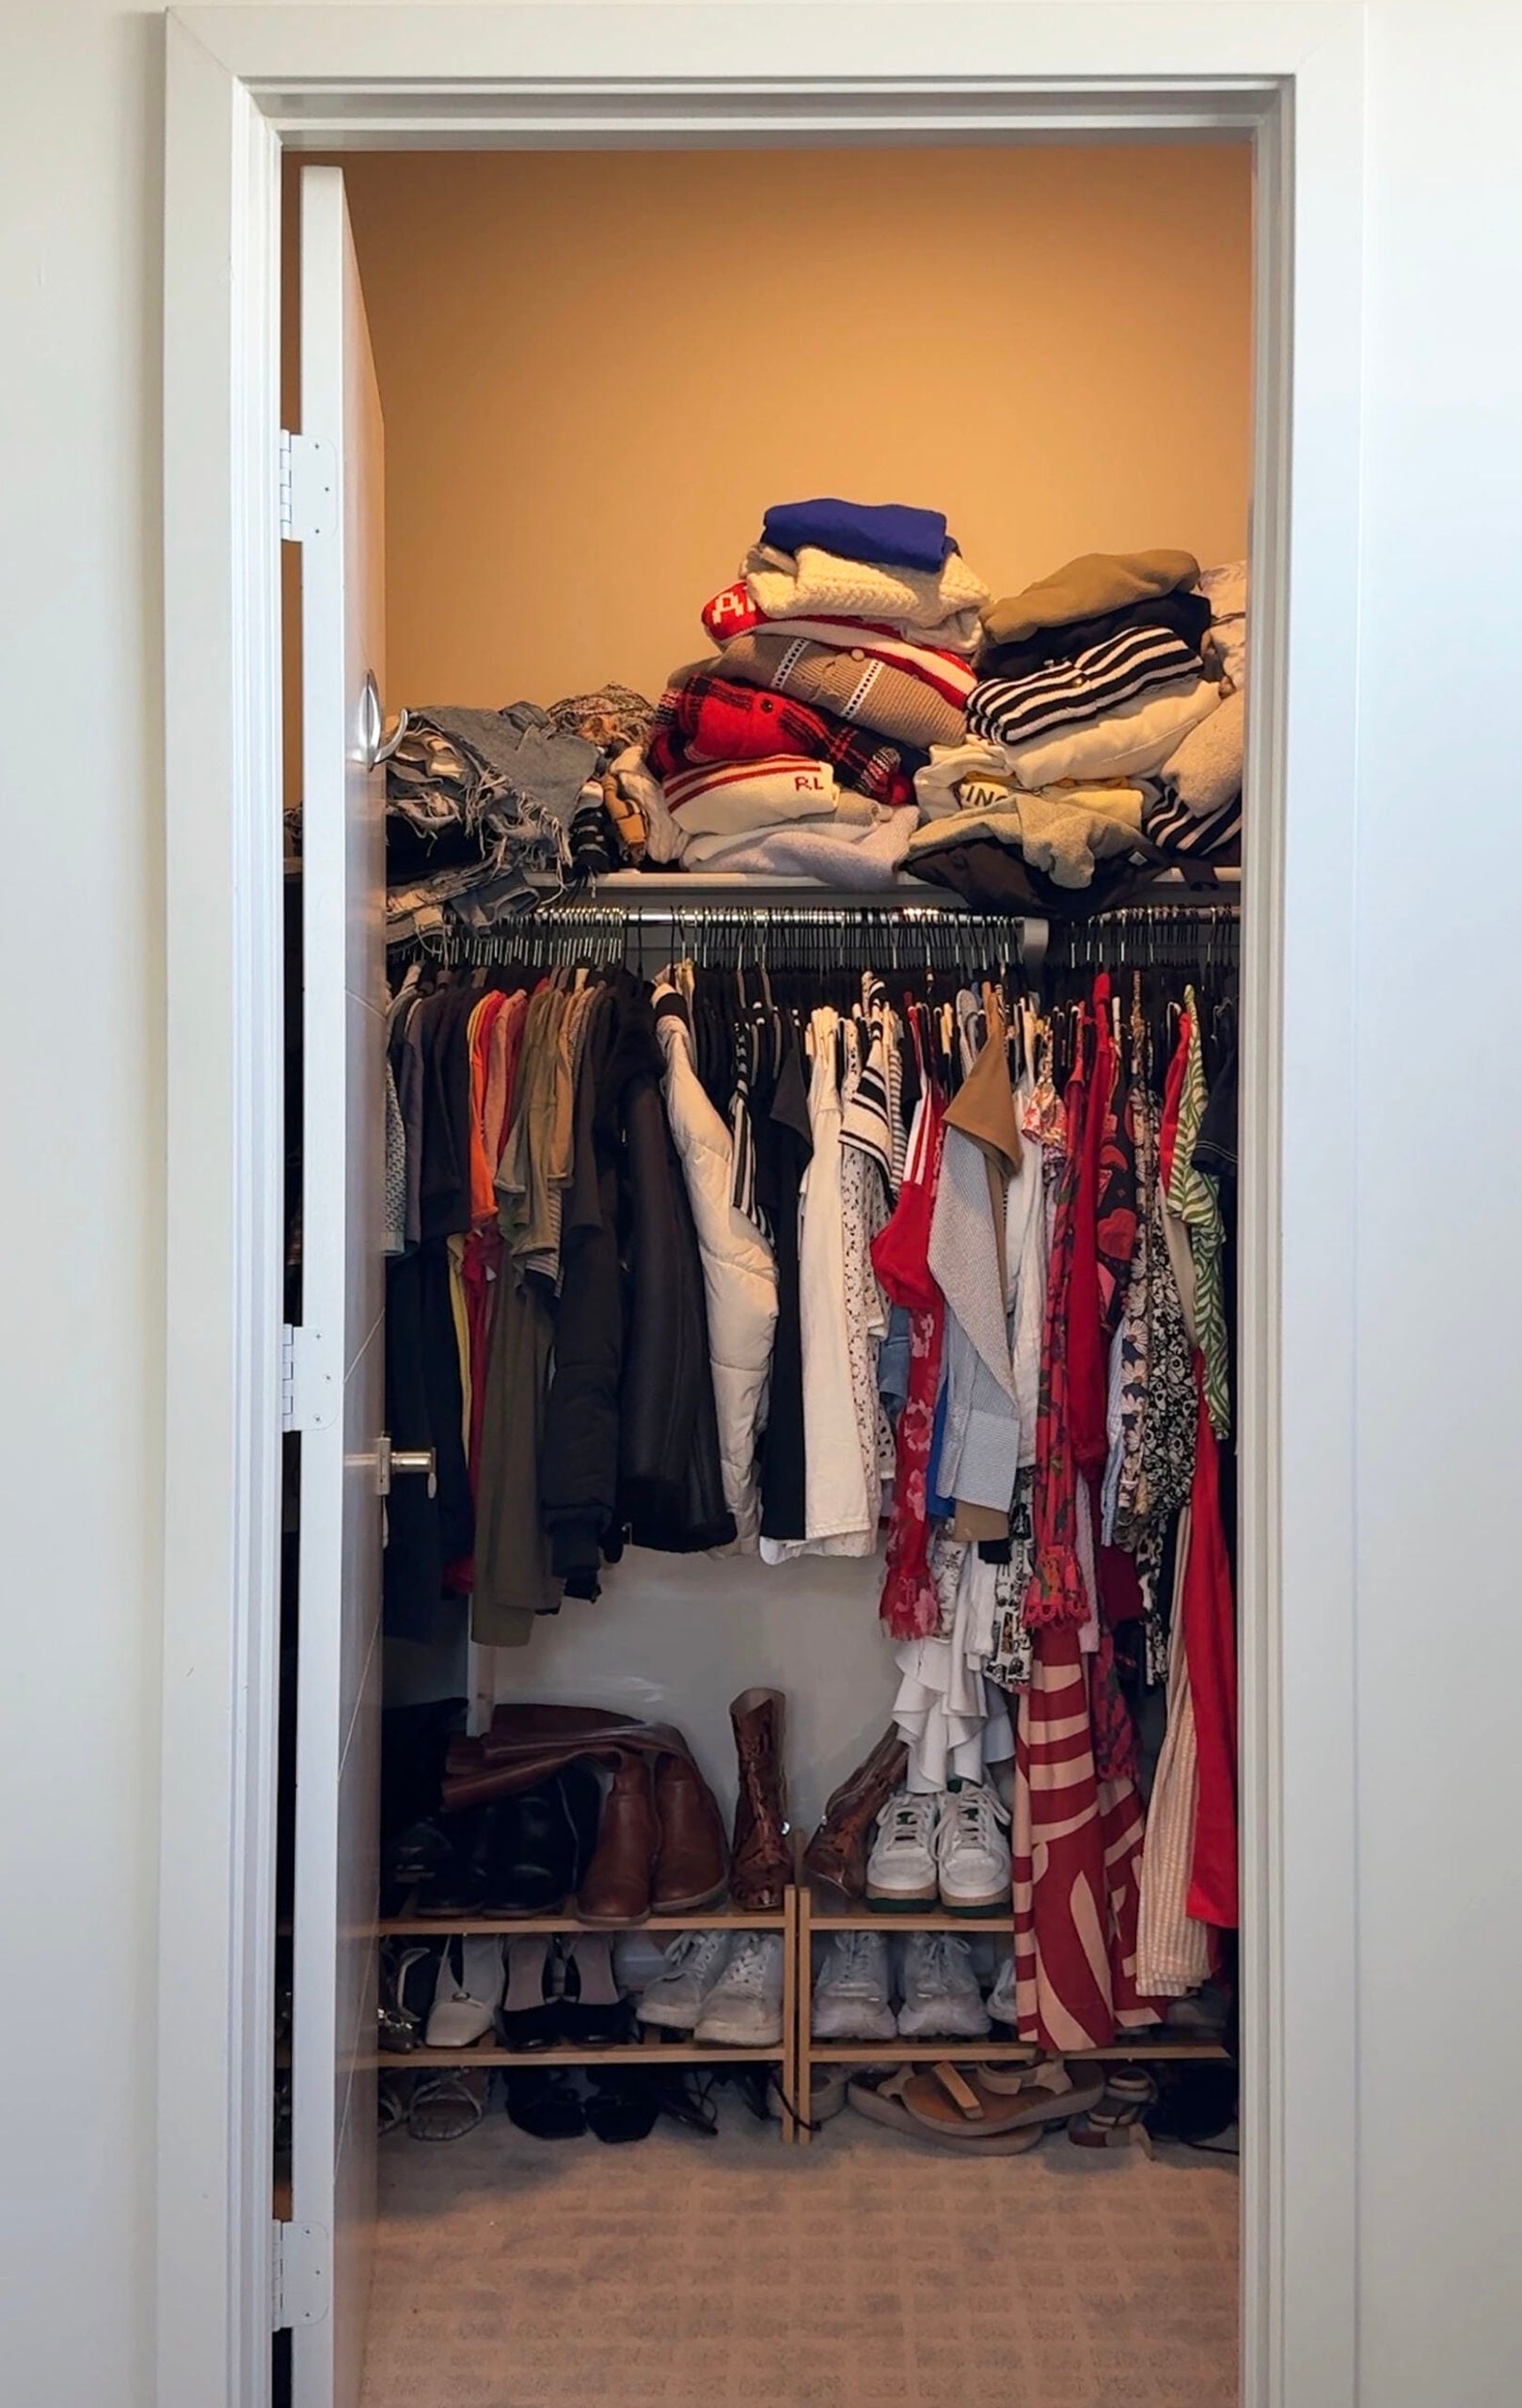
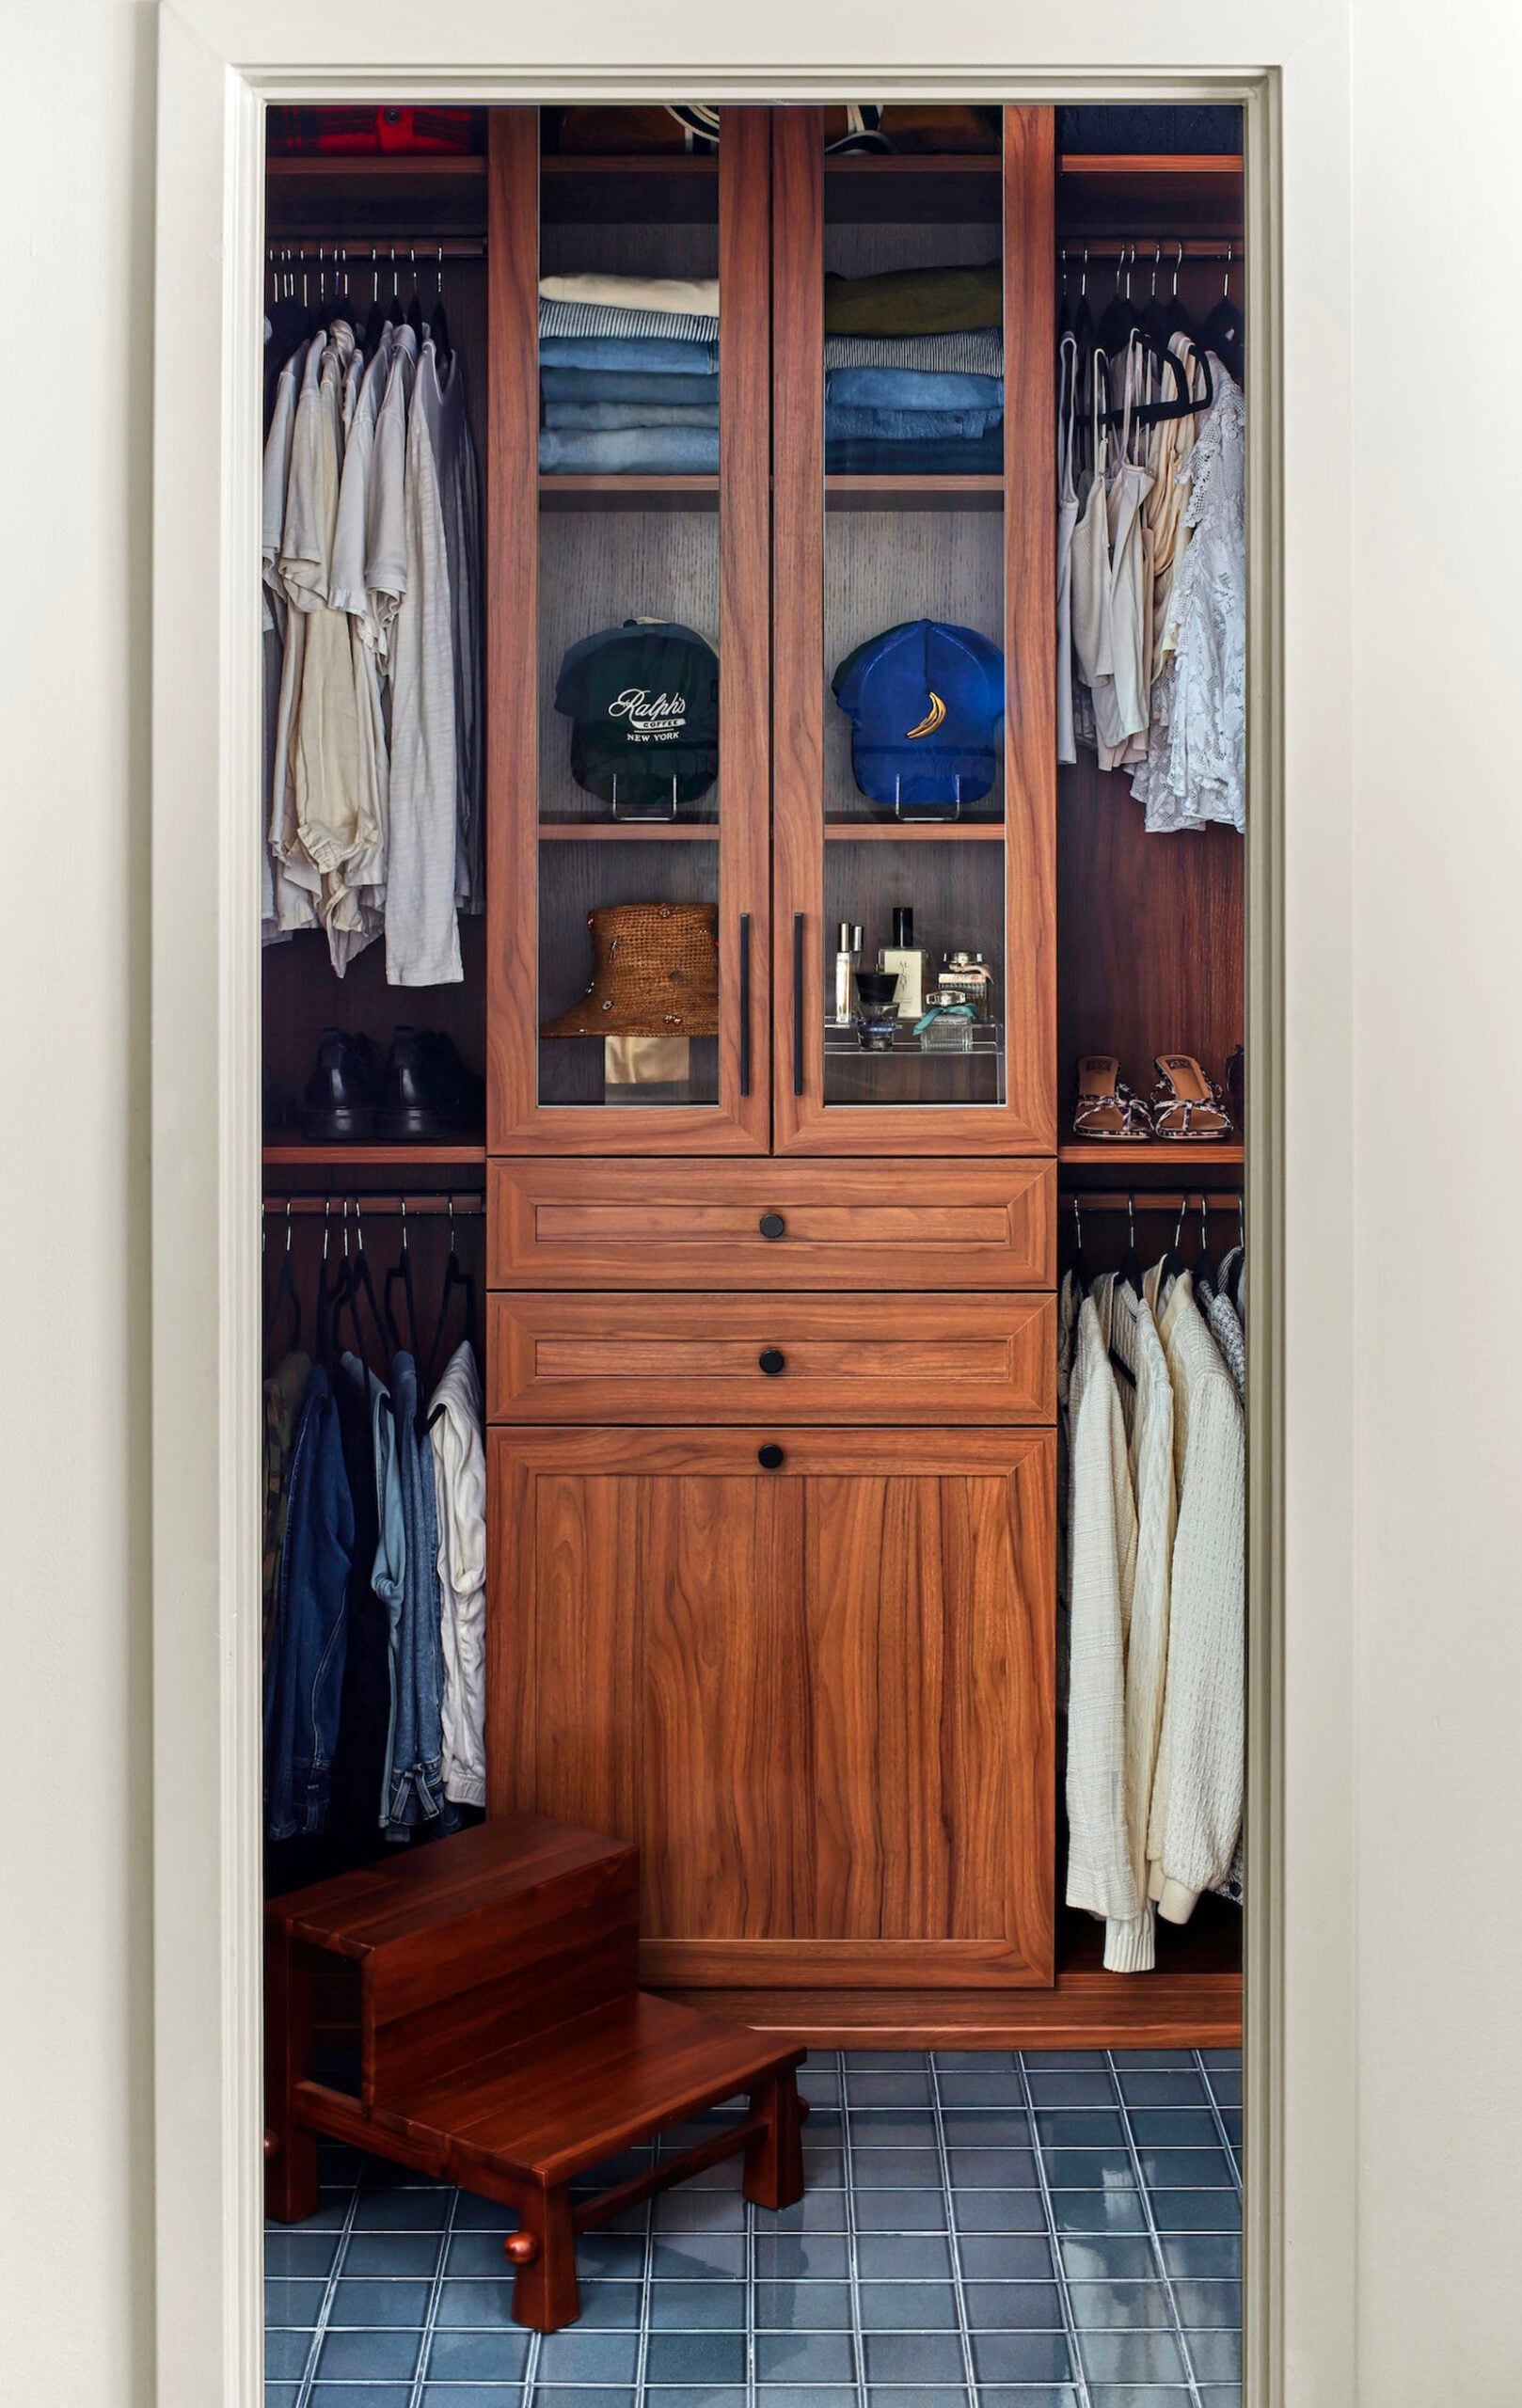
That’s all for my closet reveal!! I hope you guys love it as much as we do – it was such a fun project to work on and has improved my daily life GREATLY. Huge thank you to California Closets for collaborating on this; it has made our lives so much better (I’m not being dramatic!). If you’re interested in upgrading your closet space too, be sure to check them out. Thank you for being here!
*Design by Mallory Wackerman and Cooper VonAchen from California Closets
**Photo by Sara Ligorria-Tramp

Cost?
Click around on California Closet’s site. They have a great interactive graphic that shows what general costs are for reach and walk-ins at various finish Levels. And the standard disclaimer:
The cost of a California Closets solution is driven by the size of your space, the complexity of your design, and the materials you choose. *Price may vary by location.
High. Often very high.
This is a beautiful beautiful closet makeover (honestly one of the nicest California closest I’ve seen online) but there is zero chance more clothes are fitting in there compared to the before!!!
Hmmm, I think it is pretty close if you look at the before and afters. The before is one long rack with 2 smaller sides. The new one has 2 upper, 2 lower and a dress area. If you look at the length of those it’s not far off, plus drawers, cabinets and space saving solutions. Seems like a win to me. I wouldn’t mind losing a tiny bit of hanging space to get all the rest!
Honestly I think it’s a optical illusion! The double racks on both sides ended up being way more hanging space than our previous closet which is wild because visually it does look similar! But I was also hanging a lot of stuff before that now is folded (and should be folded) like my pants, sweatshirts, shorts, etc. So that’s also why it looks like there are less clothes!
I think folding clothes instead of hanging them totally creates more space and you can fit more. I just got some hanging cubes to fold clothes in in my closet and I was SO surprised how many more things fit by just folding some of them.
Very cute! We use Blissy silk pillowcases and wash them with our bedding/towels on the extra hot cycle and throw them in the dryer. They’ve held up for years. I started out handwashing them and hanging them to dry but quickly grew tired of that.
yes the blissy pillowcases are awesome!! Our sometimes get a weird film sort of feeling when we put them in our dryer so I am loving the steam styler!!
So, is this a sponsored post? Is there an approximate cost that can be shared with readers? Thoughts on best aspects of this project? Tips on how to achieve the look/function for less?
Wow! Looks great and I made note of some of the things you added like the organizer for baseball caps. Do all of your clothes fit? You added double racks but still seems like you have less hanging space than previously. A good reason to minimize the wardrobe I suppose!
They do!! The double clothing rack fits A TON of clothes and we’re able to fold a lot of stuff that we weren’t before (pants, sweatshirts, shorts, etc) 🙂
This is lovely, but I’m curious as to why you didn’t add more drawers (especially as a Mario Kondo fan), rather than add-on boxes that don’t protect from dust. Or do you have a chest of drawers outside the closet?
Also, are the shelves adjustable? There seems to be lot of wasted headroom above the hats.
We have a dresser in our bedroom right outside so we didn’t need as many drawers! Plus I love the look of the glass cabinet. Also I thought a similar thing so after this shoot I ended up swapping the hats and the pants since that lower middle shelf has a bit more room. It works perfectly now 🙂
Agreed, the glass cabinet is lovely 🙂
When we downsized to our retirement home, I needed to find a way to fit a dresser for two into our walk-in 9.5’L x 5.5’W x 9’H closet. I also needed room for a heated towel rack, a hamper and enough shelving for all our shoes and my purses. It is amazing what a professional can do when utilizing every square inch of a space. All of our day to day clothing fits for both warm and cold seasons (coats, gloves, hats and snow boots are in a separate walk-in coat closet – it gets cold and snowy where we live). We spent about $8500. It was worth every cent.
a well-functioning closet can really be life changing!!
I would have so much enjoyed this post if it had been a true DIY.
This one was honestly well above my DIY limits! Custom cabinetry is a skill I’ve not yet mastered. I’ll have a lot more DIYs in the house in other spaces though that I will share 🙂
It looks fantastic! I’m curious what the dimensions are for the closet as I start to dream about how I’m going to re-work my primary bedroom closet!
Yes, please share closet dimensions.
Thanks for sharing this! I was hoping to find a ballpark cost for what this might be if not sponsored (especially the CA closets bit). I had them out for our closets a few years ago and I could not get them to even share a range with me without getting deep into the design weeds, which was quite off-putting.
After a different EHD Cali Closet sponsored posts I reached to my local store. The rep gave me a ballpark over the phone after I provided my closet dimensions. She didn’t want to waste either of our time. A no frills, nearly all hanging closet started at $8k for me.
California Closets does a great job, and this is beautiful. But they are *very* expensive. I say this as a designer.
True! I installed the IKEA Pax system and had great results – including two jewelry drawers. I really liked the 12” deep hanging pants rack. I used it with shelving for shoes and purses above.
I need to do this for our closet. We added shelving and hanging before we moved in but quickly realized it’s not super ideal.
You’ve inspired me to draw up some plans and figure out what will work best for us!
Is there a price listed somewhere that I missed? I have a similar size closet
I don’t think you missed it. While the steamer is amazing (we have a similar product, also by LG) which was specifically called as not being sponsored the closet did not have the same disclaimer. The end product is gorgeous, and there was no pricetag. I’m guessing $10k?
The blue tile looks sooo good in here. It totally makes the space. (Plus that beautiful glass cabinet.) What a fun re-design! Thanks for sharing with us!
It’s gorgeous, but it looks like there is a lot less space for the cloth!!
Big fan of the colors used. The oxblood and medium blue is such a good color combo. While the wood reads traditional the black handles and knobs lean modern. Very nice.
Please share the dimensions of the closet. There’s just so much approximating one can do with clues like the width of the steam thing. With a custom closet I imagine custom widths. The wrap around wood covering the squared corner is chef’s kiss.
For the steam thing, was there an option to put the door and the mirror cabinet opening on the same side. So it all opens the same way? Knowing me and my hips, I’d bump into one of the two doors. lol
Just as a “been there done that”, skip the slanted shoe shelves. Look at Misty Copeland’s California Closets shoe storage. Flat shelves store so many more shoes. It’s a closet, not a shoe shop: you don’t need tilted display shelves.
Would you be willing to share the full cost breakdown, so readers can get a true idea of what something like this would cost? It’s not a particularly helpful post otherwise. Thanks!
I’d be a lot more inclined to check out California Closets if there were costs included in this post. Even ballpark would be helpful.
Yeah, that question has certainly been ignored. I’ve been looking for that answer for 3 days…
As designers working on a collaboration, they chose the most gorgeous finishes and options that CC offers that would look nice on the post (and in their home). Providing a cost here would not be particularly realistic for the average consumer as there are SO many customizable options provided that make the price vary greatly with each choice.
As someone who chose the most basic finishes and shelf/drawer/cabinet options (while still functioning the best for our needs/space), our 9x7ish closet in TN 5 years ago cost about 5k. The best money we have spent in our house as storage was far and away our home’s greatest pain point!
We also went from builder grade to California Closets after our wire racks fell off the wall from overloading them 🙃 Similarly priced to another closet builder we got quotes from but liked what CC was offering better. No regrets!!
Love this! Our current house had a fairly nice custom closet, but it just didn’t work well for how we use a closet. After living with it for three years we finally decided to see if we could rework it without tearing it all out. We changed two hanging racks into shelves and added some shelves. it’s a million times better!