Design
The DIY Closet Project Jess Finally Gave Herself A Deadline For
Welcome back to a project I first talked about… a while ago. What I initially thought would be fairly quick and easy was soon flooded with overcomplicated ideas and a new door that was too short for its new door frame. I’m not going to point fingers, but the right measurements were given to Les Bunge, and, well, the “Bungo, I found the perfect door” turned out to be 3″ short of “perfect”. I ultimately lost steam and just focused on my living room and bedroom. But the tide has finally shifted, and I am sick of looking at my sad “too short” salvaged door every time I walk into my apartment. So here’s the deal: I am giving myself a deadline of November 1st for my DIY closet. I have a plan; I have a new DIY buddy:); and enough energy to finally get this little pass-through DIY closet DONE and checked off the project list. Let’s jump right in.
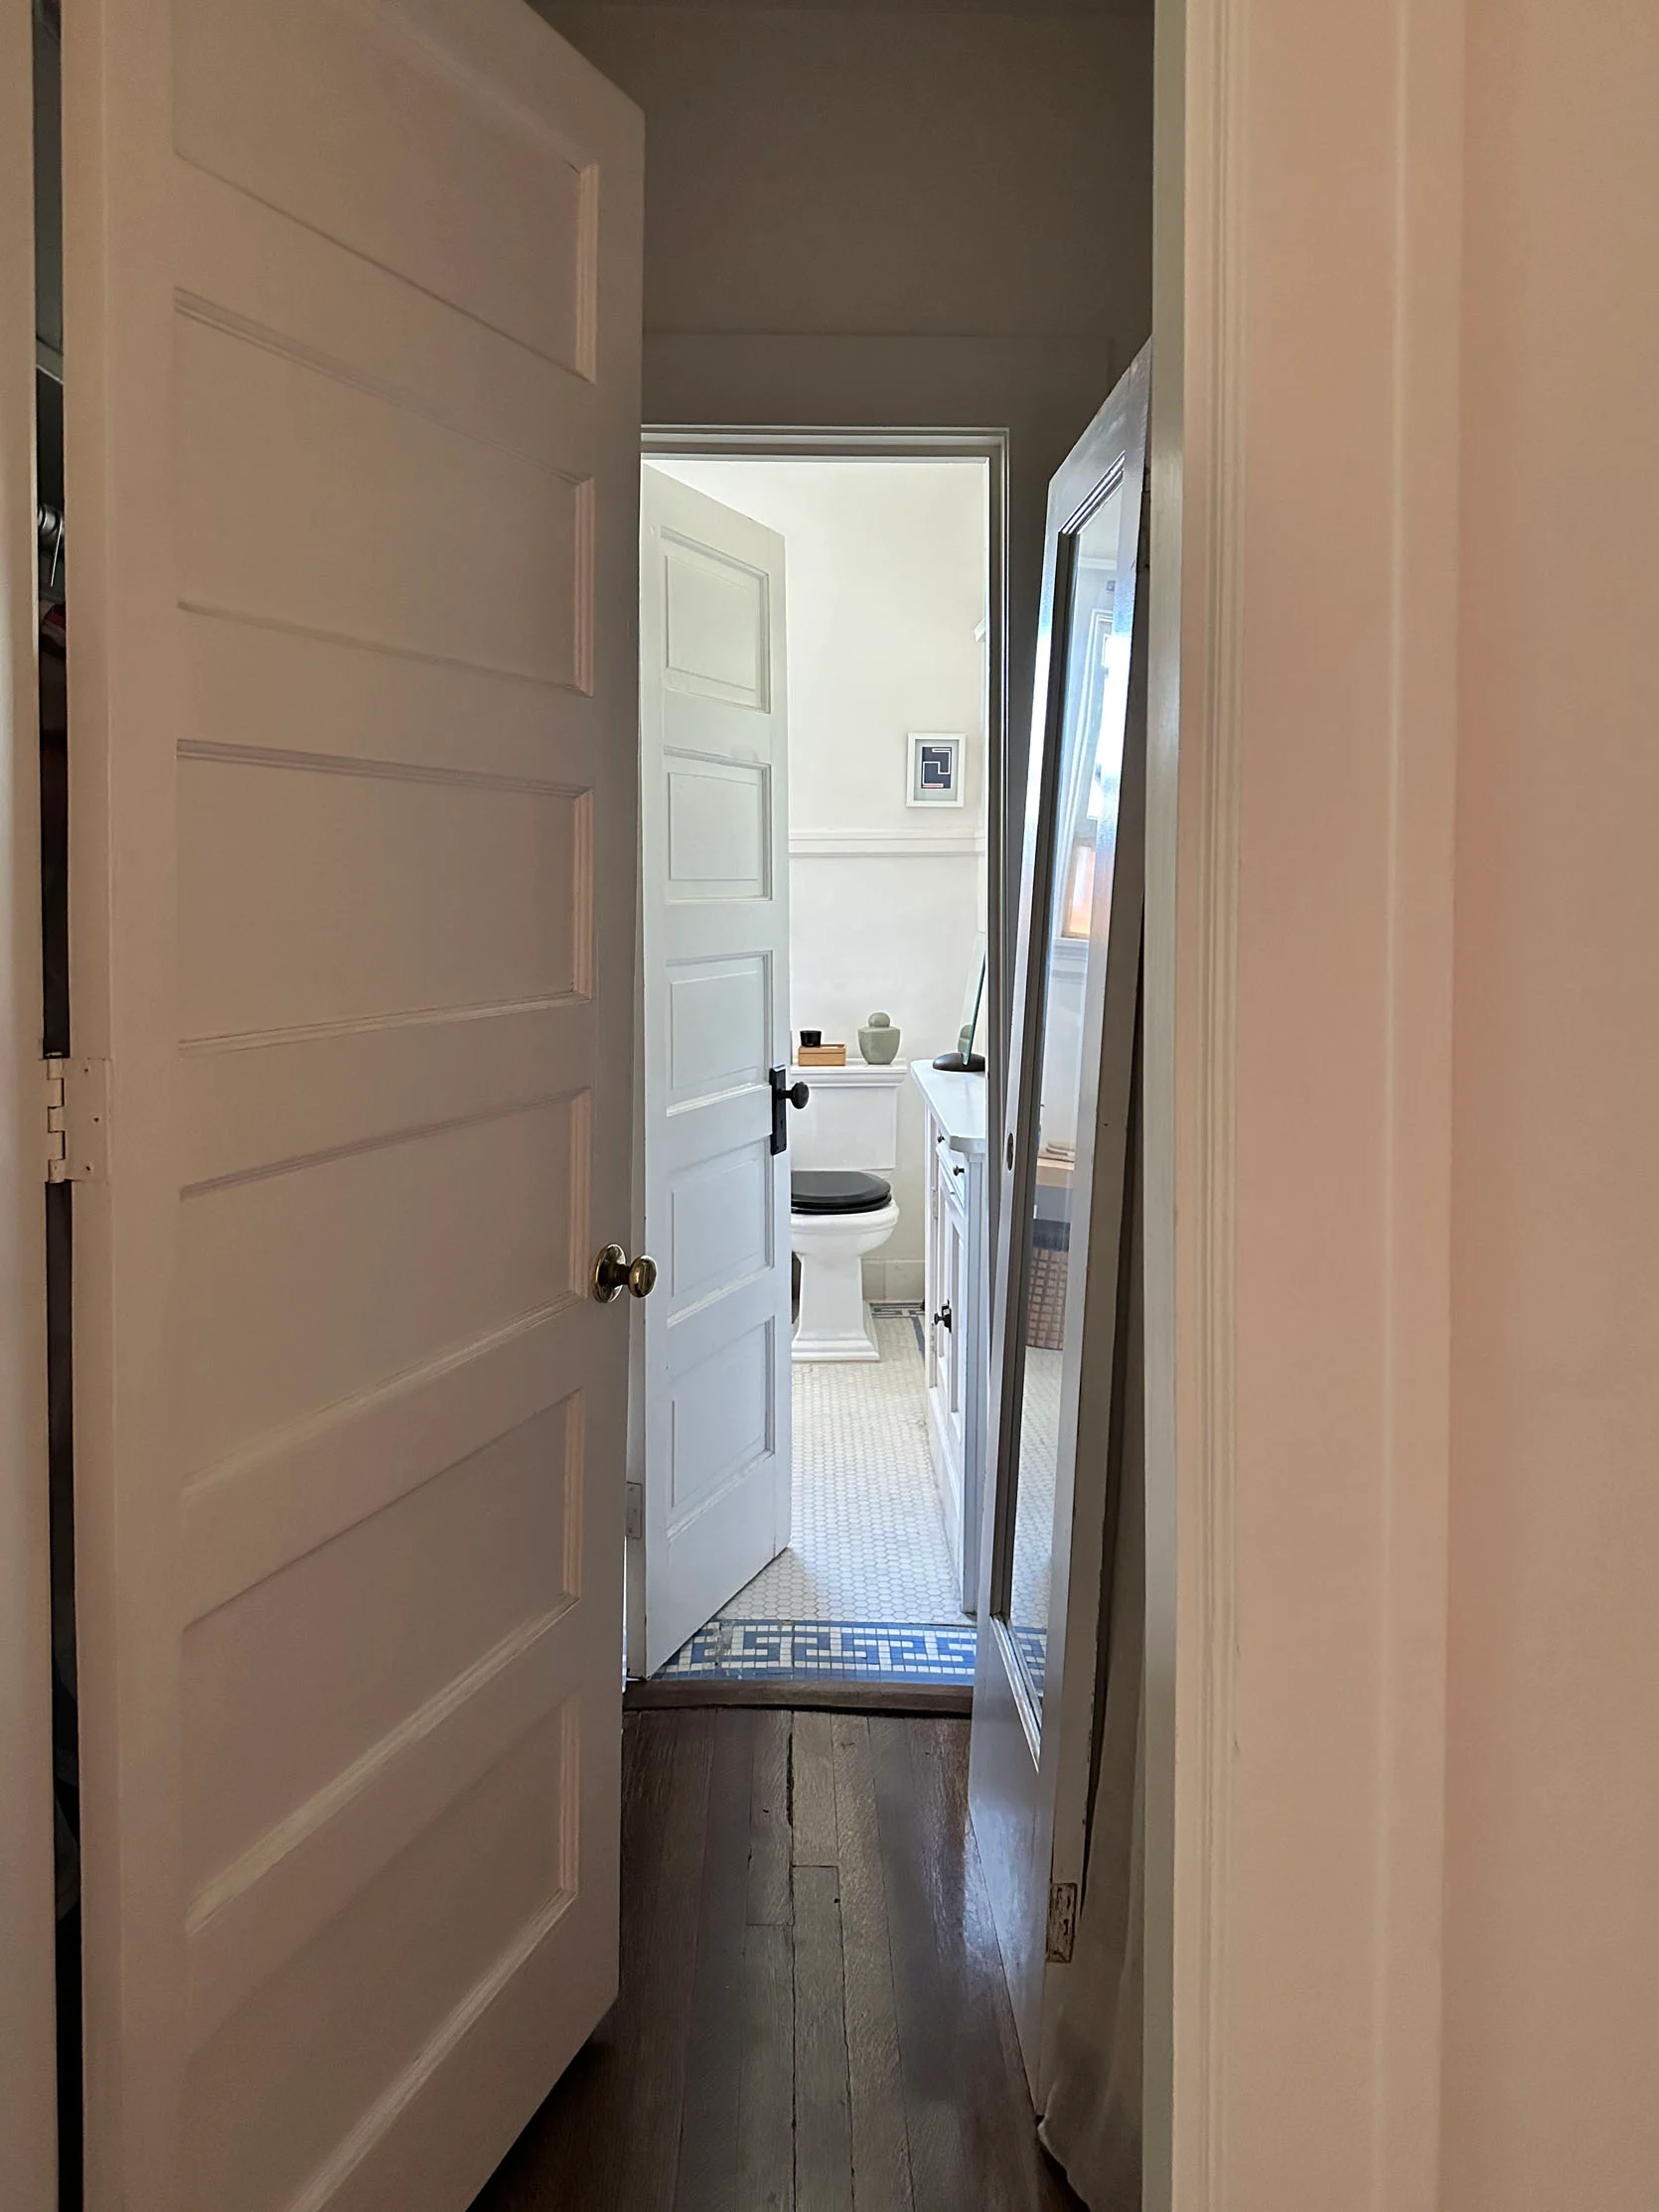
This is the view I am tired of. It’s not just that the extra door is off to the side, but also that my very lovely toilet is the first thing you see upon entry. It’s a cute bathroom, but I’d prefer some more visual mystery. But since the main/only natural light for the hallway is from my bathroom, I thought switching out the door that’s there for a door with glass, that I could add privacy film to, would be a pretty solution. That way I still get the light without the toilet welcoming you into my home.
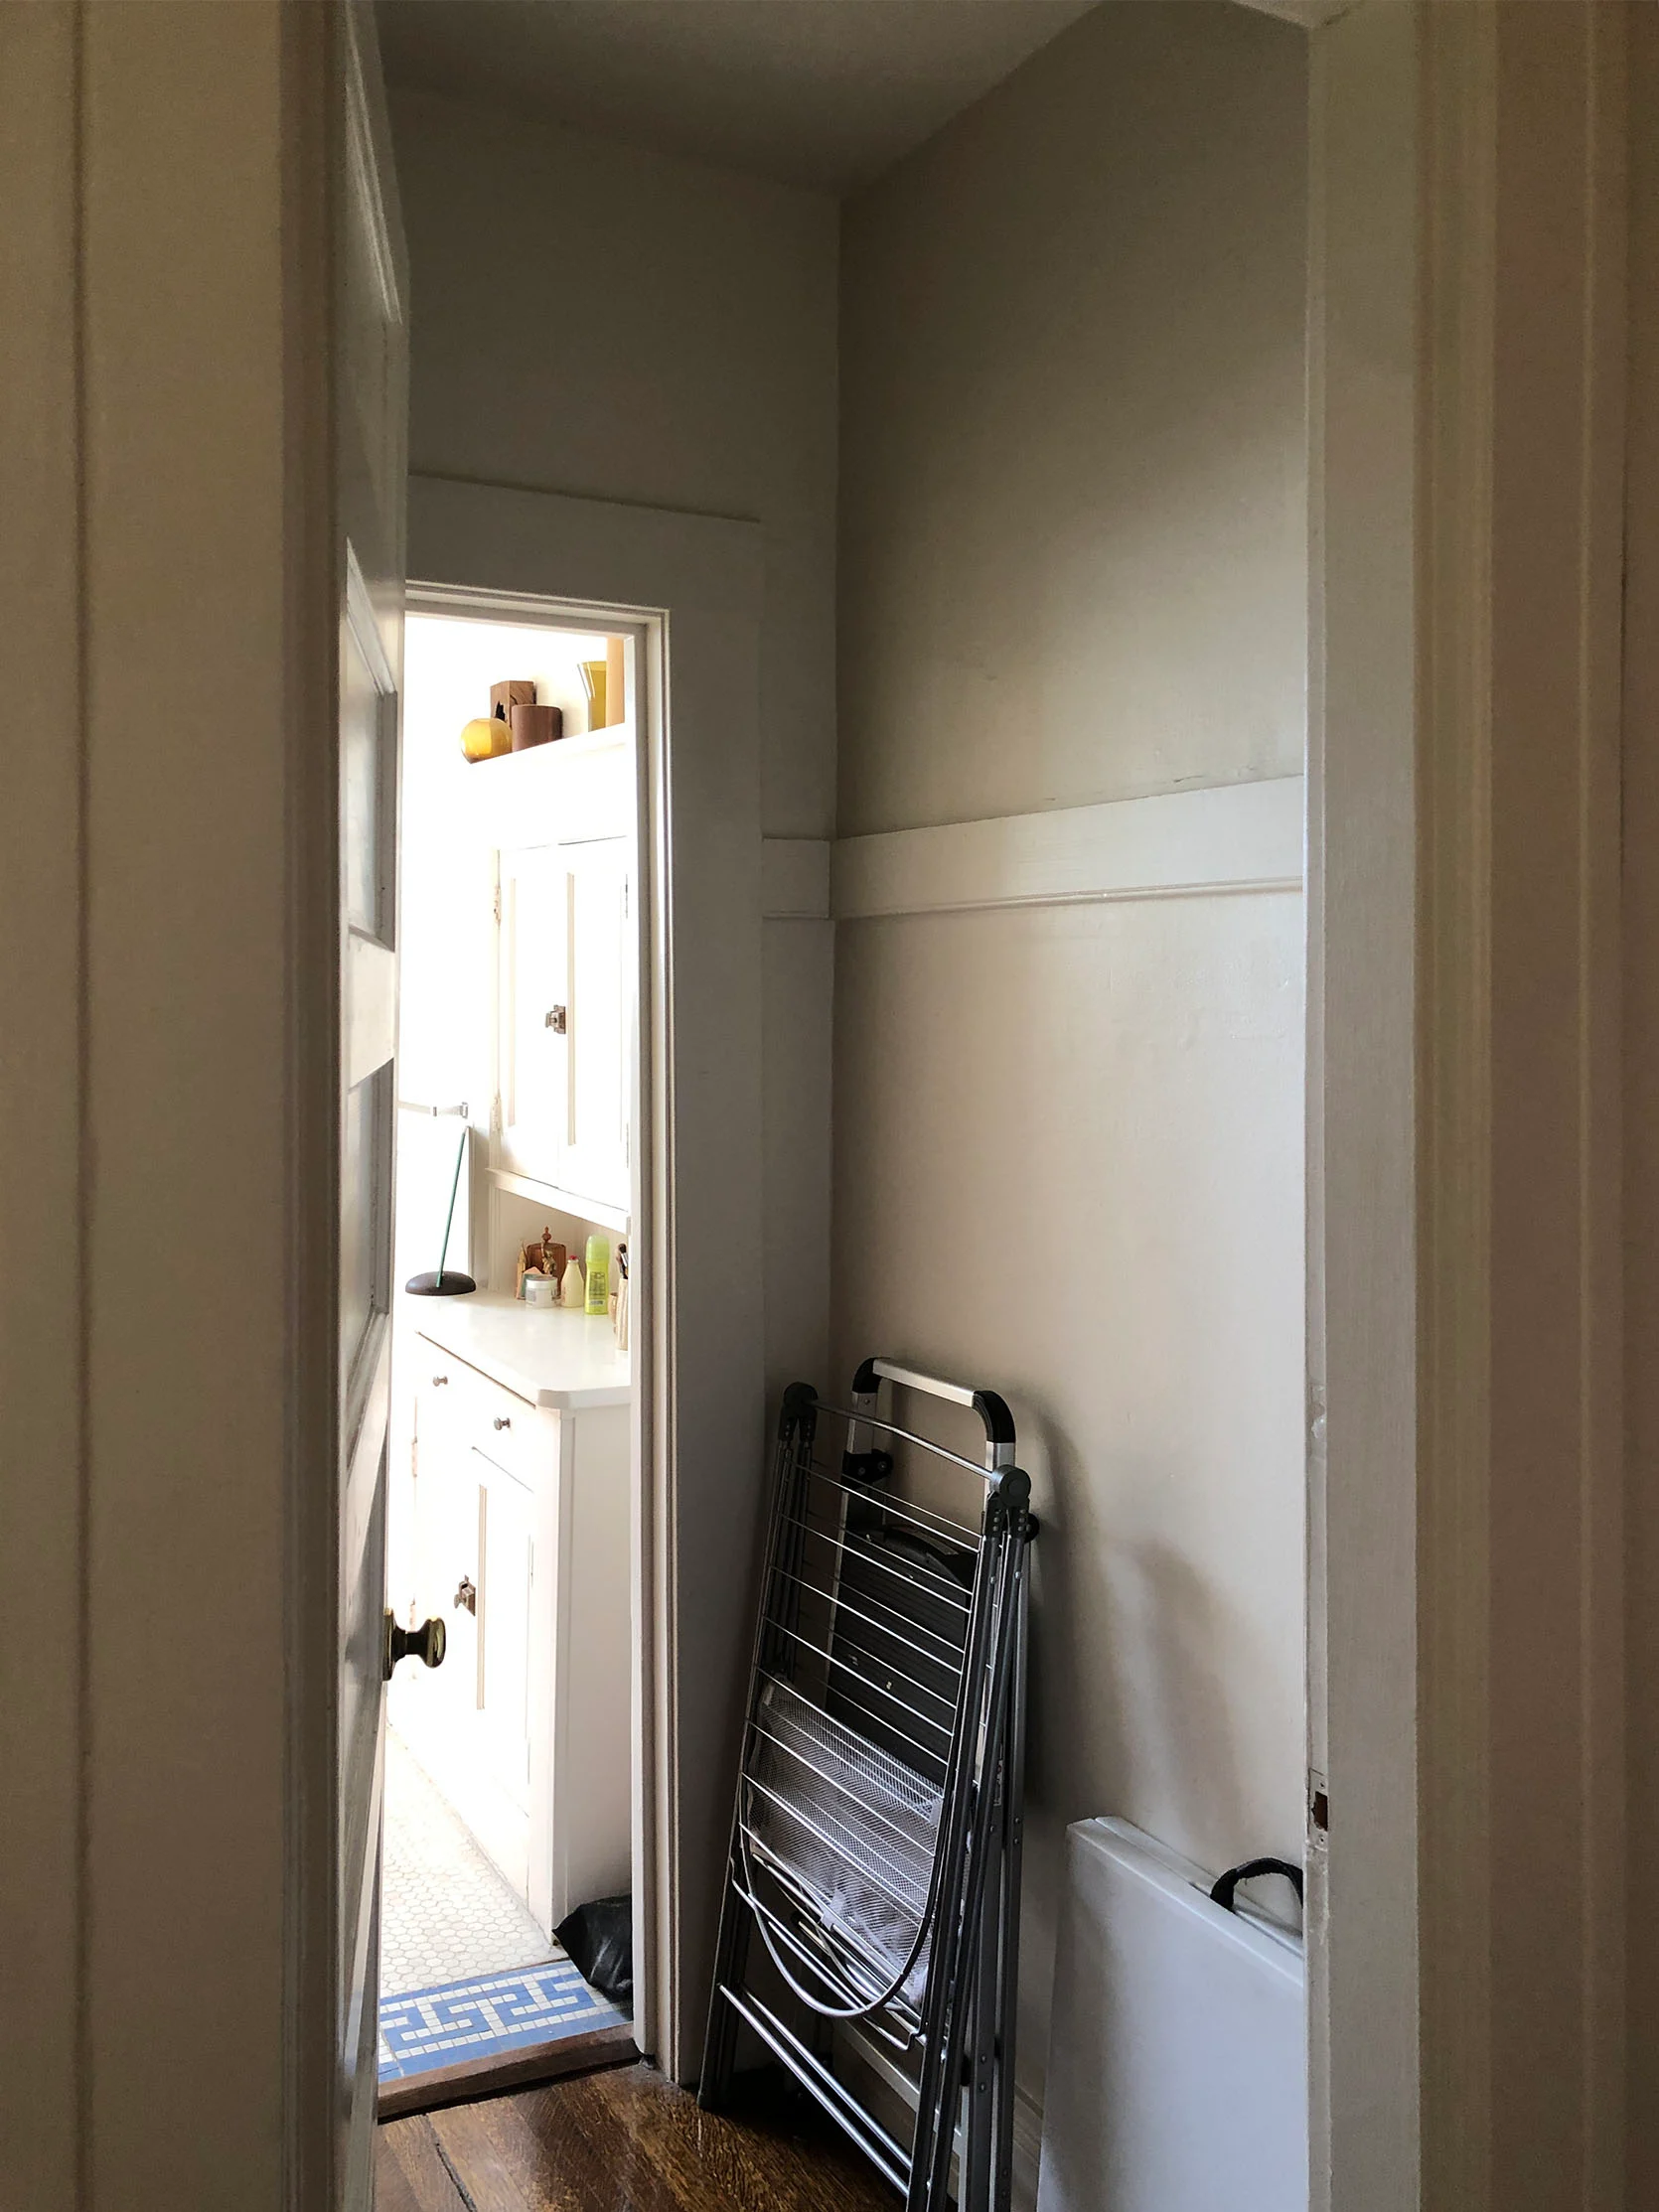
But before that little idea came to be, I wanted to make this pass-through closet cuter and add more storage. I knew I could make this right side much more functional. Let me show you how.
DIY Closet: The First Idea…More Storage

Here’s a little guest star moment of DIY Dad helping me get wood for the shelves I asked him to build. Nothing fancy since I knew I wanted to stain or paint them once I had my whole design plan together.
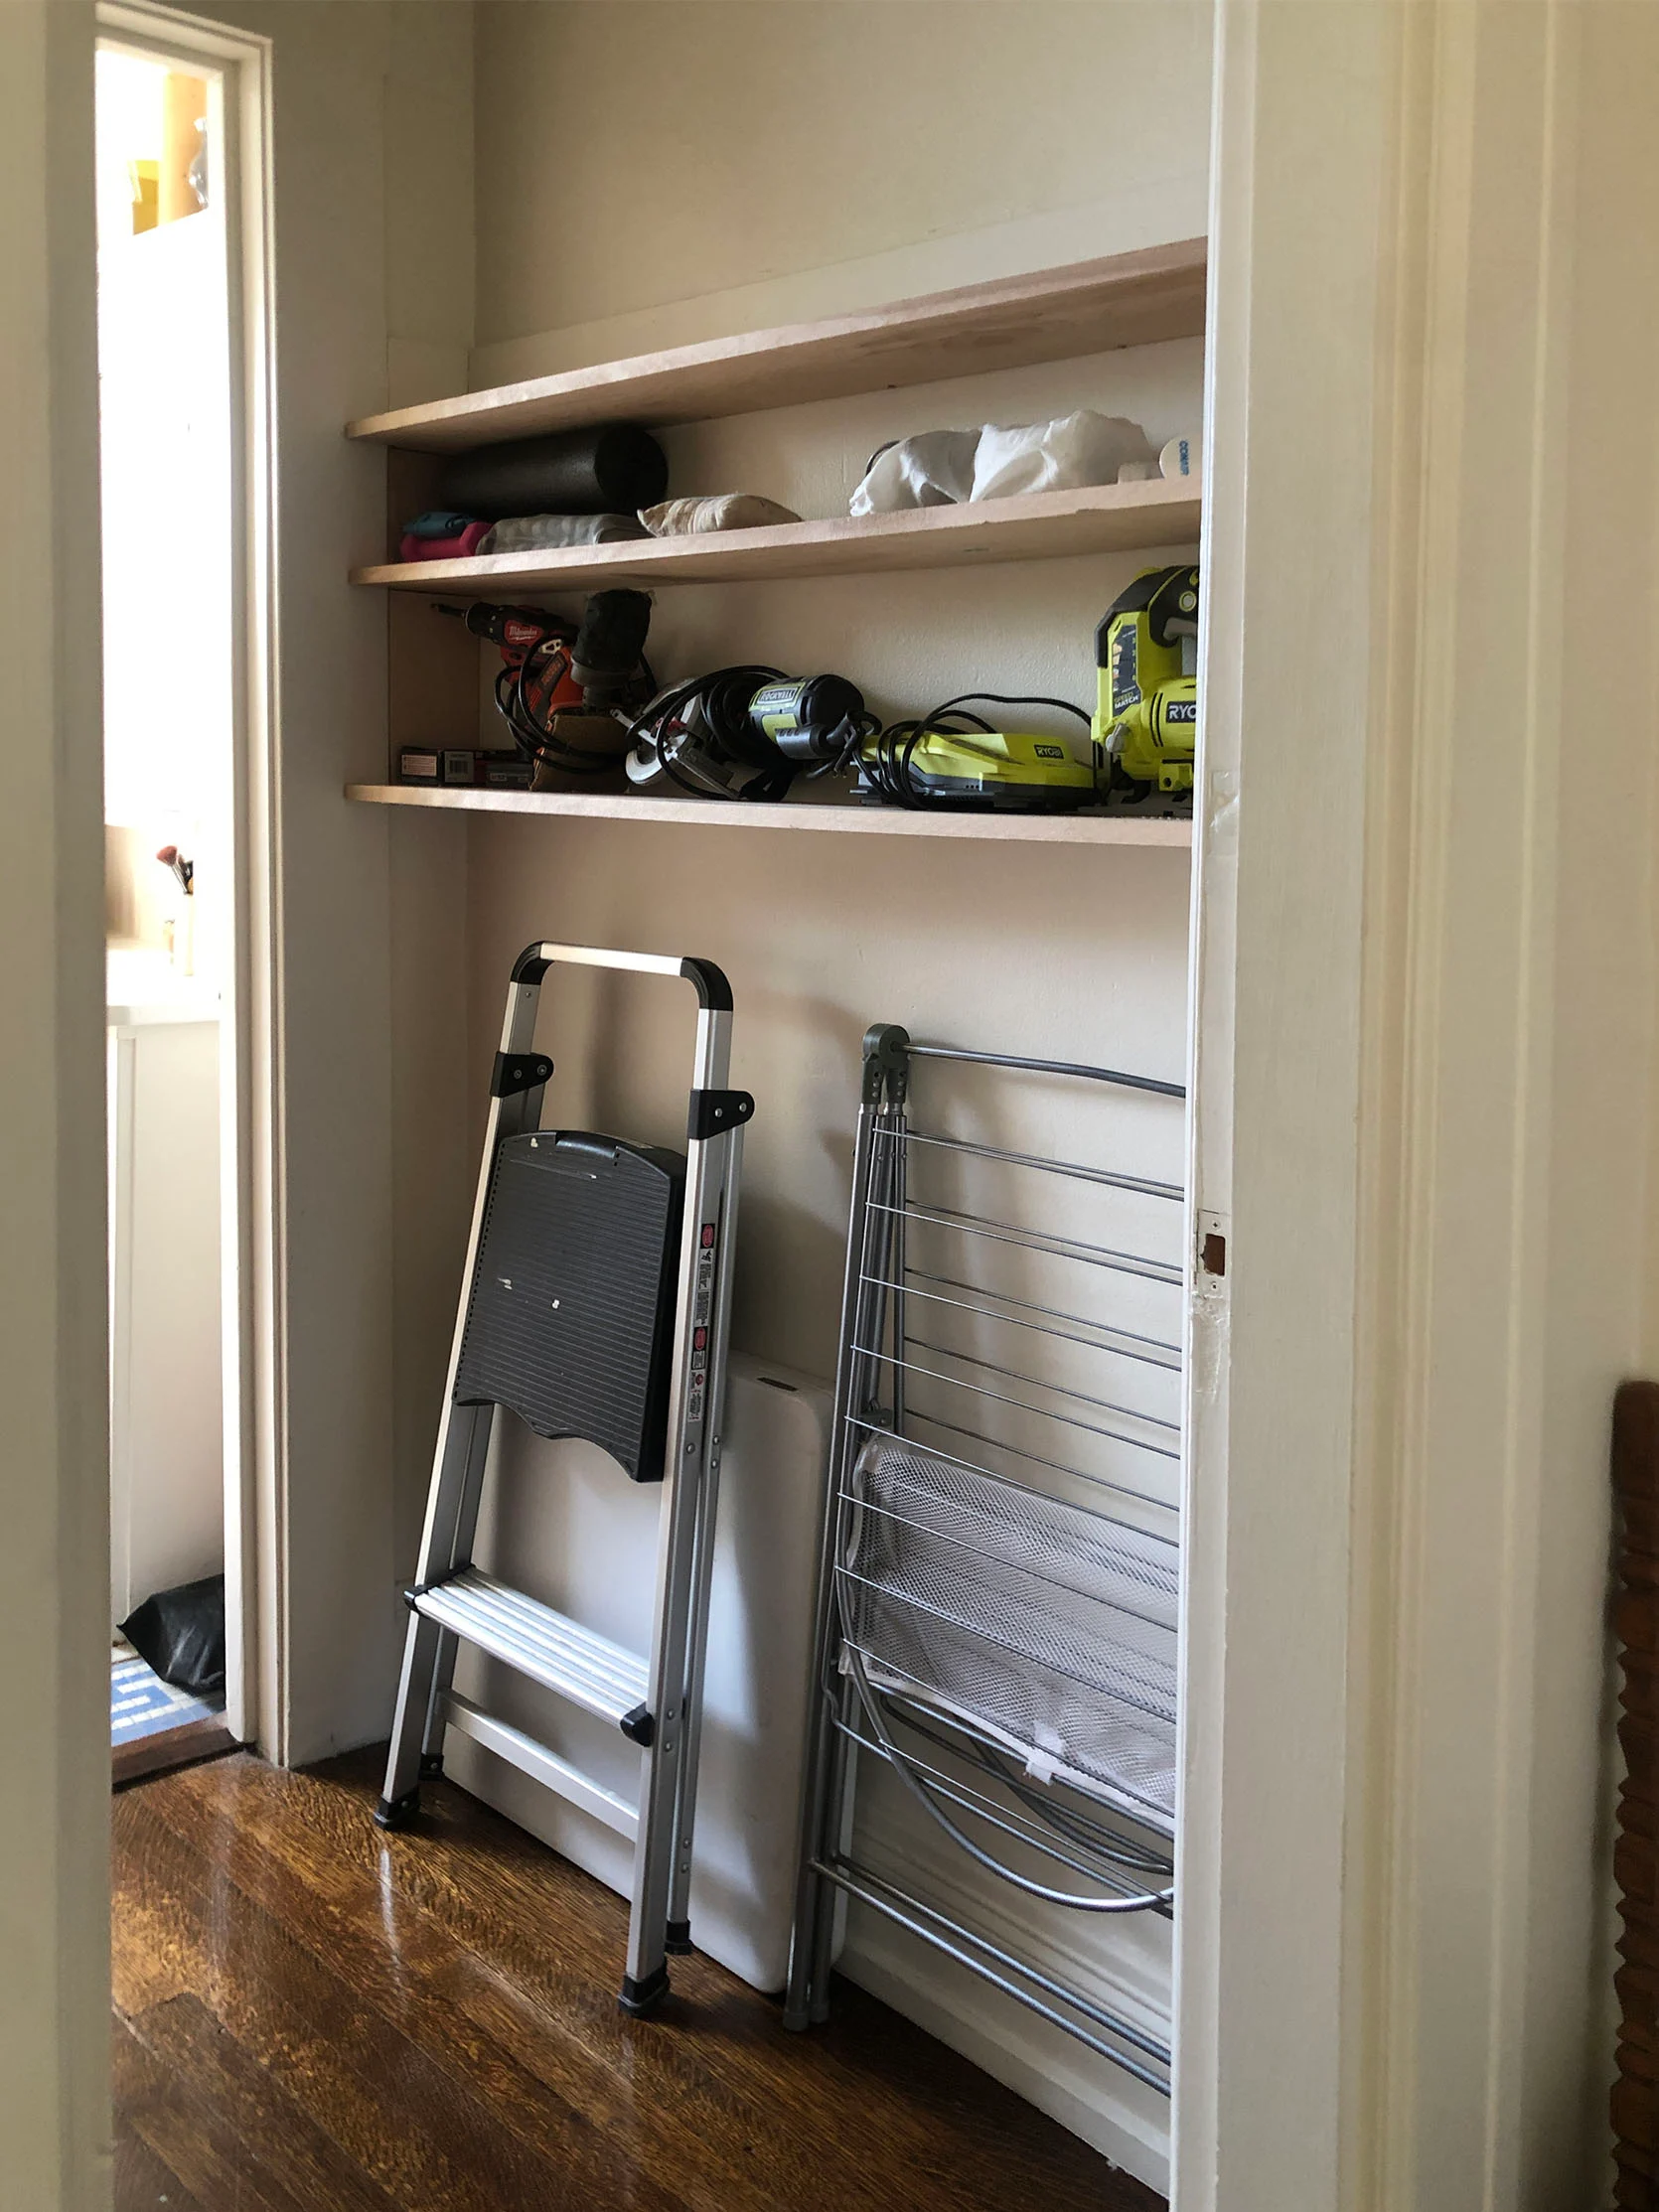
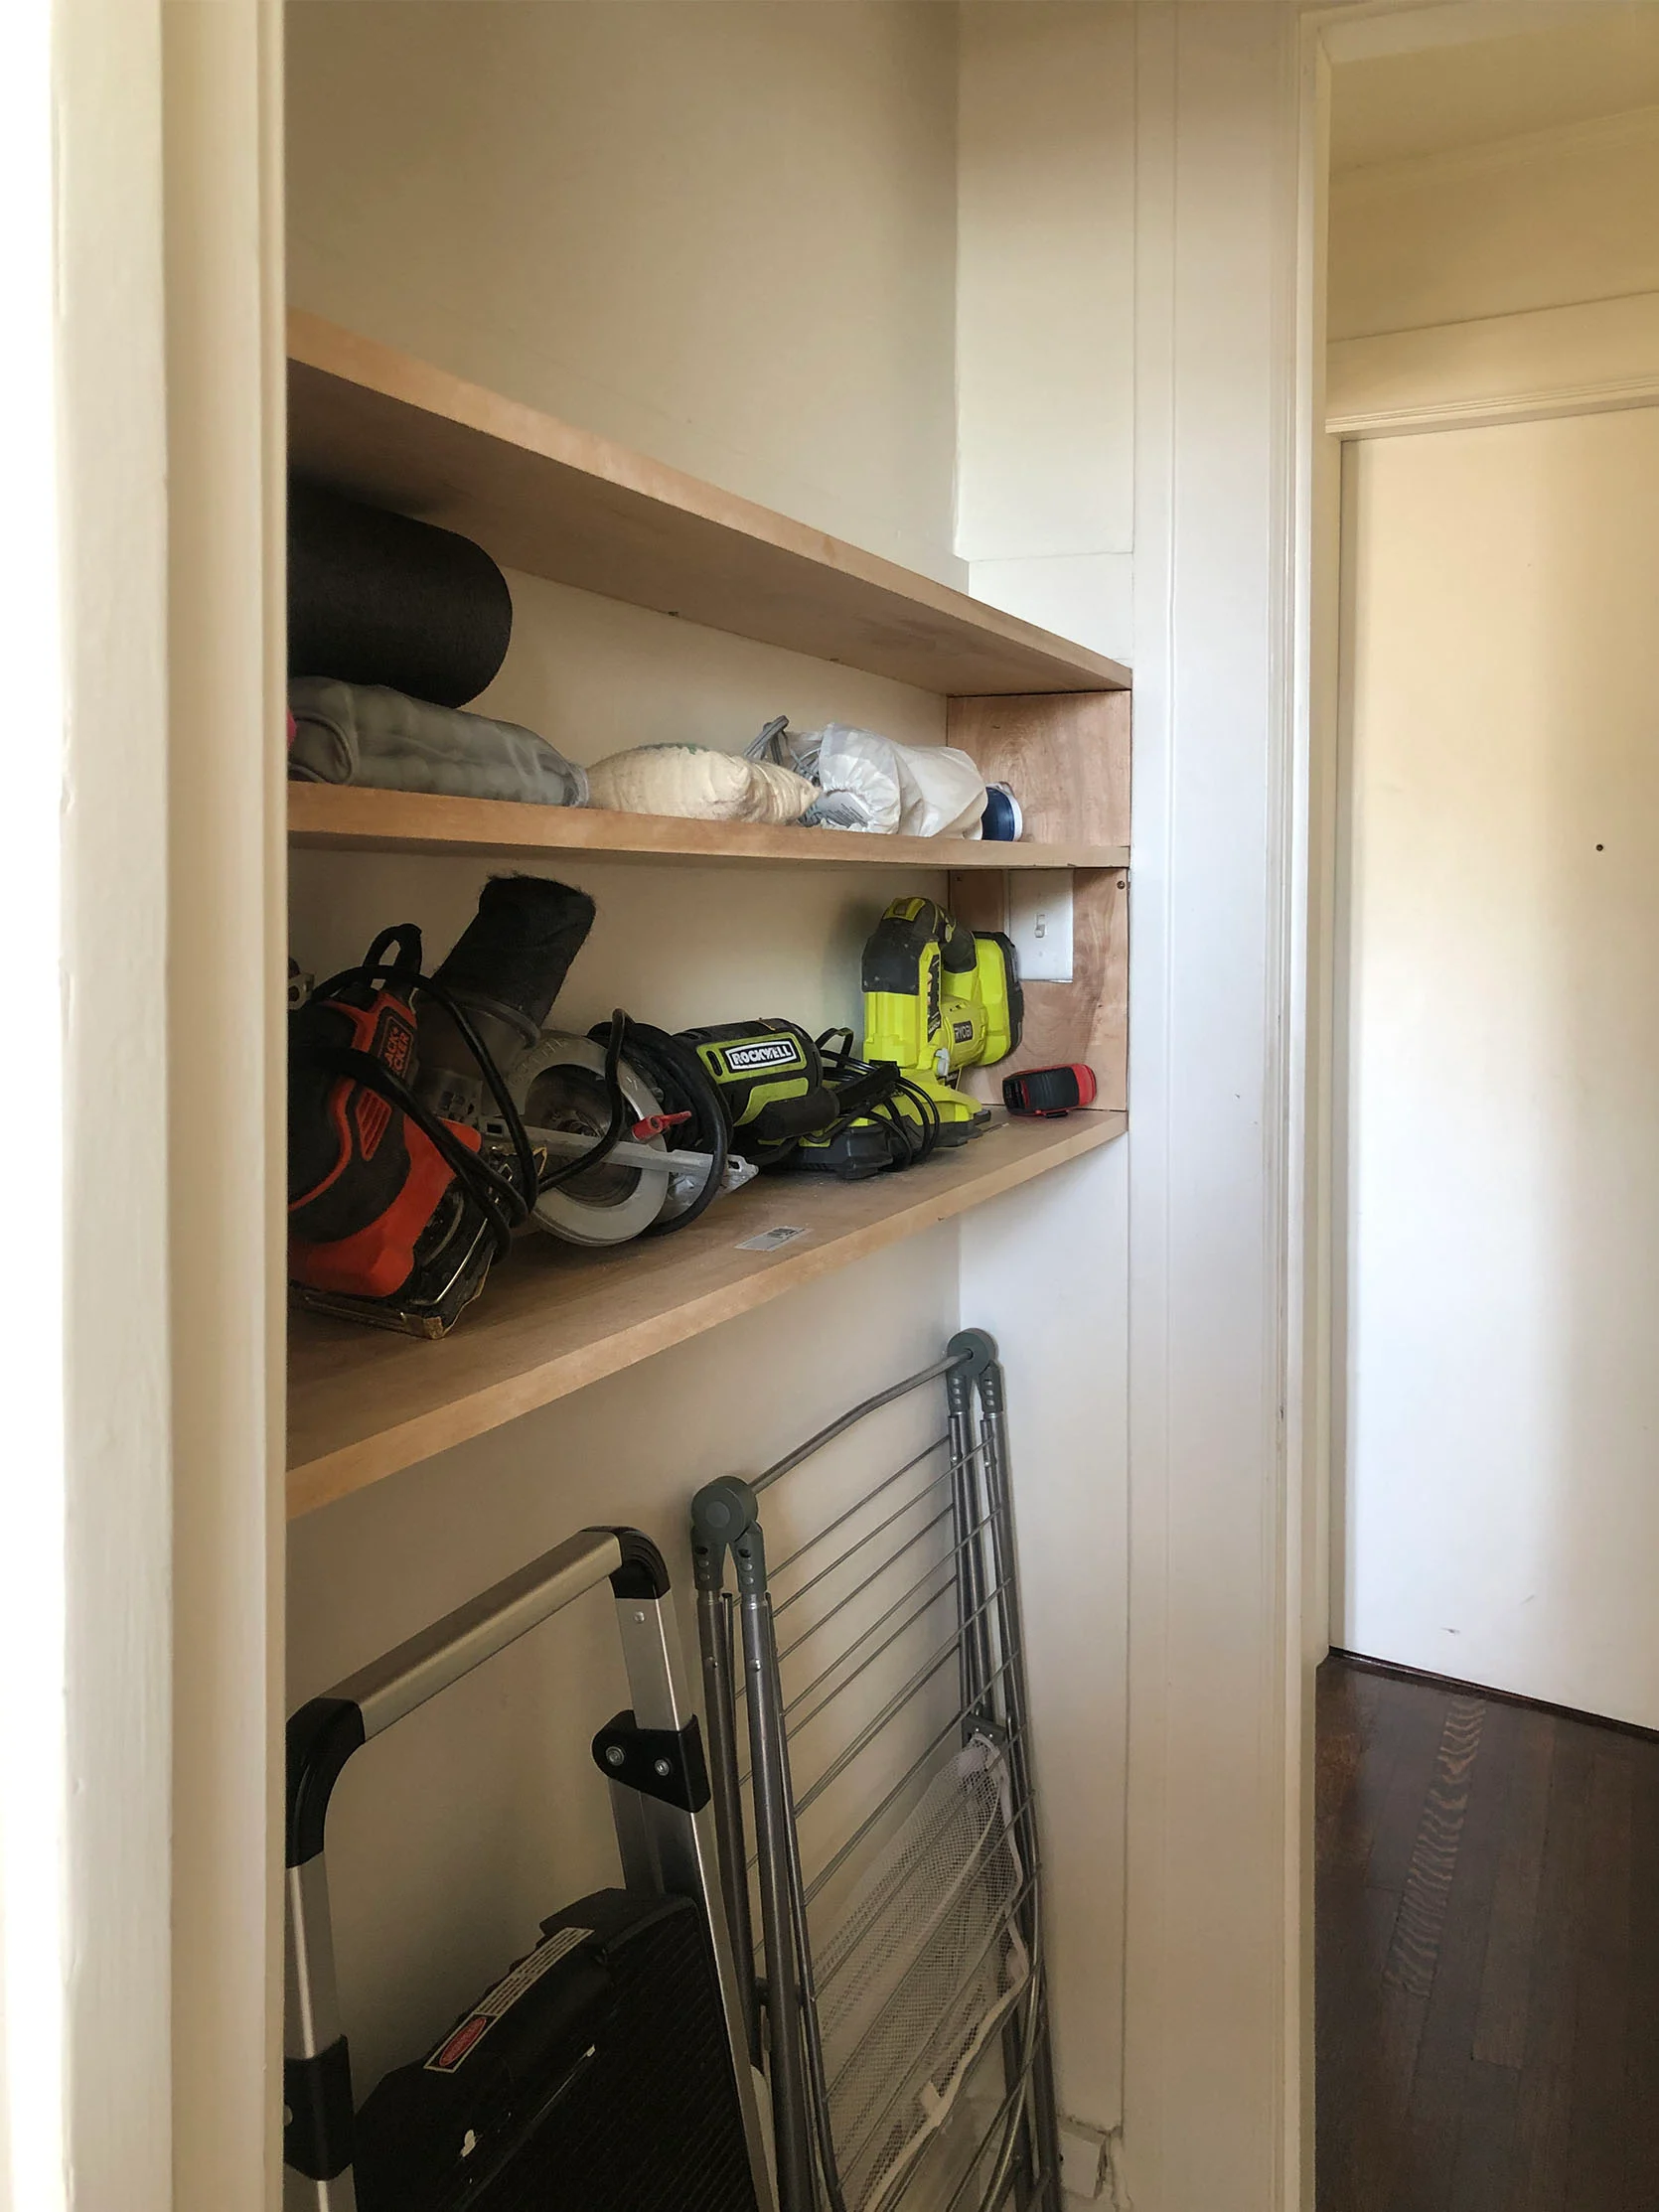
My idea was to have a couple of shelves for tools, and I guess workout weights (?) while leaving enough height below for my stepstool and drying rack. You know, those important helpful items that don’t fit effortlessly in a one-bedroom apartment. I would then add a curtain to conceal the important helpful (but unattractive) items as well as bring in some soft texture. Then the ideas went a little wild…
DIY Closet: The Roman Clay Idea
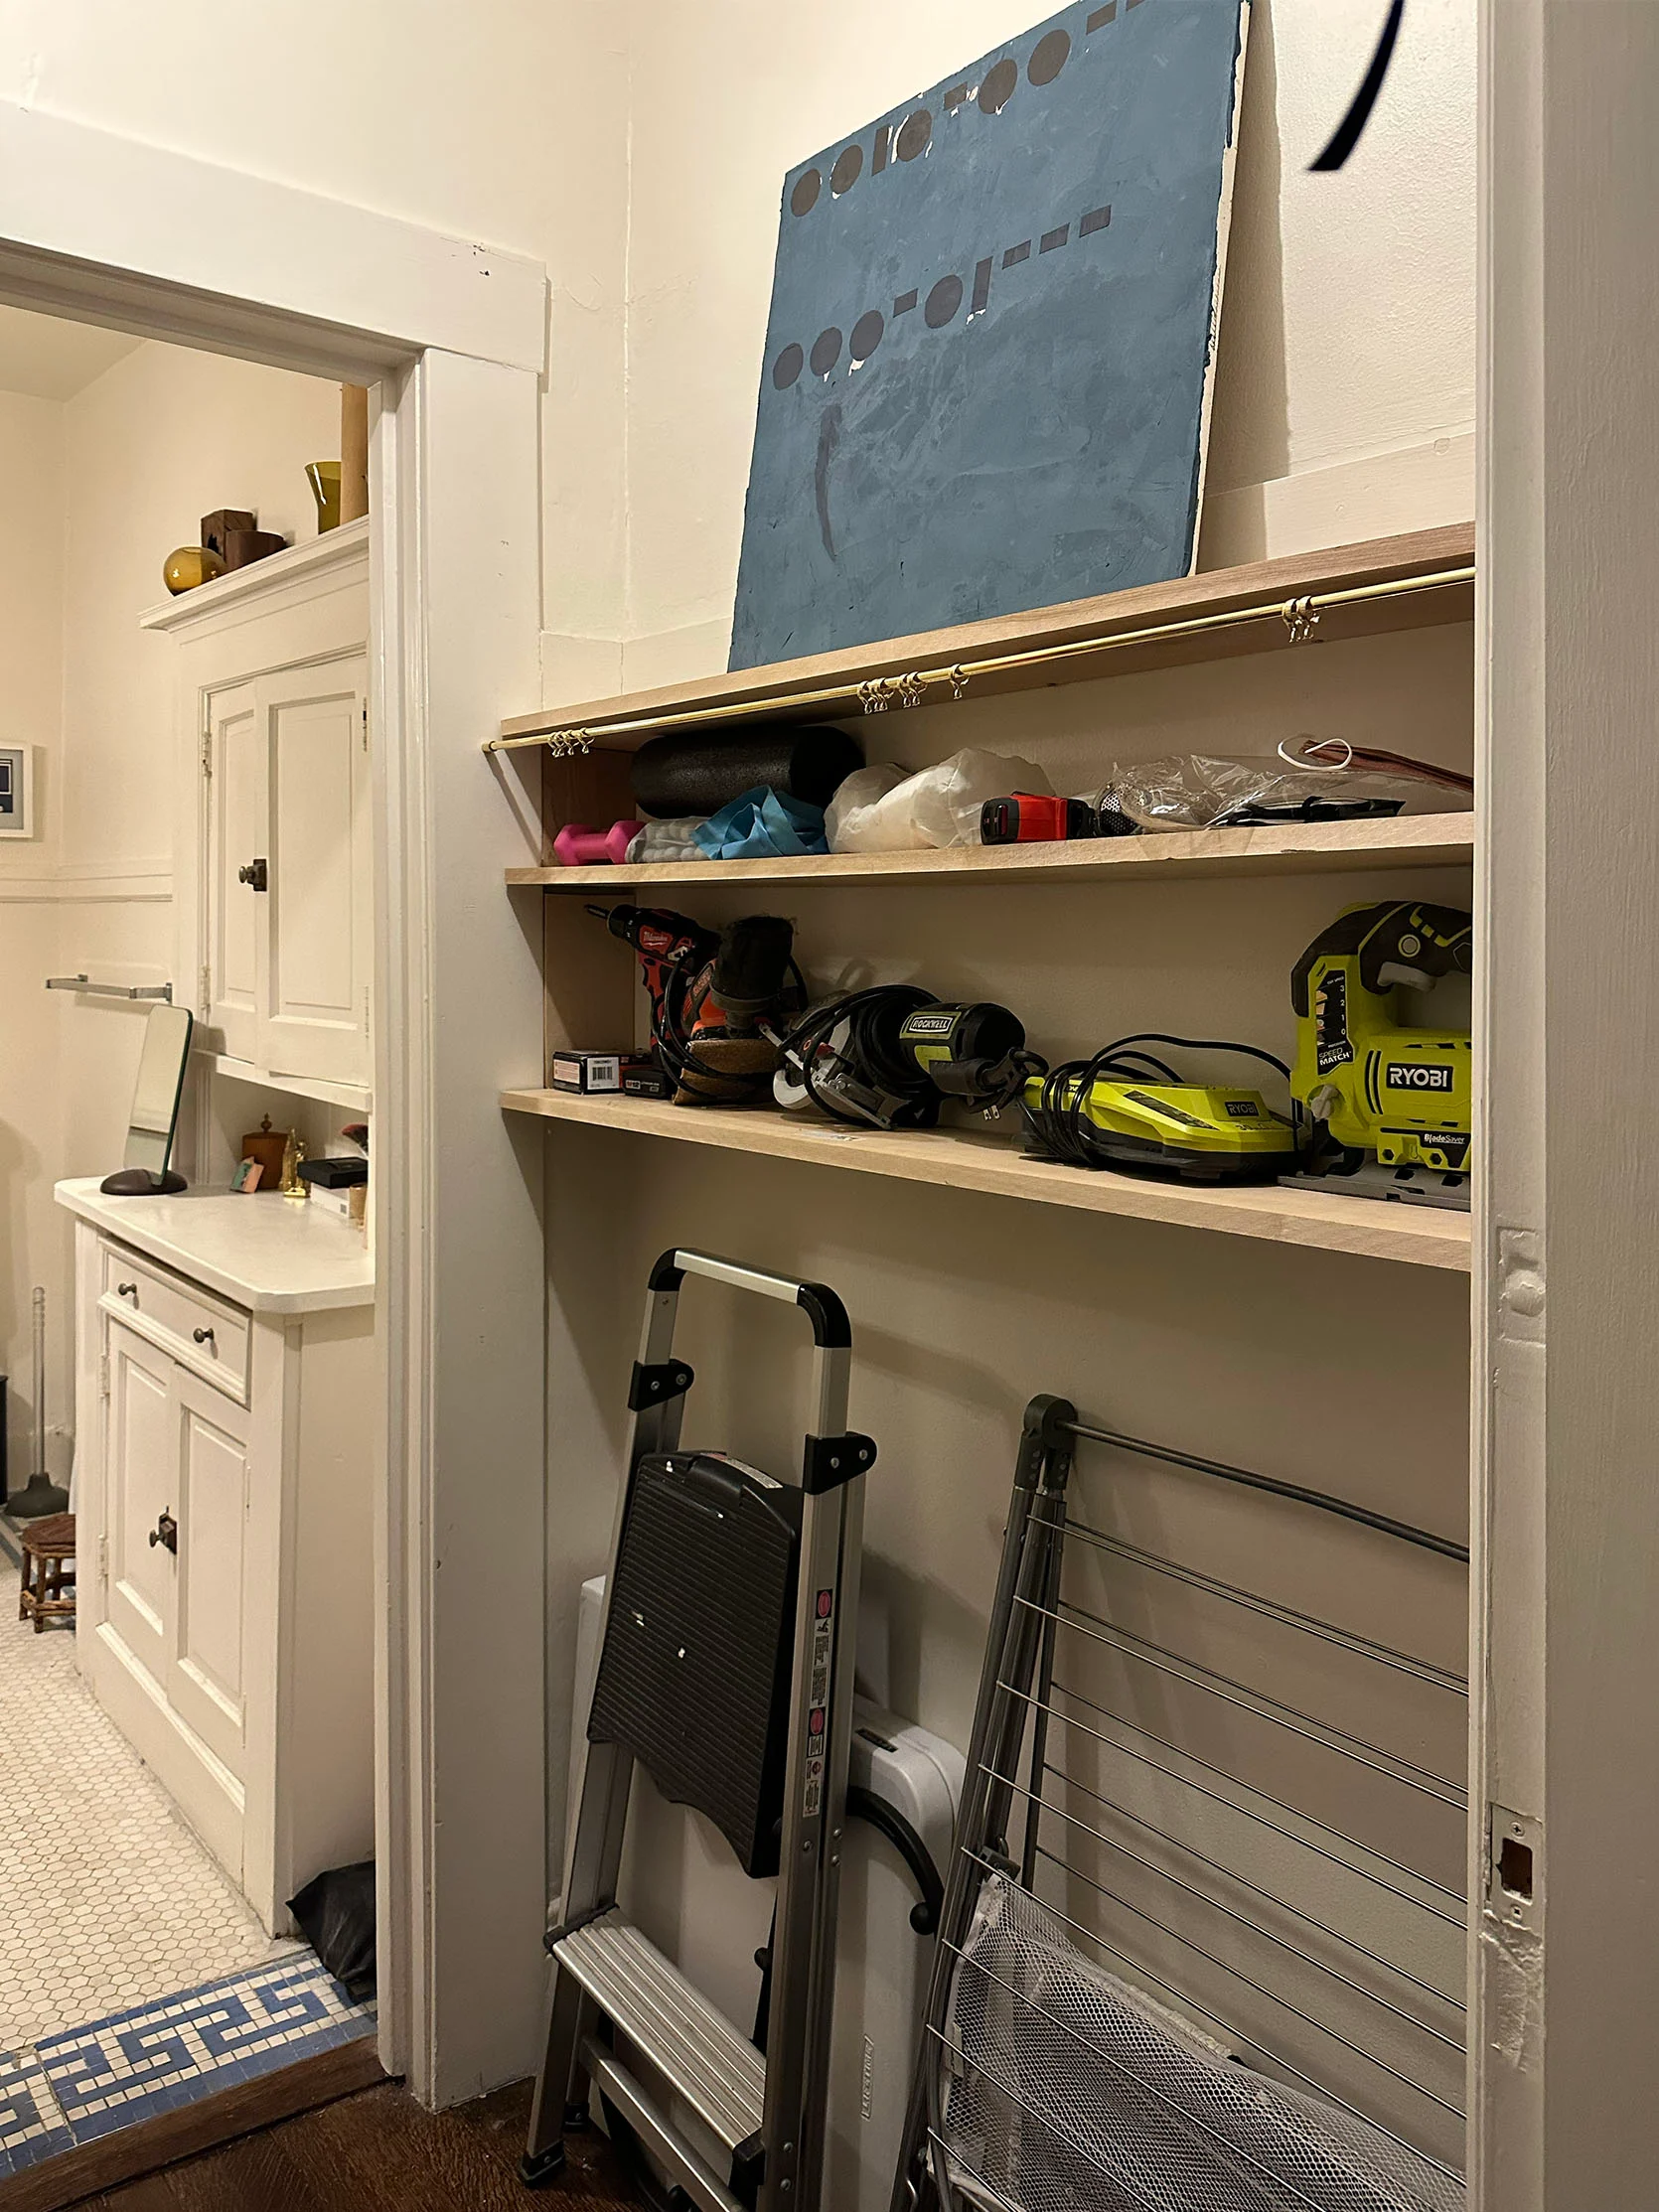
Remember this idea? What started out as a very sweet and personal idea turned into something I realized I didn’t want to do. I love the look of Roman clay and limewash paint, but nowhere else in the apartment would have it, and it was a feature I don’t know I would have loved in the end. Plus, I was really nervous about the application and the success of my idea of how I would add my “Morse code” shapes. I also wasn’t convinced of either color I chose. Ultimately, I’m so glad I didn’t go this route in this home. Maybe a textured paint is in my future, but for now I’m sticking to something more classic.
DIY Closet: A Curtain…FINALLY
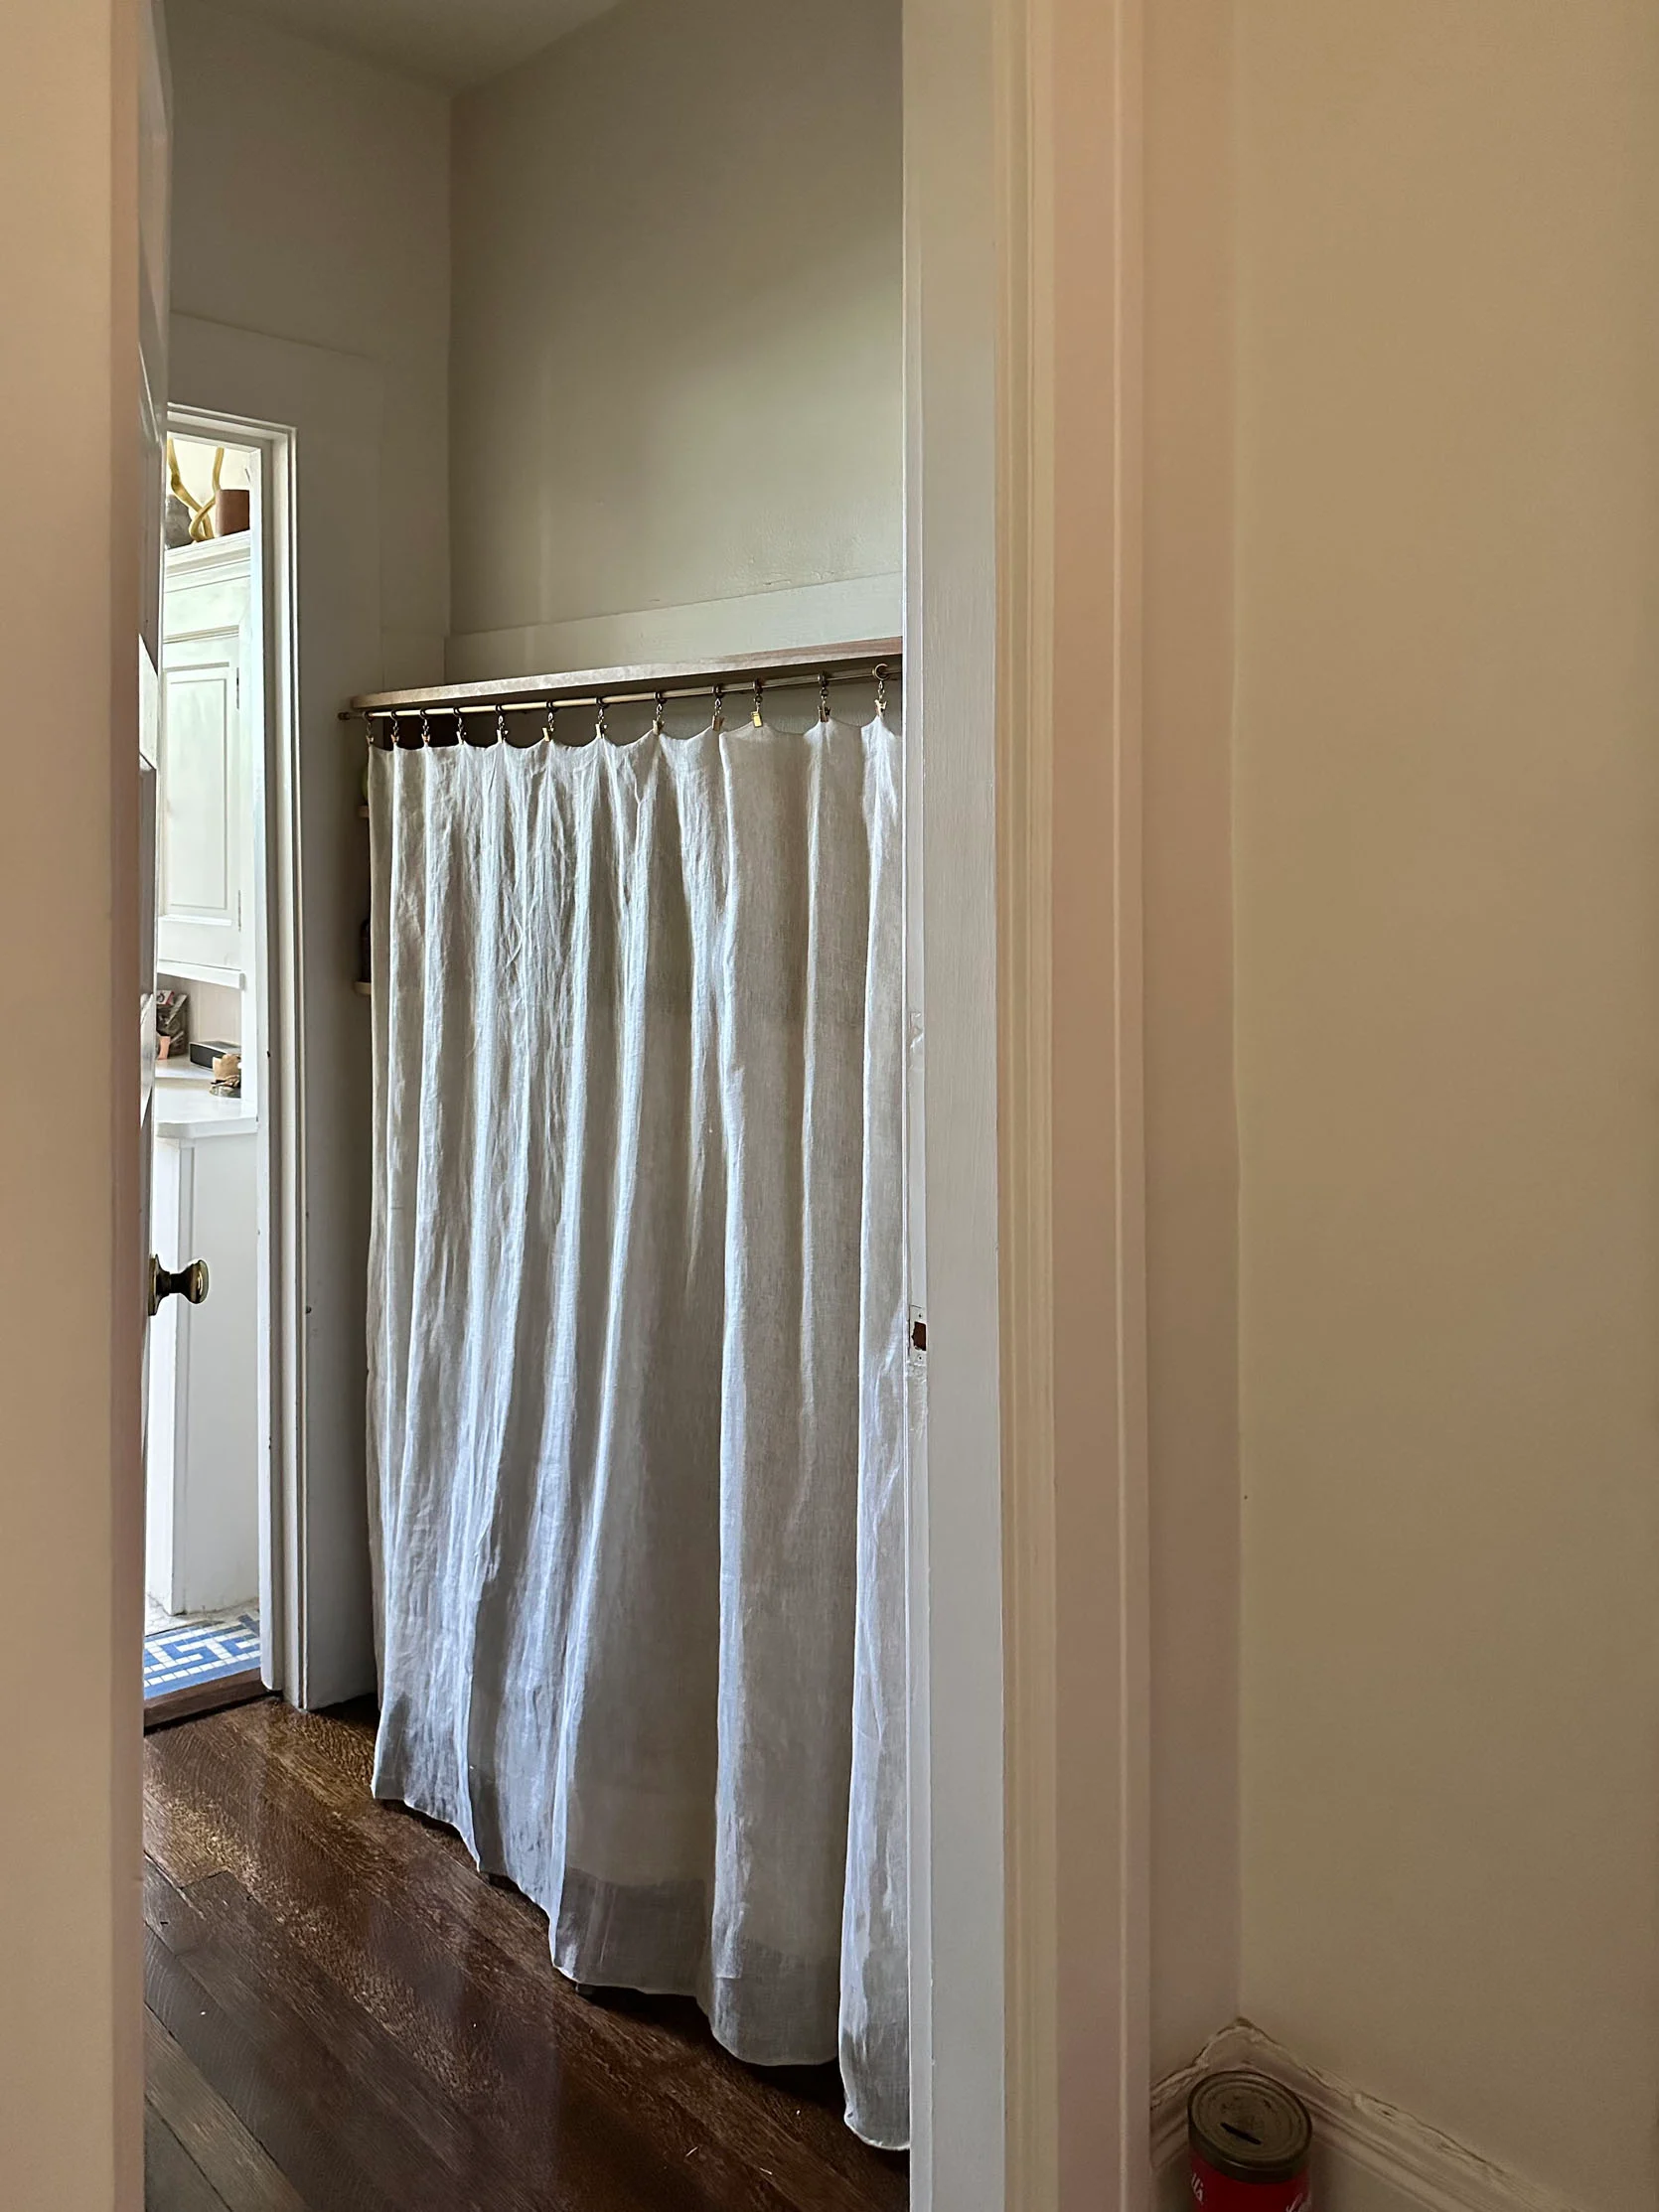
Concealed Mount Cafe Set | Cafe Curtain Rings
The one thing I did get done was finding a rod, rings, and curtain to cover the less beautiful things I wanted to store. The curtain I have is a pretty sheer one from Zara Home. I needed the curtain to be lightweight (since the rod doesn’t have a center support bracket) but obviously not see-through. So I just folded it in half so it was less transparent. It’s been working just fine, but I’m not opposed to swapping it out if that’s better for the final design. Also, an FYI that some of you told me after I had already made the purchase! If you get this beautiful rod from Rejuvenation, I highly recommend getting the cafe curtain rings instead of the cafe pinch rings. They may be cheaper, but they will also drive you nuts when your curtains won’t stay up. Maybe there’s a secret trick, but unless you are crafty, just go for the ones with the better clips.
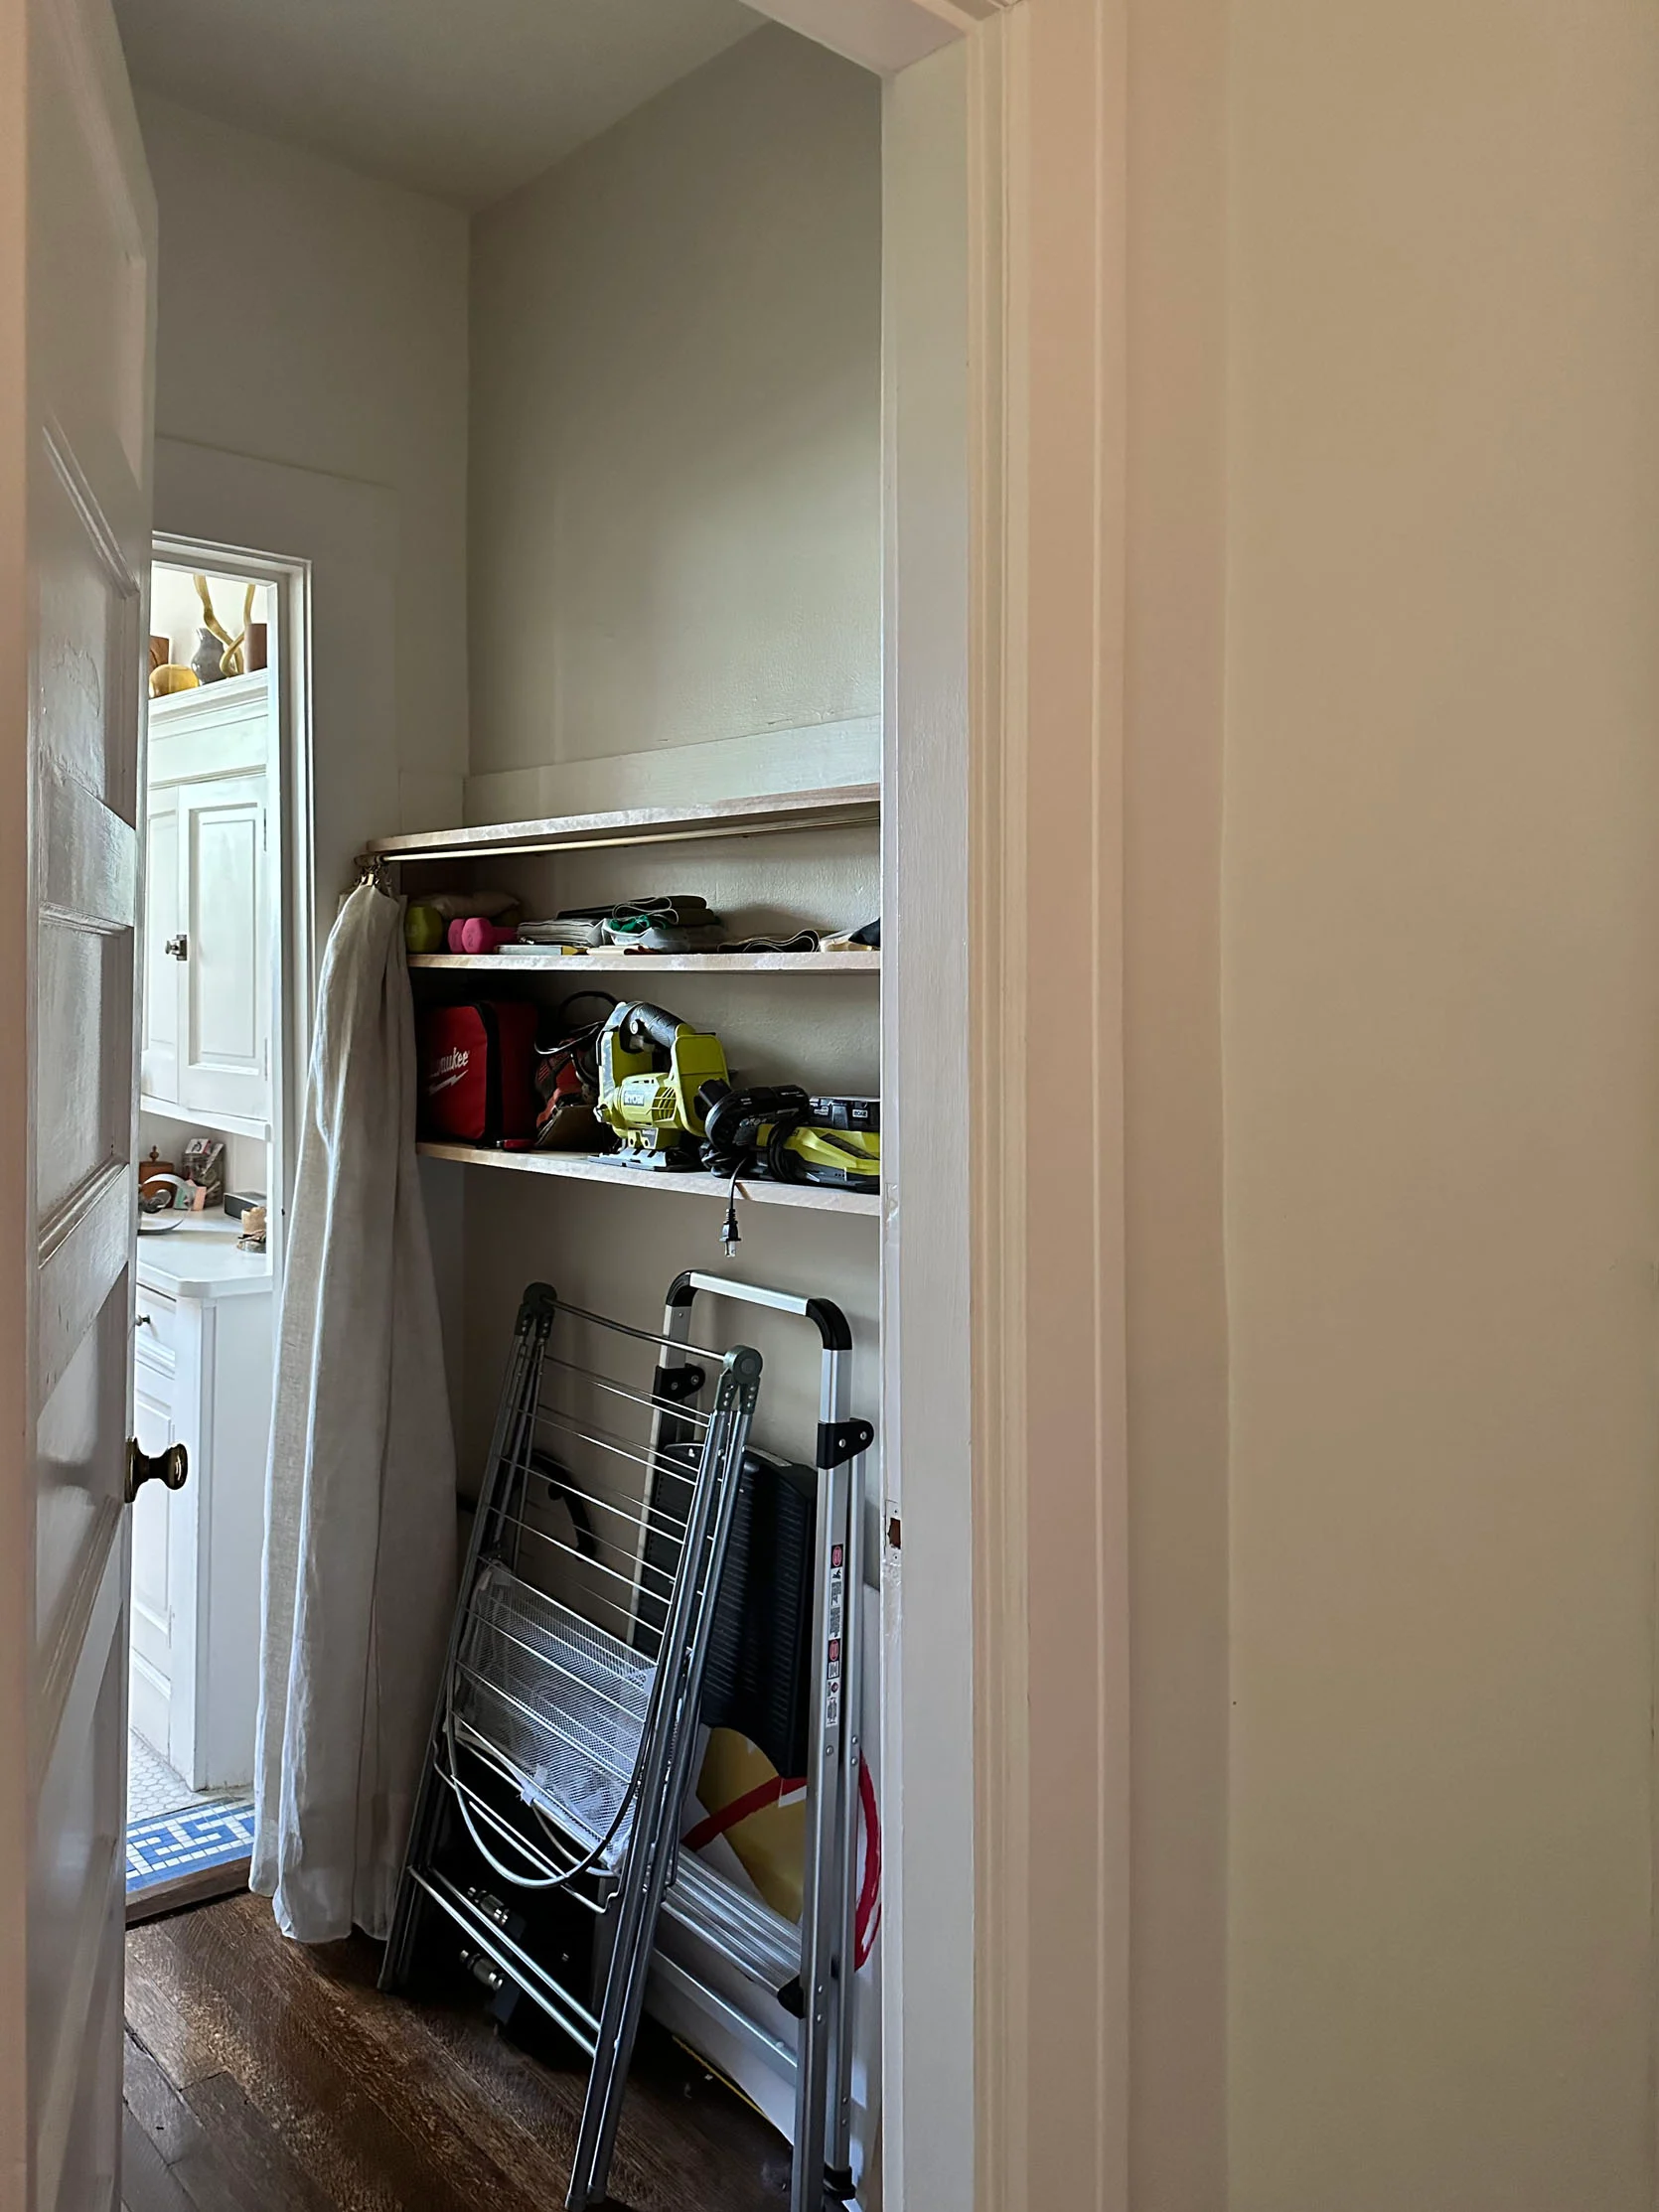
So with some decor on the top shelf, this is how it’s looked for the last few years.
DIY Closet: A New Door??
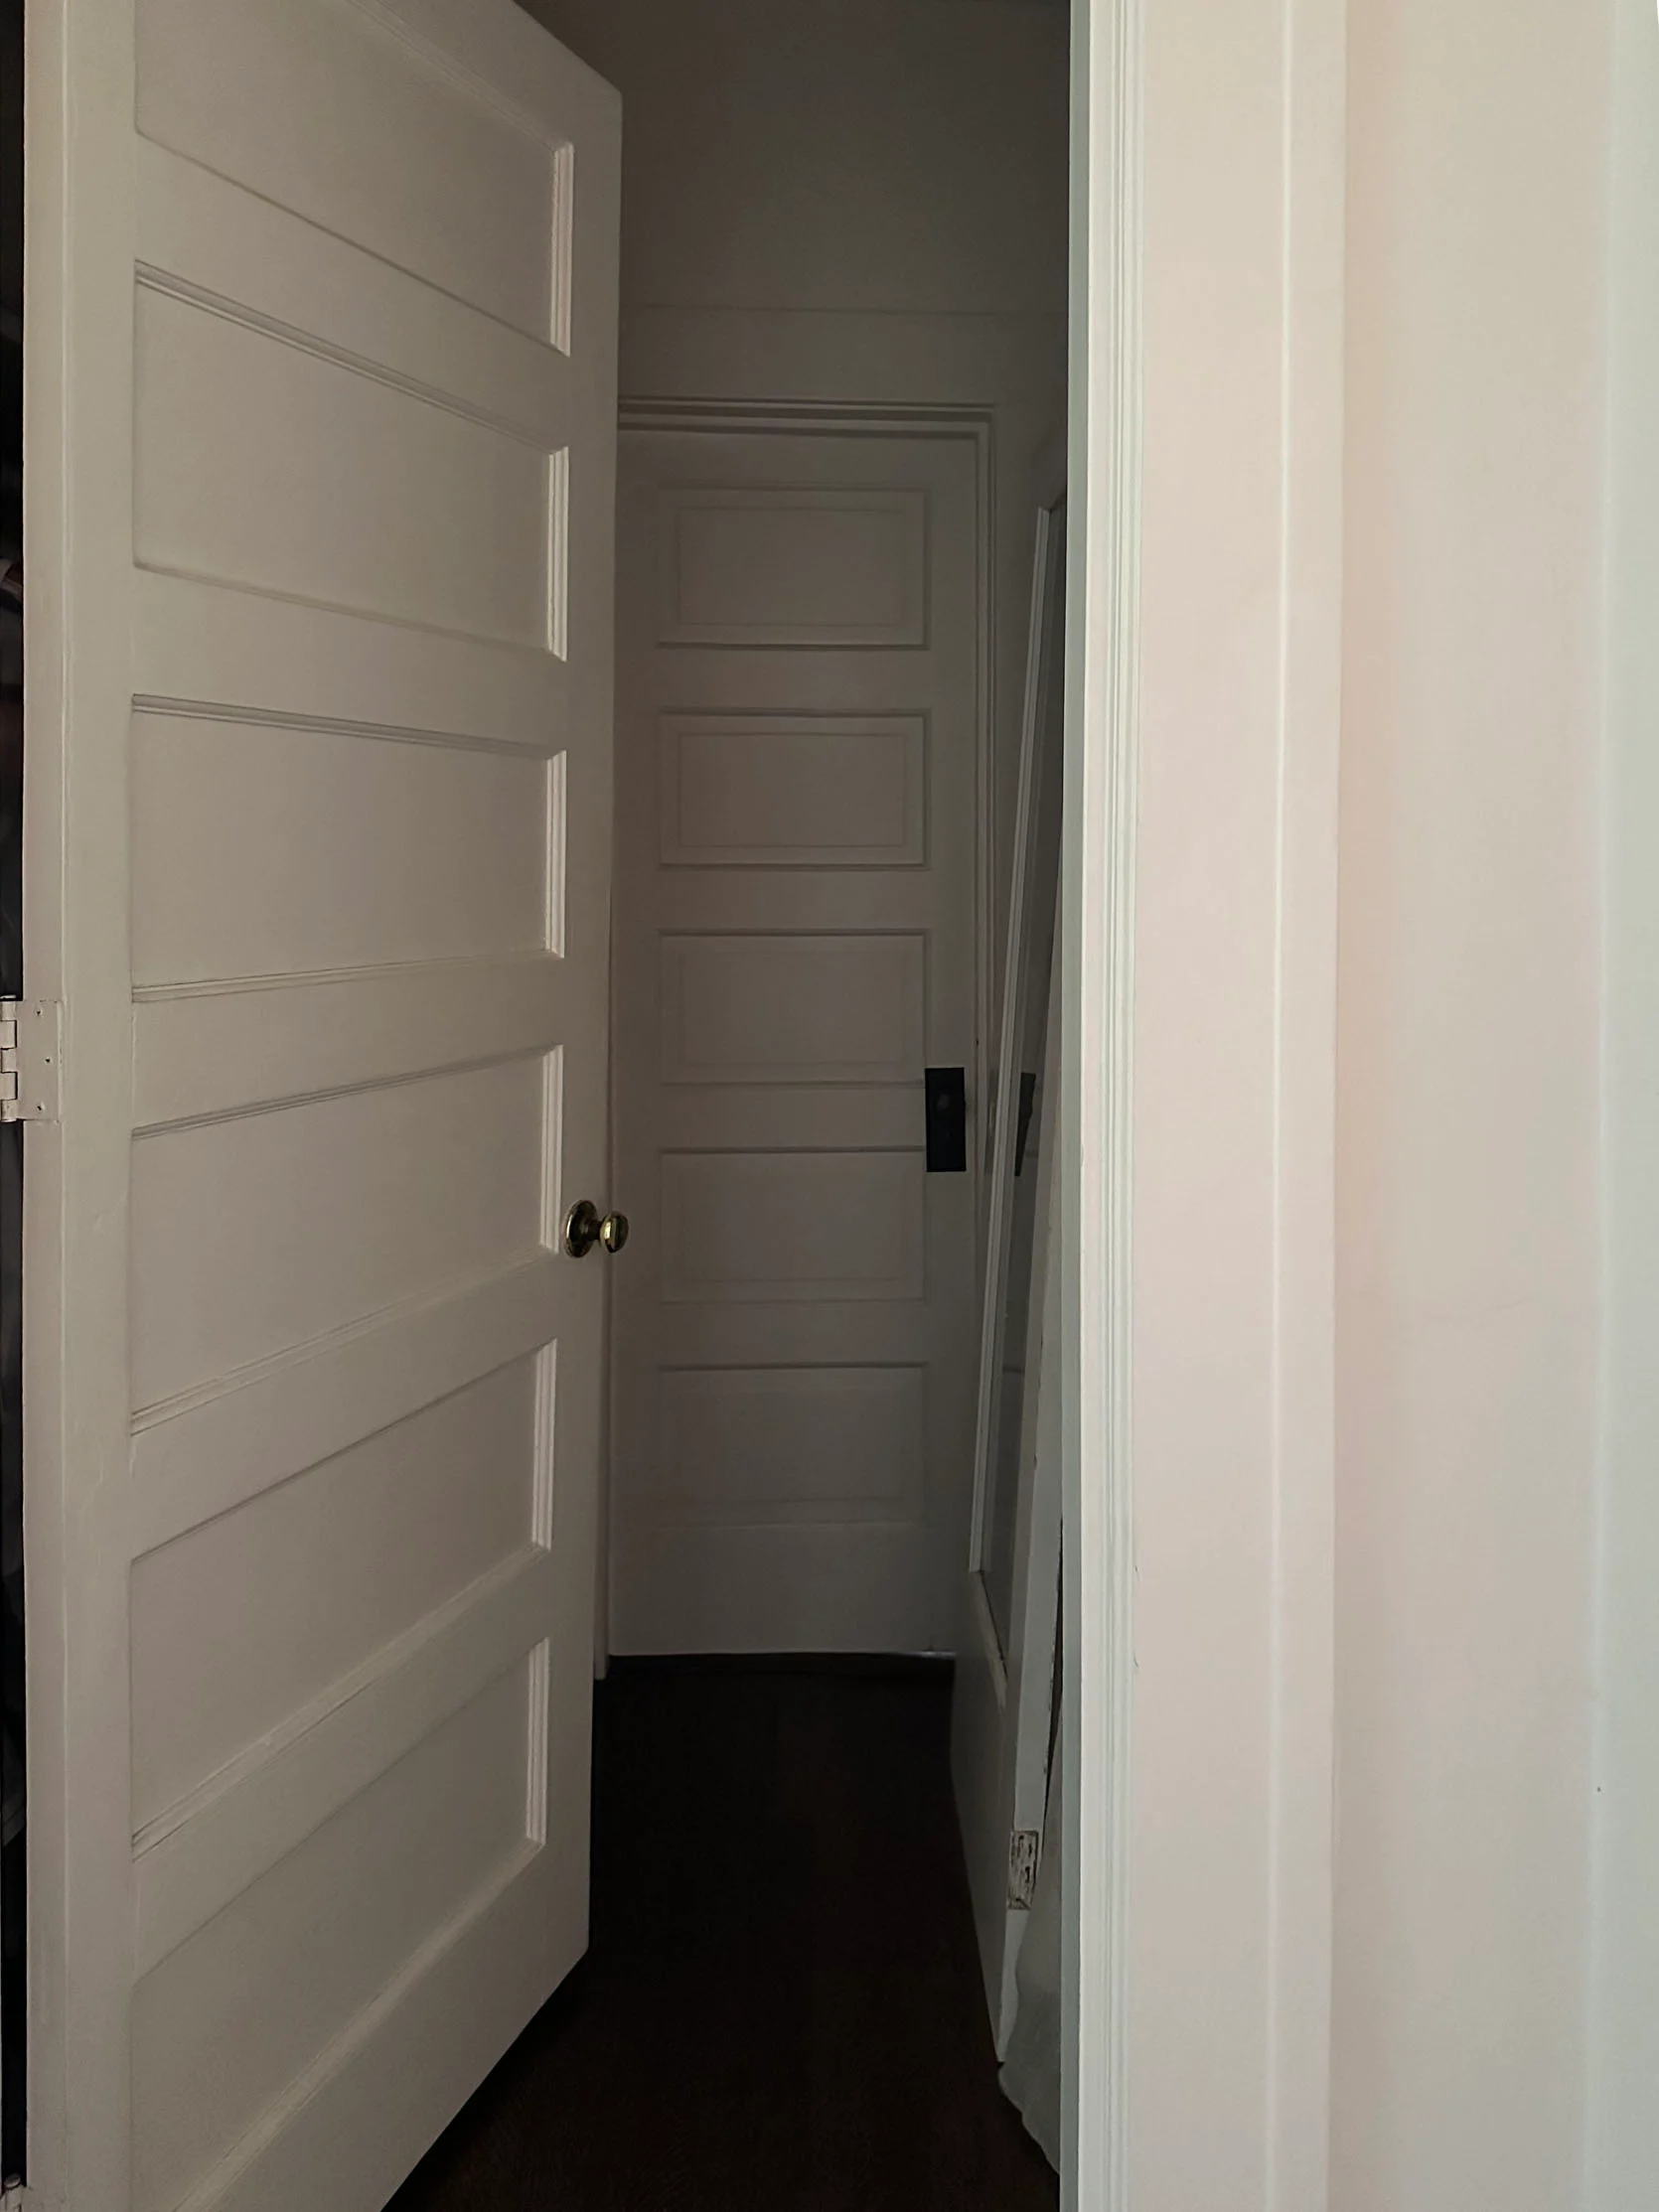
Ok, it’s time to dig into the door drama. To show you how dark it is when the current door is closed look at the photo above…it’s dark. That also means that when you walk through my front door, you nearly step into darkness, but with a bright room directly to your right. The balance is too off which is why I am going to replace the door. Don’t worry, nothing bad is happening to that pretty paneled door. It will just be carefully wrapped and put into the owner’s storage garage.
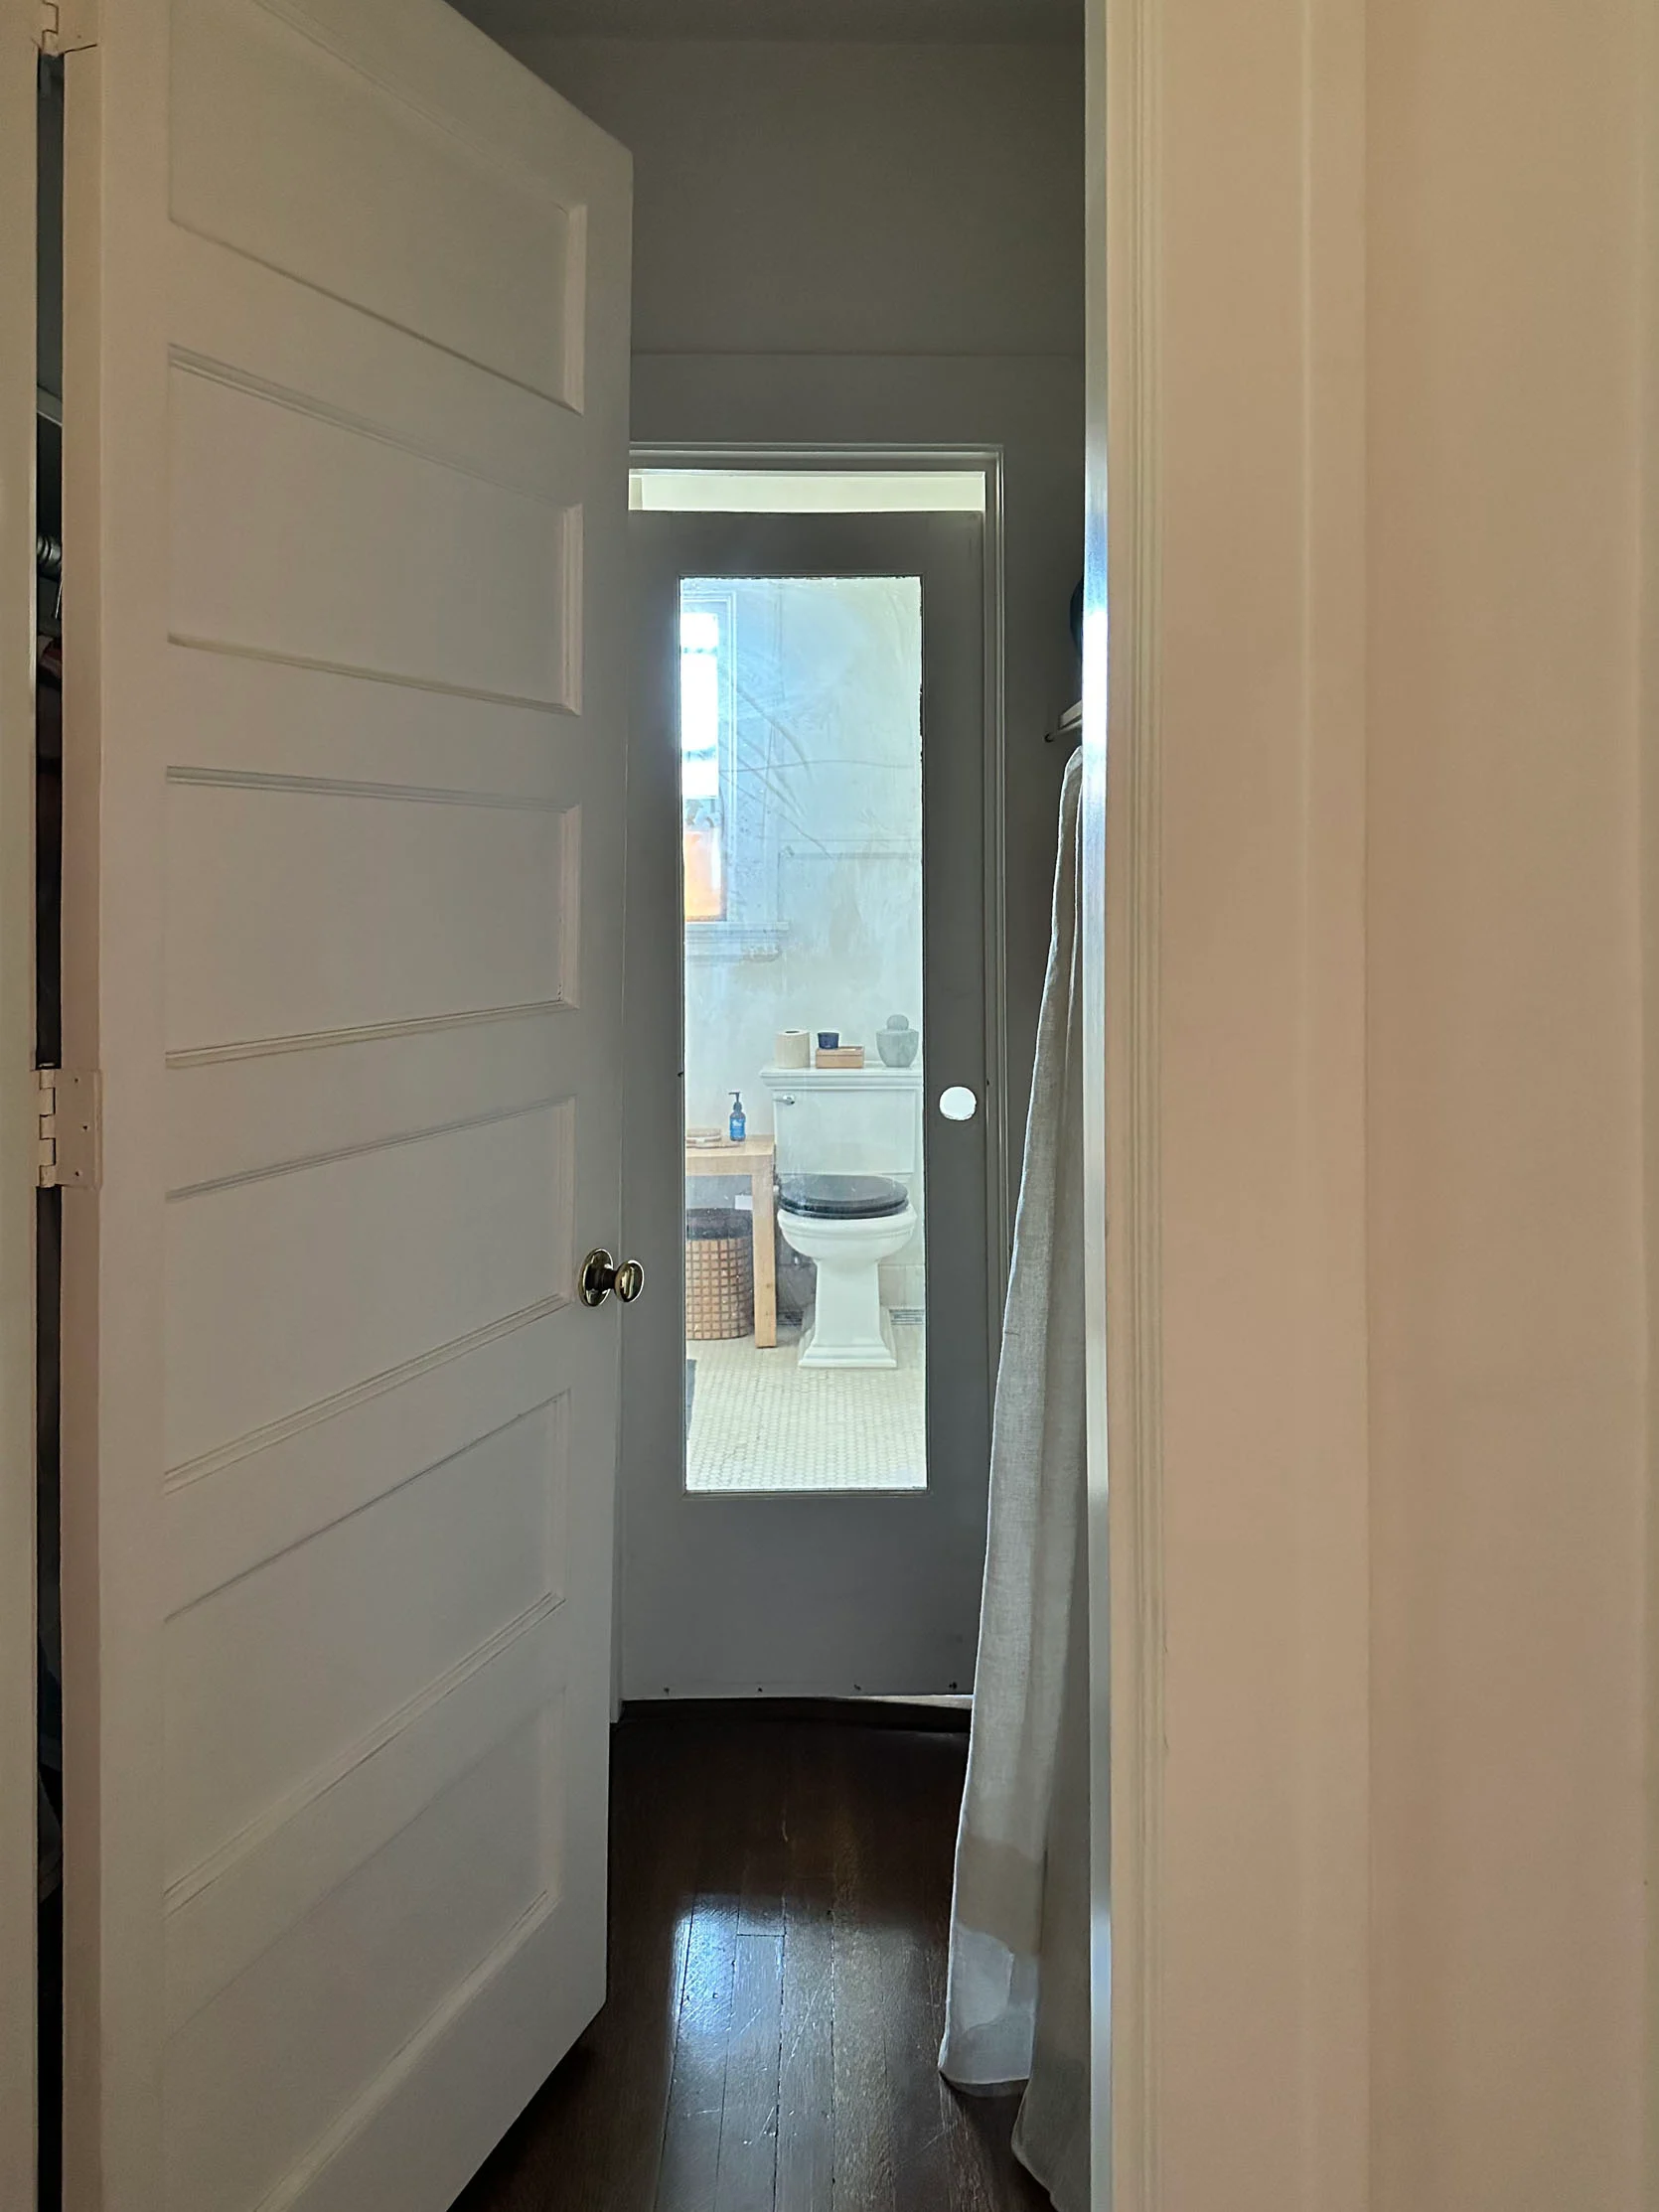
Now, here is the $50 door my dad found that’s…not the right height. Allllmost, Bunge. Oh, and yes, the floor is very slanted, but that’s what we call “free charm” in a 100+ year old home:) My options are to find a magical unicorn of a door at a salvage yard that IS the right size or find a cheap door that’s the same width and add it to the top of the door I have. I’ll keep you posted. The latter seems more feasible if you ask me.
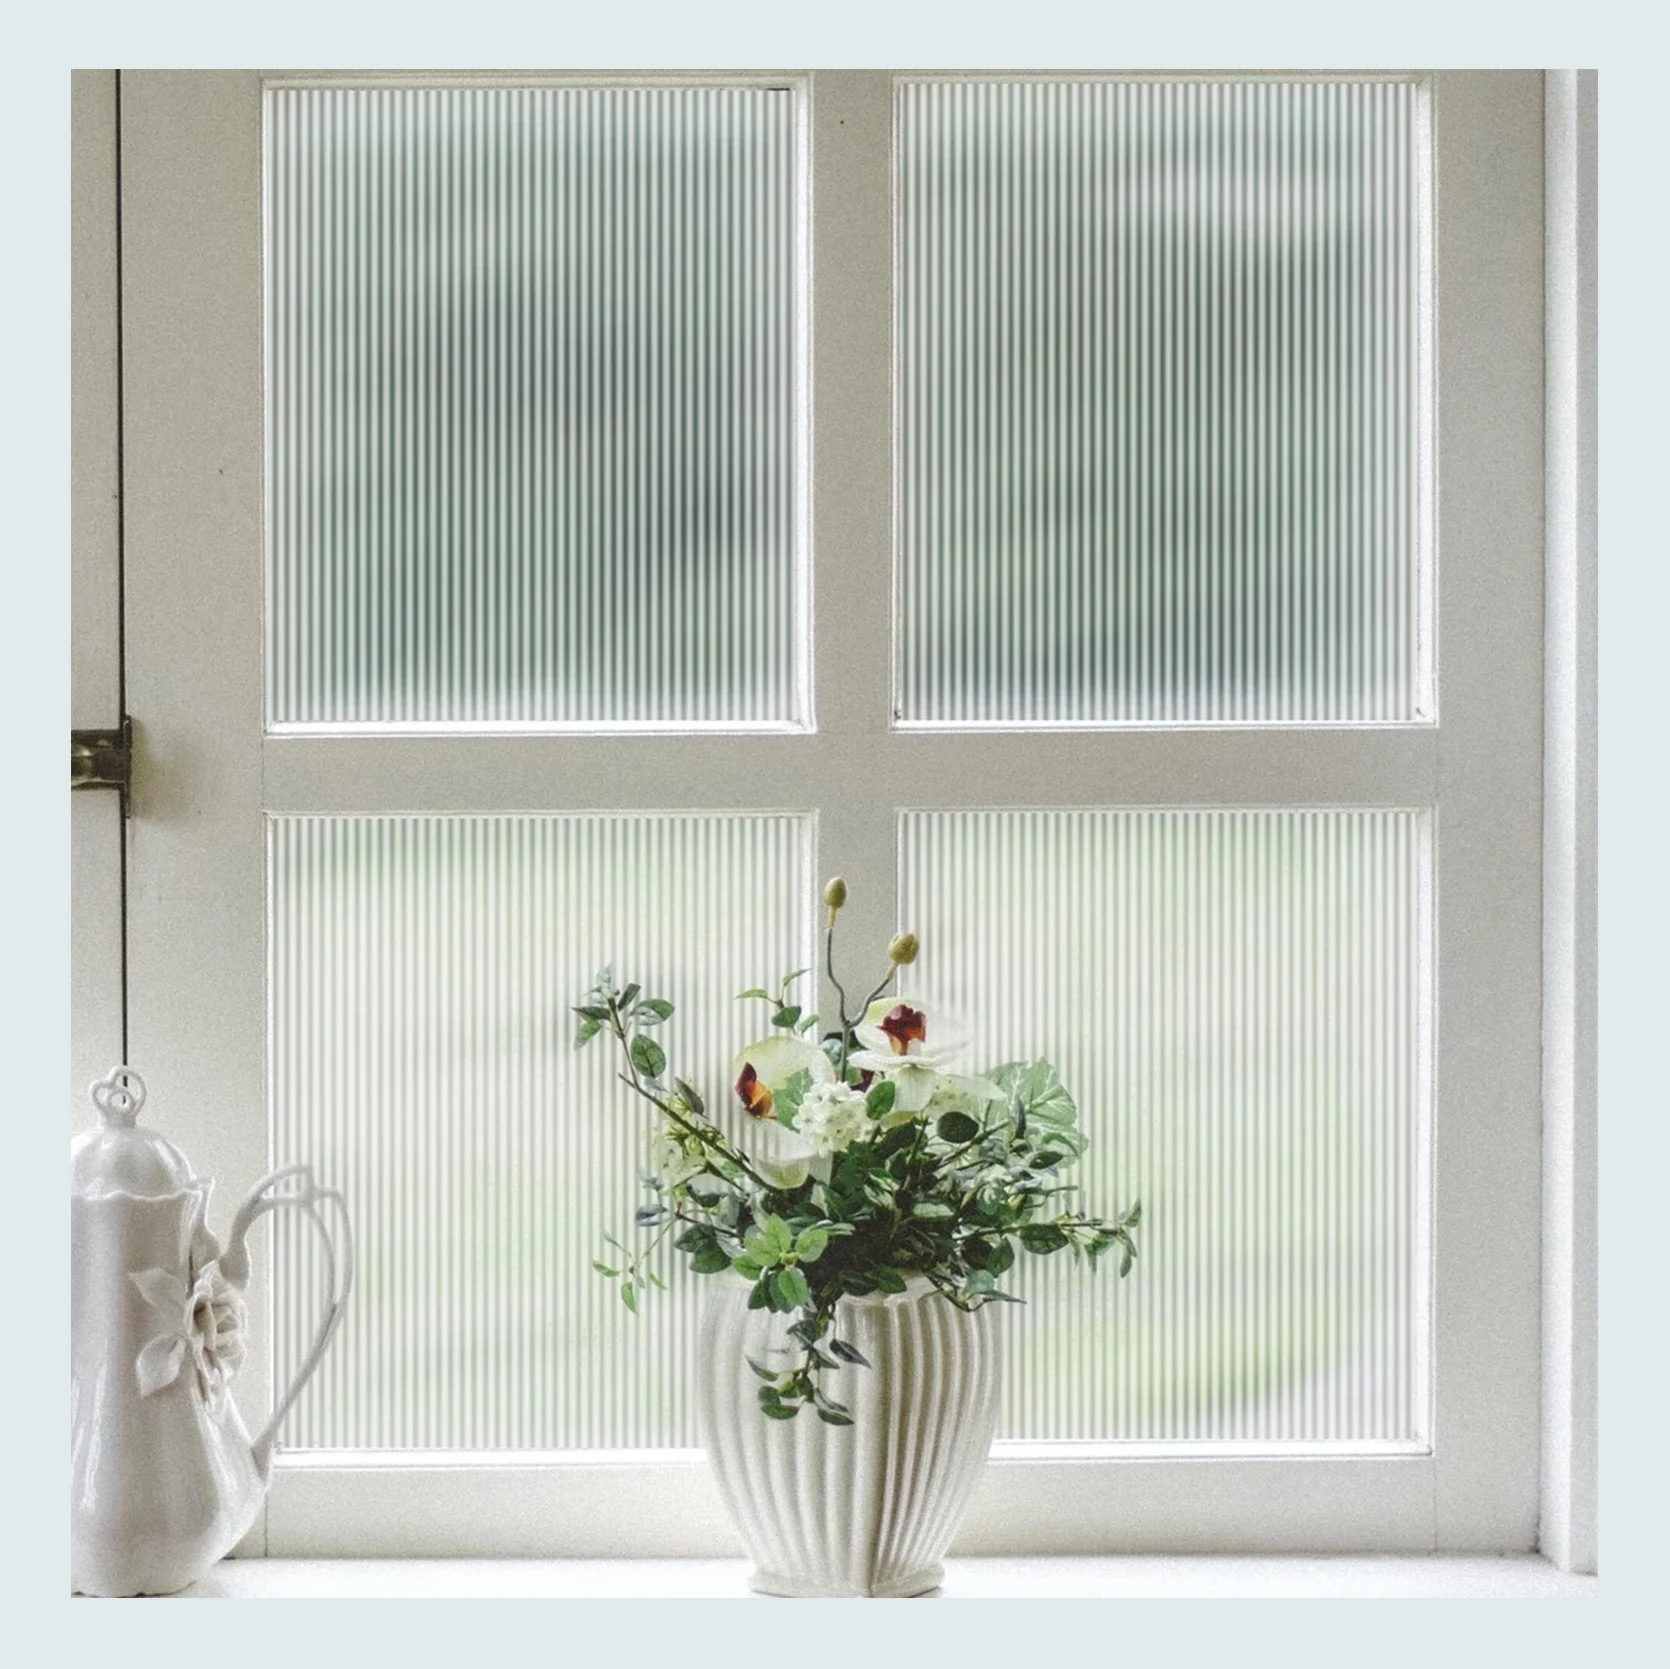
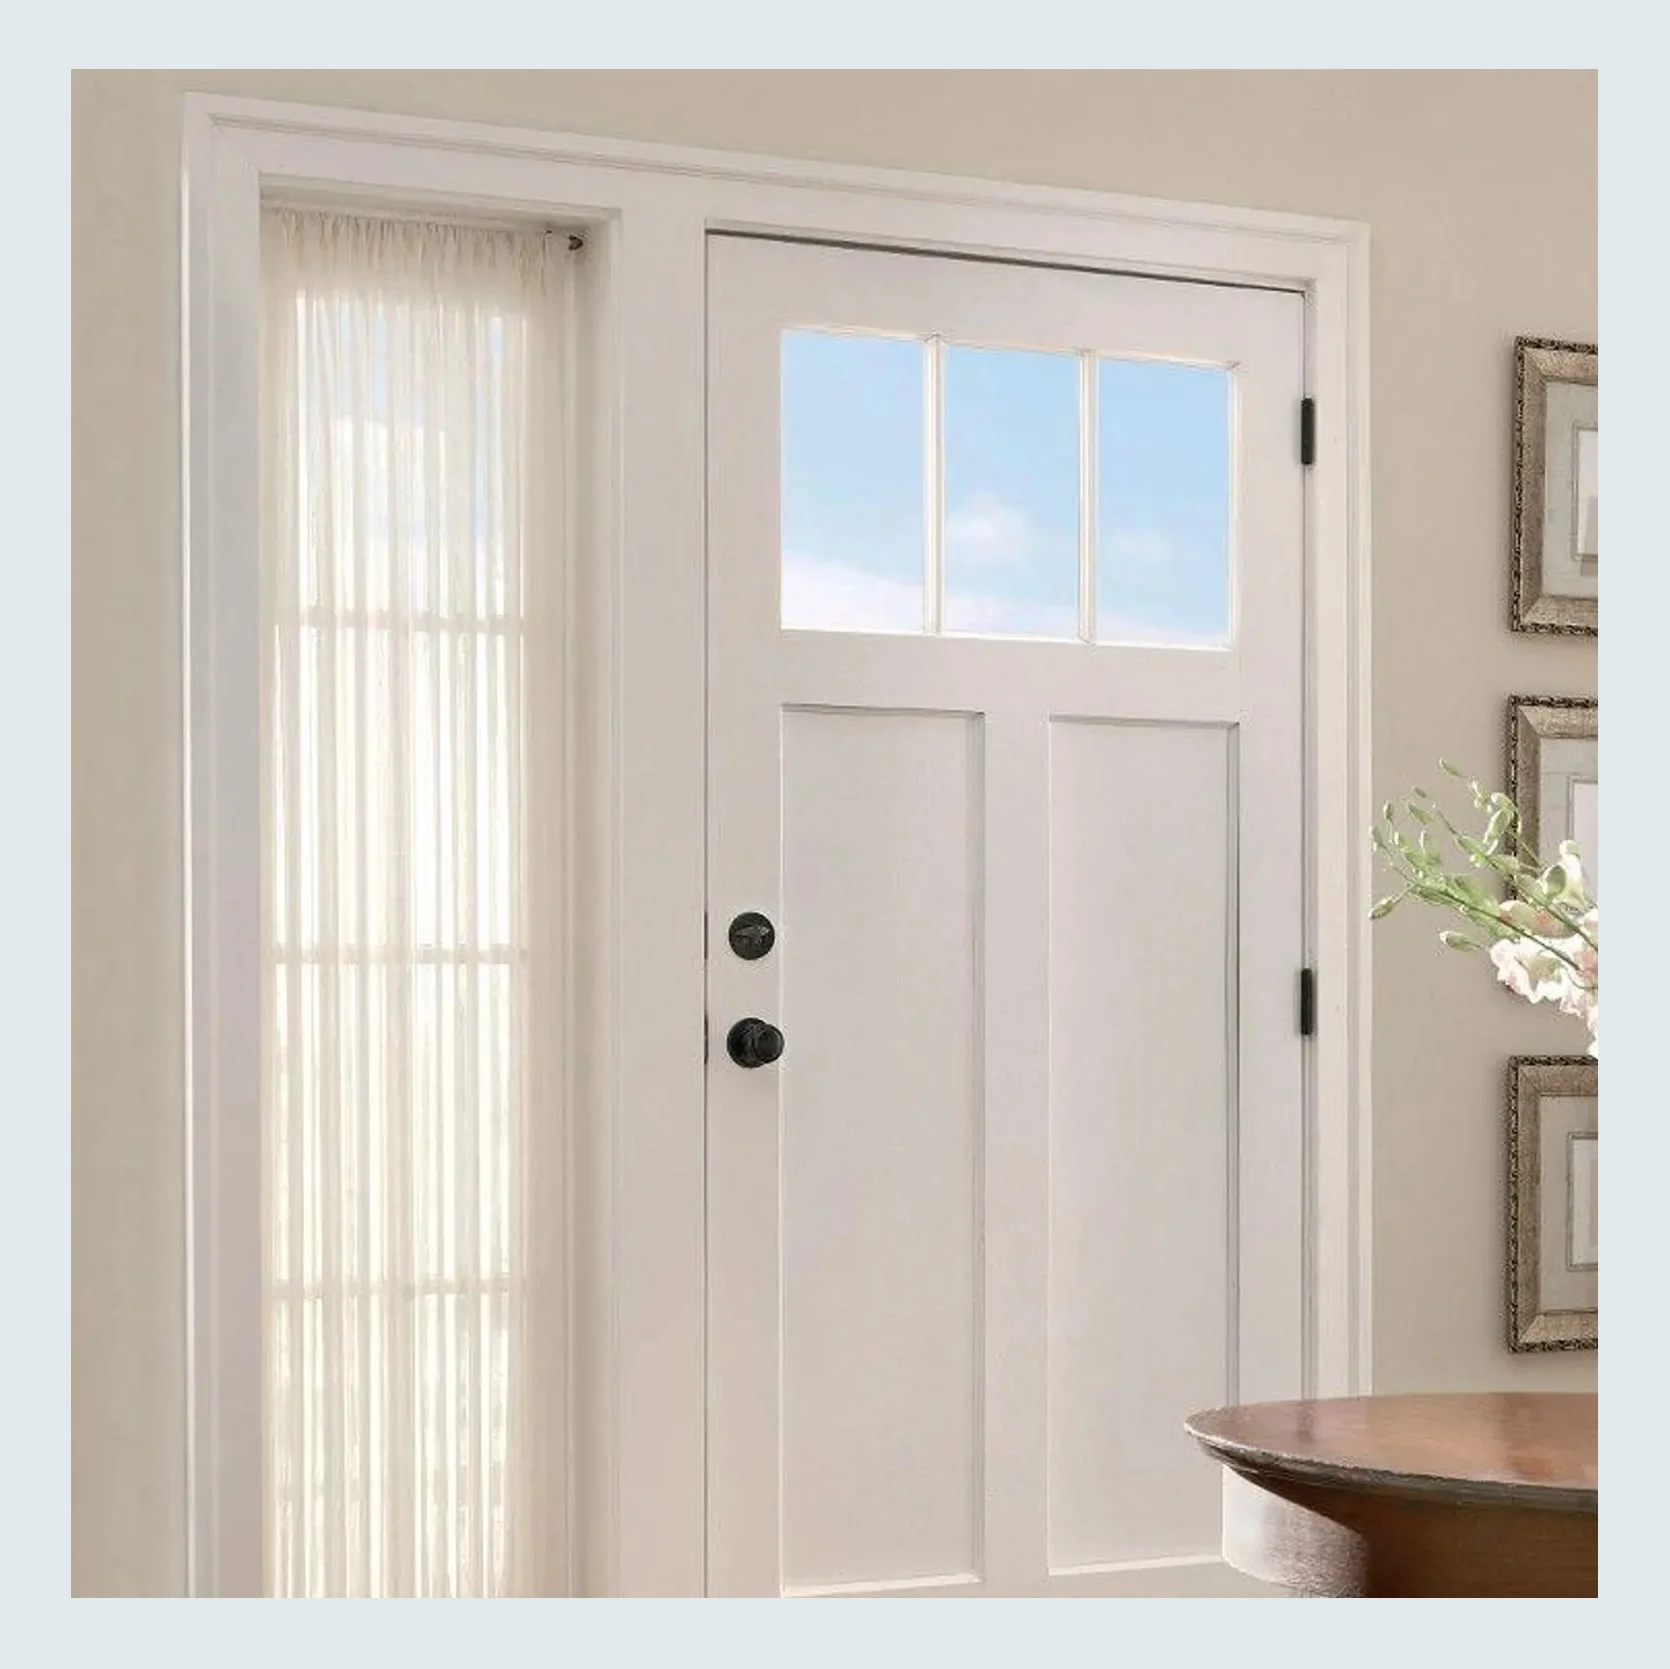
Reeded Glass Window Film | Custom Made Linen Door Or Narrow Window Panel
For the privacy part of this DIY, I will likely do a reeded privacy film. I’m sure you’ll still see soooome of the toilet, but it’s so much better than nothing and it adds some fun style. My other idea was to order a custom-size “French door curtain” but with a curtain right next to it hiding the shelves. I think that’s too much fabric for one little DIY closet and actually provides less visual privacy than the film.
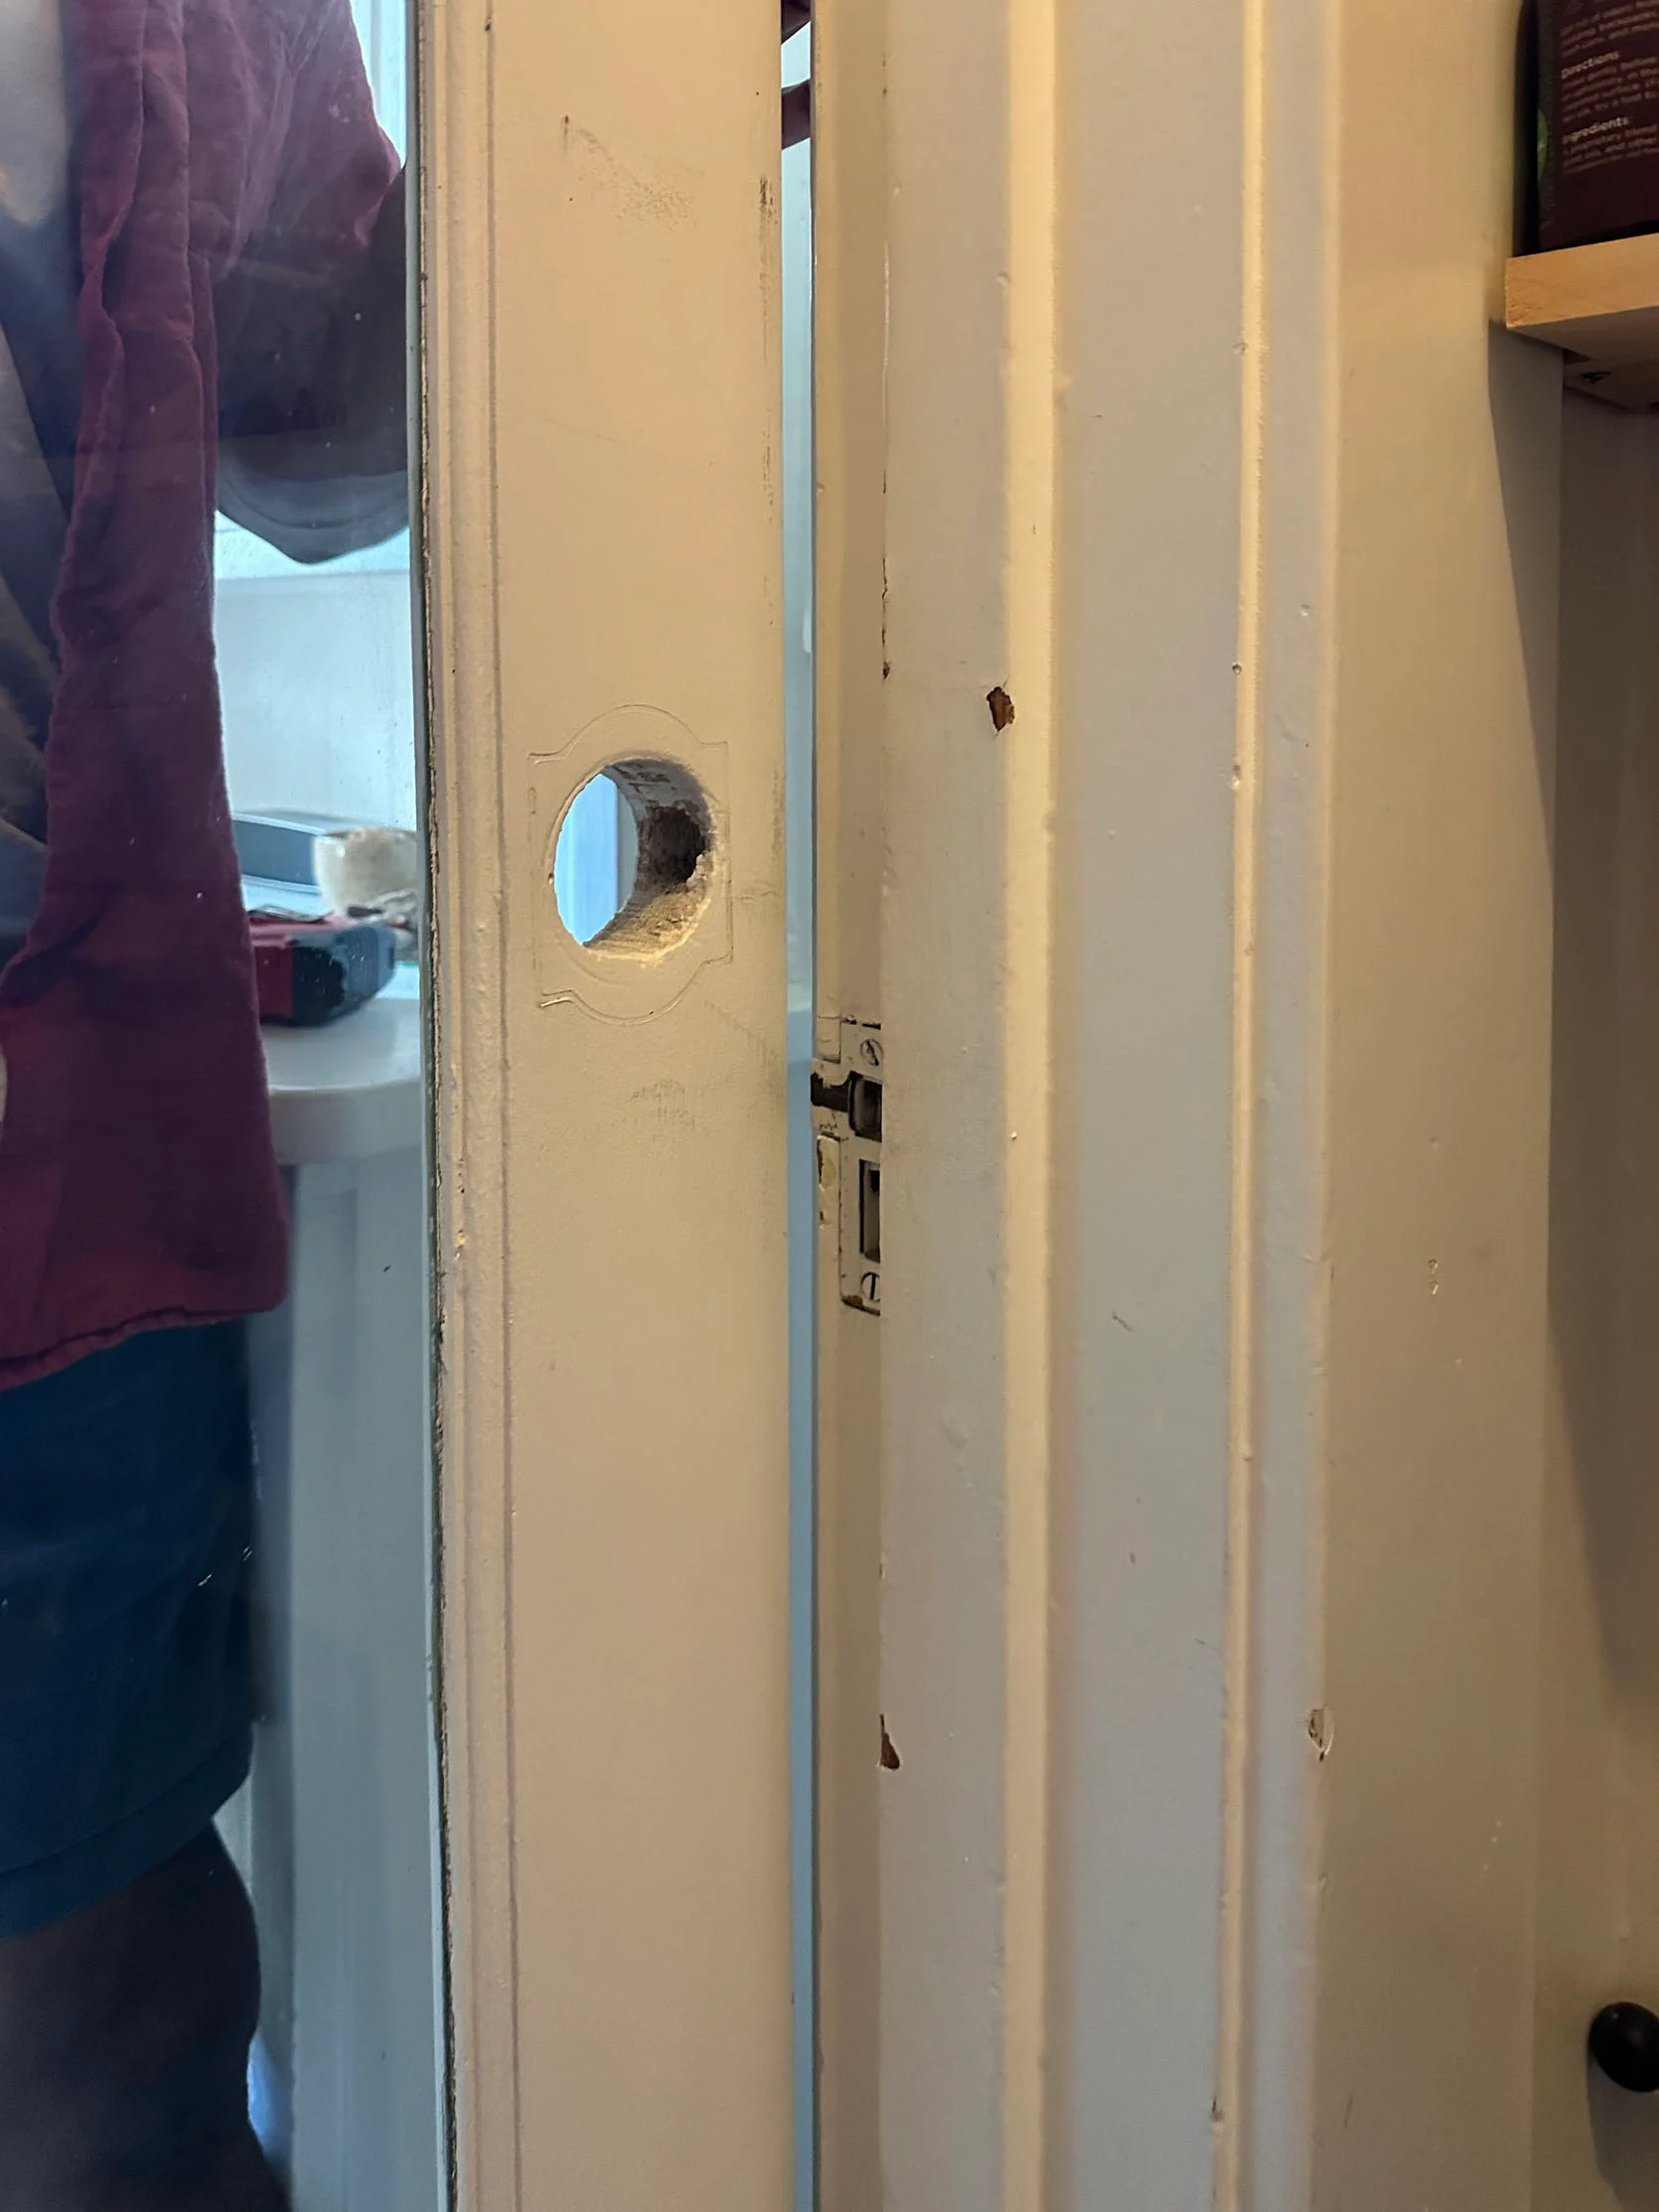
Oh, and another little hiccup! Where the handle goes on the door doesn’t match the door frame’s hardware. So either I need to chop some length off the bottom of the door (which there’s enough of if you go back to the photo) or patch up the current hole and make a new one. The first option seems easier to me since I already need to add to the top.
Now onto the fun stuff (she says with a heavy dose of decision anxiety)
DIY Closet: Picking A Paint Color
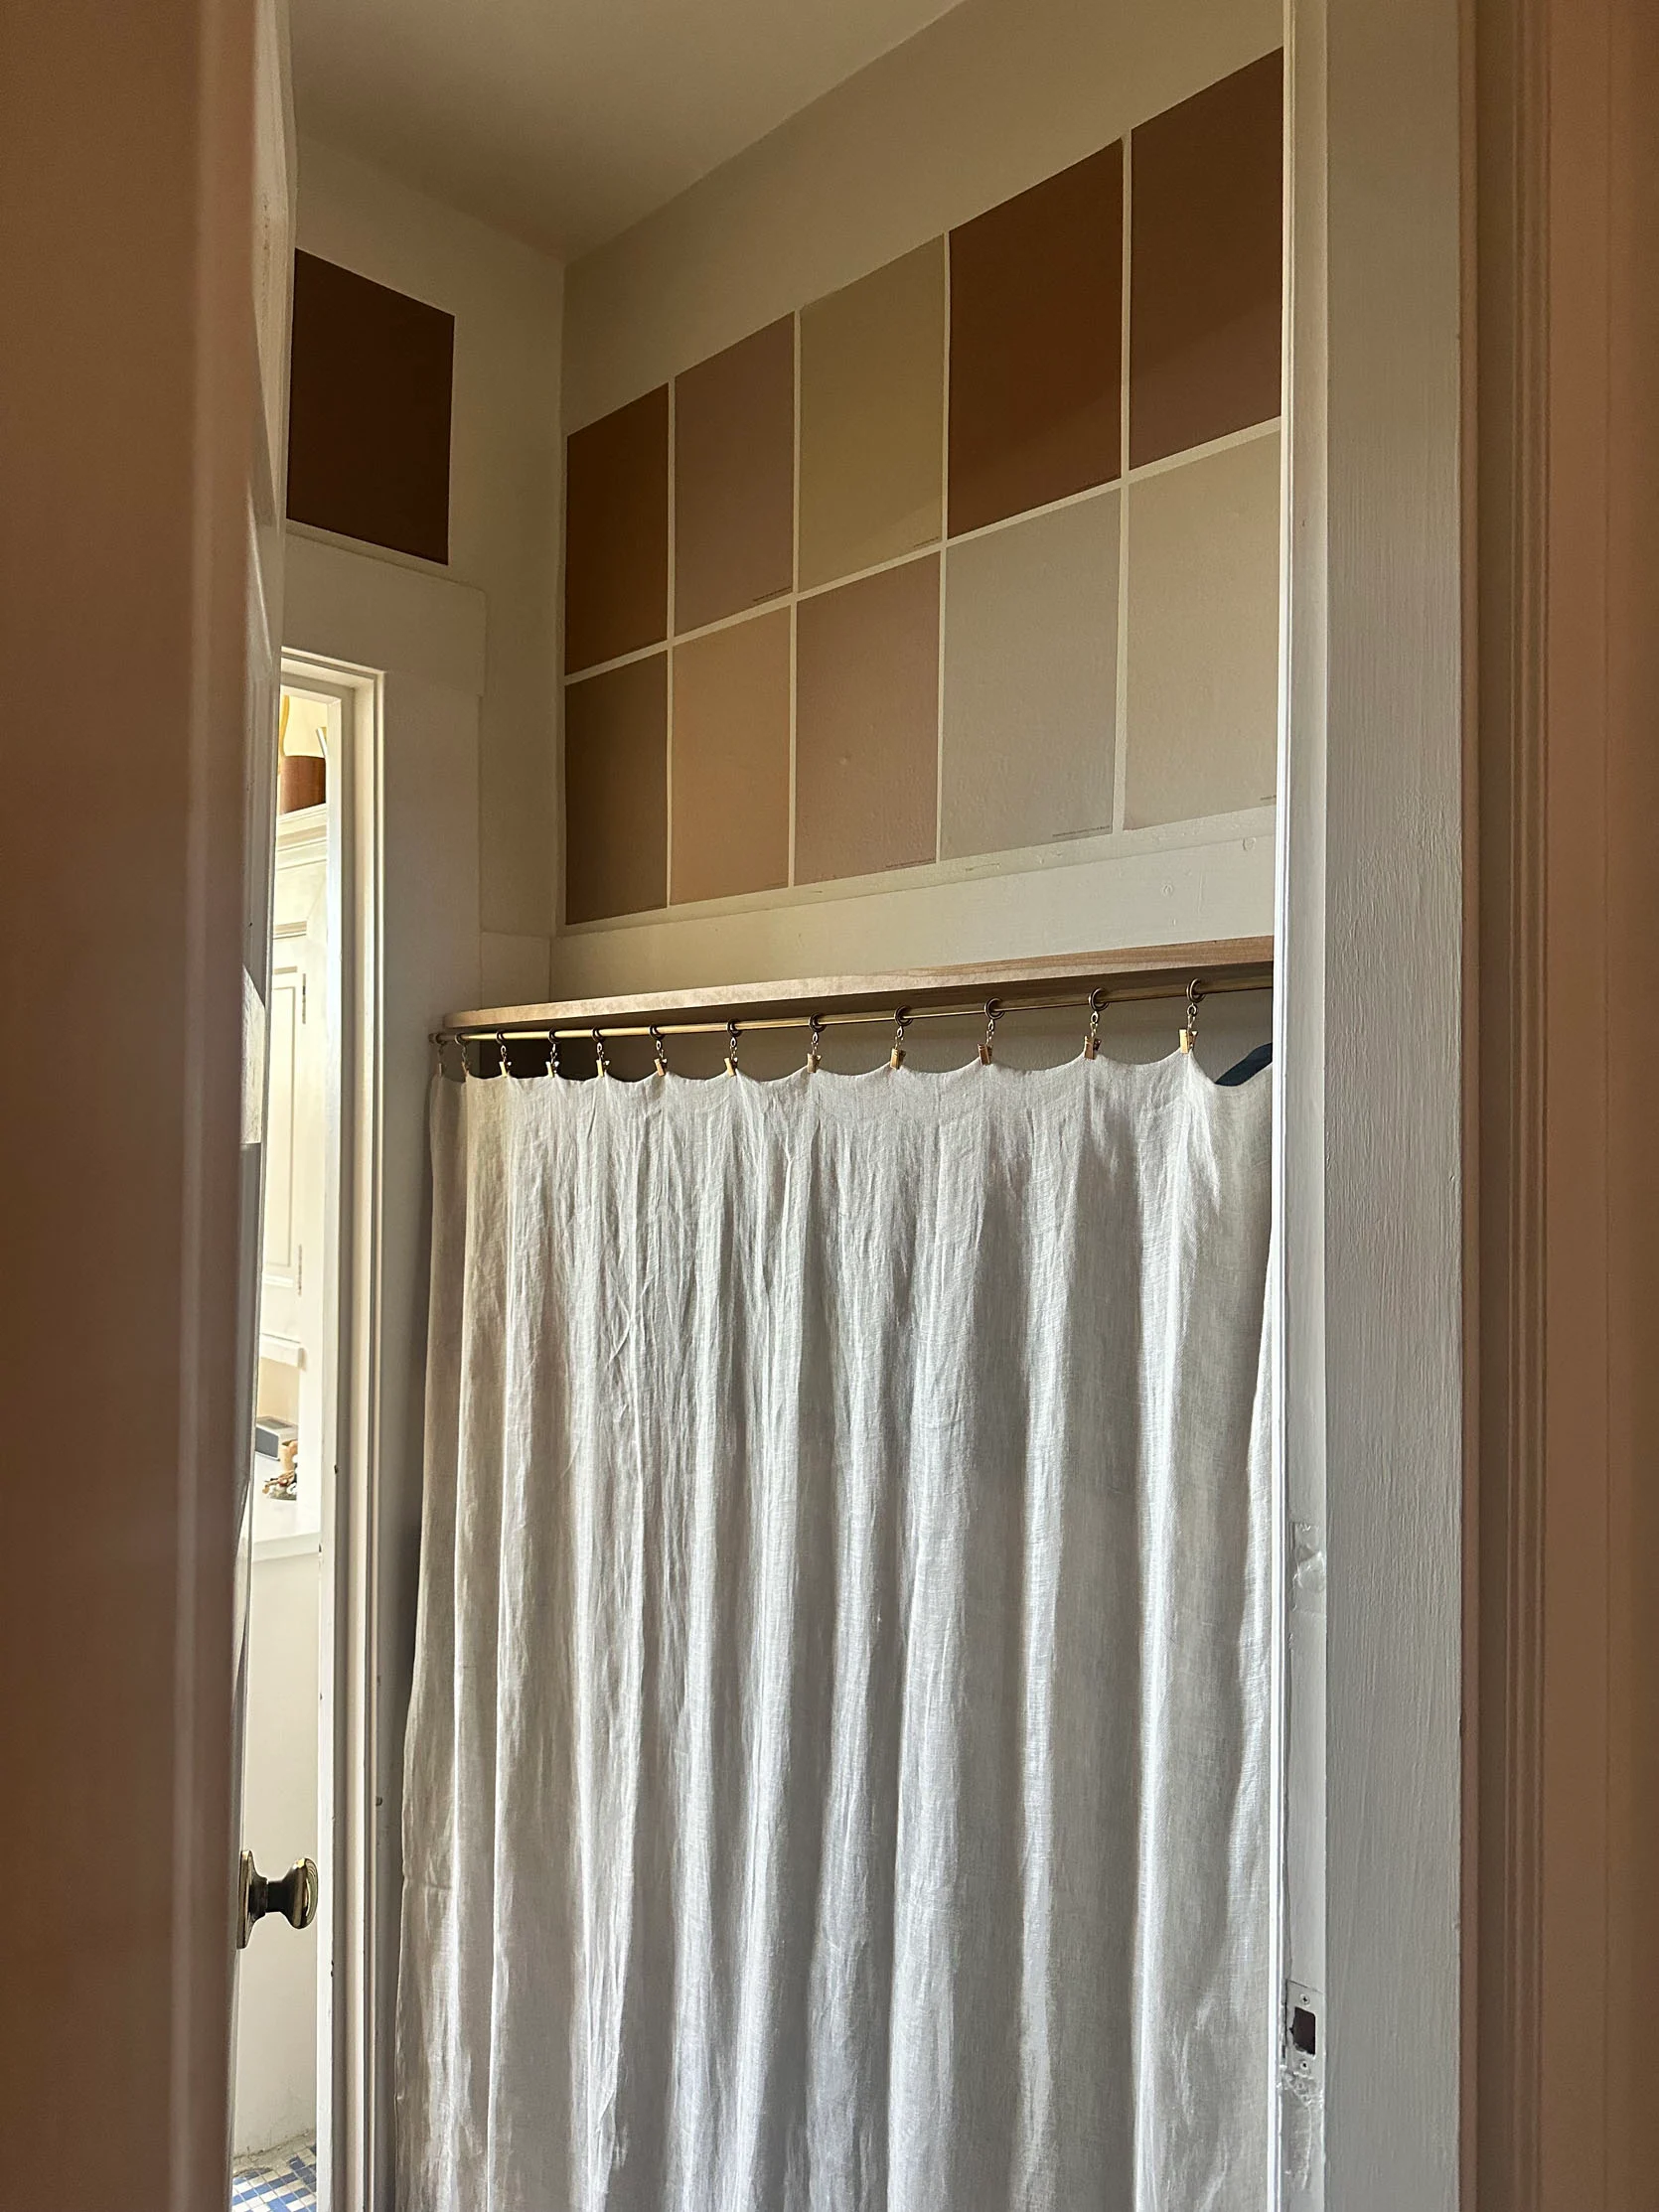
These are the Samplize colors I picked. I don’t ever want to go back to a world where they don’t exist. I wanted a lot of colors because I knew the light was going to be really funky. Our general rule is to paint a light room light and a dark room dark, but this is a weird medium option – kinda light but mostly dark, but not super dark. A real mess if you ask me.
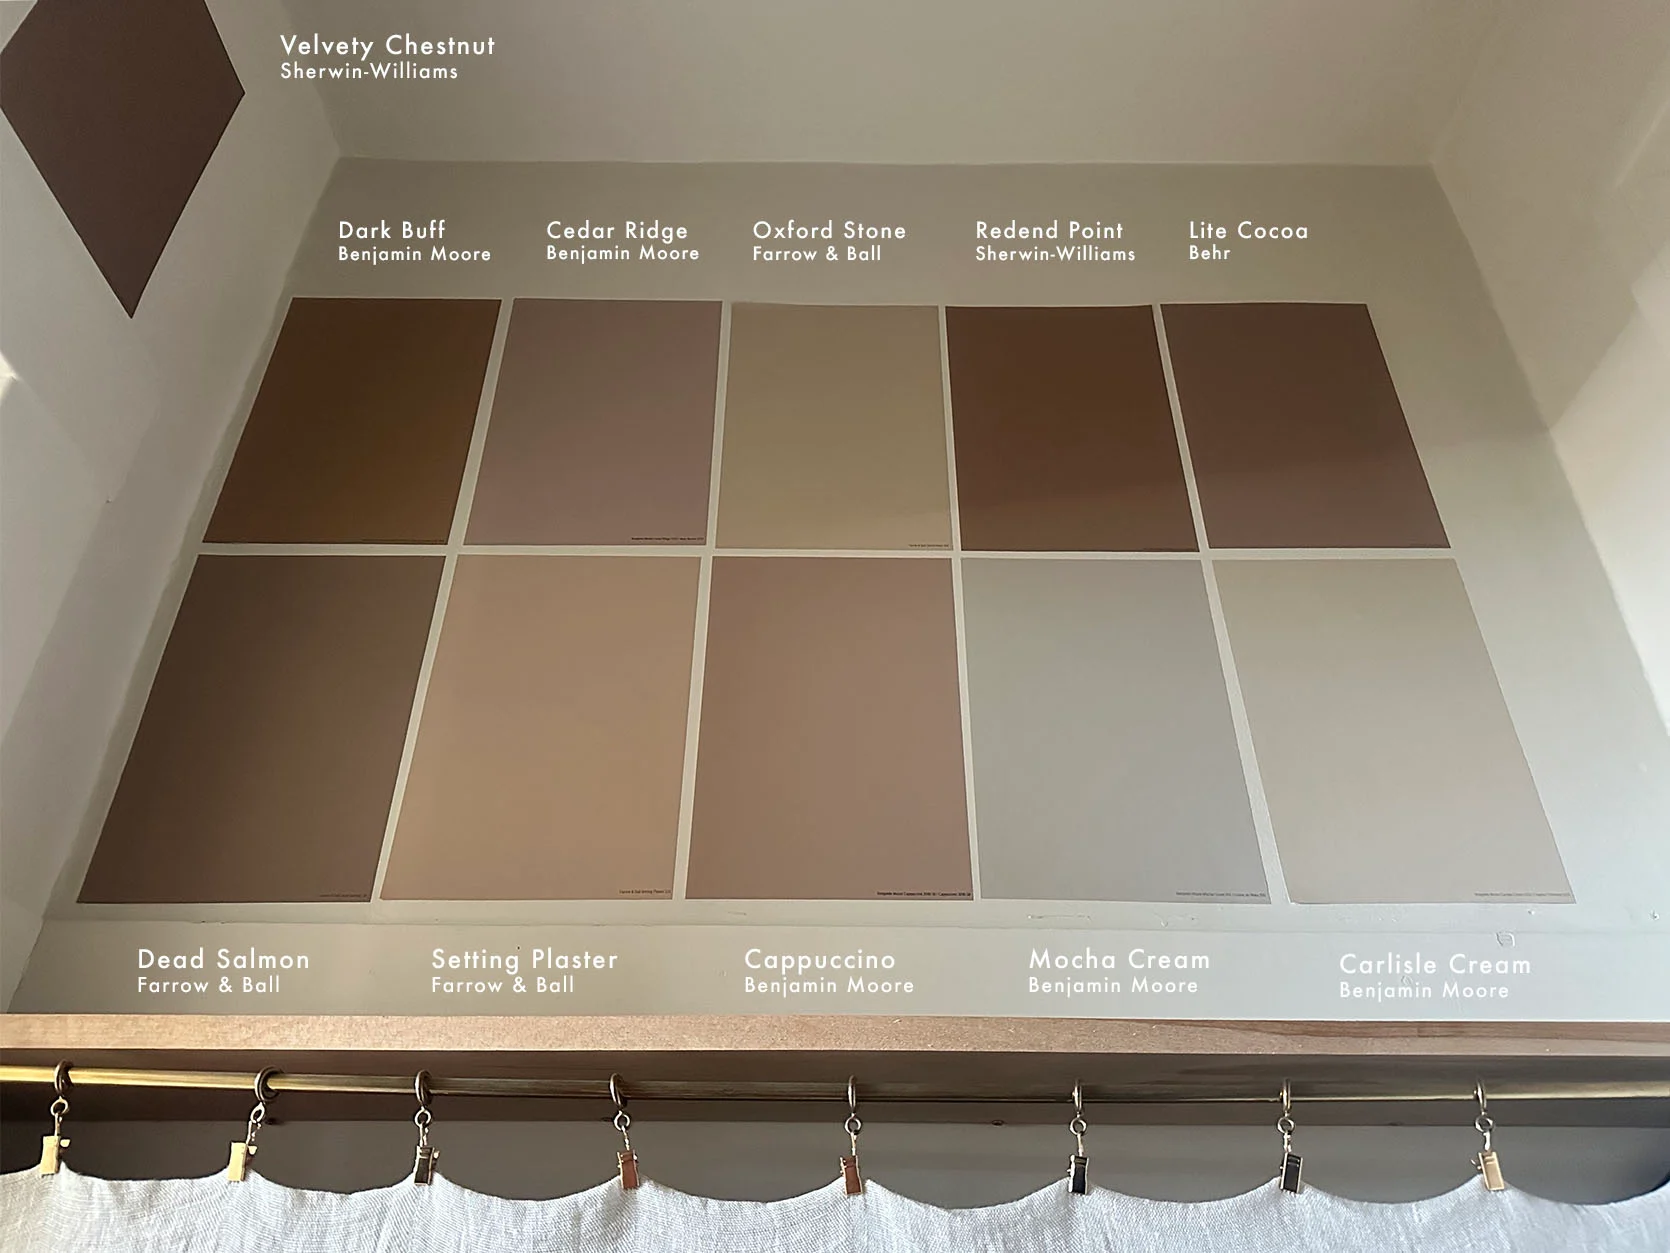
Top Row: Velvety Chestnut | Dark Buff | Cedar Ridge | Oxford Stone | Redend Point | Lite Cocoa
Bottom Row: Dead Salmon | Setting Plaster | Cappuccino | Mocha Cream | Carlisle Cream
But they are all really pretty! But my gut was to take out the dark colors and Mocha Cream since it was reading very gray. The last thing I want is for this to be a random dark hole in an otherwise lighter-toned apartment. Also remember, it’s THE FIRST thing you see when you open my apartment’s door. A medium to light tone was what I felt was going to be best.
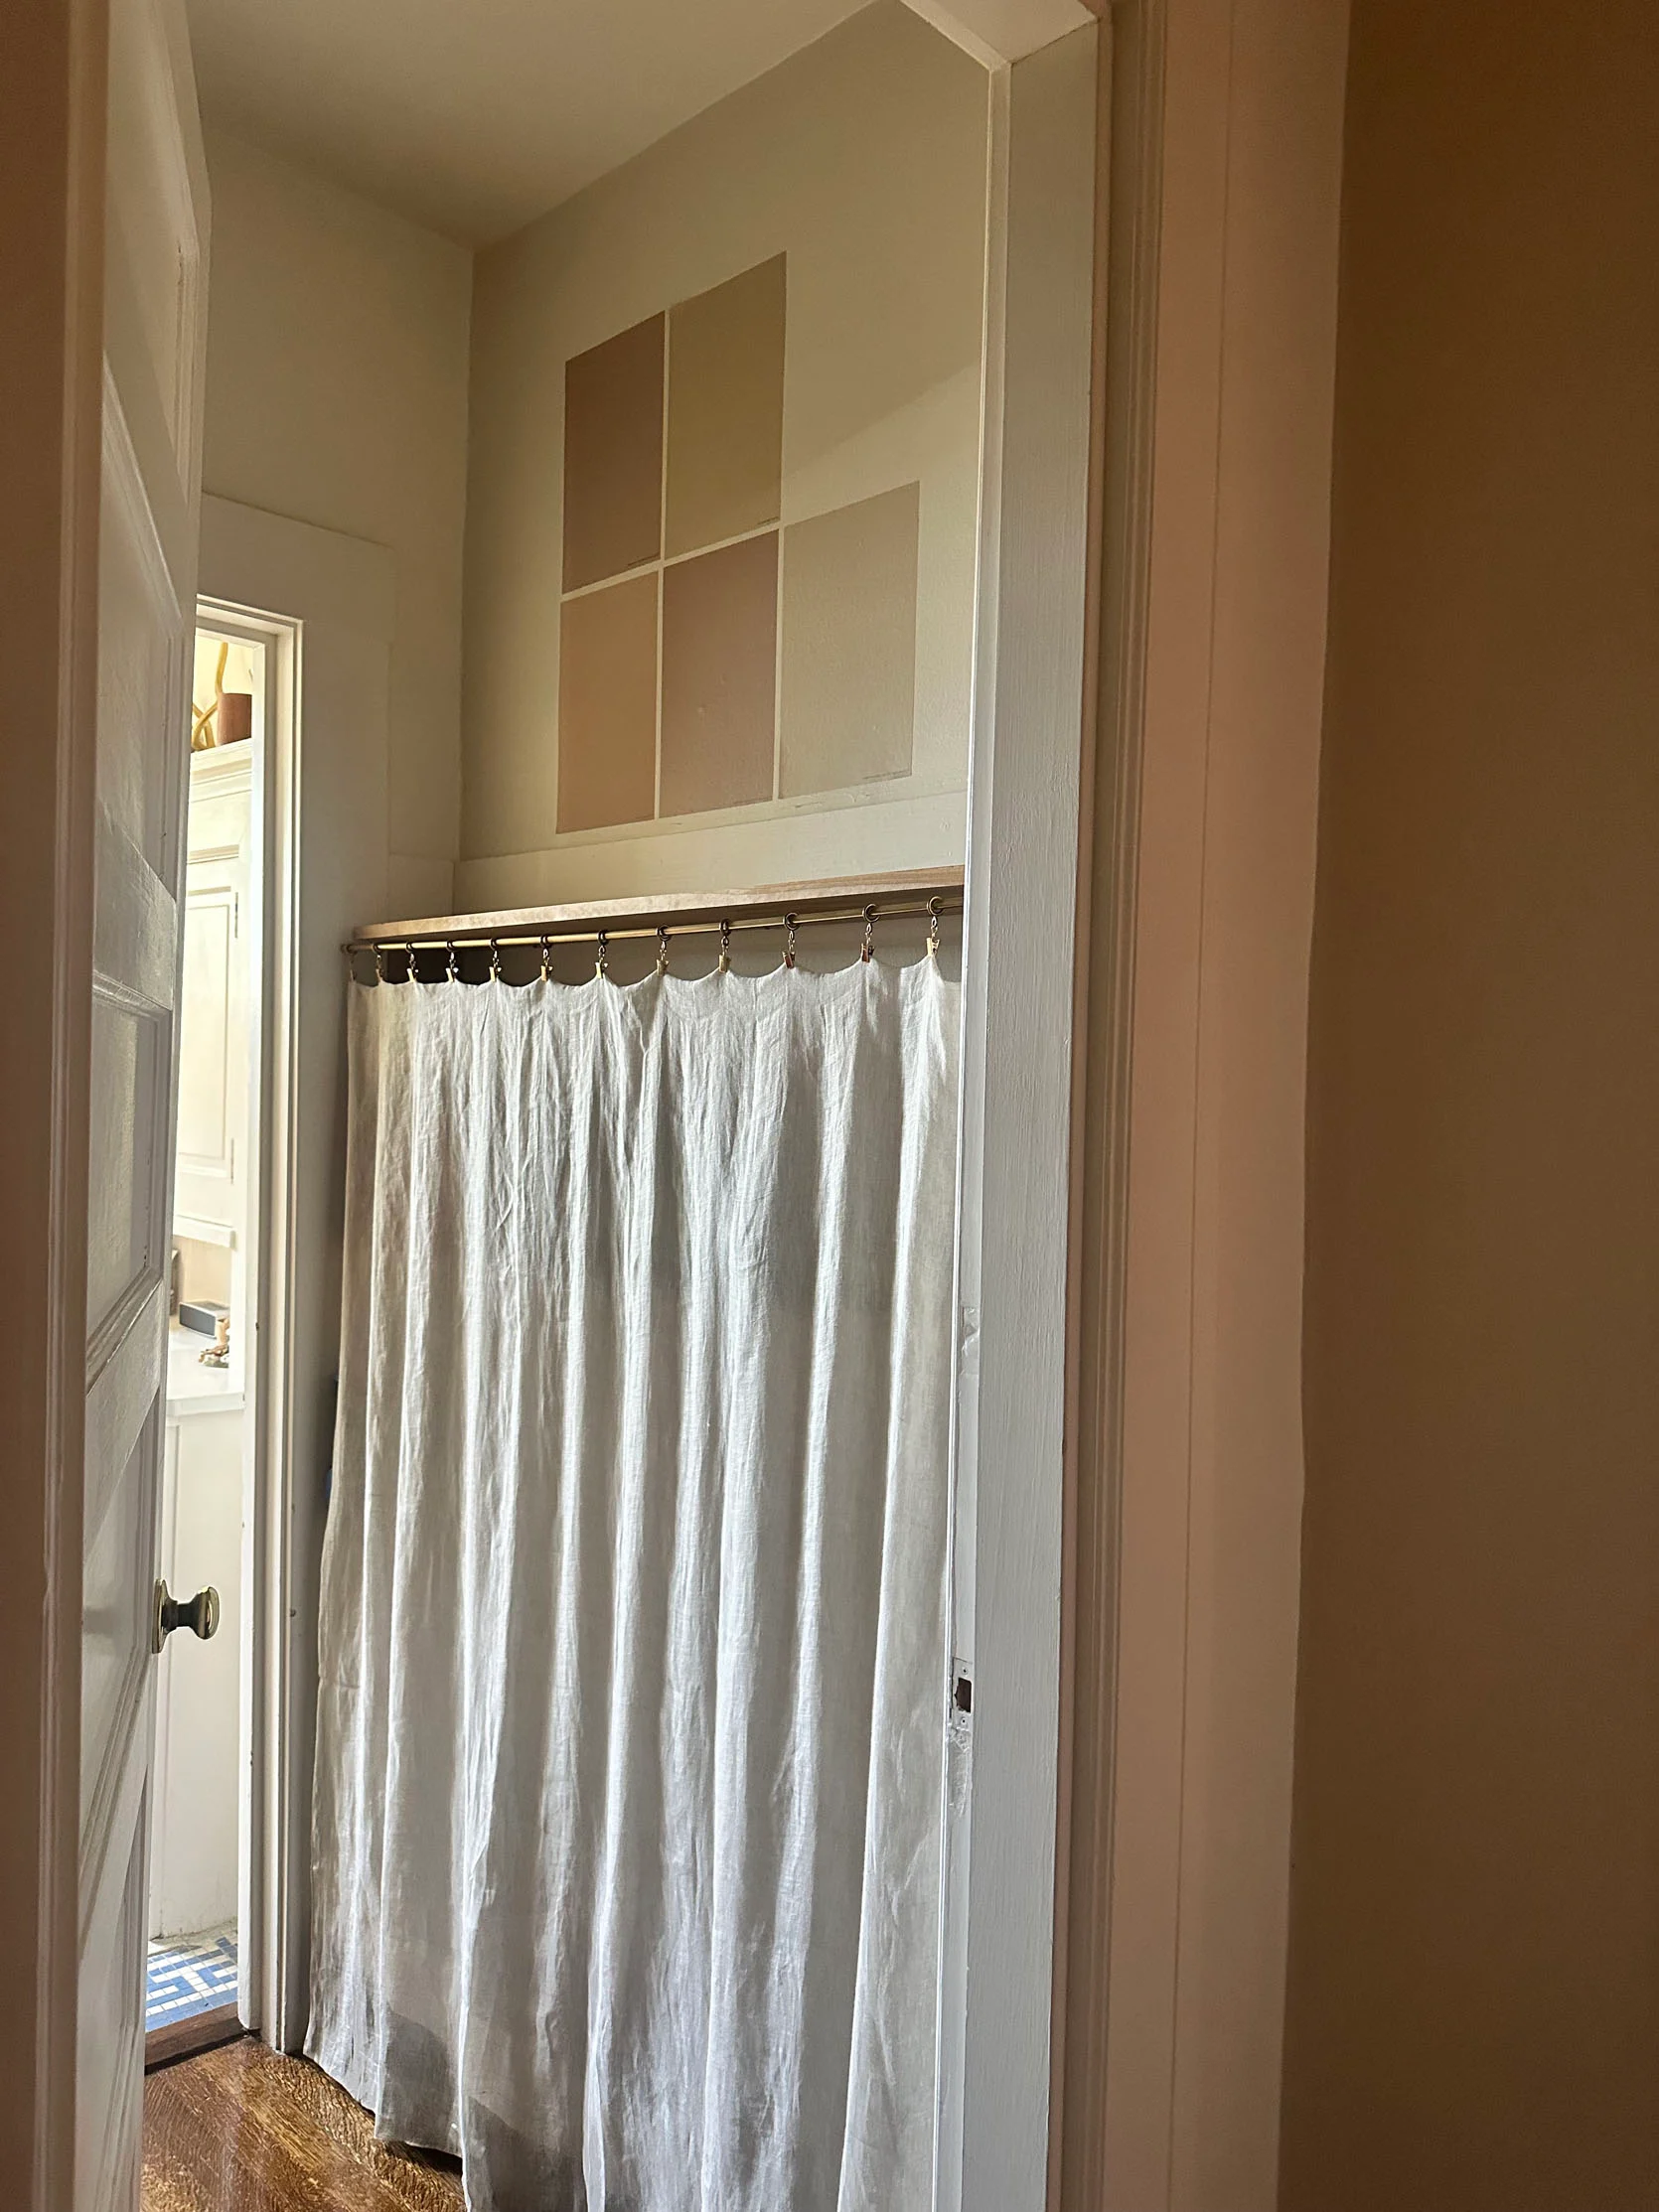
Here’s all of the super dark colors taken off (another beautiful perk of using Samplize: don’t like it, remove it!). Better right?
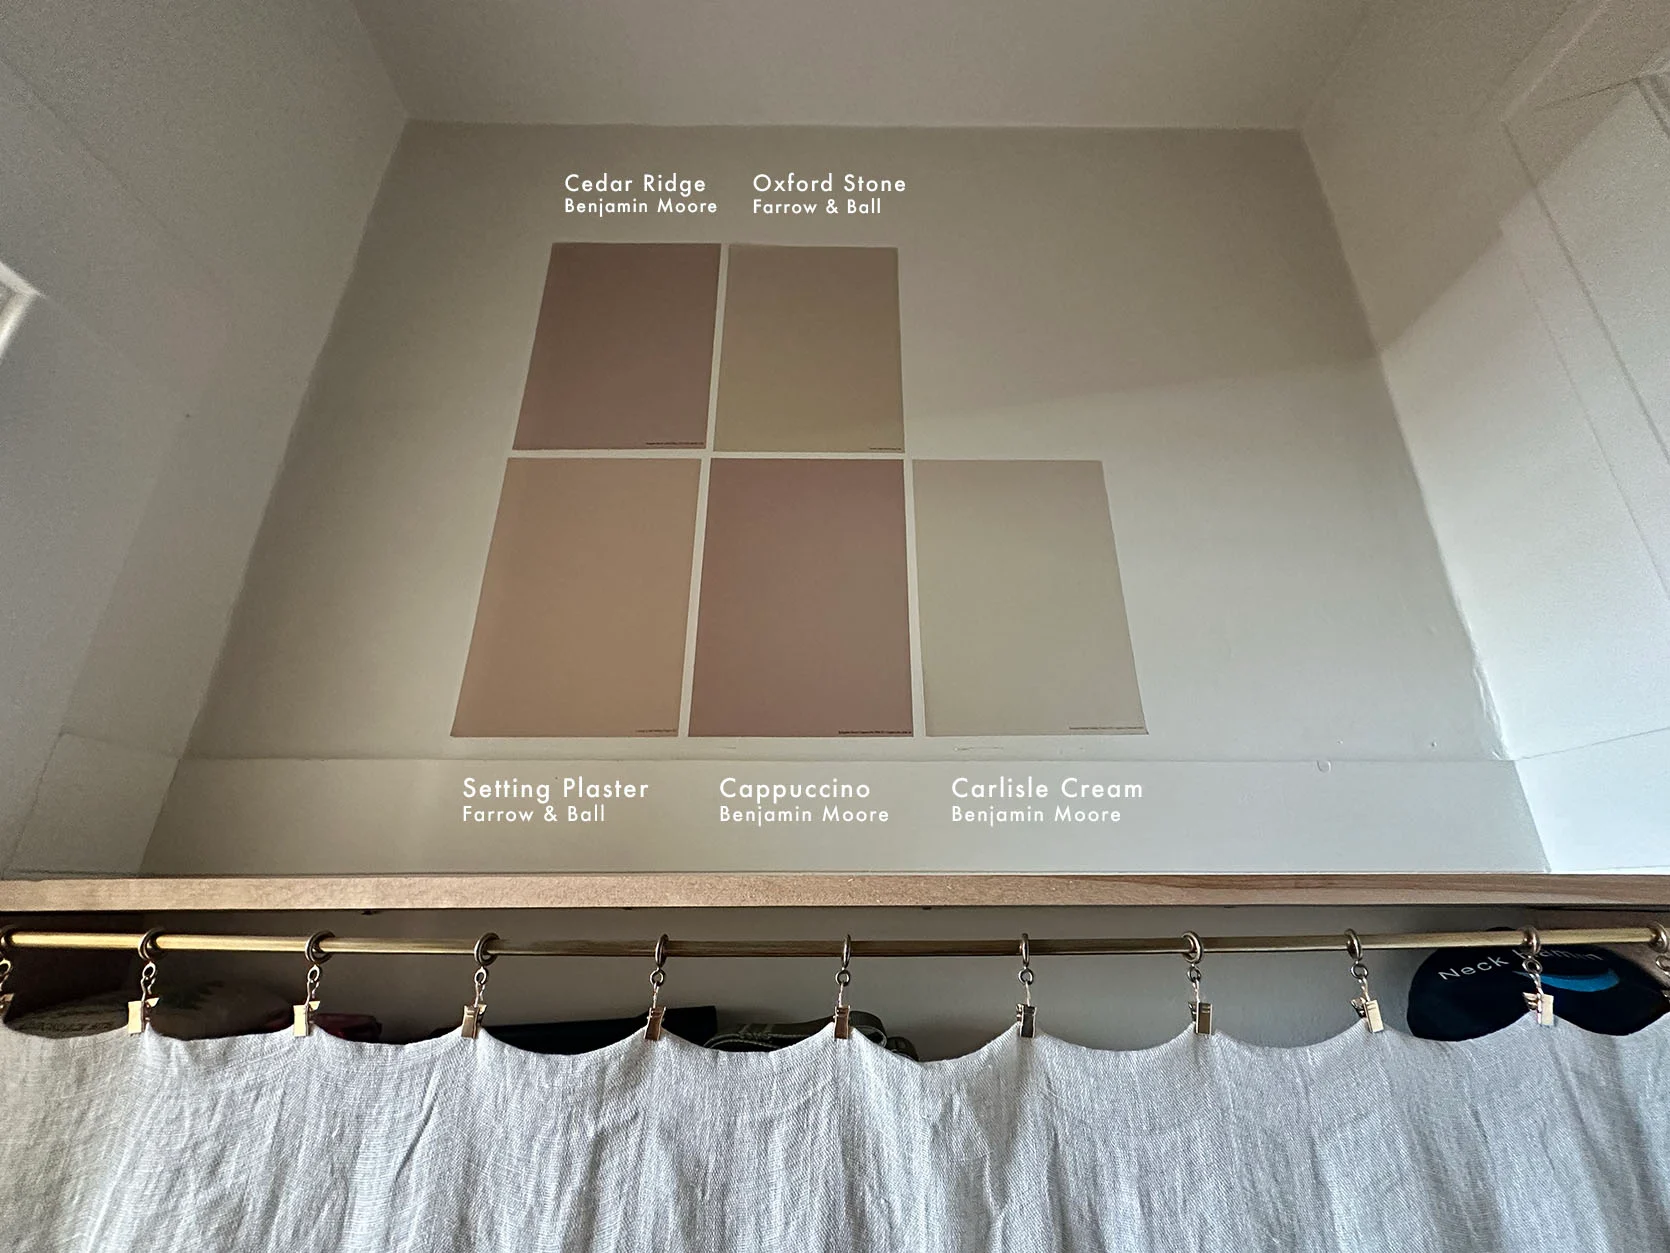
Top Row: Cedar Ridge | Oxford Stone
Bottom Row: Setting Plaster | Cappuccino | Carlisle Cream
Here the first cut, but a little easier to see. If you think you have your vote decided, I have another curveball for ya:) My bathroom is getting renovated. Some leaks in our super old pipes need replacing, so my landlord asked me if I wanted to help design it! SO exciting, but I’m really not ready to talk about it. I’m still very much in the design phase, and until things are more locked in, I’m holding off on talking about it here. But I will give you a sneak peek at what my general color palette is because that also very much affects the color I choose. They need to make sense together as well as with the overall apartment.
These will be the main colors along with some kind of white (likely White Flour by Sherwin-Williams that I used in my bedroom since the spaces are connected). I’ve loved this color combo for so long. And since there is already a fun blue tile in the bathroom (that I’m actually really sad to lose but must), I think this will only be a step up.
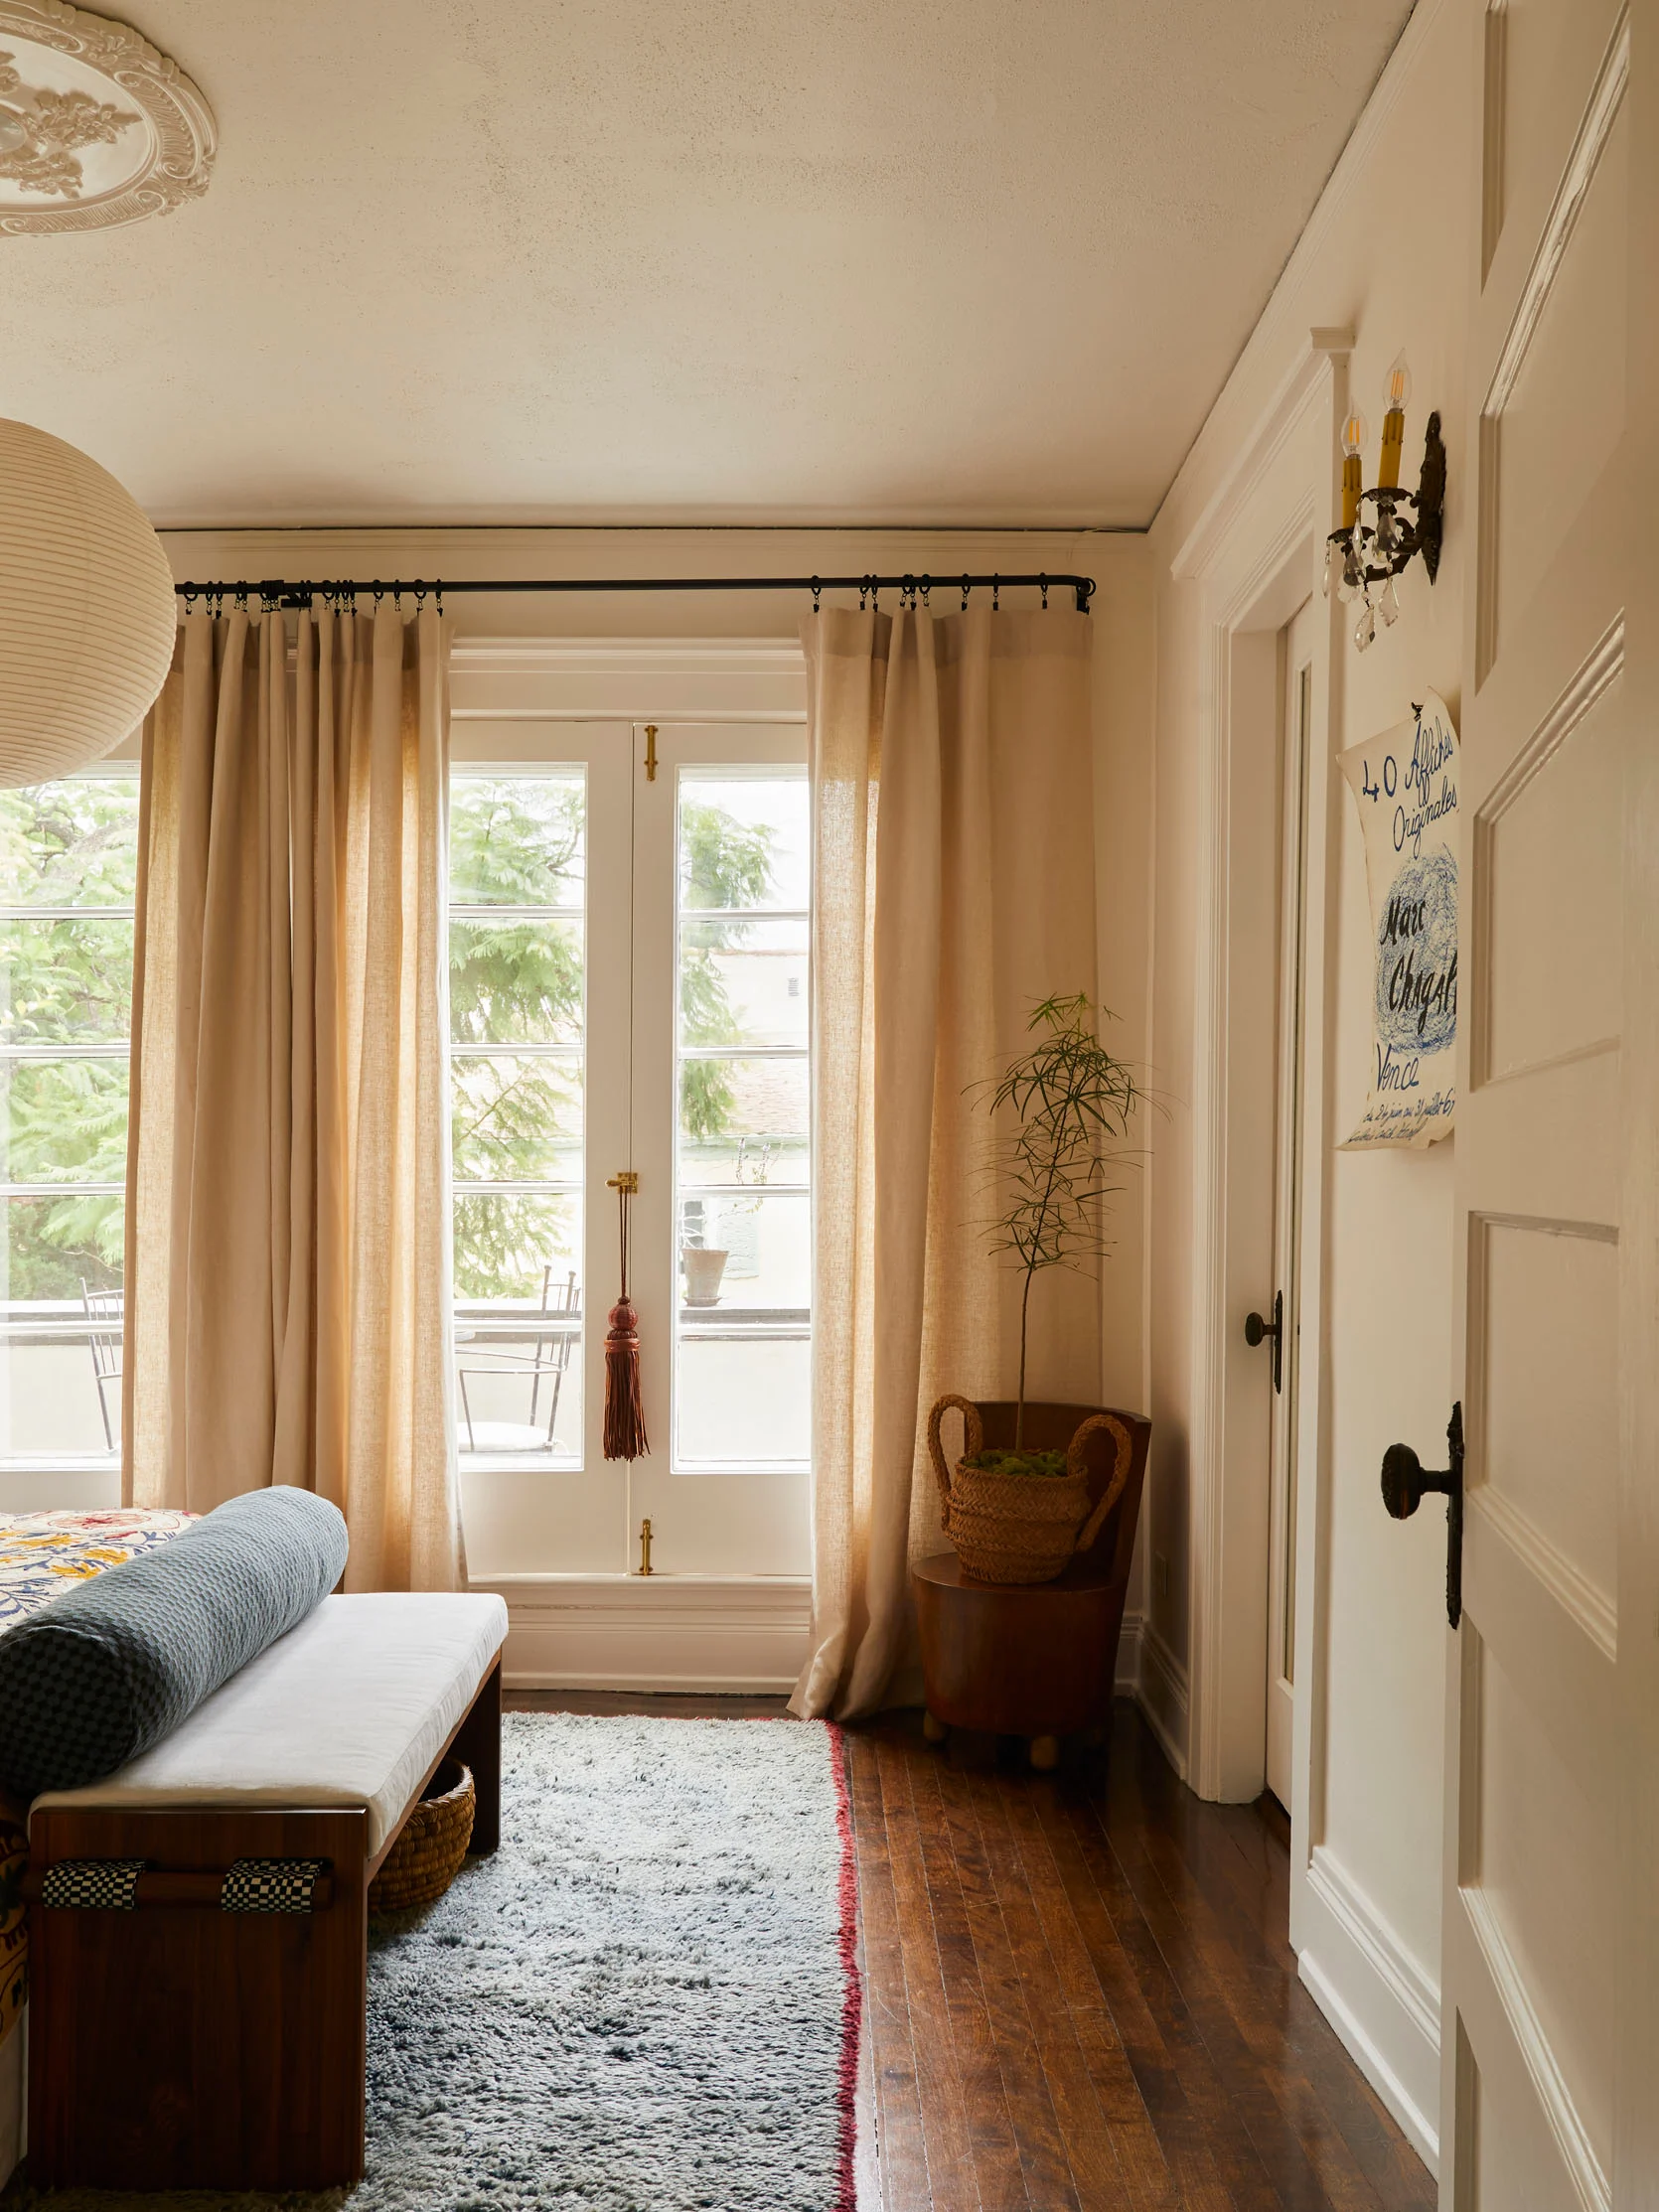
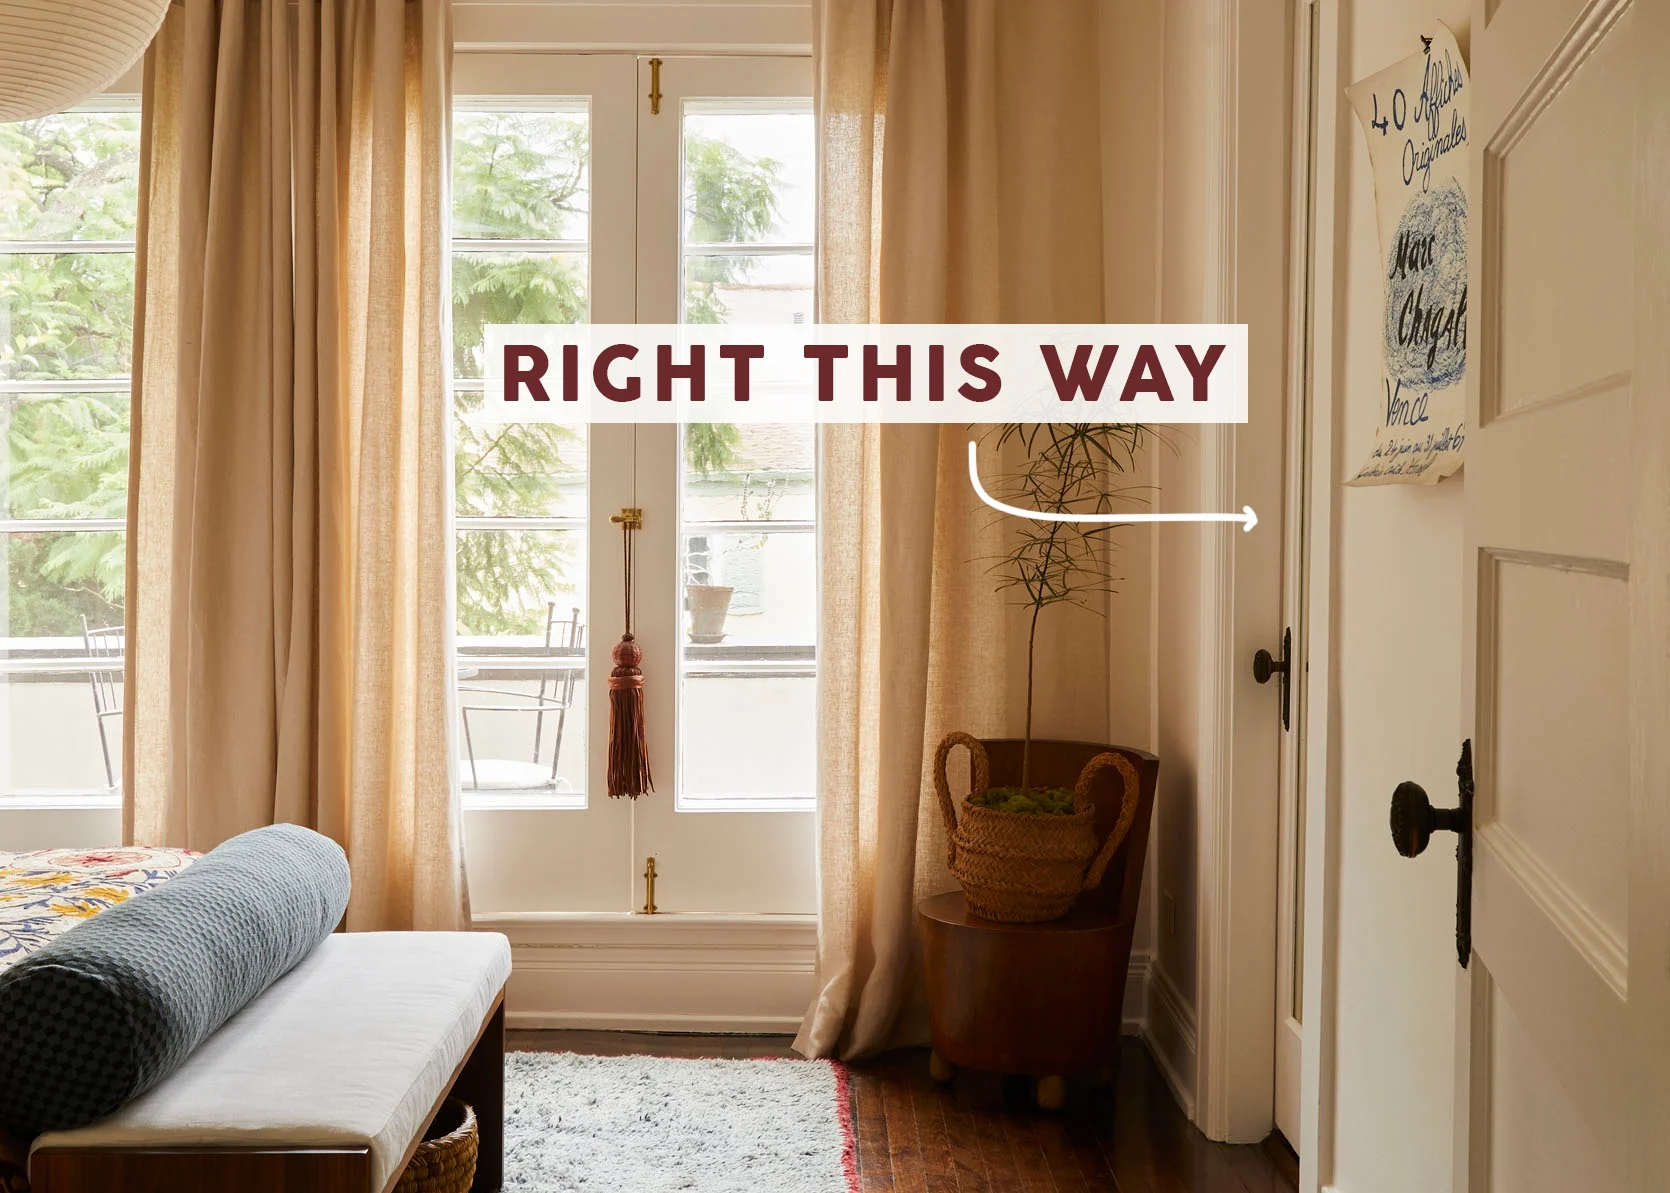
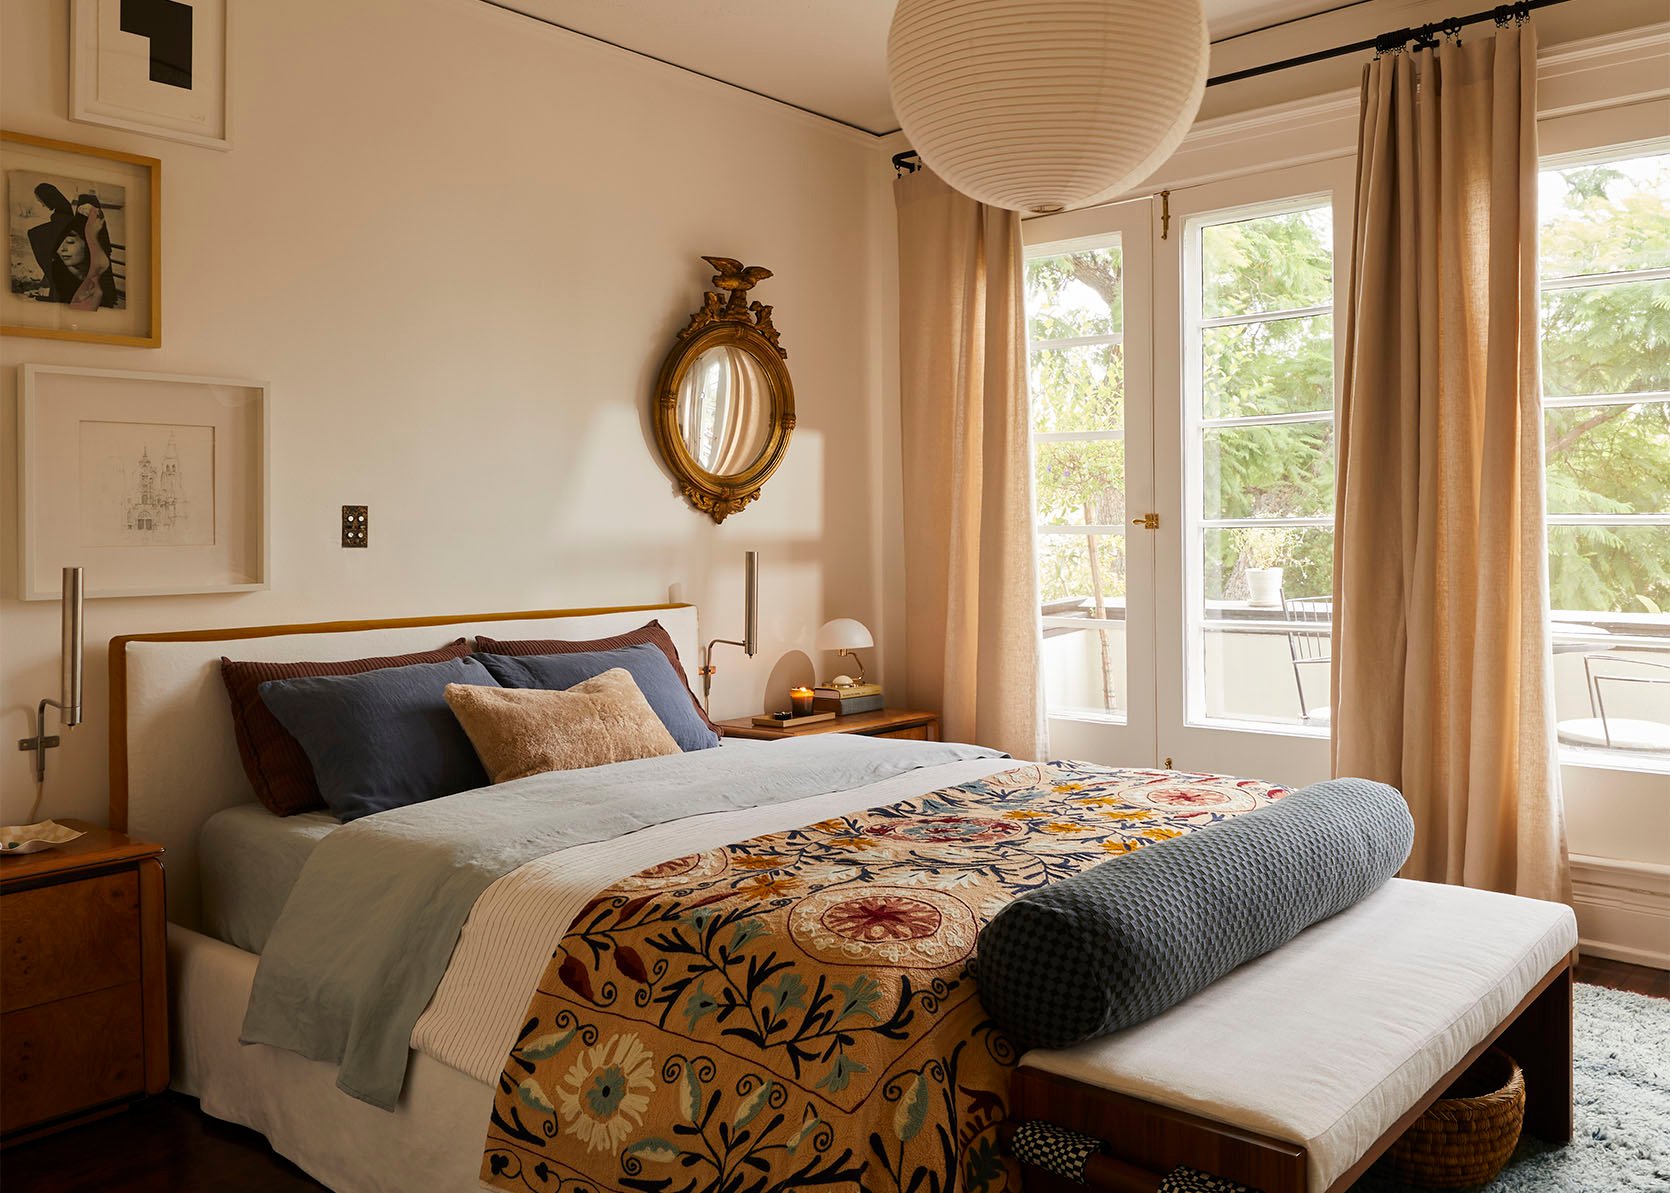
Here’s a reminder of what my bedroom looks like, and the door to the bathroom is the one on the right with the mirror inset. I also, of course, know that this is a rental and that not every tenant after me will choose a similar palette for their bedroom. But I promise that I will keep the style of the hard finishes very in line with the style of the home. I want to honor this home with a bathroom it deserves as one of the very lucky tenants in it’s hopefully very long history. Plus, I’ve never designed a bathroom before! I’m so grateful and also FREAKING OUT. But back to my little DIY closet.
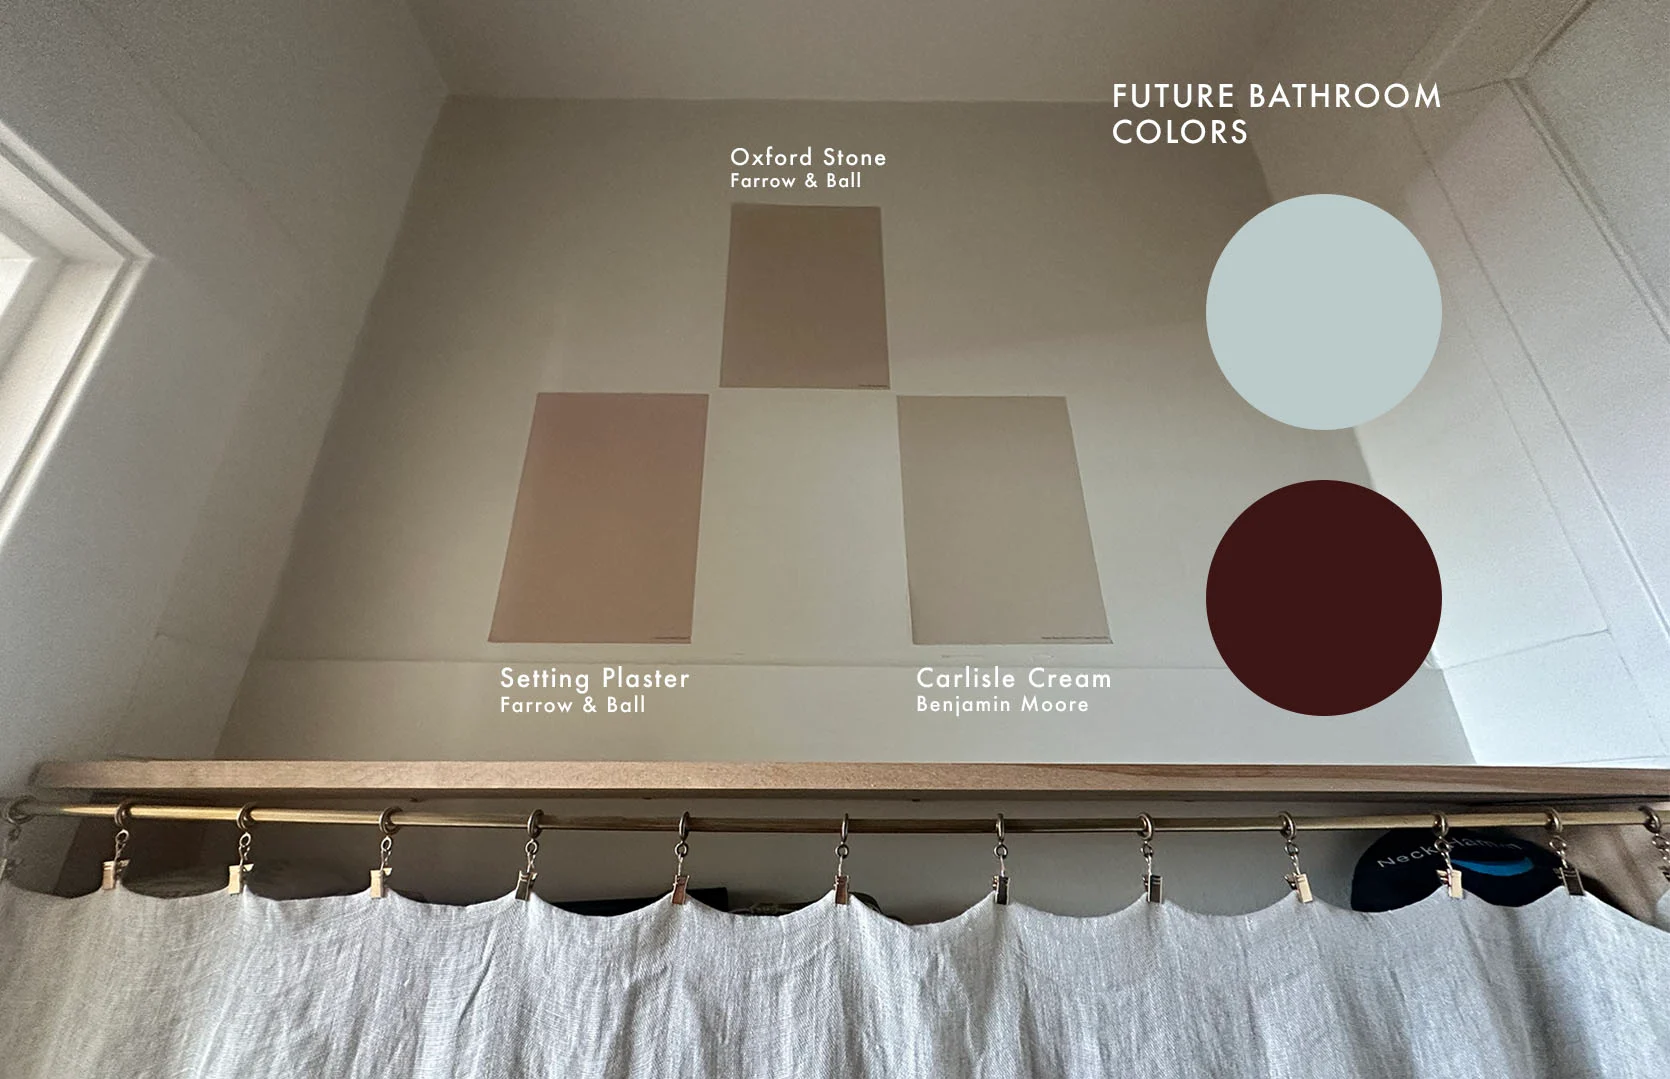
Top Row: Oxford Stone
Bottom Row: Setting Plaster | Carlisle Cream
Here are the bathroom colors next to the three finalists. At first look, my heart says Carlisle Cream. But when I asked a few trusted sounding boards, they agreed that Carlisle Cream was pretty but maybe not enough of a contrast to the general white tone that the rest of the home is covered in, and that Setting Plaster was a little more fun. I saw their point but didn’t really agree at first. But then I looked around more and started to change my tune. I don’t want a “bold accent closet,” but I also don’t want it to be so similar that it doesn’t really look like anything, you know? Oh, and Oxford Stone was clearly out, ha.
Oh, and I will likely stain the wood shelves a darker walnut tone:)
DIY Closet: Of Course I Need A Special Flush Mount
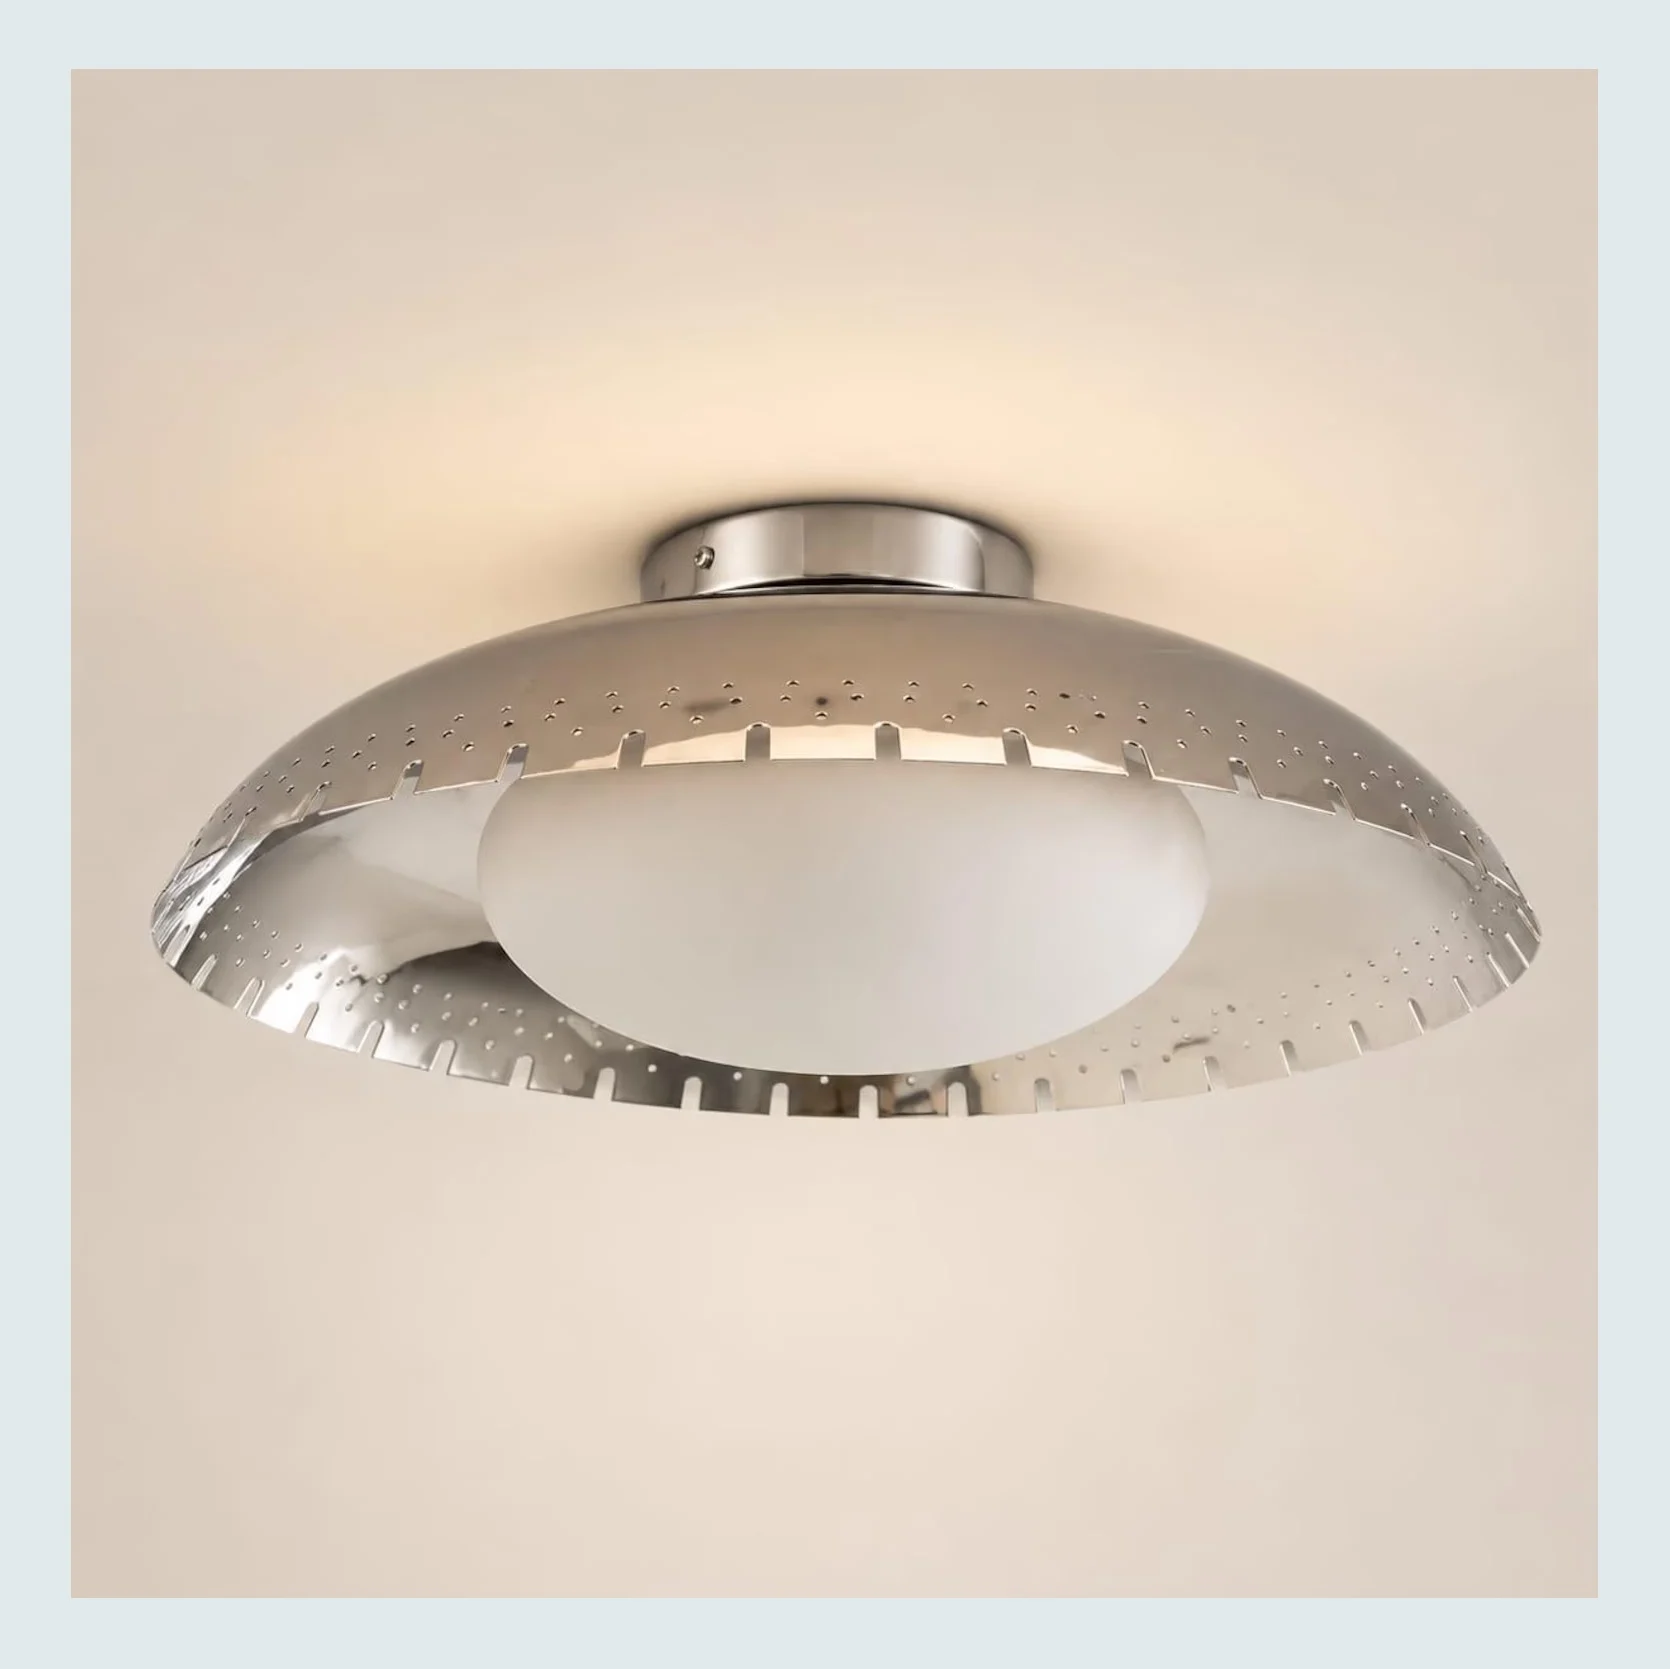
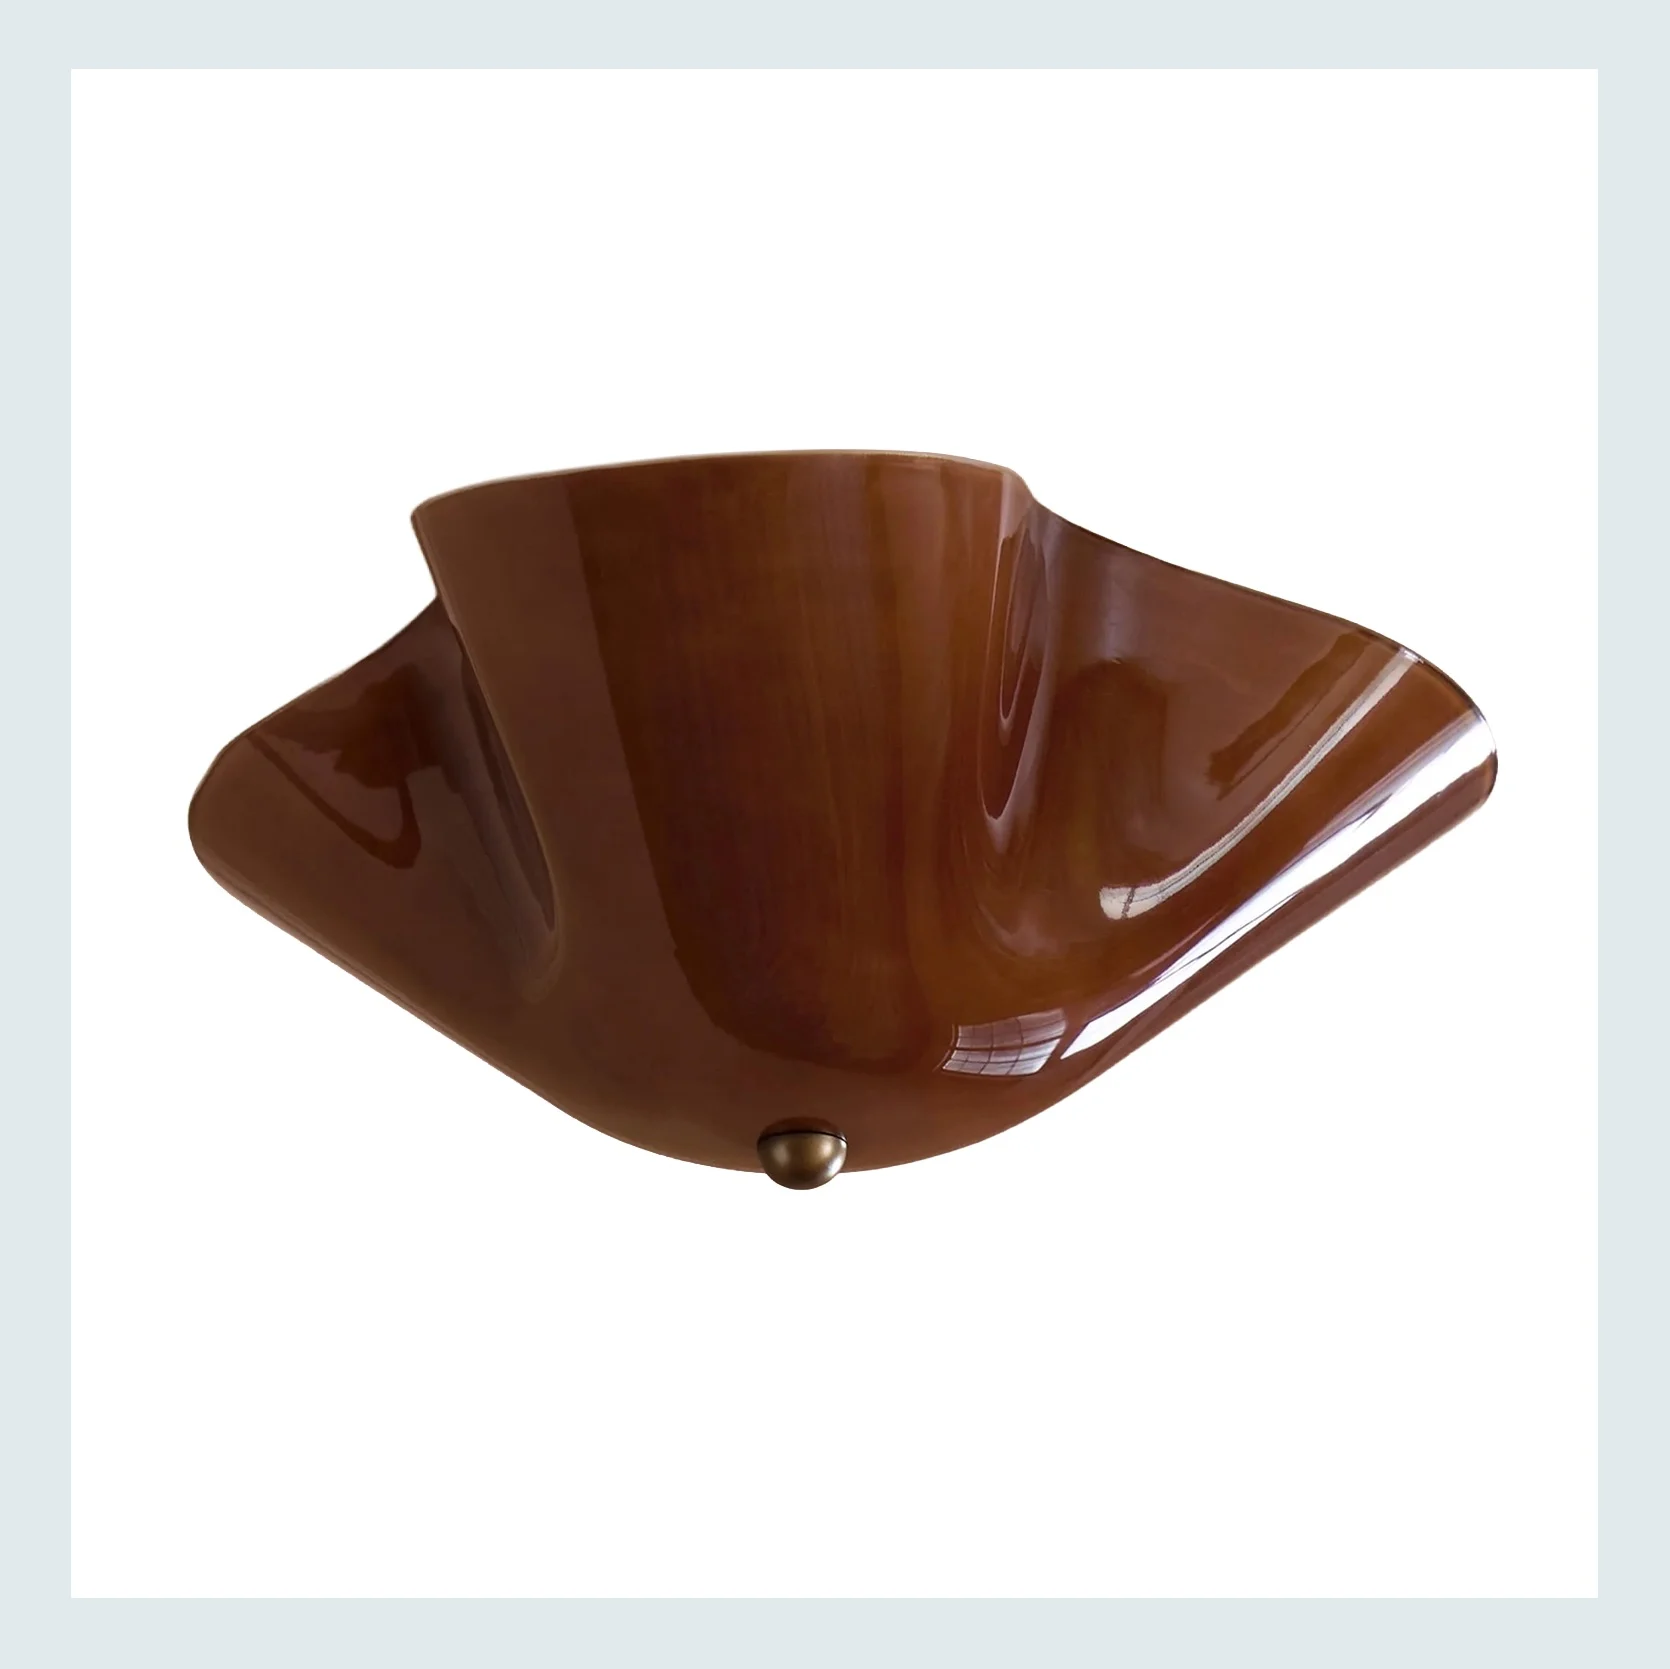
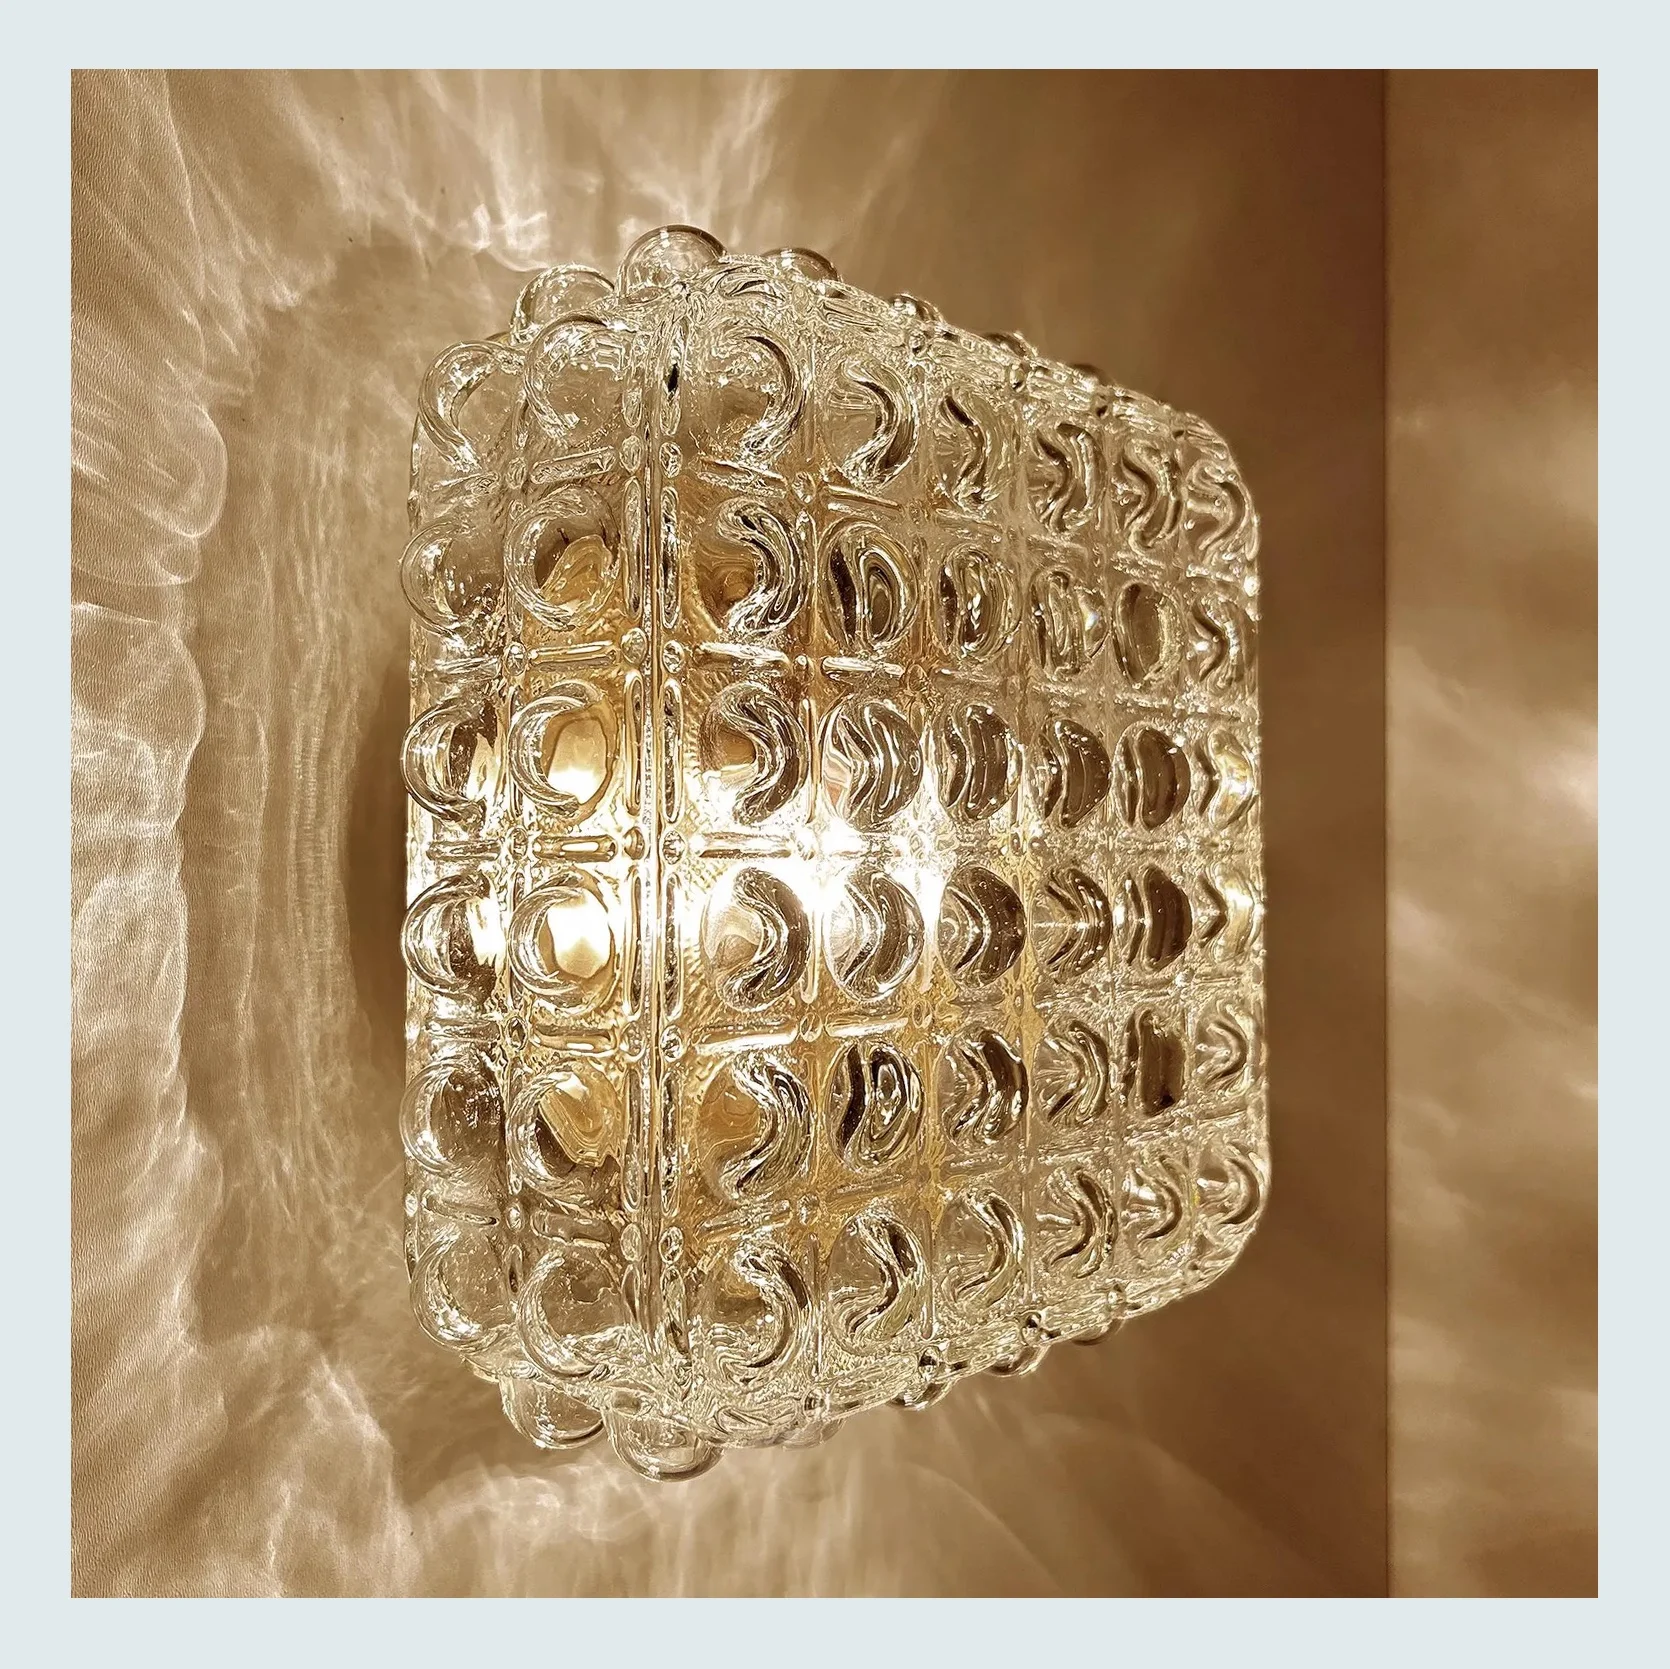
Modern Flush Mount Globe: Perforated Metal Shade | Radner Flush Mount Light | My Little Secret;)
To end with some home jewelry, if you will, these are the three flush mounts I’m looking at. I love the idea of mixing metal with this chrome cutie. Plus, it feels a little vintage, and I’m planning on most of the hardware in the bathroom being in the silver family. The amber glass one has a refined organic feel that is so stunning, and the tone will work with the burgundies I want to use in the bathroom. The final bubble glass one is vintage, so I don’t want to give the link yet! But I like the geometric style it has, and that would tie in with the other geometric elements I have in other parts of my home. The only thing is that the chrome one is MUCH more affordable than the other two, and it’s all coming out of mama’s wallet. So as I get closer, we’ll see what I decide!
To recap, the deadline is November 1st. I would make it soon, but this month is FILLING UP with so many birthdays (mine included), an EHD retreat, and other fun celebrations. I’m very grateful and excited. Plus, my most favorite flea market, Downtown Modernism, is happening on 10/25, and maybe I’ll find a perfect item for the closet? I have to at least look. So that’s the plan, and I’m sticking to it.
Any kind and constructive ideas are welcome. Any paint color preference? Are you team Setting Plaster or Carlisle Cream? Any tips on adding to a door’s height? Let’s talk DIY closet feelings:)
Love you, mean it.
Opening Image Credits: Design by Jess Bunge | Styled by Emily Bowser | Photo by Sara Ligorria-Tramp | From: Jess’ Bedroom Reveal

Setting plaster is like a warm hug IRL. Big fan!
That’s my vote too!!
Same!!! I also love setting plaster 🙂
Same! I color drenched my guest room in Setting Plaster with no regrets.
Love how much storage you were able to add to this tiny tiny space. I would paint it the same pale aqua as the bathroom.
So fun! I love the curtain. What a beautiful home. I’m team Setting Plaster for sure. It was my pick when all the samples were up!
Team setting plaster!! Can’t wait to see it when it’s all done, Jess 🙂
I like setting plaster the best. As for the space above the door, could your dad build a little transom box? Just a simple wooden box with glass or stained glass tiles inset that you could affix in a way that would be removable for when your landlord puts the original door back in? It could be super cute!
You could do this after you chop the bottom off, once you make the door hardware line up.
Or find a vintage transom and hang it with eyehooks in the space.
I love a transom idea, but I think it needs to be added in permanently. Personally I would not love to have just eye hooks for the transom. The glass door already compromises privacy in regards to smells and sounds, eyehooks goes too far…
ok, I think the reeded glass might not work. here’s the thing: a person sitting _on the toilet_ would be clearly visible through it. like, maybe not the details of them, but definitely their presence and outline. not ideal. I think the French curtain would be so good. it’s one “old-world” detail that hasn’t really taken hold yet, you know? and it would soften and bounce the light coming into the closet and entry. btw, I love your bedroom so much! the drapery and colors are so rich. I think the window curtain would echo that feeling well.
adding onto the top of the door will probably be the least complicated route. and moving the plate on the door frame is easy too. imho 🙂
I agree with you about the long pane f reeded glass. I had a old 1930’s office door as my bathroom door in an old place, with textured glass on the top half of the door, and wood on the bottom. It was good- although the toilet was far from the door. I hate to say it, but a French curtain on the door in the bathroom would look like a germ depot to me…
If you cut down the bathroom door so it matches the latch mechanism of the original, it could feel like you have a purposeful transom window at the top. Voila: two problems solved. You could even find an old stained glass window, or something else to hang in the “transom” to make it look intentional. Or have your dad create a frame that sits in it to look like he’s framed out a window, and you add the same detail you’re adding to the door.
Fun space!
Came to the comments to suggest a transom as well!
Im all over this thread and have a new idea…Can you just keep the existing all wooden doorway, remove the top 2 interior wood panels o that door to create little windows and then your dad can put stained glass in? Is that crazy ?
Marco Zamora added a very cute DIY transom window to the kitchen doorway in his first apartment – might be something to look into!
VERY excited about this project! I’m rooting for Setting Plaster + vintage glass (riffs off your fabulous DIY multi-holed cabinet).
Yes get the vintage glass light. Sounds like Jess’ heart is already set on it anyway!
Would it be possible to replace your front door with one that has glass insets at the top to bring in more light?
I think the amber glass would severely block the light from the fixture. I used a much lighter amber once and the room was so dark that I had to change the whole thing out. It was such a bummer.
I used a window film in my bathroom that lets in light but that you can see NOTHING through. This would probably work much better for privacy than the reeded glass look.
I tried to search my order history at target, but it doesn’t go back far enough. But I *think* it was this product:
VEVOR Window Privacy Film, Frosted Glass Window Film, Sun Blocking Heat Control, Non Adhesive Static Cling Reflective Window Tint,White
Team setting plaster! My mom very sadly took out the tile in her guest bathroom – it had all been handmade by the artists who lived in (and built/designed) the house originally. They were gorgeous and she even more sadly replaced them with very typical cream tiles. BUT, my mom saved some of the tiles and had them made into trivets (basically, deep wood frames with tiles placed in them and then grouted). If the existing tiles are really nice, could be a nice option.
This might sound crazy but when I first saw the picture with the paint samples I thought the wall was actually already painted in a cool checkered pattern and I kind of loved it! Maybe that could be an option?
Oxford stone has my vote, with setting plaster just behind. Such a beautiful old apt!
Is there an electrical outlet on the curtained wall? If so, it would be so fun to have a small lamp on the top shelf that stays on all the time. If no electrical, there are really cute lamps that are rechargeable, not ideal but you would have some light in that dark area all the time which I think would look amazing.
I’ve seen the picture of the tile used in the shower and loved it. I would love to do that when I remodel my bathroom. Love using the color burgundy. as my bedroom walls are that color. Setting plaster is my paint choice also, but the metal ceiling fixture looks cheap to me.
Setting Plaster, hands down.
You could add wood to the door:
Just wanted to add a. note about the cafe pinch rings. It is a case of “they just don’t make them like they use to.” I ended up returning a number of different brands because they wouldn’t hold up even light weight cotton on a small window. I did find some at a thrift store and they work great!
Cutting down the door makes sense. Adding wood to the top using a biscuit joiner and wood “biscuits” will make the glue job sturdier. In my experience with this kind of wood working process, you will probably need to use Bondo or something similar to eliminate the line where the two wood pieces meet, and sand well before painting. It’s definitely a multiple-step process! If you cut the right amount of wood from the bottom, you will align with the door latch but your hinges will probably need to be redone on the doorframe then. This would mean filling in the old hinge cutouts on the doorframe (cut small pieces of wood to fit, and Bondo is your friend here as well) and cutting in new spaces for the hinges to fit. Maybe finding the door to fit the opening and having the door frame refitted in the remodel can be done? I like a curtain more than reeded glass but there are plenty of opaque films out there as well. Bathroom privacy is a good thing. Also, if you are trying to add light to a space, the dark glass shade is not going to do the job. It… Read more »
It’s looking great!
I am wondering about adding lumber to the BOTTOM of the door, and then covering it with a brass kick plate for more vintage charm (and for extra strength and concealment of the joint). It seems like you’ll have to adjust the doorknob and hinge placement in any of the options anyway.
Carlisle Cream! Setting Plaster seems too dark.
Setting Plaster, and ooh, the bubble glass! love it, and the bathroom color combo!
I’m going to echo what everyone has said re: setting plaster. It’s an incredible color for spaces with weird light. I have it in my office and it really is so warm and glowy. I will say though that I’ve been disappointed by Farrow & Ball. The quality just isn’t that nice and the matte finish gets dirty really easily, and in a pass through space I just feel like it will look dingy really fast. I ended up doing the closest dupe in Benjamin Moore, Boudoir, which is almost identical to setting plaster and if you get it in an eggshell finish it’ll bounce the light around, and you won’t get that dingy look. It’s going to look amazing!
Wow that is interesting ! What direction do the windows in your office face? ( Im thinking of Setting Plaster or dupe)
Two windows — east and south, but the south window is blocked by huge trees so only get an hour of direct sun.
I also love Setting Plaster. I also love the traditional matte finish (Estate Emulsion), but it is hard to clean. I’ve used their Dead Flat finish in a couple bathrooms, and it is really durable, so that’s what I’d do here. Sheen shows off imperfections in old walls.
Team Setting Plaster from the outset! It’s warm and uplifting, and still has enough personality and depth to play well with your bathroom colour palette!
You could make the 3″ above the door into a faux transom. Maybe with some colored film to faux stained glass? it would still be in the style realm for the age of the place.
Did you try flipping the door upside down so the hole match?
I have setting plate Rin my home. Beautiful.
In regards to the too-short door, in the open space above, what about filling in the sides of the opening with wood the same width as the door frame below, making it like a little transom window?
Add wood to the top of the door. Before joining new wood to door, trim top of door just enough to get a clean square surface then attach new wood using glue and biscuit or domino joiner. Fill and sand joint as needed, prime and paint. It would be easiest to raise the strike plate to meet the original handle whole. Remove strike plate. Fill whole with epoxy, let cure then sand flush. Determine where the new strike plate will need to be and then using a chisel, Cut out a new recess for the plate. This would be way simpler than cutting off the bottom and having to reposition all the hinges.
Here’s a silly, but serious, suggestion. Can you plaster the closet walls with your jumbo Samplize swatches? I kind of dig how they look.
You have a new DIY buddy:) ?
Pick what you like!!! My only paint color and design advice ever. If you like Carlisle cream, go for it!
I hear you on wanting more light AND, as a person who has done a ton of home DIYs, I just don’t think replacing the door is worth it. Hanging doors is hard, this is why a lot of doors come pre-hung in their frames. You’d go to all that work and then you’d have a door that doesn’t really fit the style of the space. That large pane of glass just wouldn’t have existed in a home of the era that yours appears to be. Can you lean into the dark more? Plug in sconce / mini table lamp in the shel? Put lights on a timer so they’re on all day? You have such a cool apartment and I think when it comes to the door, the juice isn’t worth the squeeze. Best of luck!
Not to sound like a GroupMe but I never forgot your closet. 🙂 looking forward to the big reveal.
Oops. That’s “groupie” and I guess I am one. Big fan. 🙂
Lengthening a door is really not that difficult, especially if it’s going to be painted. I’ve done it multiple times (one of my previous homes doors were all chopped down to fit in carpet over the hardwoods). Lots of filler and sanding will be in your future but it’s not hard.
I like Setting Plaster!
I was drawn to Setting Plaster from your first pic before realizing what it was – and when I realized I liked it even more, we painted our bedroom that color a couple months ago and I LOVE IT! We have one side of the room that is very very bright and the other side that is fairly dark and Setting Plaster works perfectly for that 🙂
My living room is Setting Plaster and it’s always perfect- not too loud, not too boring, not too pink, not too anything. I know light exposure makes all the difference but I LOVE IT.
use your current door, replace all the recessed panels with glass/plexiglass, and now you have a door that fits with lites.
What about a vintage lace curtain for the glass door? There’s some really beautiful vintage lace fabric and curtains on Etsy that could be lovely stretched from top to bottom on curtain rails over the door window.