Budget Ideas
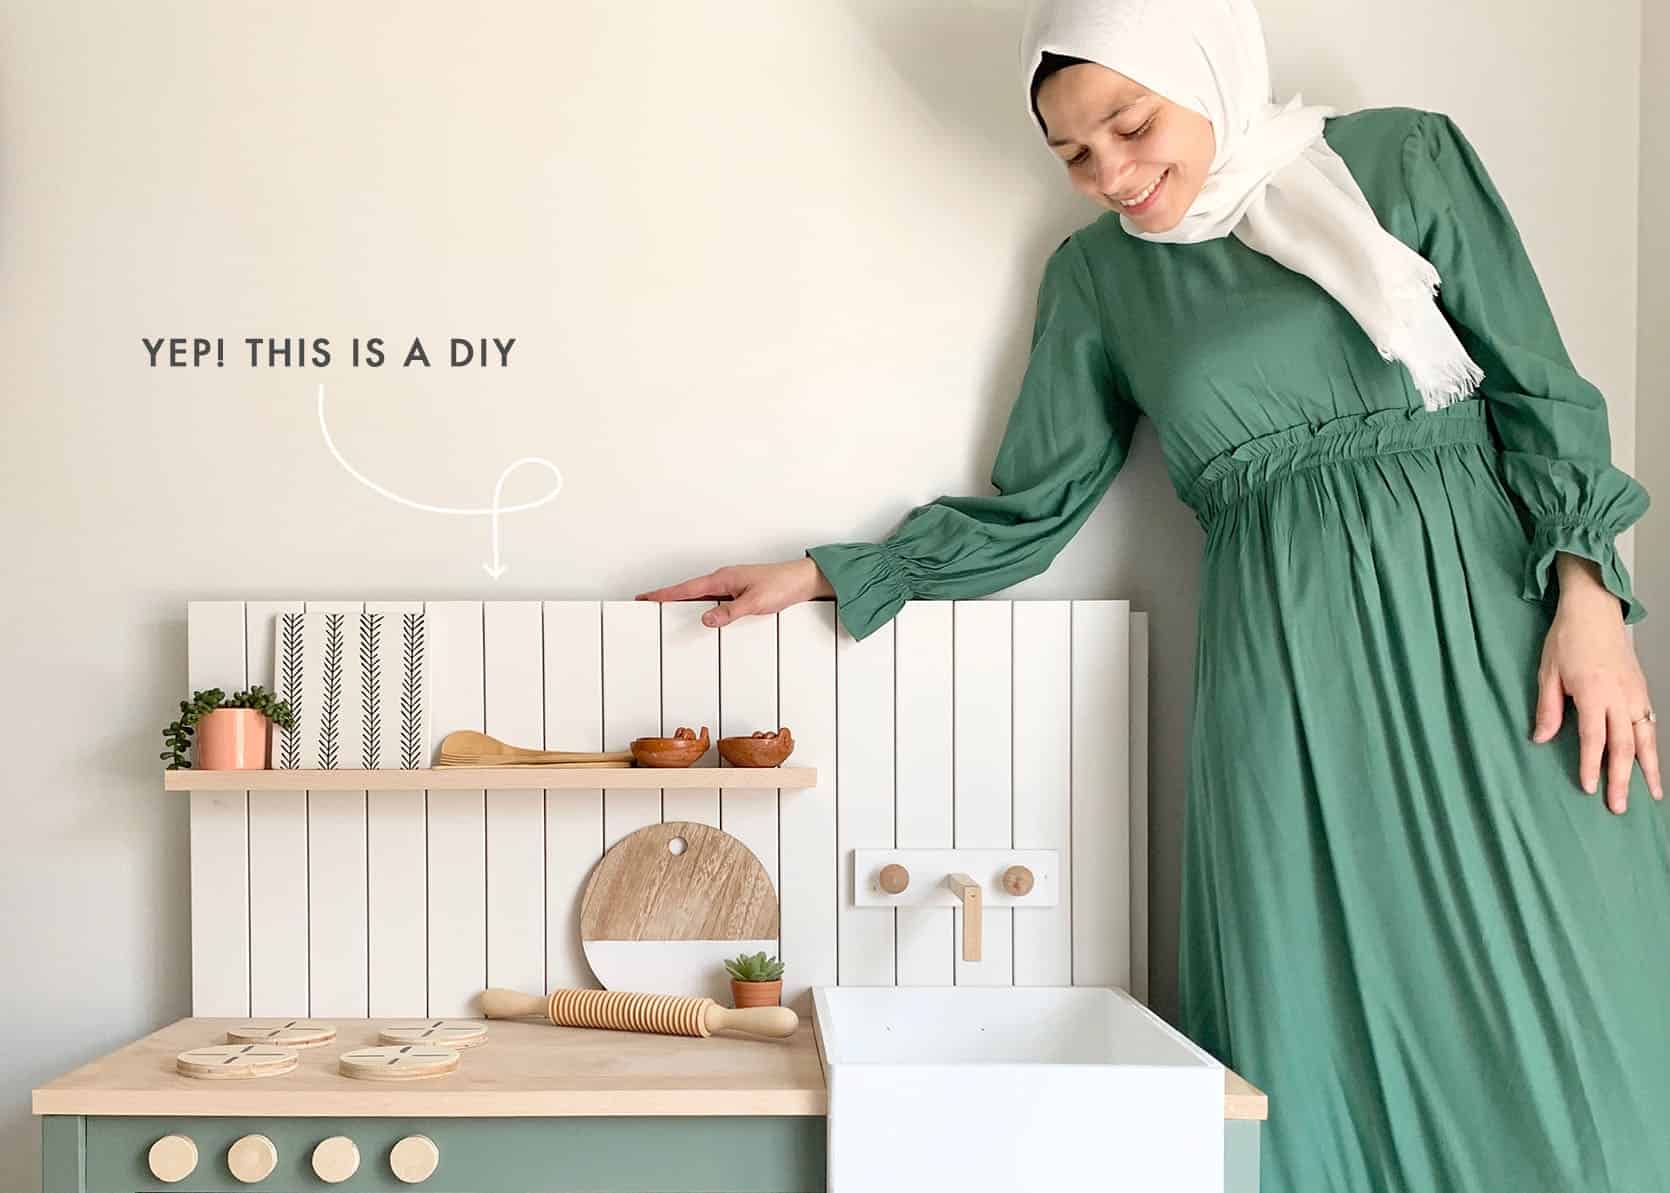
Saving For Your Dream Kitchen? DIY A Mini Version For Your Kids (Imelda’s Here To Show You How)
In an editorial meeting a few weeks ago, Sara asked us if we had seen this play kitchen by Imelda Cervantes. We all quickly grabbed our phones, scrambled to Instagram, and saw what Sara was so excited about…The coolest play kitchen ever. So we reached out and asked if she would walk our readers through the steps and boy did she ever! Now, this isn’t necessarily a DIY for beginners but whether you are a seasoned pro or a newbie you will get A TON of ideas and very helpful tips. Imelda, take it away…
This year I was faced with the reality of having to celebrate Eid, a holiday observed by Muslims following the end of Ramadan, in my home due to COVID-19. My DIY buddy Hana, and I challenged ourselves to create an awesome Eid gift for our loved ones and that’s when I decided to build my kids their own personalized play kitchen. Ever had a dream kitchen design in mind but knew that it was far from reach?! Yup! I know that feeling too well! Inspired by what I envision my real kitchen to be, this play kitchen presents itself with a modern and boho feel!


The first thing I like to do when starting any new project is sketch up a draft. I took my tape measure and held it up against my bedroom wall to get an idea of how tall and wide I wanted this kitchen to be. My initial measurements were 40 inches wide and 42 inches tall, but I made a few adjustments along the way and ended up with 38” tall and 36 ½” inches wide. I decided to sketch my kitchen in 2 pieces, top and bottom. Once I had my measurements and sketch done, I began to make a list of all the supplies that I would need.


I began by cutting some leftover ¾” birch plywood into 2 pieces. These pieces will serve as the sides of the play kitchen and measured 14” wide by 17” tall. I set the pieces to the side and cut my 2 square balusters to make 4 legs that measured 19 ¼” each.
I had a team member from Home Depot cut my 4 x 8 ft Sande Plywood in half to make the transportation easier. I then took my circular saw and cut the back of my kitchen. My initial back piece was 40” by 40” but I modified the measurements and changed it to 34” wide and 37 ½” in height. I took my measuring tape and drew 2 outlines that will serve as a guide to cut out 2 sections from kitchen back to attach and connect the sides.


I outlined 2 openings on each side measuring 1 ¼” wide and 17 ¼” tall for where the legs would go. To cut these openings I used my jigsaw and a spare 1” X 3” board to help get a straight cut.
Once these pieces where cut I began working on connecting the legs to the sides of the kitchen. I made a total of 6 pocket holes, 3 on the right and 3 on the left, on the 2 side pieces using my kreg jig and drill. I used my clamps to hold the jig in place while making the holes.


I then connected the legs and sides using 1 ¼” Kreg pocket hole screws. I left a 2” clearance space on the bottom of the legs because I preferred an open space between the floor and the play kitchen. I then took my ½” sande plywood and cut the bottom piece of the kitchen, 14” in depth and 35” wide.
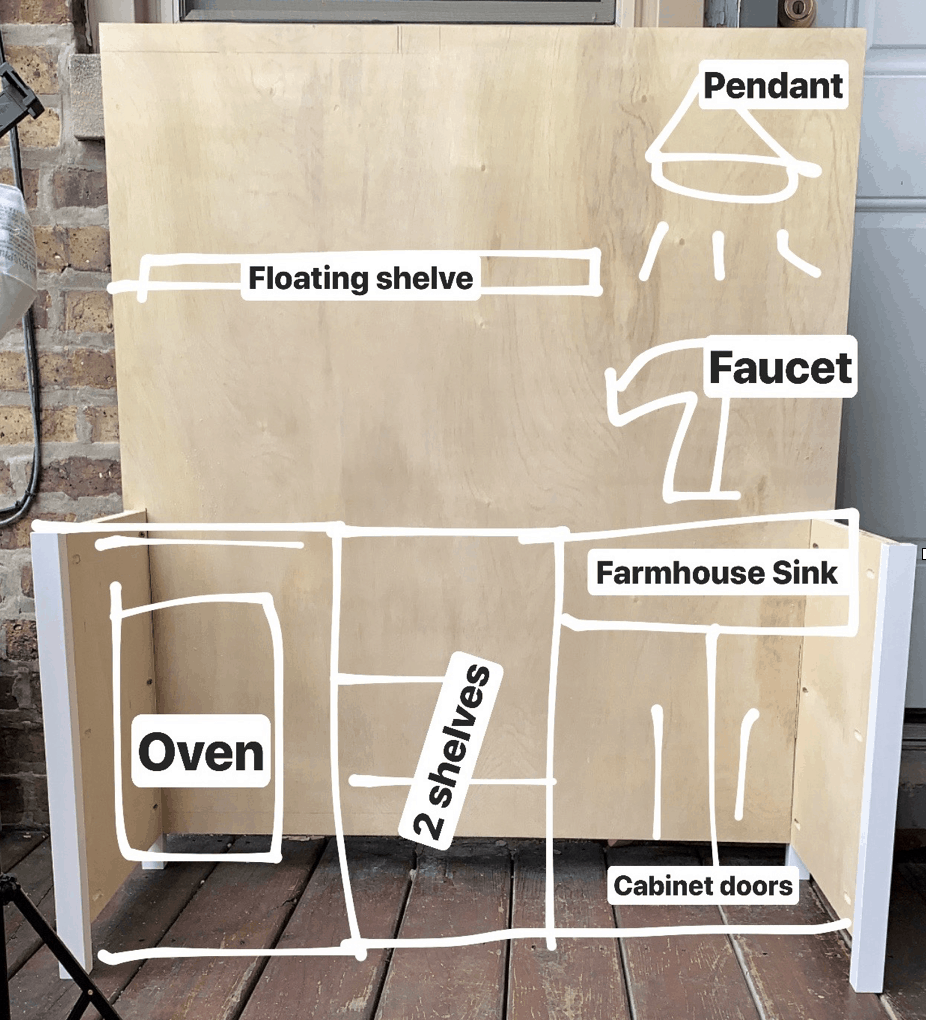
Before connecting the pieces, I took a picture and tried to visualize what the kitchen layout will be like. The following step was to connect the sides and bottom to the back. Once again I made pocket holes, this time to the back and the bottom of the kitchen.

Now that the structure was done, I cut out the face frame using 1” X 3” Primed Pine for the top, where the oven knobs would go, and 1” X 2” for the remainder of the frame.
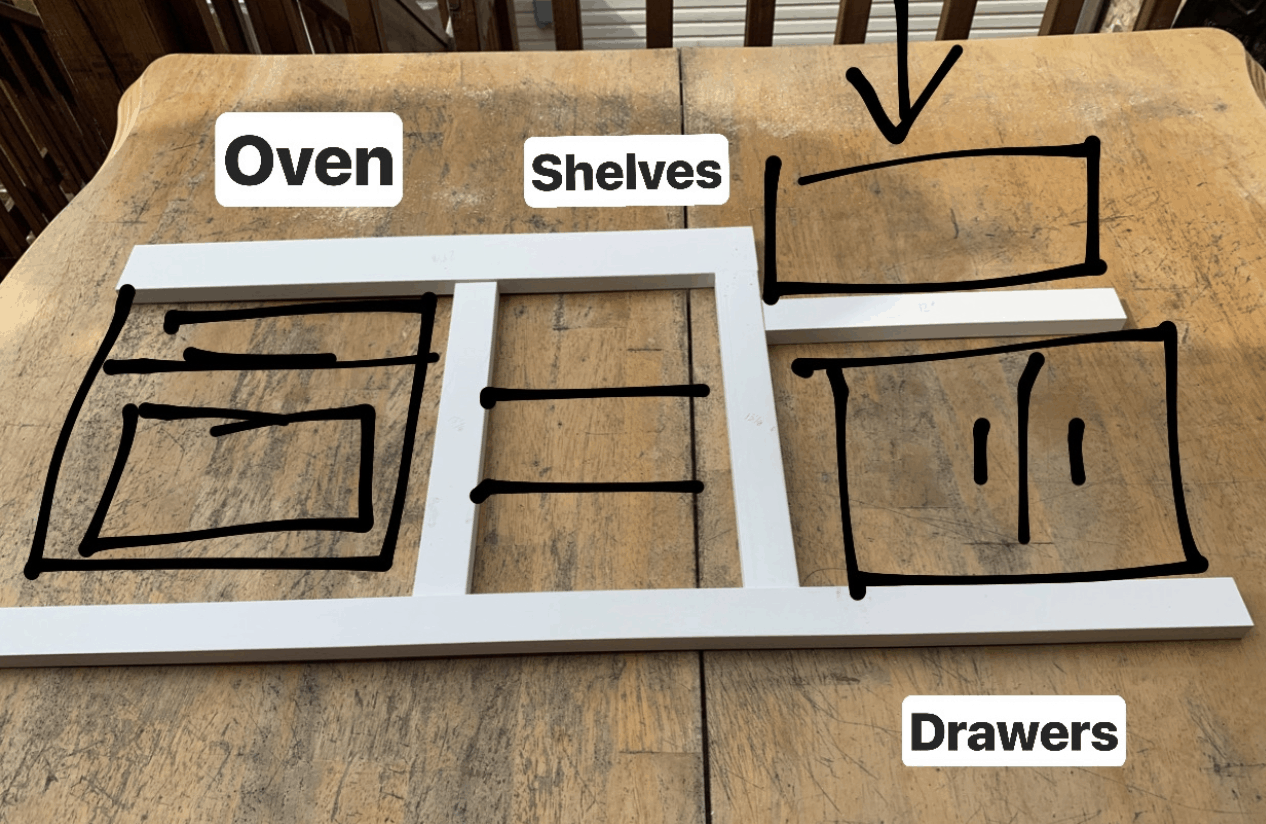
I ended up adding two more pieces on the sides of the frame. I made a total of 7 cuts:
(1) 1 X 3 – 23 1/8”
(1) 1 X 2 – 35”
(1) 1 X 2 – 12 1/4”
(1) 1 X 2 – 9 1/2″
(3) 1 X 2 – 13”


Before installing the frame, I built the shelves that will be inserted in the middle of the kitchen. I wanted to add shelves in all 3 sections but only did so for the middle section. I cut my 4 pieces and put them together using my kreg jig and screws.


I installed the shelves and then worked on the front face trim. I took all my 7 boards and used pocket holes and 1” kreg screws to connect them. I added a few pocket holes to connect the front face trim to the sides of the kitchen.

I attached the face trim with both pocket hole screws and 1” brad nails. I used my 18 gauge nail gun because it makes the nail holes very small and easy to cover. After the face was installed, I painted the back top of the kitchen with primer and white paint using a brush. At this point, I was considering a honeycomb backsplash but ultimately decided to go with shiplap. I am so glad I did!


While the paint was drying, I cut my primed MDF casing boards. I used a total of 16 pieces for the shiplap style backsplash and they were 17” in length. To install these boards I used my nail gun and 1-inch nails. To space them out I used a pile of 4 business flyers.

I used my ½” plywood to create a box that would be used as the sink. I put it together using nails and wood glue. I covered my holes and gaps with plastic wood. The sink measured 12” wide, 15 1/2” in-depth, and 6 ½” in height.


I used my router to round up the edges of the sink and then sanded it. I used my bullseye spray primer to prep for painting. Once dried I sanded and applied a second coat of primer. For the paint, I used a basic trim white color to go over it and it only took one coat to cover well.


I set the sink aside and built my door frames. I used 1 ½’ primed pine and used wood glue and pocket holes to put them together. I made 2 smaller doors that would go under the sink and 1 bigger door that will be used as an oven door. For the oven door, I wanted a clear “glass” look. I decided to use an empty laminated pouch and used thumbtacks to secure it to the back of the door.


Once built I painted the doors and installed the everbilt hinges. For the door handles, I used 5/8” square dowel. I decided to leave them natural and did not stain them. I used wood glue and 1” nails to add them to the doors and plastic wood to fill in the holes.

For the color, I mixed 2 paints. I used Behr Pinecone Hill and added a bit of white to lighten up the green. I then painted the frame and doors.

Next, I worked on cutting my countertop. I used ¾” birch plywood and sealed it using Minwax Matte Water-Based Polyurethane. To cover the plywood edges, I used my wood veneer edging. I also added the same edging to the floating shelf that I made and attached with pocket holes. I attached both the counter and sink with my nail gun and wood glue.


Finally, I began working on the small fun details: stove grates, knobs, sink faucet, and floating shelve! I was finally realizing that all the work was worth it! Because seriously guys, this took a lot of patience!! Haha
I used my circular jig and router to cut out my circles for the stove grates and stove knobs. I used 1/2” plywood for both. I painted a simple design to get my look complete. The stove knobs were left natural and both grates and knobs were installed with wood glue and my nail gun. For the faucet, I made a simple design using my square dowel and for the knobs, I used two 1 ¼” Birch Wood Round Cabinet Knobs. I attatched these pieces to a board and then nailed the board to the shiplap.
At last, my play kitchen was done! I have never been more proud of my work and my kids were so excited to play with it. Made with nothing but love, this play kitchen is now a token of joy in my home.
Credits: Design and Photos by Imelda Cervantes


I mean. I’m so impressed I barely have words. Amazing.
That’s how we all felt when we first saw it!
Omg that’s so adorable. That farmhouse sink!!!
This is better than my actual kitchen.
Amazing!!
Same lol
Haha, same here!
That’s love.
Insert standing ovation gif…!
O man I wish we could insert gifs!
DAMN, this woman has skills!!! Such a beautiful product Imelda! Feel like a major kids’ brand should collab with you so we could all buy this perfect little kitchen 🙂
Agreed!!!
Wow wow wow. Heart eye emoji. So we’ll done, Imelda!
What a badass woman showing her skillllllzzzzz! This project is so impressive. Thank you to Imelda and the EDH team. It looks like you had a wonderful end to Ramadan. Eid Mubarak!
this makes me want to buy some power tools!!!
WOW! This is one of the most impressive DIYs I’ve ever seen. So excited to follow Imelda’s work!
I think my jaw literally dropped. Wow.
I know. its crazy good. we were/are so very very very impressed.
That looks amazing!
SOOOOO CUTE! I’m also planning a DIY play kitchen for my daughter – I love seeing this example.
Love it! I’ll take one full sized please!!
me too!
1. OMG GORGEOUS
2. ? Imelda should tie the ends of her scarf behind her head while operating a circular saw!
Yes, this is gorgeous, and she should perhaps also wear safety glasses!
She definitely is in the bottom photo ?
I’m glad you said this. I wanted to but was afraid to.
Amazing! Such talent! It’s one thing to design it, but building it takes that talent to the next level.
Super impressed by Imelda’s mad skilz! Adorable, yet sophisticated. Makes me want to have more kids just so I could have that tiny kitchen in my house.
AMAZING.
Jaw dropping. What a labor of love!
Amazing. I can’t believe you made this! Well done!
This is such an amazing idea!!
This is amazing! It must have made the holiday so special! Love the progress shots where Imelda is doing it all herself. Serious girl power going on.
For real!
Beautiful, Imelda!
Thus is beautiful
Impressive!
Awesome job Imelda! Wishing I did this instead of buying my Ikea kitchen, this DIY is worthy of some $650 and $800 kitchens I was looking at. Early Eid Mubarak ?
I am super impressed! Inset doors? And the paint colors are perfect. What lucky little kids!! Imelda, you are a craftswoman.
Incredible! Such a beautiful gift, not just the finished product – your thoughtfulness, patience, and love for your children shines through!
Wow that is amazing! I also made a play kitchen for my toddler in lieu of being able to afford my own dream kitchen at the moment but it was an Ikea hack so no where near as impressive!
Question… I know there is sincere desire from everyone at EH to be more intentional about diversity and inclusion on the blog. I’m curious if there is similarly a commitment to compensating folks who are invited to be featured on the blog and whose labor helps to diversify your content? (Apologies if that was addressed in another post!)
We are absolutely paying our contributors:)
WOW. No other words! I’m so inspired!
Amazing! If this seems like too much DIY or you don’t have the tools, you can source a pair of used bedside tables instead. Screw them together, paint, customise! I did this and although it was still lots of work after the kids were in bed each night, I didn’t need so many specialised tools or power tools (important as I had to build quietly so they didn’t wake up). With wooden accessories and a nice scandi colour scheme it looks fab despite beginning life as shiny orange varnished pine!
This is so cute! What a great present + a great DIY activity <3
wowwowwow this is so dang impressive! bravo!!
OMG! I LOVE IT! You did a really awesome job!