
All Things Renovation
Design Coaching Chrissy & Pete: A Mini Demo Update And OFFICIAL Kitchen Layout
Gretch here, signing on to give you a project update! A few weeks ago we kicked off a new design coaching series and introduced you to our starting line-up (Chrissy & Pete). If this doesn’t ring a bell, hop on over to the intro post where we break it all down. But for a quick memory-jogger, Chrissy and Pete are renovating their builder-grade kitchen, all while juggling a tricky layout, tight budget, tighter timeline, and oh yeah, three kids under three!

Since our last post, Chrissy and Pete have officially finalized their layout, purchasing all of their IKEA cabinetry, and have even begun some light demolition to get things rolling. It’s all happening!
Many of you shared some great layout suggestions on the last post, and we think you’ll be pleased to see where C+P landed. A few of you also asked for some floor plans of the space to better understand the layout and the vision. So let us deliver! As a refresher, here’s where we last left off with the kitchen:

Their biggest concern was the lack of storage space and the need to adjust the dysfunctional layout, considering how the new one should connect with the rest of the open floor plan. And that weird, angled ’90s island? Yeah, it just all needed a refresh.

Picture yourself standing where it says “Old Floor Plan”, looking into the kitchen from the dining/living areas (like the shot above). Straight back is a hallway that leads to their garage, with a very small powder bath to the right and a laundry closet to the left. The angled wall opens up to a den, and the hallway next to that loops around the stairs and back over to the living/dining. There’s a small wall across the island with a pantry door to access storage under the stairs.

In the new layout, everything is much more streamlined. The main wall of cabinets to the left straightens out, with the bathroom wall bumping out about a foot to sit in line with the short wall across it (adding more space to the tiny powder bath–WIN). The window is replaced and centered on the new sink, and the island is updated to a better shape with more storage and shifted to be more central in the room. The biggest change happens at the old pantry wall, where Chrissy and Pete have decided to put their fridge and oven/microwave, moving the access door to the hallway.

On our recent drop-in, we were pleased to see that Pete had already made some demolition headway, removing the pantry door and walling it off to prepare for the incoming cabinetry. While there, Emily also had a chance to help…hold their littlest, Birdie (sound familiar??) while we talked about next steps. With 3 under 3, someone has to hold the baby while someone else holds the hammer–and Em will always volunteer 🙂

Pete also knocked out a new entrance to the pantry space, and Chrissy found an inexpensive place in town that will customize a reclaimed door to fit the new angled opening in the hallway. For now, this will stay as their pantry space, but they have ideas about turning the laundry closet into a more robust pantry zone once they eventually shift the laundry room upstairs (but one remodel at a time).

This is their new kitchen taking shape in IKEA’s space planning tool. I added the openings to the garage hallway and den in the back, but hopefully you get the gist! Yes, they’ve purchased all the cabinets, and no, there are no uppers going on the main wall.

Changing up our viewing orientation 90 degrees counter-clockwise, here’s the current view of the “main wall” of cabinets. The new cabinets will still cap off where the ceiling height changes as you step into the dining/living areas.
The New Kitchen Layout

And here’s that new floor plan view, this time with labels! There’s room for all the necessary appliances, plenty of counter space, and the flow just feels SO MUCH better.
The Kitchen Island

This is the back side and cooktop side of their new island, where Chrissy has also started playing with hardware. As you can see, tons of storage! She is still planning for an overhang on the short end of the island near the garage entrance for a couple of barstools.

These are the elevations for the new “main kitchen wall” and what was once the “pantry wall” but is now the “fridge and oven wall”. Again, tons of thoughtfully planned storage and some panel-ready appliances on the main wall. Unfortunately, the panel-ready fridge IKEA sells felt way too small for their family, so they opted for a larger, stainless steel French door model instead. This was part of the reason they wanted to give the fridge/oven space its own wall, so the main wall could stay more of a feature.

And here’s that feature wall digitally imagined–Chrissy spent some time mocking up how she envisions this area, complete with floating shelves and some drop-dead gorgeous zellige tile from Ann Sacks. We love it! This isn’t exactly final–the tile may not be within their budget, and the shelves are a bit TBD (two shelves? three? how long? store-bought or custom?). But how awesome is that tile layout?
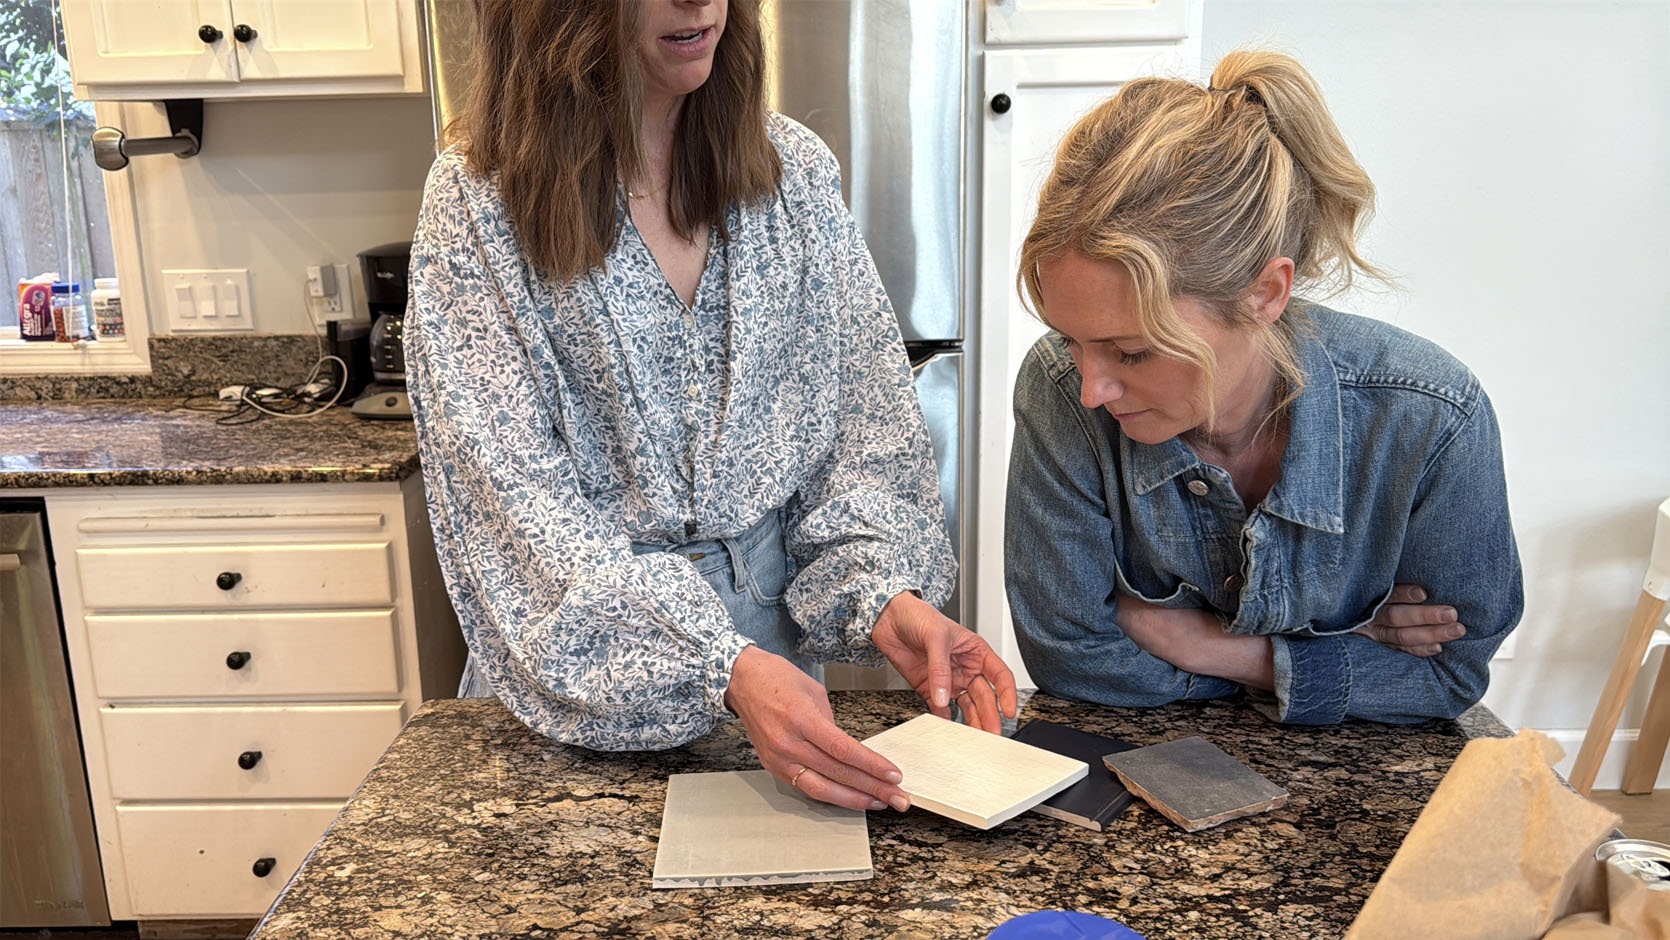
Here, Emily and Chrissy are looking at some samples. Chrissy fell in love with the Pearl Gray Idris Field tile, and is going to try and find a way to make it work. We don’t blame her. It’s awesome.

At first, we were a little worried it might feel too dark with the already dark blue IKEA cabinets, but seeing the samples in person changed our minds. The tile is lighter than we were expecting, but still so rich in color, and the finish reflects the light really well. If they can squeeze it out of their budget, it’s going to be so awesome!

One thing they did already squeeze out of the budget was this stone. A beautiful quartz slab, “Enigma”.
So, countertops? Check. Cabinets? Double check (they’re all on site, and next up after a much larger round of demo). Pete has big tear-down plans to keep the project rolling. We’re excited to check back soon to see how they’re faring. It can be tricky to find “the right time” to demolish such a functional part of your home, especially with three little ones, but they intend to move FAST! And we believe in them!

Other design thoughts on the horizon involve hardware, fixtures, and lighting. Chrissy is leaning toward the Archie line from Rejuvenation in polished nickel. She’s also picked out a beautiful sink and faucet from Kohler–the ever-so-functional Riverby and beautiful Edalyn. The lighting is proving to be tricky and expensive. These can lights are just not cutting it, but swapping them for flush mounts will quickly add up. Chrissy is shopping around for better options, but is coming to terms with the lighting not being perfect if it means her tile backsplash could be.

And if you’ve been following along since the first post, you’ll know that a dining banquette is still on the table! Pun intended. For now, Chrissy and Pete are really dedicating their attention to the kitchen area first, but still have big banquette plans once phase one is complete. So stay tuned for that and many more fun updates to follow! Personally, I can’t wait to see it all gutted real soon.


The plan is very helpful.
I really worry about there only being 34″ in the aisle at the range and sink/dishwasher. Kitchen aisles should generally be 42″ wide for good function, and when appliances are back to back like this, 48″ is preferred. 34″ is tiny! Seeing the plan (and so as to not have to move too many walls) I would have considered putting the fridge in the double door entry to the den with a tall pull-out or shelves next to it, and boxed it out with a new wall on the den side. If a microwave is a must, I’d think about a drawer in the island. Moving the fridge allows the island to shift for more space between the sink/dishwasher and the range…larger island with seating opposite the range.
What would you suggest to replace the can lights? Wouldn’t flushmounts decrease the amount of light?
Admittedly this isn’t my strong suit, but since there is patching and drywall-ing happening anyway, I would consider adding a small header to the hallway opening. Open all the way to the ceiling looks funny next to the nearby door frames.
Otherwise, it’s a huge upgrade and good use of the space. Will they get to do anything to the half bath layout or just leave it for now?
Good idea! Matching it to the one from the garage into the kitchen seems like a good way to go.
Ah yes! I forgot to mention this in the post, but that is one thing Chrissy mentioned last visit; They plan to make the opening height match that of the den, which I agree will look more cohesive in the space.
For now, they are just leaving the half bath, but will give it a facelift when budget/timeline frees up!
Way to go Chrissty & Pete; woohoo!! Mulling and choosing a layout is a big task, and you’ve accomplished so much beyond that already! I’ve always loved dark blue cabinetry and am pumped to see yours once installed, and with the custom hardware layout it looks like you have planned. Then the tile. Stunner!!! I can see how the choice of tile can come over lighting (could the lighting be upgraded later?) is a consideration. Regardless of what you choose, this is going to be a classy and unique space. So excited for you and to follow along. Stay strong, hydrate, and take some breaks together as a family during your process. Lunch at the park (yep, even in your demo clothes) or a trip out for icecream can put some fun into the memory bank during this busy time!
Well, the design wouldn’t work for me (narrow aisles, window is small for the big wall since it has no uppers, how about a doubled window OR add uppers to the far sides) but that’s why every kitchen design is a custom design, right? I trust that they have thought through the details and are happy with how it will work for them! Definitely am glad they moved away from the cramped focal wall with countertop cabinets that we saw in the earlier iterations.
I support the idea for a bigger window, especially since they’re replacing it anyway – it will make the space feel brighter and larger (I don’t know what the view is, but hopefully a little planting could help). I would be fine with the aisles being narrow, as the alternative (a wider island) would take away the pantry wall where the fridge stands.
Agree I would want a larger window, not smaller. Maybe there is a reason?
What is the distance between the wall cabinet run and the island? by my math its only 33″ which is very very narrow, even 38″ (which i have) is sometimes tight with just me and my husband working. Especially if that is where all the systems (range, sink prep area) are located.
If i were the homeowners, I’d consider a smaller island for better clearance.
I hate to leave layout comments when everything has already been decided, but this is a pretty major thing (and I’m a mom of 3 who has had kitchens with a lot of these issues over the years, so I’m trying to reach cross-country like the Ghost of Christmas Part!), and I think some of it can still be fixed, if construction hasn’t yet begun. I’m 100% agreed about the clearance being a huge red flag; we had a 36″ clearance between a sink run (with dishwasher) and island (with drawers, but not a cooktop!) in a previous house and it was EXTREMELY hard to navigate. The fact that in this case the sink/dishwasher are back-to-back with the cooktop make it a pretty worrisome layout; I’m hoping the measurements from the IKEA planner aren’t accurate?? It’s not ideal since I’m sure they’re looking for as much island depth as possible, but I’d cut the filler between the rows of cabinets in the island if at all possible (I’m wondering if they’re there to allow for a downdraft vent?) to gain a few inches between stove and sink. I’d even consider flipping the cabinets in that stove run so the cooktop… Read more »
I totally agree with this layout for what it’s worth!
I also agree with this floorplan. More functionality for sure, and I also really like the idea of one long open shelf (at the height of the top of the backsplash) on the right to balance the window on the left. There may be some cost savings with this idea bc of not moving window/ sink too. (Save the money here to get the tile you want!!) Not only do I hope they consider this idea, but I would recommend switching their cooktop to a stove/oven combo. I know they currently have a wall oven, but having an island in their new layout seems to be a priority. If they switched to no wall oven, they could move the island farther away from the window wall/ main run to improve movement and functionality on the sink/ dishwasher/ stove side. Yes, this would tighten up the fridge side, but they already have plans to change the laundry to a butlers pantry type thing, and the fridge and microwave can move into there down the line. Once they move it, they could have no cabinetry on the current fridge wall, or they could get shallow cabinetry for more storage and more walk… Read more »
I also agree with this floorplan. More functionality for sure, and I also really like the idea of one long open shelf (at the height of the top of the backsplash) on the right to balance the window on the left. There may be some cost savings with this idea bc of not moving window/ sink too. (Save the money here to get the tile you want!!) Not only do I hope they consider this idea, but I would recommend switching their cooktop to a stove/oven combo. I know they currently have a wall oven, but having an island in their new layout seems to be a priority. If they switched to no wall oven, they could move the island farther away from the window wall/ main run to improve movement and functionality on the sink/ dishwasher/ stove side. Yes, this would tighten up the fridge side, but they already have plans to change the laundry to a butlers pantry type thing, and the fridge and microwave can move into there down the line. Once they move it, they could have no cabinetry on the current fridge wall, or they could get shallow cabinetry for more storage and more walk… Read more »
I put in an IKEA kitchen several years ago, and it’s the greatest thing I did for my house/my life! It looks like you’re putting in many drawers vs cabinets, and I’m here to say put in all the drawers you can. I mostly did the set with a small silverware tray-deep drawer at top followed by a deeper drawer with a super deep bottom drawer. I then made lots of “zones” i.e. one cabinet drawer has the everyday stuff I need for eating (silverware, smaller plates, bowls), one is for cooking (cooking utensils like paring knives, peelers, and tongs in top drawer, pots and pans and lids in lower drawers), one is for baking (spatulas, rolling pin, measuring spoons etc in top drawer, measuring cups, muffin tins, and bread tins in second drawer, and big mixing bowls, cookie sheets, and cooling trays in bottom drawer). I know where everything is all the time, and it’s so much easier to pull out a drawer than to try to dig through lower cabinets. I do have a really tall wall cabinet with all drinkware (including crystal, everyday glasses, coffee mugs) on one side and entertaining items (trays, bowls, etc) on the… Read more »
Just wanted to chime in and say way to go Chrissy and Pete, I’m excited about these plans and rooting for you! I can so relate to making choices based on what the space is already, and budget, and time… It’s a lot, but I can see how this will be soooo much more functional for a busy young family, and beautiful to boot. You go, guys!
oh this is fun! Not sure if the mock up is “true to life” but if the window really opens out like that, I can tell you from experience it’s REALLY hard to reach all the way over the sink and out to get it closed again. My house has windows that open like that, and they are almost 100 year old originals so we won’t be changing it…but if I was putting in a new window, I would not have one that opens like that over the sink again. And I’m tall-ish (5’9″) It would be impossible for anyone shorter to get it closed.
Not sure that’s correct. Casement windows, as pictured, or sliders are always appropriate over kitchen sinks. Historically, it’s single or double-hung windows that aren’t acceptable.
Oh, sorry, just re-read your comment….you must have french or push-out casements. Most casements in the US are crank, with the crank at the bottom of the sill, easily accessible.
I have a new (2021) casement window over my kitchen sink, I’m 5’3″ with a negative wingspan (aka short arms), and I can easily roll it open/closed. Maybe your original casement windows don’t have the twisty-lever handle thing that then folds down when not in use? I LOVE our casement windows, the screens fit on the inside so they don’t get damaged by the elements and they are so easy to open/close compared to the traditional double-hung windows I grew up with where you have to muscle it up and down.
It looks like a modern casement, which (unlike your original windows, which I’m sure are lovely!) will have a crank opener on it. We just installed something very similar over our sink so it WOULD be easy to open. But if you have antique casements I know exactly what you mean; our old apartment had them and you had to manually unlatch the thing on the opener bar and reach out to pull them back in.
I’m a little surprised that, given the need for storage was an issue, they decided to go without upper cabinets. I can see their want to have more ‘ visual ‘space though. I think it would be great (also help lighten up the darkish tile) if they changed out the window to a bigger one – it would create the visual openness that they’re looking for.
Wow, what a big undertaking. I can’t imagine renovating with three under 3. Onward!
I can’t get down with the large sink wall with no enclosed storage on the uppers. The open shelves will inevitably look messy and get dusty and the window feels marooned. Two tall enclosed cabinets on either wall provide enclosure, frame the space and still leave plenty of counter top. Plus, display space with no dusting. Just my two cents! Best of luck!
Related to this suggestion, less tile might mean more $$ to address the lighting situation. I know we all have our own unique and layered perspectives which is what makes design so much fun, but can lighting just makes me sad. Also, upper cabinets means the owners could put in under-cabinet lighting, which is the single best choice I made in my kitchen update! Beautiful color choices and excited these owners are sharing their journey.
Hey FYI the (new?) ad slots that block a lot of the screen make it kinda intolerable to use the site.
we’re slowly implementing a re-built version of the site – this will be fixed this week, and you all should have a much better experience once it’s all live!! thanks for your patience 🙂 figured i’d flag for anyone else experiencing this. appreciate you all for sticking with us through it!
In a kitchen this size with five people navigating for space, the kitchen island seems insane. I would’ve made a large peninsula and left the middle of the kitchen open so everyone can be in that one space without bumping into each other. Not to mention the fact that this is a walkthrough space to enter/exit to the garage and bathroom. It is very tight.
Good progress! I would NOT have the stools on the end of the island near the garage etc. This is going to block access to sink and fridge while cooking etc. Why not push the island a foot ro two towards the garage, and put the overhang at the living room/dining room end, which makes much mores sense! Agree with others that if no uppers perhaps add more window!
Ditto to this! Plus stools on the dining room side can be used for extra seating if guests are over for dinner.
It’s amazing how much room you can create by moving a door!! It will be beautiful and sure they are working around some constraints but it will still be fresh and new and with customized cabinet space that they chose. My garage door is right at the end of my kitchen, so no moving it which was a bummer. However, not even that can change how good it feels to cook in a brand new kitchen! Can’t wait to see the final result.
My eye likes symmetry, so in looking at the cabinet layout of the back of the island, my instinct is to place the 12 inch cabinet in between the two 36 inch cabinets.
This is so exciting for them!
While I only like zellige in Mediterranean or mid-century homes, and more in bathroom and outdoor spaces, I can speak from experience that when you fall in love with tile it’s awesome to have it and look at it every day. We installed Fireclay star and cross in Crater Lake as our kitchen backsplash 5 years ago and it still makes me happy every morning!!
Oh, I feel terrible because I also don’t want to be one of those people who make suggestions when things are already decided but I just want to yell, ‘Stop’, take stock and think about how this kitchen will function. There is so little storage in this configuration and I feel like the opportunity to add more is being railroaded by the desire for a ‘feature’ wall. And secondly, the layout. I cannot imagine a busy family using the fridge and oven effectively on that side of the kitchen, which is essentially a thoroughfare and circuit for kids to run around (so kinda dangerous). I think there are two elephants in this room … the angled den wall and the tiny window with no outlook – and both are having some impact on it being the best space it can be. I would personally remove the window and create a wall of clever cabinetry that could potentially house the fridge and oven and some upper cabinets and then make the dining room window much larger to compensate for the lost light. I worry they will invest heavily in a space that may look super pretty but will be far from… Read more »
Remodeling newer living into an earlier decade house can be quite the space planning puzzle. My house is 1948, and I can’t count the times I’ve wished a room was just an extra few inches in one direction. I agree that the 34” aisle on the sink side will be tight. Have you considered scooting the island toward the fridge to allow for 41” in each aisle? A French door fridge could help with the narrower space and people potentially passing by.
Same! They have already bought the cabinetry yet I also want to yell STOP with the fridge and oven separated from the sink by an island. The spaces of each ‘aisle’ area are so very tight that I suspect it will make the entire kitchen fill tiny and be a stressful place in which to cook, clean, and hangout.
Exciting! Looks amazing. Thanks for opening up your project to us, Chrissy and Pete!
Love where this is headed and absolutely get why they want an upper cabinet-less main wall! As someone who must have been wronged by a diagonal wall in a past life given the sheer intensity of my dislike for them aesthetically and functionalit, I have one thought on layout…what if they squared off the opening to the den, with the doorway being reduced to same width as hallway opening. Doesn’t seem like any meaningful space is lost in the den, while they gain room to 1) put another set of cabinets in the corner that can be used as a Phase 1 pantry and 2) repurpose the space under the stairs to recess as much of the fridge wall cabinets as possible to gain much more navigation room on both sides of the island.
I wondered about this, too! I assume this gets into some structural work that’s beyond the scope at the moment but I agree that it would be a great move.
Love where this is headed and absolutely get why they want an upper cabinet-less main wall! As someone who must have been wronged by a diagonal wall in a past life given the sheer intensity of my dislike for them aesthetically and functionalit, I have one thought on layout…what if they squared off the opening to the den, with the doorway being reduced to same width as hallway opening. Doesn’t seem like any meaningful space is lost in the den, while they gain room to 1) put another set of cabinets in the corner that can be used as a Phase 1 pantry and 2) repurpose the space under the stairs to recess as much of the fridge wall cabinets as possible to gain much more navigation room on both sides of the island.
As someone who has deliberated my own kitchen layouts and builds ad nauseum— and made many changes even mid-build, I would just make sure the walkways are at least 42” wide, even if it means returning certain ikea cabinets and re-ordering others (a pain but, I have been there too)!
Here to chime in that I put in 34″ walkways in my kitchen and they’re TOTALLY FINE! Nay, perfect. I can do the dishes or cook on the stovetop and people can walk by. Not a big deal at all. People do have to wait while the fridge is open, but they can go around the island the other way… and it’s not like the fridge is ever open for very long? We even have stools that bump into one walkway when they’re in use… and it’s also 100% passable. I wouldn’t worry about the 34″ walkways if they’re what works for you all =)
Other unsolicited suggestions:
For the microwave, consider a speed oven. It’s the size of a microwave and operates as both a microwave and a small oven. We use ours CONSTANTLY. The oven function heats up in like 5 mins. Plus, nice to have two ovens for holidays.
Look at some architectural salvage places for inexpensive lighting that adds lots of character! We got our 4′ school-house style kitchen pendants for like $120 each if I recall correctly.
Looks awesome! Can’t wait to see the updates!
Good on them for putting their plans out there! I’m sure it wasn’t easy to bring it all together, but for what it’s worth, I have this exact layout, with similar distances between the island and wall cabinets and boy does it not work for family life. One person moving around on their own? Sure, but throw two adults and littles in the mix and its too tight. Having to constantly maneuver around the island to get to the fridge/oven/microwave is annoying over time. I’d have considered a peninsula over the island, but that’s just me! I hope they love it and that it works well for their family!