Design
The ’90s Decor Trend Making A Serious Comeback (+ 3 Unexpected Ways To Use It)
Growing up in the late 1980s and early ’90s, design choices existed in my home that are branded into my memory. Love them, hate them, or be traumatized by them, something you can’t say about these decades of interior decoration is that they were forgettable. My childhood house had many of the ’90s decor trend heavy hitters: wallpaper borders, hand-stenciled borders, ALL KINDS OF BORDERS, the original farmhouse chic—you know, the one with the chickens and so much gingham—mauve and gray, burgundy and forest greens, floral sofas, wicker sofas (yes, inside)…the list goes on.
In a turn of events that shouldn’t shock me at all as someone who has spent time studying the cycle of trends (though it does if I think too long about it), so many of these have found their way back into our design vernacular—including the focus of today: Window cornices and valances. This reboot is likely in part due to the Golden Forty-Year Rule. If you haven’t heard of it, here’s a quick rundown of what it is and why it seems to hold in areas such as style and media:
This 40-year trend cycle is a theory that pop culture, design, and fashion tend to experience major nostalgia-driven revivals anywhere between 40 and 50 years after their original ascension. Part of this is due to the “Gatekeeper Age Effect,” which basically means that the people in charge of making decisions now are typically in their 40s and 50s. They naturally draw inspiration for their work from what’s called the “Edenic” area (a fancy word for early childhood), which usually involves the media and design that their parents loved while they were growing up. It’s also a long enough generational gap where the original generation who first brought it to pass have moved on, and a new age group discovers it and brings it forward as “fresh” and “authentic” or even “retro” instead of dated.
It’s fascinating to me, and I’d love to dive into this more in a future post as I use the past to figure out where we’re heading in interiors. But let’s move back onto our path from our little detour and get into those fabric-wrapped window “mustaches” we loved so much 40 years ago, have spent the last 30 hating for their fussiness and formality, and now are squarely bringing back into the design conversation.
Window Cornices Are “Back” (Here’s Why You’d Use One)
Now that we’ve established that window cornices are a big decorating trend right now, I should probably tell you what they are exactly, just on the off chance the word doesn’t conjure any images for you. A window cornice is a tailored window treatment made of upholstered, batting-padded wood panels. It mounts firmly above the window and gives a crisp, custom look. They’re almost always custom or made-to-order because they do require precise specs for the window or area they will be installed in. And if you’re wondering, wait…what’s the difference between that and a valance? Ah, well, a valance is kind of like the softer, less structured sister to the cornice. The fabric ripples or hangs down rather than being tightly wrapped on a wood board, but the function is similar.
Designers have used them for centuries, even before their revival in the 1900s, first in the Renaissance era, then during the Baroque period, and then later in the 18th century and the Industrial Revolution. The homes from these times were, of course, drastically different than the suburban tract homes most of us grew up in or live in now. At least in modern times (yes, including the “vintage” 1980s/90s), cornices were used to hide clunky drapery hardware or practical shades, but also to add height to shorter windows or just drama in general.
Designers & Creators Using Them Well
This section is for the doubters out there, and hey, if you’re a minimalist or lover of more contemporary style or even an allergy sufferer (achoo!!), you still likely will not be on board. But if you love rooms that are layered, more formal, and highly decorative, you might like what you see next.
I know this dining room by Jessica Alex Interiors isn’t everyone’s style, but I just love its bravery and whimsy. The striped blue and white curtains get some extra drama and attention from the matching cornice, with a phenomenal dentil molding-like trim.
Here’s a room with a very different design perspective, by McNell Interiors. Playful, youthful, and energetic, not stuffy at all. I am trying to figure out how that door opens, though… 🙂
Scroll through to get a better look at this one, because the craftsmanship where the pattern lines up between the shade and cornice is masterful. The room is by Elizabeth Hay Design.
Here’s a valance in a very charming room, shared by Salvesen Graham. You can see that the edges are flowier and less rigid than in a traditional cornice.
For my neutral lovers out here, yes, this also flies without all the color and pattern shouting at you. Eadie & Crole’s gorgeous, elegant living room proves it.
Cornices and valances are great with draperies, but they also do a good job of hiding the bulk of a Roman shade that’s drawn. Extra points if you have some fun with the design of it, like the one seen here by Jenna Buck Gross.
It’s easy to find examples of high-design (i.e., wildly expensive to pull off) rooms that make something like a cornice look very now and desirable. But to me, it’s far better when I can discover a space that feels like a “normal” person’s home. This lovely bedroom features a DIYed cornice board in a fun fabric. It really draws attention to the large bank of windows along the long wall of her primary bedroom.
And if you’re interested in making one yourself, here’s a link to a DIY I found that seems very doable and affordable!
3 Ideas For Where To Put A Cornice That’s Not A Window
While fabric choice and shape dictate what style of room a cornice works well in, there are just some homes or spaces where a cornice/valance just doesn’t make sense. If you like the look but can’t do the cost of custom—which can be anywhere from $300 to close to $1,000 per window, and that’s before you add drapes or shades—there are some really smart ideas for how to repurpose secondhand ones (including a gorgeous design by a friend of the blog and my now-friend IRL, Ajai…keep reading). A valance is considerably cheaper, but even so, let’s think outside the window for this section.
Around a shower with added curtains. More and more, I’m convinced that we don’t think enough about what covers our showers. Draperies are a thing now, but have you seen them with the added layer of a cornice?!? I do have questions that come to mind, such as: How do you make this thing waterproof? Is mold not a concern? Is this for showers that aren’t used that often? If anyone knows the answer to these, chime in below, but for now, I’d like to live in the fantasy world where these things don’t matter:
I love everything about this bathroom, but perhaps most of all, I can’t take my eyes off the cornice with the matching shower curtain. The grid pattern made of vines (I think?) works so well with the structure of the cornice board and the soft ripple of the curtains. Gorgeous!
Look at what this does for a fairly basic bathroom with no reno involved! The ceiling height feels endless!
A designer showhouse is typically going to display a designer’s wildest fantasies. You know, like a matching cornice + curtain + wallpaper combo…IN A BATHROOM. So fun, Kerri Folb Pilchik Design.
Hiding utility items like projector screens. I saw this post by a favorite creator of mine @chalkwhitearrow where she had a short cornice created to cover where her pull-down projector screen lived in her home. It was in a similar stripe as her wallpaper, so it blended in nicely and just brought down the visual clutter of having the screen hardware displayed. I’m all for not feeling like you have to cover up what you use for everyday living, but I can also applaud a creative solution to something that bugs you! You can click below to watch the transformation.
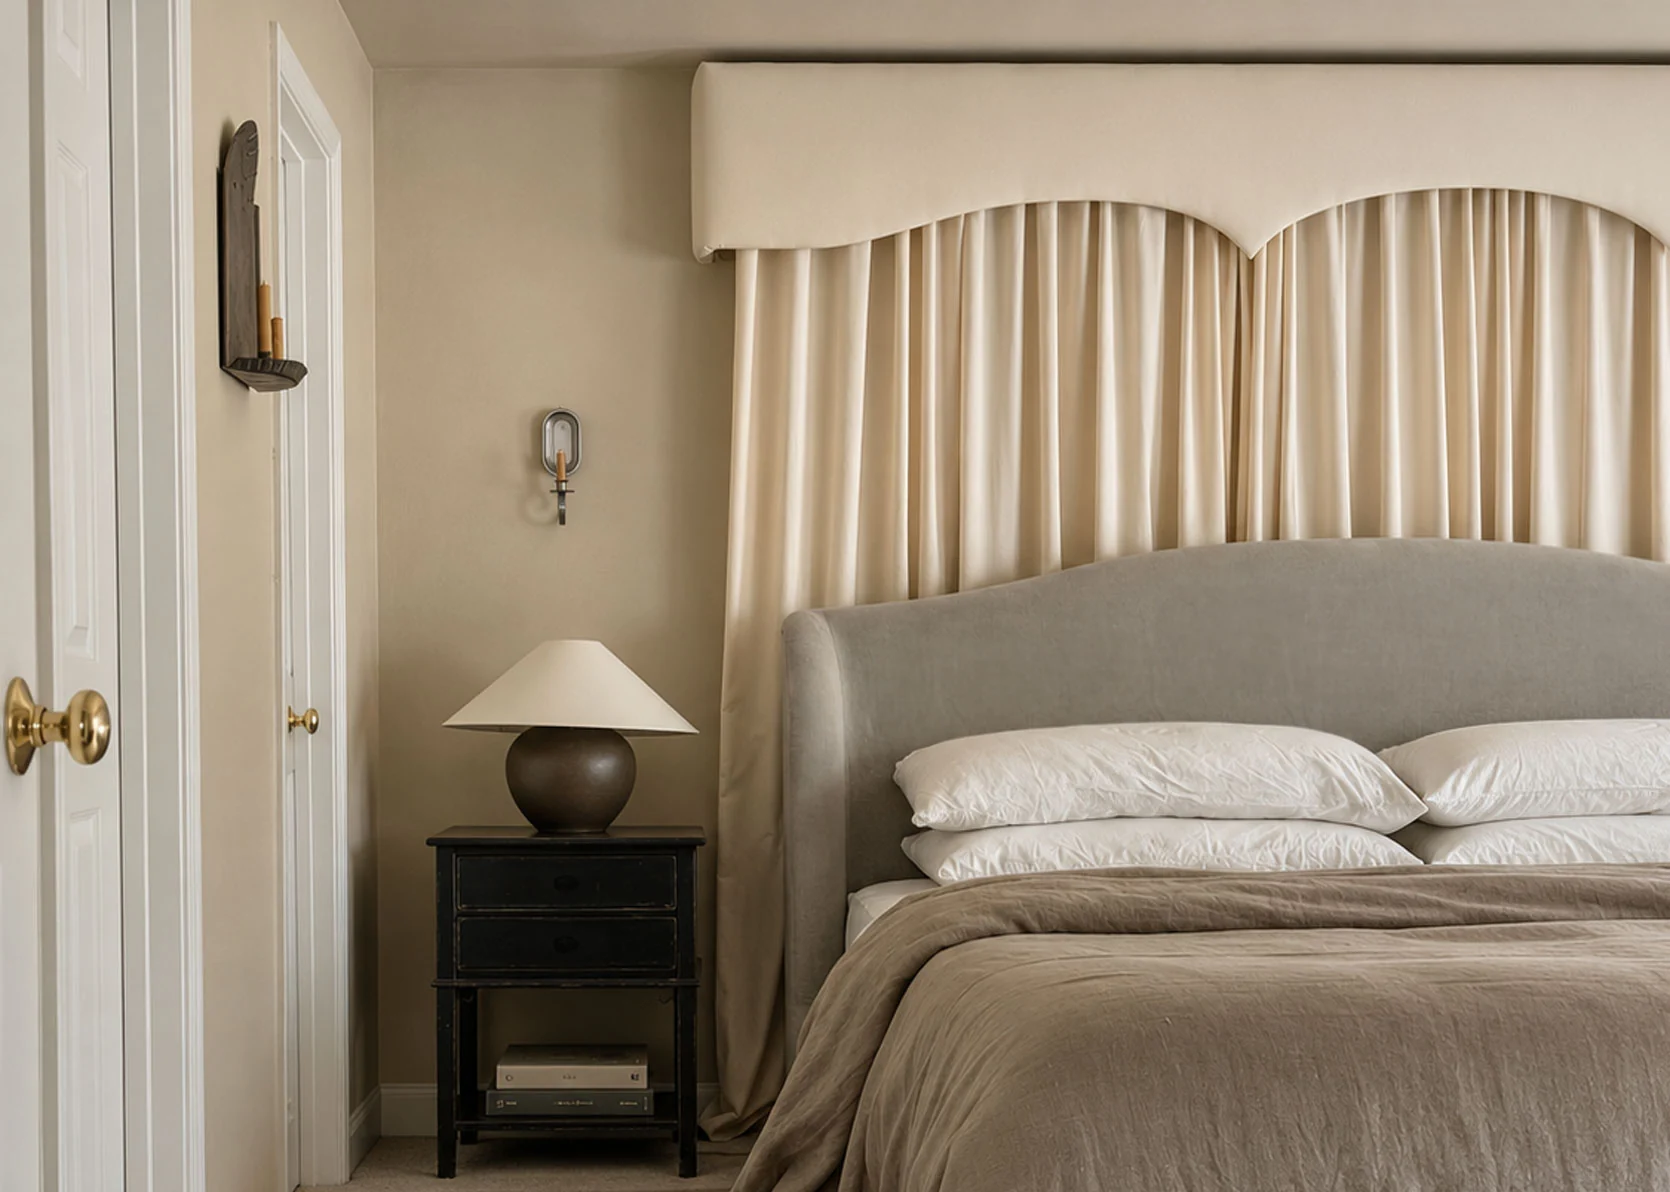
Creating a canopy vibe above a bed. Talk about dreamy boutique hotel vibes! I love this one, and it’s an ideal way to repurpose a secondhand cornice as long as it fits the size of your bed, but there’s some wiggle room there, too! Our friend, previous EHD contributor and designer Ajai Guyot, found two cornices for $50 on Facebook Marketplace that she recovered in fabrics to match both her bedroom and her son’s nursery. You can see those in her carousel below:
Here’s a video showing the process for the cornice she DIYed above her own bed, and here’s the other one of her baby’s bedroom. For anyone wanting to do something similar to her, Ajai was kind enough to answer a few questions about the process:
EHD: What should someone be aware of when shopping for a used cornice on Facebook Marketplace? What makes a good find?
Ajai: I’d pay the most attention to the wood and the overall construction. You can always change the fabric, batting, and even the finish, but beautiful craftsmanship and detailing are what make a cornice special. I especially love finding older cornices with carved details, because the wood creates such a beautiful silhouette. Check for cracks, water damage, warping, or any other significant damage to the wood. Don’t worry too much about outdated fabric or worn batting if the structure is in good shape.
Pay attention to the dimensions, too, and make sure the width works for your window or space. I look for something that extends a little beyond each side of what you’re putting it over. As for price, I love a good bargain (mine were under $50 for the pair!), but I’d rather pay a little more for a well-made piece with beautiful details than buy something newer that lacks character.
EHD: Are they easy to recover in your own fabric? Anything to keep in mind if that’s the end goal?
Ajai: Yes, they’re actually a pretty approachable DIY project, especially if you’re comfortable with a staple gun. Like I said, I found mine on Facebook Marketplace and recovered them completely myself. I removed the old fabric and batting, added new batting, and reupholstered them in a fabric that better suited my home.
The biggest thing is making sure the wood is in good condition before you buy, so you have a clean surface to work with once the old fabric comes off. When choosing your fabric, consider the shape and detailing of the cornice. If it has a beautiful carved design, choose something that complements it rather than competes with it. The right fabric will highlight the silhouette and make the architectural detail stand out.
EHD: How did you hang your curtains behind the cornice?
Ajai: I hung my curtain rod behind the cornice, so the cornice acts as a decorative header and hides the hardware. It gives everything a more finished, custom look without a visible rod or mounting brackets. Make sure you hit studs when hanging the cornice itself. The main thing, though, is leaving enough clearance behind it for the rod and curtains to hang freely. Before installing anything, measure the depth of the cornice against the projection of the rod and brackets. Also consider your curtain length and set the rod at the right height for the look you want, whether that’s puddling on the floor or just grazing it.
EHD: Any other ideas for using a secondhand cornice besides above a bed?
Ajai: Absolutely. I think cornices are such an underrated architectural detail. Above living room windows is the most obvious choice, but they also work in dining rooms, kitchens, and even bathrooms. In a bathtub nook, you can fit one to the width of the wall to create an architectural, alcove-like feel, especially since you’re already hanging a curtain there. They’d be beautiful in a dressing room or closet, too. I also love the idea of using one to create a little theater or reading nook for a child. My son Jack has a window seat in his book nook, and I’ve thought about extending a cornice across it and adding curtains. That way, he could use it as a stage, or close it off when he wants to curl up with a book.
A cornice can add a custom, finished look above a built-in bookcase, a doorway, a vanity, or cabinetry. The key is to see it as more than a window treatment. It’s an opportunity to bring architectural interest, texture, and character into a space.
Thank you, Ajai!
—
AND that brings me to the end of today’s post. Thanks for being here today, readers. I always appreciate your time and thoughts.
Until next time, friends…
Opening Image Credits: Design, styling & photography by Ajai Guyot

A Few Favorites
Subscribe
0 Comments
Oldest